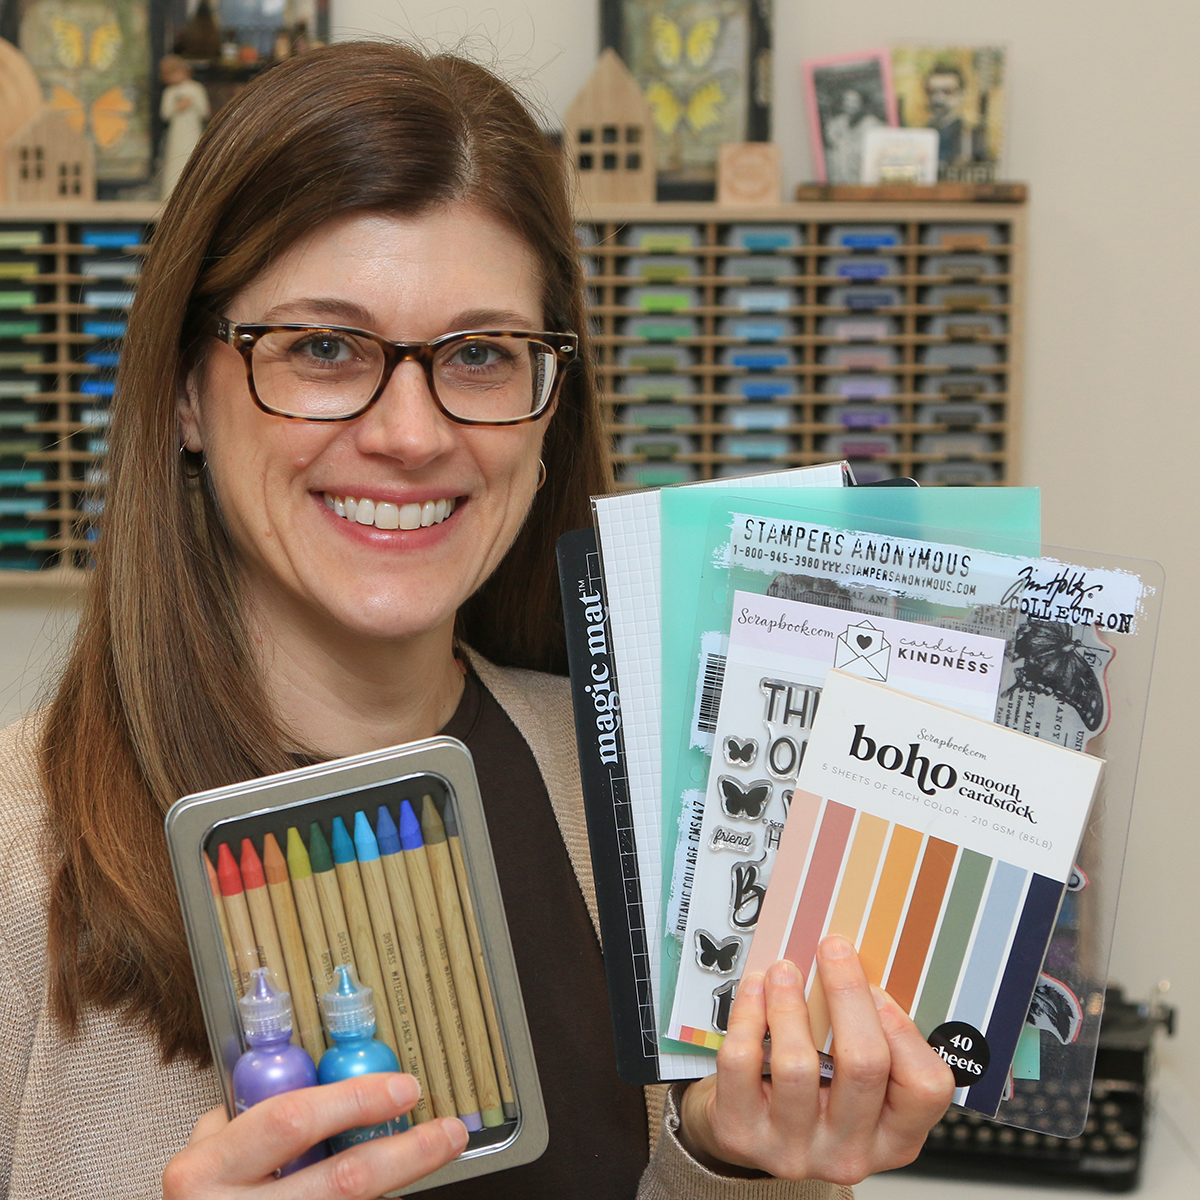
2022 Top Gifts for Cardmakers

Hello friends! Welcome to my 2022 Top Gifts for Cardmakers guide. Today I'm sharing the top 13 gifts that every cardmaker needs on their wishlist this holiday season. All of these products are favorites of mine and get loads of love in my own craft room. Whether you're the crafter yourself or you're looking for a friend or family member, you're sure to find the perfect gift idea! If you want to share this guide with a loved one so they know just what to get you, all you need to do is share this link to my 2022 Top Gifts for Cardmakers product list. Now let's see what's on my list!

2022 Top Gifts for Cardmakers Holiday Gift Guide Juliana Michaels 17turtles

2022 Top Gifts for Cardmakers
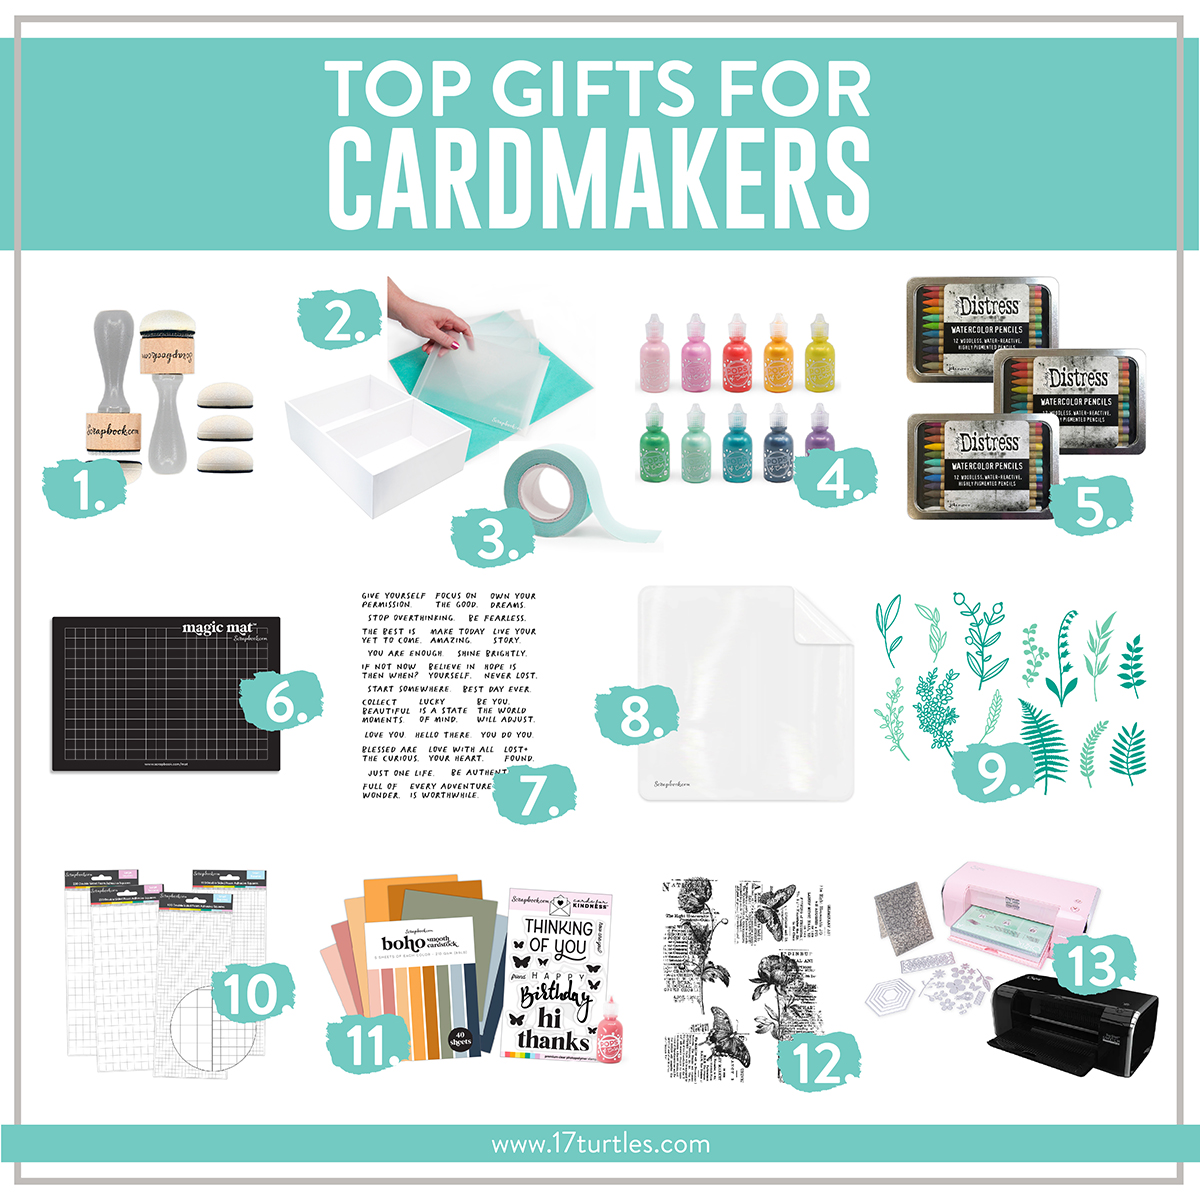
2022 Top Gifts for Cardmakers Juliana Michaels 17turtles.com

• • • • • • • • • • • • • • • • • • • •

These products hit on many of the trendy techniques that cardmakers are enjoying this year, along with some great basics that can take your card making skills to the next level. Affiliate links to Scrapbook.com are used throughout this post at no extra cost to you and a linked supply list is available at the bottom of this post.

1. Scrapbook.com Ink Blending Tool


Scrapbook.com Ink Blending Tool

If you love ink blending or working with stencils then the Scrapbook.com Ink Blending Tool with Domed Foam Applicators may just become your new favorite tool. It’s everything you love about ink blending, but with the rounded foam of a craft dauber. The rounded shape that will have you saying goodbye to harsh lines or dark inky areas that won’t blend out.

2. Scrapbook.com Medium Envelope Organizer and Medium Envelopes

Scrapbook.com Medium Envelope Organizer and Medium Envelopes


If you have tons of storage envelopes but no place to put them, the Scrapbook.com Medium Envelope Organizer is your answer! This 9.25" x 12.5" storage unit is perfect for storing all of your little envelopes of dies stamps and so much more! And if you have been looking for a way to store your Tim Holtz Stampers Anonymous Stamps, this is the storage solution for you! You can fit over 40 stamps sets in each organizer!

3. Scrapbook.com Mint Tape

Scrapbook.com Mint Tape

Keeping dies and stencils in place on your paper is easy with Scrapbook.com's Mint Tape. This low-tack, removable tape lets you focus on getting projects perfect every time. It's also great for masking off areas during ink blending or stamping.

4. Scrapbook.com Pops Of Color

Scrapbook.com Pops Of Color

Make adding the finishing touch to your project easier than it's ever been with Scrapbook.com's exclusive Pops Of Color Collection. This bundle of little bottles each contains a vibrant liquid embellishment in a rainbow of pearlescent colors that will leave breathtaking accents on your cards, layouts, handmade gifts, and more.
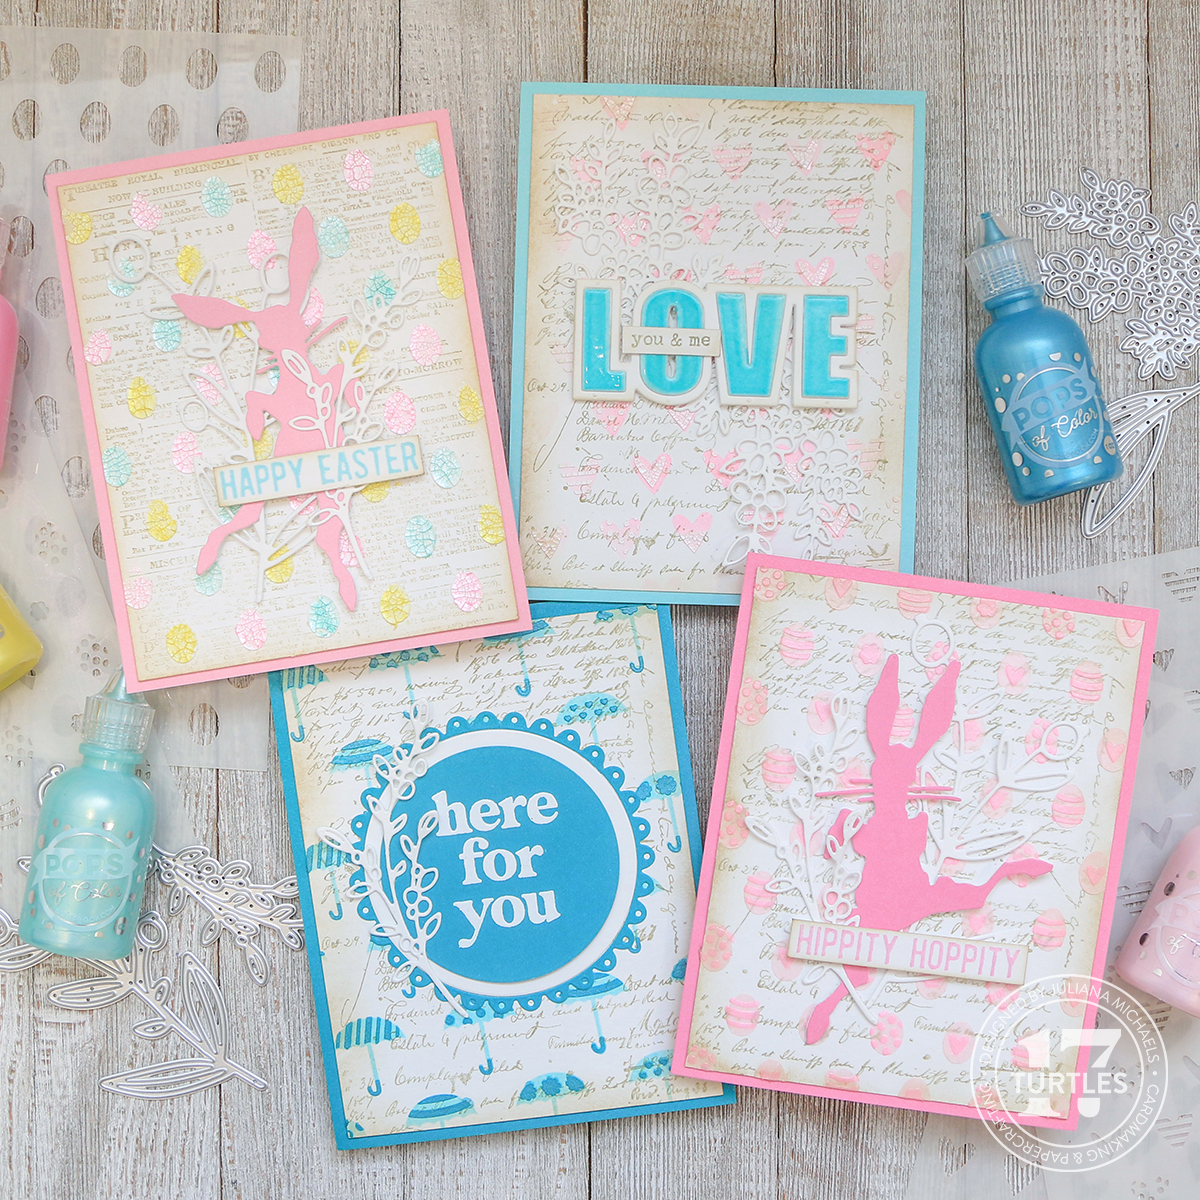
I love the multiple ways you can use this product, but one of my favorites is using it with stencils. To learn more check out the following blog posts and videos.


5. Tim Holtz Distress Watercolor Pencils
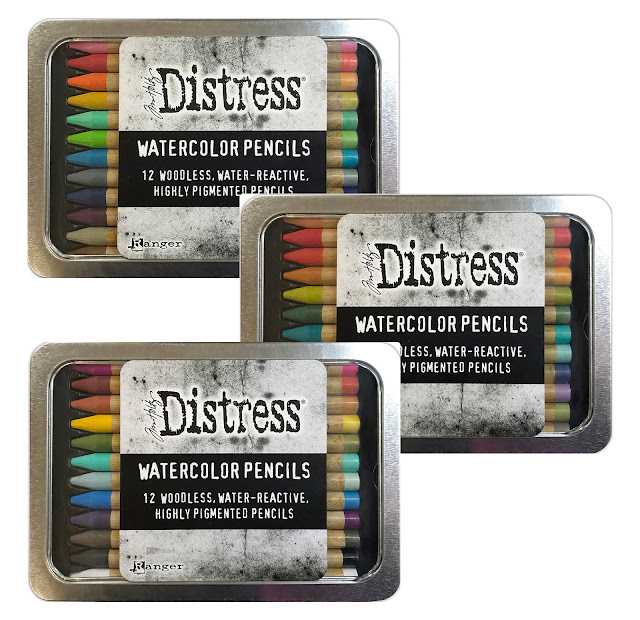

The Tim Holtz Distress Watercolor Pencils will fast become a favorite new product for your projects. These woodless watercolor pencils can be used on a variety of porous surfaces. They are water-reactive and are perfect not just for watercoloring but also for shading, sketching, and other crafting techniques. These pencils can be used for cards, scrapbook pages, tags, journal and planner pages, and a variety of other paper crafting, mixed media, and home decor projects. One of my favorite things about these is that the colors coordinate with the entire Distress palette of colors.

For ideas and inspiration on how to use these Tim Holtz Distress Watercolor Pencils check out either of these videos I created:


6. Scrapbook.com Magic Mat

Scrapbook.com Magic Mat


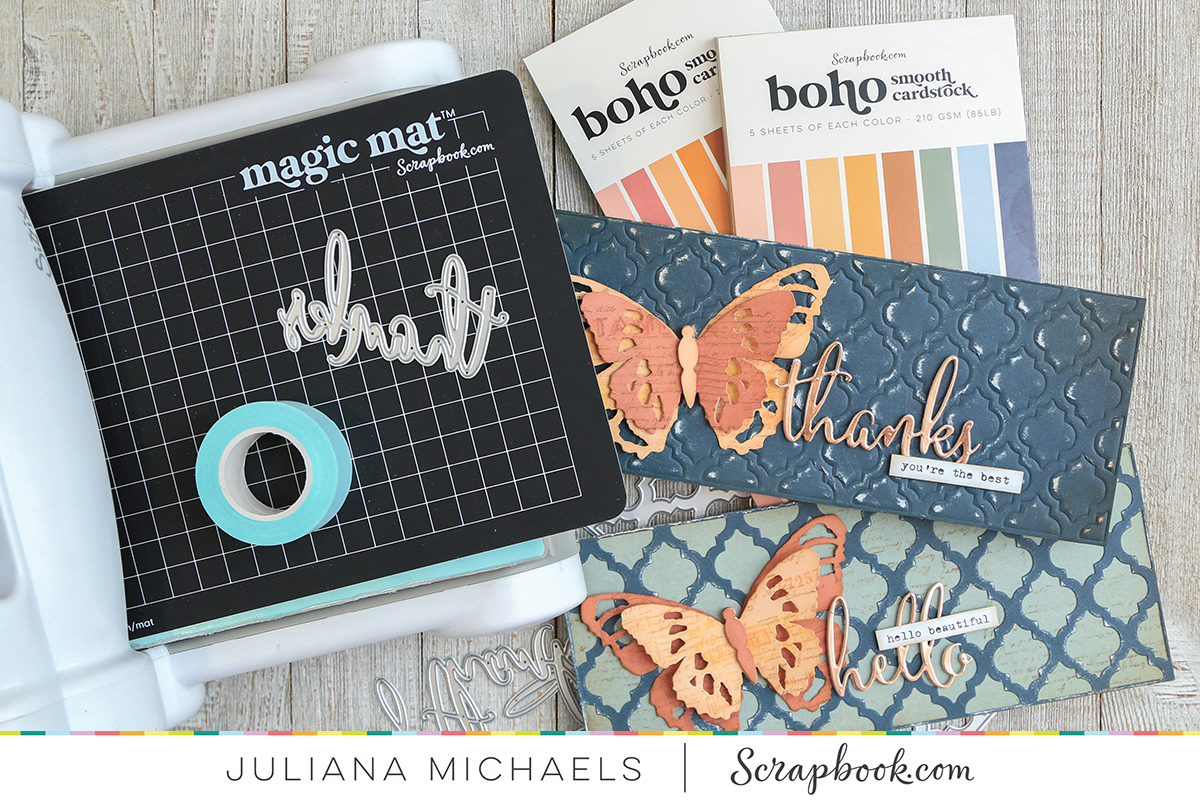
The Scrapbook.com Magic Mat is the innovative, game-changing product your die cutting has been missing. Swap out one of your plastic cutting pads for this sturdy self-healing pad and you'll be amazed by the cleanest cuts you've ever achieved. Say goodbye to the typical cracking and etching you're used to in standard plastic cutting pads. With the Magic Mat, you won't have to worry about deep plastic cutting pad impressions getting transferred to your new project. Double sided and made of self-healing cutting material it's great for use with intricate thin metal dies. It works great for dry embossing with your dies and it can also be used as a work surface for cutting, slicing, and trimming.



7. Tim Holtz Stampers Anonymous Noteworthy Stamp Set

Tim Holtz Stampers Anonymous Noteworthy Stamp Set


The Tim Holtz Stampers Anonymous Noteworthy Stamp Set is a cling mounted rubber stamp set that includes 29 sentiments that are perfect for all those noteworthy events or days in your life.


8. Scrapbook.com Project Grip Silicone Craft Mat

Scrapbook.com Project Grip Silicone Craft Mat

Keep all of your projects, inks, stencils and so much more from slipping around on your work station with 
the Scrapbook.com Project Grip Silicone Craft Mat! This versatile mat has double sided grip to help keep projects in place as you blend, stencil, stamp and so much more while crafting. I love the grip part of it for holding paper and stencils in place and how easy it is to clean. It's also heat resistant so you can even heat emboss on it!

You can see it in action as I use it to create this Christmas card using the gorgeous new Tim Holtz Distress Color Lumberjack Plaid.


9. Scrapbook.com Decorative Die Set Sprigs and/or Delicate Leaves

Scrapbook.com Decorative Die Set Sprigs and/or Delicate Leaves


Add the perfect botanical accent to all of your cards, scrapbook pages and traveler's notebook pages with the Scrapbook.com decorative Sprigs or Delicate Leaves dies set. This amazing set of 6 dies will quickly become your go-to for adding a little extra something to any of your paper crafting projects. Combine several of them to create bouquets or place them end to end for a quick & easy border! They are seriously perfect for all your year round crafting!


10. Scrapbook.com Double Sided Adhesive Foam

Scrapbook.com Double Sided Adhesive Foam

Add depth, dimension, and detail to your projects with Scrapbook.com's exclusive Scrapbook.com Double Sided Adhesive Foam shapes! These sticky, dimensional adhesives in TWO sizes of squares lets you get the perfect pop with photos, ephemera, die cuts, and more! The crafting fun will never stop when you add some pop! These are a must have for adding depth and dimension to your projects!

11. Scrapbook.com Decorative Card Maker Essentials Bundle

Scrapbook.com Decorative Card Maker Essentials Bundle

Want to get into card making but don't know where to start? If you said yes, then this Scrapbook.com Decorative Card Maker Essentials Bundle was made for you! It has all of the card making basics you need to get started including a stamp set with everyday sentiments, a paper pad and a Pops of Color for embellishments!

12. Tim Holtz Stampers Anonymous Botanic Collage Stamp Set

Tim Holtz Stampers Anonymous Botanic Collage Stamp Set

This four piece cling mounted rubber stamp set features flowers and butterflies with newspaper print behind them. Definitely one of my favorite stamps sets this year! You can see how I used it to create this card. 


Tim Holtz Botanic Collage & Oxidized Stamping Technique Video


13. Sizzix Big Shot Switch Plus Machine Cherry Blossom or Tim Holtz Black

Sizzix Big Shot Switch Plus Machine Starter Kit Cherry Blossom or Tim Holtz Black

If you are new to die cutting, looking to up your die cutting game or looking to switch from a manual to an electric machine then the Sizzix Big Shot Switch Plus Machine Starter Kit Cherry Blossom or Tim Holtz Black then look no further! The Cherry Blossom (pink color) is an Exclusive Collaboration with Scrapbook.com and you can't find this color anywhere else! You will love this Big Shot Switch Plus Machine, the sleek design, and all its other features. If pink isn't your thing, the machine also comes in a Tim Holtz edition that is black with chrome accents or white with chrome accents.

• • • • • • • • • • • • • • • • • • • •

If you're looking for even more holiday gift ideas, make sure to check out Scrapbook.com's 2022 Holiday Gift Guide too. It's packed with even more amazing products for all your paper crafting needs!


• • • • • • • • • • • • • • • • • • • •

Thanks so much for stopping by today to check out my 2022 Top Gifts for Cardmakers Guide. Make sure to pin the image below and share it with everyone you know! Want to share this with a loved one so they know just what to get you? All you need to do is share this link to my 2022 Top Gifts for Cardmakers product list.

Pin Me and Share!

2022 Top Gifts for Cardmakers Juliana Michaels 17turtles.com

2022 Top Gifts for Cardmakers Guide

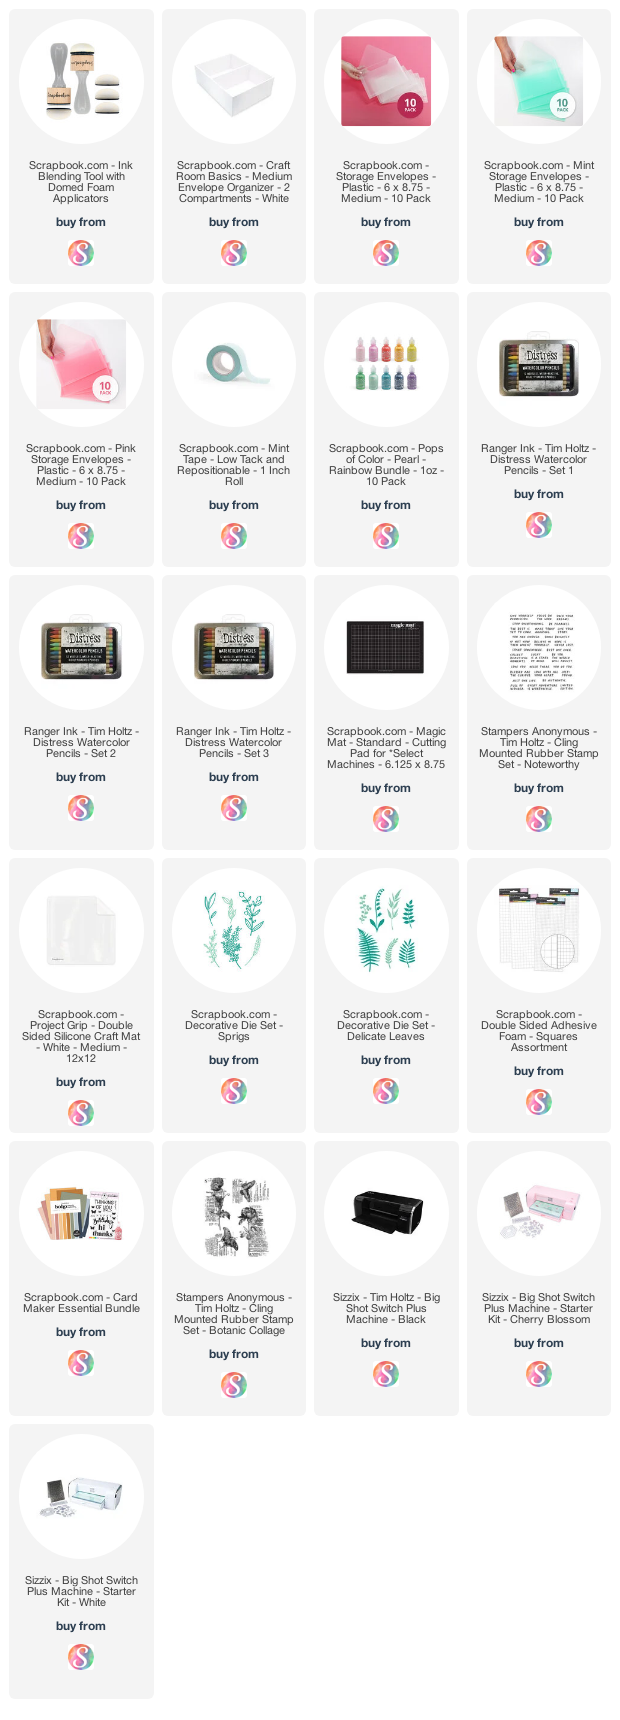
You can find the all the products that are in my 2022 Top Gifts for Cardmakers Guide below with compensated affiliate links to Scrapbook.com. These links are at absolutely no cost to you. When you shop through the links below, I receive a small commission from Scrapbook.com. These links are at absolutely no cost to you and the commission I receive helps me cover the costs of my blog and other expenses, which allows me to continue to provide you with FREE inspiration and tutorials. If you want to learn more about what an affiliate link is, you can see my full affiliate and product disclosure state

Christmas Cards with Layered Plaid Thinlits | Tim Holtz Sizzix Christmas 2022

We all have those dies that we reach for over and over again. Those basic shapes that are just perfect for all the things. Well, in my book, the Layered Plaid Die is one those. While I've only had the opportunity to use it for Christmas cards, I know it will be the perfect backdrop for just about any card you can imagine and regardless of your style. I also love that even though it has 3 dies that are meant to be layered to create a multi color plaid, it works just as well when you only use one of the layers.

In this blog post, I want to share with you two Christmas cards I created using the Layered Plaid die and show you how I only used one layer of the die on each of the cards. If you are looking for more inspiration on how to use this die or any of the others from the Tim Holtz Sizzix Christmas 2022 release, make sure to check out Tim's blog post.

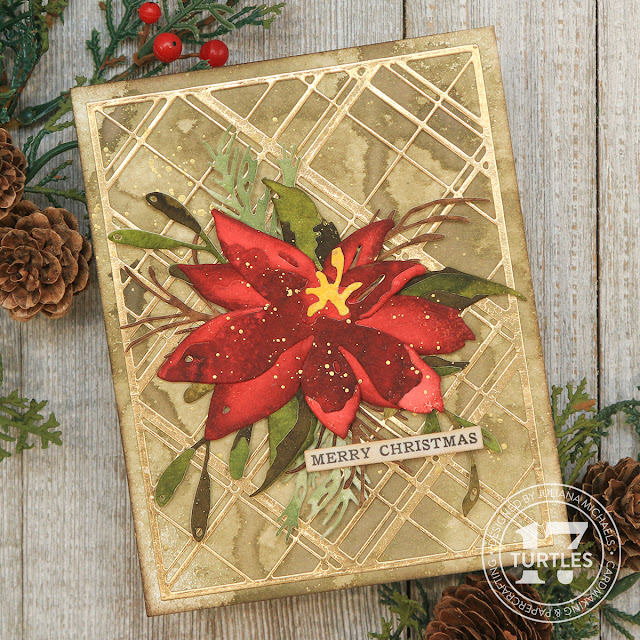
MERRY CHRISTMAS CARD

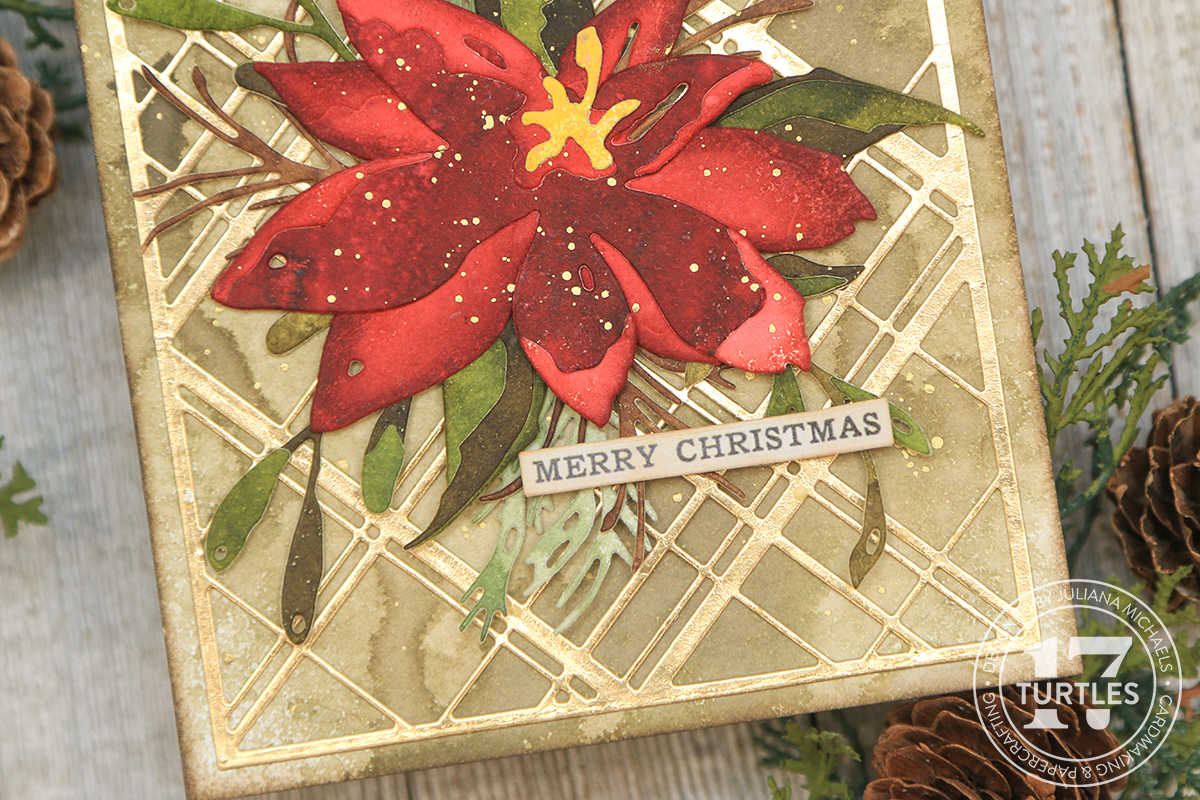
To create this Merry Christmas card, I used the more detailed of the layers. It adds a nice touch of interest to the background when paired with the contrasting red poinsettia but not so much that it is overpowering.

Merry Christmas Card by Juliana Michaels featuring Tim Holtz Holiday Brushstroke 3 and Layered Plaid Thinlits

I die cut the more detailed plaid layer from a piece of gold Metallic Kraftstock and layered it onto a piece of Distress Watercolor Paper that I had sprayed with Frayed Burlap Distress Stain and spritzed with a bit of water before I dried it.


For the focal point, I used the Holiday Brushstrokes 3. I sprayed separate pieces of Distress Watercolor Paper, one for each of the following Distress Spray Stains: Aged Mahogany, Fired Brick, Forest Moss, Peeled Paint, Fossilized Amber, Walnut Stain and Bundled Sage. While I was spraying the color, I added a bit of water and dried them with my heat tool. I then die cut the various layers from the different colors and put them together to create the poinsettia and greenery. I also cut the bottom layer twice and rotated it slightly to get the shading. For the poinsettia I also inked the edges with Aged Mahogany to add more shading as well.


To finish off the card, I added some splatters of Gilded Foundry Wax and a sentiment from the Christmas Idea-ology Sticker Book. You could also use a stamp if you wanted to mass produce this design.


JOY CHRISTMAS CARD

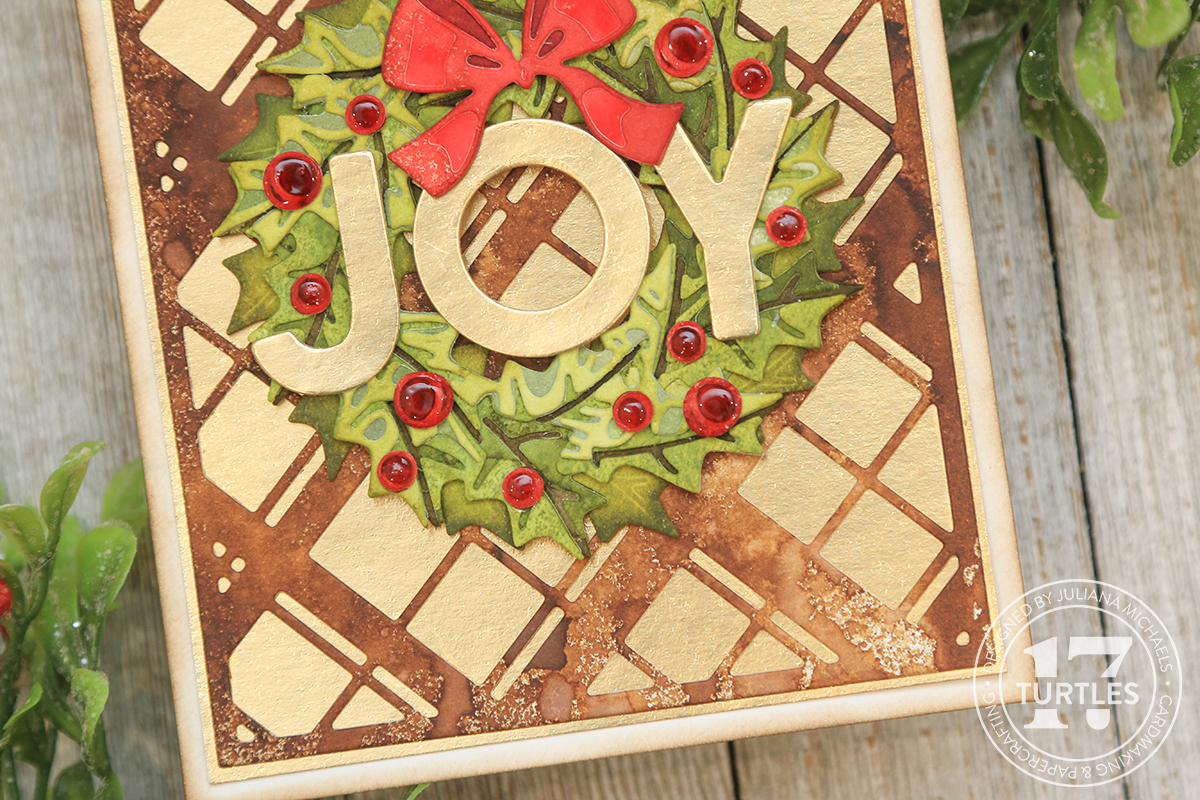
Now onto my second card using the Layered Plaid Dies. On this one I used the other layer to create a slightly more bold design for the background. This bolder background is a nice contrast to the more detailed wreath I added as the focal point.

Joy Christmas Card by Juliana Michaels featuring Tim Holtz Yuletide and Layered Plaid Thinlits

The plaid was die cut from a piece of Distress Watercolor Paper that I had sprayed with Walnut Stain Distress Spray Stain and then layered onto a piece of gold Metallic Kraftstock.

The wreath on this card was created using the Yuletide Thinlits. I added color in a similar manner as the poinsettia in that I die cut the various layers from pieces of Distress Watercolor paper that I had inked with the following Distress Spray Stains: Forest Moss, Peeled Paint, Shabby Shutters and Peeled Paint, Bundled Sage and Shabby Shutters. These are listed in order of dark to light and bottom to top layer. The bow was cut from Aged Mahogany and Fired Brick.


For the Berries, I only used 2 layers from the dies and cut them from Aged Mahogany and Fired Brick. After adhering the berry layers, I applied Glossy Accents to give them a little shine. A touch of Rock Candy Distress Glitter would have been a nice touch as well!

The sentiment is from the Bold Text Christmas Thinlits and die cut from gold Metallic Kraftstock and white cardstock. I cut the white card 2 times and adhered the gold on top to give the letters a little more dimension before I adhered it to the wreath.


Thanks so much for the visit and I hope you enjoyed this bit of Christmas Card inspiration using the Layered Plaid Thinlits.

SUPPLIES

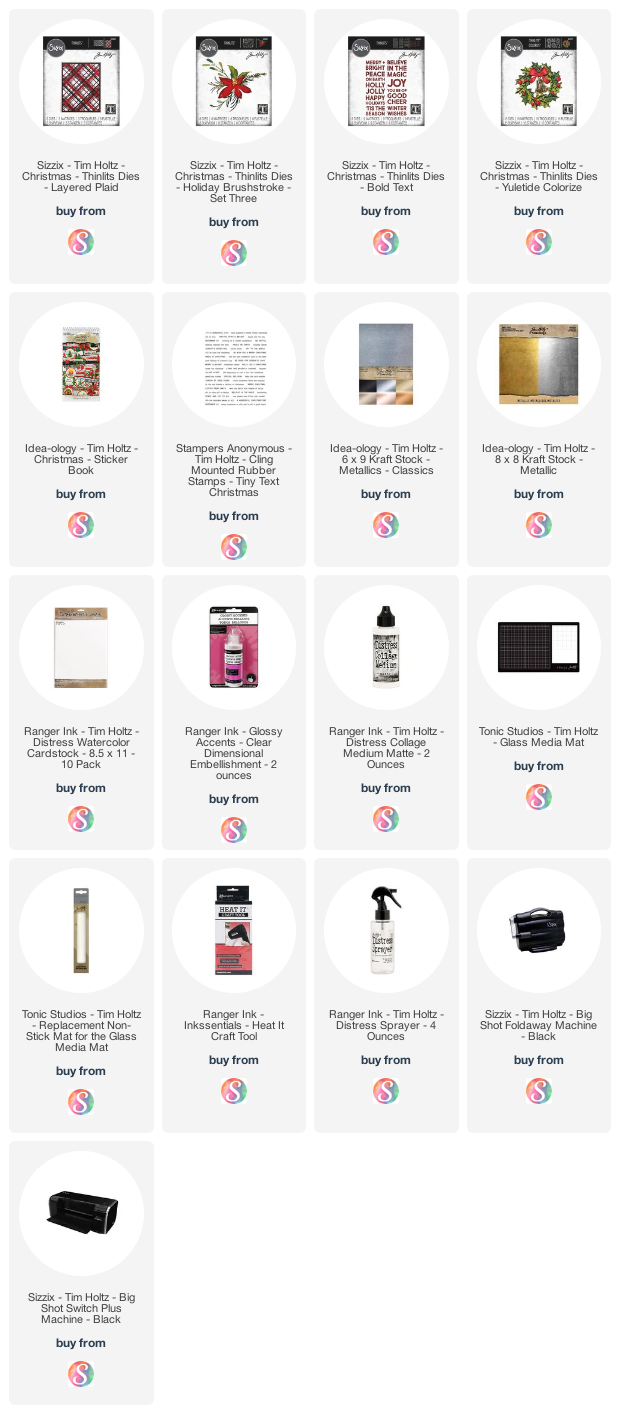
Below you can find the products I used to create these projects along with compensated affiliate links to Scrapbook.com. These links are at absolutely no cost to you. When you shop through the links below, I receive a small commission from Scrapbook.com. These links are at absolutely no cost to you and the commission I receive helps me cover the costs of my blog and other expenses, which allows me to continue to provide you with FREE inspiration and tutorials. If you want to learn more about what an affiliate link is, you can see my full affiliate and product disclosure statement here. Thank you so much for your love and support! 

The Magic of the Scrapbook.com Magic Mat

I have something to admit. This card almost didn't happen. It all began when I pulled out the Christmas Stitched Border Strips Emboss and Die Set and was underwhelmed with the results. How is that possible you ask? Well let me share my story of the magic of the Scrapbook.com Magic Mat and how it saved the day.

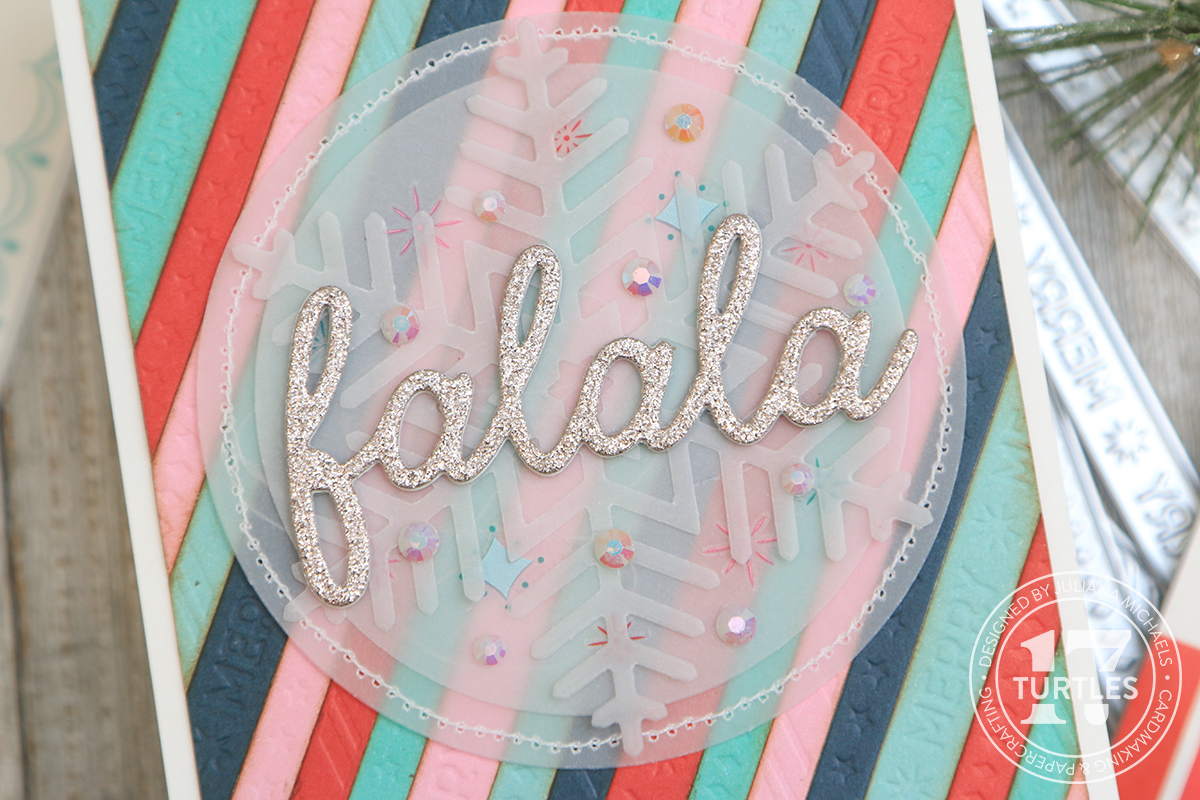
Fa La La Christmas Card by Juliana Michaels featuring Scrapbook.com Magic Mat and Christmas Border Strips

You see, this was my first time to use one of the emboss and cut dies from Scrapbook.com. I had grabbed a few of the strips, some paper and my regular Sizzix die cutting plates and did what I normally do to cut paper. When I went to lift off the cutting plate I could hardly see the design that shows so well on the dies and I was like what the heck? I was so bummed and was about to move on and figure out something else when my crafty friend, who happened to be in town for the weekend had an idea.  She suggested that maybe I needed something softer under the dies to allow for the embossed images to show up and that made me think of my Scrapbook.com Magic Mat. I pulled it out and replaced my bottom cutting plate with it, repeated my die cutting process and viola, I had perfectly cut AND embossed strips!

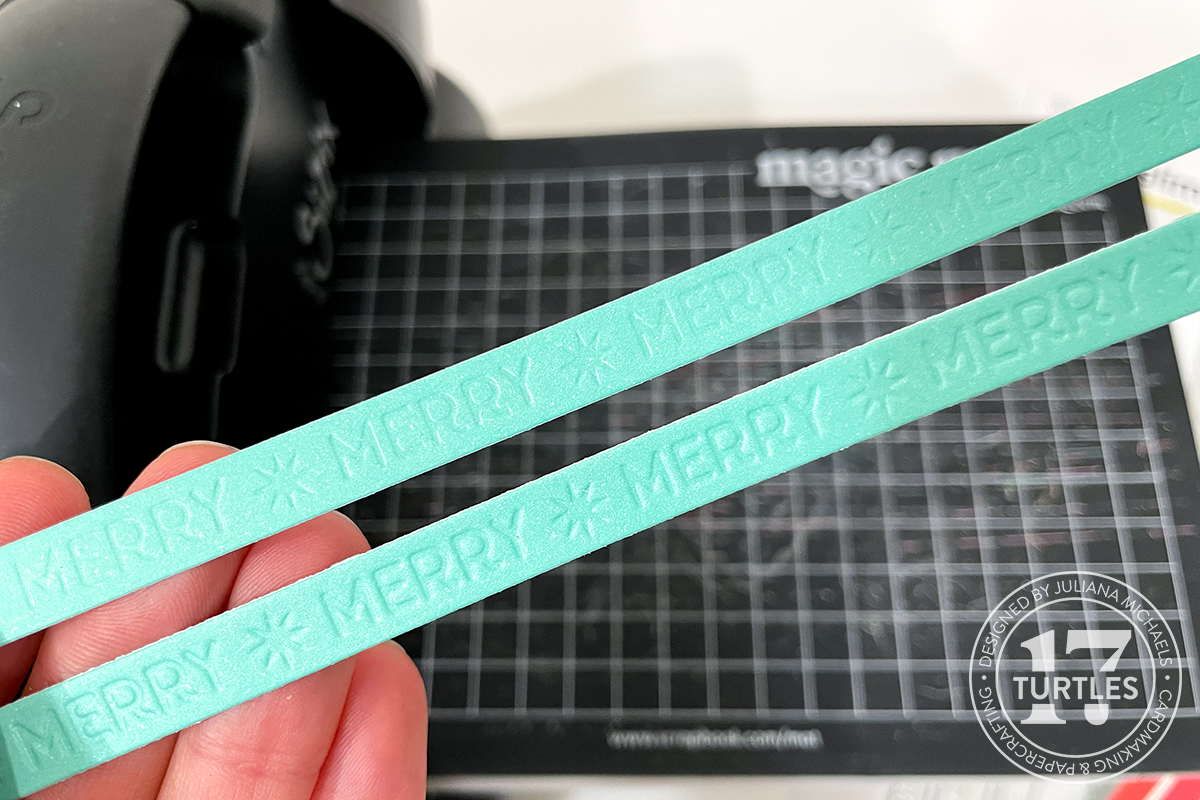
In this image the strip on the top was the first one I cut and embossed with my regular die cutting plates. The bottom strip is the one that was cut and embossed using the Scrapbook.com Magic mat. You can really see the difference...or should I say the magic that the Magic Mat added for the embossing.


Here are the same strips from the back side. You can see in even more detail just how well the paper was embossed when I used the Magic Mat.


Once I had discovered the magic of the Magic Mat, I went to town cutting and embossing using a mix of colored papers from the Slimline Peppermint Paper Pad. I inked the edges of each strip with Vintage Photo Distress Ink, but you can definitely skip this part. Next, I cut a piece of white cardstock to 4 x 5.25 inches and began adhering the strips at a diagonal onto the paper. I used scissors to trim off the overhanging strips and with that my background was finished. I then adhered this to a standard A2 Card base.


For the embellishment, I die cut two circles from vellum using the Scrapbook.com Nested Circles Dies. I added some machine stitching to the larger circle. I then applied some stars from the Peppermint Holiday Rub Ons to smaller circle. These rub ons go on like butter by the way! I then layered on a snowflake cut from Vellum using the Scrapbook.com Snowflakes Dies. To adhere the vellum layers together and to attach it to the card I used Scrapbook.com Refillable Permanent Tape Roller and was really impressed that you couldn't see it through the vellum.


To create the sentiment, I die cut a piece of glitter cardstock using the Scrapbook.com Fa La La Die. I then cut it twice from white cardstock and glued the layers together to give the die cut a little dimension before adhering it to the card front. I finished off the card by adding some Pinkfresh Glacier Jewels.


Now that you know about the magic of the Scrapbook.com Magic Mat, will you be cutting and embossing all the things?! Thanks for your visit and if you have any questions, please don't hesitate to ask!

SUPPLIES

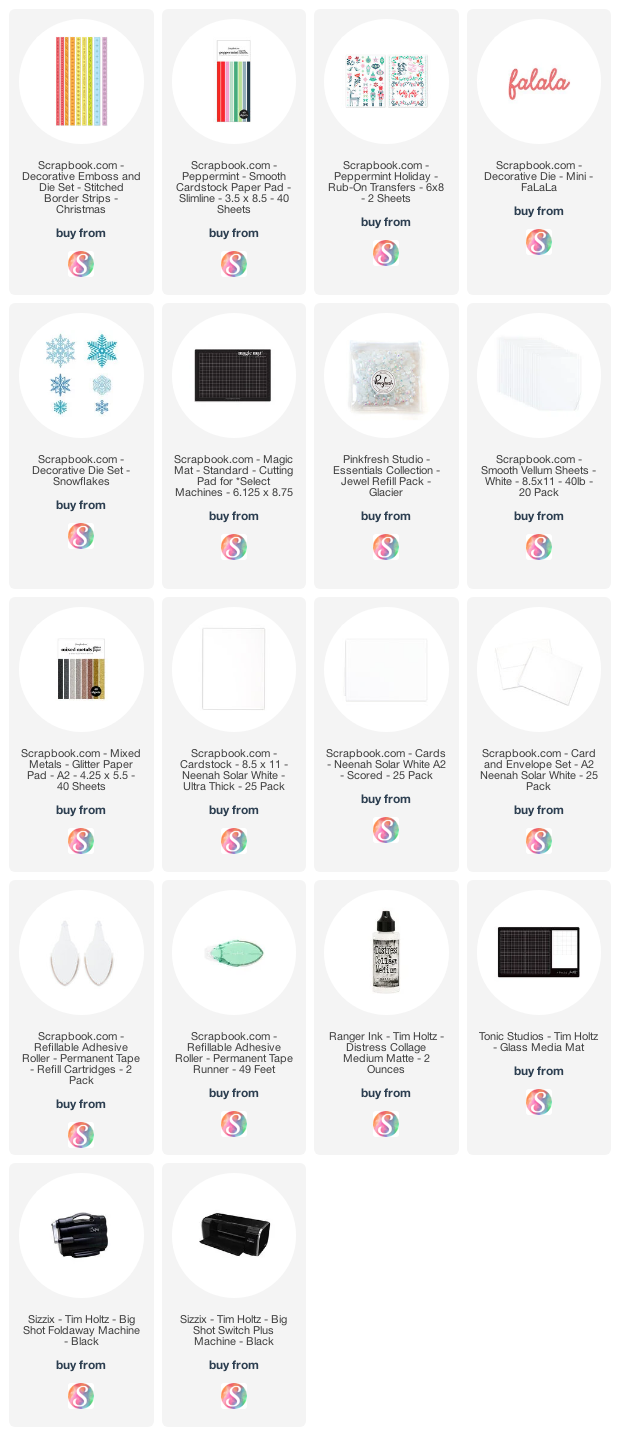
Below you can find the products I used to create these projects along with compensated affiliate links to Scrapbook.com. These links are at absolutely no cost to you. When you shop through the links below, I receive a small commission from Scrapbook.com. These links are at absolutely no cost to you and the commission I receive helps me cover the costs of my blog and other expenses, which allows me to continue to provide you with FREE inspiration and tutorials. If you want to learn more about what an affiliate link is, you can see my full affiliate and product disclosure statement here. Thank you so much for your love and support! 

Christmas Tags and Cards with Nested Dies

I love dies. I love all dies. I also love nested dies. What are nested dies you ask? Well, let me tell you! They are a set of dies that are all the same shape and come in graduated sizes. You can use them to create layers, mat photos, cut out a frame or even create a mosaic. Scrapbook.com has a great assortment of basic shapes that are available as nested dies and today I want to share some Christmas tags and cards I created using their Nested Circles and Squares dies.

NESTED CIRCLES CHRISTMAS TAGS

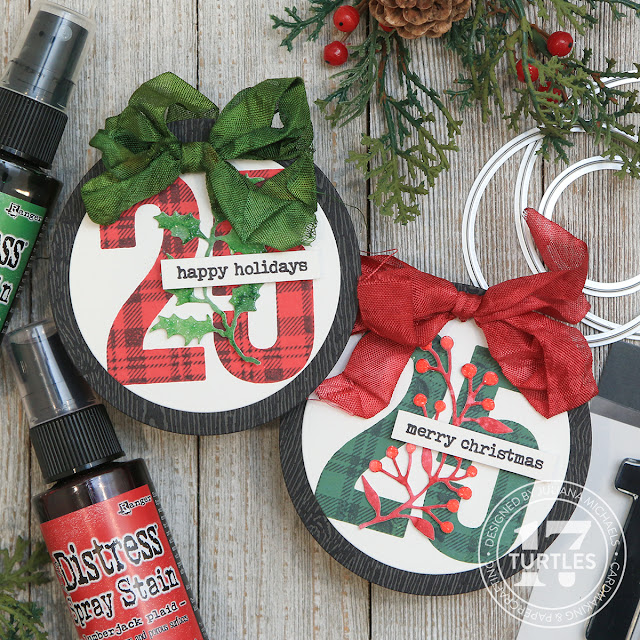
First up are these Christmas tags I made using the Nested Circles Dies. This set contains 6 dies that range in size from 4 inches to 1.5 inches. To create these tas I used the 3 and 3.5 inch circle dies and layered them together. By adding some stamping, festive greenery and a bow you are ready to deck out your holiday gifts in style!

Christmas Tag by Juliana Michaels featuring Scrapbook.com Nested Circles Dies and Modified Kissing Technique

MODIFIED KISSING TECHNIQUE

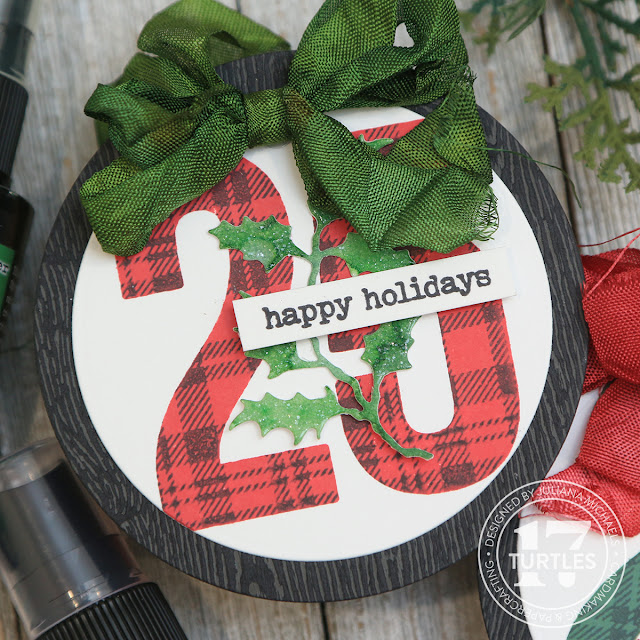
You may be wondering how I achieved the plaid number. Well let me share the details with you. It's a modified kissing technique using a stamping platform. I began with a piece of Neenah Solar White Cardstock which I placed into my stamping platform. I then placed the 25 from the Large Bold Numbers Stamp Set in my stamping platform and inked it up with Lumberjack Plaid Distress Oxide Ink and stamped it onto the paper. I then cleaned off the stamp, but left it in position on the stamping platform. I also made sure not to move the paper in the stamping platform. I then took the plaid stamp from the Plaid and Nordic Stamp Set placed it onto a large stamping block, inked it up with Black Soot Distress Ink and stamped it onto the number stamps in my stamping platform and then stamped them over the previously stamped image. And viola you get a red and black plaid stamped image!

If you don't have a stamping platform you could do the traditional kissing technique in which you ink up your plaid stamp and leave it ink up on your crafting surface.  Next, you place the number onto a stamping block, ink it, stamp it onto the inked plaid stamp and then stamp it onto your paper. I personally am not that great of a stamper when it comes to working with stamping blocks. I never get a good crisp image. When I got a stamping platform it really changed my stamping game and so that is why I chose to use this modified technique here.

Christmas Tag by Juliana Michaels featuring Scrapbook.com Nested Circles Dies and Modified Kissing Technique

Once I had the stamping completed, I then took the 3 inch circle die, lined it up over the stamped image, used some Mint Tape to hold the die in place and ran it through my die cutting machine. I then layered it onto a piece of Black Woodgrain paper die cut using the 3.5 inch circle.

The holly piece is die cut from a piece of Distress Watercolor cardstock that I had inked with Rustic Wilderness Spray Stain. To add a little sparkle, I applied Glossy Accents to the leaves and sprinkled them with some Distress Rock Candy Glitter, tapped off the excess and allowed it to dry. I then added the sentiment which is from the Wordfetti December Stamp Set. The bow is a piece of seam binding which I dyed using Rustic Wilderness Spray Stain.

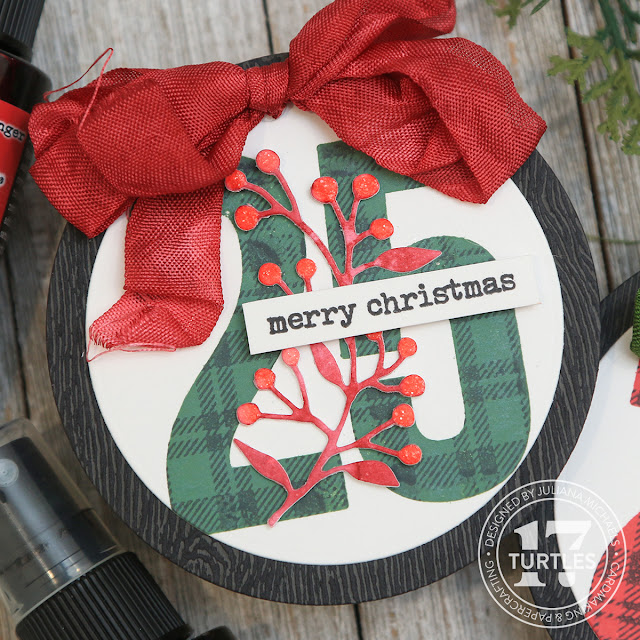
For this second tag, I used the same process just reversed the colors.

Christmas Tag by Juliana Michaels featuring Scrapbook.com Nested Circles Dies and Modified Kissing Technique

NESTED SQUARES CHRISTMAS CARD

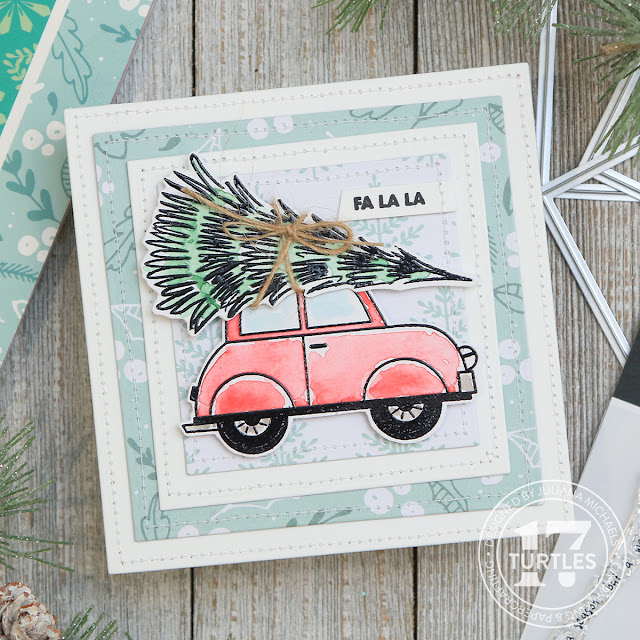
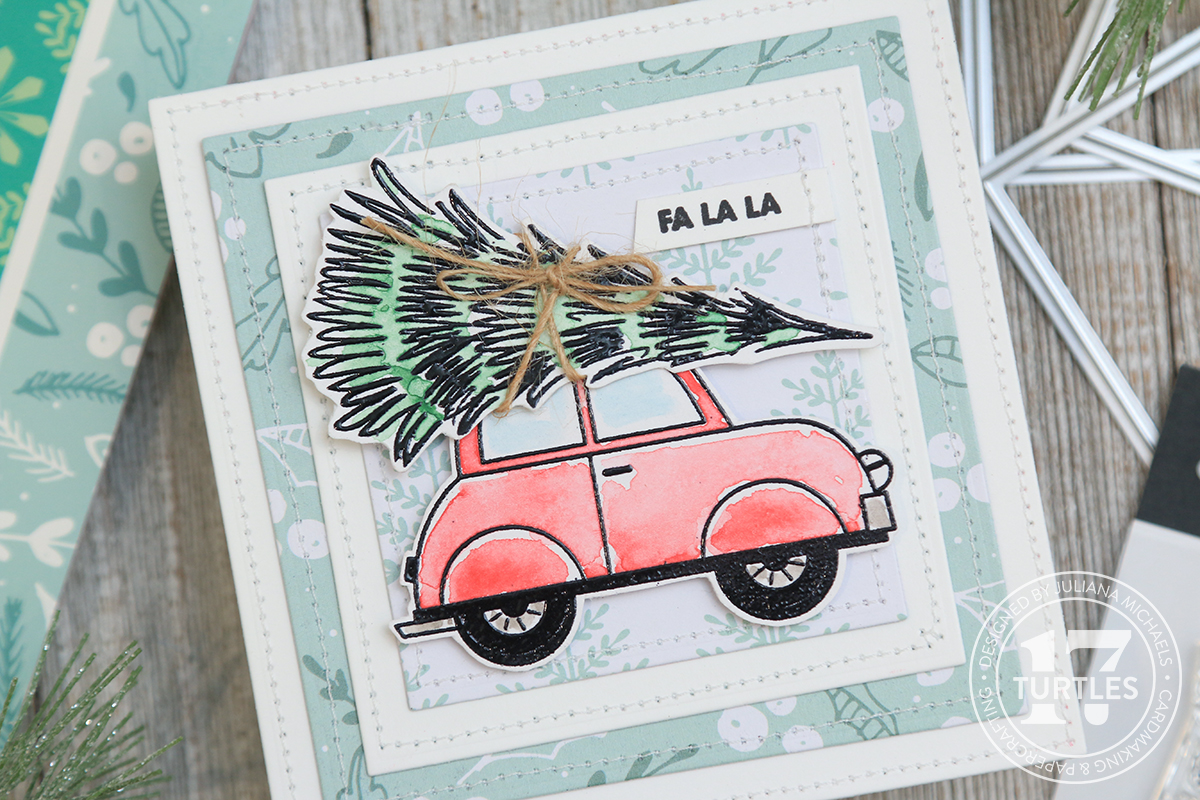
To make this Christmas card I used the Nested Squares dies. These range in size from 4x4 to 1.5x1.5 inches. I began by die cutting a piece of white cardstock using the 4x4 and the 3x3 square dies. I added machine stitching around the outside edge for a little texture.

I then took two different patterns from the Peppermint 6x8 Paper Pad and die cut them using the 3.5x3.5 and 2.5x2.5 square dies. I also added machine stitching to them.

Christmas Card by Juliana Michaels featuring Scrapbook.com Nested Squares Dies

For the stamping, I used the Joyful Ride Stamp Set. I stamped the images onto Distress Watercolor Paper using Versamark Embossing Ink, sprinkled them with Black Embossing Powder and heat embossed them using a heat gun. Before I stamped the image, I wiped an anti-static pouch/brush over the paper to help lessen the static on my paper and to have less embossing powder where I don't want it. I find the anti-static pouch to work better than the brush, but with the brush you don't get the powder on your hands. The powder from the pouch can get a little messy, but I store mine in an old Altoid Tin to prevent the mess.

Once the embossing was completed, I watercolored the image using Distress Watercolor Pencils and a waterbrush. I used the waterbrush to pull the pigment from the pencils and apply it to the paper. The colors I used were Rustic Wilderness, Candied Apple, and Tumbled Glass (for the windows). I then fussy cut the images using a pair of precision tip scissors. I tied a piece of jute twin around the tree and then adhered them to the card using double sided foam squares. To finish off the card, I added a sentiment from the Wordfetti Fa La La Stamp Set.


Thanks so much for stopping by today and checking out my Christmas Tags and Cards created with Scrapbook.com Nested Dies.

SUPPLIES

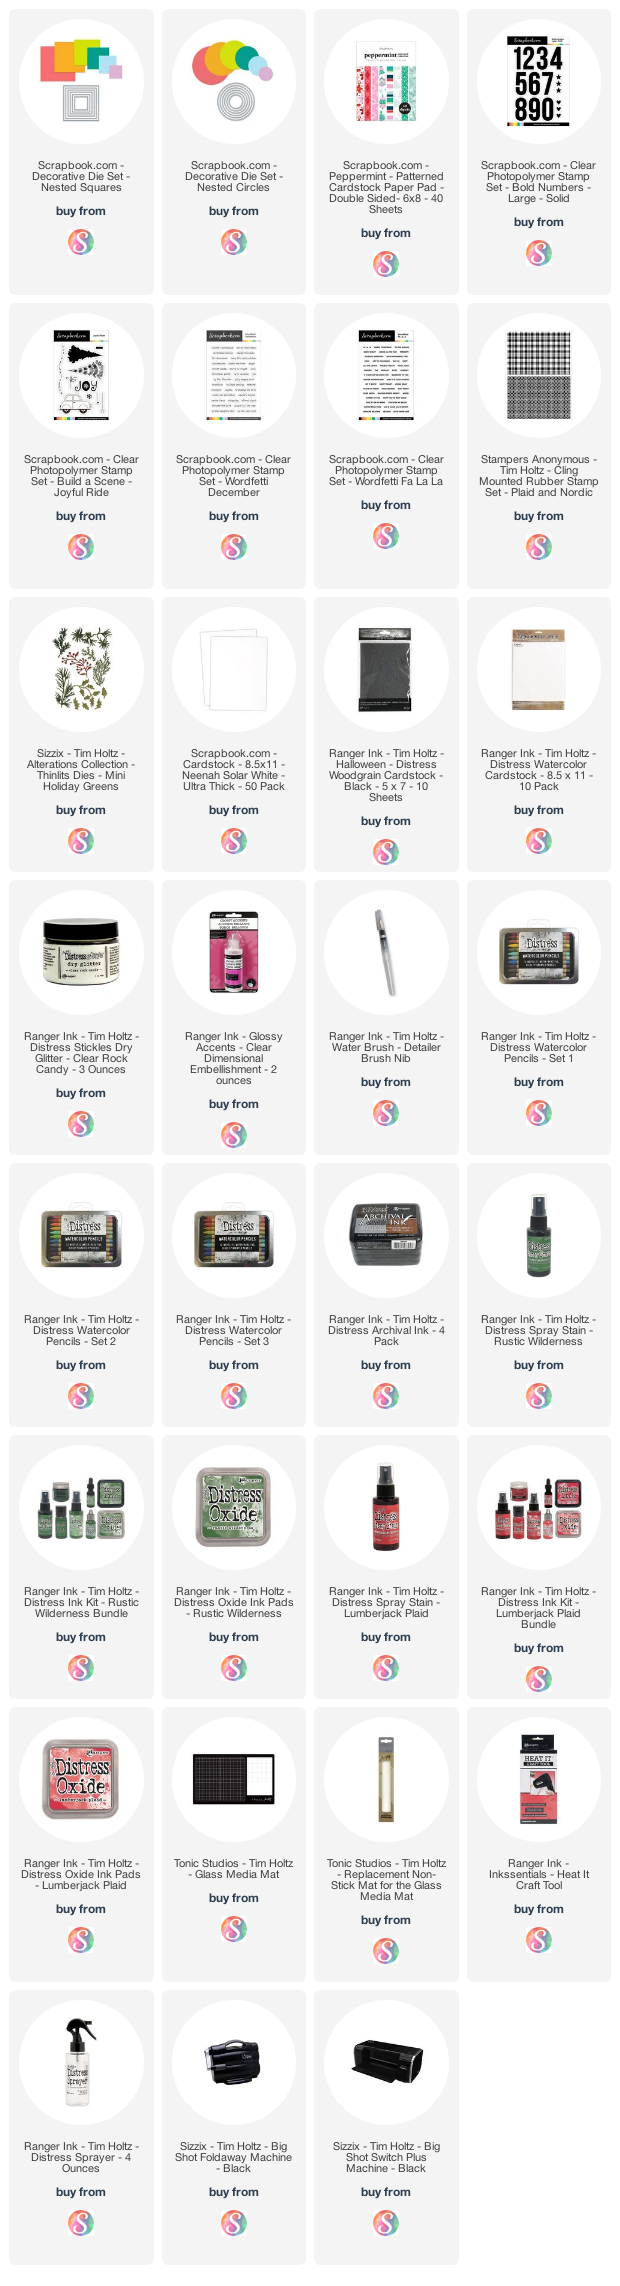
Below you can find the products I used to create these projects along with compensated affiliate links to Scrapbook.com. These links are at absolutely no cost to you. When you shop through the links below, I receive a small commission from Scrapbook.com. These links are at absolutely no cost to you and the commission I receive helps me cover the costs of my blog and other expenses, which allows me to continue to provide you with FREE inspiration and tutorials. If you want to learn more about what an affiliate link is, you can see my full affiliate and product disclosure statement here. Thank you so much for your love and support!

New Tim Holtz Distress Color | Lumberjack Plaid

Hello friends! I'm super excited to be sharing some inspiration and techniques using the new Tim Holtz Distress color Lumberjack Plaid. Before I get started, I want to thank Scrapbook.com for their generosity in sending this new color to me to create with. In this blog post, I'm going to share some different swatch ideas, some color combinations and then take you step by step through how I created this Christmas card using Lumberjack Plaid Distress Embossing Glaze!

Merry Christmas Card by Juliana Michaels featuring Tim Holtz Distress Color Lumberjack Plaid

DISTRESS INK SWATCHES

The first thing I had to do when I got Lumberjack Plaid was swatch it! I've found that creating a swatch tends to help me get into the groove with a new color and how it fits in with the other colors in the Distress pallette.

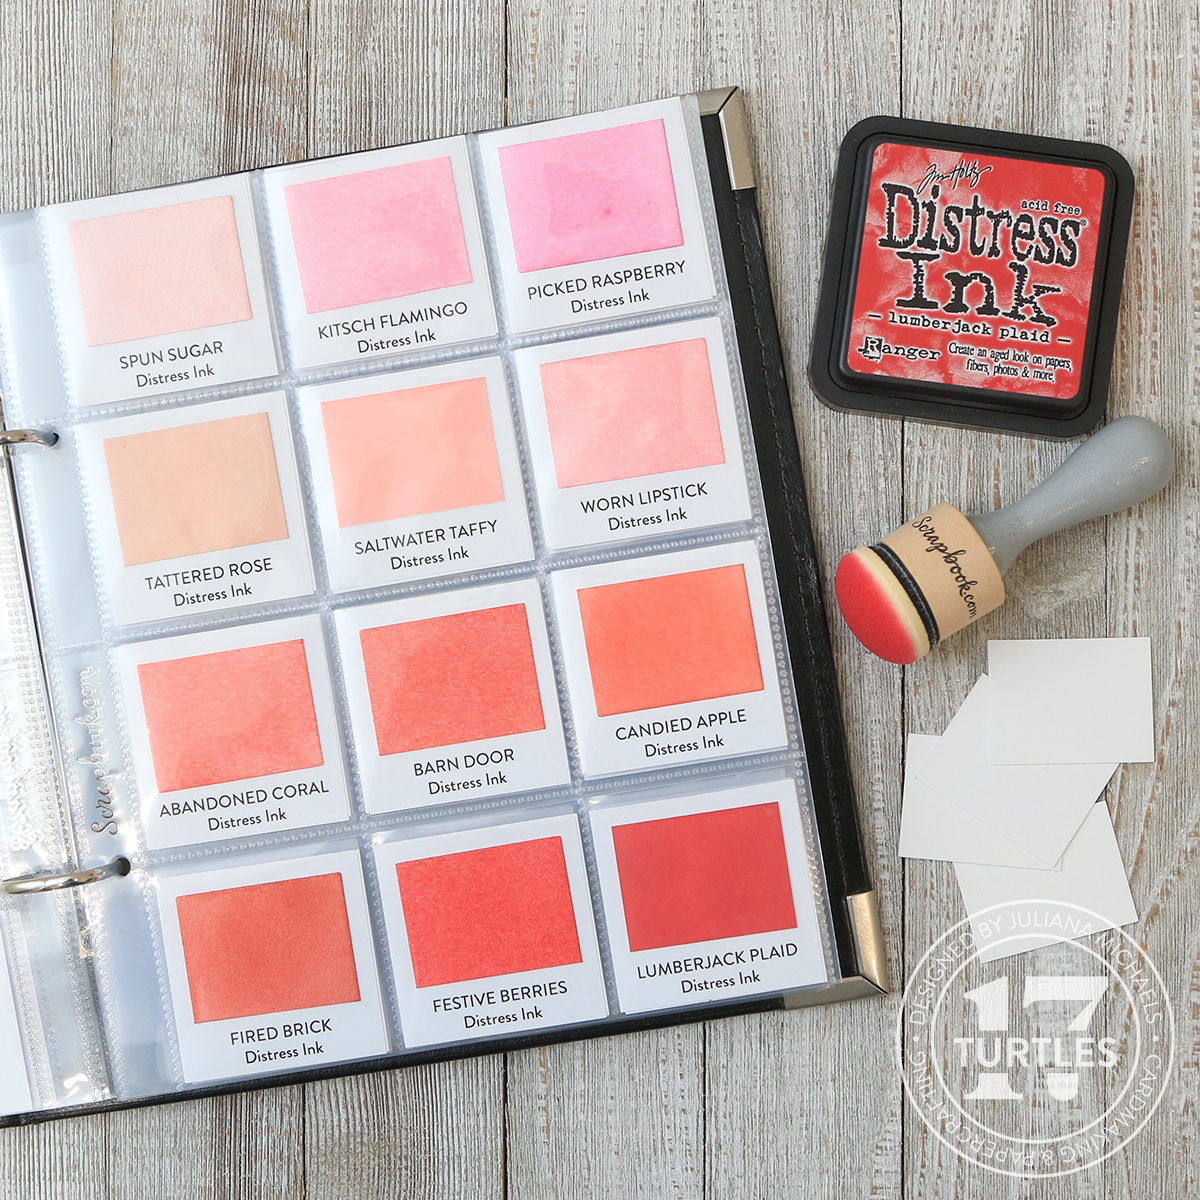
One way I like to create and store my swatches is in this 6x8 album from Scrapbook.com and their 2x2 square pockets page protectors are the perfect size for swatches. I simply swatch the ink onto a piece of Distress Watercolor paper and trim it down to fit on a square of white printer paper with the ink color printed on it.

6x8 Album with Distress Ink Swatches by Juliana Michaels

Here you can see how Lumberjack Plaid fits in with the other reds in the palette. I've swatched both the Distress Ink and Distress Oxides as the inks are slightly different in color due to the nature of their properties. Since Distress Ink is more transparent and the Oxides are more opaque and they are both swatched onto white paper, I spritzed the Oxides with water and dabbed them dry to lift off some of the ink.

6x8 Album with Distress Oxide Ink Swatches by Juliana Michaels

If you want to take your swatch game to the next level, you can create what I like to refer to as "pretty swatches" that show both the color AND are pretty to look at!

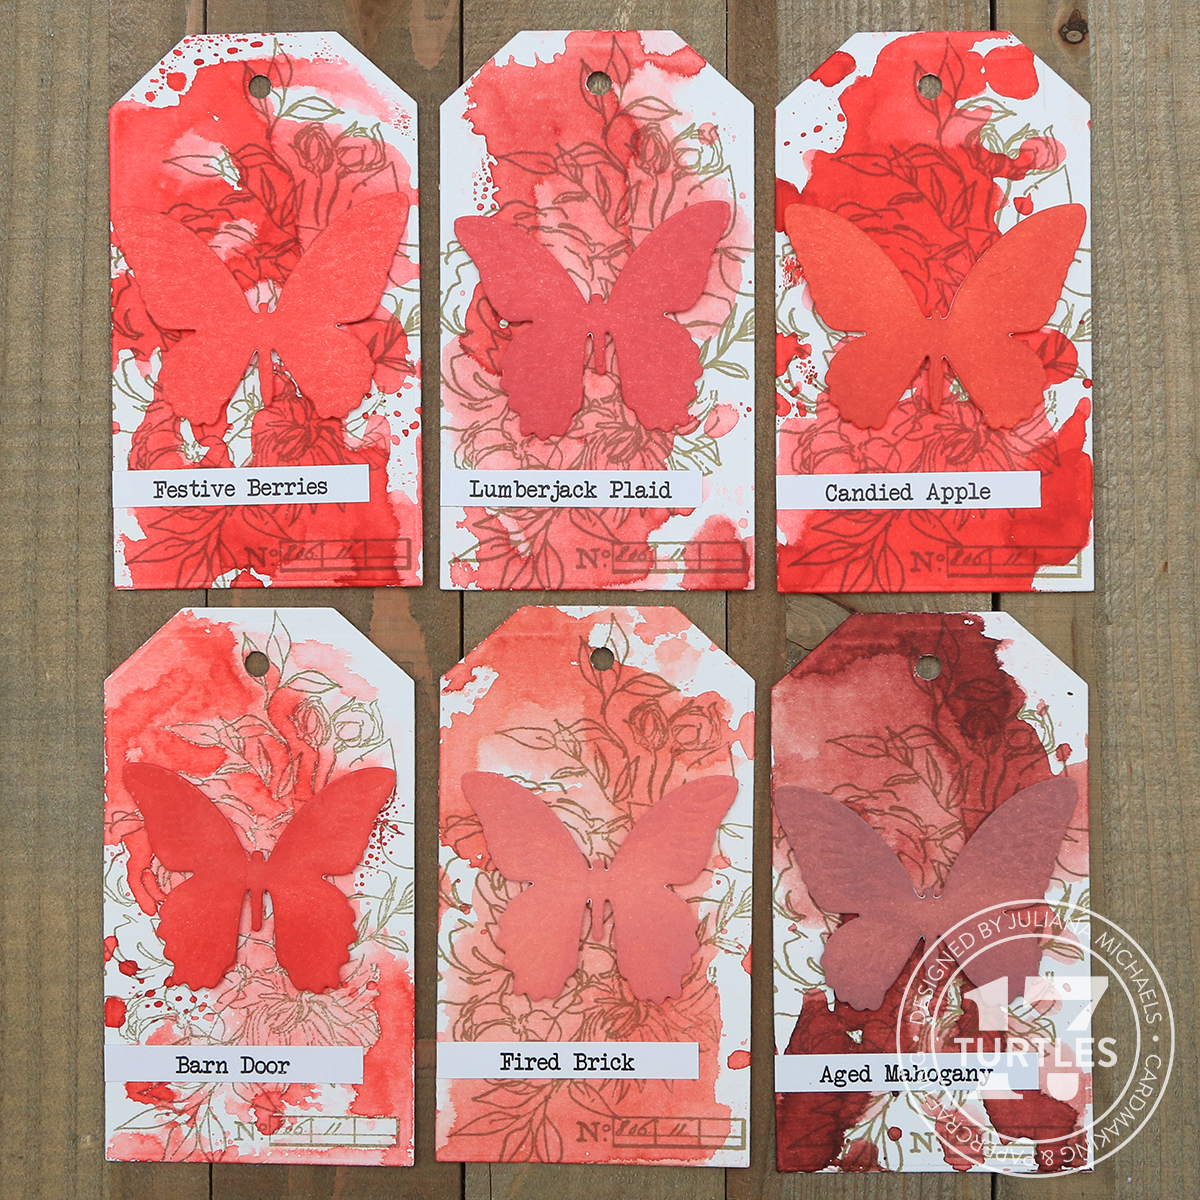
Pretty Tag Distress Ink Swatches by Juliana Michaels

When creating these types of swatches I recommend using the products in ways that you typically use that product and on paper that you would use for that technique.


One of my favorite techniques is ink smooshing, so I used watercolor paper to die cut the tag because I know it can hold up to the ink and water used with this technique. I used the Distress Ink on the tag with the ink smooshing technique. For the butterfly, I die cut a piece of Distress White Heavystock and ink blended it with the Oxide Ink, because that is a common way I tend to use the Oxide Inks. I then added some stamping and a label with the new color. Here you can see how it looks when compared to the other reds in the palette. You could also create something similar using the spray inks!


For more swatches you can check out the ones I made for the pinks when Saltwater Taffy was released and for the blues when Uncharted Mariner was released.

• • • • • • • • • • • • • • • • • • • • • • • • •

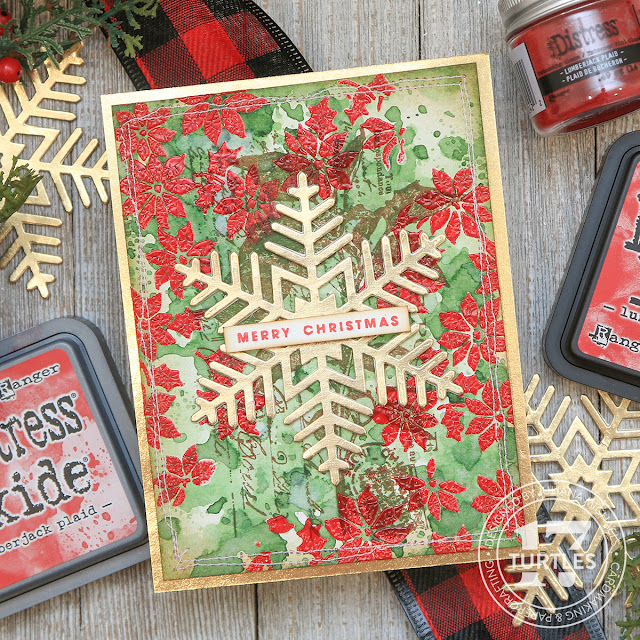
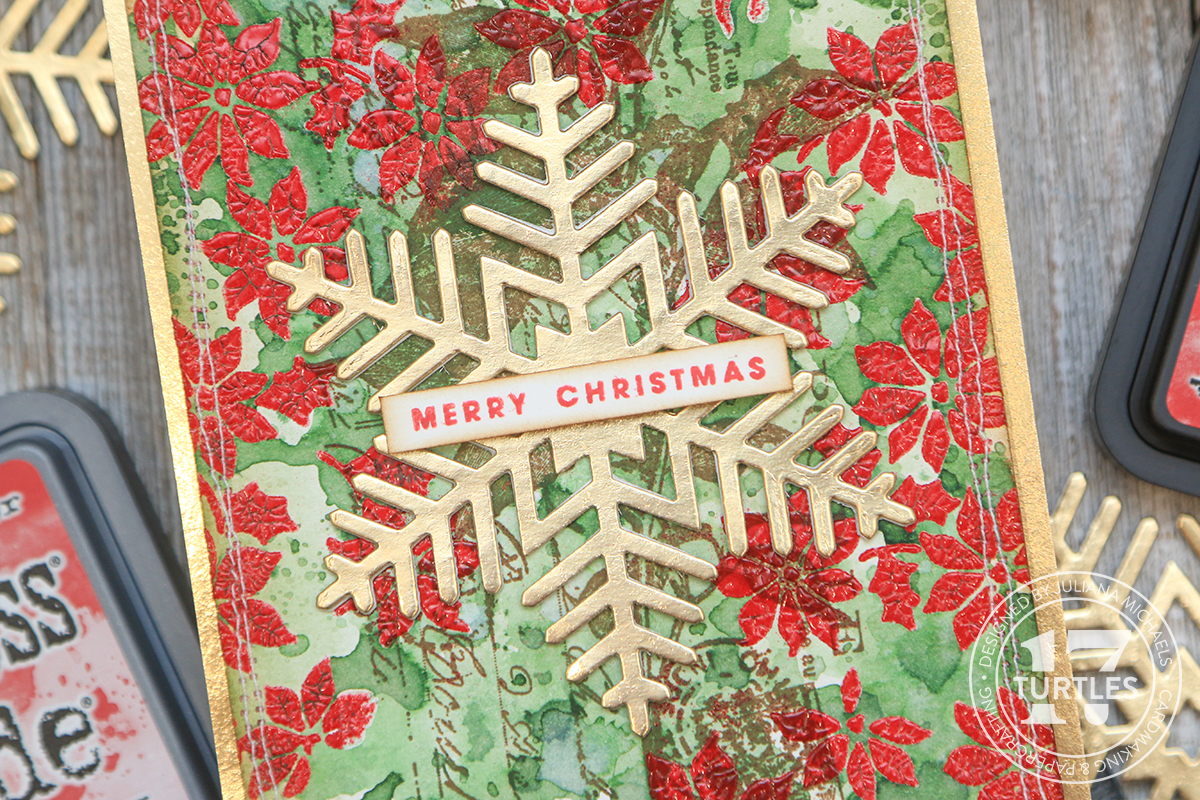
MERRY CHRISTMAS CARD | LUMBERJACK PLAID DISTRESS EMBOSSING GLAZE

Now that we've seen the swatches, let's get to the card I created using the Lumberjack Plaid Embossing Glaze! And if reading isn't your thing, I also have a video I created that you can check out below or HERE.


To get started, I cut a piece of Distress Watercolor Paper to 4 x 5.25 inches and stamped the poinsettia image from the Tim Holtz Festive Collage stamp set, but feel free to use any stamp you like, using Archival Ink in Vintage Photo. I'm using this ink because it's a permanent waterproof ink that won't bleed, which is important for the techniques I'm going to be using as I create this card. 

After stamping the image, I inked the edges using a foam blending tool and Vintage Photo Distress Ink.  I then use a heat tool to dry the ink and paper. I need it to be completely dry before the next step. You can also allow it to air dry if you aren't in a hurry.


Once the ink is dry I apply Distress Translucent Crackle Paste through the stencil using a palette knife. This paste will create a beautiful crackle effect as it dries and because it's translucent you can see through it! To get the crackle effect though, you must allow the paste to air dry. If you try to speed it up with a heat gun, it just doesn't seem to crackle at all. Also as you apply the paste, the thicker it is the larger the cracks and the thinner the smaller. However, the thicker application will also take longer to dry, so keep that in mind as well. The drying time will also vary depending on the temperature and humidity of where you live. Once you are finished applying the paste, wipe off any that is hanging over the edge and then make sure to wash your stencil immediately so the paste doesn't dry on the stencil.

Next, I add the Lumberjack Plaid Embossing Glaze. If you aren't familiar with Embossing Glaze it's similar to embossing powder, however it's biggest difference is that it's translucent, so you can see through it to whatever is underneath it. As for the similarities, it's also a powder that needs something to stick to and you must heat it with an embossing gun to melt the powder. That's why you want the ink to be dry before going onto this step. The powder can stick to any ink or even water and we just want it where we apply the paste.


On this card, I'm using the Crackle Paste for it to stick to, so I pour the glaze over the paste and then tap off the excess. I then set this to the side and allow the paste to air dry.

Once the paste is dry, I hold the paper with a pair of tweezers to protect my fingers and use a preheated embossing tool to melt the powder.

While you're melting the powder, make sure to keep the heat gun moving so you don't overheat the powder and once you see it turn shiny move on to the next section. If you overheat the powder, you run the risk of melting it so much that you can't see the crackle texture anymore.

To bring out the crackle effect, I added some color to the background using an ink smooshing technique. You can use Distress Spray Stain or Distress Ink. I used an ink pad and smooshed the pad onto my craft mat and spritzed it with some water. I then used my finger to mix it together and kind of smooth out the straight edges from the ink pad and then smooshed my paper into the ink. I then used my heat tool to dry the ink. You can repeat this process as desired. You can also spritz the paper with water to help the ink move around more and to add to the distressed look.

With the background completed, I added a snowflake cut from gold metallic paper using the Scrapbook.com Snowflakes Decorative Die Set. I added a sentiment from the Celebrate Expressions Stamp set from Scrapbook.com, which I stamped using the Lumberjack Plaid Distress Oxide ink and popped it up using double sided foam adhesive strips. The final touch was to add a bit of machine stitching before layering the background onto a piece of gold metallic cardstock.


• • • • • • • • • • • • • • • • • • • • • • • • •

LUMBERJACK PLAID DISTRESS COLOR COMBOS

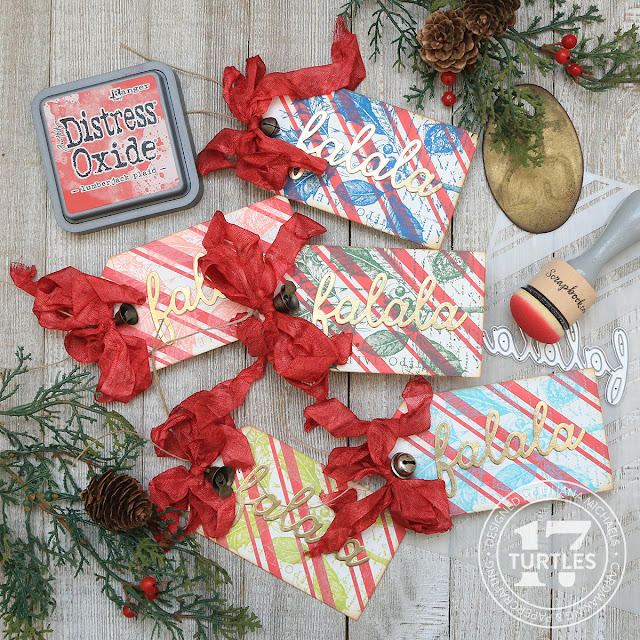
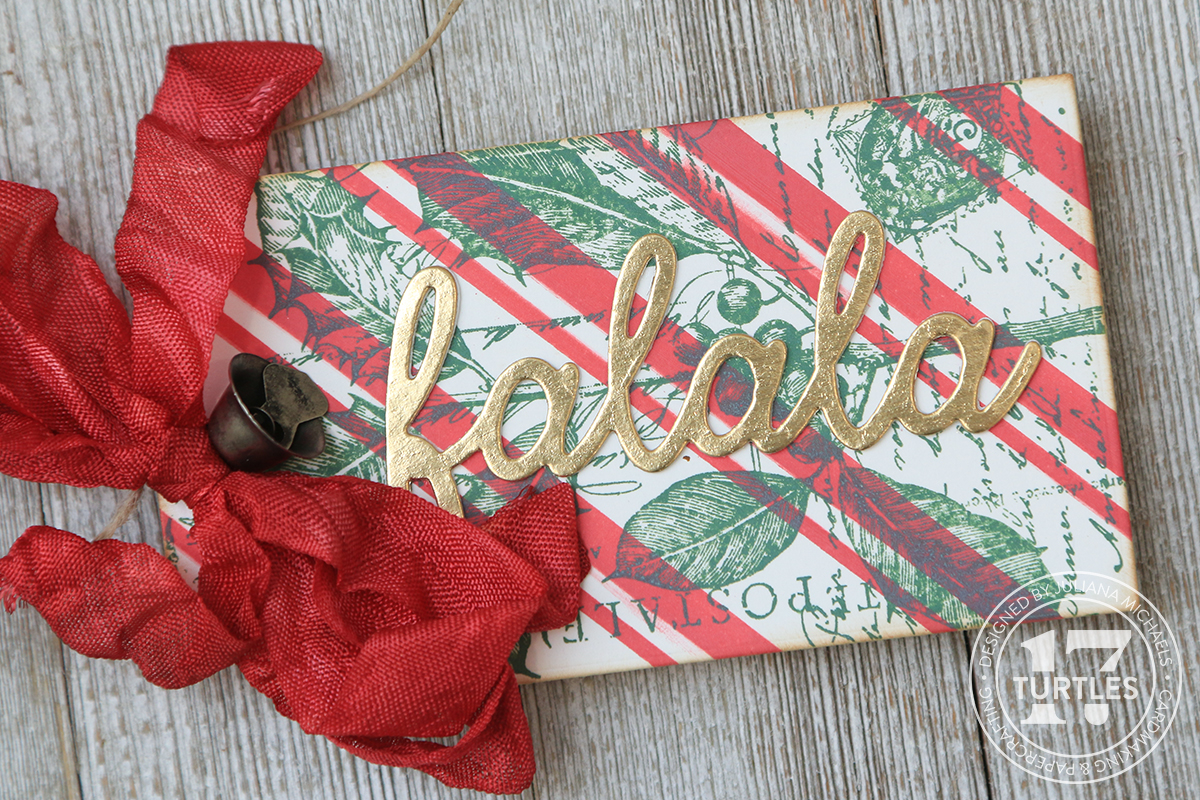
One last thing I wanted to share with you are some color combinations using Lumberjack Plaid. I used these combos to create a set of Christmas tags and I love how they show how Lumberjack Plaid can go from a traditional to a modern color scheme depending on which colors you mix with it.

Tim Holtz Lumberjack Plaid Distress Color Combinations by Juliana Michaels

I began by using a tag die to cut a piece of Distress White Heavystock Paper. I then placed the Scrapbook.com Candy Stripe Stencil over the tag and applied Lumberjack Plaid Distress Oxide using a blending brush. I then used the holly image from the Festive Collage Stamp Set and stamped it in Oxide Ink. The bow is made using seam binding that I inked with Lumberjack Plaid Distress Spray Stain. To finish off each tag, I inked the edges with Vintage Photo Distress Ink and added a Tim Holtz Idea-ology Christmas Tiny Bells.

Here are the color combinations I came up with:

Lumberjack Plaid + Uncharted Mariner


Lumberjack Plaid + Rustic Wilderness


Lumberjack Plaid + Saltwater Taffy


Lumberjack Plaid + Twisted Citron


Lumberjack Plaid + Salvaged Patina


I also think it would pair great with any of the pinks (Picked Raspberry and Kitsch Flamingo would be fun), blues (Faded Jeans would be gorgeous), greens (Peeled Paint one of my all time favorite greens) any of the browns and of course Black Soot if you want to go straight up Lumberjack Plaid!

• • • • • • • • • • • • • • • • • • • • • • • • •

Thanks so much for stopping by and I hope you enjoyed seeing the new Tim Holtz Distress Color Lumberjack Plaid in action with the and how to work with Distress Embossing Glaze.

SUPPLIES

Below you can find the products I used to create this project along with compensated affiliate links to Scrapbook.com. These links are at absolutely no cost to you. When you shop through the links below, I receive a small commission from Scrapbook.com. These links are at absolutely no cost to you and the commission I receive helps me cover the costs of my blog and other expenses, which allows me to continue to provide you with FREE inspiration and tutorials. If you want to learn more about what an affiliate link is, you can see my full affiliate and product disclosure statement here. Thank you so much for your love and support!

Subscribe