Gina K Designs & My Sweet Petunia Blog Hop

Hello friends and welcome to the Gina K Designs and My Sweet Petunia Blog Hop! The MISTI is seriously the most amazing stamp positioning tool. I got my first one about a year ago and it seriously changed my life. I was, and still am, one of those stampers who could never stamp an image right the first time. Being able to re-ink and stamp again has changed my card making life and I've gone from not liking to stamp to loving to stamp all because of the MISTI!

You Are Amazing Card by Juliana Michaels. Card design and layering stamp images with the MISTI. Boho Flowers Stamp Set by Gina K Designs.

Card Design and Layering Stamp Images with the MISTI


With that being said, the MISTI is such a great tool and it gives you the flexibility and freedom to create some many wonderful designs with ease.  One of my favorite things to do with the MISTI is use it to lay out my card design and determine how I want to layer the stamped images. I did just that when I created the card I'm sharing with you today.  

To create this card, I started by using the MISTI to lay out the design for my card using stamps from the Boho Flowers Stamp Set. This set was part of the recent BoHo Flowers Mini Kit by Gina K Designs.

I knew I wanted to layer the flower images and the large "you" on top of the leaves and swirls, so I used the die cuts from the flowers and the "you" to help me determine the placement of the leaves and swirls.

Card design and layering stamp images with the MISTI Tutorial by Juliana Michaels

At this point, I wasn't sure what colors I was using for the flowers, etc. so I die cut some scrap paper using the flower dies. I played around with the placement of the flower dies and the leaves, swirls and sentiment stamps until I liked their placement on the card front.

Card design and layering stamp images with the MISTI Tutorial by Juliana Michaels

Once I was happy with the placement, I removed the die cuts and closed the lid to pick up the stamps.

Card design and layering stamp images with the MISTI Tutorial by Juliana Michaels

Next, I inked them up with Jelly Bean Green Ink by Gina K Designs. I just love that you can ink and stamp multiple stamps all at the same time.
Card design and layering stamp images with the MISTI Tutorial by Juliana Michaels

As you might have noticed, part of the sentiment stamp was on their as well. After I had inked and stamped the leaves, I then added black ink to that stamp and stamped it.

Card design and layering stamp images with the MISTI Tutorial by Juliana Michaels

After all of this was stamped, I then used the MISTI to stamp the flowers. I double stamped all of the images to get a nice dark color with the ink. After die cutting the flowers, I then adhered them to the card. I used some double sided foam tape to pop up the largest flower. For a bit of dimension and detail, I added enamel dots to the flower centers and then colored in the dots on the flower and swirl images using Sakura Glaze Pens.

You Are Amazing Card by Juliana Michaels. Card design and layering stamp images with the MISTI. Boho Flowers Stamp Set by Gina K Designs.

I hope you enjoyed learning how I used the MISTI to create this card!


Blog Hop Details & Giveaway


Gina K Designs and My Sweet Petunia will each be giving away a wonderful prize. There will be two winners...one for each prize. The prizes are either an Original or mini MISTI from My Sweet Petunia or the Stitched Leaves Mini Kit from Gina K Designs. For your chance to win one of these awesome prizes all you have to do is leave a comment on each blog along the hop!

The deadline for commenting is September 5th at noon central. Winners will be posted on the My Sweet Petunia blog winners page and on the Gina K blog no later than Friday, September 8th.

Gina Krupsky
Ilina Crouse
Joyce Erb
Jeanne Streiff
Lydia Fiedler
Sheri Gilson
Kia Gibson-Clapper
Cathy Tidwell
Ceal Pritchett
Susie Moore
Donna Idlet
Giovana Smith
Bethann Silaika
Chris Dayton
Karen Hightower
Stephanie Severin
you are here >>Juliana Michaels<< you are here
Sean Fetterman
Laurie Schmidlin
Silke Ledlow
Melanie Muenchinger
Rema DeLeeuw
Theresa Momber
Iliana Myska


Supplies


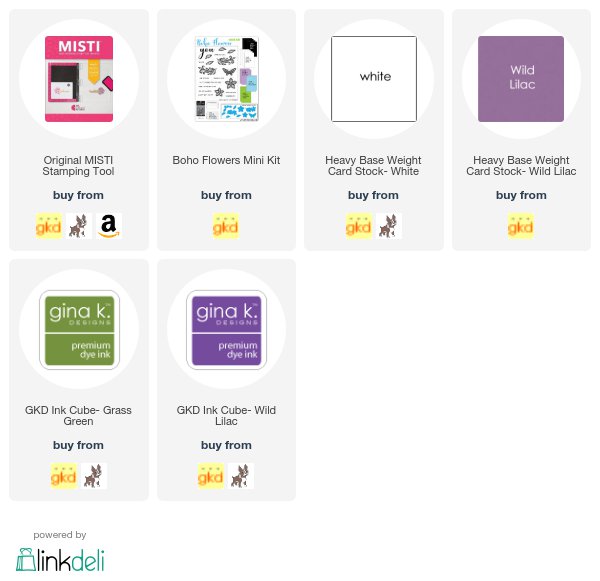
Are you interested in the supplies I used to create this card? To make them easy for you to find, I've listed them below. Affiliate links are used at no additional cost to you and I've linked to them because I use them and love them! Click on the image below each picture to go to your favorite store.

Quick and Easy Galaxy Background | Newton's Nook Designs & Chibitronics

Everyone loves an interactive card, so how about a card that lights up? This week, Newton's Nook Designs and Chibitronics are partnering for a fabulous inspiration week! All week long both design teams will be sharing ways to light up your cards using Chibi lights with Newton's Nook Designs stamps! There is also an awesome giveaway going on, so make sure to check out the details after you check out my card.

When I started thinking of ideas on what to create, I was immediately inspired to use the Chibi lights with the Cosmic Newton stamp set and Starfield Stencil. I thought it would be fun to create a galaxy background and light up a few of the stars.

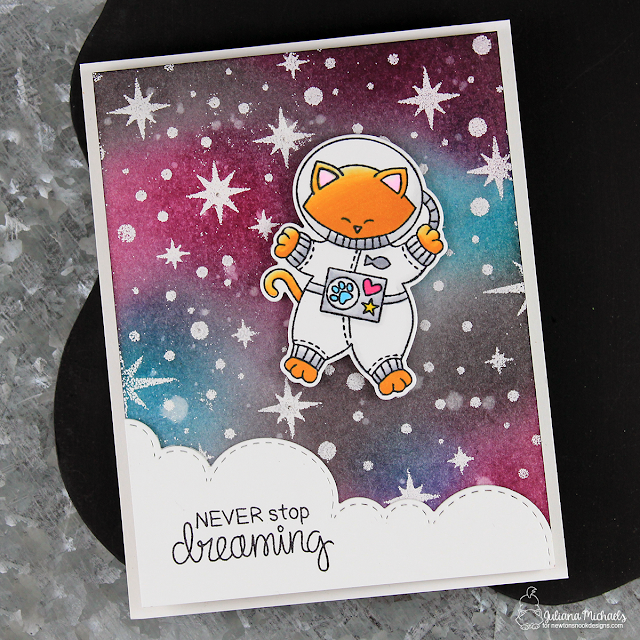
Never Stop Dreaming Card by Juliana Michaels. Quick and Easy Galaxy Background featuring Newton's Nook Designs and Chibitronics.

Quick and Easy Galaxy Background


To create a quick and easy galaxy background, gather your supplies. This includes a piece of watercolor paper, Newton's Nook Designs Starfield Stencil, Versamark Embossing Ink, White embossing powder, Heat gun, and Foam Blending Tool. You will also need Distress Ink in Picked Raspberry, Peacock Feathers, Seedless Preserves and Black Soot. All of these supplies are linked below if you are interested.

Begin by placing the Starfield Stencil over the watercolor paper and tap the Versamark ink pad on top of the stencil to apply the ink. Remove the stencil, sprinkle with white embossing powder. Tap of the excess powder and heat set it using the heat gun.

Never Stop Dreaming Card by Juliana Michaels. Quick and Easy Galaxy Background with Stencils and Distress Ink.

Next take your ink blending tool and apply the Distress Ink in Picked Raspberry, Peacock Feathers, and Seedless Preserves in several areas over the embossed watercolor paper.  Don't cover the entire piece of paper with these colors. Make sure to leave a little space between them at some points and allow them to blend together in others. Next, take the Black Soot and apply it to the open areas and then blend it lightly over the colored areas.  There you have it...a quick and easy galaxy background!

Never Stop Dreaming Card by Juliana Michaels. Quick and Easy Galaxy Background with Stencils and Distress Ink.

Now things get a little more complicated, but the effort is definitely worth it! Once my background was complete, I went about adding the Chibitronics lights using their Chibi Lights Starter Kit. As you can see in the photo below, I designed it so that several of the stars would light up when you press on the sentiment.

Never Stop Dreaming Card by Juliana Michaels. Quick and Easy Galaxy Background featuring Newton's Nook Designs and Chibitronics.

Chibitronic LED Circuit Stickers Tips & Tricks


This was my first time working with this product and I'll admit it was a bit of trial and error to learn how to create the circuit. My first bit of advice is to actually read the instruction booklet that comes with the kit. It breaks it all down into simple sets and makes it easy to follow. Second, make sure the tips on the LED stickers are fully touching the copper tape so that the circuit is complete and they will light. If you think it might be the battery, think again. It's probably a poor connection somewhere. Don't ask me how I know this! LOL Seriously, though, don't give up until you get it working. The end result is SO much fun and I can't wait to create another one in the near future!

Never Stop Dreaming Card by Juliana Michaels. Quick and Easy Galaxy Background featuring Newton's Nook Designs and Chibitronics.

Giveaway


As I mentioned in the beginning, here are all the details about the giveaway. One lucky winner will receive a prize pack including a Starter Kit from Chibitronics and a $30 store credit to Newton’s Nook Designs. Would you like to be the winner? If so, leave a comment on the Newton Nook Designs Blog & Design Team blog posts from August 21-25. The links for each blog can be found on the Newton's Nook Blog. One winner will be randomly chosen from all of the blog posts throughout the week so the more posts you leave comments on the better your chances are of winning! You have until Friday August 25th at midnight CST to comment. The winner will be announced on the NND blog post on Monday, August 28th.

For another chance to win, make sure to visit the the Chibitronics Blog each day this week for more inspiration!


Supplies


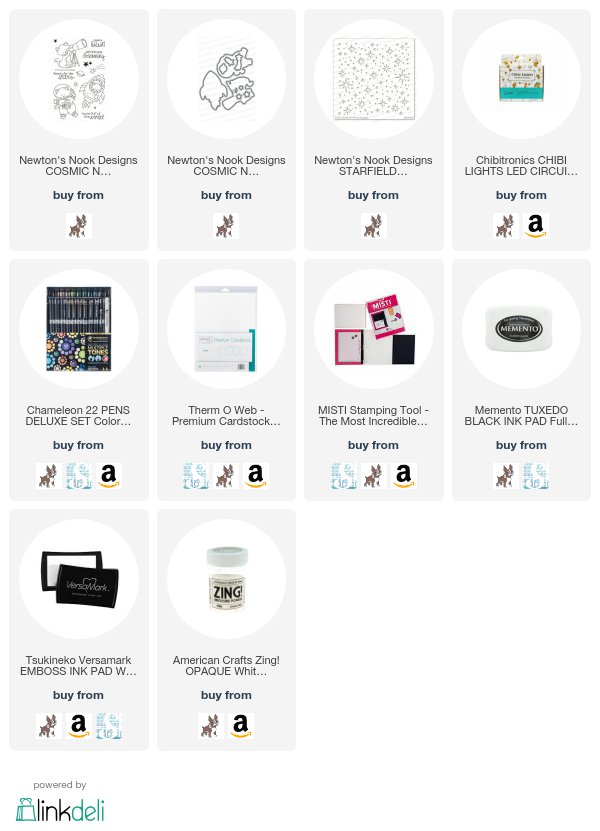
Are you interested in the supplies I used to create this card? To make them easy for you to find, I've listed them below. Affiliate links are used at no additional cost to you and I've linked to them because I use them and love them! Click on the image below each picture to go to your favorite store.


Newton's Nook Designs August Release | Autumn Newton

Hello friends and welcome to Day 4 of the Newton's Nook Designs August Release! I hope you've been enjoying the release so far. Today the design team is sharing projects created using the Autumn Newton Stamp Set.

Autumn Shaker Card


When I look back on this release, it appears that I was really into the interactive cards. This is my second shaker card from the release, but I just couldn't help myself!

To create the shaker frame, I used a stitched rectangle die and cut it 6 times from kraft cardstock. I glued 5 of the layers together. I then adhered the sixth rectangle to a piece of transparency and then attached this to the top of the 5 layers.

Autumn Shaker Card by Juliana Michaels featuring Newton's Nook Designs Autumn Newton Stamp Set

To create the background sky, I used Distress Oxide Ink in Peacock Blue and applied it to a piece of watercolor paper using foam blending tool.  I then used the hill die from Land Border Dies to create the grass. I glued these together and trimmed them to the size of the stitched rectangle. I then added my stamped, colored and die cut Newton in the leaves.

To fill up the shaker I stamped, colored and die cut some of the small leaves from the stamp set. I added them along with a mix of sequins to the inside of the shaker.  Once I had all these goodies added to the shaker frame, I adhered the background piece to the back of the frame. I love how the mix of sequins and die cut images add to the feeling of a pile of leaves ready for Newton to dive into and start playing.

Autumn Shaker Card by Juliana Michaels featuring Newton's Nook Designs Autumn Newton Stamp Set

Blog Hop + Giveaway

Are you ready for the fun stuff? Here are all the blog hop and giveaway details. So, how would you like to win a the Autumn Newton Stamp Set?


Newton's Nook Designs Autumn Newton Stamp Set

For your chance to win, all you have to do is leave a comment on the Newton's Nook Design Blog and each of the Design team Members blogs. You have until Thursday August 17th at 9pm CST to comment and the winners will be announced on the Newton's Nook blog on Friday, August 18th.

Newton's Nook Designs
Amanda Bodine
Holly Endress
Ellen Haxelmans
Larissa Heskett
Samantha Mann
Juliana Michaels
Naki Rager
Maria Russell
Jennifer Timko
Tatiana Trafimovich


Supplies


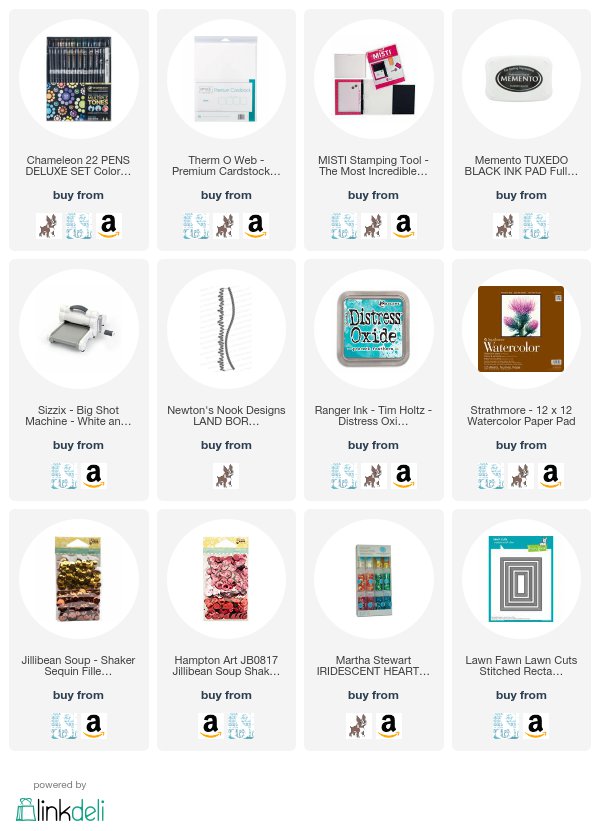
Are you interested in the supplies I used to create these cards? To make them easy for you to find, I've listed them below. Affiliate links are used at no additional cost to you and I've linked to them because I use them and love them! Click on the image below each picture to go to your favorite store.

Newton's Nook Designs August Release | Knight's Quest

Hello friends and welcome! Thanks for stopping by for Day 3 of Newton's Nook Designs August Release!

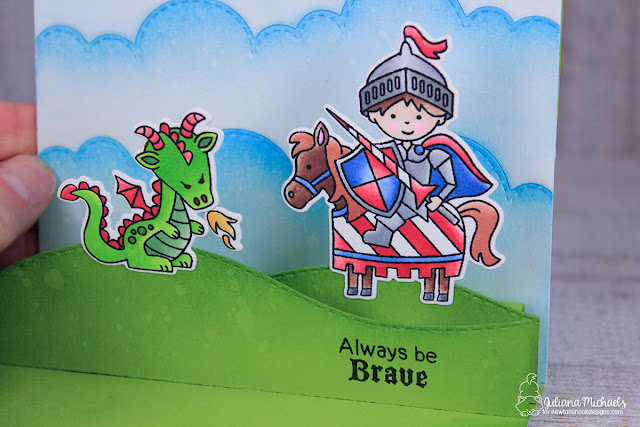
Always Be Brave Pop Up Card by Juliana Michaels featuring Newton's Nook Designs Knight's Quest Stamp Set

Today the design team is featuring the brand new Knight's Quest stamp and coordinating die set. I used this new set to create a fun pop card and I have a step by step tutorial below to show you to do one yourself.

Hill Landscape Pop Up Card Tutorial


At first glance, this card might seem a little simple, however once you open the card the fun begins!I used the Sky and Land Border Dies to create the scene on the front of the card. I then used these same dies to create the pop up scene on the inside.

Always Be Brave Pop Up Card by Juliana Michaels featuring Newton's Nook Designs Knight's Quest Stamp Set

To create your own pop up scene, begin with a piece of green cardstock cut to 4.25 x 5.5 inches. Cut this in half using the hill die.

Hill Landscape Pop Up Card Tutorial

Take one of the die cut pieces and offset it with the first piece so that you have two hills.


Hill Landscape Pop Up Card Tutorial

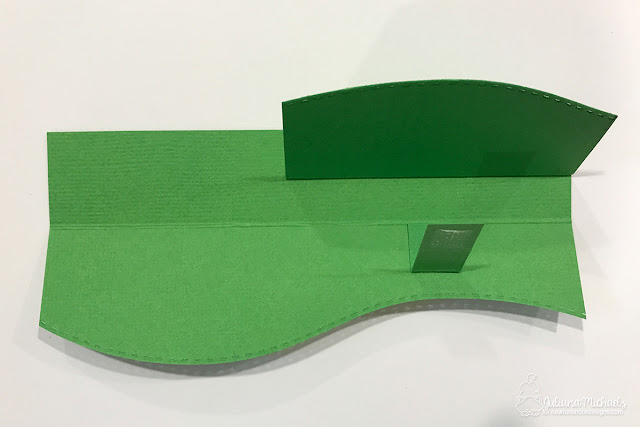
Trim off the excess piece on the left side of the second piece to create the hill in the background. Don't throw away that scrap. You are going to use it in a few!

Hill Landscape Pop Up Card Tutorial

Score the first hill piece at 1 inch.

Hill Landscape Pop Up Card Tutorial

Score the second hill piece at 1 inch.

Hill Landscape Pop Up Card Tutorial

After scoring the second hill, trim off 1/2 inch from the bottom.

Hill Landscape Pop Up Card Tutorial

Take that scrap that I told you not to throw away from the second hill and trim it into (3) 1/2 inch strips. Cut one strip to 2 inches long. Cut the other two strips to 1.5 inches.

Score the 2 inch strip at 1/2 inch and 1.5 inches.

Hill Landscape Pop Up Card Tutorial

Score the 1.5 inch strips at 1/2 and 1 inch.

Hill Landscape Pop Up Card Tutorial

Adhere the two hills together, making sure to line them up as indicated in the image below.

Hill Landscape Pop Up Card Tutorial

Fold back the second hill and attach one of the 1.5 inch strips as per the photo below.

Hill Landscape Pop Up Card Tutorial

Fold the second hill flat and attach the other 1.5 inch strip as shown in the photo.

Hill Landscape Pop Up Card Tutorial

Adhere the 2 inch strip as per the image below.

Hill Landscape Pop Up Card Tutorial

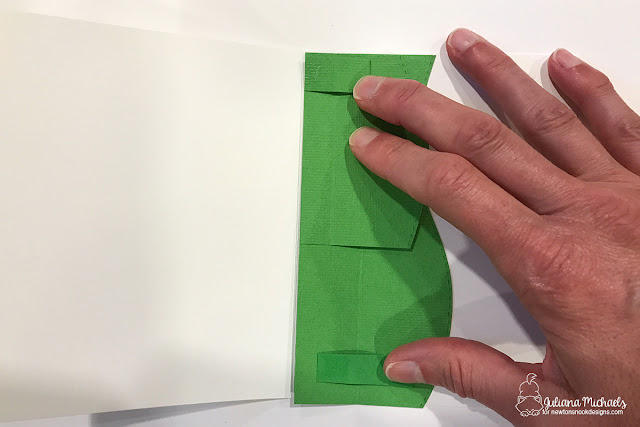
Place the piece inside a folded card base. Apply adhesive along the bottom fold on the first hill and adhere this to the card base. Make sure it is pushed all the way into the fold of the card.

Hill Landscape Pop Up Card Tutorial

Fold the tabs flat as per the photo below, add adhesive to the tabs and close the card.

Hill Landscape Pop Up Card Tutorial

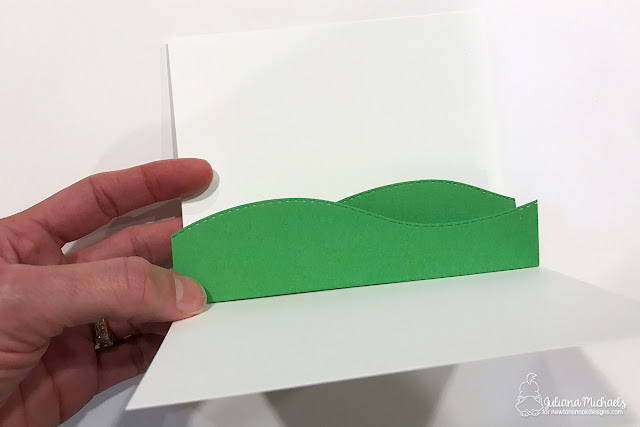
When you open the card, your hill landscape pop up is complete. Now it's time to decorate it with your favorite critters or people to build your scene!

Hill Landscape Pop Up Card Tutorial

If you want to stamp a sentiment on the hill, make sure to do that before you attach it to the inside of your card. Don't ask who, but I might know someone who didn't do that the first time and it is much easier to do the stamping first!

Always Be Brave Pop Up Card by Juliana Michaels featuring Newton's Nook Designs Knight's Quest Stamp Set

Here is a view of the completed pop up from the top.

Always Be Brave Pop Up Card by Juliana Michaels featuring Newton's Nook Designs Knight's Quest Stamp Set

I hope you enjoyed learning how to create your own Hill Landscape Pop Up Card Tutorial!

Blog Hop + Giveaway

Are you ready for the fun stuff? Here are all the blog hop and giveaway details. So, how would you like to win a the Knight's Quest Stamp Set?


For your chance to win, all you have to do is leave a comment on the Newton's Nook Design Blog and each of the Design team Members blogs. You have until Thursday August 17th at 9pm CST to comment and the winners will be announced on the Newton's Nook blog on Friday, August 18th.

Newton's Nook Designs
Amanda Bodine
Holly Endress
Ellen Haxelmans
Larissa Heskett
Samantha Mann
Juliana Michaels
Naki Rager
Maria Russell
Jennifer Timko
Tatiana Trafimovich

Supplies


Are you interested in the supplies I used to create these cards? To make them easy for you to find, I've listed them below. Affiliate links are used at no additional cost to you and I've linked to them because I use them and love them! Click on the image below each picture to go to your favorite store.


Newton's Nook Designs August Release | Once Upon A Princess

Hello and welcome to Day 2 of the Newton's Nook Designs August Release! Today we're continuing the fantasy theme with another adorable stamp set called Once Upon A Princess.


Always Believe Card


 I just have to tell you, I had so much fun coloring and creating this little scene. It made me feel like a little kid again playing with my paper dolls! To create this card, I started by stamping all of the images with Memento Tuxedo Black. I then colored them using my Chameleon Pens. After all the coloring and cutting was complete, it was time to play around with creating the scene. 

Always Believe Princess Card by Juliana Michaels featuring Newton's Nook Designs Once Upon A Princess Stamp Set

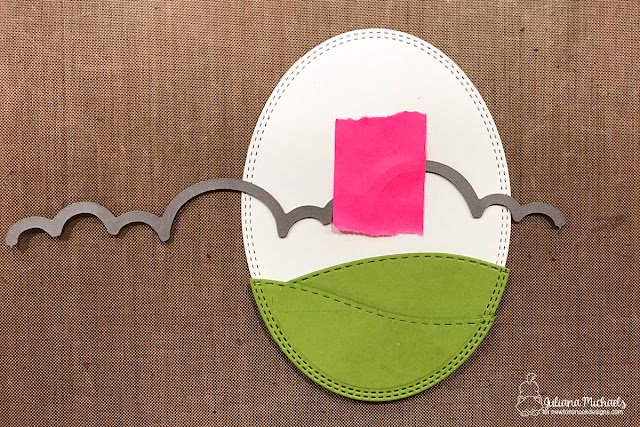
To create the landscape background, I die cut the grass using the hill dies from the Landscape Borders Die Set. After layering them, I then placed an oval stitched die over them to cut them out to fit the oval shape.

Oval Landscape with Dies Tutorial by Juliana Michaels

Next, I took the oval die and cut an oval from white cardstock. To die cut the clouds I used the Sky Borders Die Set. I positioned the die over the white oval and ran it through my die cut machine.
Oval Landscape with Dies Tutorial by Juliana Michaels

I then moved the die and cut the cardstock again. For even more ideas on how to use your cloud ideas, make sure to check out my 3 Ways to Create Cloudy Sky Backgrounds Using Dies.


The final result of all this die cutting is a fun little scene perfect for any princess!

Always Believe Princess Card by Juliana Michaels featuring Newton's Nook Designs Once Upon A Princess Stamp Set

So are your ready to create with this fun set? Keep reading for you chance to win!

Newton's Nook Designs Once Upon A Princess Stamp Set


Blog Hop + Giveaway


Are you ready for the fun stuff? Here are all the blog hop and giveaway details. How would you like to win a the Once Upon A Princess Stamp Set? If so, all you have to do is leave a comment on the Newton's Nook Design Blog and each of the Design team Members blogs. The winner will be chosen at random from the collective reveal posts. You won't know which blog has been chosen so the more comments you leave, the better your chances are of winning! You have until Thursday August 17th at 9pm CST to comment -- winners will be announced on the blog post on Friday, August 18th.

Newton's Nook Designs
Amanda Bodine
Holly Endress
Ellen Haxelmans
Larissa Heskett
Samantha Mann
Juliana Michaels
Naki Rager
Maria Russell
Jennifer Timko
Tatiana Trafimovich

Supplies


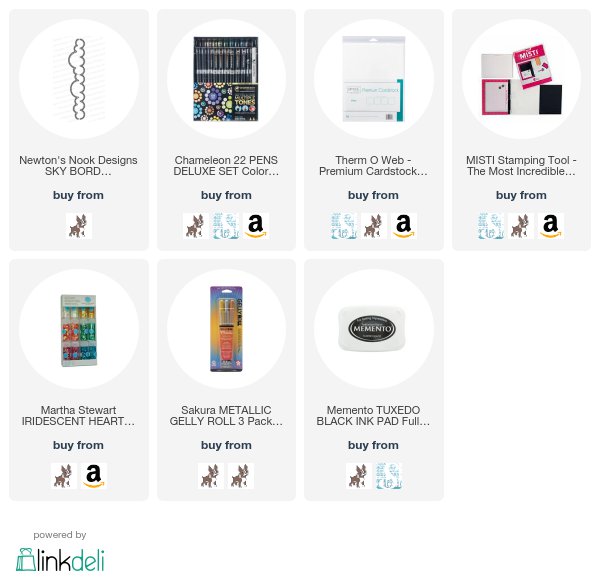
Are you interested in the supplies I used to create these cards? To make them easy for you to find, I've listed them below. Affiliate links are used at no additional cost to you and I've linked to them because I use them and love them! Click on the image below each picture to go to your favorite store.


Newton's Nook Designs Blog Hop | Believe In Unicorns

Hello friends and welcome to Day 1 of the Newton's Nook Designs August Release! We'll be sharing 4 new stamp sets this week and we are kicking it off with the new Believe In Unicorns stamp and coordinating die set. Keep reading to learn about the unicorn shaker card I created and for your chance to win this new stamp set.


Unicorn Shaker Card | Believe In Unicorns Stamp Set


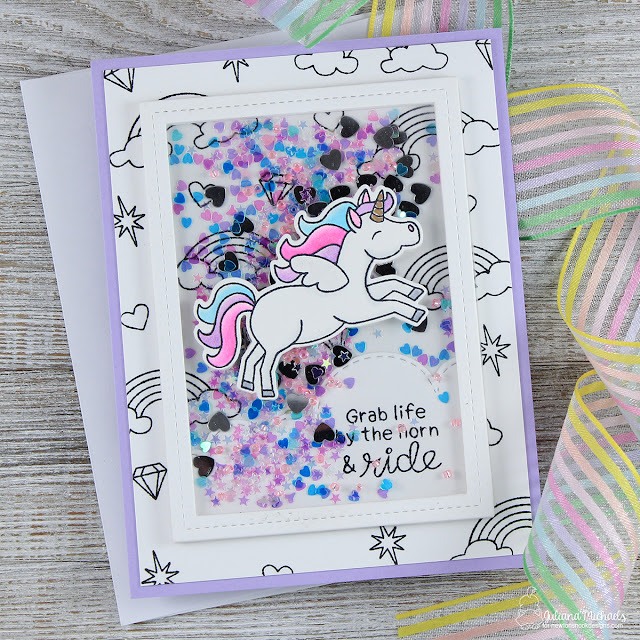
From the start, I knew I wanted to do a shaker card. I mean seriously....sequins and unicorns are a perfect match! Don't you think?!

Unicorn Shaker Card by Juliana Michaels featuring Newton's Nook Designs Believe In Unicorns Stamp Set

I began by stamping the unicorn and coloring it with my Chameleon Markers. For a touch of gold on the unicorn horn, I used a Sakura Gold Gelly Roll Pen. To create the background I used a variety of the stamps from the set and randomly stamped them with black ink.

Unicorn Shaker Card by Juliana Michaels featuring Newton's Nook Designs Believe In Unicorns Stamp Set

I then created the shaker window to place on top of the background so you could see through it to the background I created. With the unicorn flying through the sky, I decided to use the Cloud border die from the Sky Dies set inside the shaker as well and used that as a space to add the sentiment.

Believe in Unicorns Stamp Set by Newton's Nook Designs


Blog Hop + Giveaway


Are you ready for the fun stuff? Here are all the blog hop and giveaway details. How would you like to win a the Believe In Unicorns Stamp Set? If so, all you have to do is leave a comment on the Newton's Nook Design Blog and each of the Design team Members blogs. The winner will be chosen at random from the collective reveal posts. You won't know which blog has been chosen so the more comments you leave, the better your chances are of winning! You have until Thursday August 17th at 9pm CST to comment -- winners will be announced on the blog post on Friday, August 18th.

Newton's Nook Designs
Amanda Bodine
Holly Endress
Ellen Haxelmans
Larissa Heskett
Samantha Mann
Juliana Michaels
Naki Rager
Maria Russell
Jennifer Timko
Tatiana Trafimovich

Supplies


Are you interested in the supplies I used to create these cards? To make them easy for you to find, I've listed them below. Affiliate links are used at no additional cost to you and I've linked to them because I use them and love them! Click on the image below each picture to go to your favorite store.

Subscribe