Pops Of Positivity Party | Celebrating the New Scrapbook.com Gallery

Hey friends! I want to share some exciting news with you. Today, is the launch of the brand new Scrapbook.com Gallery! To celebrate, I'm participating in the Pops of Positivity Party and sharing a few cards I've created using Scrapbook.com's Pops of Color!


You may wonder what's so special about the new gallery. Well, it has some awesome new features for leaving comments and cheer. You can leave emojis (all happy ones of course!), hearts, and positive comments. There are also positive encouragement pop-ups on the site after you leave some love. Everything is designed to promote positivity and to share it with your fellow crafters. It also has a new look and in my opinion is even easier to navigate and enjoy the beautiful creations being shared.  Another great feature is that it's' even easier to see what products were used to create the projects.
 
If you are wanting even more details on the new Scrapbook.com Gallery you can check out this wonderful article they shared.


Below you can check out some of the cards I've created using Scrapbook.com Pops of Color.  Pops of Color are a liquid embellishment that comes in a rainbow of pearl, gloss and glitter colors that will leave beautiful accents on your cards, layouts, handmade gifts, and more.

I loved for you to click the link, check out my Scrapbook.com gallery and see all the new features for yourself. (These are affiliate links that add no cost to you.) While you're there you can also see all the supplies I used to create each card as well. 


Thanks so much for stopping by today for the Pops Of Positivity Party Celebrating the New Scrapbook.com Gallery!

Tim Holtz STAMPtember® 2021 | Merry Christmas Card with Masking

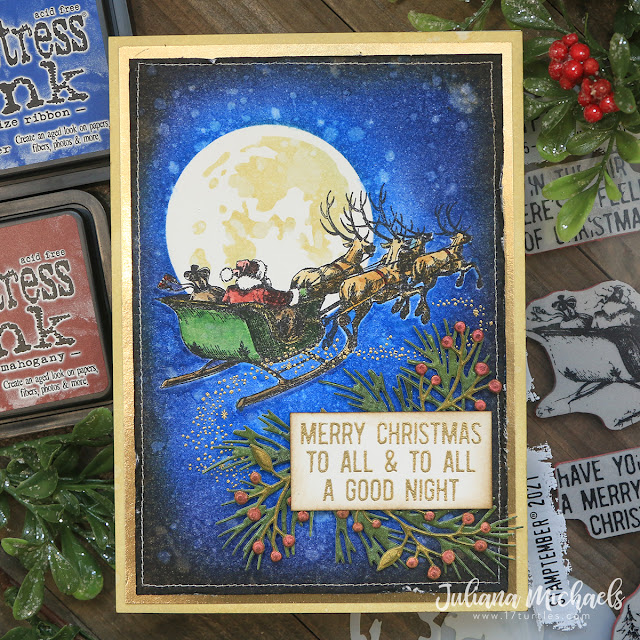
Hey friends! I'm so excited to be sharing a Christmas card I created using the new Tim Holtz STAMPtember® 2021 stamp and mask set. This set features Santa and his reindeer flying through the sky and included with the stamp set is an exclusive moon mask that is perfect for creating a night sky.

Merry Christmas Card by Juliana Michaels featuring Tim Holtz STAMPtember® 2021

[Affiliate links used. If you would like to learn more about what an affiliate link is, you can see my full affiliate and product disclosure statement here.]

If you're new to STAMPtember®, let me tell you a bit about it! It's a yearly event at Simon Says Stamp and this year marks their 12th Anniversary. Each day during the month of September they release a new, exclusive stamp set or kit that is done in collaboration with many of the amazing stamp companies that are a part of our industry. These stamp sets are available for a limited time AND only while supplies last. Many of them sell out super fast, so if you see one you like, you better grab it. With all that being said, the STAMPtember® set by Tim Holtz is sure to sell out quickly. This stamp set is AVAILABLE NOW (12 PM ET), so if you're worried about it selling out, head on over and purchase the Tim Holtz STAMPtember® 2021 stamp and mask set immediately and then pop back here for some inspiration on using your new stamp set!


Here's a look at the entire new Tim Holtz STAMPtember® 2021 stamp and mask set and the moon mask that is included with it.


So without further ado, let me share all the details on how I created this Merry Christmas card featuring the Tim Holtz STAMPtember® 2021 stamp and mask set.

Before I get started though I wanted to share a little something with you. I have never been much into masking and stamping. It has always intimidated me. However, I really wanted to use this cool moon mask so I decided it was time to get over my fear of masking and give it a go. I had to do a bit of research and lots of trial and error I was able to create this one layer background with the moon mask and the Santa and reindeer image and I must say, I'm quite proud of myself.

I followed a tutorial by the uber talented Emma Williams, but incorporated the moon mask and then created my own mask for the stamped image using Gina K Designs Masking Magic Sheets. I'll also admit that I was super intimidated to try cutting a mask for such a detailed image. However, I quickly realized that many of those details, such as the antlers, didn't need a mask because there wasn't anything to color in those areas. I also realized that I could color in any gaps using a waterbrush and the Distress Ink I had ink blended in that area. So now that the intimidating issues have been taken into account, let's get on to how this card came together.

For the background I first stamped the Santa and reindeer image onto a piece of Distress Watercolor cut to 4.5 x 6.5 inches using Black Soot Archival Ink. The finished size of this card is 5x7 inches.


Next, I placed the moon mask and the mask I created for the Santa and reindeer in place with a bit of temporary adhesive. The Gina K Designs Masking Magic Sheets have an adhesive on them, but because I wanted to be able to reuse the mask I didn't want to remove the liner and then have to try to line it back up with the detailed image, so I just applied some temporary adhesive to the backside.


I then carefully ink blended Prize Ribbon Distress Ink toward the center and Chipped Saphire toward the outside. By carefully I mean that I did have to hold the mask in place so it wouldn't move. This goes back to me not using the adhesive on the back of the masking sheet. You won't have to worry about it so much if you remove the liner. Also, if you look closely you can see that I didn't cut out the space underneath the sleigh. Once the ink blending was completed, I used a waterbrush to apply a bit of Distress Ink to fill in this area and any other gaps around the mask. Being able to do this also helped with not having to get too fussy with cutting the mask.


With the ink blending and masking for the background completed, I added a bit of water using the Distress Sprayer and blotted it dry with a paper towel to lift off a bit of the ink and create the effect of stars. In these photos you will notice that the water droplets are much larger than the finished card. As I mentioned earlier, there was a bit of trial and error in creating this so to avoid the large droplets either hold the Distress Sprayer farther away from your paper or use a fine paint brush to splatter the water and give you a bit more control.


I then added on the center part of the moon mask while keeping the Santa mask in place and ink blended it using Antique Linen Distress Ink.


Continuing with the background, I added a bit of Walnut Stain Distress Ink to the edges. I then distressed the edges using the backside of my craft knife and finished it off with some machine stitching.

With the background completed, I began coloring the Santa and reindeer image using Distress Ink and a waterbrush. The colors I used were: Aged Mahogany, Rustic Wilderness, Brushed Corduroy and Walnut Stain.


Once everything was nice and dry, I stamped the swirl of stars using embossing ink and heat embossed it with gold embossing powder. I did the same thing for the sentiment and trimmed it to a rectangle to adhere to the card.


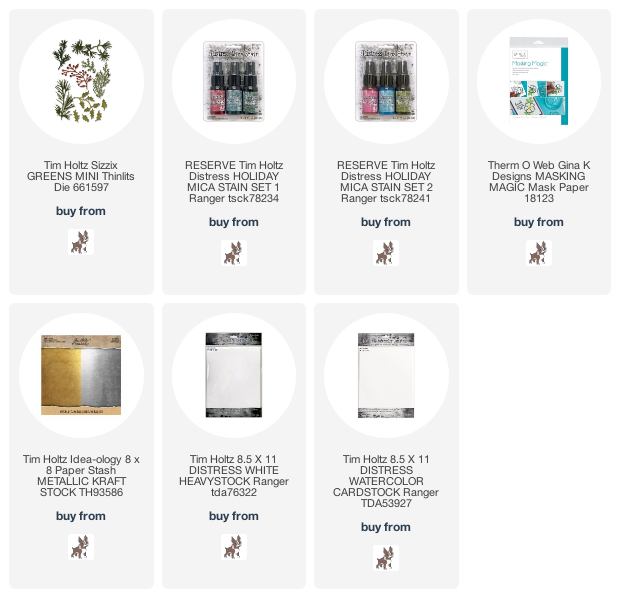
For the cluster of greenery, I used the Mini Holiday Greenery Thinlits. I sprayed pieces of Distress Watercolor paper with Distress Mica Stain in Tree Lot and Holly Branch and die cut the greenery. I then used a small paint brush to apply Peppermint Stick Mica Stain to create the berries.


To complete the card, I layered it onto a piece of Gold Metallic Kraftstock and then onto a piece of Distress Heavystock ink blended around the edges with Antique Linen Distress Ink.

Merry Christmas Card by Juliana Michaels featuring Tim Holtz STAMPtember® 2021

Thanks so much for stopping by today to see how my Merry Christmas Card came together using the Tim Holtz STAMPtember® 2021 stamp and mask set. I hope you enjoyed the inspiration and give masking a try!

Finished card size: 5 x 7 inches

Supplies

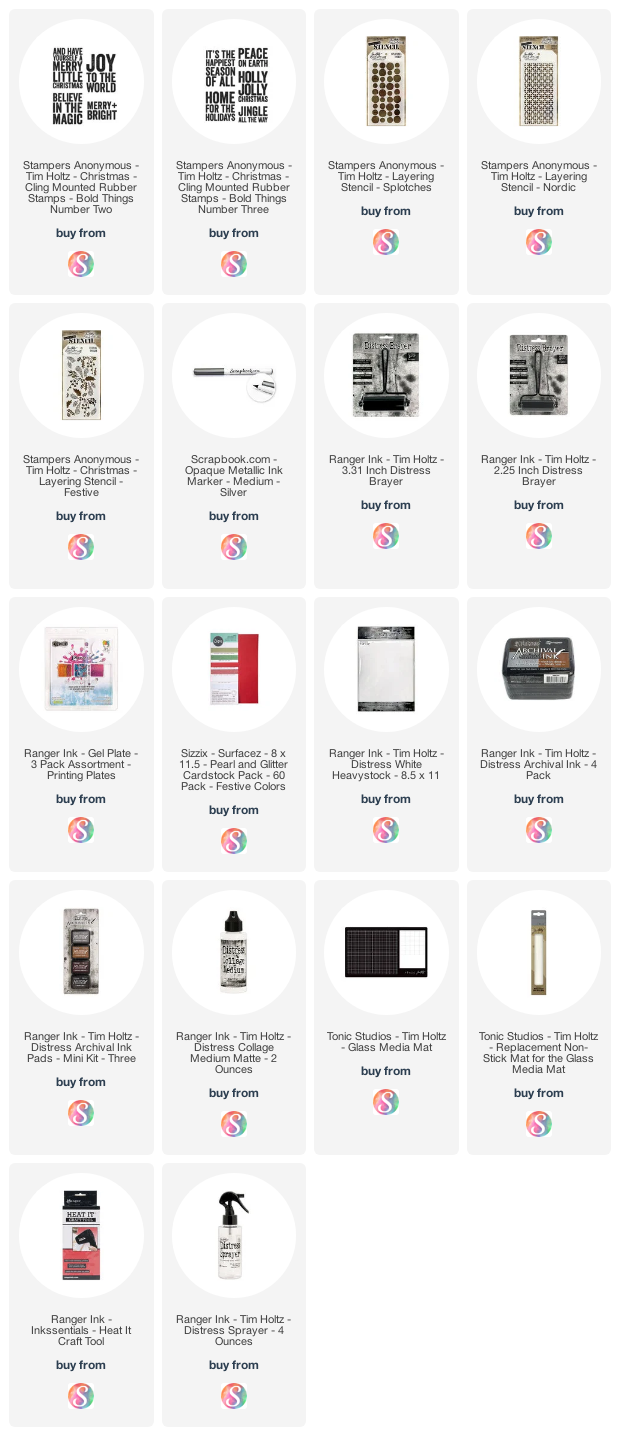
You can find the products I used to create these projects along with compensated affiliate links to Simon Says Stamp. These links are at absolutely no extra cost to you. If you want to learn more about what an affiliate link is, you can see my full affiliate and product disclosure statement here.
Jolly Santa Slimline Christmas Cards | Tim Holtz Stampers Anonymous Christmas 2021

Hello friends! I hope you're ready to get your jolly on! With the new Tim Holtz Stampers Anonymous Christmas I know I am! Today I'm sharing the slimline cards I created using the Jolly Santa Stamp Set. I'll walk you through how I created the backgrounds and all the other little details that I put in to each card.

Did you have a chance to enjoy Tim Holtz Stampers Anonymous Christmas YouTube Live? In case you missed it, you can always catch the replay over on Tim's YouTube or Blog.

Jolly Santa Slimline Christmas Cards by Juliana Michaels featuring Tim Holtz Stampers Anonymous Jolly Santa and Bold Tidings Stamp Set

To create the backgrounds for these cards I used my latest favorite technique...Gel Printing with Distress Oxide Ink and Stencils. I've used this technique on quite a few of my cards recently including some I created for the Stampers Anonymous Halloween YouTube Live featuring the Wicked Hipsters, Bold Frights and Snarky Cats. You can also check out a video I created sharing How To Create Backgrounds with Gel Plates, Distress Oxide Inks & Stencils.

Merry Bright Jolly Santa Slimline Christmas Card by Juliana Michaels featuring Tim Holtz Stampers Anonymous Jolly Santa and Bold Tidings Stamp Set

The stencils I used for these cards include Splotches, Festive and Nordic. I used Iced Spruce, Rustic Wilderness and Festive Berries Distress Oxide Inks. I used Distress Heavystock paper to create these backgrounds, but I also love to use HP Premium Choice 32 lb. Laserjet Paper now called HP Premium 32, because it is a thinner paper that can be pushed into the stencil and grab a little more ink. It's also super smooth which makes the ink take well. The only thing you have to keep in mind is it won't hold up to any kind of ink splattering, misting or spraying. I knew I wanted to add some ink splatters to these cards, so that is why I used Distress Heavystock.


My first ink layer was done with the Splotches stencil and Iced Spruce. I used the first lift on the background that was used on the Merry Bright card and the second lift on the Jingle card. Again for the full explanation of what this means you can check out my  How To Create Backgrounds with Gel Plates, Distress Oxide Inks & Stencils post.

For the second ink layer I used the Festive stencil with Rustic Wilderness and this time I used the first lift on the Jingle card and the second lift on the Merry Bright card.

The final ink layer was done with the Nordic stencil and Festive Berries. I used the first lift on both cards because I wanted that detail of the stencil design and the pop of color it added.

With this technique I've found it best to start with a bold and open design for the first stencil and to have the final layer be a smaller design so that each layer shows as you create them.


In this image, the background shown at the top of the photo was used on the Merry Bright card and the bottom one was used on the Jingle card.


Once the backgrounds were completed, I trimmed them down to 3.5 x 7 inches. I then added some stamping with Hickory Smoke Archival Ink and used some of the stamps from the Jolly Santa stamp set. The stamping doesn't show up super great in the photos, but it adds a wonderful depth to the card design when you see it in real life.


As for the Jolly Santa, he is colored with Copic Markers. This medium isn't my strong suit, but it is one I enjoy and I was inspired to pull them out after seeing some of the amazing coloring done by Alberto Gava for the Stampers Halloween release.
I used Memento Tuxedo Black Ink to stamp the image onto Neenah Classic Crest cardstock and then colored it using Copic Markers. I then fussy cut the image before adding it to my card front with double sided foam adhesive.


For the sentiment, I used the Bold Tidings Two. I stamped it directly onto the card front using Black Soot Archival Ink and added the little dots using the Scrapbook.com Opaque Metallic Silver Marker.

Jingle All The Way Jolly Santa Slimline Christmas Card by Juliana Michaels featuring Tim Holtz Stampers Anonymous Jolly Santa and Bold Tidings Stamp Set

I used the same techniques on this card as I did for the Merry Bright card.


However, on this card I used the Bold Tidings Three stamp set for the sentiment. Each of these cards is 3.75 x 7.25 inches when finished. The gel print background is layered onto a piece of pearl cardstock in either red or green from the Sizzix Festive Colors Pearl and Glitter Cardstock Pack.


On the background of each card, I added a bit of ink splattering using the Frosted Juniper Mica Stain. You can see a hint of it in the upper left hand corner of image above. This Mica Stain is part of the Ranger Ink Distress Christmas Collection, which is a limited seasonal release, so once they're gone, they are gone for good! I don't consider myself much of a spray person, but the level of shimmer and shine that these add, along with the other unique properties they possess, have sold me on these sprays as a must have for all year round crafting!


I want to thank you for stopping by to check out my Jolly Santa Slimline Christmas Cards blog post. I hope you enjoyed learning about how these cards came together. So now, which stamp sets are your must haves from this release?

Finished card size: 3.75 x 7.25 inches

Supplies

You can find the products I used to create these projects along with compensated affiliate links to  Scrapbook.com. These links are at absolutely no extra cost to you. If you want to learn more about what an affiliate link is, you can see my full affiliate and product disclosure statement here.

Winston Snowman Easel Christmas Card | Tim Holtz Sizzix Christmas 2021

Oh, the weather outside is frightful
But the fire is so delightful
And since we've no place to go
Let it snow, let it snow, let it snow!

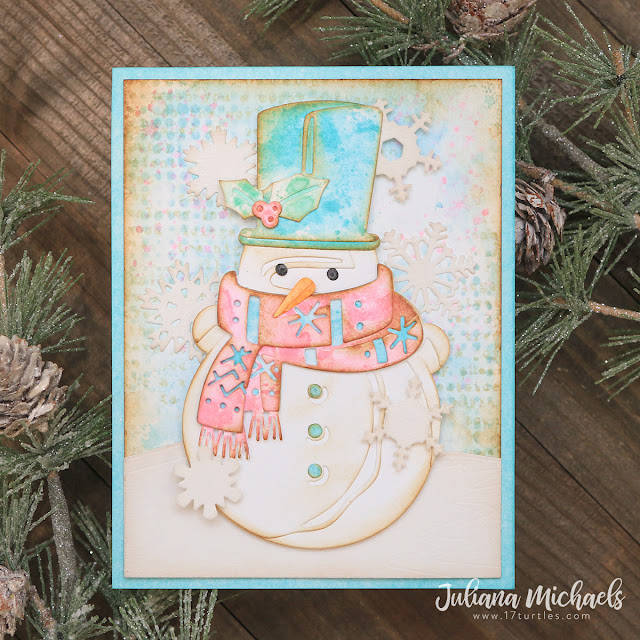
The weather might not be frightful, but I'm definitely in a Christmas crafting mood! I love this time of year when it's time to start crafting all the things for my two favorite holidays...Halloween and Christmas! Today I'm sharing the Winston Snowman Easel Christmas Card I created for the Tim Holtz Sizzix Christmas 2021 YouTube Live.

I've never created an easel card before, but I was inspired to give it a try after seeing Jennifer McGuire share some recently. If you aren't familiar with them, it's a folded card that stands up, kind of like an art easel and is a super fun way to display your card! The actual easel part of the card is quick and easy to make. I'm going to walk you through the process and before you know it you'll be creating your own easel cards!
 
Snowman Easel Christmas Card by Juliana Michaels featuring the Tim Holtz Winston Colorize Thinlits

To get started, you will begin with the card size of your choosing. I prefer to cut and score my own cards, but you can also use premade card bases as well. Here I'm using an A2 size, cut and scored so it opens vertically. This means you need to cut your paper to be 4.25 inches wide by 11 inches tall. Score the paper at 5.5 inches and then again at 2.75 inches. You will attach your card front or the image of your choice on the half of the card that you have scored in half. Just make sure you only adhere it on the bottom section so that the easel function will work. Someone I know may be have forgotten this the first time they went to attach the card front. 

Once you have created the easel card base it's time to make something to help it stay open when on display. To achieve this all you have to do is place some sort of dimensional piece inside the card such as a strip, a panel or even an embellishment. You can use dimensional foam adhesive to adhere them or even a couple layers of cardstock will do the trick. For my card, I went with the layers of cardstock and placed my sentiment on the strip. Since this part of the card is visible when it's on display, feel free to get creative with this area.


Now that you know all the basics of how to create an easel card, I'm going to share a few details on how I created the front panel using the adorable Winston Colorize Thinlits. I die cut all of the pieces from Distress Watercolor paper. I then applied the various colors using the ink smooshing method except as noted on the body. I also inked all of the edges with Vintage Photo before adhering them together. Here are the Distress Ink colors I used for each piece:
Hat - Salvaged Patina
Scarf - Kitsch Flamingo and Salvaged Patina
Holly - Cracked Pistachio and Kitsch Flamingo
Nose - Carved Pumpkin
Body - Edges inked with Vintage Photo
Eyes - Black Soot


The background panel was created by ink smooshing a bit of Tumbled Glass on Distress Watercolor. Next, I added some stamping using the text image from the Stripes and Holiday Stamp Set using Old Paper Distress Ink and the tiny snowflakes from the Vintage Holidays Stamp Set using Kitsch Flamingo Distress Ink. The next step was the addition of some stencil work using the Dot Fade Layering Stencil and Tumbled Glass Distress Ink. I then inked the edges with Tumbled Glass and then Vintage Photo Distress Ink.


To give the project a bit of snowy sparkle, I die cut the snowflakes using the Mini Paper Snowflakes Thinlits and I used one of the layers from the Snowscape Colorize Thinlits to create the snowdrift. These were both die cut from white Pearl paper in the Sizzix Festive Colors Pearl and Glitter Cardstock Pack.
The back panel of the card front is a piece of Distress Watercolor ink blended just around the edges with Salvaged Patina Distress Ink to create a coordinating cardstock color. I used this same technique to color the paper used on the sentiment strip. Before coloring the paper, I stamped the sentiment from the Tiny Text Christmas Stamp Set using embossing ink and then heat embossed it with clear embossing powder. After I applied the Distress Ink to color the paper, I wiped over the stamped sentiment to remove the ink and reveal the words.

Thanks so much for stopping by today to check out my Snowman Easel Christmas Card featuring the Tim Holtz Winston Colorize Thinlits.

Supplies

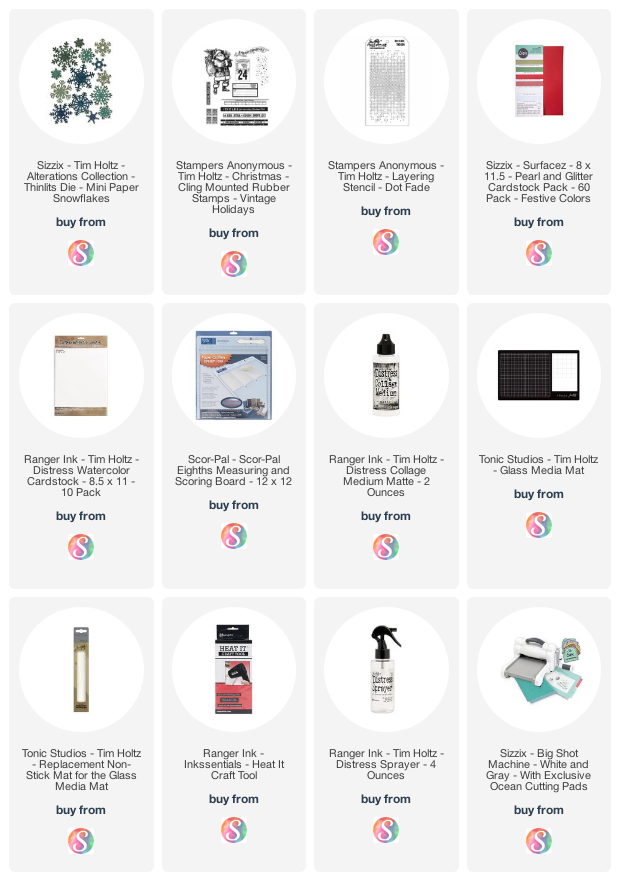
You can find the products I used to create these projects along with compensated affiliate links to  Scrapbook.com. These links are at absolutely no extra cost to you. If you want to learn more about what an affiliate link is, you can see my full affiliate and product disclosure statement here.

Tim Holtz Ranger Ink Distress Christmas Mica Stain | Christmas Cards

Christmas is coming and I'm already counting down the days! As a lover of all things Christmas, I'm so excited for the Tim Holtz Christmas product reveals to begin. How about you? Today, Tim revealed his new limited edition Ranger Ink Distress Holiday Collection that is perfect for all our Christmas makes. These products include 2 sets of Distress Mica Stains, (when combined with the Halloween colors we now have a rainbow of colors to play with) a Distress Holiday Sparkle Set, and a Distress Holiday Texture Set.

I was blessed to be gifted these new products a bit early, so I thought it would be fun to share a few cards I created using the brand new Mica Stains. I want to remind you that these are limited edition and once they are gone, they are gone!

Also, as I mentioned when I shared some Halloween cards I created using the Halloween Mica Stains, it is nearly impossible to photograph how gorgeously shiny these Mica Stains are in real life, but I promise you they are absolutely magical!

Merry Christmas Card by Juliana Michaels featuring the Tim Holtz Ranger Ink Distress Christmas Mica Stain

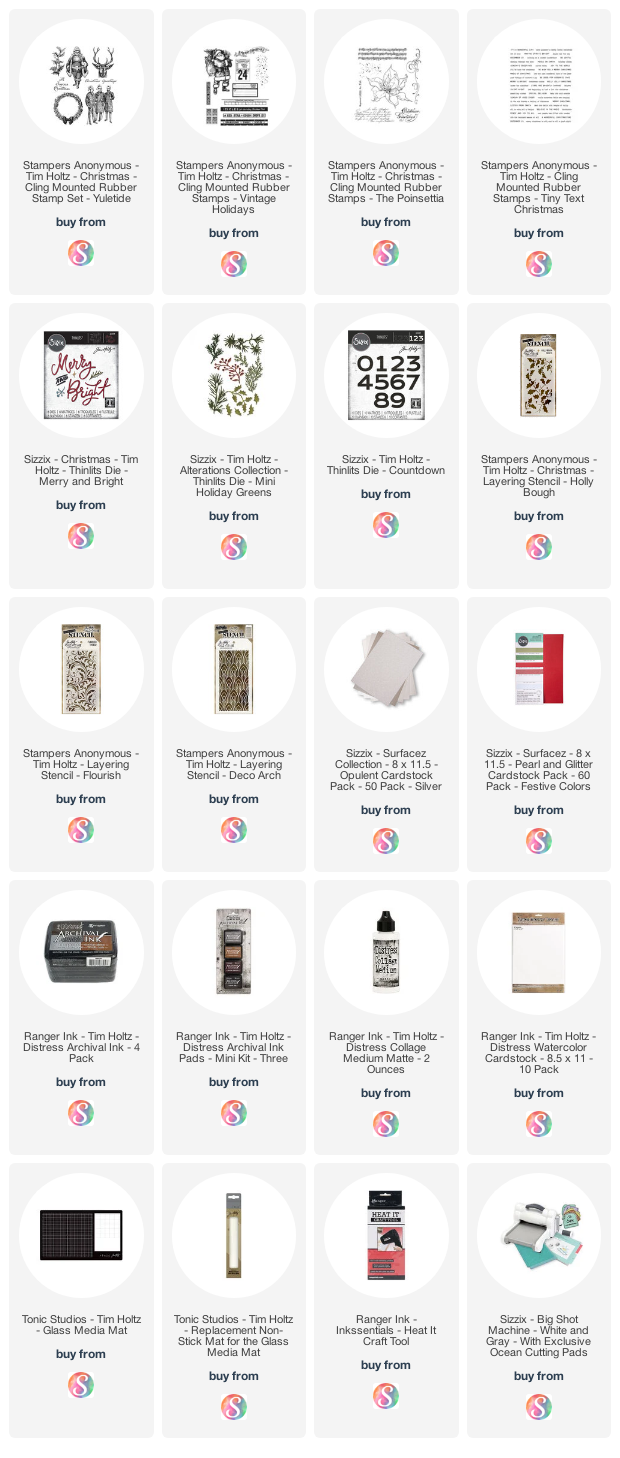
This first card uses the Flourish Layering Stencil with the Peppermint Stick and Winterberry Mica Stains onto a piece of Distress Watercolor. Once the stains were dry, I added some stamping using Hickory Smoke and Black Soot Archival Ink and images from the Yuletide and Vintage Holidays Stamp Sets. I then layered one some die cuts using the Countdown Thinlits cut from black cardstock.


To add a little more shimmer the Merry was die cut from some Mistletoe Green Pearl Cardstock from Sizzix using the Merry and Bright Thinlits. The edges were inked with a bit of Festive Berries Distress Ink and the entire panel was adhered onto a piece of Holly Berry Pearl Cardstock for even more shimmer. I finished off the card with at sentiment from the Tiny Text Christmas Stamp Set. 

Season's Greetings Christmas Card by Juliana Michaels featuring the Tim Holtz Ranger Ink Distress Christmas Mica Stain

On this card, I used the Deco Arch Layering Stencil with the Snow Flurries and Frosted Juniper Mica Stains. I added a touch of stamping with Hickory Smoke Archival Ink using a script stamp from the The Poinsettia Stamp Set. Next, I die cut the largest snowflake from the Stunning Snowflakes Thinlits from a Silver Pearl Cardstock by Sizzix. I then layered on a holly die cut from black cardstock using the Mini Holiday Greens Thinlits.


To complete the card, I inked the edges with Salvaged Patina Distress Ink and added a sentiment from the Tiny Text Christmas Stamp Set.

We Wish You A Merry Christmas Card by Juliana Michaels featuring the Tim Holtz Ranger Ink Distress Christmas Mica Stain

For my final card, I used the Holly Bough Layering Stencil with the Holly Branch and Tree Lot Mica Stains. The stamping on this card used images from the Vintage Holiday and The Poinsettia Stamp Sets in Hickory Smoke Archival Ink.


I layered on the number die cuts using the Count Down Thinlits die cut from the Holly Berry Pearl Cardstock and another holly leaf die cut. The edges on this card were inked with Peeled Paint Distress Ink and once again I used the Tiny Text Christmas Stamp Set for the sentiment. 


Thanks so much for stopping by today! The post Tim Holtz Ranger Ink Distress Christmas Mica Stain Christmas Cards first appeared on 17turtles.

Supplies

You can find the products I used to create these projects along with compensated affiliate links to  Scrapbook.com. These links are at absolutely no extra cost to you. If you want to learn more about what an affiliate link is, you can see my full affiliate and product disclosure statement here.

Subscribe