Dog Sympathy Cards

Hello friends! No one likes to send sympathy cards, but most of us find the need for them more often than we want. Now, thanks to Scrapbook.com we have a set of Dog Sympathy and Pet Sympathy Stamp Sets that make creating this type of card a bit easier. Scrapbook.com recently sent me some of their new stamps to create with. At about the same time, I had some friends who lost their dog unexpectedly. The Dog Sympathy set was just what I needed at the moment to create a card for them.

Dog Sympathy Cards by Juliana Michaels featuring Scrapbook.com Dog Sympathy Stamp Set

I paired the Dog Sympathy Stamp Set with the Tim Holtz Crazy Dog Stamp Set. I stamped the dog images and colored them with Copic Markers. I then die cut them using the coordinating Crazy Dog Dies. You can find a full list of the supplies I used including affiliate links to Scrapbook.com at the bottom of this post.

Dog Sympathy Cards by Juliana Michaels featuring Scrapbook.com Dog Sympathy Stamp Set

Next, I took a 5.5 x 4.25 inch Neenah Flat Card Front in Solar White and die cut it using a postage edged die. You could use any frame type die from your stash. I then temporarily positioned the dog image where I wanted it and stamped the sentiment from the Dog Sympathy Stamp Set using the Scrapbook.com Hybrid Ink Pad in Black. To add a bit more interest on the panel, I stamped the paw prints from the same stamp set using the Scrapbook.com Hybrid Ink Pad in Fog. Unfortunately, the ink is so light it was nearly impossible for me to get the image to show up in the photos. In person, thought it adds a nice subtle touch to the background.

Dog Sympathy Cards by Juliana Michaels featuring Scrapbook.com Dog Sympathy Stamp Set

The other thing I did to add some texture to the card front was to take a wood grain embossing folder and emboss a 5.5 x 4.25 inch Neenah Flat Card Front in Solar White. I layered this onto a card base and then added a piece of coordinating cardstock and then the main card panel to complete the card.

Dog Sympathy Cards by Juliana Michaels featuring Scrapbook.com Dog Sympathy Stamp Set

Since I add all of my supplies out, I decided to make a second card to keep in my stash for the future. It's always nice to have this sort of card ready to go when you need it the most.

Dog Sympathy Cards by Juliana Michaels featuring Scrapbook.com Dog Sympathy Stamp Set

Dog Sympathy Cards by Juliana Michaels featuring Scrapbook.com Dog Sympathy Stamp Set

Just in case you missed it, Scrapbook.com has free shipping on orders $60+ using the Coupon Code: SANTASHIP2019. This offer is going on through tonight December 16th midnight MST. They also have a deal for you international shoppers as well. You can find all the details here and make sure to check out the most recent freebie!

Supply List


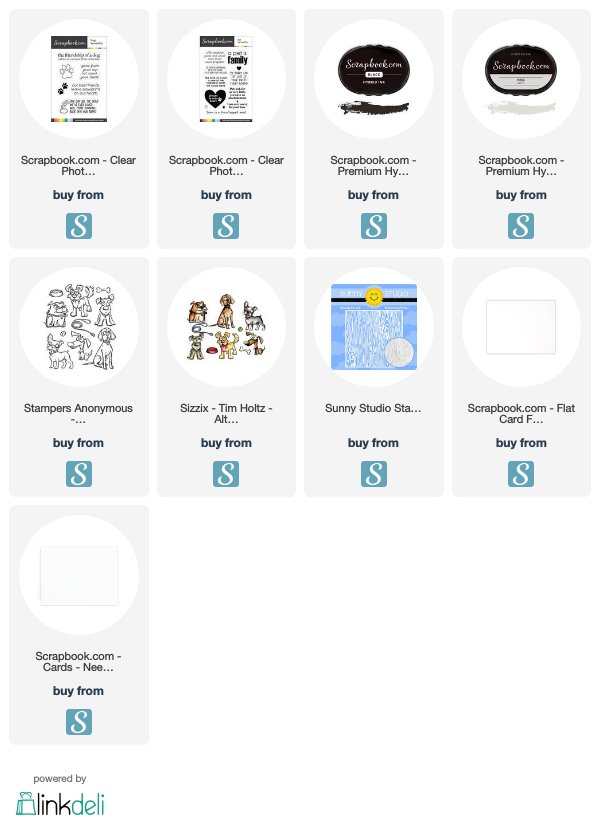
Here is a full list of the main supplies I used to create my Dog Sympathy Cards. These are affiliate links to Scrapbook.com and if you buy through my links, I would greatly appreciate it. Doing so adds no extra cost to you. (You can check out my full affiliate disclosure statement here.) If you have any questions about the supplies I used, please feel free to ask!


Your Dreams Card & FREE Tonic Die

Hello friends! Today I'm here to share an exclusive "Hold On To Your Dreams"Tonic Studio Die that's FREE today (Wednesday, December 11th) at Scrapbook.com with any purchase through Thursday, December 12th at midnight MST or while supplies last.

HOLD ONTO YOUR DREAMS DIE | TONIC STUDIO SCRAPBOOK.COM EXCLUSIVE


Hold On To Your Dreams Card by Juliana Micheals featuring Tonic Studios Hold On To Your Dreams Dot and Drop Die Exclusively for Scrapbook.com

This fun die is one of Tonic's Dot and Drop Layering Dies. And I hate to admit it, but this was my first time to play with one! Besides cutting a fun design, it also provides a perfect guide for placing Nuvo Crystal, Glitter and Jewel Drops.

At the bottom of this post you will find links to all of the products I used. These links are affiliate links to shop at Scrapbook.com.  You can read my full disclosure regarding this here.

Another thing I hate to admit is I don't have any Nuvo Drops of any kind, so I decided to challenge myself and come up with another way to use those guide holes.

Hold On To Your Dreams Card by Juliana Micheals featuring Tonic Studios Hold On To Your Dreams Dot and Drop Die Exclusively for Scrapbook.com

I began by die cutting the phrase from white cardstock and the layering back piece from a piece of Tim Holtz Metallic Kraft Stock in gold.

Since the die is a phrase, I knew I wanted to make it the focal point of my card. As I pondered what to do, the idea of using those holes as a stitching guide popped in my head! I pulled out my stash of embroidery thread and using 4 strands and a needle, I stitched along the edge to created a colorful and textured border for the phrase.

Hold On To Your Dreams Card by Juliana Micheals featuring Tonic Studios Hold On To Your Dreams Dot and Drop Die Exclusively for Scrapbook.com

Once the stitching was completed, I knew it needed a fun background to make the die cut pop. I pulled out the Scrapbook.com Bold Stripes Stencil and placed it diagonally onto a 5.5 x 4.25 inch Neenah Flat Card Front in Solar White. I used a bit of adhesive to hold it to my craft mat and I used Therm O Web Purple Tape to hold the stencil in place while I inked it up in a rainbow of Scrapbook.com Hybrid Ink colors.

Scrapbook.com Bold Stripes Stencil with Ink Blending using Scrapbook.com Hybrid Inks and Domed Foam Blending Applicator

I finished off the card with a few splatters of watered down white and black acrylic paint and then adhered the sentiment using Scrapbook.com Double Sided Adhesive Foam Squares.

Hold On To Your Dreams Card by Juliana Micheals featuring Tonic Studios Hold On To Your Dreams Dot and Drop Die Exclusively for Scrapbook.com

Thanks for stopping by today! I hope you enjoyed seeing a new twist on using Tonic Studios Dot and Drop dies with stitching! This freebie is only available through Thursday, December 12th at midnight MST or until the supply run outs. What are you waiting for? Head on over to Scrapbook.com NOW to get your free die with any purchase!

SUPPLIES

Here is a list with links to Scrapbook.com of the supplies I used to create my Vintage Style Christmas Cards. These are affiliate links to Scrapbook.com. If you buy anything through my links, it adds no extra cost to you. I truly appreciate and thank you for your support! (You can see my full affiliate disclosure statement here.)


Handmade Holiday Parade | Scrapbook.com

Today I have the privilege of hopping with Scrapbook.com as a part of the inspiring Handmade Holiday Papercrafting Parade filled with fabulously festive holiday crafting. Join me and many others as we celebrate a week of unbelievable deals on Scrapbook.com's fabulous exclusive products! Be sure to leave a crafty comment at every stop along the way of this amazing parade hop to qualify for an unbelievable GIVEAWAY! 20 of your favorite crafters have used tons of Scrapbook.com Exclusive products to provide you with plenty of holiday cardmaking inspiration! You'll love seeing how we used products like the Exclusive Hybrid Inks, the revolutionary Domed Blending Tool, festive stencils, cheery stamps and so many more! Come join us on this parade of Handmade Holiday Cardmaking Inspiration!

BLACK FRIDAY WEEK

Black Friday Week starts today November 26 and continues through November 30. There are tons of amazing deals, discounts with Scrapbook.com Exclusive Products at their Lowest Prices - 30%, 40% and 50% OFF!


FREEBIE

There is an awesome Freebie each day of the sale and today's Freebie is this adorable enamel pin by Doodlebug Design created exclusively for Scapbook.com.

VINTAGE STYLE CHRISTMAS CARDS

As I mentioned above, I am hopping along and as part of this I've created two vintage style Christmas cards to share with you using Scrapbook.com Exclusive products including their Hybrid Inks, Domed Blending Tool, Stencils, Stamps and Dies. Keep reading to learn more about how I created each card. At the bottom of this post you will find links to all of the products I used. These links are affiliate links and you can read my full disclosure regarding this here. And as always, I appreciate your support!

Vintage Style Christmas Cards featuring Scrapbook.com Exclusive Stencils, Stamps, Dies and Ink by Juliana MIchaels

Let's take a look at how this card came together.

Believe In The Magic Vintage Style Christmas Card featuring Scrapbook.com Exclusive Stencils, Stamps, Dies and Ink by Juliana MIchaels

To create the background, I placed the Little Boxes Stencil on top of a 5.5 x 4.25 inch Neenah Flat Card Front in Solar White. To hold the paper in place, I add a little adhesive to the backside of the paper and stick it down onto my crafting surface. I then position the stencil on top and use Therm O Web Purple Tape to hold it in place. I then applied Cardinal Red ink through the stencil using the awesome Scrapook.com Exclusive Ink Blending Tool with Domed Foam Applicator!

Using a stencil with Scrapbook.com Exclusive Stencil, Hybrid Ink Pads and Ink Blending Tool with Domed Foam Applicator

I wanted to add a bit more interest to the background, so I took the Dotted Stencil, tilted it slightly and applied Scrapbook.com's Exclusive Embossing Ink using the ink blending tool. I removed the stencil, sprinkled the paper with gold embossing powder and heat set it with a heat gun. Once I was finished with the stenciling, I trimmed the paper to 4 x 5.25 inches and inked the edges with Scrapbook.com Hybrid Ink in Leather.  To finish off the background, I added some machine stitching with brown thread.

Heat Embossing with a stencil using Scrapbook.com Clear Embossing Ink and Ink Blending Tool with Domed Foam Applicator

Believe In The Magic Vintage Style Christmas Card featuring Scrapbook.com Exclusive Stencils, Stamps, Dies and Ink by Juliana MIchaels

For the deer die cut, I inked it up using Scrapbook.com Hybrid Ink in Dark Chocolate and Leather for the body. Black was added to the hooves and Sugar Cookie to the antlers.

Ink Blending a Die Cut with Scrapbook.com Exclusive Hybrid Ink Pads, Ink Blending Tool with Domed Foam Applicator

The sentiment on this card is from the Big Bold Christmas Stamp Set. I stamped it using the Embossing Ink and then heat embossed it with gold embossing powder. The sentiments in this set are just that...big and bold and perfect as the focal point of your card.

Believe In The Magic Vintage Style Christmas Card featuring Scrapbook.com Exclusive Stencils, Stamps, Dies and Ink by Juliana MIchaels

To add more interest to the card, I stamped a music note image onto a 5.5 x 4.25 inch Neenah Flat Card Front using Dark Chocolate Ink. I then die cut 2 stars using the Nested Star Die Set. I inked them with Pine Ink and added a bit of Leather Ink to the edges for a more distressed look.

Die cutting with Scrapbook.com Exclusive Nested Star Dies

For the final touch I tied a length of jute twine around the side of the card.

Believe In The Magic Vintage Style Christmas Card featuring Scrapbook.com Exclusive Stencils, Stamps, Dies and Ink by Juliana MIchaels

Now let's take a look at how I created my second card.

Santa Looks Attractive Vintage Style Christmas Card featuring Scrapbook.com Exclusive Stencils, Stamps, Dies and Ink by Juliana MIchaels

I knew I wanted to use the funny sentiment about Santa from the Christmas Fun Card Sentiments Stamp Set so I grabbed a Santa image and stamped it using Dark Chocolate Ink. I then used the Sponge Daubers to color the image using Cardinal Red for the suit, Pine for the gloves, and Black for the boots. This is a rather unconventional way to color and image, but I knew I was going to fussy cut it so I didn't mind if the ink went outside the lines. This technique made for a quick and easy way to color a stamped image. After I fussy cut the Santa, I inked the edges with an Ink Blending Tool and Leather Ink.

Coloring a stamped image with Scrapbook.com Exclusive Hybrid Ink Pads, Sponge Daubers and Ink Blending Tool with Domed Foam Applicator

The stars on this card are created just like the stars I used on the first card.

Santa Looks Attractive Vintage Style Christmas Card featuring Scrapbook.com Exclusive Stencils, Stamps, Dies and Ink by Juliana MIchaels

For the background on this card, I used the Bold Stripes Stencil and tilted it to make diagonal stripes. It didn't quite cover the card front, so I just slide it up and down to get full coverage. Here I used Cardinal Red Ink with the Ink Blending Tool.

Creating a stenciled background with Scrapbook.com Exclusive Stencil, Hybrid Ink Pads, and Ink Blending Tool with Domed Foam Applicator

To continue with the background, I used the Little Boxes Stencil with Pine Ink and I also added the same gold embossed dots using the Dotted Stencil. Once all the stenciling was complete, I inked the edges with Leather Ink and added the same machine stitching to the edge.

Layering stencils to create a custom background with Scrapbook.com Exclusive Stencil, Hybrid Ink Pads, and Ink Blending Tool with Domed Foam Applicator

Santa Looks Attractive Vintage Style Christmas Card featuring Scrapbook.com Exclusive Stencils, Stamps, Dies and Ink by Juliana MIchaels

This card was also finished off with a bit of jute twine tied around the side.

Santa Looks Attractive Vintage Style Christmas Card featuring Scrapbook.com Exclusive Stencils, Stamps, Dies and Ink by Juliana MIchaels

I hope you enjoyed this bit of vintage style Christmas Card inspiration using some of the fabulous Scrapbook.com Exclusive Products.

GIVEAWAY

You'll be so inspired after visiting each of the 20 stops that you'll want to create designs of your own, we just know it! Why not enter to win a Scrapbook.com Gift Certificate for yourself? Scrapbook.com is giving away a $100 Gift Certificate to ONE lucky winner! To be eligible, leave a comment letting us know a bit about your holidays at each of the 20 hop stops along with your email. It's that easy! Share a favorite tradition, a cherished memory, or a memorable handmade gift! Giveaway closes Tuesday, December 3, 2019, at midnight MST. The winners will be notified and announced no later than Monday, December 9, 2019. The winner will be notified through the email provided and has 72 hours to respond to claim their prize. Good luck! For complete official rules click here.

HANDMADE HOLIDAY PARADE STOPS

(Leave a comment at each of these official stops to enter the Giveaway!)
Alexandra Stapleton-Smith
Jess Francisco
Nicole Watt
Mona Toth
Amy Tsuruta
Terri Burson
Anita Trippi
Laura Volpes
Laura Mooney
Brandi Mahon
Nanette Tracy
Daniel West
Ashley Ebben
Marie Heiderscheit
Erin Reed
Juliana Michaels (you are here!)

HOP OVER TO YouTube
Justine Hovey
Heather Little
Ingrid Blackburn
Lorene Caido


SUPPLIES
Here is a list with links to Scrapbook.com of the supplies I used to create my Vintage Style Christmas Cards. These are affiliate links to Scrapbook.com. If you buy anything through my links, it adds no extra cost to you. I truly appreciate and thank you for your support! (You can see my full affiliate disclosure statement here.)

-->

Pre Black Friday Starts Now | Scrapbook.com

Hello crafty friends! Guess what? Scrapbook.com's Pre Black Friday Event starts NOW and continues through Friday November 25. Starting today they have their 9 Hottest Items of 2019 on sale again + there is a 10% off coupon!


And if that's not enough you can get this awesome Sizzix Thinlit Flower as a freebie with any order.


I personally own some of these Hot products including the Tim Holtz Glass Travel Media Mat (I have the full size one and love it! PS....it's also on sale just not as much as the travel size one.) Another favorite of mine is the Therm O Web Purple Tape and Pixie Spray! Both of these adhesives so versatile for crafting!


Happy shopping!

9 HOT ITEMS OF 2019 ALL ON SALE at SCRAPBOOK.COM


This post contains affiliate links to Scrapbook.com. (If you're interested, you can see my full disclosure statement here.)

25 Days of Christmas Tags | Sunny Studio Stamps

Hello friends! I'm super excited to be joining Tracy McNeely's annual 25 Days of Christmas Tags! This year is her 9th anniversary of hosting the event. You can find all the details here. And...be sure to visit the daily posts on Tracey's blog for more tag inspiration and a chance to win today's giveaway from Sunny Studio Stamps! Each day there is a new sponsor and prize revealed along with some fabulous inspiration.

Today I'm sharing a quick and easy tag that's perfect for mass production. I like to create a bunch of quick tags for the gifts and then spend most of my crafting time creating the cards I give out to family and friends!  

Christmas Wreath Gift Tag by Juliana Michaels featuring Sunny Studio Stamps Scallop Tag Circle Die and Season's Greetings Stamp Set

To begin, I simply die cut the Scallop Circle Tag Die from white cardstock. I then used the Season's Greetings stamp set to stamp a wreath onto the tag. I created a template to use with my stamping platform to make this super easy to repeat stamp.

All you have to do is line the tag up with the template, use some temporary adhesive to hold it in place on the template, place it in the corner of your stamping platform and then rotate it to stamp the evergreen sprig on each side. Grab a different sprig and maybe a different color ink and repeat again until the wreath is to your liking. I then stamped the berry's and die cut them with the coordinating die set. The inks I used are Scrapbook.com's Exclusive Premium Hybrid Ink in Cardinal Red for the berry's and Pine, Pear, Succulent and Olive for the sprigs.

I then stamped the "to" and "from" with black in and added a red bow! To attach it to the bag, I cut a slit along the edge of the top part of the tag so the hole would just slide over the handle. Like I said, easy peasy tags! 

Christmas Wreath Gift Tag by Juliana Michaels featuring Sunny Studio Stamps Scallop Tag Circle Die and Season's Greetings Stamp Set

Thanks so much for stopping by today and don't forget to check out the other inspiration 25 Days of Christmas Tags event!


SUPPLIES
This post contains affiliate links to Scrapbook.com and Simon Says Stamp. If you buy anything through my links, it adds no extra cost to you, but it does help me keep my blog up and running and allows me to share this content with you! I truly appreciate and thank you for your support! (If you're interested, you can see my full disclosure statement here.)


Wicked Halloween Tags

Happy Halloween friends! Today I have one last Halloween project to share with you... a trio of Wicked Halloween Tags.

Wicked Halloween Tags featuring Stamp and Smear Background Technique with Distress Oxide Inks. Products used include Tim Holtz Stampers Anonymous stamps and Ranger Ink

STAMP & SMEAR DISTRESS OXIDE TECHNIQUE

These tags are rather easy to make. Just grab a paper tag, any tag size you prefer. Here I used the largest tag die from the Stacked Tags Dies and cut it from Bristol paper.

Next came the fun part...one of my favorite background techniques that I like to refer to as Stamp and Smear! You simply stamp the image, wait just a bit to let it slightly dry and then smear the ink with an ink blender or paper towel. If waiting isn't your thing, you can also dab the wet ink off and then smear.

Stamp and Smear Background Technique with Distress Oxide Ink

The stamped images I used came from the following stamp sets, but feel free to go through your stash to select a mix that fits your style or the theme of your project.

Stamps used: Entomology, Mini Halloween 3, Ticket Booth, Mr Bones, The Professor, Distinguished, Tangled Webs and Fragments.

I then began stamping the images onto the tag using various Distress Oxide inks using the Stamp and Smear Technique mentioned above.

Distress Oxide Inks used: Wilted Violet, Twisted Citron, Carved Pumpkin, Brushed Corduroy, Frayed Burlap, and Black Soot. 

Once I was finished with the background, I added some extra interest by stamping the branch on a couple of these with embossing ink and then I heat embossed it with black embossing powder.

I then inked the edges and slightly over the images with Antique Linen. I added a little Black Soot and Frayed Burlap only on the edges.

Wicked Halloween Tags featuring Stamp and Smear Background Technique with Distress Oxide Inks. Products used include Tim Holtz Stampers Anonymous stamps and Ranger Ink

Now for the main feature on each tag. Here I stamped the Professor and his hat onto watercolor paper with Black Archival Ink. I then fussy cut the pieces and colored them with Distress Ink and a water brush. I also added the little spider which is heat embossed with black embossing powder and I added Glossy Accents to the lenses on his goggles.

Wicked Halloween Tag featuring Stamp and Smear Background Technique with Distress Oxide Inks. Products used include Tim Holtz Stampers Anonymous stamps and Ranger Ink

I then added the sentiment which is heat embossed with black embossing powder.

Wicked Halloween Tag featuring Stamp and Smear Background Technique with Distress Oxide Inks. Products used include Tim Holtz Stampers Anonymous stamps and Ranger Ink

This tag features Mr Bones. I used the same process as on the Professor and added Glossy Accents to his eye!

Happy Halloween Tag featuring Stamp and Smear Background Technique with Distress Oxide Inks. Products used include Tim Holtz Stampers Anonymous stamps and Ranger Ink

Happy Halloween Tag featuring Stamp and Smear Background Technique with Distress Oxide Inks. Products used include Tim Holtz Stampers Anonymous stamps and Ranger Ink

On this final tag, I used the Falling Stars Stencil to add some interest to the background. I inked through it with embossing ink and heat embossed it with liquid platinum embossing powder. I then stamped the large web and heat embossed it with black embossing powder.

The main image here is a combo of the small skull from the Mini Halloween 3 set and the hat and bowtie from the Distinguished set.

Trick or Treat Halloween Tag featuring Stamp and Smear Background Technique with Distress Oxide Inks. Products used include Tim Holtz Stampers Anonymous stamps and Ranger Ink

Trick or Treat Halloween Tag featuring Stamp and Smear Background Technique with Distress Oxide Inks. Products used include Tim Holtz Stampers Anonymous stamps and Ranger Ink

Thanks so much for stopping by today! I hope you enjoyed learning about how I created these Wicked Halloween Tags!

SUPPLIES

This post contains affiliate links to Scrapbook.com and Simon Says Stamp. If you buy anything through my links, it adds no extra cost to you, but it does help me keep my blog up and running and allows me to share this content with you! I truly appreciate and thank you for your support! (If you're interested, you can see my full disclosure statement here.)


Lost in the Darkness Halloween Card | Tim Holtz

Hello my crafty friends! It's been a bit, but I'm back today to share a Halloween card I created recently using a mix of Tim Holtz Sizzix dies and a fun full moon background technique. I came across this technique thanks to the talented Stacy Hutchison. I modified her technique a bit to fit the supplies I had on hand, but in the end I was Lost In The Darkness for sure!

LOST IN THE DARKNESS | HALLOWEEN CARD


Lost In The Darkness Halloween Card  featuring Tim Holtz Sizzix by Juliana Michaels

(A full list of supplies with affiliate links is located below.)

To create the background, I die cut a piece of gold foiled cardstock with a 3 inch circle die to use as a mask for the moon. (Stacy used a piece of Yupo paper, however I didn't have this on hand.) You really just need a piece of paper that has a slick surface on one side, so dig through you crafty stash to see what you have on hand that will work. The slick surface prevents the ink from drying, so you can wipe off the ink and use the mask over and over.

Lost In The Darkness Halloween Card  featuring Tim Holtz Sizzix by Juliana Michaels

I then took a piece of watercolor paper cut to 4 x 5.25 inches, placed the moon mask on top, lightly misted it with water and then sprayed the paper with Wilted Violet Distress Spray and Pumice Stone Distress Spray. I then sprayed it with some Black Soot Distress Oxide Spray. I then heat dried the piece with my heat tool.

Once everything was dry, I spritzed the piece with water and that as Stacy says..."is when the magic happens!" The ink magically runs toward the center of the moon and creates these cool streaks.

I then dried it again and then splattered the piece with a bit of watered down black acrylic paint, dried it again and then repeated the splattering with white acrylic paint.


Once the background was dry, I was able to add a spooky Halloween scene using the Ghost Town and Bat Crazy dies.

The houses use the same technique for the windows that I shared in my Halloween Haunted House. I switched up the color of the houses to more brown tones of Distress Ink. For the roofs, I cut extra houses and trimmed off the roofs. I then went a little old school and pulled out my Deckle Edge scissors and trimmed the edges to give them some interest. I then embossed them using the Lumber 3D Texture Fade Embossing Folder. This was another fun idea I saw on another amazing project Stacy shared.


After I finished adhering the haunted houses and bats I added a Halloween Quote Chip. To grunge it up a bit, I distressed the edges with the back side of my kraft knife and added a bit of Distress Ink.


To complete the card, I mounted it onto a scrap of play time paper that I wasn't super happy with but the color was perfect for this card. I then distressed the edges of the main panel using the backside of my kraft knife and inked them with a bit of Black Soot Distress Ink.


Thanks so much for stopping by today! I hope you enjoyed learning some of the details on how I created this Lost in the Darkness Halloween Card.

SUPPLIES


This post contains affiliate links to Scrapbook.com and Simon Says Stamp. If you buy anything through my links, it adds no extra cost to you, but it does help me keep my blog up and running and allows me to share this content with you! I truly appreciate and thank you for your support! (If you're interested, you can see my full disclosure statement here.)


Sunny Studio 4th Birthday Blog Hop + Giveaway

Hello friends and welcome to the Sunny Studio 4th Birthday Blog Hop! I'm so excited to be a part of this fun hop and to celebrate this wonderful milestone with Sunny Studio. Let me share a bit about what's going on today. As you hop along, you're going to be inspired with projects featuring the upcoming Sunny Studio Stamps Fall Release! AND...you will be able to PRE-order the new release during the blog hop! Yep, you read that correctly! Also, no blog hop would be complete without some fabulous prizes! You'll have the chance to win a $25 gift code from me to the Sunny Studio Online Shop! In fact, there is a total of $450 in prizes being given away during this hop, so make sure you check out all the details below.


You should be coming here from the fabulous Ana Anderson, but if not, you can certainly start here and continue along the hop. But first, let me share a set of Christmas Tags featuring the gorgeous new Layered Poinsettia Die! I've created 2 versions of the same tag...one clean and one distressed! I'd love to know which one you like the most!

CLEAN & DISTRESSED LAYERED POINSETTIA CHRISTMAS TAGS

For the clean set of tags, I began by taking the Scalloped Circle and Square Tag Dies and die cutting a piece of off white cardstock to create the tag base. I then repeated the die cutting with a piece of brown cardstock.

Clean Layered Poinsettia Christmas Tag featuring Sunny Studio Stamps Layered Poinsettia Die, Wood Grain Embossing Folder and Scalloped Tags

Next, I used scissors to trim off the scalloped part of the die cut which left me with the inside piece. I then embossed this using the Woodgrain Embossing Folder and adhered it to the center of the tag. I then die cut the gorgeous Layered Poinsettia Die using several shades of red cardstock to create the main flower part. I also used some green and yellow cardstock to create the leaves and center.
Clean Layered Poinsettia Christmas Tag featuring Sunny Studio Stamps Layered Poinsettia Die, Wood Grain Embossing Folder and Scalloped Tags

Using a fine tipped adhesive applicator, I adhered all of the layers together. I found it helpful to refer to the instructions that come with the die to help line up all the layers. I then adhered the finished poinsettia to the tag using double sided foam adhesive. To finish off each tag, I added a sentiment stamped from the Merry Mice Stamp Set and added a bit of green and white bakers twine.
Clean Layered Poinsettia Christmas Tag featuring Sunny Studio Stamps Layered Poinsettia Die, Wood Grain Embossing Folder and Scalloped Tags

For my second set of tags, I went a bit more distressed and grungy. I once again started off by die cutting cream cardstock with the Scalloped Circle and Square Tag Dies. This time instead of using brown cardstock for the inside piece, I die cut a piece of water color paper. I once again trimmed off the scalloped part and then embossed it with the Woodgrain Embossing Folder. I then took Distress Ink in Gathered Twig and Espresso and ink blended over the embossed paper. To add to the grungy look, I also distressed the edges of the paper using the backside of an X-acto knife.

Distressed Layered Poinsettia Christmas Tag featuring Sunny Studio Stamps Layered Poinsettia Die, Wood Grain Embossing Folder and Scalloped Tags


For the poinsettia, I created my own custom red and green paper using Distress Sprays and Distress Oxide Sprays.

RED: I spritzed watercolor paper with water and then sprayed it with a mix of Distress Spray in Fired Brick, Festive Berries and Aged Mahogany. I dried it with a heat tool and then sprayed the paper with Distress Oxide Spray in Fired Brick and Peeled Paint. I then sprayed the paper with a bit of water to activate the oxide. I then dried it and then sprayed on just a bit of Distress Spray in Old Paper.

GREEN: I spritzed watercolor paper with water and then sprayed it with a mix of Distress Spray in Peeled Paint, Bundled Sage and Old Paper. I dried it with a heat tool and then sprayed the paper with Distress Oxide Spray in Iced Spruce and Peeled Paint. I then sprayed the paper with a bit of water to activate the oxide. I then dried it and then sprayed on just a bit of Distress Spray in Old Paper.
Distressed Layered Poinsettia Christmas Tag featuring Sunny Studio Stamps Layered Poinsettia Die, Wood Grain Embossing Folder and Scalloped Tags

For the yellow parts, I inked a piece of watercolor paper with Fossilized Amber Distress Oxide.

Once all of the papers were ready to go, I die cut each of the layers from its respective color. I then inked the edges of each piece with Vintage Photo Distress Ink and then began assembling each Poinsettia.

To finish off each tag, I again added the sentiment from the Merry Mice Stamp Set and then for a vintage touch I added crinkle ribbon died with Distress Spray to coordinate with the tags.
Distressed Layered Poinsettia Christmas Tag featuring Sunny Studio Stamps Layered Poinsettia Die, Wood Grain Embossing Folder and Scalloped Tags

I hope you enjoyed these two versions of Christmas tags using the Layered Poinsettia Die! You can find the full list of Sunny Studio products used below.


BLOG HOP DETAILS & GIVEAWAY

Here are a few more details about the blog hop and giveaway...


Along with being able to PRE-order the new release Sunny Studio will be offering FREE shipping within the USA and a mini light bulb die on all orders (or a $4 discount + a free mini light bulb die on international orders) + a FREE enamel pin on orders over $50 through September 30th.  See that cute little mouse in the mug? That's the adorable enamel pin you can get!


If you are interested in winning a $25 gift code from me to the Sunny Studio shop, leave me comment below! (Please make sure I have a way to contact you if you are the winner.) The contest is open through Friday, September 27th 11:59 pm PDT and the winner will be announced on the Sunny Studio blog on Tuesday, October 1st. Good luck and thanks so much for stopping by today!

Now hop along to your next stop which is the amazingly talented Anja Bytyqi.

Just in case, here is the complete hop list:
Sunny Studio
Nichol Spohr
Sandy Allnock
Laura Bassen
Kay Miller
Michelle Short
Francine Vuillème
Teri Anderson
Rachel Alvarado
Angelica Conrad
Francesca Vignoli
Leanne West
Vanessa Menhorn
Eloise Blue
Ana Anderson
Juliana Michaels
Anja Bytyqi
Candice Fisher

SUPPLIES


This post contains affiliate links to Sunny Studio Stamps. If you buy anything through my links, it adds no extra cost to you, but it does help me keep my blog up and running and allows me to share this content with you! I truly appreciate and thank you so very much for your support! (If you're interested, you can see my full disclosure statement here.)


Subscribe