Blossom Birthday Cards | Backgrounds from my stash

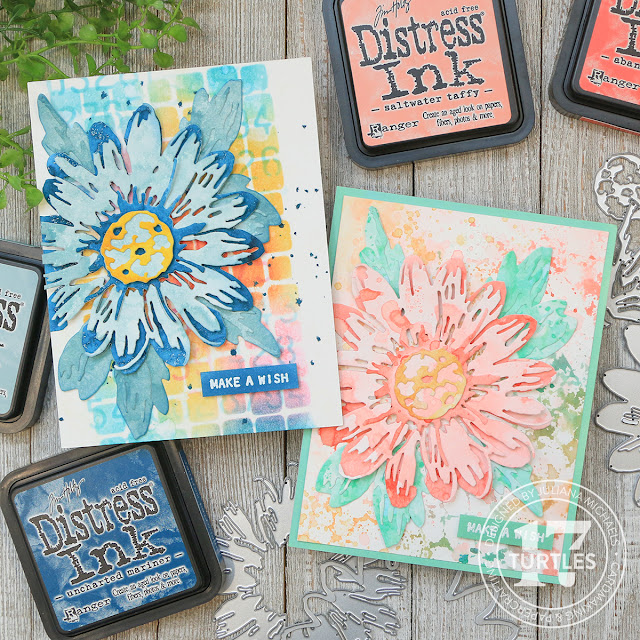
Spring has officially arrived and with it the promise of warmer weather, blossoming flowers, and a renewed sense of energy and inspiration. With spring in full swing, I wanted to share a couple of spring like birthday cards I created featuring the Tim Holtz Blossom Thinlits Die. They're sure to brighten your spirits and the recipients with their spring color palettes.

Make A Wish Birthday Cards by Juliana Michaels featuring Tim Holtz Sizzix Blossom Thinlits Die

To create these cards, I did something I don't normally do. I dug through my pile of backgrounds and grabbed two of them to use and I let the colors of each one inspire the colors I used to create the Blossom.
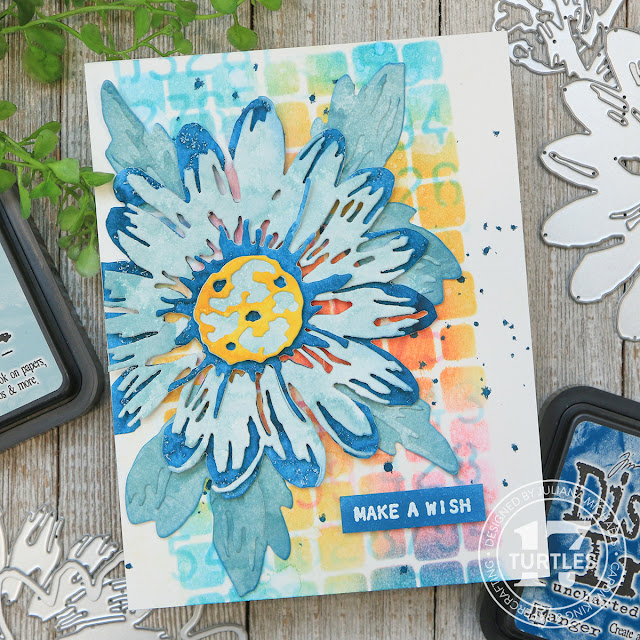
I made this first background quite some time ago by just layering the stencils and applying Distress Oxide Ink through the stencil and while I didn't use the exact same blue as the background, I think it ended up coordinating nicely once it was put together. The Distress Oxide colors used on the background are: Crackling Campfire, Fossilized Amber, Peacock Feathers and Picked Raspberry.

Make A Wish Birthday Card by Juliana Michaels featuring Tim Holtz Sizzix Blossom Thinlits Die

Before I die cut the flower layers, I created several ink smooshed panels. I took pieces of Distress Watercolor Paper, smooshed the ink onto my craft mat, spritzed it with water, smooshed the paper into the ink and then dried it with my heat tool. For this Blossom, I used Speckled Egg, Uncharted Mariner and Fossilized Amber.


The sentiment is from the Tim Holtz Tiny Text Stamp Set. I stamped it in Embossing Ink and then heat embossed it with white embossing powder. I then applied Uncharted Mariner Distress Ink to the paper, wiped over it to remove the ink from the embossed letters and then trimmed it to size.


Before adhering the flower and sentiment with double sided foam tape, I added a few splatters of Uncharted Mariner Distress Ink. And with that this card was complete.


This second card uses another background from my stash. This one was created by applying different colors of Distress Ink to my craft mat and spritzed them with water. I then took the Tim Holtz Bubbles Stamp and stamped it into the ink before stamping it onto a piece of Distress Watercolor Paper. I love the dreamy watercolor effect this achieves. The Distress Ink colors used on the background are: Abandoned Coral, Wild Honey, Peeled Paint and Cracked Pistaschio.

Make A Wish Birthday Card by Juliana Michaels featuring Tim Holtz Sizzix Blossom Thinlits Die

I used the same ink smooshing technique for this flower as I did on the first one, I just used different colors. Here I used Saltwater Taffy and Abandoned Coral. For the leaves and the sentiment I used Cracked Pistachio.


To make this one slightly different, I trimmed the background down to 4 x 5.25 and mounted it onto a piece of custom colored cardstock.


To create the custom colored cardstock, I took a piece of Distress Watercolor Paper cut to 4.25 x 5.5 inches and applied Cracked Pistachio Distress Ink just around the outer edges of the paper since that is all that would be showing. This is a great way to create custom colored cardstock without wasting time and ink.


Thanks for stopping by today! I hope these birthday cards featuring the Tim Holtz Blossom Thinlits Die  inspires you and brightens your day!

SUPPLIES

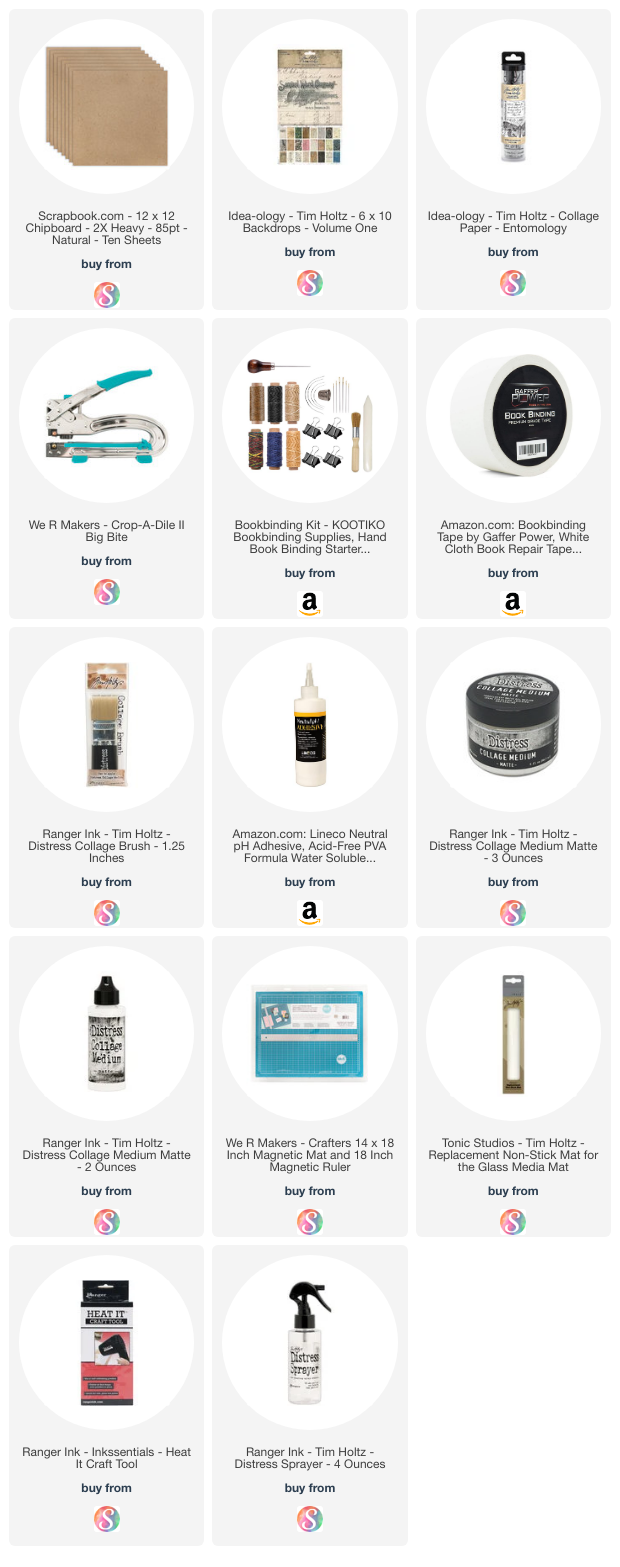
Below you can find the products I used to create these cards along with compensated affiliate links to Scrapbook.com. These links are at absolutely no cost to you. When you shop through the links below, I receive a small commission from Scrapbook.com. These links are at absolutely no cost to you and the commission I receive helps me cover the costs of my blog and other expenses, which allows me to continue to provide you with FREE inspiration and tutorials. If you want to learn more about what an affiliate link is, you can see my full affiliate and product disclosure statement here. Thank you so much for your love and support!

Junk Journal Journey Part 2 | Creating The Cover & Sewing In The Signatures

I'm back for Part 2 of my Junk Journal Journey and in this episode I'm sharing about my adventure of creating the cover for my junk journal and sewing in the signatures. This part of the journey was a bit challenging and at times a little frustrating, but I learned SO much that will help me when it comes time to make my next journal. In this video I share all that I learned with the hope that it will help you avoid these same frustrations. From how to cut thick chipboard, to the easiest way to poke holes, I've got loads of tips to share.

Junk Journal Journey Part 2 by Juliana Michaels How to make a junk journal -  Creating The Cover & Sewing In The Signatures

So grab a cuppa and check out my Junk Journal Journey Part 2 video. As always if you have questions feel free to ask!


I'll be back soon with Part 3, as I continue on with my Junk Journal Journey and share how I'll be adding pockets and other ephemera to my journal.

SUPPLIES

Below you can find the products I used to create my junk journal along with compensated affiliate links to Scrapbook.com. These links are at absolutely no cost to you. When you shop through the links below, I receive a small commission from Scrapbook.com. These links are at absolutely no cost to you and the commission I receive helps me cover the costs of my blog and other expenses, which allows me to continue to provide you with FREE inspiration and tutorials. If you want to learn more about what an affiliate link is, you can see my full affiliate and product disclosure statement here. Thank you so much for your love and support!

Junk Journal Journey Part 1 | Signatures and Vellum Collage Fodder

I have something a little different to share with you today. I'm starting my first junk journal after being inspired by the talented Luise Heinzl. As I begin this journey I thought it might be fun to take you along with me as I create my first one and to share with you a little bit about what junk journaling is and what it is to me!

Junk Journal Journey Part 1 by Juliana Michaels - Signatures and Vellum Collage Fodder

There are loads of resources out there on junk journaling, but I wanted to share my take on it and how I plan to incorporate junk journaling into my papercrafting. Playing with paper has and always will be a creative outlet for me and I love to try new things...so this is my next new thing to try! I'm not sure where this creative journey will lead me, but I'm excited to take the first steps and see!

In today's video I'm going to go over what signatures are, how I created mine, what collage fodder is and how to create some for your junk journal using vellum, stamp, embossing folders and Distress Spray Stain.

I'd love for you to pop over to my YouTube Channel to check it out and I'd love to hear what you think about it? Is this something you've tried or want to try? I have to say, I'm already in love with it and can't wait to continue the journey.


I hope you enjoyed this Junk Journal Journey Part 1. I'll be back soon with Part 2 to share more ow I'm going to do my cover, as well as more details about the inside pages such as adding pockets and more, so stay tuned!

SUPPLIES

Below you can find the products I used to create with along with compensated affiliate links to Scrapbook.com. These links are at absolutely no cost to you. When you shop through the links below, I receive a small commission from Scrapbook.com. These links are at absolutely no cost to you and the commission I receive helps me cover the costs of my blog and other expenses, which allows me to continue to provide you with FREE inspiration and tutorials. If you want to learn more about what an affiliate link is, you can see my full affiliate and product disclosure statement here. Thank you so much for your love and support!


Yay Tag | SBC Fest Spring 2023

YAY! SBC Fest starts TODAY at 10 AM EST! I've got my calendar blocked off and I'm ready to spend the day crafting along and taking in all the inspiration! Whether you love cardmaking, scrapbooking, mixed media, or clean and simple projects, you're sure to find something to inspire your next project!

Yay Tag by Juliana Michaels featuring the Scrapbook.com Yay Tag Decorative Die Set and Tim Holtz Tailored Thinlits Die Set

SBC Fest begins each day at 7 AM PST / 10 AM EST and will end each day around 12:30 PM PST / 3:30 PM EST. This is a FREE virtual two-day papercrafting event hosted by Scrapbook.com on their YouTube channel!

While I'm not an instructor this go around, they have an amazing lineup of instructors for the Spring 2023 SBC Fest including: Paige Evans, Dyan Reaveley, Frank Garcia, Becki Adams, Anna Komenda, Joy Baldwin, Laura Evangeline, Jess Crafts, Robin Marshall Clark, Shannon Allor, and Laura Graff for Scrapbook.com! During the event, you'll have the opportunity to chat along with the instructors and fellow crafters, plus enter for some amazing giveaways!

If you haven't grabbed your , you can still do that or if you have other shopping to do, make sure to use the coupon code SBCFEST2 to save 10% off your order at checkout!

And while you're checking out, make sure to grab the newest Freebie..the Yay Tag Decorative Die Set! This fun die set is perfect for all the Yay moments in your life! I used it to create this tag. Keep reading to check out all the details on how it came together. (And yes that Tim Holtz Tailored Thinlits Die Set that I love so much has made another appearance!)

So now let me share the details on how I put this tag together.

Yay Tag by Juliana Michaels featuring the Scrapbook.com Yay Tag Decorative Die Set and Tim Holtz Tailored Thinlits Die Set

As always, let's begin with the background. For this tag, I took a piece of Distress Watercolor Paper and die cut it using the Yay Tag Die. The tag dies is 2.375 x 4.75 inches. I then embossed it using the Sunburst A2 Coverplate Die. If you didn't know, you can emboss with any die you have, you just need a silicone mat. I used this technique recently in a card I created using the new Lost Shadow Distress Ink. I share how to emboss with a die in this Blog Post or you can also watch this Video.

After I had embossed the tag, I did some ink smooshing with some Brushed Corduroy, Frayed Burlap and Fossilized Amber Distress Oxide Ink, drying in between each color. Distress Oxide inks tend to build up layers of color instead of blending together which makes for a wonderful effect. Once dry, I inked the edges of the tag with Walnut Stain Distress Ink and set it to the side to work on the focal point.

I began by first embossing a piece of Black Kraft Stock using the Tim Holtz Woven 3D Texture Fade Embossing Folder. I then used this to die cut the top hat and jacket from the Tim Holtz Tailored Thinlits Die Set and the yay from the Yay Tag Die Set. I used a Distress Sanding Disk to gently sand off a bit of the black paper to reveal the kraft core. If you don't have one of these, you can use a piece of sand paper.

DESIGNER TIP: With the Tim Holtz Tailored Thinlits Die Set each piece is grouped together on one die. For example, all of the layers to create the top hat are on one die. To cut out the different layers from different papers, simply trim the paper close to the size of that part of the die and use a piece of Mint Tape to hold it in place as you run it through your die cutting machine. This will prevent you from wasting paper and die cutting some of the pieces that you won't use because of the color or type of paper.

Next, I used a piece of printer paper to cut out the shirt. I find this thinner paper folds nicely to create the shirt collar. Finally, I die cut the band on the hat, the tie and the hole reinforcer on the tag from a piece of paper from the Sunny Lane A2 Paper Pad. Once the die cutting was completed, I inked the edges with Walnut Distress Stain and adhered the layers together using Distress Collage Medium.

To finish off the sentiment, I cut the shadow layer from a piece of paper from the Playful A2 Paper Pad. I then adhered the yay sentiment to the shadow layer, and inked the edges with Walnut Distress Stain.

I then used double sided foam adhesive to adhere the die cuts to the tag to create some dimension. For the final touch, I added a bit of ribbon from my stash to the tag.


Thanks so much for stopping by today! I hope you have a great time at SBC Fest!

SUPPLIES

Below you can find the products I used to create this card along with compensated affiliate links to Scrapbook.com. These links are at absolutely no cost to you. When you shop through the links below, I receive a small commission from Scrapbook.com. These links are at absolutely no cost to you and the commission I receive helps me cover the costs of my blog and other expenses, which allows me to continue to provide you with FREE inspiration and tutorials. If you want to learn more about what an affiliate link is, you can see my full affiliate and product disclosure statement here. Thank you so much for your love and support!

Tim Holtz Tailored Vintage St. Patrick's Day Card

Hello friend! Today I'm sharing a bit of vintage St. Patrick's Day inspiration with you! I happen to be part Irish and green happens to be one of my favorite colors, so I couldn't resist creating a card specifically for this holiday.

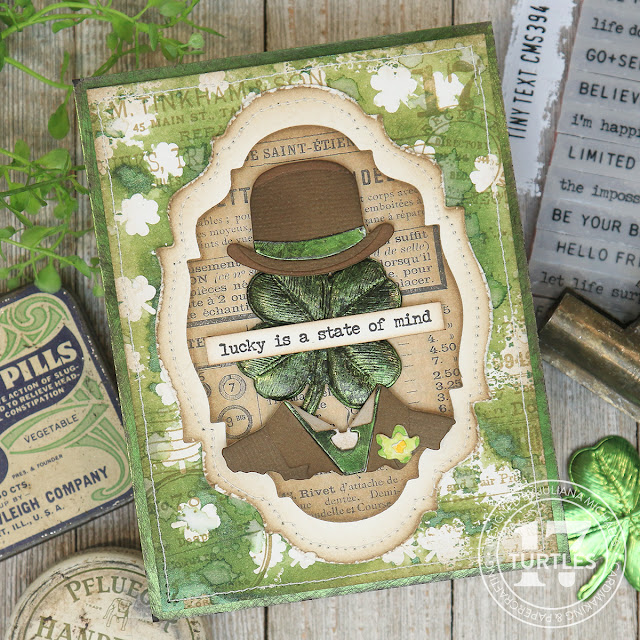
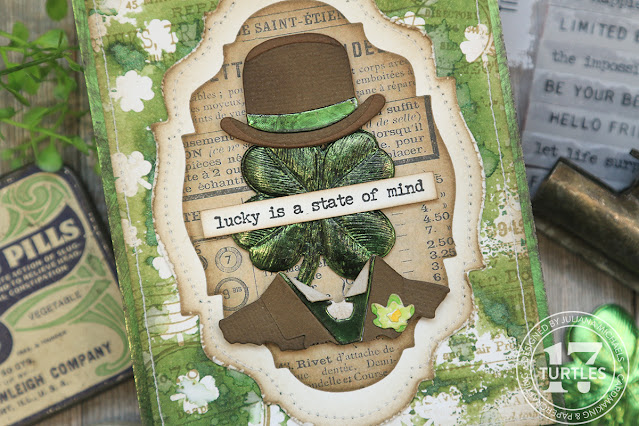
Tailored Vintage St. Patrick's Day Card by Juliana Michaels

You may recall seeing a similar-ish looking card that I shared around Valentine's Day, and if you do remember it, you have some made memory skills! I actually made both cards at the same time with the idea of using similar products to create a card for each of these holidays. If you missed that card, you can find more details on my Vintage Valentine's Day Card here.


TIM HOLTZ TAILORED VINTAGE ST. PATRICK'S DAY CARD

As always, I like to start off with the background. I began with the Scrapbook.com Shamrocks Stencil and used it to create a monoprint. Do this, I placed the stencil in my Splat Box and sprayed it with Tim Holtz Tree Lot Mica Stain (this is a seasonal product that is sold out, but you can use any color of green spray ink). Off to the side, I had a piece of Distress Watercolor Paper placed on top of a paper towel and an extra paper towel as well. I placed the inked stencil on top of the paper and used the extra paper towel to push down while at the same time dabbing up any ink that seeped under the stencil openings. To see this technique in action make sure to check out my How To Monoprint with Stencils video.

I lifted off the stencil and they dried the ink with my heat gun. Once the ink was dry, I added some stamping using Frayed Burlap Archival Ink and stamps from the Tim Holtz Field Notes, Merchant and Christmas Postmarks. I then inked in the edges with a little Walnut Stain Distress Ink and added some machine stitching around the border. I then adhered this to a piece of green metallic Kraft Stock that I had lightly sanded and then inked with Walnut Stain Distress Ink.


As on Vintage Valentine's Day Card, I created the focal point using the Tim Holtz Tailored Thinlits Die Set and cut the various layers from colored and metallic cardstock and adhered them together using Distress Collage Medium. Before adhering the metallic papers, I lightly sanded them, and inked them with Walnut Distress Stain using a foam blending tool. The small flower is from the Mini Brushstroke Flowers Thinlits and was cut from Distress Watercolor Paper and then watercolored using a waterbrush and Distress Ink in Twisted Citron and Mowed Lawn.

To create the embossed four leaf clover or shamrock I used the Tim Holtz Lucky Love 3D Impresslits Embossing Folder. Impresslits, actually cut and emboss all in one step! I used it with a piece of green metallic Kraft Stock and to give it the slightly grungy look I used a technique that Tim shared during his Sizzix Everyday 2023 Release YouTube Live at around the 3:05 mark. After die cutting the shape, I painted it with Black Soot Distress Paint, allowed it to start to dry and then used a paper towel to wipe off some of the excess paint. You have to let the paint slightly dry so it will start to stick to the paper but still wet enough that you can wipe some of the paint away and reveal the metallic paper. I absolutley love the grungy end result!


To frame the focal point, I used the Tim Holtz Stacked Baroque Thinlit Dies and cut it from a piece of Tim Holtz Idea-ology paper and inked the edges with Walnut Stain Distress Ink. I then cut the next largest die from White Heavystock, added seom machine stitching and inked the edges with inked the edges with Walnut Stain Distress Ink.

The final touch was the sentiment...lucky is a state of mind. This is a stamp from the Tim Holtz Tiny Text Stamp Set which I stamped onto Distress White Heavystock with Black Soot Archival Ink, trimmed it into a strip and then inked the edged with Walnut Stain Distress Ink. I then adhered it to the card with a bit of foam tape on the two ends so that it was the supported as it went over the embossed four leaf clover


Thanks as always for stopping by and taking a closer look at this Tim Holtz Tailored Vintage St. Patrick's Day Card! And as always, if you have any questions please don't hesitate to reach out.

SUPPLIES

Below you can find the products I used to create this card along with compensated affiliate links to Scrapbook.com. These links are at absolutely no cost to you. When you shop through the links below, I receive a small commission from Scrapbook.com. These links are at absolutely no cost to you and the commission I receive helps me cover the costs of my blog and other expenses, which allows me to continue to provide you with FREE inspiration and tutorials. If you want to learn more about what an affiliate link is, you can see my full affiliate and product disclosure statement here. Thank you so much for your love and support!

Subscribe