New Tim Holtz Distress Color | Saltwater Taffy Card Ideas & Inspiration
Hello friends! I'm so excited to be sharing some card inspiration with you using the new Tim Holtz Distress Color Saltwater Taffy. I have 3 cards to share with you AND I made a video for one of them! I decided to only do the one video since the technique on that card is a bit unique as compared to the ones I used on the other 2 cards. But never fear, I have all the details on how I created the other two cards in this blog post, along with some swatches I created comparing the new color. And if you would like a video for the other 2 cards, let me know and I'll put one together!
I want to thank Scrapbook.com for their generosity in sending me this New Distress Color to create with!
Saltwater Taffy Swatches
Before I get into the card details, I wanted to share the swatches I created for the new ink. I was inspired to up my swatch game after seeing the one's Zoe Hillman created for the recent Archival Ink release. I decided it would be fun to swatch them in the ways I tend to use them the most. I grabbed the Distress Ink in all the colors that are somewhat close to Saltwater Taffy. As I was doing this, I realized I didn't have Victorian Velvet in Distress Ink. Guess that's going to have to change ASAP! Next, I die cut a bunch of tags from Distress Watercolor paper and some butterflies from Distress Watercolor for the Oxide swatches and some from Distress Heavystock for the Distress Ink Swatches. I used this paper since it is the one I used the most frequently.
On the Distress Ink Swatches, I ink blended the butterfly and then did some ink smooshing on the background. These are two of the more common ways I use this type of ink, so I love that this will give me a good feel for how it will look on a project.
Distress Ink Swatches
As you can see Saltwater Taffy color definitely fills an opening in the color palette by being a lighter version of Abandoned Coral but as always, these colors can be chameleons when you start mixing and layering!
For the Oxides, I ink blended the Butterfly, but then spritzed it with some water to activate the oxide and to again give me a better feel for how it will look. I then ink blended the edges of the tag to show that effect.
Distress Oxide Swatches
Now, let's get on with the making! Here's the video I created using Saltwater Taffy Embossing Glaze. You can check it out below. If the video isn’t showing up, click HEREto watch it.
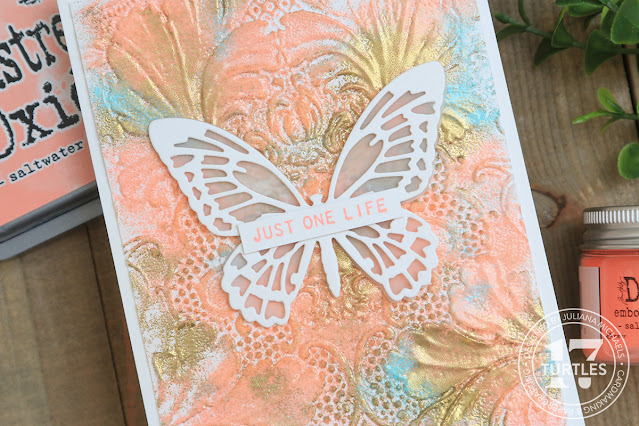
Just One Life Card | Embossed Embossing Technique
This first card (I actually ended up making 2 of them so I could create the video) was made using Distress Embossing Glaze, an embossing folder and embossing powder. Which is why I'm calling it embossed embossing! I invite you to check out my video for all the details. You can find a complete supply list at the end of this post.
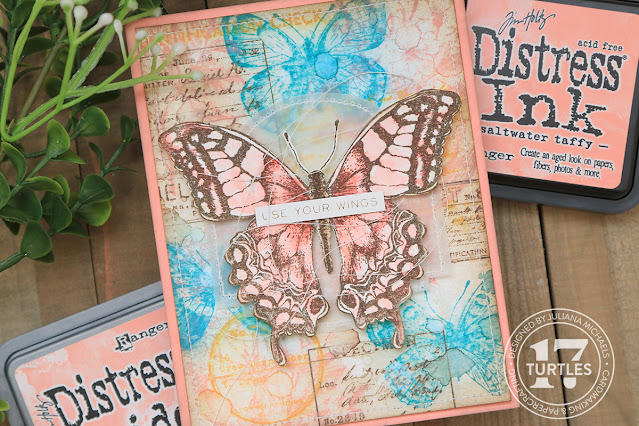
Use Your Wings Card | Distress Oxide Stamp and Smudge Technique
On this card, I used Distress Oxide and the Stamp and Smudge Technique to create the background. I began with a piece of Distress Watercolor paper trimmed to 4 x 5.25 inches. I then selected a mix of stamps including: Flutter, Illustrated Garden and Field Notes. I started by stamping images from the Field Notes set in Ground Espresso Distress Oxide. While the ink was still wet, I took a clean paper towel and smudged (smeared) the ink. For the second layer, I stamped images from Illustrated Garden in Saltwater Taffy and repeated the smudging. I stamped some butterflies from the Flutter stamp set using Peacock Feathers and for the final bit of stamping I stamped a couple more images from Field Notes using Wild Honey. With each color, I stamped and then smudged the ink while it was still wet. Once the stamping was completed, I inked the edges with a bit of Ground Espresso Distress Ink. I then spritzed the entire panel with a bit of water and dried it with my heat tool.
Now onto the butterfly. I stamped the image using the butterfly from the Perspective Stamp Set using Ground Espresso Archival Ink. I smooshed the Saltwater Taffy and Abandoned Coral Distress Inks onto my craft mat and used a waterbrush to pick up the ink and color in the image. I then fussy cut the image using a pair of scissors. Behind it I placed a piece of vellum die cut using the Tim Holtz Label Thinlits. I added some machine stitching around the outside edge before I adhered it to my card.
The card panel was attached to a piece of Distress Heavystock that I ink blended with Saltwater Taffy Distress Oxide creating my own custom cardstock.
I then finished off the card with a sentiment from the Tim Holtz Idea-ology Metallic Stickerbook.
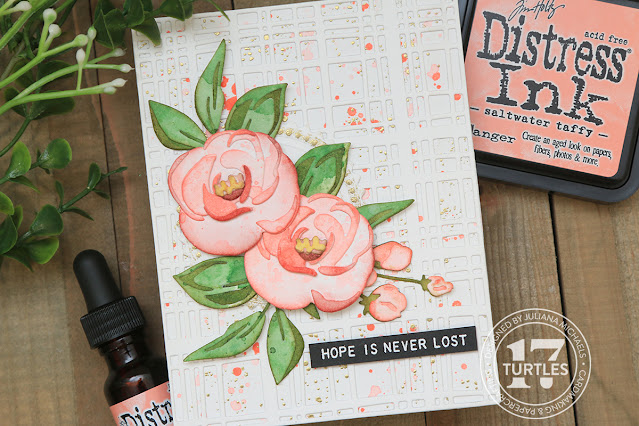
Hope Is Never Lost Card | Ink Smooshing Die Cuts Technique
For this card, I began by taking several pieces of Distress Watercolor paper (4.25 x 5.5 inches but any size will work). I then smooshed some Saltwater Taffy Distress Ink onto my craft mat, spritzed it with water and then smooshed one of the pieces of paper into the ink. I dried the paper and then repeated the smooshing until I was pleased with the look. I repeated this process on a second piece of paper, this time with Rustic Wilderness Distress Ink. I also took a couple of small watercolor paper scraps and ink smooshed one with Aged Mahogany and another one with Fossilized Amber. Next, I took Tim Holtz Bloom Colorize Thinlits Dies and cut out the various parts of the flower from the different pieces of inked paper. To give the layers of the flower a bit more contrast, I inked some of the pieces and edges of the paper with Abandoned Coral Distress Ink. For the flower center ( the pieces die cut from Aged Mahogany and Fossilized Amber) I inked the edges with Frayed Burlap Distress Ink. With the leaves, I inked the main background piece and the edges of the layers with Forest Moss Distress Ink. I then adhered all of the layers using Distress Collage Medium.
Behind the flowers, I added a Seal die cut created using the Seal Switchlit. I lightly rubbed a bit of embossing ink over the raised areas and heat embossed it with gold embossing powder.
For the background, I took a piece of Distress Watercolor paper trimmed to 4.25 x 5.5 inches and repeated stamped the ink splatter stamp from the Tiny Toadstools Stamp Set and heat embossed it with gold embossing powder. I then added some ink splatters using the Saltwater Taffy Distress Ink Reinker and a bit of water. I then added more water to get a lighter ink splatter. I completed the background by layering a piece of Distress Heavystock die cut using the Simply Plaid Thinlits Die.
To finish the card, I stamped a sentiment from the Tiny Text Stamp Set onto black cardstock and heat embossed it with white embossing ink.
I sure hope you enjoyed the card inspiration and video I've shared featuring the new Tim Holtz Distress Color Saltwater Taffy. Thanks so much for your visit!
Supplies
Below you can find the products I used to create these cards along with compensated affiliate links to Scrapbook.com. These links are at absolutely no cost to you. When you shop through the links below, I receive a small commission from Scrapbook.com. These commissions help me cover the costs of my blog and other expenses, which allows me to continue to provide you with FREE inspiration and tutorials. If you want to learn more about what an affiliate link is, you can see my full affiliate and product disclosure statement here. Thank you so much for your love and support!
Fabulous cards and techniques.Thanks for sharing them. I cant wait to play with that pretty new pink. Funny how you dont know what you are missing until someone shows you. (:


So pretty!
ReplyDeletethank you so much!
DeleteLove your swatches! Did you stamp the floral on each of the tags after you diecut them? Makes them much more interesting!
ReplyDeleteYes, I stamped the image after die cutting. Thank you!
DeleteFabulous cards and techniques.Thanks for sharing them. I cant wait to play with that pretty new pink. Funny how you dont know what you are missing until someone shows you. (:
ReplyDeleteThanks! And isn't that the truth! I hope you enjoying playing with the new color!
Delete