
We all have those dies that we reach for over and over again. Those basic shapes that are just perfect for all the things. Well, in my book, the Layered Plaid Die is one those. While I've only had the opportunity to use it for Christmas cards, I know it will be the perfect backdrop for just about any card you can imagine and regardless of your style. I also love that even though it has 3 dies that are meant to be layered to create a multi color plaid, it works just as well when you only use one of the layers.
In this blog post, I want to share with you two Christmas cards I created using the Layered Plaid die and show you how I only used one layer of the die on each of the cards. If you are looking for more inspiration on how to use this die or any of the others from the Tim Holtz Sizzix Christmas 2022 release, make sure to check out Tim's blog post.
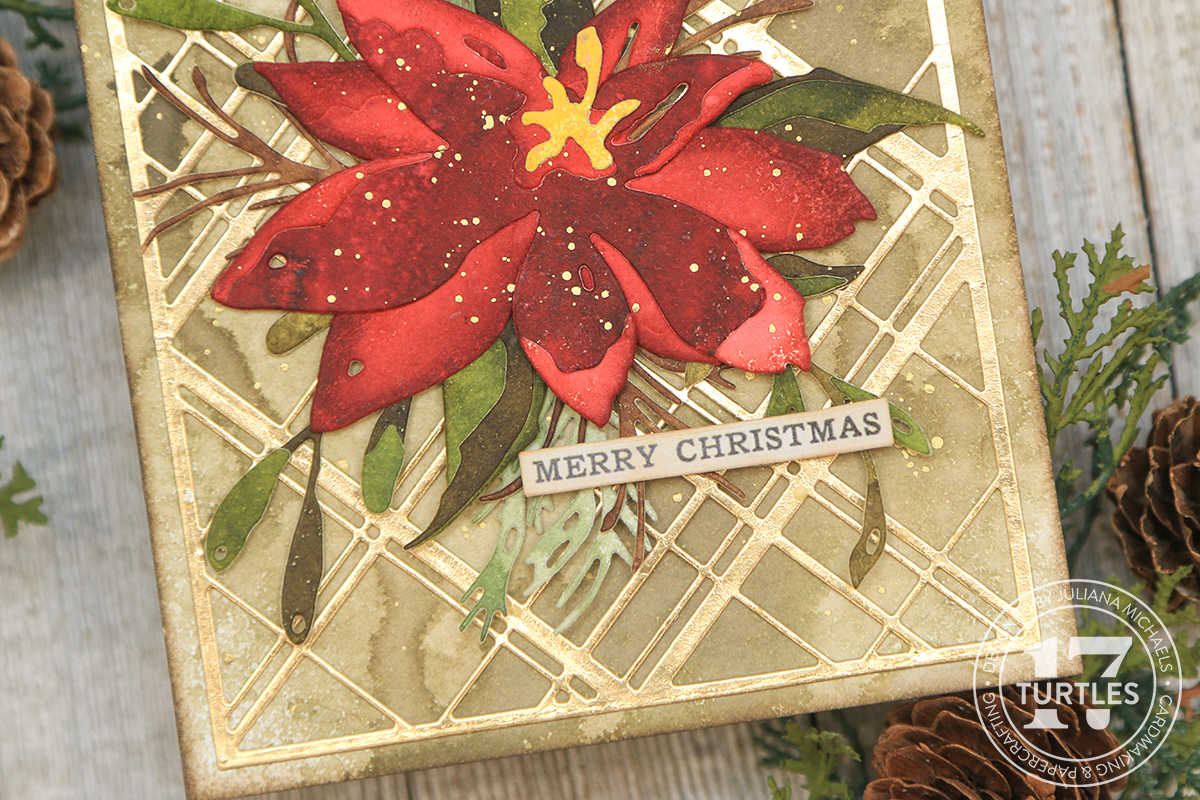
MERRY CHRISTMAS CARD
To create this Merry Christmas card, I used the more detailed of the layers. It adds a nice touch of interest to the background when paired with the contrasting red poinsettia but not so much that it is overpowering.

I die cut the more detailed plaid layer from a piece of gold Metallic Kraftstock and layered it onto a piece of Distress Watercolor Paper that I had sprayed with Frayed Burlap Distress Stain and spritzed with a bit of water before I dried it.

For the focal point, I used the Holiday Brushstrokes 3. I sprayed separate pieces of Distress Watercolor Paper, one for each of the following Distress Spray Stains: Aged Mahogany, Fired Brick, Forest Moss, Peeled Paint, Fossilized Amber, Walnut Stain and Bundled Sage. While I was spraying the color, I added a bit of water and dried them with my heat tool. I then die cut the various layers from the different colors and put them together to create the poinsettia and greenery. I also cut the bottom layer twice and rotated it slightly to get the shading. For the poinsettia I also inked the edges with Aged Mahogany to add more shading as well.

To finish off the card, I added some splatters of Gilded Foundry Wax and a sentiment from the Christmas Idea-ology Sticker Book. You could also use a stamp if you wanted to mass produce this design.
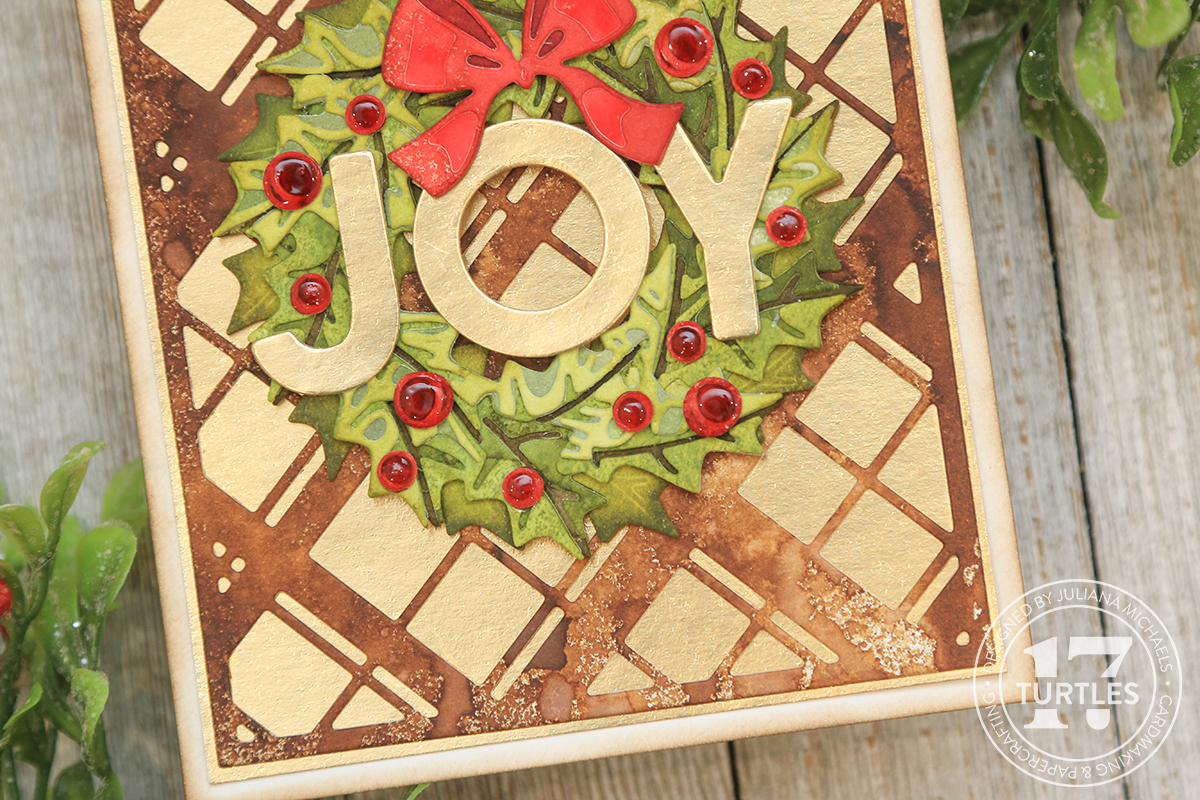
JOY CHRISTMAS CARD
Now onto my second card using the Layered Plaid Dies. On this one I used the other layer to create a slightly more bold design for the background. This bolder background is a nice contrast to the more detailed wreath I added as the focal point.

The plaid was die cut from a piece of Distress Watercolor Paper that I had sprayed with Walnut Stain Distress Spray Stain and then layered onto a piece of gold Metallic Kraftstock.

The wreath on this card was created using the Yuletide Thinlits. I added color in a similar manner as the poinsettia in that I die cut the various layers from pieces of Distress Watercolor paper that I had inked with the following Distress Spray Stains: Forest Moss, Peeled Paint, Shabby Shutters and Peeled Paint, Bundled Sage and Shabby Shutters. These are listed in order of dark to light and bottom to top layer. The bow was cut from Aged Mahogany and Fired Brick.

For the Berries, I only used 2 layers from the dies and cut them from Aged Mahogany and Fired Brick. After adhering the berry layers, I applied Glossy Accents to give them a little shine. A touch of Rock Candy Distress Glitter would have been a nice touch as well!
The sentiment is from the Bold Text Christmas Thinlits and die cut from gold Metallic Kraftstock and white cardstock. I cut the white card 2 times and adhered the gold on top to give the letters a little more dimension before I adhered it to the wreath.
Thanks so much for the visit and I hope you enjoyed this bit of Christmas Card inspiration using the Layered Plaid Thinlits.
SUPPLIES
Below you can find the products I used to create these projects along with compensated affiliate links to Scrapbook.com. These links are at absolutely no cost to you. When you shop through the links below, I receive a small commission from Scrapbook.com. These links are at absolutely no cost to you and the commission I receive helps me cover the costs of my blog and other expenses, which allows me to continue to provide you with FREE inspiration and tutorials. If you want to learn more about what an affiliate link is, you can see my full affiliate and product disclosure statement here. Thank you so much for your love and support!


I like them both, the Plaid die adds just the right amount of contrast to the focal piece. Enjoyed my visit...
ReplyDeleteI have been looking at how to put the brushstroke 3 flower together and can't for the life of me figure it out. I don't see two dies for the flower to get the shading. Am I missing something? Your flower looks so good but I am stumped. thanks as always for sharing and all the inspiration.
ReplyDeleteHi Theresa! Thank you so much for bringing this to my attention! I totally forgot to add in my tutorial that I cut the bottom layer twice and just rotated it slightly to get the shading. I'm adding it in now.
Deletethank you so much. I know I can miss things but this really had me scratching my head. I so enjoy your cards and I have fun making them. At 70 with my disabilities, I am just happy to still be making. thanks again for sharing and all the inspiration.
ReplyDeleteI would made one more addition to your directions for the wreath card, add the letters before the berries. I didn't do that so my letters are sometimes a little crocked. Just a thought. Loved making these cards. All the labor was worth it. I made six of each for mailing out. Will post in addicts when I get pics taken. thanks again for sharing and all the inspiration.
ReplyDelete