Butterfly Specimen Canvas | Tim Holtz Butterfly Perspective Thinlits

Butterflies are my thing! I love everything about them so it was no surprise to me that I immediately fell in love with the Tim Holtz Butterfly Perspective Thinlits! This oversize design is perfect for offsetting and using only part of the design as I did in my Don't Forget To Fly Card or to use it in full as I did on this Butterfly Specimen Canvas that I'm sharing today.

Butterfly Specimen Canvas by Juliana Michaels featuring the Tim Holtz Butterfly Perspective Thinlits

The base of this project is an 8x8 inch canvas. You can find these at your local craft supply store or online. To prep the surface, I first painted it with a coat of Distress Collage Medium. Once that was dry, I inked over the entire thing with a bit of Vintage Photo Distress Ink. I then added some Distress Crackle Paste to the sides of the canvas and then on the top about a 1/2" or so in from the sides. No need to waste the paste when I knew I was going to layer other pieces on top of it. Applying the ink before the paste allows some of the color to seep through and add to the distressed look of the crackle. After the Crackle paste was dry, I then applied another layer of Distress Collage Medium and allowed that to dry. To complete the distressing, I then applied some Walnut Stain Distress Crayon to make the cracks stand out even more. With the base completed, I set it to the side and began working on the focal layer.


I started off die cutting the Butterfly Perspective twice from Distress White Heavystock. I inked both layers with Peacock Feathers Distress Ink toward the edges and Speckled Egg Distress Ink toward the center. Next, I applied a bit of Therm O Web DecoFoil Transfer Gel to the edges of the one butterfly and allowed it to dry. Once dry, I covered it with a piece of Copper Decofoil and ran it through my Minc to adhere the foil. I then adhered the two butterfly layers together and sat them to the side.


Now onto the background. For this I took a piece of Distress White Heavystock and trimmed it to 6.5 x 6.5 inches. I placed the Roses Layering Stencil on top and applied Crackle Paste and allowed it dry. I cleaned the stencil and once the crackle was completely dry, I placed it back on top and applied embossing ink. I then sprinkled the flowers with Tattered Rose Embossing Glaze and the leaves/stems with Peeled Paint Embossing Glaze and heat embossed it.


I find that if I try to apply the Embossing Glazes to the Crackle Paste that a lot of it doesn't stick and blows off when I go to heat emboss. This extra step with the embossing ink has solved that problem for me! Next, I added some random stamping using Frayed Burlap Distress Ink with the Ledger Script Stamp Set. This step would have been easier if I'd done it before the stenciling, but it's all good! I then added a couple of stamped, distressed and cut out labels from the Field Notes Stamp Set. To the edges I added some ink blending with Distress Oxide Vintage Photo and Frayed Burlap. I then finished it off with the addition of some Hardware Heads colored with Mushroom Alcohol Ink.


This entire piece was then layered onto a piece of paper from the Kraftstock Metallic 2. The final touch was that I used a straight pin, colored with Mushroom Alcohol Ink to "adhere" the butterfly specimen to the canvas. To do this, I simply poked the pin through the papers and used a bit of hot glue to hold it in place on the backside. If the pin is too long, you can use a pair of jewelry metal cutters to carefully trim off any excess that might poke anyone.


Thanks so much for your visit and I hope this Butterfly Specimen Canvas using the Tim Holtz Butterfly Perspective Thinlits inspires you with your next make!
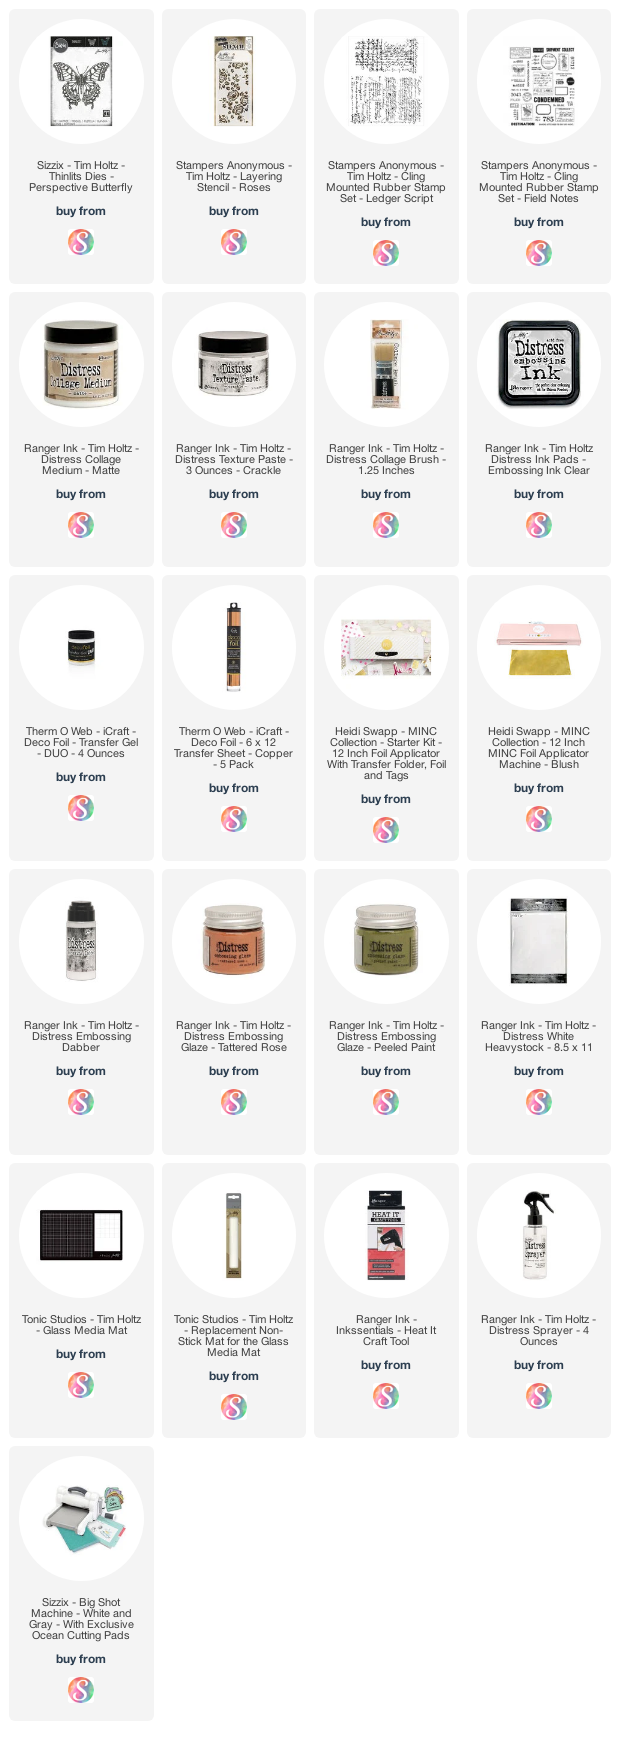
Supplies

Below you can find the products I used to create this project along with compensated affiliate links to Scrapbook.com. These links are at absolutely no extra cost to you. If you want to learn more about what an affiliate link is, you can see my full affiliate and product disclosure statement here.

5 Ways to Use a 6x8 Album

What do you think of when you hear the words 6x8 album? Do you think scrapbooking, mini album, pocket pages? Scrapbook.com recently released a new line of 6x8 albums in 10 new colors and designs. They sent me one to play with and I thought it would be fun to come up with some ways to use these beautiful albums. Today I'm going to share with you 5 Ways to Use a 6x8 Album  to organize your craft room as well as a little scrapbooking/pocket page inspiration. So let's get started.

5 Ways to Use a 6x8 Album 

1. Pocket Pages/Memory Keeping/Scrapbooking

Memory keeping or scrapbooking is, of course, the most common way to use a 6x8 album. I recently started scrapbooking again using a pocket page type format and this past October I participated in Ali Edward's Art of Noticing. If you're interested in more information about this project you can check out her first Art of Noticing post from February.


I had done the journaling and photo taking at the time, but I got a bit lazy about actually putting it all together. When the 6x8 albums arrived I knew I had found the perfect system to use. I incorporated it with some papers and stickers from the Heidi Swapp Storyline Chapters collection and some Scrapbook.com Simple Scrapbook Cards.
 

Now here's a fun note for you...the Scrapbook.com Simple Scrapbook Cards I used are the Little One pack of cards. These are meant to be used for baby themed projects, but when I looked closely at the art on them I realized so many of them could be used for way more than baby projects and the colors and rainbows were perfect to coordinate with the other products I was using.


I definitely recommend taking a look at the Simple Scrapbook Cards and to keep an open mind as to how they could be used for something other than just the specific theme for which they are named.

 2. Stencil Organization

Next up, let's get into some organization and storage ideas. I've been collecting stencils for quite awhile now and I've been looking for a way to store my ever growing stencil collection. For some reason, I tend to keep them in the package, but on many of them the plastic packaging has started to rip, so I've been on a mission to find a new solution. Once again, when the 6x8 album arrived I knew I had found the perfect solution!


You can easily store your stencils in the 6x8 pocket pages. Here I've used the packaging card from the Scrapbook.com stencils and trimmed off a quarter inch so they would fit in the pocket. If you no longer have the packaging, simply cut a piece of paper to size and place it into the pocket. And if you want to get really fancy you could use a label maker to create labels for each stencil to help organize things even more.

3. Ink Swatch Organization

I've been creating ink swatches for awhile now, but most of mine were done on a piece of paper, punched with a hole and then stored together on a binder or book ring. This worked great, but lately I've seen examples of people using coin collecting pages to organize their swatches and I really loved the look and how you can see the colors laid out next to each other!


Coin collecting pages have 2x2 inch pockets that are a great size for an ink swatch. With the arrival of the 6x8 album and page protectors, I was inspired to create my very own ink swatch book. However, there was only one problem, I didn't have any 2x2 coin pages that would fit my 6x8 album. So I thought, hmmm...I have a Fuse Tool, why don't I try to make one using a 6x8 pocket page? Well, after a little trial and error I figured it out and created my own 2x2 pocket pages. 

UPDATE..Scrapbook.com now offers 2x2 pocket pages and you can find them linked in the supply list below.


Here you can see how I've used this method to swatch my collection of Distress Ink, Distress Oxides, Archival Ink and Alcohol Inks. When creating swatches, I highly recommend that you swatch the ink onto the type of paper that you most commonly use with that ink.


4. Stamp Organization

Another option is to organize your stamps. By using a mix of pocket pages, you can store a wide variety of stamps sizes. I cut a piece of typing paper to slide behind each stamp set, but you could certainly include the packaging insert of so desired. You could also include the coordinating dies by adding them to a magnet sheet and including that in with the stamp set. With all the different colors of albums that Scrapbook.com offers, you could easily separate your stamps by theme or brand and give each one it's own album. Just think how beautiful that would look on your shelf!

These are stamps stored in a 6x8 page protector...


Stamps in a 4x6 pocket page protector...


Stamps in a 3x4 pocket page protector...

5. Handmade Card Sending Kit

By now you might be starting to see a theme for some of the ways to use a 6x8 Album...organization. Yes, these little albums are perfect for organizing so many of our favorite crafting supplies. But what about your handmade cards? Mine usually end up in a bin somewhere, bent and forgotten. By placing them in the two 4x6 page protectors you have a great way to safely store your cards. You can even sort them by theme with the use of handmade dividers. Include a pocket for your envelopes and stamps, add a pretty pen and you've created your own handmade card sending kit.


To create a storage pocket for holding the stamps and envelopes, I used one of the Scrapbook.com Medium Plastic Storage Envelopes. Using the We R Memory Keepers Crop-A-Dile Multi Punch I added a couple of holes so I could include it in the album.

The dividers were made using the We R Memory Keepers Tab Punch Board and a selection of rainbow colored cardstock. I cut each piece of cardstock to the same size as one of the 6x8 page protectors and then followed the instructions to create the tabs. Once again, I used the Crop-A-Dile Multi Punch to add some holes so I could add them to the album. To decorate each divider, I used a Scrapbook.com Stencil with either a corresponding lighter or darker color of Distress Oxide Ink so that the design would show up against the cardstock color.


Just think how handy this will be for keeping you organized with sending out all those handmade cards you create!


So, now that I've shared 5 Ways to Use a 6x8 Album with you, how would you use the 6x8 albums in your craft room? Would you just stick to memory keeping or would you use them as a way to organize your crafting supplies? I'd love to hear your ideas!

Supplies

Below you can find the products I used to create this project along with compensated affiliate links to Scrapbook.com. These links are at absolutely no extra cost to you. If you want to learn more about what an affiliate link is, you can see my full affiliate and product disclosure statement here.

6x8 Albums, Page Protectors, & Tools

Pocket Cards, Stencils, & Stamps 

Kitsch Flamingo Distress | There Is Only One Happiness Card

So, I finally had a bit more time to play with the new Kitsch Flamingo Distress Ink from Tim Holtz, and quite honestly I'm kind of in love with what I created. I don't say that often, but sometimes do you ever create something that just really makes your heart happy? Well, this is definitely one of those makes for me. This combination of beautiful florals and vintage typography is two of my favorite things. The only thing missing is a butterfly!

There Is Only One Happiness Card by Juliana Michaels featuring Kitsch Flamingo Distress Ink, Bloom Colorize Thinlits, and Retro Type Bigz Dies by Tim Holtz

I started off by embossing a piece of silver Metallic Kraftstock using the 3D Texture Fades Typewriter. I then trimmed it to 4.25 x 6 and painted over the entire surface with Black Soot Distress Paint. Once the paint was dry, I lightly sanded over the surface to reveal the numbers and distress it just a bit.


Next, I started die cutting pieces of Distress White Heavystock using the Bloom Colorize Thinlits and the Retro Type Bigz Dies. I also die cut the Retro Type base from a piece of craft foam. Once the die cutting was finished, I began ink blending the flowers with Distress Ink in Kitsch Flamingo and Spun Sugar. With the flowers assembled I also did a little ink smooshing into some Kitsch Flamingo as well. For the flower centers I used Fossilized Amber and Gathered Twigs and after adhering these, I inked the edges of the flowers with some Vintage Photo. On the leaves, I used Peeled Paint, Rustic Wilderness and Forest Moss.
 

To add color to the typewriter, I first painted the Distress White Heavystock with Speckled Egg Distress Paint. I probably could have ink blended this with Distress Ink, but for some reason, I wanted to do a little painting. I used Brushed Pewter Distress Paint for the carriage return, roller knob, etc. Once the paint was dry, I lightly inked the edges with Vintage Photo Distress Ink. I then inked the entire surface with an Embossing Ink Pad, making sure to cover the Brushed Pewter areas so no ink would stick there. I then heat embossed the body of the typewriter with Speckled Egg Embossing Glaze giving it a shiny metallic look. I then repeated the heat embossing on the Brushed Pewter areas using clear embossing powder. For the space bar and and keys I used black embossing powder. To avoid having to heat emboss all the tiny key pieces, I cut a piece of heavystock to fit behind the opening, heat embossed it with the black embossing powder and adhered it to the back of the typewriter.
 

With the flowers and typewriter completed, I then added a typed phrase I created using my Royal Jr. Typewriter, making sure to type it out so the trimmed piece would fit through the opening on the die. I absolutely love the look this adds to the piece. And if you don't have a typewriter, you could easily achieve the same effect using a typewriter font with a word program on your computer and then print it out.

To finish off the card, I ink blended a piece of Distress White Heavystock trimmed to 4.5 x 6.25" using Kitsch Flamingo Distress Ink.


I hope you enjoyed this bit of inspiration using the new Kitsch Flamingo Distress Ink. Thanks so much for stopping by today and I look forward to seeing what you create using this gorgeous new color!

Supplies

Below you can find the products I used to create this project along with compensated affiliate links to Scrapbook.com. These links are at absolutely no extra cost to you. If you want to learn more about what an affiliate link is, you can see my full affiliate and product disclosure statement here

Why You Need These Double Sided Adhesive Rolls

Hey friends! I've got adhesives on my mind today and I'm sharing some fun ways to use some new to me adhesives from Scrapbook.com. Now before you say "I'm good, I don't need any more adhesives", let me share a few things about them and explain why you need these adhesive rolls. 

They have two different kinds of double sided adhesive rolls. One is a clear double sided adhesive that is permanent, acid-free, archival quality, and heat resistant which means when used with a laminator (such as the Minc) it won't melt. These rolls come in a range of sizes from 1/8" all the way up to 6" wide.  The double sided adhesive is perfect for adhering just about anything you can think of and is perfect for cardmaking, journaling, scrapbooking and more!

The other adhesive roll is a double sided foam adhesive that is acid free, permanent, and has an easy peel backing. These rolls come in sizes from 1/8" up to 2" and are perfect for adding dimension to any project, for creating shaker cards and the extra wide rolls are perfect for die cutting.

Now that you know a little bit more about these adhesives, let me now share a couple of cards I made using these adhesive rolls. Keep scrolling to see for yourself why you need these double sided adhesive rolls. They are sure to become a favorite staple in your craft supply stash!


On this first card, I used both the 1/4" Double Sided Adhesive Roll and the 1/4" Double Sided Foam Adhesive to create a love themed shaker card.

I created the panel for this card with some Distress ink smooshing, stamping and ink blending. The colors I used are Kitsch Flamingo, Milled Lilac, Vintage Photo, Gathered Twigs and Ground Espresso. For the complete list of supplies, please check out the supply list at the end of this post.


Once the panel was completed, I centered the Stacked Baroque Thinlit in the center of the paper, used Mint Tape to hold it in place and ran it through my die cutting machine to create a window. I saved the cut out part and adhered it to the center of another plain card panel to use as the back panel of the shaker.


Next I turned the panel over and adhered strips of double sided adhesive around the outside. I love how easy this tape is to tear to length, but you can easily cut it with scissors if you prefer. After removing the liner, I then adhered a piece of acetate cut to 4 1/8" x 5 3/8" to complete the shaker window.


With the shaker window completed, it's now time to create the shaker box. I took the back panel and adhered strips of double sided foam adhesive around the edge. My favorite scissors for cutting foam adhesive are my Nonstick Micro Serrated Scissors by Tim Holtz. Make sure the edges are touching on each side to create a box. Repeat this to create two layers of foam tape.


Next, pour in a mix of sequins, beads, etc that you want to use for you shaker. Here I used Sizzix Cherry Blossom Sequins and Beads.


Now, it's time to adhere the shaker pieces together. Here's a trick I used to line things up when adhering layers together. I begin by peeling off only the liner on the strip of adhesive along the top of the card. I then line up the shaker window with the shaker box by starting at the bottom. Once things are lined up I adhere the tops together and then lift up the remaining sides, remove the liner and adhere the rest of it together.


One other fun thing I learned about this double sided foam adhesive is that it's perfect for adding dimension to die cuts. The word love is cut from a piece of metallic kraftstock adhered to a piece of 2" double sided foam adhesive. I laid the "love" die on it and ran it through my die cutting machine to create a delicate but dimensional embellishment for my card. 


This second card is a love themed slimline card that again uses both types of adhesive rolls. The double sided adhesive roll was perfect for adhering the stenciled background to the slimline card base and the double sided foam adhesive was perfect for giving some dimension to the die cut banner and letters.


The background was created using the Scrapbook.com Rose Bloom Stencil and was ink blended using a stencil brush with Worn Lipstick Distress Ink. I then added a bit of stamping for extra interest and then inked the edges with a bit of Vintage Photo Distress Ink. You can see a full supply list below.


To create the banner I used the Scrapbook.com Nested Flag Banner Dies. I took a piece of pink paper from the Scrapbook.com Floral Paper Pad, trimmed it just slightly larger than the banner die, adhered a piece of 2" double sided foam adhesive to the back side and then ran it through my die cut machine.


For the letters I used the same process and die cut each letter using the Scrapbook.com Classic Type Alphabet Dies. I absolutely love the dimension the foam adds to the die cuts and because the adhesive is double sided all I had to do was remove the liner and adhere the pieces to my card.


Supplies

Below you can find the products I used to create this project along with compensated affiliate links to Scrapbook.com. These links are at absolutely no extra cost to you. If you want to learn more about what an affiliate link is, you can see my full affiliate and product disclosure statement here.  

Find Joy In The Ordinary Card | Tim Holtz Brushstroke Flowers 1 and Alphanumeric Stretch Thinlits

Joy. That is my word for 2021. My word to focus on during the everyday ordinary moments of life. This Find Joy in the Ordinary Card was created as a reminder that joy can be found in the everyday ordinary routines of life. Sometimes you might have to look for it, but it's there, just waiting for you to find it. Now, let's get on to the details of how this card came together using the Tim Holtz Brushstroke Flowers 1 and Alphanumeric Stretch Thinlits!

Find Joy In The Ordinary Card by Juliana Michaels featuring Tim Holtz Brushstroke Flowers 1 and Alphanumeric Stretch Thinlits

For this card, I started off by making the flowers. I die cut them from Distress Heavystock and ink blended them with Distress Oxide in Spun Sugar, Worn Lipstick, Squeezed Lemonade, Mustard Seed, Fossilized Amber, Walnut Stain and Peeled Paint. I then smooshed a Distress Ink pad in a darker color onto my craft mat, spritzed it with a tiny bit of water and then dabbed the piece into the ink to add a bit of interest. For example on the large flower, I inked the large petal section with Spun Sugar Distress Oxide and then added Worn Lipstick Distress Ink as the darker color. On the yellow flower I used Fossilized Amber as the darker color and for the leaves Peeled Paint (yes, I know it's not darker, but it still added the darker spots...go figure!). Once the flowers were finished, I played around with assembling them and how I might place them on a card. That's when I came up with the idea to place them on an oval frame and then add a sentiment inside the frame.


The frame was created using the now retired Stitched Oval Thinlits. I took the largest die and the next one down in size and placed them onto a piece of Distress Heavystock, making sure to center them to create the frame. I then used Mint Tape to hold them in place as I ran them through my die cutting machine. To color them I used Distress Oxide and Distress Ink in Walnut Stain using the same technique I did with the flowers.

With these pieces completed, I moved onto the background. I went with a light color to allow the flowers to pop. I used the smoosh, spritz and dab technique with Old Paper Distress Ink and a piece of Distress Heavystock. I then inked the edges with some Vintage Photo Distress Ink. For a touch of interest, I added some Distress Ink stamping using Vintage Photo Distress Ink and some stamps from Field Notes and Entomology.


After completing the background, I was then able to adhere the frame and flowers. To create the sentiment I die cut Joy using the Alphanumeric Stretch Thinlits from Distress Heavystock and used the same technique to color them that I used on the flowers. The rest of the sentiment was created using the Tiny Text Stamp Set and Vintage Photo Archival Ink. I trimmed the piece into single words and then adhered them to the card.

To finish off the card, I added a machine stitched border and then layered the entire panel onto a piece of Distress Heavystock ink blended using the same colors and technique that I used on the frame.


Thanks so much for your visit today! I hope you're inspired to create something using the Tim Holtz Brushstroke Flowers 1 and the Alphanumeric Stretch Thinlits. As always, if you have any questions about this project please reach out either in the comments here or you can also DM me on Instagram.

Supplies

Below you can find the products I used to create this project along with compensated affiliate links to Scrapbook.com. These links are at absolutely no extra cost to you. If you want to learn more about what an affiliate link is, you can see my full affiliate and product disclosure statement here

Subscribe