Happy Halloween Shaker Box Card

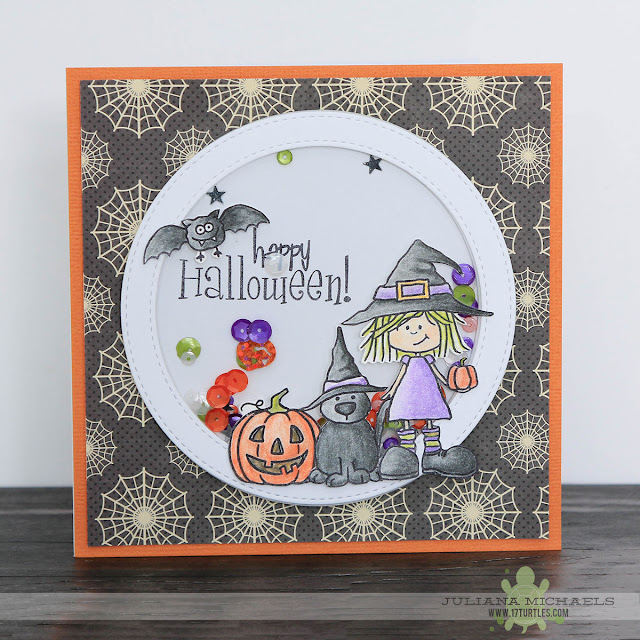
Happy Halloween my crafty friends! Today I'm sharing a Halloween shaker box card that I created using a combination of super fun products from SRM Press, MFT Stamps, Pretty Pink Posh and Jillibean Soup.

Happy Halloween Shaker Box Card by Juliana Michaels featuring SRM Stickers Jane's Doodles Stamps, Pretty Pink Posh Sequins, MFT Stamps Dies and Jillibean Soup Paper

I started off by stamping several of the images from the SRM Stickers / Jane's Doodles Get Candy stamp set with Ranger Archival Ink in black. I colored in each of the images using colored pencils and blended the colors using gamsol and blending stumps.  Finally, I fussy cut each of the images.

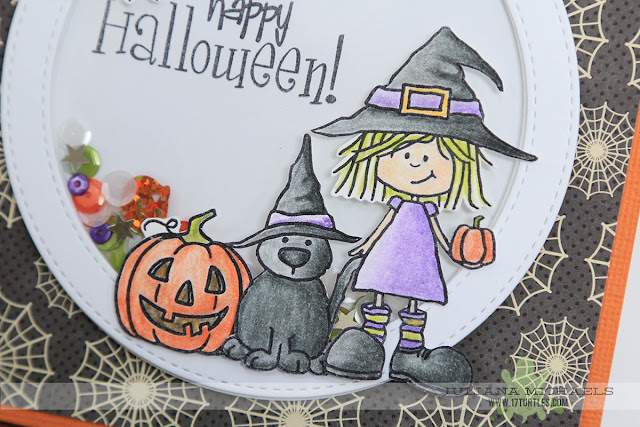
Happy Halloween Shaker Box Card by Juliana Michaels featuring SRM Stickers Jane's Doodles Stamps, Pretty Pink Posh Sequins, MFT Stamps Dies and Jillibean Soup Paper

To create the shaker box, I used the MFT Stamps Die-namics Stitched Circle Frames. Those awesome sequins are from Pretty Pink Posh and I added my own touch with the tiny silver stars. 

Happy Halloween Shaker Box Card by Juliana Michaels featuring SRM Stickers Jane's Doodles Stamps, Pretty Pink Posh Sequins, MFT Stamps Dies and Jillibean Soup Paper

I then layered the shaker box onto a piece of paper from the Jillibean Soup Owloween Stew 6x6 Paper Pad and American Crafts cardstock.

Happy Halloween Shaker Box Card by Juliana Michaels featuring SRM Stickers Jane's Doodles Stamps, Pretty Pink Posh Sequins, MFT Stamps Dies and Jillibean Soup Paper

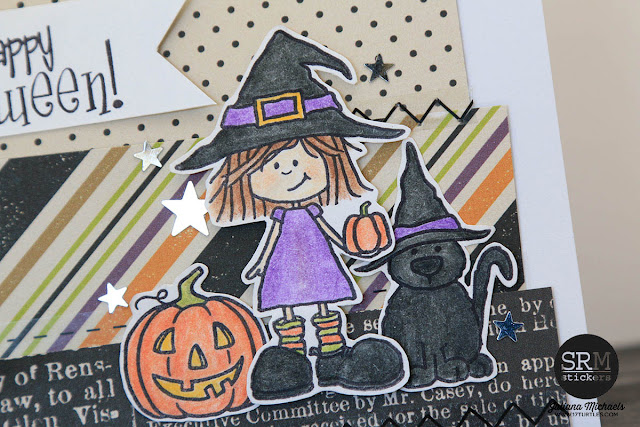
If you are looking for more Halloween card inspiration using the adorable Get Candy Stamp Set by Jane's Doodles you can check out another Happy Halloween card I created and that is on the SRM Stickers blog.

Happy Halloween Shaker Box Card by Juliana Michaels featuring SRM Stickers, Jane's Doodles Stamps and Echo Park Paper

Thanks so much for stopping by today and I hope you enjoyed the Halloween card ideas I shared with you today!

Supplies | Happy Halloween Shaker Box Card
Pretty Pink Posh Sequins

Dollar Tree Halloween Skull Decor

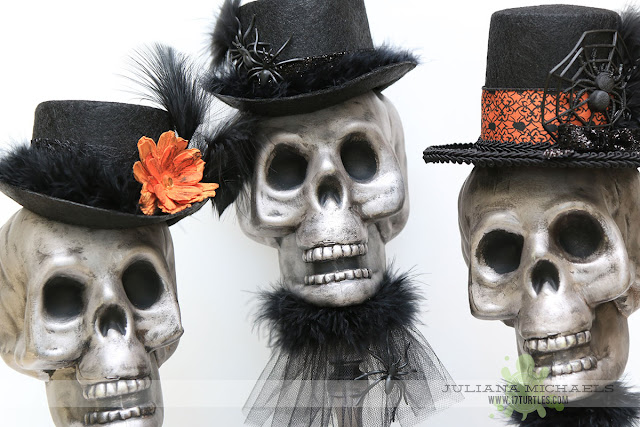
Well, the Dollar Tree has done it again for my Halloween decorations this year. I had no idea that some Dollar Tree plastic skulls could turn into such awesome Halloween Decor!

The idea for this project started as I was looking for Halloween inspiration on Pinterest. I came across a tutorial on how to alter the Dollar Tree skulls, but I didn't have all of the recommended products. I really didn't want to go and buy everything that they used, so I ended up using the products I already owned to alter them.

Dollar Tree Halloween Decor using Plastic Skulls by Juliana Michaels

Supplies
Dollar Tree Plastic Skulls
Wood Candle Stick Holders
1/4" Wooden Dowel Rod
Valspar Spray Paint (Color Radiance Paint + Primer) - Flat White
Rub N Buff - Pewter
Acrylic Paint - Black
Rags - Old T Shirt
Felt Doll Hats
Embellishments: Ribbon, Trim, Tulle, Lace, Fur Trim, Plastic Spider, Paper Flower, Feathers
Hot Glue Gun
Straight Pins

Tutorial | Dollar Tree Halloween Decor

Painting the Skulls

  • Spray paint the plastic skull with the paint/primer spray paint.
  • Once the paint is dry, paint the skull with black acrylic paint. You could also use spray paint here, but I didn't have any black spray paint and I was trying to keep my cost down.
  • After the black paint is dry, apply the Pewter Rub N Buff following the directions on the tube. Work in very small sections when applying this or it will remove the paint you have already applied.
  • Now, you get to paint the skull again with the acrylic paint. This time you do not want to use a spray paint. Apply the paint liberally with a foam brush or even a soft rag and then let it start to dry. Make sure to get the paint into the crevices of the skull. Before it is completely dry, wipe off the excess with a rag.
  • To make the eye sockets black, I applied the black acrylic paint with a small paint brush.
  • Don't be afraid to apply more Rub N Buff and black paint in areas until you get the look you desire.
Disclaimer: 
I will say that I found the paint was easy to scratch off the skulls. I wonder if I had used a primer made only for plastic if that would have helped. The Valspar paint that I used said it was for use on plastic, however, I think the quality of the plastic used on these skulls make it difficult for paint to adhere well. I recommend that you handle them with care. You can also touch up any scratched off areas with a Silver Krylon Leafing Pen. Just use your finger to wipe on the paint and it will blend in well.

Painting the Candlesticks:
  • Paint them with black acrylic paint.  
  • After the paint is dry,  apply the Pewter Rub N Buff and cover the candlestick. 
  • Next,  apply the black acrylic paint and wipe off the excess before it is completely dry. This is the same process that I used on the skulls.
  • To decorate the top of each candlestick, adhered a piece of ribbon or trim using a hot glue gun.
Attaching the Skulls to the Candlestick:
I attempted various methods to adhere the skulls to the candle sticks. They would not stick using my low temp hot glue gun. This is the best method I found: 
  • Cut a 3 inch length of a 1/4" wooden dowel rod. Position the dowel rod into the opening on the candlestick holder where the candle would go.  Apply hot glue while holding the dowel rod in position and allow the glue to completely cool.
  • Take a Philips head screw driver and widen the hole that is on the bottom of each skull. If there is not a hole use a drill to make a hole. 
  • Insert the dowel rod into the hole on the bottom of the skull. If you want the skull to be more secure you can add some hot glue at this point and it will help hold it in place.
Dollar Tree Plastic Skull

Dollar Tree Halloween Decor using Plastic Skulls by Juliana Michaels

Dollar Tree Halloween Decor using Plastic Skulls by Juliana Michaels

Painting the Candlesticks:
  • Paint them with black acrylic paint.  
  • After the paint is dry,  apply the Pewter Rub N Buff and cover the candlestick. 
  • Next,  apply the black acrylic paint and wipe off the excess before it is completely dry. This is the same process that I used on the skulls.
  • To decorate the top of each candlestick, adhered a piece of ribbon or trim using a hot glue gun.
Attaching the Skulls to the Candlestick:
I attempted various methods to adhere the skulls to the candle sticks. They would not stick using my low temp hot glue gun. This is the best method I found: 
  • Cut a 3 inch length of a 1/4" wooden dowel rod. Position the dowel rod into the opening on the candlestick holder where the candle would go.  Apply hot glue while holding the dowel rod in position and allow the glue to completely cool.
  • Take a Philips head screw driver and widen the hole that is on the bottom of each skull. If there is not a hole use a drill to make a hole. 
  • Insert the dowel rod into the hole on the bottom of the skull. If you want the skull to be more secure you can add some hot glue at this point and it will help hold it in place.
Attaching the Hats to the Skulls:
You are going to love this...I used straight pins. Yes, like the ones you use for sewing. You have to push pretty hard to get them through the plastic, but it works. Again, I did not have luck with my hot glue gun to attach them to the skulls.

Dollar Tree Halloween Decor using Plastic Skulls by Juliana Michaels

As you can see each, I decorated each skull's hat just a little differently using a variety of ribbon, trim and other fun embellishments. I used a hot glue gun to adhere the embellishments to the hat.
Dollar Tree Halloween Decor using Plastic Skulls by Juliana Michaels

Dollar Tree Halloween Decor using Plastic Skulls by Juliana Michaels

Dollar Tree Halloween Decor using Plastic Skulls by Juliana Michaels

I am seriously in love with these and how they look decorating my house! I also love how they coordinate perfectly with my Dollar Tree Halloween Door Decor that is back in action again this year!


Linked and Shared on The Pin Junkie Pin Party #139

If you're looking for another great Dollar Tree Halloween project, check out my Dollar Tree Deco Mesh Wreath.

Dollar Tree Deco Mesh Halloween Wreath by Juliana Michaels


Halloween Scrapbook Page Ideas

Hello all! I hope your week is off to a great start. This weekend I took a trip to visit my nieces and we had a really great time together. I got to see lots of volleyball and soccer games. We also went to a pumpkin patch and corn maze! However, the thing I enjoyed the most was helping them pick out their Halloween costumes. Imagine that being my favorite thing! I even added a few custom touches to them with some craft supplies and a glue gun. We finished up everything really late on the night before I left, so I don't have any pictures to share, but their mom has promised to take some and send them to me!

Today, I'm sharing a Halloween scrapbook page that I created for the September issue of Create Magazine.

Toil and Trouble Halloween Scrapbook Page by Juliana Michaels featuring Echo Park Paper, Tim Holtz, Jolee's Boutique and Therm O Web Adhesives

This layout was created for their Fall / Halloween theme. As you know, I love Halloween, so it was an easy choice for me to pick Halloween.

Toil and Trouble Halloween Scrapbook Page by Juliana Michaels featuring Echo Park Paper, Tim Holtz, Jolee's Boutique and Therm O Web Adhesives

To create my layout, I used the new Echo Park Paper Hocus Pocus collection. Along with the great stickers include with this collection, I added some fun embellishments from Tim Holtz and Jolee's Boutique.  Aren't those skulls super cool?

Toil and Trouble Halloween Scrapbook Page by Juliana Michaels featuring Echo Park Paper, Tim Holtz, Jolee's Boutique and Therm O Web Adhesives

This layout is another photo from our Halloween party from 2013. I'm really looking forward to this year's party and getting some more photos to scrap!

Toil and Trouble Halloween Scrapbook Page by Juliana Michaels featuring Echo Park Paper, Tim Holtz, Jolee's Boutique and Therm O Web Adhesives

I also have another Halloween layout to share with you today over on the Therm O Web blog. This layout also features the Echo Park Hocus Pocus collection along with the brand new Black Deco Foil from Therm O Web! I used it to create some spooky spider web die cuts. You can see a peak of it here.  Make sure you visit the Therm O Web blog to see my full layout and to download the free Spider Webs digital cut file.

Wicked Halloween Scrapbook Page by Juliana Michaels featuring Echo Park Paper, Tim Holtz, and Therm O Web Deco Foil and Adhesives

For even more Halloween Scrapbook Page Ideas check out this post: Halloween Scrapbook Page Ideas with Jillibean Soup

I also recently shared some Halloween Digital Cut Files that you can download - Halloween Icons.

Thanks for stopping by today and I hope you enjoy the Halloween inspiration and free cut files!

Halloween Mason Jars & Coasters | Downloadable Digital Cut File

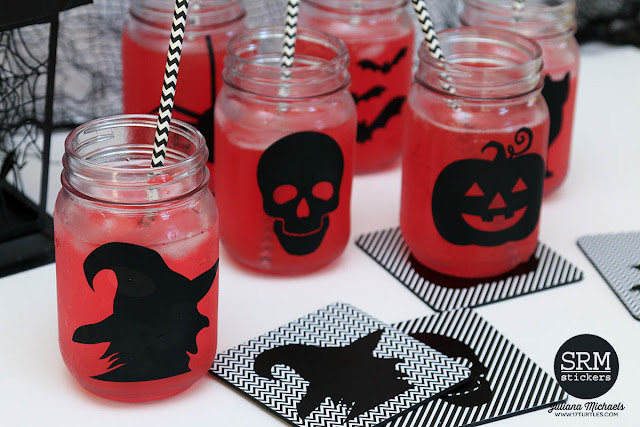
Hello friends! Today I'm up on the SRM Stickers blog with a faBOOlous Halloween project that I created using their adhesive patterned vinyl. I used it to decorate a set of Mason jars and coasters that are going to be perfect for our upcoming Halloween party!

Halloween Mason Jars and Coasters by Juliana Michaels featuring SRM Stickers Adhesive Vinyl

This is a little peek of my project. I invite you to head over to the SRM Stickers blog to check out all the details and to download the digital cut file - Halloween Icons - that I created and used on this project.

FREE DIGITAL CUT FILE | HALLOWEEN ICONS

Halloween Icons Free Digital Cut File by Juliana MIchaels 17turtles.com

Thanks so much for stopping by today and I hope you enjoy this new downloadable digital cut file!

A Fabulous Class | Die Cut Backgrounds

As you may already know, I'm teaching a class at Big Picture Classes called Stretch Your Cuts that teaches you different ways to get the most out of your electronic die cut machine and digital cut files.  But, did you know that there are other fabulous classes you can take that teach you more great things about your electronic die cut machine and cut files? Today, I want to share with you about a great class that I took called Die Cut Backgrounds, taught by the super talented Ashley Calder.


In this class you'll learn so many great thing about cut files, including how to...

  • get the most out of your background cut files
  • incorporate background cut files into your own personal style
  • hot tips on how to mix patterned paper and background cut files
  • kick up your layout style with layering tips using background cut files
  • use mixed media techniques with background cut files to personalize your pages
  • create your own background cut files

The class Die Cut Backgrounds also includes 6 free cut files that you can download and use on your own layouts. This class is a great compliment to what you learn in my class and it will most certainly help you expand your knowledge and creativity when using your electronic cutting machine and digital cut files.

Now, head on over and check it out! If you don't already have a membership to Big Picture Classes, you can always sign up for a free trail membership to explore these classes along with all the other great classes they offer.

Thanks for stopping by today!

But First Coffee Altered Wood Plank Home Decor

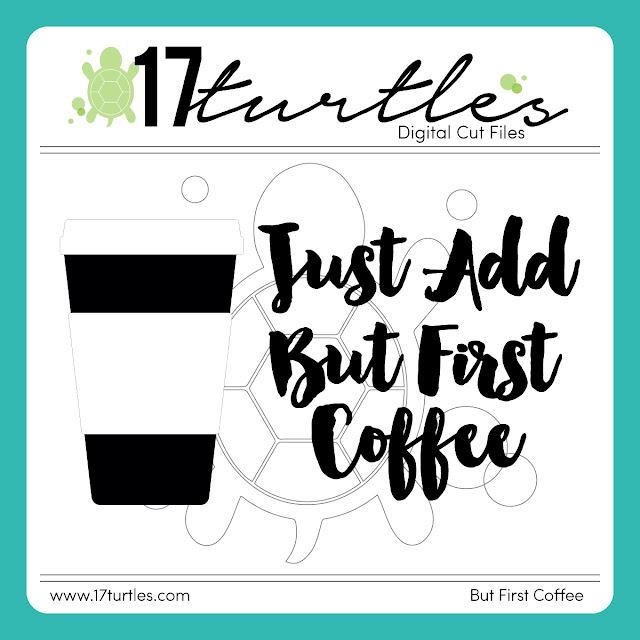
Today is the final day of the Fall Coffee Lovers Blog Hop and I decided to create one more project using the But First Coffee Digital Cut File that I created and used on my Good Days Start With Coffee and You Card.

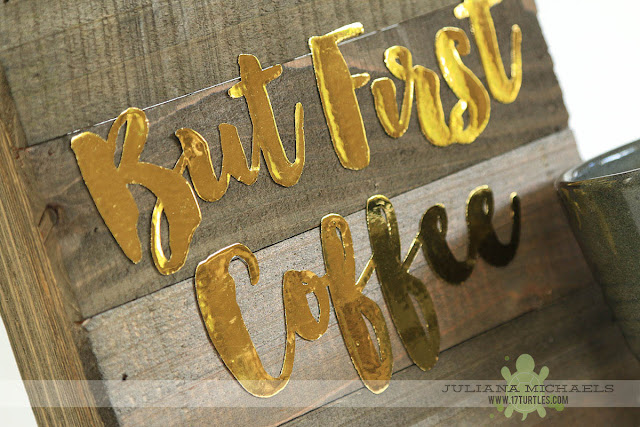
But First Coffee Altered Wood Plank by Juliana Michaels featuring Jillibean Soup Mix the Media Wood Plank and Therm O Web Deco Foil


But First Coffee Free Digital Cut File by Juliana Michaels 17turtles.com

For this project I used a Jillibean Soup Mix the Media 6x6 Wood Plank. These are so fun and easy to alter for one of a kind home decor pieces.

To create the gold foil saying, I used Therm O Web's iCraft Deco Foil Transfer Sheets in Gold and iCraft Hot Melt Adhesive. You can follow my Foiled Die Cuts Tutorial that I created and shared on theTherm O Web blog. I then adhered the die cut to the wood plank with adhesive.

But First Coffee Altered Wood Plank by Juliana Michaels featuring Jillibean Soup Mix the Media Wood Plank and Therm O Web Deco Foil

Thanks so much for stopping by today and I hope you have been enjoying the Fall Coffee Lovers Blog Hop as much as I have!
Subscribe