Hello friends! I'm back to share my latest project...a Field Notes Tag Book. This project was greatly inspired by tag books created by the amazingly talented Paula Cheney and Stacy Hutchison.
Paula first shared this tag book idea and then
Stacy shared her take on it. After seeing both of them I was inspired to create my own version. It also gave me the chance to play around with more of the techniques I've fallen in love with after watching Tim's Saturday FB Live Demos. If you've missed any of them, you can check them all out over on
Tim's blog.
I'm going to warn you now, this post is photo and information heavy. I wanted to share all the little details on the tag book with you, so I hope you don't mind.
CREATING THE BACKGROUNDS
Each of these tags was created specifically with this project in mind, but you can certainly grab already created tags from your tag stash to create your own version. I wanted a very color coordinated look, but don't be afraid to mix things up to fit your own style.
To get started, I die cut some #8 size tags from watercolor paper using the Framelits Tag Collection. Using Archival Ink in Vintage Photo, I stamped images on each tag using a mix of stamp sets including Flower Shop, Field Notes, Grunged, and Entomology.
I then picked out a stencil for each tag and and applied either Distress Texture Paste Matte or Crackle using a spatula. I know some makers have been sprinkling the embossing glazes onto the wet paste. I however, came up with a different look that I kind of like.
Once the texture paste was dry, I lightly and gently rubbed an embossing ink pad over the raised texture. Next, I sprinkled the tag with embossing glaze, tapped off the excess and embossed it with my heat gun. I love how areas of the tag are covered with embossing glaze and others aren't. This gives you space to ink and grunge up the tag even more. If you tend to be heavy handed, this technique might not be for you, but you can always give it a try and wipe the excess away if too much of the tag is covered up for your liking.
I added Weathered Wood and Peeled Paint Embossing Glazes to the tags. Once the embossing was complete, it was time to start grunging things up a bit!
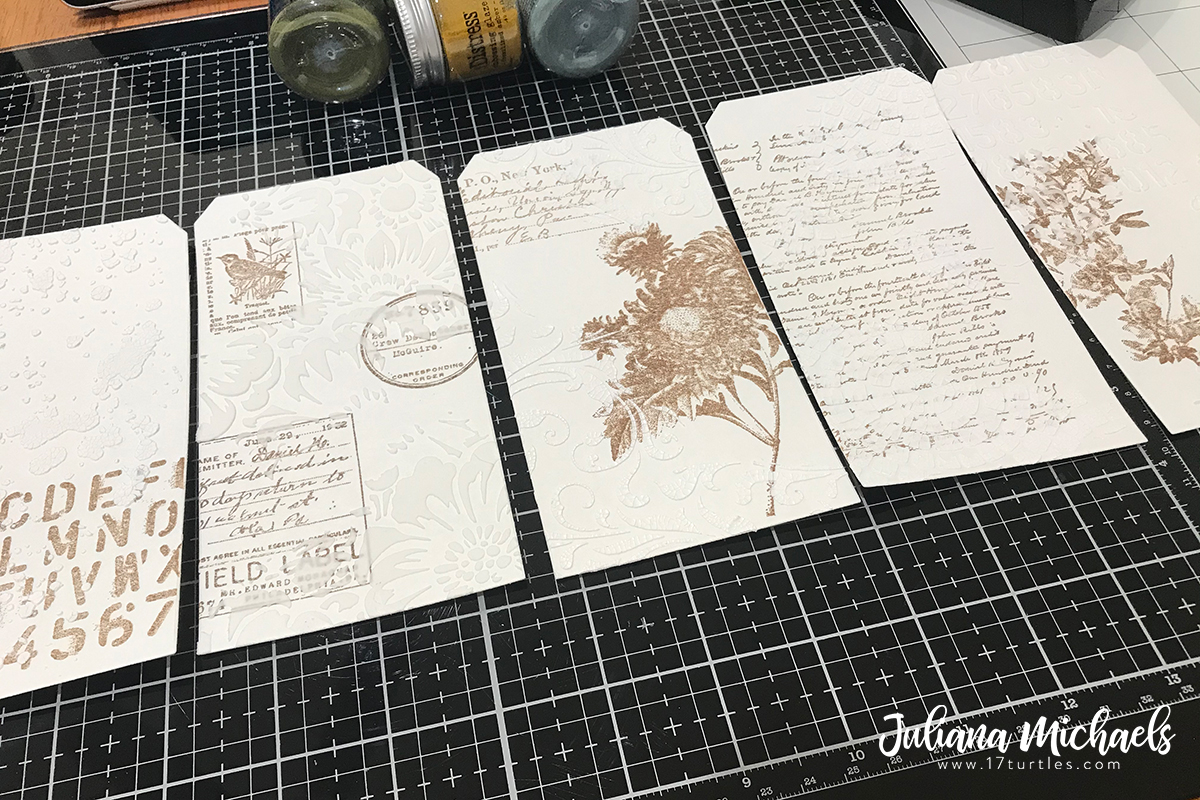
Here you can see what some of the tags looked like before I started the grunging process. I only ended up using the Old Paper Spray Stain though.
During this step, I inked the tags, focusing the ink to the edges and open areas. I applied Distress Oxide Ink using a foam blending tool. On the green tags I used Peeled Paint and Forest Moss and on the blue tags I used Weathered Wood and Faded Jeans. I recommend starting with the lighter ink and then adding the darker ink. I then inked the edges with Walnut Stain Distress Ink and spritzed each tag with water and then dabbed the water dry with a paper towel.
Unfortunately, I neglected to take photos of the next step where I added even more grunge using Distress Crayons. I applied a Walnut Stain over the stenciled areas on the green tags and Faded Jeans on the blue tags. I've learned so much recently about working with this medium and I really enjoy the depth and detail it brings out in project.
After I had completed the background for each tag and began assembling the tag book, I realized I didn't care for the back side to be left undecorated. For a quick and easy fix, I die cut some more tags from scraps of patterned paper and applied them to the back side of each tag using Collage Medium. I must thank my dear friend Katrina for this solution, who gave it to me during one of our crafty chats!
For complete details on how to assemble the tag book, please visit
Paula Cheney's blog.
EMBELLISHING THE TAGS
Now that the tag book base is completed, the next fun step begins...decorating each tag! I didn't have any Photobooth pictures which is what Paula and Stacy both used, so I reached for what I did have and love...die cuts and stamps with flowers and butterflies!
I stamped all of the images using Black Soot Archival Ink onto watercolor paper. The stamp sets I used are Flutter, Field Notes, and Ticket Booth. I then either fussy cut them or used the coordinating dies to cut them out.
To color the butterflies, I used Distress Ink and a waterbrush. I tapped the ink pad onto my craft mat and then picked up the color with a waterbrush. I used Faded Jeans, Stormy Sky, and Fossilized Amber Distress Ink.
For the tickets and other ephemera type images, I smooshed an Old Paper Distress Ink pad onto my craft mat, spritzed it with water and dragged and tapped the paper into the ink. I then dried it with my heat tool and if it needed more ink, I repeated the process. Next, I inked the edges with Walnut Stain Distress Ink and a foam blending tool. I then finished them off by spritzing them with my Distress Sprayer and dabbed them dry.
The die cut flowers are from the Thinlits Wildflower Stems 1 and 2 Die Set and are die cut from watercolor paper. I used a waterbrush to apply Distress Ink to the stems and the petals using the watercolor technique I also used on the stamps. I then added the tiny splatters with a fun little technique I accidentally discovered.
After watching Tim's videos, we have all learned how differently the glass mat works vs the non-stick craft mat for holding ink when you want to smoosh, drag or tap your paper into the ink applied there. He often spritzes the ink with water to get the ink to bead up more and even runs his finger through it to spread the ink out. Well, while I was watercoloring I ran my waterbrush through the ink and saw that it created tiny droplets of ink, much smaller than the spritzing with the Distress Sprayer. I took the watercolored images and tapped them into the tiny ink dots and came away with these tiny ink specks, that I just love!
The woodgrain frames were created by die cutting a piece of watercolor paper using the Bigz Decor Frame Dies. To achieve the wood grain look, I embossed them with the 3D Lumber Embossing Folder. I then inked them with Walnut Stain Distress Ink and applied Walnut Stain Distress Crayon to pull out the texture.
The final embellishment are the die cut butterflies from the Scribbly Butterflies Thinlits. These are die cut from watercolor paper and then stamped with images from the Field Notes and Entomology Stamp Sets in Vintage Photo Archival Ink. I then inked them with Fossilized Amber Distress Ink.
TAG BOOK TIE CLOSURE
To create the tie closure on my tag book, I inked up some Hug Snug Rayon Seam Binding with Distress Sprays in Stormy Sky, Faded Jeans, Old Paper and a tiny bit of Walnut Stain.
I hope you enjoyed this detailed but lengthy share on how I created my Field Notes Tag Book. Here are a few more photos for you to enjoy.
SUPPLIES