The Secret to Creating Stunning Card Designs

Do you ever wish you knew all the secrets of creating stunning card designs? Are you always looking for inspiration and ideas to use your stash of supplies? If you answered yes to either or both of these, then I think I might have the answer for you. It's called the Card Maker Success Summit and I'm delighted to announce that I'll be one of the speakers at this upcoming event. If you aren't familiar with what a Summit is, let me share a little bit more about what this event is with you. If you aren't familiar with what a Summit is, let me share a little bit more about what this event is with you.


The Card Makers Success Summit is a 4 day, virtual event that's happening March 7-10, 2024. Over those 4 days myself and 45+ other talented educators will be sharing a variety of card making classes for you to choose from with a variety of styles and techniques. If this sounds interesting to you, then I encourage you to grab your free ticket.

Here's what you get with the FREE TICKET:

• Access to the event schedule
• 24 hour access to each days presentations
• Access to a downloadable PDF for each class with a full supply list and written instructions
• Access to the Facebook group
• Access to live Q&A with the experts
• Chances to win prizes

There will also be a short kick off on March 6 at 7PM EST to explain all the details.

After you get your free ticket and the event starts on March 7th, you'll have access to the classes for a 24 hour period of time. Each presentation will be available to you for 24 hours from 8am EST to 8am EST the following day - so regardless of your time zone, you can enjoy all the presentations when it's convenient for you!

Once they are available, you can pick and choose which classes you want to watch during that 24 hour period. Each day there will be a different group of classes for you to enjoy and after that 24 hour period those classes will no longer be available, but the next day of classes will be. If you do the math, with over 45 instructors over the 4 days, there will be over 10 classes a day to pick and choose from! That is a lot of great techniques and inspirations for free!

Don't worry if you don’t have Facebook. You can still participate in the events without missing any of the speaker content as all of the videos are hosted in a private classroom on the Card Makers Success Summit website that you get access to once the event starts. The live Q&A events can be viewed on the Stamp Me Some Love Facebook page, Facebook Attendee Group, AND on Youtube.

GET YOUR FREE TICKET HERE!


As I've already mentioned, this event is absolutely free. BUT, if you're feeling overwhelmed and afraid you can't enjoy all of the videos that you're interested in, want to be able to watch them a second time or already have plans during the event, then you might want to consider the VIP All Access Pass.

Here's what you get with the VIP All-Access Pass:

• Immediate and ongoing access to 45+ awe-inspiring presentations (yes, you can start watching the presentations right now!)
• A comprehensive 300+ page digital workbook overflowing with inspiration
• A virtual card making crop over Zoom, where you can revel in the joyful art of card making alongside fellow enthusiasts on March 9th
• Premium bonus content from the speakers, including SVG files, exclusive courses, free memberships, fabulous discounts, and more!

To get the VIP All Access Pass you have to sign up for your free ticket, then you'll have the opportunity to grab the VIP All Access Pass at the low price of $39. This price is only good for the first 20 minutes once you sign up for the free ticket. After that, the price will increase to $59.

I also want to share with you that if you use my link to purchase the VIP All Access Pass that is how I am making money. The instructors are not paid ahead of time. The only way we benefit from this is if you purchase the VIP All Access Pass using our link. So feel free to support me or your favorite instructor if you decide to purchase one. I'm sharing this information with you just to be upfront and honest about things. This is in no way meant to make you feel pressured to purchase anything. You can fully enjoy the event with the free ticket.

If you do decide to purchase the VIP All Access Pass through my link, you will receive access to my Debossed Ink Resist Technique Class for FREE. This is just my way of thanking you for your support!

MY PRESENTATION

And last but not least, my presentation will go live on Friday, March 8 at 8AM EST. The class I'll be teaching for the event is this Masculine Mixed Media Cards with Fabulous Faux Metal Techniques. My live Q&A will be at 11 AM EST on March 8.

Here's a review of your ACTION STEPS:

  1. Grab your free ticket HERE. You will then receive an email from Brandi Mahon, the host of the summit with your free ticket.
  2. Read the email and make sure to hang on to it because it has loads of important information about the event. You can check out a FAQ page, join the Facebook group, or subscribe to the Stamp Me Some Love YouTube Channel. (You can view the livestreams on YouTube if you aren't on Facebook.) You can also find a link to the schedule of events.
  3. Click the link for the event schedule. When you click that link make sure to scroll down to see who is presenting each day. You'll be able to see who each of the presenters are and an image of the project they are sharing in their presentation. 
  4. Once you see the presenters and projects plan which classes sessions you want to attend. 
  5. Then just sit back and watch all weekend long March 7-10.
  6. If you are feeling overwhelmed with wanting to take in ALL of the presentations or the dates don't work with your schedule, just remember you can always grab the VIP All-Access Pass.

The countdown to this amazing card making extravaganza has begun, and I'm so excited to share this incredible journey with you! If you have any questions about this event, feel free to reach out to me. 

I can't wait to see you there!

Presence of Wonder Embroidery Hoop

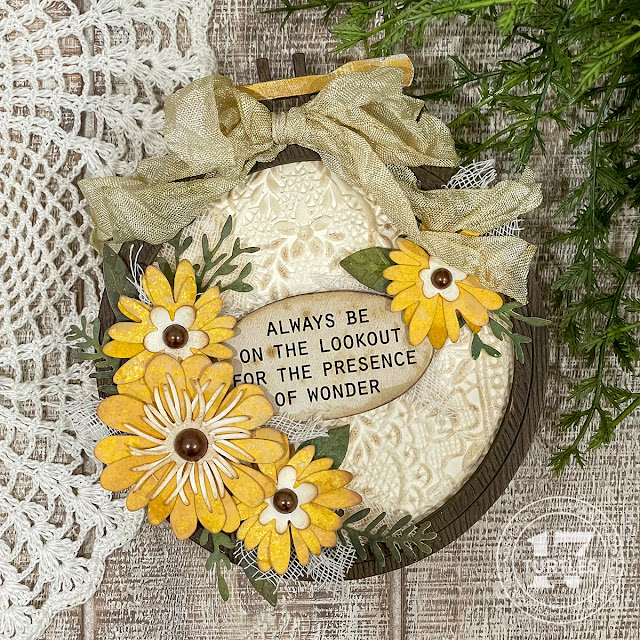
Outside the birds are chirping, the sun is shining and it feels like spring is coming! It's hard to believe that where I live, snow is in the forecast for tomorrow. But, I'm not going to let that get in the way of sharing a spring inspired project I just created using some of the latest dies and embossing folders from Sizzix. While there is no video for this project, I will share how I put together this Presence of Wonder Embroidery Hoop. So grab a cup of your favorite brew and check it out below.

An embroidery hoop made from paper with an embossed paper lace background. Handmade yellow flowers and green leaves made from paper surround a chipboard sentiment piece that says "always be on the look out for the presence of wonder".

If you’re interested in any of the supplies used to create this project, you can find a complete supply list at the end of this post. When you shop through those affiliate links you’re helping me continue to be able to provide you with all the content I share.

PRESENCE OF WONDER EMBROIDERY HOOP


The base of this project is made using the Eileen Hull Embroidery Hoop Bigz Die. I cut it twice from Mat Board and once from Distress Woodgrain. I also cut just the top part from gold metallic kraftstock and trimmed it to create the brass screw closure. I adhered the Mat Board and the Distress Woodgrain layers together, placing the woodgrain paper on top. Next I painted these with Distress Paint in Gathered Twigs and let it dry. Once dry, I applied  Distress Paint in Scorched Timber. Working in small 1 inch sections, I applied the paint to get it down into the woodgrain texture and then lightly rubbed over it with a damp cloth to remove the paint on the surface. This helped make the woodgrain texture more visible. I then set this to the side to dry. I then painted around the brass screw area with Distress Paint in Tarnished Brass and once that was dry I adhered the gold metallic kraftstock piece.


To back the embroidery hoop, I used the Sizzix Circles Dies to cut a piece of Distress Mixed Media Heavystock. Any circle die that is close to the size of the embroidery hoop will work. If it's slightly larger, you can trim off the excess with scissors. After die cutting it, I then embossed it using the Eileen Hull Lace 3D Embossing Folder. This design is absolutely stunning! I then lightly rubbed a foam blending tool over the top of the textured design to make it more visible. The blending tool had been inked with Vintage Photo Distress Oxide Ink and used already, so there was very little ink on the blending tool. I then adhered this piece to the back side of the embroidery hoop.


For the flowers, I began by inking piece of Distress Mixed Media Heavystock. I spritzed the paper with water and then sprayed it here and there with Mustard Seed Distress Spray Stain, Fossilized Amber Distress Oxide Spray and Scattered Straw Distress Oxide Spray. I then dried this with my heat tool. For the flower centers I used plain Distress Mixed Media Heavystock.


For the leaves, I used the same paper and technique, but sprayed this piece with Mowed Lawn Distress Spray, Peeled Paint Distress Oxide Spray and Forest Moss Distress Oxide Spray.


I then die cut the papers using some of the flowers and leaves from the Tim Holtz Vault Funky Wreath Die Set. The large flower is from the Sizzix Fabulous Bold Florals Die Set. I cut two of the centers for the large flower and two of the petals for each of the flowers. Next I used the Tim Holtz Shaping Kit to give the flowers a little dimension. I then lightly inked the edges of the flower centers and petals with Vintage Photo Distress Ink. It was then time to assemble the flowers and leaves. I used the new to me Precision Glue Press and loved how easy it was to apply the adhesive. For the flower centers I used Tim Holtz Droplets which were a seasonal item and no longer available, but any sort of enamel dot or pearl would work.


Once all of the pieces were assembled I began arranging them on the hoop. I adhered them with a combination of the Glue Press and double sided foam squares. I also tucked in small snippets of Mummy Cloth to add a little texture.

The sentiment is a Tim Holtz Quote Chip. Before adhering it to the center of the hoop, I painted the edges with Scorched Timber Distress Paint.


The final touch was the addition of a bow created from seam binding. I cut a length of the ribbon, sprayed it with water and then sprayed it with Old Paper Distress Spray Stain. Next, I wrinkled it up and dried it with my heat tool. I then tied it in a bow and adhered it to the front of the embroidery hoop.


I hate that I didn't get a video together for this project, but I'm giving myself some grace about doing a video for every piece I make. The reality is that the video making takes a little bit away from my creative process and flow and I really needed to just make and enjoy the process and not worry about the recording. Thanks for your understanding. If you have any questions, don't hesitate to reach out to me. I'll be back soon enough with another video to share with you. Until next time, stay crafty my friend!

SUPPLIES

Below you can find the supplies I used to create these cards. When you shop through the links below, I receive a small commission from Scrapbook.com. These links are at no cost to you and the commission I receive helps me cover the costs of my blog and other expenses, and allows me to continue to provide you with FREE inspiration and tutorials. If you want to learn more about what an affiliate link is, you can see my full affiliate and product disclosure statement here. Thank you so much for your love and support!

Even More Ways to Use Distress Watercolor Pencils

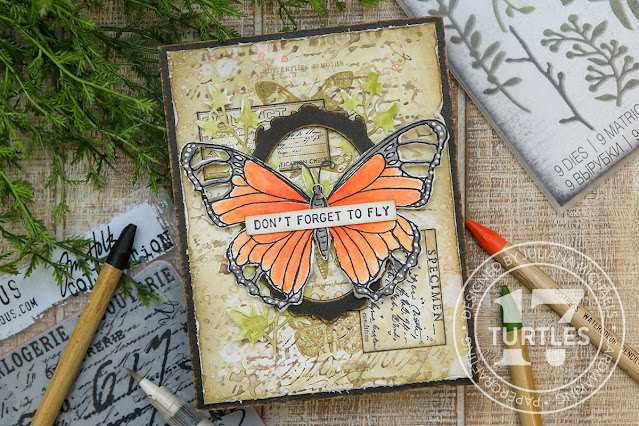
Hello there! In my latest video I’m sharing even more ways to use Tim Holtz Distress Watercolor Pencils and walking you step by step through how I used them to create this card. I used them on everything from the background to the embellishments!
Don't Forget to Fly Card by Juliana Michaels featuring Tim Holtz Distress Watercolor Pencils

Personally, I’m very excited that the entire Distress palette is now available in this medium and I that I now have another option when it comes to adding color to my projects. For me there is also a certain level of comfort in using them because I already know the Distress color palette really well and know what the colors are going to look like when I use them. And while you can use Distress Inks to achieve many of these same effects, I love that I’m not wasting ink and I feel like I have a little more control in adding color if I use them to color directly onto the paper.

You can either watch the video below or head over to my YouTube Channel HERE to check it out.


If you’re looking for more ideas and techniques using the Distress Watercolor Pencils, make sure to check out my Distress Watercolor Pencils Playlist. You can find a link to that in the description box below.


If you’re interested in any of the supplies I’m using in this video, you can find a complete supply list at the end of this post. When you shop through those affiliate links you’re helping me continue to be able to provide you with all the content I share. 

DON'T FORGET TO FLY CARD | DISTRESS WATERCOLOR PENCILS


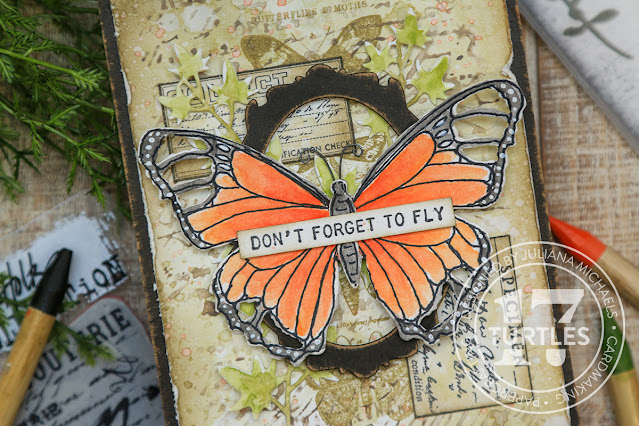
Here are some detail images of the card I create in the video. The finished size is A2 - 4.25 x 5.5 inches.

Don't Forget to Fly Card by Juliana Michaels featuring Tim Holtz Distress Watercolor Pencils

Don't Forget to Fly Card by Juliana Michaels featuring Tim Holtz Distress Watercolor Pencils

Don't Forget to Fly Card by Juliana Michaels featuring Tim Holtz Distress Watercolor Pencils

Don't Forget to Fly Card by Juliana Michaels featuring Tim Holtz Distress Watercolor Pencils

I’m so glad you stopped by today and I want to thank you for your visit. I hope you enjoyed this bit of inspiration using the Tim Holtz Distress Watercolor Pencils. So what was your favorite technique, tip or trick that I shared? Feel free to leave me a reply in the comments below! Until next time stay crafty my friend!

SUPPLIES

Below you can find the supplies I used to create these cards. When you shop through the links below, I receive a small commission from Scrapbook.com. These links are at no cost to you and the commission I receive helps me cover the costs of my blog and other expenses, and allows me to continue to provide you with FREE inspiration and tutorials. If you want to learn more about what an affiliate link is, you can see my full affiliate and product disclosure statement here. Thank you so much for your love and support!

Loads of Ideas for Love Notes

Hello there! Whether you celebrate Valentine's Day or not, I truly believe love should be celebrated all year long and it's always a great excuse for making stuff. And to give you a little more incentive, Tim Holtz just released a special loved themed stamp set called Love Notes that is available NOW!

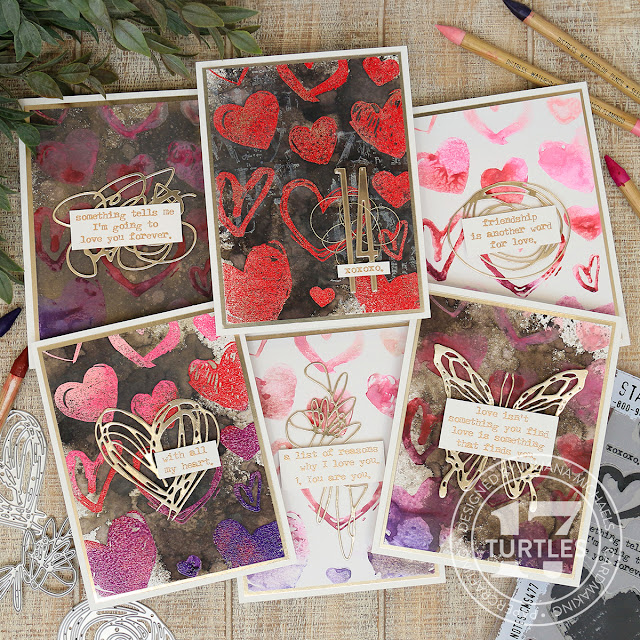
Valentine's Day Cards by Juliana Michaels featuring Tim Holtz Stampers Anonymous Love Notes Stamp Set

In my latest video I'm sharing multiple ways to use the new Love Notes Stamp Set from Tim Holtz and Stampers Anonymous. I’m mixing it up with everything from Embossing Glaze, to Distress Sprays and even Watercolor Pencils. There are loads of ideas, techniques, tips and tricks sprinkled throughout. You can follow along and create one of each like I did, or you can pick your favorite and mass produce it. And even if you don’t have this exact stamp set, feel free to use something similar that you already have. I just recommend that you use a stamp set that has a more solid bold design like this one.

You can watch the video below or head over to my YouTube channel to watch it HERE. And while you're there, make sure to subscribe and turn on notifications so you never miss one of my videos.


If you’re interested in any of the supplies I’m using in this video, you can find a supply list at the bottom of this post.

LOADS OF IDEAS FOR LOVE NOTES | TIM HOLTZ STAMP SET

Below you can find photos of each of the cards I create and share in the video. I've shared them in here the order that I share how I created them in the video.

BACKGROUND NO. 1

XOXOXO Valentine's Day Card by Juliana Michaels featuring Tim Holtz Stampers Anonymous Love Notes Stamp Set

BACKGROUND NO. 2

With All My Heart Valentine's Day Card by Juliana Michaels featuring Tim Holtz Stampers Anonymous Love Notes Stamp Set

BACKGROUND NO. 3

Friendship is Another Word for Love Valentine's Day Card by Juliana Michaels featuring Tim Holtz Stampers Anonymous Love Notes Stamp Set

BACKGROUND NO. 4

Love Isn't Valentine's Day Card by Juliana Michaels featuring Tim Holtz Stampers Anonymous Love Notes Stamp Set

BACKGROUND NO. 5

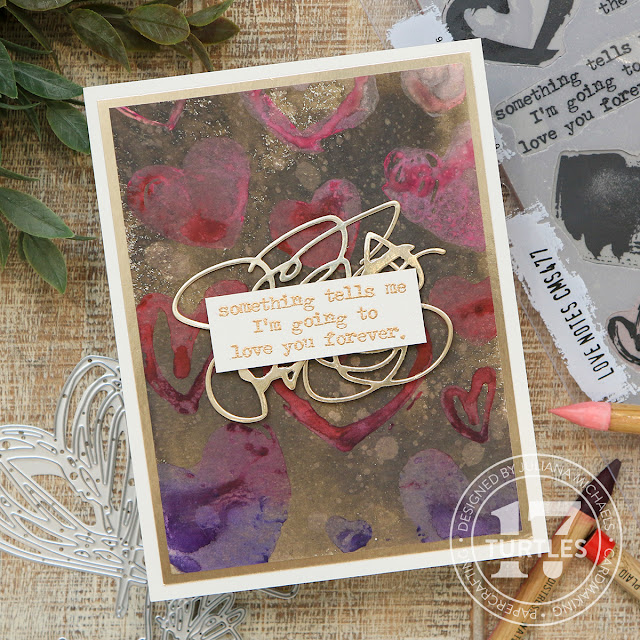
Something Tells Me Valentine's Day Card by Juliana Michaels featuring Tim Holtz Stampers Anonymous Love Notes Stamp Set

BACKGROUND NO. 6

Why I Love You Valentine's Day Card by Juliana Michaels featuring Tim Holtz Stampers Anonymous Love Notes Stamp Set

Thanks so much for stopping by today. I hope you got loads of ideas for using the Tim Holtz Stampers Anonymous Love Notes Stamp Set or for your next crafty project. Until next time stay crafty my friend!

SUPPLIES

Below you can find the supplies I used to create these cards. When you shop through the links below, I receive a small commission from Scrapbook.com. These links are at no cost to you and the commission I receive helps me cover the costs of my blog and other expenses, and allows me to continue to provide you with FREE inspiration and tutorials. If you want to learn more about what an affiliate link is, you can see my full affiliate and product disclosure statement here. Thank you so much for your love and support!

Stretch Your Stash | 6 Ways To Use the Same 3 Supplies

Are you looking for ways to get the most of out your supplies? Let me help you stretch your stash! In this video I've come together with my friend Mary Polanco to share 6 Ways To Use the Same 3 Supplies. Over on my YouTube channel, I'm sharing 3 ideas and Mary is sharing 3 more on her YouTube channel. And while our styles are on opposite sides of the spectrum from each other (I’m more mixed media and she’s more clean and simple), we thought it would be fun to bring our 2 worlds together and share with you how you can take the exact same supplies and use them in so many different ways!

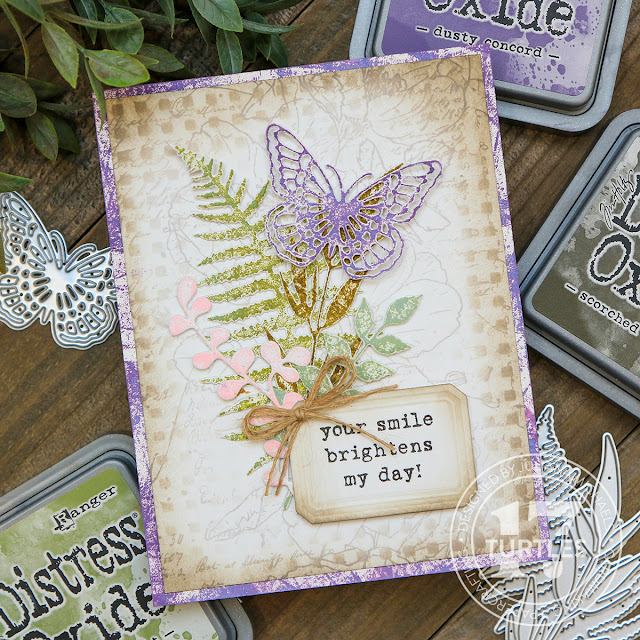
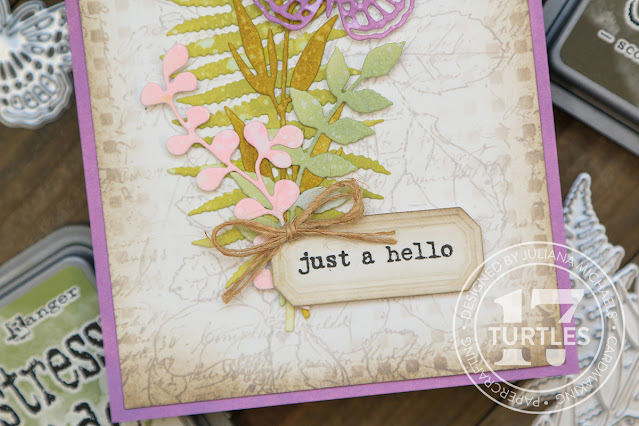
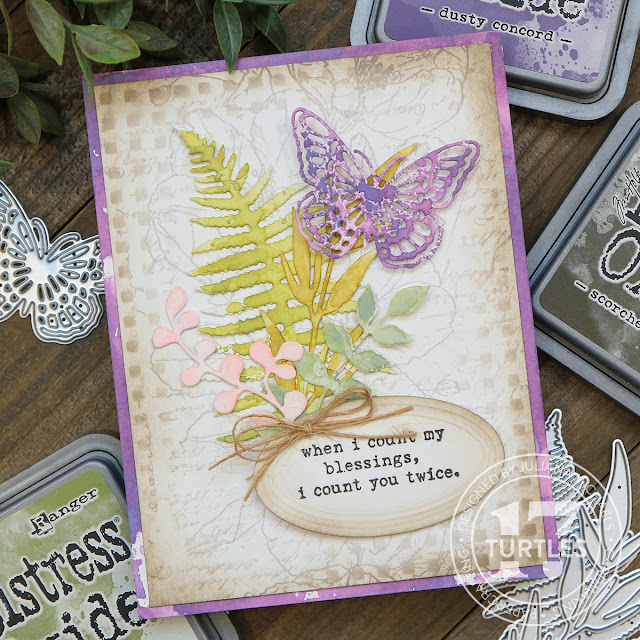
Stretch Your Stash | 6 Ways to Use the Same 3 Supplies Cards created by Juliana Michaels using 3 different techniques to color the die cuts using Distress Oxide Inks

The supplies we're both using are from Scrapbook.com and they include the Butterflies 1 Decorative Die Set, the Delicate Leaves Decorative Die Set and the Little Boxes Stencil. If you want to follow along you can certainly use these exact same products, but I’m willing to bet you may already have something very similar in your stash.

You can either watch the video below or head over to my YouTube Channel HERE to check it out. All of the supplies I used are linked at the bottom of this post. When you shop through the affiliate links below you are supporting me and helping me continue to provide you with all the content I share.

Once you finish watching my video, make sure you head over to Mary’s channel to check out her video for 3 more ways to use these same supplies.


Here is a closer look at the 3 cards I create in the video. For each one I share a different technique using Distress Oxide Inks on the die cuts. The finished size for each card is 4.25 x 5.5 inches.

TECHNIQUE NO. 1 | DIRECT TO PAPER


Card with die cuts colored using a direct to paper ink technique with Distress Oxide Inks


TECHNIQUE NO. 2 | INK SMOOSHING


Card created using an ink smooshing technique with Distress Oxide Inks


TECHNIQUE NO. 3 | INK BLENDING


Card created using an ink blending technique with Distress Oxide Inks


I’m so glad you stopped by today and I want to thank you for your visit. I hope you enjoyed this fun collaboration and learning how you can take the same supplies and use them in so many different ways!

Until next time stay crafty my friend!

SUPPLIES

Below you can find the supplies I used to create these cards. When you shop through the links below, I receive a small commission from Scrapbook.com. These links are at no cost to you and the commission I receive helps me cover the costs of my blog and other expenses, and allows me to continue to provide you with FREE inspiration and tutorials. If you want to learn more about what an affiliate link is, you can see my full affiliate and product disclosure statement here. Thank you so much for your love and support!

Subscribe