Newton's Nook Designs | National Coffee Day Blog Hop

Welcome friends and Happy National Coffee Day! I'm super excited to be a part of a blog hop with Newton's Nook Design Team to celebrate this special day! As part of this hop we're sharing coffee themed inspiration with you using our favorite coffee themed Newton's Nook Designs stamps AND you have a chance to win a fun prize. Check out all the details below on how you can win. For even more coffee themed inspiration and fun, make sure to visit the Coffee Loving Cardmakers blog for another fabulous blog hop and a chance to win more prizes!

Pumpkin Spice Coffee Card

As a coffee lover myself, I couldn't help but to get in the mood by using one of my favorite coffee themed stamps from Newton's Nook called Fall-ing For You. I usually drink my coffee black, but as a special treat (and especially during this time of the year) I sure do love a pumpkin spice latte!
For this card, I randomly stamped the images onto a piece of watercolor paper using Scrapbook.com Premium Hybrid Ink in Black. I then colored in the images using Zig Clean Color Real Brush Markers and blended the colors using a water brush.

Pumpkin Spice Coffee Card by Juliana Michaels featuring Newton's Nook Designs Falling For You Stamp Set

For the sentiment, I used a scrap of water color paper. If you look closely you will see the edge of the paper from when it was removed from the spiral bound paper pad. It was one of those happy accidents as I was trying to use up a scrap of paper that was close to the size I wanted for the sentiment! Gotta love those kind of accidents! Before stamping the sentiment, I inked the paper with Distress Oxide in Antique Linen and added a bit of Vintage Photo to the edges. I then stamped the sentiment from the Fall-ing For You Stamp Set using Ranger Archival Ink in Coffee.

To complete the card, I "tied on" the sentiment with a bit of twine and then added a few enamel dots for a bit of color and interest.

Pumpkin Spice Coffee Card by Juliana Michaels featuring Newton's Nook Designs Falling For You Stamp Set

Blog Hop & Giveaway

Would you like to win a $25 store credit to Newton's Nook Designs online shop? We will choose one lucky winner from our to win! All you have to do is leave a comment on the NND blog and each of the Design Team blogs. You have until Sunday, September 30th at 9pm EST to comment. Winners will be announced on NND blog on Tuesday, October 2nd so please check back to see if you've won!

Check out all the awesome Design Team Blogs below to enter:

Sunny Studio Stamps 3rd Birthday Blog Hop


Hello friends and welcome to the Sunny Studio Stamps 3rd Birthday Blog Hop! I'm so excited to be a part of this year's celebration and to share a set of Christmas Gift Tags I created using some products from their brand new holiday release! It's been amazing to watch Sunny Studio grow and bloom these past few years and I'm so happy that I've been able to be a part of it. Today we're celebrating with a fun blog hop that includes loads of inspiration from some pretty talented card makers and what blog hop would be complete without some fabulous giveaways?!  Make sure to check out all the blog hop and giveaway details below!

Christmas Gift Tags

To create this set of Christmas Gift Tags, I began by die cutting the white cardstock using the Build A Tag No. 2 Dies. I then embossed each tag using the Cable Knit Embossing Folder. Yes, I said embossing folder! Sunny Studio now has added embossing folders to their line of products and I'm betting they are going to become a new favorite craft supply for you!

Christmas Gift Tags by Juliana Micheals featuring Sunny Studio Stamps Build A Tag No. 2 Dies, Alpaca Holiday Stamp Set, Cable Knit Embossing Folder and 6x6 Holiday Cheer Paper Pad

I then die cut a topper for each tag using some of the patterned paper from the Holiday Cheer 6x6 Paper Pad. I just have to tell you, the patterns and colors in this new paper pad are perfect for all of your holiday paper crafting projects. I love that there is a mix of colorful and festive patterns along with nice monochromatic patterns in the same cheerful colors!

Christmas Gift Tag by Juliana Micheals featuring Sunny Studio Stamps Build A Tag No. 2 Dies, Alpaca Holiday Stamp Set, Cable Knit Embossing Folder and 6x6 Holiday Cheer Paper Pad

Once the tag bases were created, I went about embellishing each tag with a different alpaca from the Alpaca Holiday Stamp Set. I stamped each image onto Neenah Classic Crest 110lb Smooth Solar White Paper using Memento Ink in Tuxedo Black. I then colored them in using Copic Markers. Once all of the coloring was complete, I die cut them using the coordinating Alpaca Holiday Die Set.

Christmas Gift Tag by Juliana Micheals featuring Sunny Studio Stamps Build A Tag No. 2 Dies, Alpaca Holiday Stamp Set, Cable Knit Embossing Folder and 6x6 Holiday Cheer Paper Pad

I paired each adorable alpaca with a present or two to create a cute little scene on each tag.

Christmas Gift Tag by Juliana Micheals featuring Sunny Studio Stamps Build A Tag No. 2 Dies, Alpaca Holiday Stamp Set, Cable Knit Embossing Folder and 6x6 Holiday Cheer Paper Pad

For this one, I added a stocking from the Happy Owlidays and some holly from the Foxy Christmas Stamp Sets!

Christmas Gift Tag by Juliana Micheals featuring Sunny Studio Stamps Build A Tag No. 2 Dies, Alpaca Holiday Stamp Set, Cable Knit Embossing Folder and 6x6 Holiday Cheer Paper Pad

I love that each one turned out a bit different by mixing and matching some of the new stamp sets.

Christmas Gift Tag by Juliana Micheals featuring Sunny Studio Stamps Build A Tag No. 2 Dies, Alpaca Holiday Stamp Set, Cable Knit Embossing Folder and 6x6 Holiday Cheer Paper Pad

I hope you enjoyed this bit of Christmas Gift Tag inspiration using the Build A Tag No. 2 Die Set and other products from Sunny Studio Stamps!


Discount Code

Before I get to the giveaway, I wanted to mention that the new holiday release is NOW available in the Sunny Studio Stamps Shop! AND you can save 15% off your retail order by using the promo code "CELEBRATE". The code is good now through October 1st.

Giveaway & Blog Hop

As I mentioned, there is also some fabulous giveaways going on today. I have a $25 gift code to give away to one lucky person. All you have to do is leave a comment below and let me know what is your favorite item from the Sunny Studio Stamps Holiday Release! You will have a chance to win a $25 gift code at each blog that is part of the hop. The contest will run through Monday 11:59 pm PDT and the winners will be announced on the Sunny Studio blog on Friday, October 5.

Now it's time to hop on to the next blog for more inspiration and chances to win:

Supplies

Here are the Sunny Studio Stamp supplies I used to create my set of Christmas Gift Tags. Affiliate links have been used. Thank you so very much for your support!


Stenciled Background Christmas Cards

Hello friends! Today I'm excited to share a couple of stenciled background Christmas Cards I created using the brand new exclusive Scrapbook.com Stencil Brushes and Premium Hybrid Ink Pads!
Scrapbook.com was kind enough to send these fabulous new products to me to play with and I have to admit I fallen in love with them!

Stenciled Background Christmas Cards

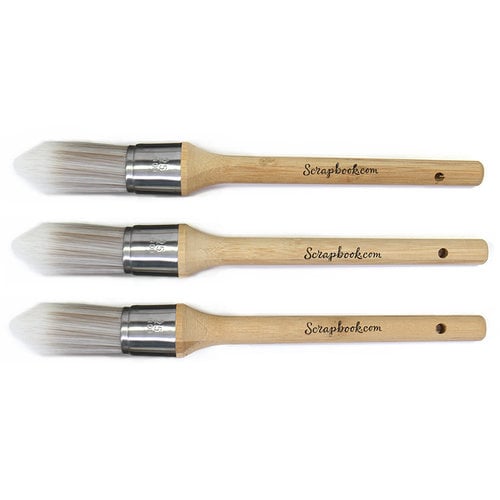
First off, their new stencil brushes are seriously perfect for stenciling! I combined them with some Christmas mini stencils by Tim Holtz. These stencils have so much detail and the brushes worked perfectly with them!

Holly Stenciled Background Christmas Card by Juliana Michaels featuring Scrapbook.com Hybrid Ink Pad, Scrapbook.com Stencil Brushes and Scrapbook.comClear Christmas Stamps

Hybrid Inks & Stencil Brushes

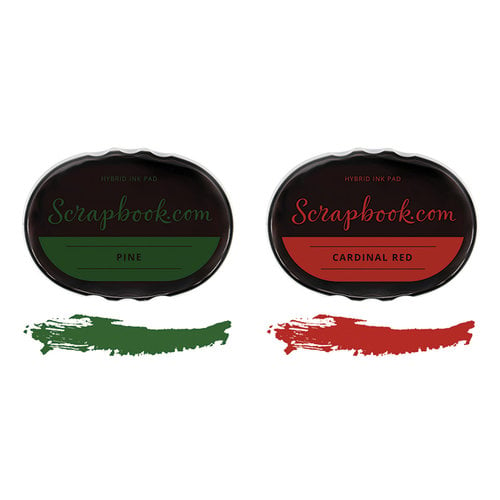
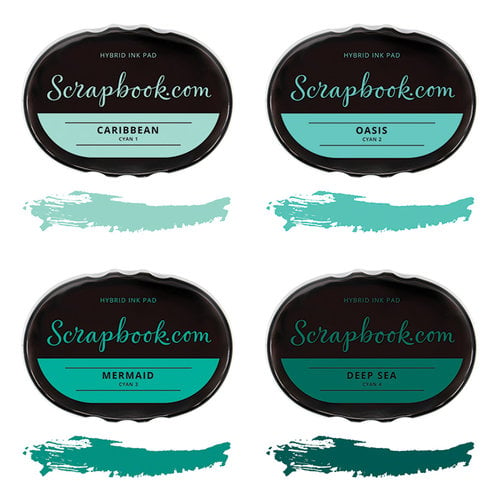
For this card, I combined a mix of green and cyan and used Scrapbook.com's Hybrid Inks in Olive, Pine, Mermaid and Deep Sea. One of the great things about these inks is that they are sold both individually and in groups of 3 or 4 shades of a color that work perfect for blending, shading and layering.

Scrapbook.com Hybrid Ink pads and Stencil Brushes used with Tim Holtz Stampers Anonymous Stencils

Sponge Daubers & Ink Splatters

To add a little more color, I inked the edges of the card front with Pine Ink using a Sponge Dauber.  It still felt like it needed more color....maybe some ink splatters would do it?! So.... I stamped the ink Cardinal Red Ink Pad onto a clear stamping block, spritzed it with water and then used a paint brush to flick the ink onto the paper. A little tip for you....make sure to mix the ink and water together well before you start flicking.

Ink splatters with Scrapbook.com Hybrid Ink

To embellish the card, I layered a bit of gold thread under the sentiment strip. Don't you just love that sentiment? It's from the exclusive Scrapbook.com Holly Jolly Sentiments Stamps. It is packed full of festive sentiments that will take you through the Holiday season and all your crafting projects!

Holly Stenciled Background Christmas Card by Juliana Michaels featuring Scrapbook.com Hybrid Ink Pad, Scrapbook.com Stencil Brushes and Scrapbook.comClear Christmas Stamps

I also created a second card using a red and pink color combo along with a different stencil and sentiment. Here I used Scrapbook.com's Hybrid Inks in Cardinal Red and Candy Shop Pink. For the ink splatters, I used Pine.

Poinsettia Stenciled Background Christmas Card by Juliana Michaels featuring Scrapbook.com Hybrid Ink Pad, Scrapbook.com Stencil Brushes and Scrapbook.comClear Christmas Stamps

The sentiment is from the same stamp set...Holly Jolly Sentiments Stamps. I have a feeling this stamp set is going to be my new go-to for my Christmas cards this year!

Poinsettia Stenciled Background Christmas Card by Juliana Michaels featuring Scrapbook.com Hybrid Ink Pad, Scrapbook.com Stencil Brushes and Scrapbook.comClear Christmas Stamps

I hope you enjoyed these stencil background Christmas Cards using Scrapbook.com's Hybrid Ink Pads and Stencil Brushes. For more inspiration using Scrapbook.com's Hybrid Ink and their clear stamps check out my One Layer Rustic Wreath Christmas Card.

Supplies

Here are the supplies I used to create this card. Affiliate links have been used to Scrapbook.com. Thank you for your support!


Premium Hybrid Ink Pad Kit - Holiday
Premium Hybrid Ink Pad Kit - Cyan

Premium Hybrid Ink Pad Kit - Rose


Stencil Blending Brushes - 3 Pack


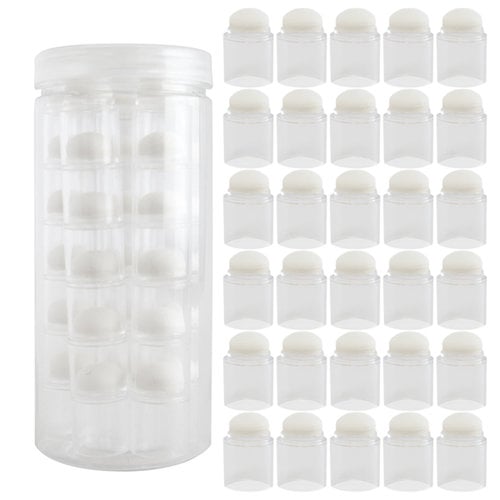
Round Dauber Storage Box - 30 Clear Stackable Daubers Included

One Layer Rustic Wreath Christmas Card

Hello friends! I know fall just arrived, but thanks to my friends at Scrapbook.com I'm getting in the Christmas cardmaking mood! They recently sent me some of their exclusive Christmas acrylic stamp sets to play with and today I'm sharing a One Layer Rustic Wreath Christmas Card I created using one of these new sets called Rustic Christmas Wreaths.

One Layer Rustic Wreath Christmas Card

One Layer Rustic Wreath Christmas Card by Juliana Michaels featuring Scrapbook.com Rustic Wreath Stamp Set and Premium Black Hybrid Ink

I went with a somewhat simple one layer card for my design. If you know me, this isn't necessarily my go to style, but when it comes to mass producing cards (which is what I like to do for the majority of my Christmas cards) you want to keep it easy. I also like to keep the coloring easy so I will be using Zig Clean Color Real Brush Markers to add a touch of color to the design.

To create this card, cut a piece of watercolor paper to 4 x 5.25 inches. Choose the wreath design of your choice and stamp it in the center of the card using the awesome NEW Scrapbook.com Black Premium Hybrid Ink. They just released an entire line of Exclusive Hybrid Inks in every color of the rainbow as well as in shades perfect for layered stamping.  This ink was perfect for this project because they are waterproof and perfect for using with water based markers and watercolors!

Continue your design by stamping the wreath in each corner of the paper so that only part of the wreath is showing. The final bit of stamping you need to do is to add a sentiment to the center of the wreath.

One Layer Rustic Wreath Christmas Card by Juliana Michaels featuring Scrapbook.com Rustic Wreath Stamp Set and Premium Black Hybrid Ink

Now it's time to color! Grab your favorite water based markers and start adding color to the wreath design. I used Zig Clean Color Real Brush Markers and a water brush, but any water based marker will work perfectly for this. Remember the idea is to be able to make these quickly! 

To complete the card, mount it to a piece of coordinating colored cardstock cut to 4.25 x 5.5 inches. Your card is now ready to add to a card base. One Christmas card down and ???? many to go!


One Layer Rustic Wreath Christmas Card by Juliana Michaels featuring Scrapbook.com Rustic Wreath Stamp Set and Premium Black Hybrid Ink

I hope you enjoyed this One Layer Rustic Wreath Christmas Card. If you have any questions about any of these products or other products included in this collection, please feel free to ask in the comment section.

Supplies

Here are the supplies I used to create this card. Affiliate links have been used to Scrapbook.com. Thank you for your support!


Premium Hybrid Ink Pad - Black

Simon Says Stamp | STAMPtember with Newton's Nook Designs

Hello and Happy STAMPtember®! I'm super excited to be a part of this year's celebration and to share some inspiration using the exclusive stamp set designed by Newton's Nook Designs!

[Affiliate links may be used at no cost to you. Thank you for your support!]

If you aren't familiar with STAMPtember®, well let me tell you a little bit about it. STAMPtember® is a month long celebration hosted and organized by Simon Says Stamp. They define it "as an event intended to inspire, educate, and celebrate our community of stampers". This special event takes place during the entire month of September and each day they release fabulous new, exclusive and limited edition products from some of the top stamp companies in the industry.

Today, Newton's Nook Designs is revealing their exclusive stamp set called Hello Beautiful. The Hello Beautiful stamp set also has and coordinating die set and they are both ONLY available at Simon Says Stamp and while supplies last. So, make sure you head on over to grab yours today - because once these are gone, they're gone forever!

Hello There Friend Card | Hello Beautiful Stamp Set

I, of course, choose to use the adorable dog images because as you might or might not know, I'm a bit of a dog lover! (We have 2 golden retrievers!!!) I colored them in with Copic Markers and then die cut them.

Hello Friend Card by Juliana Michaels featuring Newton's Nook Designs Simon Says Stamp Stamptember Hello Beautiful Stamp Set

To create the scene, I added a bit of grass using the Newton's Nook Designs Land Borders Die. After die cutting it from a piece of Bristol Paper and then inked it up with Distress Oxide in Twisted Citron.
I then die cut the grass stripe, a piece of white cardstock and a piece of black cardstock using circle dies. I then layered everything and added it all to a piece of patterned paper. It's a rather simple design, but I love how it keeps the focus on the adorable pups and there message!


Thanks so much for stopping by today! I sure hope you enjoyed the card I created and shared with you using the exclusive Hello Beautiful Stamp Set by Newton's Nook Designs! Remember, you can only get this design at Simon Says Stamp while supplies last!


For even more inspiration using this stamp set, make sure to check out the blogs of the other Newton's Nook Designs Team members...

Tatiana Trafimovich

And for even more inspiration you can visit Simon Says Stamp's Blog!

Therm O Web & Gina K Designs Holiday Release Blog Hop

Hello friends and welcome to the Therm O Web & Gina K Designs Holiday Release Blog Hop!
Today we're revealing 2 Brand New Limited Edition Stamp N Foil Sets, Foil-Mates and coordinating Die Sets. They are going to be perfect for creating some of the most elegant and easy Christmas cards ever!

And to make this hop even more exciting, you have the chance to WIN 2 fabulous prizes! Make sure you check out all the details below.

Holly Jolly Christmas Card

First up, I'm sharing a Christmas Card created using the Holly Jolly Stamp Set, Die Set and Foil Mates. I began by stamping the coordinating images onto the Foil-Mates using Gina K Designs Ink in Red Velvet and Jelly Bean Green. I then die cut them using the coordinating dies. I also stamped the pine branches onto White Cardstock and die cut them as well. Next, I foiled the poinsettias with Red Velvet Fancy Foil and the holly leaves with Jelly Bean Green Fancy Foil.

Holly Jolly Christmas Card by Juliana Michaels featuring Therm O Web and Gina K Designs Holly Jolly Stamp Set, Fancy Foils and Foil Mates

To create the background, I used the striped design from the Ornamental Holiday Foil-Mates and foiled it using the Gold Sequins Fancy Foil. For the sentiment, I die cut a piece of white cardstock using the Gina K Designs Single Stitch Circle Die and then stamped "Holly Jolly" with Red Velvet Ink.  I then layered all of the stamped images to create a cluster. I used the brand new Gina K Designs Dot Adhesive to adhere the pieces together and 3D Foam Squares to pop up some of the poinsettias. I finished the card by adding some enamel dots to the centers of the poinsettias.

Holly Jolly Christmas Card by Juliana Michaels featuring Therm O Web and Gina K Designs Holly Jolly Stamp Set, Fancy Foils and Foil Mates

Warm Wishes Card

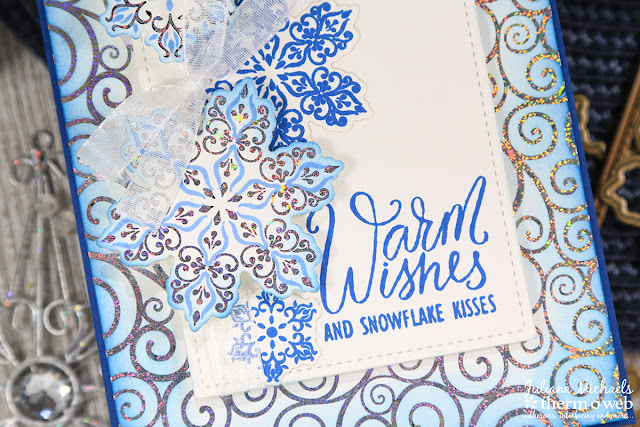
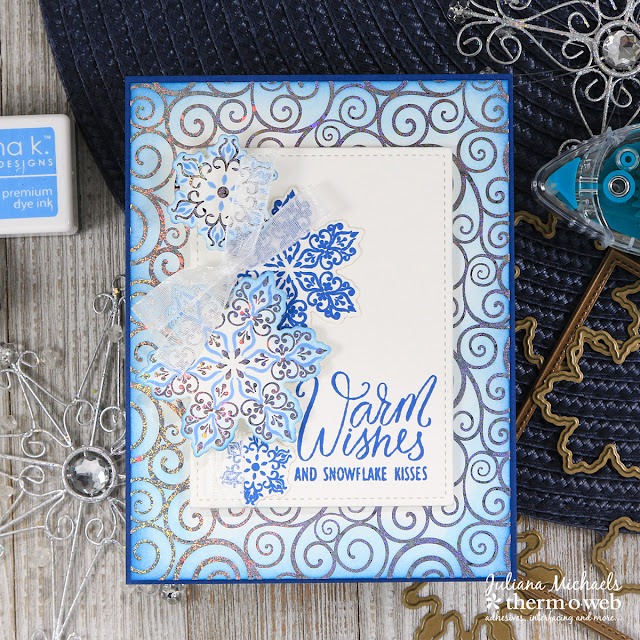
For this second card, I used the Baby It's Cold Outside Stamp Set, Die Set and Foil-Mates. I repeated the same process as the Holly Jolly Card but used a combination of Gina K Designs Powder Blue and Blue Denim ink pads. For the foil on the snowflakes I used Sparkling Silver Fancy Foils.

Warm Wishes Christmas Card by Juliana Michaels featuring Therm O Web and Gina K Designs Baby It's Cold Outside Stamp Set, Fancy Foils and Foil Mates

To create the background, I used the swirled design from the Blizzard Backgrounds Foil-Mates and foiled it using the Sparkling Silver Fancy Foil. After I foiled the background, I ink blended Blue Denim onto the edges. The sentiment was then stamped onto a piece of white cardstock die cut using the Gina K Designs Single Stitched Rectangle Dies. I then finished off the card with a sheer ribbon bow.

Warm Wishes Christmas Card by Juliana Michaels featuring Therm O Web and Gina K Designs Baby It's Cold Outside Stamp Set, Fancy Foils and Foil Mates

Giveaway No. 1

As I mentioned above, you have the chance to win 2 amazing prizes! First up is a HUGE prize package from Therm O Web that includes all of the products pictured below. This prize is worth over $200 and includes all of the new products along with a some other fabulous Gina K Designs products. For your chance to WIN this prize, head over to the Therm O Web blog and enter!


Giveaway No. 2

The second prize you could win is pictured below. This prize is worth $150 and included the new Baby It's Cold Outside Stamp Set. For your chance to WIN this prize, simply LEAVE A COMMENT right here on my blog!


Blog Hop

Now it's time to hop and see what else the rest of the Therm O Web Designers have created using these new products. You are sure to be inspired as you hop along! And make sure to leave a comment on each blog for your chance to win!

Juliana Michaels (this is my blog!)

For even more inspiration and prizes head over to the Gina K Designs Blog!

Supplies Used 

Affiliate links have been used and are at no extra cost to you. They allow me to keep providing you regular inspiration and content on my blog. Thank you so much for your support!


Gina K. Designs StampnFoil Stamp Set, Baby it's Cold Outside picture


Gina K. Designs StampnFoil Foil-Mates Detail Sheet, Baby it's Cold Outside. picture


Gina K. Designs StampnFoil Die Set, Baby it's Cold Outside picture


Gina K. Designs StampnFoil Stamp Set, Holly Jolly picture

Gina K. Designs StampnFoil Foil-Mates Detail Sheet, Holly Jolly picture

Gina K. Designs StampnFoil Die Set, Holly Jolly picture


Gina K. Designs Fancy Foils™ 6" x 8" • Red Velvet picture

Gina K. Designs Foil-Mates™ Backgrounds • Ornamental Holiday picture

Gina K. Designs Foil-Mates™ Backgrounds • Blizzard picture


Gina K. Designs (3) Nested Rectangle Dies ̢ۢ Single Stitch Design ̢ۢ Large Set picture

Purple Tape picture

Newton's Nook Designs September Release | Day 4


Hello friends and welcome to the 4th and final day of the Newton's Nook Designs September Release. Today we're revealing 3 new stamp sets, including 2 new mini sets and a gorgeous sentiment set!

All the new September products will be available for purchase on Friday, September 14th at Newton’s Nook Designs online store and other craft retailers!

Thankful For You Card | Thankful Thoughts Stamp Set

This first card features the gorgeous new Thankful Thoughts Stamp Set. This set has the right thank you sentiment for just about any occasion! I paired it with the new Tree Rings Stencil and Autumn Leaves Dies.

Thankful For You Card by Juliana Michaels featuring Newton's Nook Designs Thankful Thoughts Stamp Set, Tree Rings Stencil and Autumn Leaves Die Set

To get started, I ink blended the Tree Rings Stencil onto a piece of Strathmore 300 Series Bristol Paper. I used Distress Oxide in Vintage photo for the inside rings and then Espresso for the outside ring. I then splattered some black into on the panel. Once it was dry, I stamped the sentiment using Versafine Pigment Ink in Tuxedo Black.

Thankful For You Card by Juliana Michaels featuring Newton's Nook Designs Thankful Thoughts Stamp Set, Tree Rings Stencil and Autumn Leaves Die Set

To embellish the card, I used the Autumn Leaves Die Set to cut a bunch of leaves and acorns from Bristol Paper. I ink blended them using Distress Oxide Ink in Espresso, Vintage Photo, Spiced Marmalade, Mustard Seed, Peeled Paint and Fired Brick. I removed the veins from the leaves and added more ink to these pieces to add some contrast. I then layered everything and used 3D foam adhesive to add a bit of dimension to some of the pieces in the cluster.

Thankful For You Card by Juliana Michaels featuring Newton's Nook Designs Thankful Thoughts Stamp Set, Tree Rings Stencil and Autumn Leaves Die Set

Coffee Card | Slothy Coffee Stamp Set

This second card features the Slothy Coffee Stamp Set. As a lover of coffee, I couldn't resist playing with this adorable set! I stamped the image, colored it in using Copic Markers and then die cut it using the coordinating die set.


Slothy Coffee Card by Juliana Michaels featuring Newton's Nook Designs Slothy Coffee Stamp Set

The background behind the sloth is a piece of Bristol Paper that I ink blended with Antique Linen Distress Oxide. I then stamped the cute little coffee beans from the Newton Loves Coffee Stamp Set in brown ink. The turquoise frame was die cut using the Framework Die Set and the sentiment is stamped onto a banner from the Frames & Flags Die Set. For a touch of added interest, I embossed the white cardstock panel with a small dot embossing folder and added a strip of patterned paper to the left hand side.

Slothy Coffee Card by Juliana Michaels featuring Newton's Nook Designs Slothy Coffee Stamp Set


Blog Hop & Giveaway

Now onto the fun stuff! With each new release, you have the chance to win each of the new stamp sets. Today you have the chance to win the Thankful Thoughts Stamp Set!


And here's a peek at the 2 new mini sets and they each have a coordinating die set.

Tea-Rex Stamp Set


Slothy Coffee Stamp Set


If you'd like to win the Thankful Thoughts stamp set, all you have to do is leave a comment on the Newton's Nook Designs Blog and on each of the Design Team Members Blog. The winner will be chosen at random from one of the blogs, so the more comments you leave, the better your chance is of winning! You have until Thursday September 13th at 9pm EST to comment  and the winners will be announced on the Newton's Nook blog post on Friday, September 14th.

Newton's Nook Designs September Release | Day 3


Hello friends and welcome to Day 3 of the Newton's Nook Designs September Release. Today we're revealing an adorable new set that is perfect for all of your Autumn Greetings called Happy Tails!

All the new September products will be available for purchase on Friday, September 14th at Newton’s Nook Designs online store and other craft retailers!

Autumn Greeting Card | Happy Tails Stamp Set

Anyone who knows me, knows I pretty much love all things pumpkin. So of course, I couldn't resist the adorable deer pulling the wagon of pumpkins! I stamped the image with Memento Ink onto Neenah Classic Crest 110 lb smooth solar white paper and then colored in the image using Copic Markers. I added a few details with a white gel pen and then die cut the images using the coordinating dies.

Autumn Greetings Card by Juliana Michaels featuring Newton's Nook Designs Happy Tails Stamp Set

For the background, I used the new Pumpkin Patch Stencil and inked up a piece of Strathmore 300 Series Bristol Paper with Distress Oxide in Mowed Lawn. This paper has become my new favorite for ink blending because the ink goes on so smoothly! I always tap off the excess ink before I begin adding ink to avoid any harsh lines and I applied most of the ink to the area that would be behind the stamped image. After the ink blending was completed, I die cut it using the scallop edged frame from the Frames & Flags Die Set.

Autumn Greetings Card by Juliana Michaels featuring Newton's Nook Designs Happy Tails Stamp Set

To complete the card, I stamped the sentiment onto a banner from the same die set. I then wrapped a bit of jute twine around the side of the card. Finally, I layered everything onto a kraft cardstock base.

Autumn Greetings Card by Juliana Michaels featuring Newton's Nook Designs Happy Tails Stamp Set

Blog Hop & Giveaway

Now onto the fun stuff! With each new release, you have the chance to win each of the new stamp sets. Today you have the chance to win Happy Tails Stamp Set!


If you'd like to win this stamp set, all you have to do is leave a comment on the Newton's Nook Designs Blog and on each of the Design Team Members Blog. The winner will be chosen at random from one of the blogs, so the more comments you leave, the better your chance is of winning! You have until Thursday September 13th at 9pm EST to comment  and the winners will be announced on the Newton's Nook blog post on Friday, September 14th.

Subscribe