Merry & Bright Free Digital Cutting File

Christmas is another one of my favorite holidays. I love to decorate my entire home for it and it going to be here before I know it. I won't start decorating until after Thanksgiving, but I have started working on my decorations by creating a Noel Christmas Banner using a combination of Leaky Shed Studio chipboard and BoBunny patterned paper. It was very easy to create and I have shared the steps on how I created it and the full banner on the Leaky Shed Studio blog. I also have plans to re-purpose the banner once the Christmas season is over and I'll be sharing that project once the new year has arrived.


DIGITAL CUT FILE | MERRY & BRIGHT

For more of my Digital Cut Files, please visit my 17turtles Etsy Shop!

Merry & Bright was created with Christmas paper crafting in mind. With the Christmas holidays upon us soon, now is a great time to download this set of cut files to use on all of your Christmas crafting projects including cards, scrapbook pages, home decor and more. There are four title pieces and two images pieces. However they can all be broken apart and used in many different ways. The hand written Christmas is actually my own handwriting.

Merry & Bright


NOEL CHRISTMAS BANNER | SUPPLIES

Patterned Paper: BoBunny Elf Magic | Chorus, Dot, Chevron, Stripe, and Tinsel; Double Dot in Clover (used for the holly leaves)
Jewels: BoBunny (various - used for the berries)
Chipboard: Leaky Shed Studio | Pennant Banner and Large Type 4" Alphabet
Cardstock: American Crafts - White
Red Ribbon: Offray
Glitter: Martha Stewart
Adhesive: Glossy Accents by Ranger (used to adhere the glitter), Scotch Quick Dry Liquid Adhesive
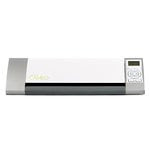
Electronic Cutting Machine: Silhouette Cameo


LINKED 
The Pin Junkie Link Party 45

Gold Tipped Feathers Tutorial

I recently shared a card for the Moxie Fab Thanks Blog Hop honoring Cath Edvalson that showcased a trio of gold tipped feathers. Today, I thought I would share with you a small tutorial on how I created those feathers using die cut feathers, a Krylon Gold Leafing Pen and gold glitter glue.

Gold Tipped Feathers Smile Card by Juliana Michaels

SUPPLIES

For the Card:
Cardstock: Bazzill
Patterned Paper: My Mind's Eye Cut & Paste
Sticker: Jillibean Soup
Resin Embellishment: Paper Bakery
Twine: The Twinery

For the Feathers:
Die Cut Paper Feathers
Scissors
Krylon Gold Leafing Pen
Gold Glitter Glue - American Crafts

TIPS | DIE CUT FEATHERS

I cut my feathers using a digital cut file that came with the Paper Bakery September Kits and my Silhouette Cameo. There are many feather images available online for use with your digital cutting machine, especially at the Silhouette Online Store. Another option would be to use a metal die such as this one by My Favorite Things. You could also hand cut them.

TUTORIAL | GOLD TIPPED FEATHERS

Here is how I created the gold tipped feathers on my Smile Card.

Gold Tipped Feathers Tutorial 1

Begin with cutting your feathers from cardstock.

Gold Tipped Feathers Tutorial 2

Fold them in half.

Gold Tipped Feathers Tutorial 3

Next take your scissors and cut from the outside edge toward the folded center, being careful not to cut through the middle of the feather.

Gold Tipped Feathers Tutorial 4

Once you have cut like this along both sides of the feather, take the Krylon Gold Leafing Pen and color the top part of the feather.

Gold Tipped Feathers Tutorial 5

Repeat coloring with the Gold Pen on each of the feathers until they all have gold tips. As you can see, your coloring does not have to be perfect.

Gold Tipped Feathers Tutorial 6

Finally, take your gold glitter glue and apply it over the gold colored area for a little extra glam.

Gold Tipped Feathers Smile Card by Juliana Michaels detail

I really love the way these feathers turned out. Don't you? Along with the "smile" sticker that I also colored with the Krylon Gold Leafing Pen they add such a wonderful touch to this happy card. 

Document December with BoBunny Misc Me

This year I have decided to Document December by creating an album using the BoBunny Misc Me Elf Magic collection. I have been wanting to create an album to record our traditions and activities during the Christmas holidays that would be fun and enjoyable to look at in the years to come.  I know it has become popular to create an album where you document about each day of the month or up until Christmas Day. However, I didn't feel like this style of album would work for me. I know there may be some days where I have nothing planned or nothing that I want to bother with documenting so I decided to create an album with pages for things that I know we do every year as part of our holiday traditions. Of course, I will have plenty of room to add to it if necessary or if I do want to document something on a day that was not very exciting.

Document December BoBunny Elf Magic Misc Me by Juliana Michaels

Document December BoBunny Elf Magic Misc Me by Juliana Michaels

Document December BoBunny Elf Magic Misc Me by Juliana Michaels

I knew that having the basic album plan put together ahead of time would make it easier for me to work on this as the month progressed. I created 17 pre-planned two page spreads. Many of them were created with a specific tradition or activity in mind. To help me decide on some of my pre-planned pages, I put together a list of things that I know we do every year, as well as some activities that I know we will be doing this year:

CHRISTMAS TRADITIONS & ACTIVITIES

  1. Decorating the Christmas Tree
  2. Decorating the house for Christmas
  3. Christmas Ornament 2013
  4. Baking cookies
  5. Nativity set
  6. Wrapping presents
  7. Christmas Cards
  8. Christmas Tree
  9. Opening presents
  10. Christmas Eve Mass
  11. Family Photo
  12. Food / Favorite Recipes
  13. Christmas Party (Tom)
  14. Visiting Family/Christmas with Family
  15. Playing in the Snow


I also added some extra pages that can be used to document whatever else I want and I still have enough supplies left over to add more pages if needed.


Document December BoBunny Elf Magic Misc Me inside pages by Juliana Michaels

I used a mix of products from the entire Elf Magic Collection and Elf Magic Misc Me. Some of the pockets were filled with the Elf Magic Misc Me Journal Contents and others were filled using some of the12 x 12 patterned papers from the Elf Magic collection. I cut the papers to fit the various pocket sizes and then used the scraps that were left over from filling the pockets as border strips. Another tip is that I cut the tags from the Elf Magic Chevron patterned paper and used them throughout the album. Can you spot any of the tags in my pages?

Elf Magic Chevron Patterned Paper

Document December BoBunny Elf Magic Misc Me inside pages by Juliana Michaels

Document December BoBunny Elf Magic Misc Me inside pages by Juliana Michaels

Document December BoBunny Elf Magic Misc Me inside pages by Juliana Michaels

Document December BoBunny Elf Magic Misc Me inside pages by Juliana Michaels

Document December BoBunny Elf Magic Misc Me inside pages by Juliana Michaels

This spread is for our Christmas Cards and I've included one of the Christmas Cards I created recently.

Document December BoBunny Elf Magic Misc Me inside pages by Juliana Michaels

Document December BoBunny Elf Magic Misc Me Christmas Card Page by Juliana Michaels


Document December BoBunny Elf Magic Misc Me inside pages by Juliana Michaels

Document December BoBunny Elf Magic Misc Me inside pages by Juliana Michaels

Document December BoBunny Elf Magic Misc Me inside pages by Juliana Michaels

Document December BoBunny Elf Magic Misc Me inside pages by Juliana Michaels

Document December BoBunny Elf Magic Misc Me inside pages by Juliana Michaels

Document December BoBunny Elf Magic Misc Me inside pages by Juliana Michaels

Document December BoBunny Elf Magic Misc Me inside pages by Juliana Michaels

Document December BoBunny Elf Magic Misc Me inside pages by Juliana Michaels

Document December BoBunny Elf Magic Misc Me inside pages by Juliana Michaels

Document December BoBunny Elf Magic Misc Me inside pages by Juliana Michaels

Document December BoBunny Elf Magic Misc Me inside pages by Juliana Michaels

SUPPLIES | BOBUNNY ELF MAGIC

Misc Me Binder: Elf Magic
Misc Me Contents: Elf Magic Journal Contents
Page Protectors: 6x8 in, 4x6 in, 3x4/4x6 in
Patterned Paper: Elf Magic, Chevron, Chorus, Fa La La La La, Flake, Stripe and Wishlist/ Elf Magic
Chipboard: Elf Magic 12 x 12 Chipboard
Jewels: Elf Magic
Stickers: Elf Magic Misc Me Sticker, Elf Magic Combo Sticker
Doilies: 6.5" Medium Doilies


With the basic album completed, I will only have to add photos, journaling and some embellishments. As we all know, the Christmas holiday season is typically a busy and hectic time, so I want this album to be an enjoyable and creative way to remember December. The amount of embellishing I do will truly depend on my available crafting time and how much effort I want to put forth. It doesn't look like much yet, but once I begin adding the photos, journaling and embellishments it will begin to transform into a something that I know I will treasure for years to come. I hope you will check back later in December, to see my completed album pages.

Arrow Titles Free Cut File

It's been nearly a month since my last FREE Digital Cutting File and I am pleased to share my newest cut file with you today called Arrow Titles. What makes this reveal even more exciting to me though, is that I have my first ever Guest Designer who has created an amazing layout using this cut file to help inspire and delight you!

DIGITAL CUTTING FILE | ARROW TITLES

Arrow Titles was created with everyday memory keeping in mind. With the new found popularity of pocket style scrapbooking, these simple titles were created to go with nearly any theme you may want to record. There are four titles, as well as one plain arrow that you can use as you wish. This digital file is available in both SVG and Studio formats and you may download this digital cut file for FREE for your own personal use.

Arrow Titles Free Digital Cut File by Juliana Michaels 17turtles.com

Speaking of scrapbooking, I was tickled pink when Katrina Hunt happily agreed to be my first ever Guest Designer. She has created an adorable scrapbook layout using the Arrow Titles cut file. Please visit her blog - Paper, Scissors and Glue to see her layout and all the super fun details.

Sneak Peek of Scrapbook Layout by Katrina Hunt using the Arrow Titles Free Digital Cutting File

I'd love to see how you use my Arrow Titles Digital Cutting File. Feel free to link it up below for your chance to be one of my next Guest Designers!

Krylon Gold Leafing Pen Wedding Favors

Gold is in right now and I love it! I have always preferred gold over silver or platinum, so it makes me quite happy to see it everywhere!!! Recently I created a set of Gold Wedding Favors for SRM Stickers using their Clear Boxes and Stickers By The Dozen - Wedding. I added a touch of gold using one of my favorite products, a Krylon Gold Leafing Pen. I have had a gold and a silver pen in my stash for years and I have occasionally used them on my projects. However, with gold being all trendy right now, I felt like it would be fun to bring it to use for decorating these wedding favor boxes. They were very simple and fast to make with only a few supplies!

Krylon Gold Leafing Pen Wedding Favors by Juliana Michaels

SUPPLIES

Clear Boxes: SRM Stickers / Clear Box 1 x 1 x 8" and 2 x 2 x 2"
Stickers: SRM Stickers / Stickers By The Dozen - Wedding
Gold Leafing Pen: Krylon
Twine: The Twinery Gold Shimmer
Gold Glitter Paper: Darice / Self Stick Glitter Paper
Other: Tulle, Gold Doily
(You can find Gold Doilies online from such places as Ebay, Etsy, Amazon, etc. Just search for Gold Foil Doilies!)

TUTORIAL

I placed the clear stickers on the gold glitter paper. The circle sticker was cut out using a 1 3/8" circle punch. I hand cut the banner shape on the "love is" sticker. I then removed the backing and applied the glitter stickers to the boxes.

To create the "gold dots" on the clear boxes, I simply made a dot with the end of the pen. As you can see, the tip of my pen is frayed from being used, so the dots are not perfect. I liked this look. A brand new pen will give you a more perfect dot if you prefer a cleaner look!

Krylon Gold Leafing Pen Wedding Favors by Juliana Michaels detail

Krylon Gold Leafing Pen Wedding Favors by Juliana Michaels detail

I also think this same technique would be great for Christmas or any other type of gift. All you would need to do is switch out the stickers with whatever theme you are looking for, and SRM Stickers has so many options to choose from in their online store!

LINKED

Paper Bakery Sketch Challenge 17

Sketch Challenge 17 is live on the Paper Bakery Blog today! This new sketch features room for 3 photos...two 4x6 and one 4x4! I can't wait to see how it inspires you!!!


Here are the details you need to know to play along with us using the sketch challenge:

1.) We will have a new Sketch Challenge every two weeks. Play along for your chance to win a $10 coupon to the Paper Bakery Shop.

2.) Make a layout or project inspired by the sketch. Be creative and have fun! We would love to see what you create using a Paper Bakery kit however, using a kit is not required for you to play along.

3.) Take a picture and link it up on the sidebar of the Paper Bakery blog using the INLINKZ widget by the due date November 30.

4.) Winners will be randomly selected and we will post them on the Paper Bakery Facebook page and on the Paper Bakery blog.  Make sure to follow us on both to find out if you are the winner!!!

I hope you are inspired by this sketch and will play along with us!  I am looking forward to seeing what you create and share!!!

BoBunny Design Team Blog Hop

Welcome to the BoBunny Design Team November Blog Hop!


I hope you are enjoying this month's blog hop! You should be arriving here from Irene Tan's blog, where I am positive you were inspired by her talent. I'd like to remind you to make sure you are collecting the answers to each of the questions you found on the BoBunny blog. Once you have all of the correct answers, enter them on the BoBunny blog using the Rafflecopter widget. The more answers you enter the more chances you have of winning. One lucky winner will be randomly selected from all of the correct answers to receive a fabulous BoBunny Elf Magic prize package!!!

Our theme this week on the BoBunny blog has been all about family. I don't have a large immediate family, because we don't have any children, but my husband and I make a great family, together with our horse Woody! He is an American Paint Horse and he is my husband's pride and joy! I love him too, but mostly because he makes my husband so very happy. We recently had some "family" photos taken by our friend Tom with Poses A Studio, so of course I felt compelled to scrap one of them using BoBunny's gorgeous The Avenues collection.

The Avenues Family Layout by Juliana Michaels

The Avenues Family Layout by Juliana Michaels detail

The Avenues Family Layout by Juliana Michaels detail

Shortly after this photo was taken, we extended our family and adopted a 9 year old Golden named Milo. So now we need to get a new "family" photo taken!


SUPPLIES | BoBunny

Patterned Paper: Courtyard, Trellis, Stripe, and Shutters / The Avenues
Noteworthy: The Avenues
Chipboard: The Avenues 12 x 12 Chipboard
Stickers: The Avenues Combo Sticker, The Avenues Layered Chipboard Stickers
Brads: The Avenues
Jewel Flourishes: Chocolate Jewels


Here is the order of the blog hop just in case you need it:
Juliana Michaels - You are here!

This is the awesome Elf Magic prize package that BoBunny is giving away to one lucky winner!

BoBunny Elf Magic Prize Package

Thanks so much for stopping by today and now it is time to head on over to Kaori's blog for more amazing inspiration!

Subscribe