Showing posts with label Bo Bunny. Show all posts

Besties | Free Digital Cut FIle

I recently had the awesome pleasure of meeting Katrina Hunt in person and attending a weekend crop at Scrapbook Generation. I'm originally from Missouri, which is where Scrapbook Generation is located, so I decided to incorporate meeting her and attending the crop during a trip to see my family. It was a wonderful weekend and one I will always treasure! It's so wonderful to meet people and learn how truly awesome they are. I truly believe that I have a new best friend for the rest of my life!
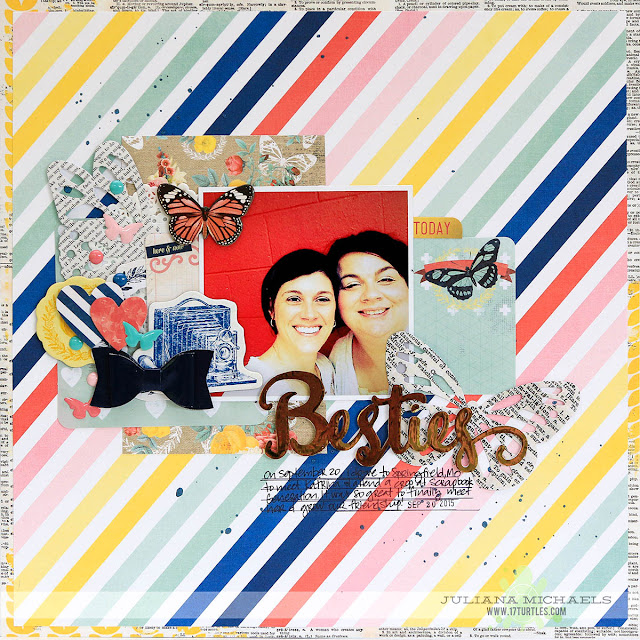
Besties Friends Scrapbook Page by Juliana Michaels featuring BoBunny and Therm O Web Deco Foil and Adhesives

While we were there, we of course had to take a selfie. Katrina printed it and then we each scrapbooked it. Katrina posted her She #Roadtripped layout last week. Today, I'm sharing my take on it using the BoBunny Sweet Life collection along with lots of fun embellishments, including a doily just for Katrina!
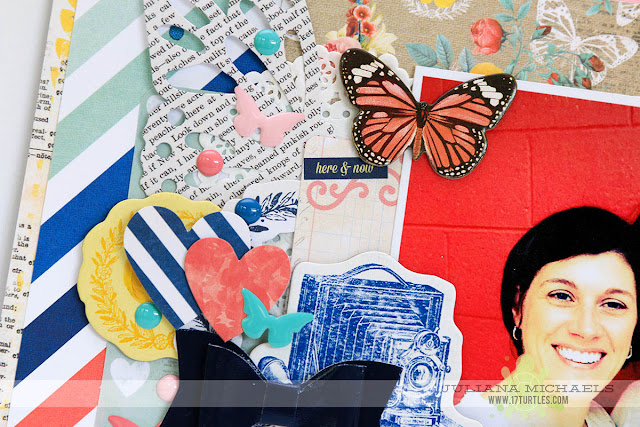
Besties Friends Scrapbook Page by Juliana Michaels featuring BoBunny and Therm O Web Deco Foil and Adhesives

To create the title, I used Therm O Web's Deco Foil and Hot Melt Adhesive. If you are interested in how I did this, you can check out the Foiled Die Cut Tutorial I created and shared on the Therm O Web blog.  It's one of my favorite ways to work their foil, however, I have branched out and tried some new techniques that I will be sharing with you very soon!

Besties Friends Scrapbook Page by Juliana Michaels featuring BoBunny and Therm O Web Deco Foil and Adhesives

Supplies:
Laminator
Enamel Shapes and Dots: Chickaniddy

•••••••••••••••••••••••••••••••••••••••••••••••

As a little gift for you, I have put together a free cut file for you to download that includes the Besties title I used on my layout. Enjoy!

FREE DIGITAL CUT FILE | BESTIES

Besties Free Digital Cut File by Juliana Michaels 17turtles.com

I hope you enjoyed today's post and that you enjoy using the Besties Digital Cut File I shared with you today! Remember you can always tag me on social media if you create something with one of my cut files. I love to see what everyone creates with them!

If you are interested in more digital cut files to download, check these out...

FREE DIGITAL CUT FILE | NUMBERS FEST

Number Fest Free Digital Cut File by Juliana Michaels 17turtles.com

FREE DIGITAL CUT FILE | HELLO SUMMER

Hello Summer Free Digital Cut File by Juliana Michaels 17turtles.com

FREE DIGITAL CUT FILE | COFFEE CUP SHAKER CARD

Coffee Cup Shaker Card Free Digital Cut File by Juliana Michaels 17turtles.com

3 Things I Love About Us | BoBunny Sweet Life

Happy Monday friends! Today I'm sharing a new layout I recently created. This layout came together through a combination of inspiration including the photo I used and a journaling challenge to create a numbered list of things. Unfortunately, I can't remember where I saw the journaling challenge.

Us Scrapbook Page by Juliana Michaels featuring BoBunny Sweet Life Collection and MFT Stamps Dies

The photo of me and Danny made me think about "Us" and that led me to think about journaling three things that I love about us. I used some number die cuts from my stash to accent each thing and I then printed the journaling onto white cardstock.

Us Scrapbook Page by Juliana Michaels featuring BoBunny Sweet Life Collection and MFT Stamps Dies

To add some interest to the design, I used a couple of dies to cut out a bunch of circles from various patterns from the BoBunny Sweet Life 6x6 paper pad. By placing them in a mostly grid like pattern, it created a punch of color and interest behind my photo. I then added a few more off to the side to help balance the overall design.

Us Scrapbook Page by Juliana Michaels featuring BoBunny Sweet Life Collection and MFT Stamps Dies

I mostly used the BoBunny Sweet Life collection to create my layout however, it's always fun to mix and match collections. When I purchased the BoBunny Sweet Life papers, I also liked the Post Card paper from the Garden Journal collection and it was perfect for fussy cutting, inking and layering behind my photo. I then added a fun cluster of embellishments by combining chipboard, stickers and die cuts. Along with mixing and matching collections from BoBunny, I also added some other fun embellishments from my stash that coordinated with the Sweet Life collection.

Us Scrapbook Page by Juliana Michaels featuring BoBunny Sweet Life Collection and MFT Stamps Dies

Supplies:
Patterned Paper: BoBunny | Sweet Life and Garden Journal
6x6 Paper Pad: BoBunny | Sweet Life
Chipboard: BoBunny | Sweet Life
Die Cuts: Simple Stories, Elle's Studio
Phrase Sticker: Simple Stories
Letter Stickers: Pebbles Inc
Dies: My Favorite Things Stamps and Lifestyle Crafts
Die Cutting Machine: Cuttlebug
Sewing Machine: Kenmore
Ink: Ranger Distress Ink - Walnut Stain
Spray Ink: Heidi Swapp Color Shine - Tea

So do you like to mix and match things from your stash when you create or do you mostly use things that were "made" to go together? Thanks for stopping by today!

BoBunny Sweet Life Scrapbook Process Video + Digital Cut File

Hello and Happy Hump Day my fellow crafty friends! Today I have a new layout to share with you using the BoBunny Sweet Life Collection and a Digital Cut File that you can download at no cost! I also created my very first scrapbook process video about my layout. It was quite the learning experience for me! I actually learned some things about myself and I how create just by making the video. For example, I knew I liked to move things around a lot, but I never realize just how much I move them around. I also want to apologize for my head! It is in the way and I know that, but I also learned that I lean over and look at my layouts a lot while I am creating them, so this "head in the way thing" is really me doing what I do when I'm creating a layout. So bear with me and hopefully, I can remember to keep my head out of the way for future videos! You can check out the video at the bottom of the post along with a full supply list for the products I used on my layout.

Always Believe Scrapbook Page by Juliana Michaels featuring a FREE 17turtles Digital Cut File and the BoBunny Sweet Life Collecttion

FREE DIGITAL CUT FILE | SCRIBBLED CIRCLE

This free cut file can be used for a full range of projects, including cards, home decor, scrapbook pages and more. This digital file is available in SVG, PNG, DXF and Studio formats and you may download this digital cut file for FREE for your own personal use. Please refer to my terms of use for more information if you wish to use these for more than your own personal projects.

Scribbled Circle Free Digital Cut File by Juliana Michaels 17turtles.com

I am in love with the BoBunny Sweet Life collection and I have to say that it is probably one of my all time favorite BoBunny collections! The colors - especially the yellow - makes me super happy!!!

Always Believe Scrapbook Page by Juliana Michaels featuring a FREE 17turtles Digital Cut File and the BoBunny Sweet Life Collecttion

Check out the awesome font I used for my journaling! It's called Ostrich Sans and you can download it from Font Squirrel.

Always Believe Scrapbook Page by Juliana Michaels featuring a FREE 17turtles Digital Cut File and the BoBunny Sweet Life Collecttion

I hope you enjoy the video and I would love for you to subscribe to my YouTube Channel and of course feel free to leave any comments you have about the video. I'd love to hear your feedback!


SUPPLIES:
Patterned Paper, 6x6 Paper Pad, Chipboard Stickers: BoBunny | Sweet Life
Cardstock: American Crafts
Jewels: BoBunny
Spray Ink: Heidi Swapp Color Shine | Butter, Ocean and Navy
Sewing Machine: Kenmore
Electronic Cutting Machine: Silhouette Cameo
Digital Cut File: 17turtles | Scribbled Circle
Font: Ostrich Sans

Quick & Easy Christmas Cards and Tags with Digital Cut Files | A Silhouette Cameo Tutorial

Yes, I know Christmas is next week, but some of us are running just a little behind on Christmas cards and tags. At least I hope I'm not the only one! If you are with me, then the card and tag tutorial that I'm sharing today, using your Silhouette Cameo and the Christmas Cheer & Winter Wishes Digital Cut File by 17turtles, is just for you!

Here are just two of the Christmas cards and tags that I created.

Quick & Easy Christmas Cards and Tags using Christmas Cheer & Winter Wishes Digital Cut File by 17turtles Juliana Michaels

Quick & Easy Christmas Cards and Tags using Christmas Cheer & Winter Wishes Digital Cut File by 17turtles Juliana Michaels

Quick & Easy Christmas Cards and Tags using Christmas Cheer & Winter Wishes Digital Cut File by 17turtles Juliana Michaels

A SILHOUETTE CAMEO TUTORIAL | QUICK & EASY CHRISTMAS CARDS AND TAGS


Begin by opening up the Christmas Cheer & Winter Wishes Cut File in your Silhouette software. Of course, you don't have to use this exact image to create cards. Any simple frame shape will work!

Quick & Easy Christmas Cards with 17turtles Digital Cut Files - A Silhouette Cameo Tutorial by Juliana Michaels

Select the image you want to use for your card front and copy it.

Quick & Easy Christmas Cards with 17turtles Digital Cut Files - A Silhouette Cameo Tutorial by Juliana Michaels

Select one of the copied images, right click on it and select Release Compound Path.

Quick & Easy Christmas Cards with 17turtles Digital Cut Files - A Silhouette Cameo Tutorial by Juliana Michaels

When you look at the image closely you will see that it has filled in the blank spaces.

Quick & Easy Christmas Cards with 17turtles Digital Cut Files - A Silhouette Cameo Tutorial by Juliana Michaels

Click on the image, selecting the outside of the shape (which will be a solid square) and move it down on the screen. This will separate the images as you see below. Select the image with the words and delete it. You do not need this piece any more. The solid square piece is going to become the back of your card.

Quick & Easy Christmas Cards with 17turtles Digital Cut Files - A Silhouette Cameo Tutorial by Juliana Michaels

Before we do anything else, let's create the piece that will be placed behind the card front (this is the patterned paper piece that you see in the card examples). Select the square image and copy it. And move it to the side.

Quick & Easy Christmas Cards with 17turtles Digital Cut Files - A Silhouette Cameo Tutorial by Juliana Michaels

Now, let's go back to creating the card. Take the solid square and place it above the piece that is the front of the card, making sure to line them up.

Quick & Easy Christmas Cards with 17turtles Digital Cut Files - A Silhouette Cameo Tutorial by Juliana Michaels

With the solid square image selected, move it down a few clicks to overlap it onto the front of the card. Select both images, right click and select Weld. If the images are not overlapped enough, the images will not weld, so make the red line between the images disappears..

Quick & Easy Christmas Cards with 17turtles Digital Cut Files - A Silhouette Cameo Tutorial by Juliana Michaels

Once the weld is complete, your card is ready to cut. Before we continue farther though, let's go back to the copied square image that we created earlier. (I have now made it green for you to be able to see it better.)


Quick & Easy Christmas Cards with 17turtles Digital Cut Files - A Silhouette Cameo Tutorial by Juliana Michaels

Select that green square and click on the Scale Tool located at the top of the Toolbar. Using the Custom Scale option, adjust it to 95.0%.

Quick & Easy Christmas Cards with 17turtles Digital Cut Files - A Silhouette Cameo Tutorial by Juliana Michaels

As you can see, this makes the green square just slightly smaller than the card front so that you don't have to worry about any paper overlapping or showing when you go to layer the papers.

Quick & Easy Christmas Cards with 17turtles Digital Cut Files - A Silhouette Cameo Tutorial by Juliana Michaels

You are now ready to cut and assemble your cards. Just remember to move the green square off of the cutting mat area while you cut the card base. As you can see, I used plain white cardstock to create the card base and then used a mostly solid patterned paper so that the image would show up nicely. I used this same technique to create a couple of gift tags as well.


I hope you enjoyed this tutorial and that you find it useful during these last few fun and festive, but definitely hectic, days before Christmas!

•••••••••••••••••••••••••••••••••••••••••••••••

One last thing before I go...the winner of the my blog candy for the Holiday Coffee Lover's Blog Hop is Lynda! Congratulations!!! Please message me on Facebook with your mailing address.


Thanks so much to everyone who stopped by and visited during the hop!!!

Handmade Christmas Ornaments | BoBunny & Leaky Shed Studio

I love making handmade Christmas Ornaments! How about you? This month BoBunny is doing a product swap with Leaky Shed Studio Chipboard and one of the chipboard sets I received was the Victorian Oval Frames.  When I first saw this set, I immediately wanted to transform them into Christmas ornaments using the new BoBunny Christmas Collage collection. 


I began by spraying the chipboard frames with the Bronze BoBunny's Glimmer Spray. I then used the frame to trace a piece of patterned paper to fit the inside of the frame. I cut the paper slightly larger than the opening and then adhered it to the backside of the frame. To decorate each of the ornaments I layered on various pieces from the Christmas Collage collection including the layered chipboard, chipboard and brads.


The holly leaf clusters where die cut from Evergreen BoBunny Double Dot cardstock and I then spritzed them with the Bronze Glimmer Spray. The new Double Dot Jewels worked perfectly for the berries!


If you love chipboard, then I invite you to visit the BoBunny and the Leaky Shed Studio blog's for loads of inspiration and ideas. And both BoBunny and Leaky Shed have some great GIVEAWAYS going on during this product swap so make sure you check them out for your chance to win!

Winter Scrapbook Page by Juliana Michaels for BoBunny

I also want to invite you to take a look at the other project that I created for the Leaky Shed Studio and BoBunny Product Swap. It's a winter layout using the sketch for BoBunny's December Sketch Challenge and the new Altitude collection. I had a great time altering the Leaky Shed chipboard using BoBunny's Glimmer Paste!

Christmas Angel | BoBunny Christmas Collage

So, have you started decorating for Christmas? I started my decorating this past weekend. This is one of my favorite times of the year! I love to decorate for Christmas and I especially love to make some of my decorations. One of my new favorite Christmas decorations this year is a Christmas Angel that I recently created using the new BoBunny Christmas Collage collection and a Darice Paper Mache Angel Kit. Read on below for detailed instructions on how she came to life!

Christmas Angel by Juliana Michaels using BoBunny Christmas Collage and Darice Paper Mache Angel Kit

DETAILS | CHRISTMAS ANGEL

I purchased the paper mache angel kit at Michael's. It comes with 7 pieces to create the angel. I didn't use the base, the halo or the hair that came with the kit. I'm not sure what will become of those pieces, but I'm thinking they would be perfect for creating some Christmas ornaments. 

Darice Paper Mache Angel Kit

Darice Paper Mache Angel Kit

I knew that I wanted to give my Christmas Angel a glowing halo and gilded wings. To achieve this look, I began by coloring the wings with a Krylon Gold Leafing Pen. This gave the wings a nice gold colored base. However, that wasn't enough sparkle for me, so I pulled out the new BoBunny Glitter Paste in Gold. I applied two coats of the Glitter Paste and allowed it to dry completely between each coat. To create the halo, I cut a piece of scrap chipboard into a 3" circle and used the same process that I used on the wings.

Darice Paper Mache Angel Kit Wings, BoBunny Glitter Paste, Krylon Gold Leafing Pen

I painted the face with acrylic paint and added the eyes, nose and mouth with a fine tip black marker. The hair is doll hair that I bought at the local craft store and I attached it using a hot glue gun.

Christmas Angel by Juliana Michaels using BoBunny Christmas Collage and Darice Paper Mache Angel Kit

To cover the base and arms of the angel, I began by creating a template using a piece of copy paper. I wrapped it around the cone shaped pieces and then trimmed it to fit. I then traced the template onto a piece of patterned paper, cut it out, wrapped it around the base and then glued it in place. I repeated this same process for the arms.

Christmas Angel by Juliana Michaels using BoBunny Christmas Collage and Darice Paper Mache Angel Kit

To create the ruffled strips, I cut 1/2" strips of patterned paper and inked the edges. I then misted them lightly with water and the proceeded to wrinkle, crinkle, and fold the paper to create the ruffles. I used a heat gun to speed up the drying. This also adds a little bit of stiffness to the paper. I then hot glued the strips to the edges.

Christmas Angel by Juliana Michaels using BoBunny Christmas Collage and Darice Paper Mache Angel Kit


To decorate the Angel, I used a variety of the embellishments that are part of the Christmas Collage collection including the chipboard, die cuts, brads, flowers, and stickers. I lightly sprayed the flowers with the BoBunny Gold Glimmer Mist for an extra bit of shine.

Christmas Angel by Juliana Michaels using BoBunny Christmas Collage and Darice Paper Mache Angel Kit

The back of the Angel is quite plain, but you could easily dress up this side if you have one that will be seen from all sides.

Christmas Angel by Juliana Michaels using BoBunny Christmas Collage and Darice Paper Mache Angel Kit

I have enough kits to make two more of these angels, and I'm really hoping that I'll have time to make them. I keep picturing the trio of them sitting pretty on one of Christmas tabletop displays. Thanks so much for stopping by and I hope you have fun creating some of your own Christmas decorations this year!

Christmas Countdown Calendar | BoBunny Candy Cane Lane

So who will be joining me in decorating for Christmas this coming weekend? I can't wait to have the house all decorated for one of my favorite holidays! And I'm sure it's going to be interesting to see how Lincoln handles the tree. I'm keeping my fingers crossed that everyone and everything will survive!

The weekend after Thanksgiving brings back fond memories of spending time making Christmas craft projects with my nieces. I really miss spending time together with them! These happy memories inspired me to create and share a Christmas Countdown Calendar that I created using the new BoBunny Candy Cane Lane collection. It is a fun and easy craft project that would perfect to work on together with your family this post-Thanksgiving weekend.

Christmas Countdown Calendar by Juliana Michaels featuring BoBunny Candy Cane Lane Collection

SUPPLIES

  • Cork Bulletin Board
  • Standard Push Pins
  • BoBunny Candy Cane Lane Countdown paper
  • BoBunny Candy Cane Lane 6x6 Paper Pad
  • BoBunny Candy Cane Lane Brads
  • BoBunny Candy Cane Lane Buttons
  • BoBunny Candy Cane Lane Stickers
  • Ranger Distress Ink Pad in Vintage Photo
  • Ranger Glitter Glue in Star Dust
  • Hot Glue Gun
  • Twine
  • Mini Clothespins

BoBunny Candy Cane Lane Countdown Paper

CHRISTMAS COUNTDOWN CALENDAR

  1. Begin with a plain cork bulletin board. I painted the frame black but this is certainly optional.
  2. Cut out the countdown squares from the BoBunny Candy Cane Lane Countdown paper. 
  3. Cut squares measured at 2 5/8" from various patterns in the 6x6 Candy Cane Lane Paper Pad.
  4. Ink the edges of all of the squares. You can certainly skip this step. 
  5. Adhere the number squares to the other squares.
  6. Embellish some of the squares with stickers and buttons.
  7. Apply Star Dust Glitter Glue to some of the images for a touch of sparkle and shine.
  8. Create custom push pins (see below for instructions)
  9. Push the pins into the cork board and tie a length of twine to each end. Trim off the excess twine.
  10. Use mini clothespins to attach the countdown numbers to the twine.

Christmas Countdown Calendar by Juliana Michaels featuring BoBunny Candy Cane Lane Collection

Christmas Countdown Calendar by Juliana Michaels featuring BoBunny Candy Cane Lane Collection

Christmas Countdown Calendar by Juliana Michaels featuring BoBunny Candy Cane Lane Collection

CREATING CUSTOM PUSH PINS

To attach the numbers to the board, I created my own custom push pins using standard push pins and BoBunny Brads.

  1. Begin by selecting some brads from the Candy Cane Lane Brads.
  2. Remove the prongs from the brad using wire cutters. Fold any excess metal toward the underside of the brad using the wire cutters.
  3. Attach the brad to the top of push pin using a hot glue gun. I recommend using either a high heat glue gun or an adhesive that is made for attaching metal and plastic together. I had good luck with Glue Dots, however you have to be more cautious when removing the push pins from the cork board as this is not a permanent way to adhere the brad to the push pin.
Christmas Countdown Calendar by Juliana Michaels featuring BoBunny Candy Cane Lane Collection

Christmas Countdown Calendar by Juliana Michaels featuring BoBunny Candy Cane Lane Collection

I hope this project inspires you to do some family Christmas crafting projects this year. They are a great way to bring the family together and they can provide years of wonderful memories!
Subscribe
