
Hello friend! Today I'm going to share all about the new Tim Holtz Distress Color Lost Shadow. Before I get started, I want to thank Scrapbook.com for their generosity in sending this new color to me to create with. It's a beautiful, light cool gray color that fits in perfectly with the Distress Palette! As always, it's available in all the regular formats including the Distress Ink, Oxide Ink, Distress Spray, Oxide Spray, Distress Paint and Distress Embossing Glaze. In this blog post, I'm going to share some swatches I created and then take you step by step through how I created this Choose Happy card using the Lost Shadow Distress Color.


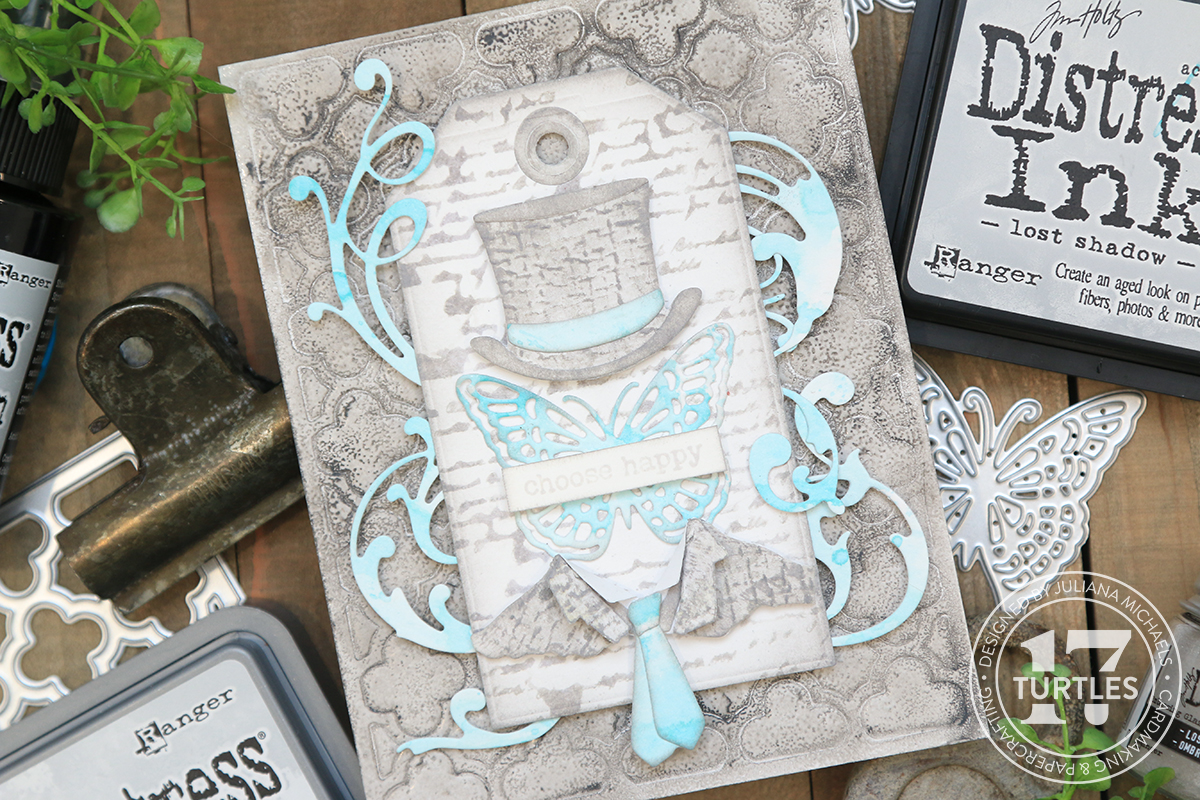
CHOOSE HAPPY CARD | TIM HOLTZ DISTRESS COLOR LOST SHADOW
Besides creating the swatches, I also made a card. I used the Lost Shadow Distress Ink, Distress Oxide Ink, Distress Spray Stain and the Embossing Glaze. Keep scrolling to read all the details OR you can check out this video I created to show you how I created it.
The first thing I started with was the background. I began with a piece of Distress Watercolor Paper cut to 4.25 x 5.5 inches and embossed it with the Scrapbook.com Mosaic A2 Die. Yep, you read that correctly. I'm going to use the die to emboss.

The sandwich I used with my Sizzix Foldaway die cutting machine (you can also use this same sandwich with the Sizzix Switch) is as follows: Base plate, Scrapbook.com Magic Mat, Silicone Mat, Paper, Die, Top Plate. If you have a different machine, please refer to your machine's instructions for the proper sandwich. I also used a piece of Mint Tape to hold the die in place since the paper was the same size as the die and I didn't want it to accidentally move as I ran it through the die cutting machine.

After embossing the paper I added some color and grunge using the Lost Shadow Embossing Glaze. If you aren't familiar with embossing glaze, it's really just embossing powder, but instead of being opaque it's transparent so you can actually see through it. This makes it fun to layer over printed or stamped images. Even though I'm not using it that way here, you can still use it to add color to your project.
Taking the embossed paper, I rubbed over the surface with an embossing ink pad. You don't need to push hard as you're just trying to get ink onto the raised areas, but if you do push harder and you get more ink, it's totally fine! I then poured the Lost Shadow Embossing Glaze over the paper and tapped off the excess powder. After doing this, I felt like there was too much of the powder on the paper, so I used my finger to lightly wipe off some of the powder and then returned the excess powder to the jar. Next, I used my heat gun to melt the embossing powder, making sure to let the heat gun warm up a little bit before I started and then making sure to keep it moving over the paper and avoiding leaving it in one spot for too long. As the heat gun warms the powder, the magic starts to happen as the embossing powder begins to melt and become shiny. Once all of the powder is melted, you're ready for the next step....the addition of a little grunge!
For this step, I used a Hickory Smoke Distress Crayon, a stencil brush and just a bit of water. I began by coloring onto the embossed paper with the crayon and then used the brush to work the crayon into the embossed design and the cracks and crevices from the embossing glaze. You can use a tiny bit of water, if needed, to help move the color around a little easier. I only applied the color around the outer edge of the paper because I planned to cover it with my embellishments. Once I had the outer edge of the card covered with crayon, I tapped my tap my finger into some of the water that was still on my mat then lightly wipe my finger over the surface to gently remove some of the crayon, while revealing the color that has gotten into the cracks and crevices!
Next up, I took a piece of Distress Watercolor Paper and die cut it using one of the tag dies from the Scrapbook.com Nested Tag Die Set. I then added some stamping to it using the script stamp from the Tim Holtz Entomology Stamp Set. To do this, I placed the tag into my MISTI and because the stamp is larger than the tag, and I can't use the magnet, I apply a bit of removable adhesive to the back side of the tag to help hold it in place. Next, I spray the stamp with the Lost Shadow Distress Spray Stain. I then close the MISTI to stamp the image on the paper. If you don't have the spray, you can get the same look by inking the stamp with a Distress Ink pad and then spritzing it with a bit of water before you stamped the image. I wanted a little more color on the bottom and top edges of the tag, so I added more ink and restamped the image. After I stamped the image, I used my heat tool to dry the ink. For the tiny bits that were taking too long to dry, I used a paper towel to speed it up. As for the adhesive I put on the back side, you can easily rub it off if you want. Next, I'm inking the edges with a bit of Hickory Smoke Distress Oxide Ink for a little contrast. I can then set this to the side and move onto to the next layer.

The next step for this card was to create a couple of pieces of custom colored paper to use for die cutting. I used the Ink Smooshing technique with a piece of Distress Watercolor Paper. I made one piece with Lost Shadow Distress Ink and a second piece with Salvaged Patina Distress Ink.
The dies I used are the Tim Holtz Tailored Die Set, Adorned Die Set and the Scrapbook.com Butterflies 1 Die Set and I cut the various pieces from my custom colored paper. One little tip when working with the Tailored Die Set that I've found to be helpful is to cut the shirt part from a piece of printer paper. I've found that when I use regular cardstock the collar doesn't fold down very easily and this thinner paper does and gives it a more of a crisp look.
To add a little more interest to the hat and jacket die cuts, I embossed them using the Tim Holtz Woven 3D Embossing Folder. Before doing this, I spritzed the backside of the paper so as not to activate the ink on the front of the paper and then ran it through my die cutting machine.
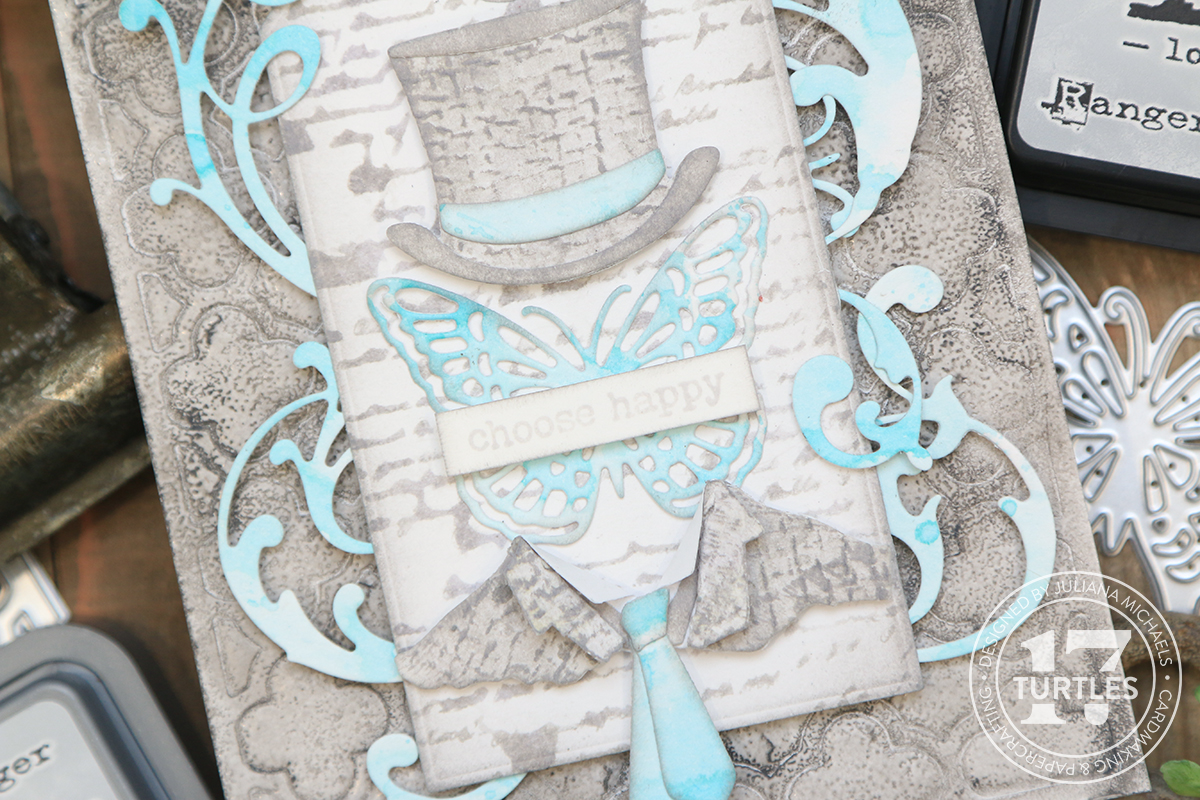
After I had embossed the hat and jacket, I highlighted the texture by lightly rubbing the Hickory Smoke Distress Oxide ink pad over the die cuts. I used a repositionable adhesive to help hold them in place while I did this. I then took a blending tool and applied Hickory Smoke Distress Oxide Ink to the edges of the hat, jacket, tie and butterfly die cuts. I also applied this same ink to the other hat layers and vest to darken them slightly and create a little more contrast.
After I finished inking the die cuts I assembled all the pieces and layers using Distress Collage Medium. Once the die cuts were assembled, I adhered them to the tag using double sided foam adhesive to give them a little bit of dimension. You could also use Collage Medium to adhere them if you're planning to mail your card and want to avoid the extra bulk from the foam tape.

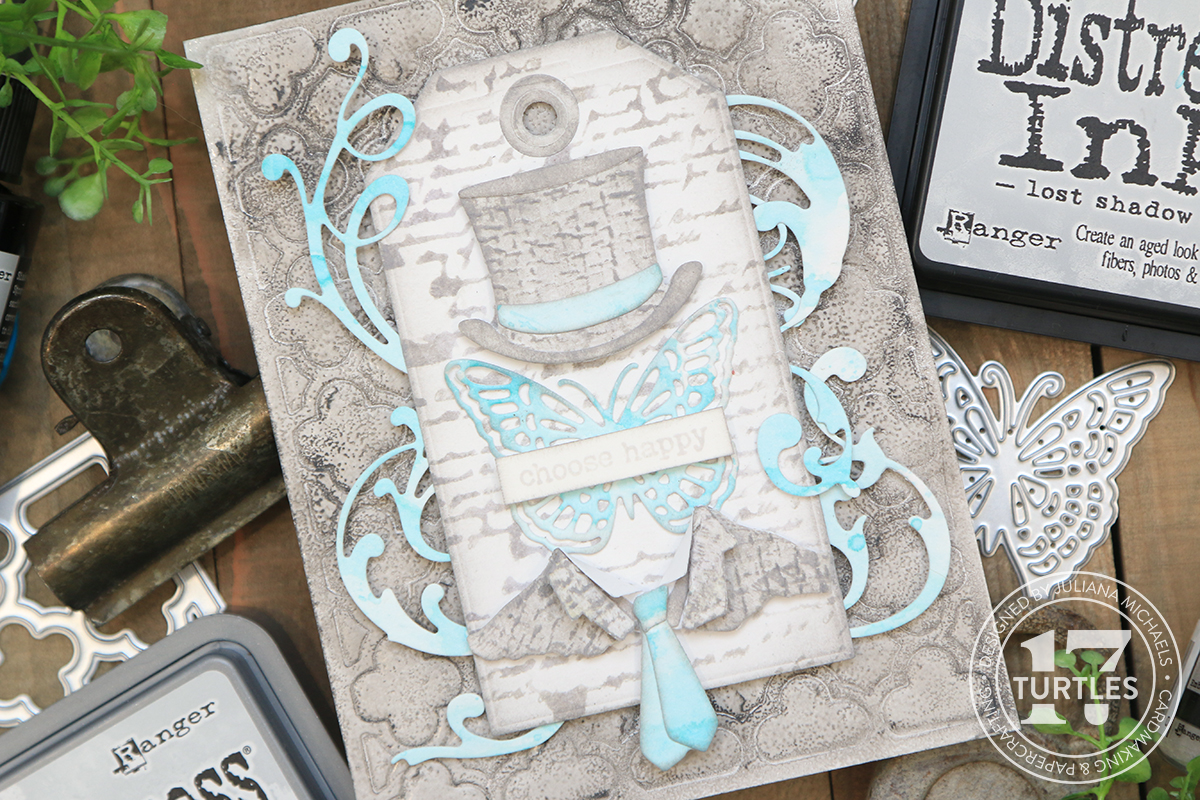
Once I got everything adhered to the tag, I grabbed the background and the flourish die cuts and began arranging how I wanted them positioned behind the tag. I cut one of them in half to add a little extra curl to the right side of the tag. To help hold the die cuts in place, I applied Easy Tear Tape to the back side of the tag, removed the liner, placed the tag on top of the flourishes and pushed down to help them stick to the tape. To adhere the tag to the background I use double sided foam adhesive. This adds more dimension, which I personally love, but if you want to avoid that you could also use a different adhesive.
The final touch for the card was the addition of a sentiment. I used the Choose Happy stamp from the Scrapbook.com Wordfetti Oh So Happy Stamp Set. They have 2 stamp sets with this awesome typewriter font and there are a ton of great sentiments and sayings to choose from to fit your specific cards needs. I stamped the sentiment using Lost Shadow Oxide Ink onto a piece of white cardstock and then trimmed it down using my new favorite scissors, the Tim Holtz 9.5 Inch Non Stick Scissors. The long blades makes it easier to get a straight cut, although it's not quite as straight as using a paper trimmer. After I trimmed it down, I inked the edges with a little Hickory Smoke Oxide Ink and then adhered the sentiment with a strip of foam adhesive.
Thanks so much for stopping by today. I hope you enjoyed this bit of inspiration using the new Tim Holtz Distress Color Lost Shadow!
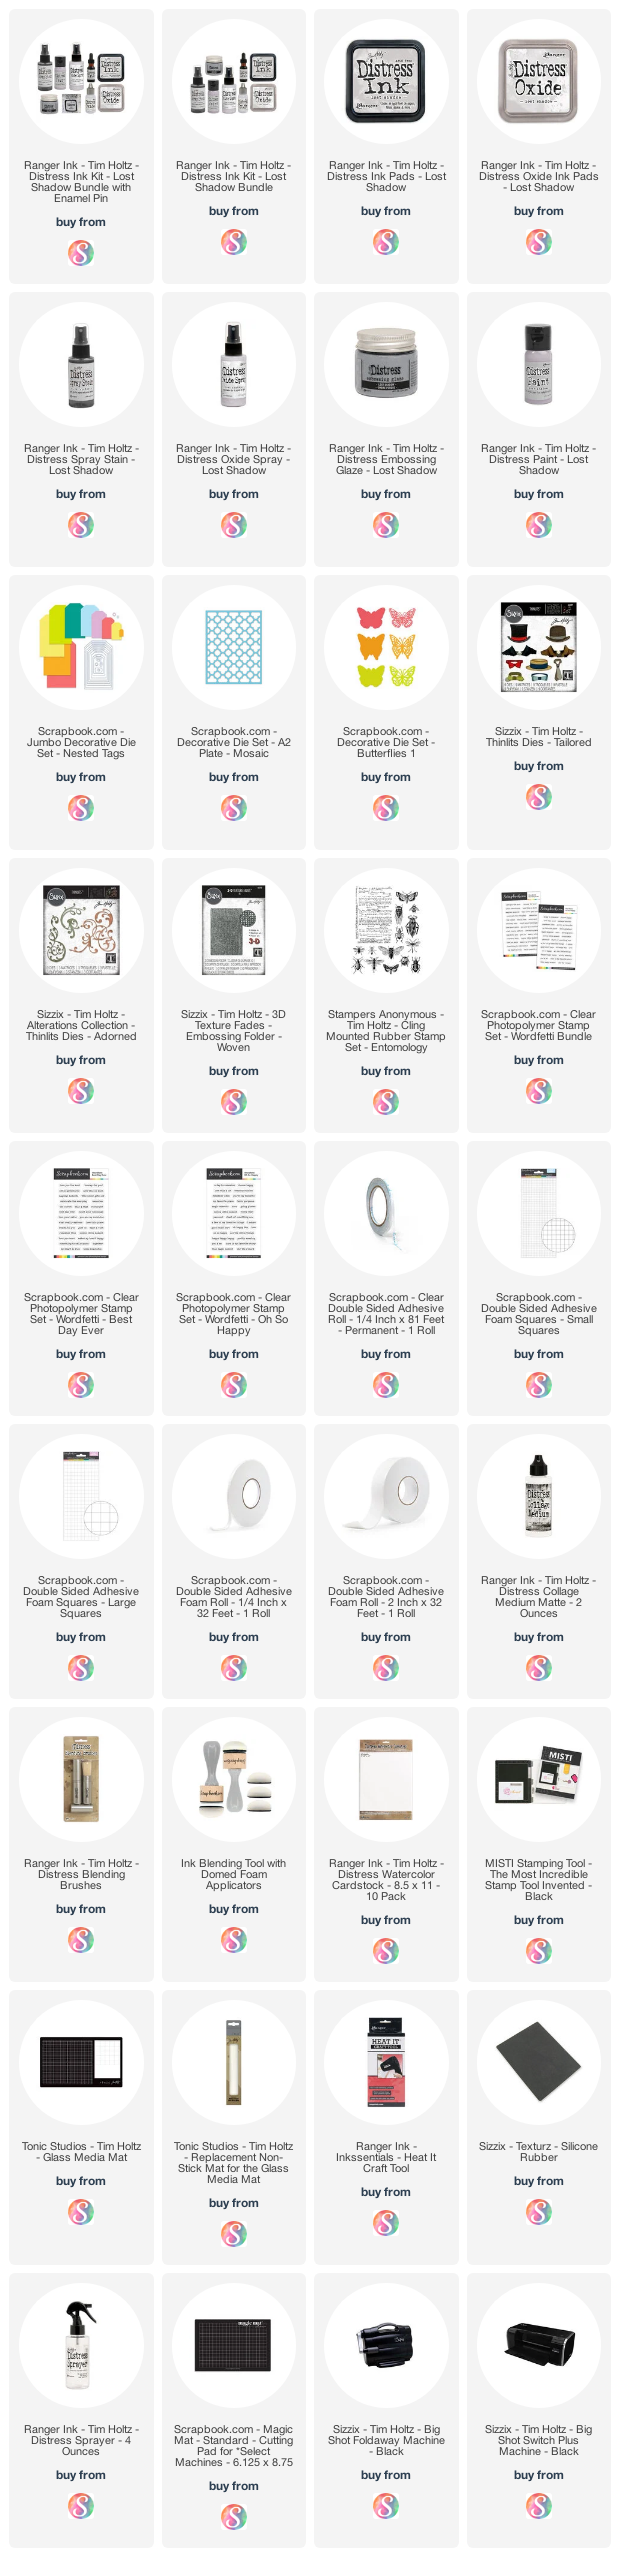
SUPPLIES
Below you can find the products I used to create this card along with compensated affiliate links to Scrapbook.com. These links are at absolutely no cost to you. When you shop through the links below, I receive a small commission from Scrapbook.com. These links are at absolutely no cost to you and the commission I receive helps me cover the costs of my blog and other expenses, which allows me to continue to provide you with FREE inspiration and tutorials. If you want to learn more about what an affiliate link is, you can see my full affiliate and product disclosure statement here. Thank you so much for your love and support!


No comments
Every time you smile at someone, it is an action of love, a gift to that person, a beautiful thing. ~Mother Teresa
HUGS!
JULIANA