Merry Christmas Wreath Card | Tim Holtz Stampers Anonymous Christmas 2022

Hello crafty friends! Even though I'm in a state of seasonal confusion as a maker and have been bouncing back and forth between Halloween and Christmas for months now, I'm super excited about the amazing Tim Holtz Stampers Anonymous Christmas 2022 LIVE launch! You can watch the replay and see all of the incredible makes and inspiration over on Tim's Blog.

I was immediately drawn to the Department Store and Festive Collage Stamp Sets and couldn't wait to combine them somehow! After playing around for a bit, I ended up with this Merry Christmas Card and Tim shared it during his Live Launch.  Now I want to share some of the details on how I created it with you. As for my other Christmas projects, I'll begin sharing them starting in November so that I can enjoy the Halloween making season!

Merry Christmas Wreath Card  by Juliana Michaels featuring  Tim Holtz Stampers Anonymous Department Store and Festive Collage Stamp Sets

To get started, I took a piece of Distress Watercolor Paper and trimmed it to 4 x 5.25 inches. I then stamped images from the Festive Collage Stamp Set around the outer edge using Iced Spruce Distress Oxide. I played around with their placement and angle to avoid having too much overlap of the images as I wanted you to be able to see the gorgeous designs.


Next, I took the Tiny Poinsettia Layering Stencil and very lightly applied Barn Door Distress Oxide through it. I made sure to keep most of the design toward the upper left and lower right corners just to leave a little breathing room.


I then cleaned and dried the stencil and placed it back onto the card, making sure to line it up with the inked design. Using a palette knife, I applied the new Distress Snowfall Grit Paste through the stencil. This paste, which is part of Tim's Seasonal Ranger Release, adds a beautiful touch of texture and hint of shimmer. If you'd like to see more, you can check out Tim's fantastic demo of these products over on his blog. I tried my best to show the Snowfall Grit Paste in a photo, but it just doesn't do it justice. In real life, is the only way you can truly appreciate what it adds to your design!


Once the paste was dry, I applied Vintage Photo Distress Ink around the outer edge using a blending tool.


While the paste was drying, I stamped the gorgeous wreath image from the Department Store Stamp Set with Vintage Photo Archival Ink onto Distress Watercolor Paper. I then stamped just the bow area so that I could use it to add a little more dimension.


Using Distress Watercolor Pencils in Barn Door, Rustic Wilderness, Iced Spruce, Peeled Paint, Vintage Photo and Walnut Stain I colored in the wreath. I used a waterbrush to pull the pigment from the pencil and color in the image. You could also color directly onto the paper with the pencil, but I find the way I did it allows me to have more control of where the color goes when I'm creating the shadows and highlights. The main thing you want to do is to make sure to have more pigment on your brush than water and apply it to the shaded (darker) areas of the stamped design. Then you can use a bit of water to blend the color out into the lighter areas.


I repeated the coloring on the extra bow image. Once the coloring was completed and the paper was dry, I used a pair of scissors to fussy cut the wreath and the extra bow. To get inside the center of the wreath, I used a craft knife to cut an opening and then cut the rest of it with my scissors. If you are really good with a craft knife, then you might be able to do it all that way. I'm just not one of those people!


Before I adhered the wreath to my background, I used double sided foam adhesive squares to adhere the bow. I also adhered the wreath with foam adhesive as well. I love adding dimension, but if that's not your thing, you can use your favorite adhesive to adhere them.


I adhered the sentiment using foam adhesive as well. The sentiment is from the Holiday Sketchbook Stamp Set and I stamped it in Vintage Photo Archival Ink, trimmed it down and inked the edges with Vintage Photo Distress Ink.


One final touch, which doesn't show up too well in the photos, is that I applied Glossy Accents to the berries. While this was still wet, I sprinkled some Rock Candy Glitter over them and tapped off the excess. In person, I really love the touch of shimmer this creates and how it adds to the vintage feel of the card design.

To finish off the card, I layered the background onto a piece of Distress Christmas Light Grey Woodgrain Cardstock trimmed to 4.25 x 5.5 inches.
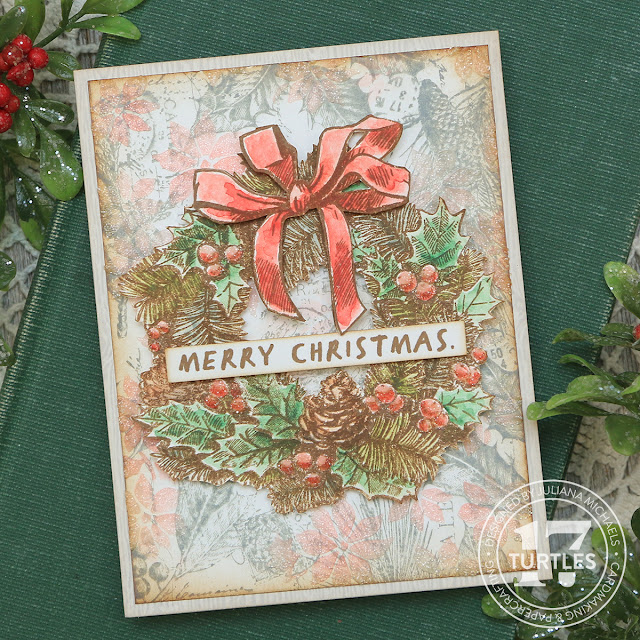
Merry Christmas Wreath Card  by Juliana Michaels featuring  Tim Holtz Stampers Anonymous Department Store and Festive Collage Stamp Sets

Thanks so much for stopping by and let me know if you have any questions.

SUPPLIES

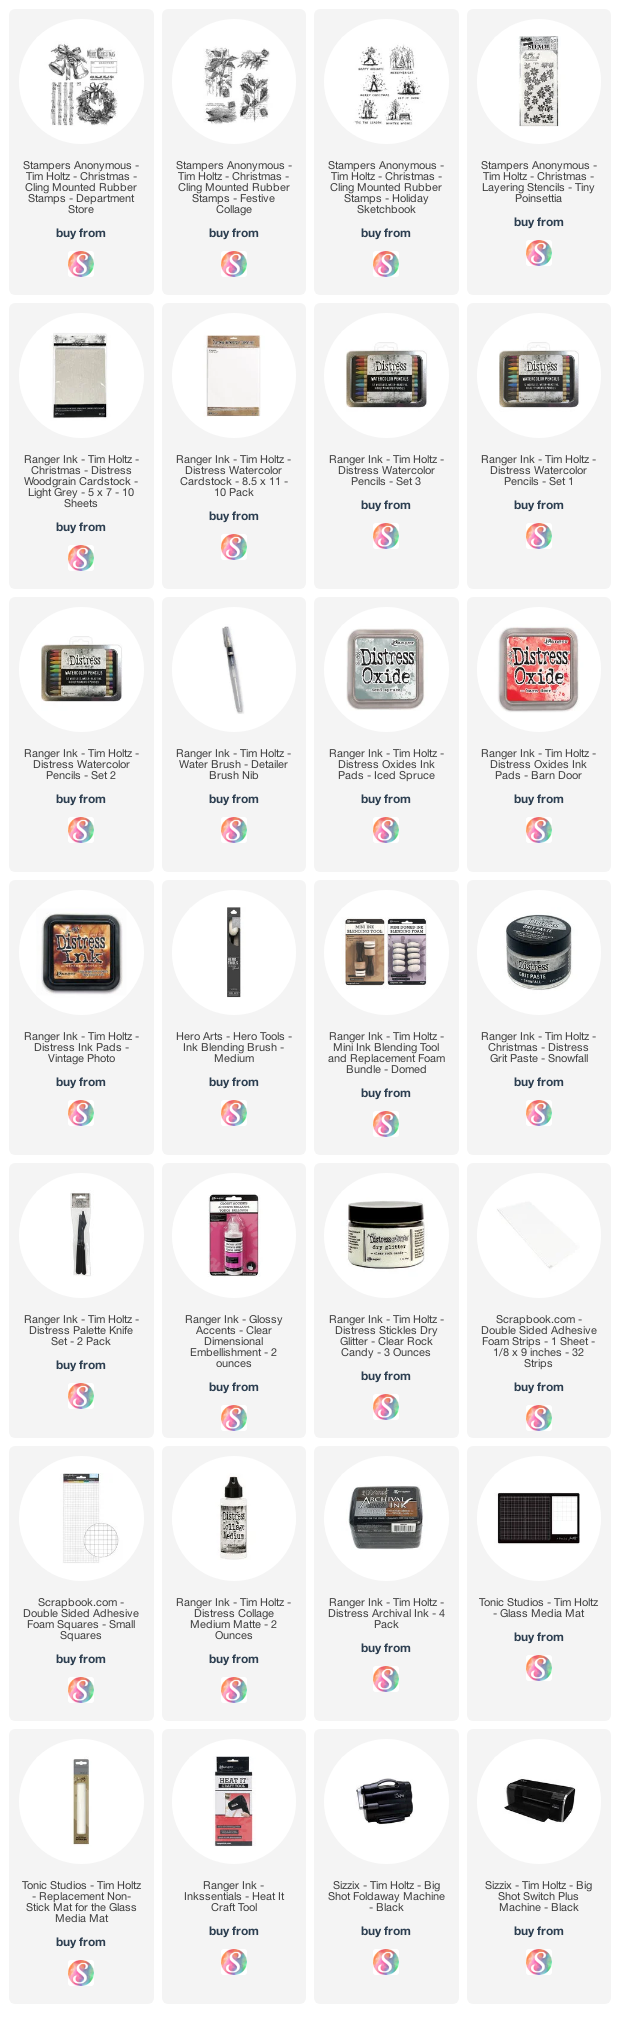
Below you can find the products I used to create this project along with compensated affiliate links to Scrapbook.com. These links are at absolutely no cost to you. When you shop through the links below, I receive a small commission from Scrapbook.com. These links are at absolutely no cost to you and the commission I receive helps me cover the costs of my blog and other expenses, which allows me to continue to provide you with FREE inspiration and tutorials. If you want to learn more about what an affiliate link is, you can see my full affiliate and product disclosure statement here. Thank you so much for your love and support!
Tim Holtz Christmas Distress Mica Stain Swatches + Giveaway

The giveaway winner is cghundley! Congratulations Carla!

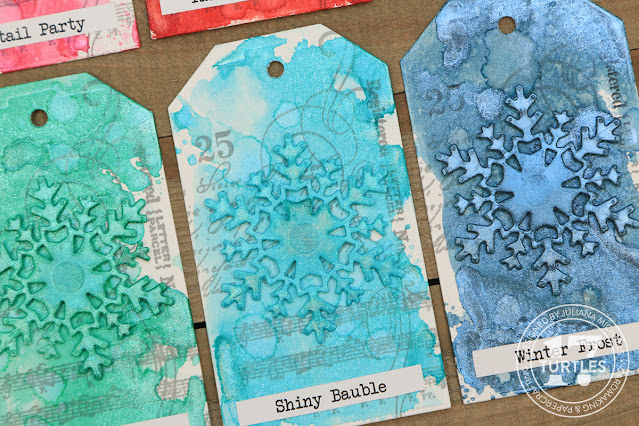
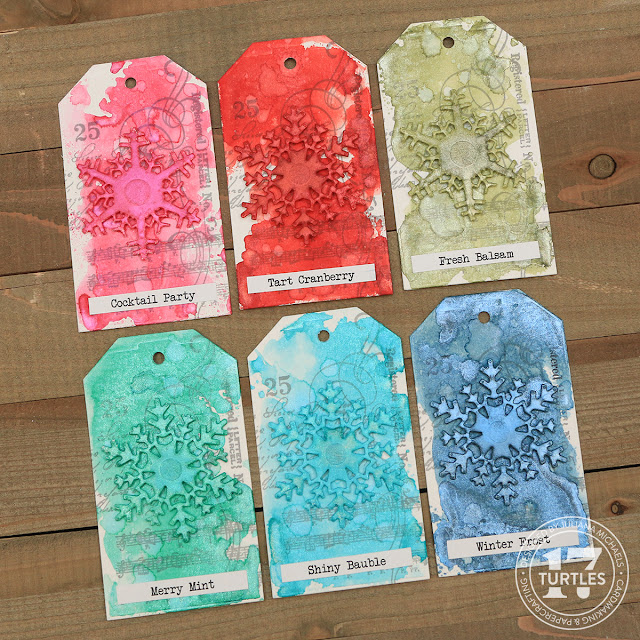
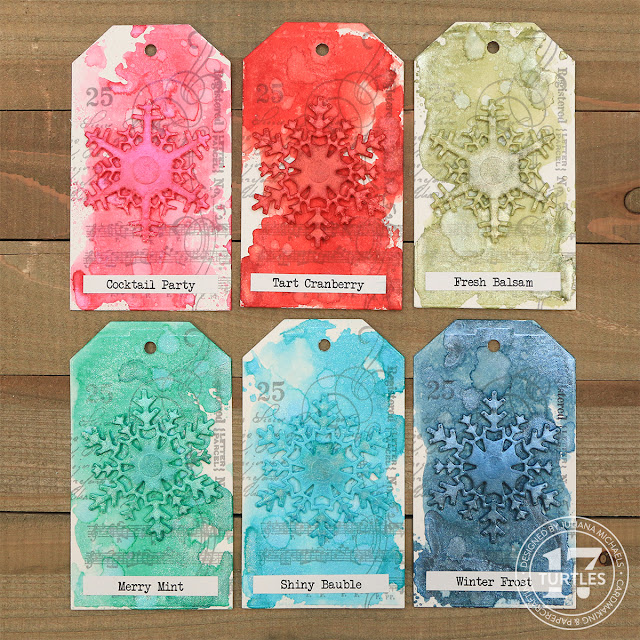
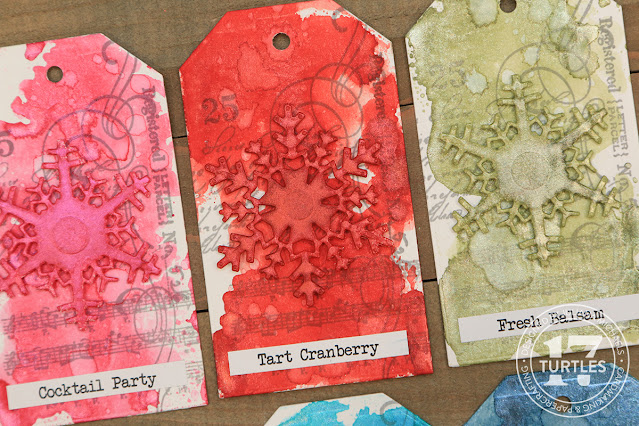
Hello friends! Tim Holtz has released his Ranger Christmas Distress collection (available for a limited time only!) and I wanted to share the swatches I made using the new Christmas Mica Stains, as well as the ones from last year. With the addition of this years colors, there are now 12 colors that make up the Christmas palette. When you add on the 12 Halloween colors, there is a rainbow of Mica Stains that can be used all year round! If you aren't familiar with the Distress Mica Stains, they are a spray ink that has a beautiful, pearlescent shimmer to it and so perfect for holiday crafting projects!

Tim Holtz Christmas Distress Mica Stain Swatches by Juliana Michaels

For my own personal use, I'm finding swatches more and more helpful when it comes to picking the colors I want to use for my makes. It also helps me break out of my rut of using the same colors all of the time. With that said, I thought it would be fun to make my swatches pretty to look at and with the recent Distress colors that have been added, I've been redoing my ink swatches. 

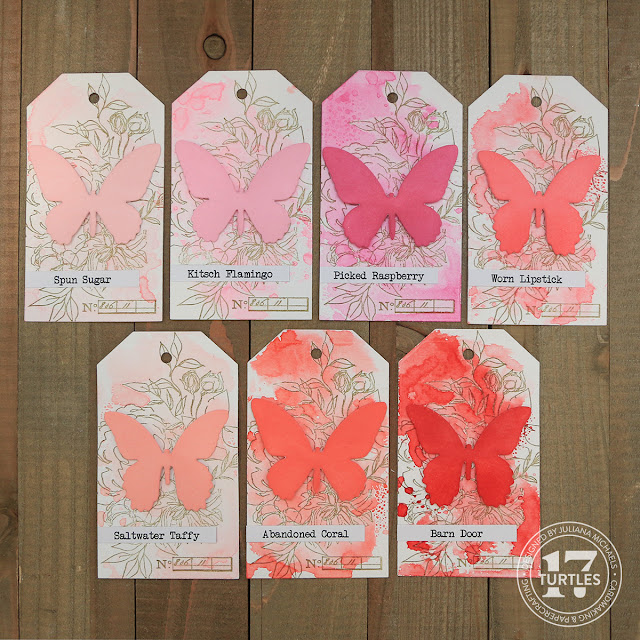
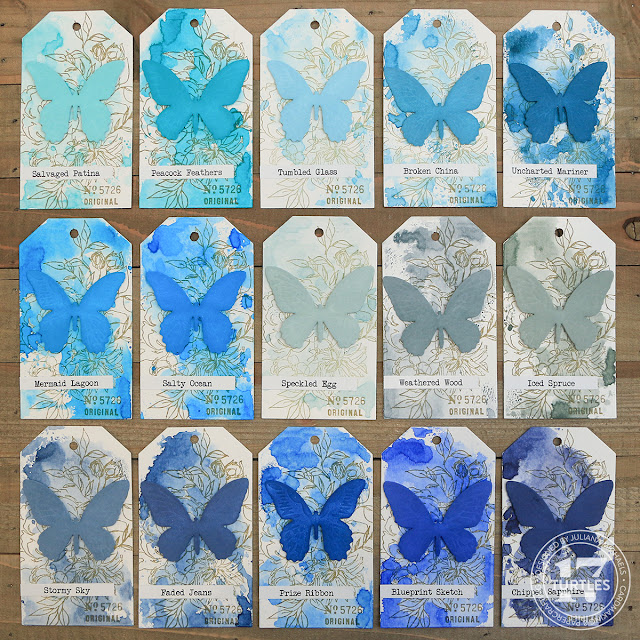
I shared them HERE and HERE if you want a little more inspiration on creating your own pretty swatches. I also debated about making these using the same stamps and dies, but I settled on giving them their own look and sticking with a bit of a Christmas theme even though you can certainly use them year round.

Tim Holtz Distress Ink Swatches by Juliana Michaels

Tim Holtz Distress Ink Swatches by Juliana Michaels

TIM HOLTZ CHRISTMAS DISTRESS MICA STAIN SWATCHES

The first thing I did was die cut 12 tags and 12 snowflakes from Distress Watercolor paper...one for each of the Christmas Distress Mica Stain colors. I then spritzed some of the Mica Stain onto my non-stick craft mat, spritzed that with water and then smooshed a tag into the ink. Using my Heat Tool, I dried the tag and then spritzed the tag with water by slowly pulling the trigger on the Distress Sprayer so I got a mix of large and small water droplets. I dried this, set it to the side and repeated the process on each of the tags with each of the colors.

While I had the ink out for each tag, I also sprayed a snowflake die cut with the coordinating ink and dried it with my heat tool.

Once I had all of the inking completed, I pulled out the Tim Holtz The Poinsettia Stamp Set and added some stamping to each tag. I placed the tag in my stamping tool, traced around it with a pencil and used this outline to place the next tag in the same spot so I could easily remove the tag and stamp the next one. I also placed a bit of repositionable adhesive on the paper inside my stamping tool to help hold the tag in place. This way I didn't have to worry about moving the magnets around each time. I then stamped the images using Hickory Smoke Archival Ink.

To finish off the set, I printed out the names of the new colors, trimmed them down and adhered them to each tag.

So there you have it, my set of pretty swatches for the new Tim Holtz Christmas Distress Mica Stains. With these completed, it's now time to do my Halloween colors!


These are the Christmas Distress Mica Stain Swatches from 2021. As with all of Tim's seasonal releases, these are only available while supplies last, so sadly they are no longer available. I sure hope you grabbed them last year when you had a chance. If you didn't though, I do recommend grabbing this year's while you can!

Tim Holtz Christmas Distress Mica Stain Swatches by Juliana Michaels


Here's a look at all 12 Christmas Distress Mica Stain Swatches together. Aren't they gorgeous?! When you see them all together you can see how different the colors are from each other and that there's definitely no overlap of colors.

Tim Holtz Christmas Distress Mica Stain Swatches by Juliana Michaels

Tim Holtz Christmas Distress Mica Stain Swatches by Juliana Michaels

So will you be adding to your stash with the Tim Holtz Christmas Distress Mica Stains? Have you tried them out yet? I can't wait to see all of the inspiration that comes along as everyone creates with them.

• • • • • • • • • • • • • • • • • • • • • • • • •

GIVEAWAY - The winner is cghundley!

To celebrate this new release, I am giving away a set of Distress Mica Stains from 2021 to ONE lucky winner. This set includes both the Christmas and Halloween colors...12 total. You can leave a comment on this blog by 11:59pm EST on Wednesday October 12th, 2022 for your chance to win. Winners will be chosen at random from the comments left on this post. Because of the nature of this product and shipping, this is only open to residents of the USA.

• • • • • • • • • • • • • • • • • • • • • • • • •

TIM HOLTZ RANGER CHRISTMAS DISTRESS

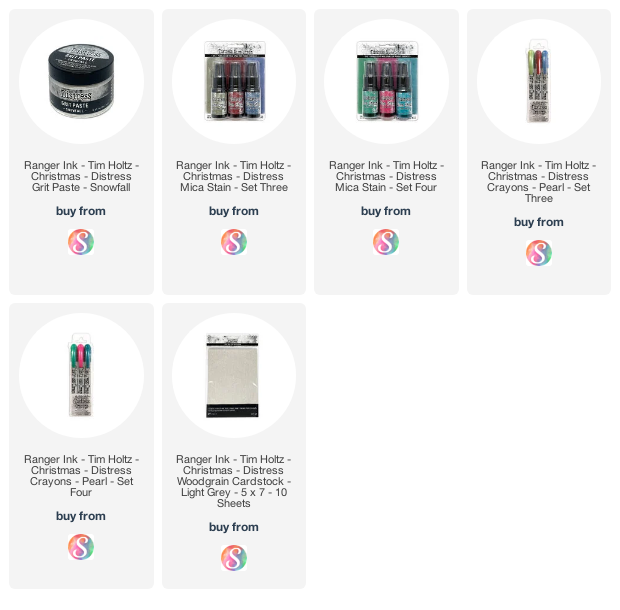
If you just have to have all the new Tim Holtz Ranger Christmas Distress products you can grab them using the links below. 

SUPPLIES

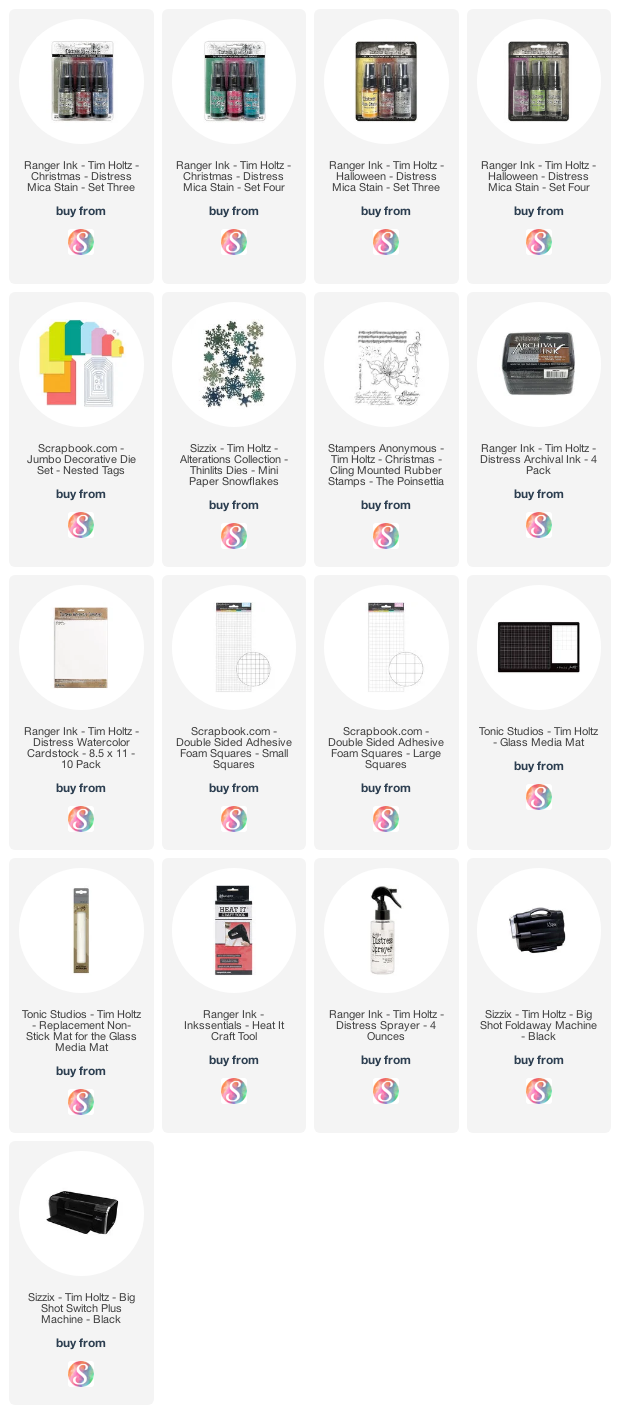
Below you can find the products I used to create this project along with compensated affiliate links to Scrapbook.com. These links are at absolutely no cost to you. When you shop through the links below, I receive a small commission from Scrapbook.com. These links are at absolutely no cost to you and the commission I receive helps me cover the costs of my blog and other expenses, which allows me to continue to provide you with FREE inspiration and tutorials. If you want to learn more about what an affiliate link is, you can see my full affiliate and product disclosure statement here. Thank you so much for your love and support!
I've also included the Halloween Mic Stains just in case you missed grabbing them!

Halloween Banner 2022

Hello friends and welcome! Today is the day. I'm finally sharing the Halloween Banner I promised last week. I have a good reason for keeping you in suspense though because this project is part of the Scrapbook.com Bat Parade! At the end of the post, I have all the details about the Bat Parade.

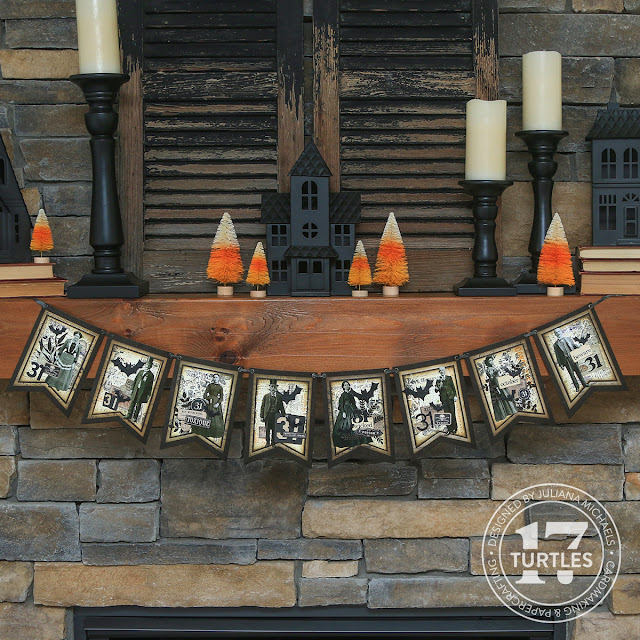
Halloween Banner by Juliana Michaels featuring Scrapbook.com Halloween Bats Decorative Dies and Tim Holtz Idea-ology Halloween

One thing I want to share before I get into the making details, is that this is another one of those projects I've been wanting to do for years (greatly inspired by the talented Zoe Hillman) and this year I'm proud to say I finally got my Halloween Banner made.


HALLOWEEN BANNER 2022

I'm going to walk you through the basics of how I created one of the banner pieces. I then repeated this formula for the remaining banners, just mixing it up with the embellishments and die cuts I added to made each piece unique.

Halloween Banner by Juliana Michaels featuring Scrapbook.com Halloween Bats Decorative Dies and Tim Holtz Idea-ology Halloween

To get started, I began by die cutting a piece of Tim Holtz Black Kraftstock using the second from the largest Scrapbook.com Nested Flag Banner Dies. 

Using the next size down, I die cut a piece of Tim Holtz Halloween Backdrop Patterned papers, inked the edges with Walnut Distress Ink and adhered it to center of the Black Banner.

I then took the next size down and die cut a piece of Distress Mixed Media Heavystock. Using an assortment of Tim Holtz Halloween stamps and Archival Ink in Black Soot, Peeled Paint, Villainous Potion and Spiced Marmalade I created my own "patterned paper".  You could easily use Distress Ink or Distress Oxide Ink if you prefer. I also made each panel different by using different stamps on each one, but if you want to hurry along the process, you could make each one the same. Once the stamping was completed, I inked the edges with Walnut Stain Distress Ink.


Next, I die cut a piece of Distress White Heavystock using the Tim Holtz Spider Web Die, inked it very very lightly with Antique Linen and Pumice Stone Distress Ink and adhered it to the stamped panel with Distress Collage Medium.

At this point, I adhered this panel to a piece of Black Kraftstock and trimmed to 3.5 inches wide and then used my scissors to cut the notch and create a thin mat layer for the stamped piece. 


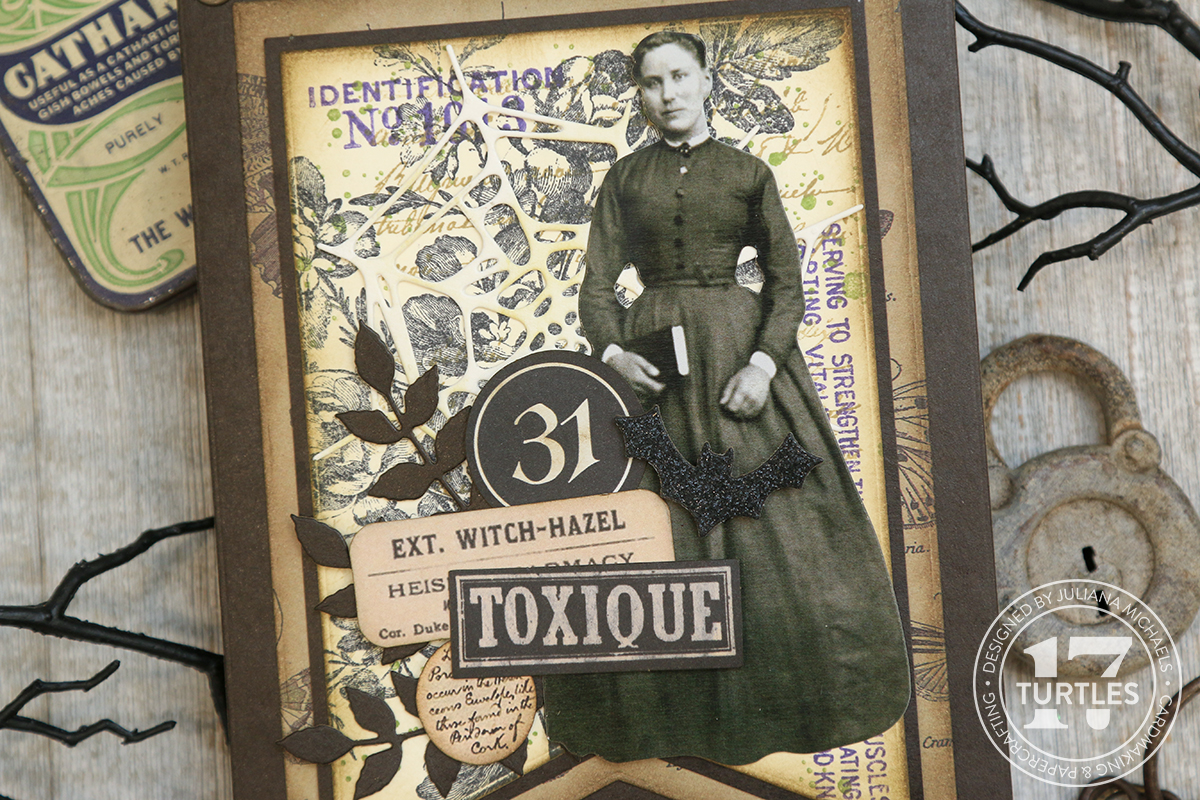
With the background completed, it's time to move onto the the embellishing. I selected a Tim Holtz Halloween Paper Doll for each banner and adhered it using double sided foam adhesive to give it a little dimension. I then added bits of Tim Holtz Halloween Ephemera and Snippets. I also die cut the letters 31 from black glitter cardstock using a mix of number dies from Scrapbook.com. To add a touch of spooky, I die cut Black Kraftstock using the Scrapbook.com Delicate Leaves die and tucked them in here and there. Who knew these gorgeous leaves could be spooky?! These dies are in the coming soon section, so make sure to hit the "notify me" button so you are in the know for when they are in stock and available!


The final touch was the addition of the bats! I die cut them from black glitter paper using the Scrapbook.com Halloween Bats Dies and adhered them with double sided foam adhesive to give them some dimension.

Next, I punched a hole in the top right and left hand corners of each banner piece using the We R Memory Keepers Crop-A-Dile to punch the hole and adhere the eyelets. I then cut a length of Hug Snug Seam Binding, inked it with Black Soot Distress Spray Stain, dried it and thread it through the eyelets so I could hang my banner.


Here is a look at each of the individual banner panels as well as a close up detail image of each one. Enjoy the scroll!


Halloween Banner by Juliana Michaels featuring Scrapbook.com Halloween Bats Decorative Dies and Tim Holtz Idea-ology Halloween


Halloween Banner by Juliana Michaels featuring Scrapbook.com Halloween Bats Decorative Dies and Tim Holtz Idea-ology Halloween


This is a look at my Halloween Banner hanging on my mantel.


I hope you enjoyed learning how my Halloween Banner 2022 came together and that it will be the first of many I create to share with you. Speaking of making. Have you ever made a Halloween Banner?

• • • • • • • • • • • • • • • • • • • • • • • • • • • • • • • • • • • 

SCRAPBOOK.COM BAT PARADE

What is the Bat Parade you ask?! Well let me tell you. Today Scrapbook.com is having a Livestream deal that features their Halloween Bats Die Set. This deal will only last for two days or while supplies last, so make sure you head over to their Livestream to check it out if you haven't already. 

To celebrate this deal, a group of talented crafters will be sharing loads of inspiration on how they've used this die set to create everything from cards, to scrapbook pages, home decor and more! You can look for them on Instagram using the hashtag #batparade or in the Bats Parade Gallery on Scrapbook.com.

HALLOWEEN BATS DIES

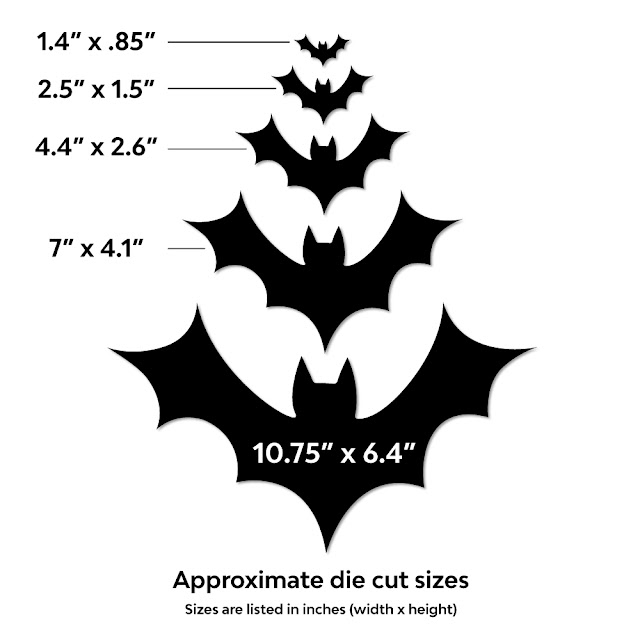
This die set includes 5 dies in the following sizes, making it perfect for all of your paper crafting needs!

Scrapbook.com Halloween Bats Decorative Dies

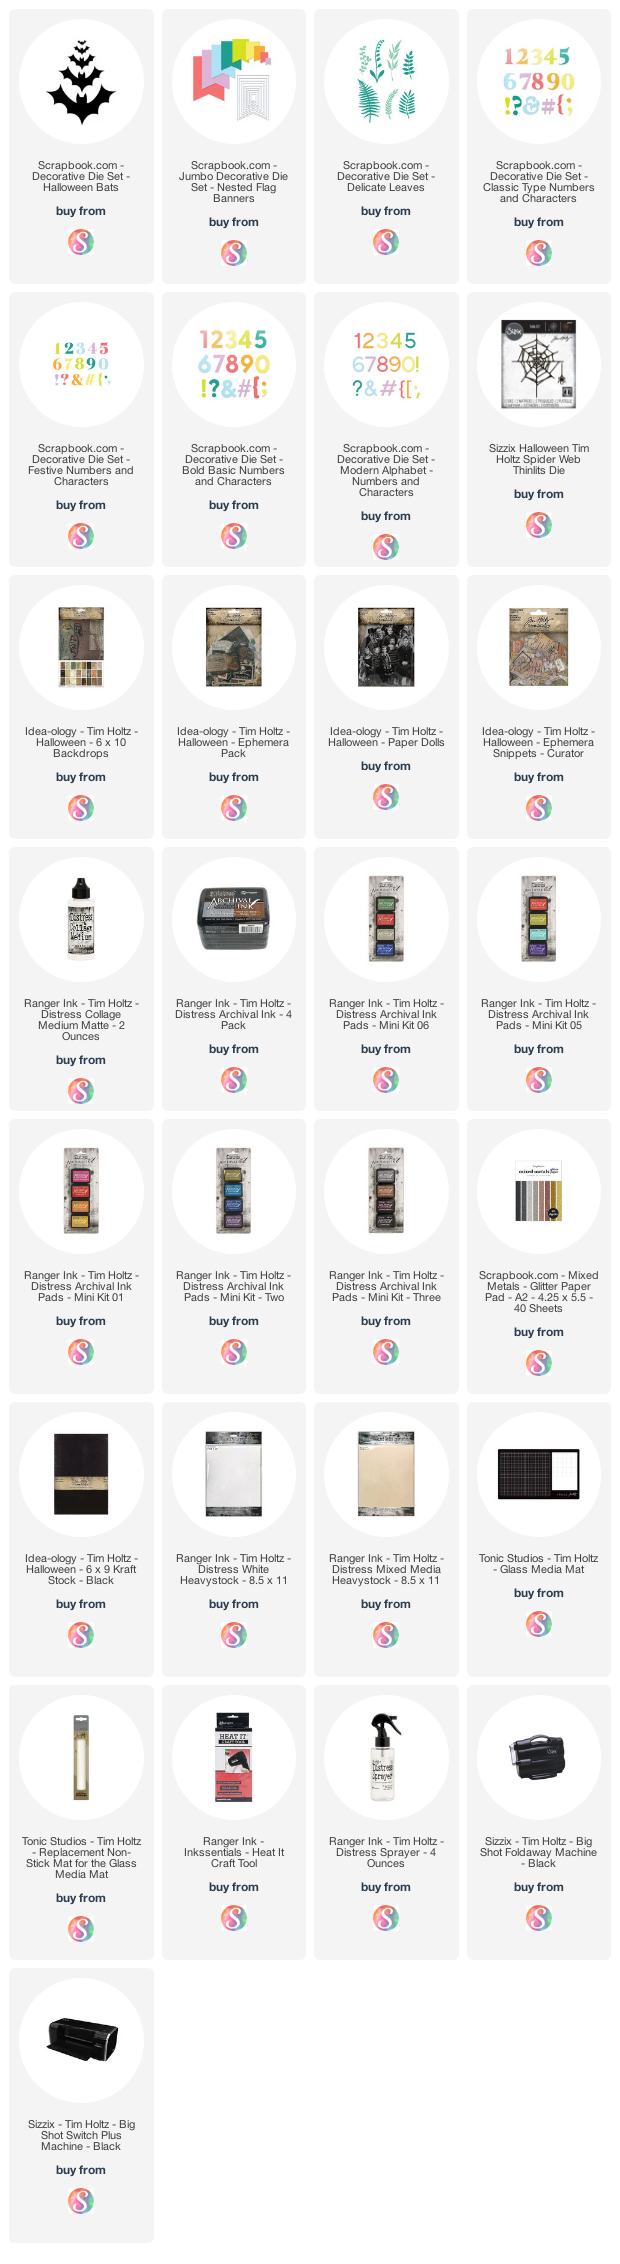
SUPPLIES

Below you can find the products I used to create this project along with compensated affiliate links to Scrapbook.com. These links are at absolutely no cost to you. When you shop through the links below, I receive a small commission from Scrapbook.com. These links are at absolutely no cost to you and the commission I receive helps me cover the costs of my blog and other expenses, which allows me to continue to provide you with FREE inspiration and tutorials. If you want to learn more about what an affiliate link is, you can see my full affiliate and product disclosure statement here. Thank you so much for your love and support!
* This is not an affiliate link, but one of the few places I've been able to locate the seam binding I used: 

Christmas Shaker Tags with Christmas Bold Text and Framed Tags | Tim Holtz Sizzix Christmas 2022

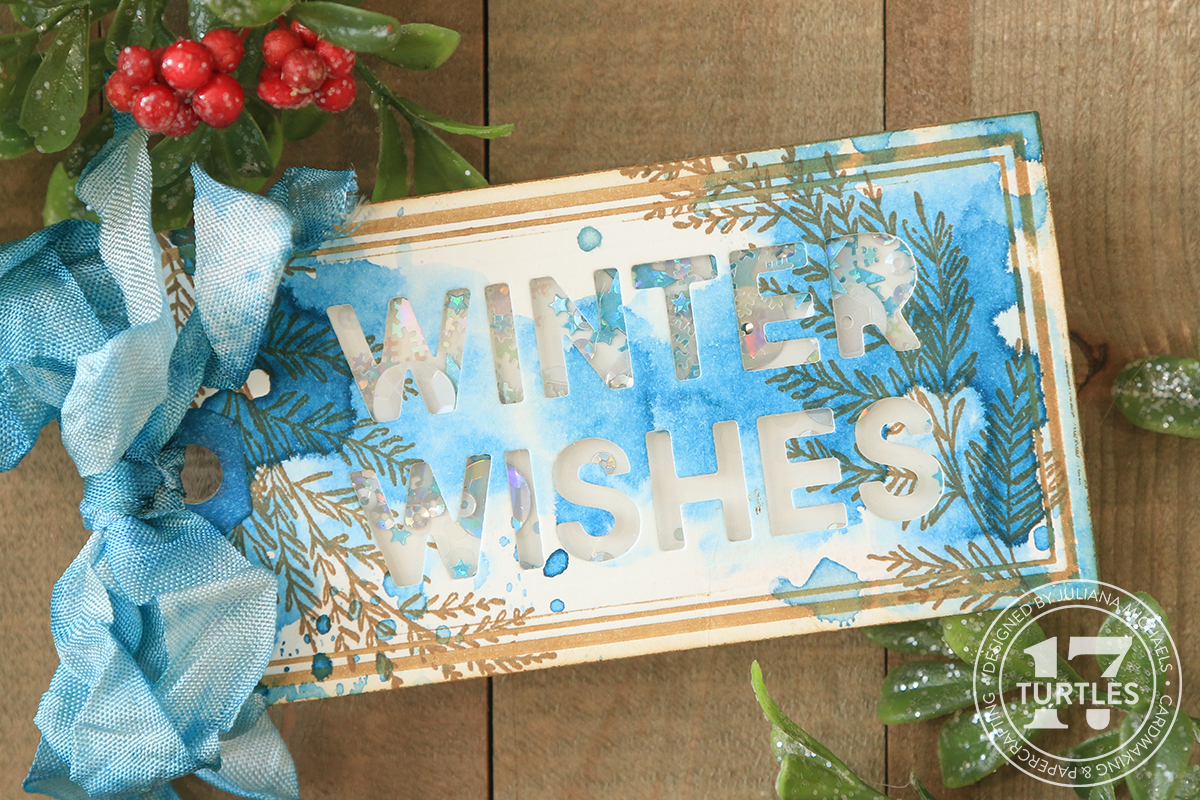
It's the start of the most wonderful time of the year AND it's time to get your shakety shake on! In this blog post I'm sharing how I created this set of Christmas Shaker Tags I made for the Tim Holtz Sizzix Christmas YouTube Live. As soon as I saw the Christmas Bold Text and Framed Tags I immediately knew that some shakety shake shaker tags were in my future! If you missed the live you can always catch the replay and check out all the inspiration from the other Makers.

Christmas Shaker Tags by Juliana Michaels featuring Tim Holtz Sizzix Christmas Bold Text and Framed Tags

I also have a short video showing how I created the blue version of these shaker tags. You can watch it below or over on my YouTube Channel.


CHRISTMAS SHAKER TAGS | TIM HOLTZ CHRISTMAS BOLD TEXT AND FRAMED TAGS

For these tags I'm using the Framed Tags Thinlits. This set comes with 3 tags and 3 reinforcer options. I began with the medium size tag and die cut it using the technique Tim shared when he released the Vintage Labels Thinlits. In that technique, he inked the die and then die cut with it to get a letterpress effect. I made sure to clean the die thoroughly with rubbing alcohol and then inked the die with Vintage Photo Archival Ink using a rubber brayer. I carefully placed the inked die onto the smooth side of a piece of Distress Watercolor Paper and ran it through my die cutting machine.
And voila...I have the look of a letterpress tag!

After die cutting the tag I applied Distress Spray Stain in Uncharted Mariner and Speckled Egg to my craft mat, spritzed them with water and smooshed the tag into the ink. I then dried the ink using my heat tool. You could also do this same technique using Distress ink pads. 

Once the ink was dry, I added some stamping using the Sketch Greenery Stamp Set. I positioned the tag into my stamping tool and then positioned one of the greenery pieces on the right side of the tag and stamped it using Vintage Photo Archival Ink. I stamped it twice to get a good impression since I was working on the watercolor paper. I then flipped the tag around and stamped the image on the left side of the tag.


Next, I positioned the Winter Wishes die from the Christmas Bold Text Thinlets in the center of the tag and used some Mint Tape to hold it in place as I ran it through my die cutting machine.

Now it's time to create the shaker part. First I cut a piece of acetate to just slightly smaller than the tag and adhered it to the back side of the tag. I recommend using some sort of double sided tape for this step. After you adhere the acetate you can trim off any excess if needed.

Next, I adhered strips of double sided foam tape around the outside of the tag to create the shaker box. As you trim the tape, you want to make sure that you don't have any gaps as you create the box, so that none of the shaker filler can fit through and fall out. I also added some foam tape to the bottom and top edges so that the tag would be the same thickness all the way across.

With the shaker box completed, I die cut another tag to use as the backside of the shaker. I hadn't cleaned off the die, so you can see a little bit of the ink on the paper. That won't matter though because it won't show once the shaker is assembled.  

To fill the shaker, I used a mix of sequins from Sizzix, but feel free to use whatever sequins, beads or other fillers you have on hand. If you end up using beads, you may need to add another layer of foam tape so that there is enough space for them to move around once the shaker is assembled.

Here I'm filling the shaker box with a mix of sequins. Once I had the shaker filled, I pulled back a little bit of the liner on some of the foam tape, lined up the other tag and adhered it in those couple of spots. I then removed the other liners and pushed down to fully adhere the back tag. If you don't get things lined up just perfectly you can use your scissors to trim off any excess. 

To finish off the tag, I added one of the hole reinforcers which I die cut and inked to coordinate with the tag. I also added some custom colored crinkle ribbon I made using Hug Snug Seam Binding. To dye the ribbon, I used Uncharted Mariner and Speckled Egg Distress Spray Stains, which are the same ones I used to ink the paper. To create the ribbon, I cut a length of it and placed it inside a plastic bag. I then sprayed the ink and a bit of water into the bag and squished it around until the ribbon was covered with ink. You can add more ink and water as needed. Once the ribbon was cover with ink, I carefully removed it from the plastic bag and dried it with my heat tool. If you don't want ink all over your fingers, you can use tweezers or even wear rubber gloves.  If you want the crinkled look, make sure to keep the ribbon wadded up as you dry it.

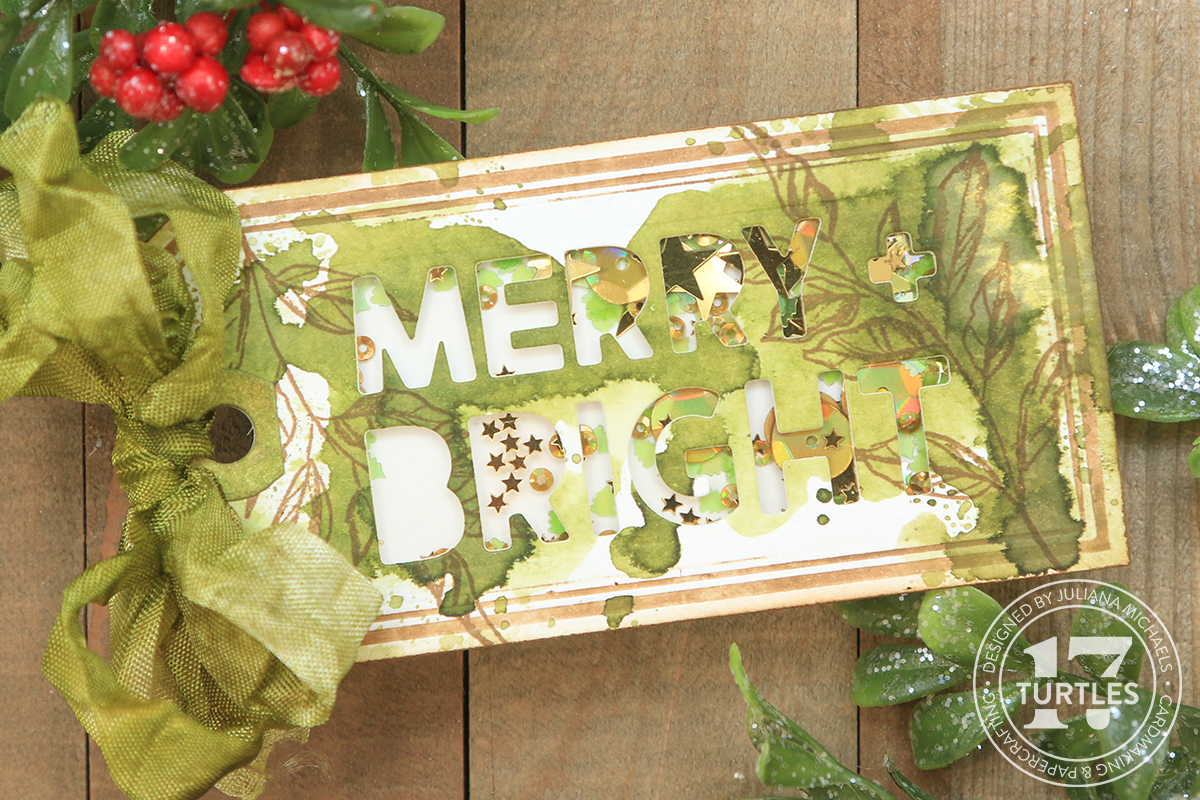
And there you have it! A Christmas Shaker Tag using the new Tim Holtz Framed Tags and Christmas Bold Text Thinlits. This video shares with you how I created I the blue tag. I also created a green and red version using the same techniques, but with different colors of spray stains. For those details and more photos, make sure to check out my coordinating blog post which is linked in the description box below.


For the green tag I used a mix of Peeled Paint and Forest Moss.


I used Aged Mahogany and Candied Apple to create the red tag.


It means so much to me that you stopped by to check out the Christmas Shaker Tags I made using the Tim Holtz Sizzix Christmas Bold Text and Framed Tags!

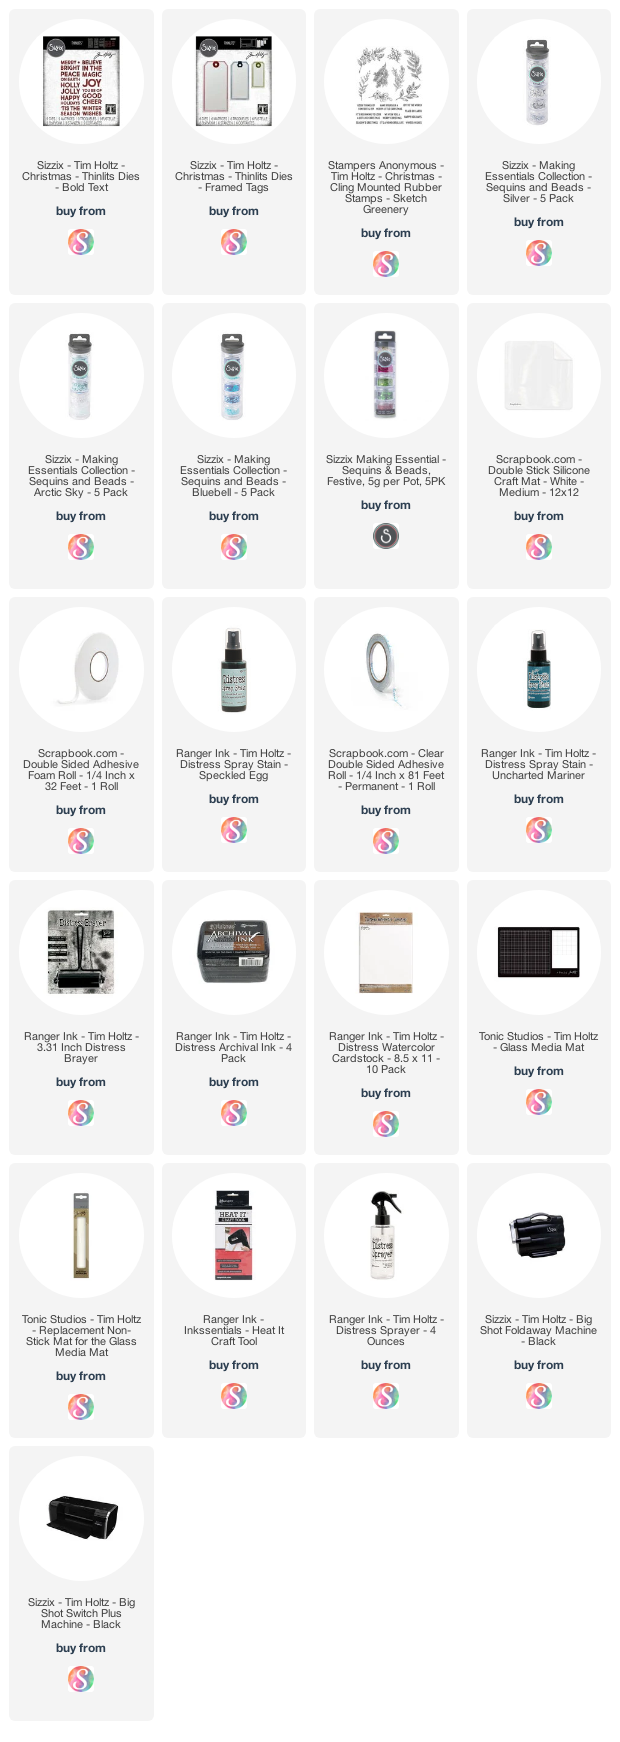
SUPPLIES

Below you can find the products I used to create this project along with compensated affiliate links to Scrapbook.com. These links are at absolutely no cost to you. When you shop through the links below, I receive a small commission from Scrapbook.com. These links are at absolutely no cost to you and the commission I receive helps me cover the costs of my blog and other expenses, which allows me to continue to provide you with FREE inspiration and tutorials. If you want to learn more about what an affiliate link is, you can see my full affiliate and product disclosure statement here. Thank you so much for your love and support!
* This is not an affiliate link, but one of the few places I've been able to locate the seam binding I used: 

Subscribe