Showing posts with label The Paper Bakery Kit Club. Show all posts

Paper Bakery Sketch Challenge #6

Happy Father's Day everyone! Today I am sharing the Paper Bakery's Sketch Challenge #6 with you!

Paper Bakery Sketch Challenge #6 Juliana Michaels

Yes, today is Father's Day and how perfect that I ended up scrapping a photo of my Dad to share with you today!!!  I took this photo during one of my visits to see him. Every time we go to see my Dad during the summer, we have to make a trip to the local burger/ice cream joint called Belew's Dairy Bar. In my opinion they make THE best peanut butter malts in the world!!!  Once I had picked this photo to scrap, I decided to use the sketch from Sketch Challenge #6 and this is my take on it.  I pretty much just followed the sketch this time and I enjoyed how quickly it came together. Sometimes it is nice to keep it easy and I find a sketch can always help with that!!!


I also have a tutorial up on the Paper Bakery blog sharing some tips and techniques that I used to create my layout and dress it up a bit. Please stop by to check it out!

Here are the details you need to know to play along with us using the sketch:
1.) The Paper Bakery will have Sketch Challenges twice a month. You can play along once for a chance to win the monthly prize OR play along twice to double your chances of winning the monthly prize.
2.) All you have to do is make a layout or project utilizing the sketch. (Using Paper Bakery kits are not required to play along.)
3.) Then, take a photo of your layout and link it up on the sidebar of The Paper Bakery blog using the INLINKZ widget. Sketch Challenge #6 is due by June 29.
4.) Winners will be chosen at random and will be posted on our Facebook page and on our blog.  Make sure to follow us on both to find out if you are the winner of the monthly prize!!!

I hope you are inspired by the sketch to play along with us and I can’t wait to see what you create and share!!! Thanks for stopping by!!!

Paper Bakery Sketch Challenge #5

Happy Friday all! I hope you have had a good week. This week has flown by for me, but I have been busy creating with the June Paper Bakery Kit and creating my challenge sketch and layout for the Oklahoma Online Benefit Crop tomorrow June 15. Today, however, I wanted to share the layout I created using the sketch from Sketch Challenge #5 for the Paper Bakery.

Paper Bakery June Scrapbook Kit Sketch Challenge #5 Juliana Michaels

First off, I had to use the fabulous Heidi Swapp paper, but it was a bit bold being only black and white, so I sprayed the background with some Heidi Swapp Color Shine in Tropicana Teal and then wiped off the excess. Then I used the stencil from the Paper Bakery May Mixed Media kit with some Heidi Swapp Color Shine in Gold to further soften the colors.

Paper Bakery June Scrapbook Kit Sketch Challenge #5 Juliana Michaels detail

Next I tackled the banner image from the sketch.  I had fun using a ton of scraps from my May and June kits to create the fun banner a the top.

Paper Bakery June Scrapbook Kit Sketch Challenge #5 Juliana Michaels detail

Instead of doing another banner at the bottom like the sketch has, I decided to go a different route.  I resized and printed some of the FREE June Printables and added them to the strip at the bottom.

Paper Bakery June Scrapbook Kit Sketch Challenge #5 Juliana Michaels detail

This is the sketch that inspired it all! You have until Saturday June 15th to play along for your chance to win a fun prize package from the Paper Bakery. 

Paper Bakery June Scrapbook Kit Sketch Challenge #5 Juliana Michaels

Paper Bakery June Scrapbook Kit Free Printables

Thanks so much for stopping by! I hope you have a fabulous weekend and maybe you will think about either joining in the fun for the Oklahoma Online Benefit Crop. If you can't play along you could think about just donating to this worthy event as ALL of the donations are being given to The United Way to help the victims of the tornado tragedies. There is a donation button on the top right hand side of the website. Thanks!!!

Paper Bakery June Kits

Did you know that the Paper Bakery has MULTIPLE kit options? They offer 3 different kits that are sure to fit all of your paper and crafting needs: a project kit, a scrapbook kit and a mixed media kit!!!
The June Kits are all about bright colors, funky patterns, fun phrases, and more!! The kits were based around the hit 1990's TV show "Saved By the Bell"!!! You are going to love all three of them! So hurry and sign up for your subscription so that you don't miss out on all the fun!!! Here are some sneak peaks of the June Kits.  The full reveal will be posted on June 15!

Project Kit: THE MAX "Friends" Album

Paper Bakery June Project Kit The Max


Scrapbook Kit: BAYSIDE HIGH

Paper Bakery June Scrapbook Kit Bayside High

Mixed Media Kit: MR. BELDING

Paper Bakery June Mixed Media Kit

Also included with the June Kit are these awesome printables! All NEW and current members will receive them!!!
Paper Bakery June Free Printables
This month we are also celebrating the Two Year Anniversary of The Paper Bakery! We will have a week of fabulous projects to share with you focusing on this celebration, as well as a blog hop and prizes!!!

And if that is not enough, one more fabulous thing we have is a FREE cut file to share with you in honor of this celebration created by ME!!!  Head over to The Paper Bakery blog and download it from the sidebar.  I hope you will have fun playing with them and I can't wait to see what you create using them!!! You can share all of your creations on The Paper Bakery Facebook page!!!

Paper Bakery June Free SVG and Stuido Cut Files by Juliana Michaels

And one last thing I wanted to mention is that our first June Sketch Challenge is live and this is the sketch I created for The Paper Bakery! I hope you will play along!!!

Paper Bakery June Sketch Challenge #5 by Juliana Michaels

So have you signed up for a subscription yet? What are you waiting for?!?!

Hi & Hello Cards

Today I have a couple of cards to share with you using The Paper Bakery May Scrapbook Kit called Glitz Roadshow. First I have this Hello cards that I made using the super fun blue polka dot ruffle ribbon that was included in the kit. I attached it to the front of the card using Terrifically Tacky Tape. You might also notice that I used the rest of the die cut cards that I had cut in half and used on my Malley's Ice Cream layout! I also use the negative piece for the "&" from my Today layout!


For my second card I embossed the glassine bag that held some of the extras that came with the kit. using my Cuttlebug. I folded the top over to size it to a height that would fit on a standard A2 size card. I then embellished it with some of the Crate Paper die cuts and some of that super fun green ribbon!


I am so happy you stopped by and I hope you enjoyed the cards I created to share with you!!!

Paper Bakery May Sketch Challenge #2

Today, on The Paper Bakery Blog we are revealing the second May Sketch Challenge!!! Another fun sketch created by yours truly!!! I can't wait to see what you create and share with us!!!

So now for a few details about how I used the sketch...

I loved the idea of adding three photos to my layout, but when I was selecting photos to create with, I only had two that I wanted to use so I choose to double one of them and use it more as an accent to the main photo. We are eating ice cream at an adorable little ice cream and chocolate shop that my husband grew up going to. They make some of the best hot fudge sauce so of course we had to have some hot fudge sundaes while we were there!!!


I cut my title letters using my Silhoutte Cameo and a font called Market Deco. I cut them from white cardstock three times and glued the layers together. I then added gold glitter glue to them for a bit of sparkle and shine!  I also used the adorable letter stickers by Studio Calico that are included in the kit. I added a little bit of machine stitching along the bottom of each word.  One thing I loved about this kit is that all of the papers had super cute barcode strips along the bottom. I trimmed them, fussy cut along the scalloped edge and then I adhered them to my layout with a little machine stitching!  Another fun tip is that the green cards along the top of the photos are all cut in half. The other half is being saved to be used on another project!!!


And last but not least, look at that Paper Bakery Flair! Be still my heart! It was the perfect little embellishment to dress up some of the Crate Paper die cuts!!!


This is Sketch #2:


So, are you going to play along with our second Sketch Challenge for May?  I sure hope so!!!


Here are the details you need to know to play along with us using the sketch:
1.) Sketch Challenges will be twice a month. Play along once for a chance to win the monthly prize OR play along twice to double your chances of winning the monthly prize.
2.) Make a layout or project utilizing the sketch. Be creative and have fun!!! Using Paper Bakery kits are not required to play.
3.) Take a picture and link it up on the sidebar of The Paper Bakery blog using the INLINKZ widget by the due date  May 19.
4.) Winners are chosen at random and will be posted on our Facebook page and on The Paper Bakery blog.  Make sure to follow us on both to find out if you are the winner!!!

Thanks for stopping by and I hope you enjoyed the layout and details I shared with you today! I also can't wait to see what you create and share with us using the sketch!

Hello Free Cut Files

Hello friends! Today is my birthday and to celebrate my special day with you I thought it would be fun to give you a little present!!!  How about a set of FREE cut files?! You can download them and use as you please. Well, as you please, except please don't sell them or use them in a class. I would love for you to link up to me if you use them though. I really would LOVE to see what you create with them!!!
To download them, just click on the image below:

Love Hello Tags


I also thought it might be nice for me to share a layout I made using some of my own cut files. I created this using the May Scrapbook Kit called Glitz Roadshow by The Paper Bakery.


I created some circle cuts to be slightly larger than the cut images and cut them out of white cardstock. I then sprayed and dripped some Dylusions and Heidi Swapp Color Shine to give them some color before adding them to my layout.


I also used the negative piece from my Zig Zag Cut File on my Today E&A layout. When I cut the zig zags for that layout I was thinking ahead and decided to place the cut in these position on the patterned paper so that I could use it for another layout at a later time.


I have chosen not to color the cut file jpeg images so that when you can look at them you will feel more free to choose your own colors and/or patterns. I hope you enjoy them and I can tell you now, that these probably won't be the first or the last of these that I create and share. If I have enough interest, I may do them on a regular basis. So let me know if you are interested in having them!  If you have any feedback or thoughts about them or any requests, just let me know!  Thanks for stopping by and for your download!!!

Zig Zag Free Cut File and Die Cut Title Tutorial

WOW! Two blog posts in one day!!! What is wrong with me???
I am posting twice today, because I have something that I forgot to share with you earlier this week. For some reason, this week has just flown by in a very good way! The layout I have posted is the layout I shared on my blog as part of The Paper Bakery's NSD blog hop using The Paper Bakery NSD Sketch and Free Cut Files. (Which by the way, is still open until tomorrow May 11!)  Since we had so much going on that day, I didn't want to overwhelm you with too much stuff on one blog post so I thought I would break it into two posts.  I had a couple of other things that I wanted to share with you, including a little tutorial on how I created  my "today" title and a FREE cut file for the zig zags!


To create the title, cut the "today word bubble" once from white cardstock and then again from kraft cardstock using The Paper Bakery NSD Free Cut File.


Once you have them cut, place the white letters in the kraft word bubble and the kraft letters in the white word bubble. Flip the die cut over.


Cut a couple strips of scrap paper and glue them to the backside of the die cut.


Make sure the strip is narrow enough that you can't see it on the other side.


Repeat this on the top and bottom of the letters to hold them in place better. 


Now it is ready to attach to your layout!


I mentioned a FREE cut file! Well, here it is...


Feel free to use it for your own personal use! I ask that you please don't sell it or use it to teach classes, etc without asking my permission. But, if you do use it, I would LOVE to see what you create with it!!! I hope you are having a wonderful weekend!!!

Paper Bakery May Sketch Challenge #1

Hello everyone! Today I am sharing my very first Paper Bakery Kit Club post with you! For today's post I am revealing the first Sketch Challenge for May.  I also have a short tutorial to share with you on embossing the super cool Crate Paper Photo Overlays and altering the gorgeous green ribbon that is included in the May Scrapbook Kit Glitz Roadshow.

First, let me share Sketch #1 with you:


This is my take on the sketch! I closely followed the sketch by using one 4 x 6 photo, layered pieces behind the photo,  similar title placement and one larger piece of paper behind everything.  From there, I choose to place the strip below the photo and then add a journaling block and embellishments.


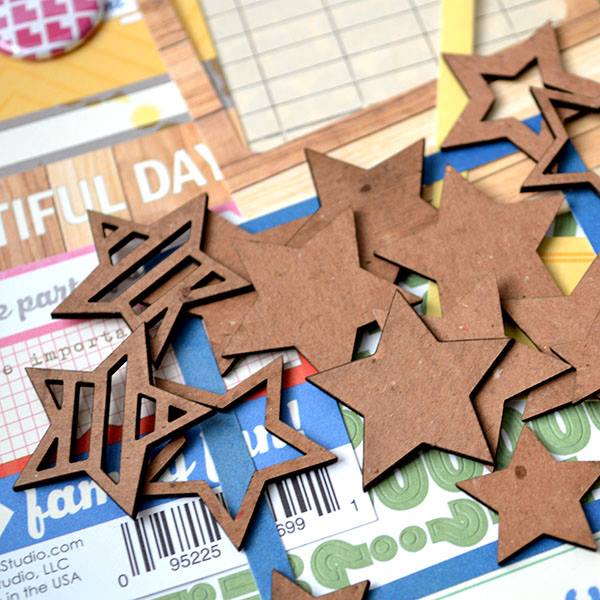
I used the May Scrapbook Kit Glitz Roadshow to create my layout. Here is a close up of one of the cool Crate Paper die cuts and that gorgeous green ribbon I mentioned!


On this close up you can see one of the exclusive Paper Bakery flair that is included in the kit!


To create my title I cut the word using my Silhouetted Cameo and a font called Pacifico. I cut it from white cardstock three times and then glued all the layers together. This gave it a little more thickness and dimension. I then covered all the letters with gold glitter glue. Now if you don't care for the white edges, I would recommend cutting the words from another color of paper, maybe kraft or gold. And the title still wasn't quite dimensional enough so I adhered it to my layout using double sided foam tape.


The number strip you see here is part of the exclusive May Kit Cut File created by Laina Lamb!  I cut it out of the kraft bag that my kit came in and then glued it on top of another strip cut from white cardstock.


Now it's tutorial time! Take a peak at this texture! Don't you just love it?!? It was super easy to achieve.


Simply take one of the photo overlays and sandwich it inside your desired embossing folder.


Run it through your embossing machine.


And ta-da! It is embossed with some gorgeous texture!!!  Now all you have to do is adhere it to your layout. I found staples to work really well for attaching the overlays.  Some of the staples are hidden behind other embellishments and the main photo, while others are visible.


The next fun technique is with the green ribbon. Begin by lightly misting it with water.


Wad it and wrinkle it up in your hand.


Keep squeezing and wrinkling and then set it to the side to dry. If you want to speed up the drying process carefully dry it with your heat tool. Be cautious not to get to close to the ribbon so that you don't risk burning it. Once dry, it is ready to use!


Here are the details for playing along with us using the sketch:

Most importantly we want you to have fun, because that is the most important part of the challenge!

1.) Sketch Challenges will be twice a month. Play along once for a chance to win the monthly prize OR play along twice to double your chances of winning the monthly prize.

2.) Make a layout or project utilizing the sketch. Be creative and have fun!!! Using Paper Bakery kits are not required to play.

3.) Take a picture and link it up on the sidebar of The Paper Bakery blog using the INLINKZ widget by the due date  May 19.

4.) Winners are chosen at random and will be posted on our Facebook page and on our blog.  Make sure to follow us on both to find out if you are the winner!!!


I hope you enjoyed the tutorials I shared with you today! I also can't wait to see what you create and share with us using the sketch!
Subscribe