
Hey crafty friends! Today Today I'm sharing a card I created using the brand new Scrapbook.com Slimline Strips Decorative Dies and I used them to do a paper weaving technique. It's an old technique that's been around for years, but when I saw the new Slimline Strips Dies from Scrapbook.com I immediately thought of this technique! In this post, I'm going to take you through my process and show you just how easy paper weaving is. You'll be ready to grab these dies and give this technique a try ASAP!

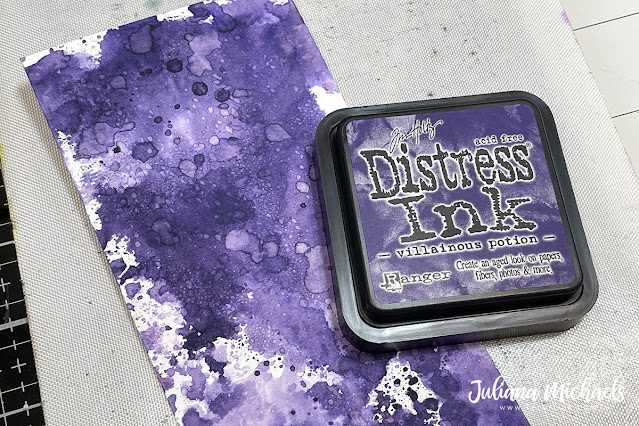
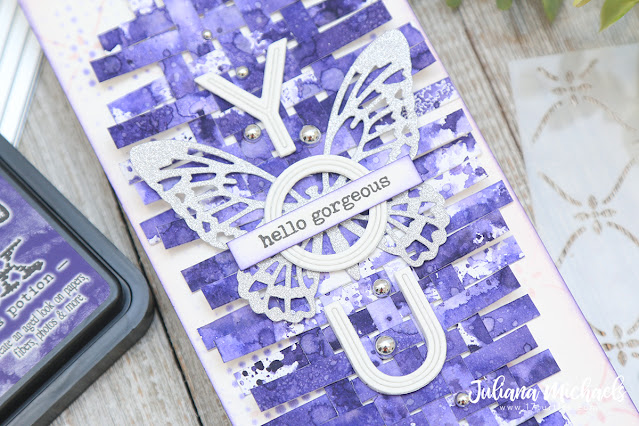
I knew I wanted to create a slimline sized card, so I grabbed a piece of Distress Watercolor and trimmed it to 4 x 8.5". I then used the ink smooshing technique to add color to the paper using Villainous Potion Distress Ink. To ink smoosh, you simply smooth the ink pad onto a craft mat, spritz it with water and then smoosh/dip your paper into the ink. Lift and then dry with your heat tool. Repeat as desired until the paper is to your liking. I also spritzed the paper with my Distress Sprayer and dabbed it dry to lift some of think for even more distressed goodness.
With my paper ready, I selected the 1/4" strips from the Slimline Strips Decorative Dies Set and die cut my paper into strips. This die set comes with 4 dies that will cut multiple strips in varying widths from 3/16" up to 1/2".
With my paper ready, I selected the 1/4" strips from the Slimline Strips Decorative Dies Set and die cut my paper into strips. This die set comes with 4 dies that will cut multiple strips in varying widths from 3/16" up to 1/2".
Once the strips were cut, I began weaving them to create my embellishment. I cut some of the strips into half and thirds and used them for the horizontal strips. When all the strips were woven together, I trimmed the strips to make them different lengths and to add some interest to the design. I added a touch of adhesive here and there to hold the strips together, but I didn't glue each and every strip. I then adhered the woven piece to my card front.
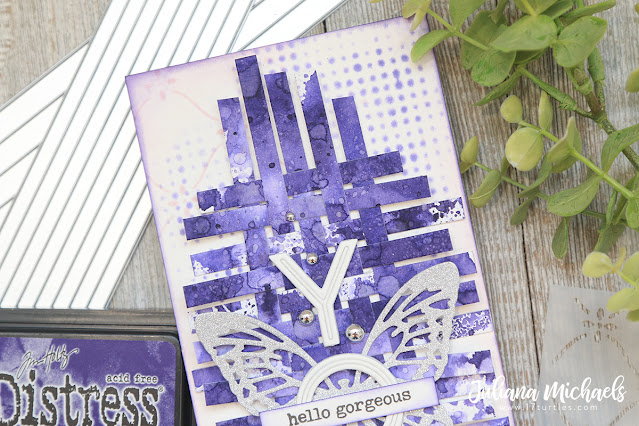
As you can see the card front has a little bit of design to it. I used the Scrapbook.com Slimline Lattice Stencil and ink blended through it using Milled Lavender Distress Ink. I then added a little more stencil detail with the Tim Holtz Dot Fade Stencil and Villainous Potion Distress Ink. To finish off the background I lightly ink blended around the edge with more Villainous Potion Distress Ink.
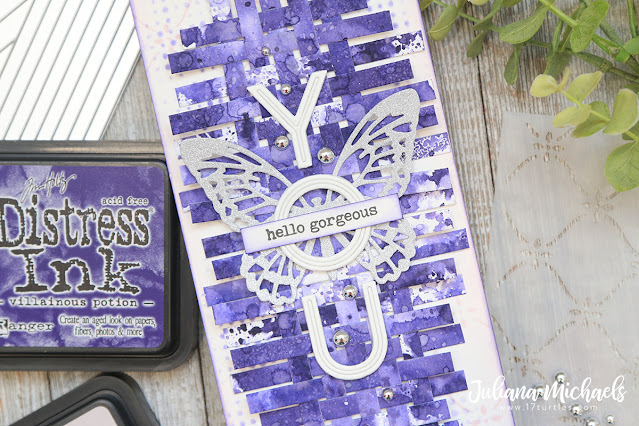
I used the Scrapbook.com Downtown Alphabet Dies to cut out the YOU. I adhered white cardstock to some Scrapbook.com 2" Double Sided Foam Tape and then die cut them. This is a great way to give your letter dies some dimension and makes them easy to adhere since they already have adhesive on them. I left the insides of the letters in place for added interest.
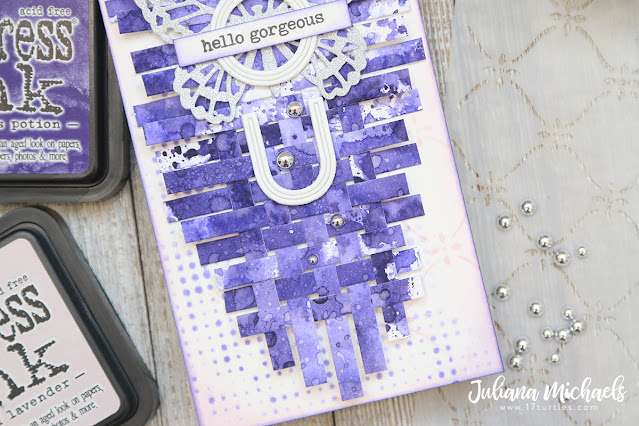
Next, I used one of the Tim Holtz Detailed Butterflies Thinlits and die cut it from silver glitter paper from the Scrapbook.com Mixed Metals Glitter Paper Pad.
The sentiment is from the Scrapbook.com Oh So Happy Wordfetti Stamp Set. I then finished off the card by adding a few Pinkfresh Studio Metallic Silver Pearls.
Supplies
You can find the products I used to create this project along with compensated affiliate links to Scrapbook.com. These links are at absolutely no extra cost to you. If you want to learn more about what an affiliate link is, you can see my full affiliate and product disclosure statement here.


No comments
Every time you smile at someone, it is an action of love, a gift to that person, a beautiful thing. ~Mother Teresa
HUGS!
JULIANA