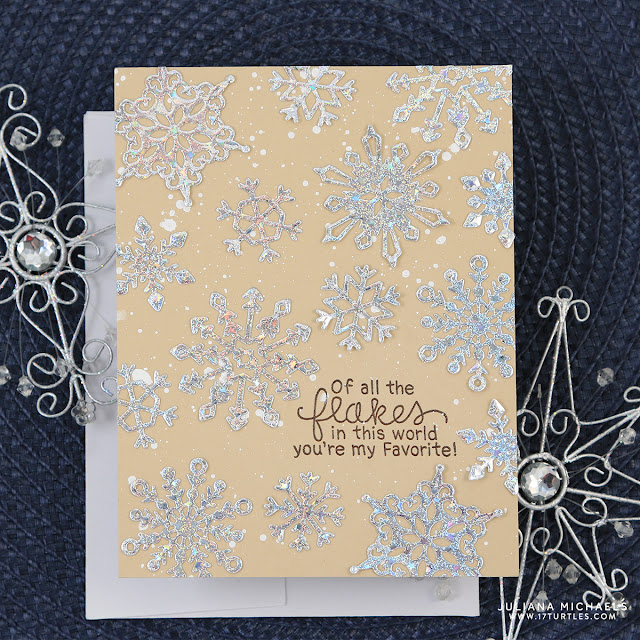
Hello friends! You might not have noticed, but foiling is still going strong and today, I'm sharing a No-Heat Foil Technique with Die Cuts that you are going to love. Seriously, no-heat means you don't need a laminator to add foil to die cuts! All you need are some fabulous dies...such as those by Spellbinders, a die cutting machine and a couple of other supplies that I'll get to in just a bit.
[All supplies are linked at the end of this post. Compensated affiliate links to Scrapbook.com are used at no cost to you. ]
[All supplies are linked at the end of this post. Compensated affiliate links to Scrapbook.com are used at no cost to you. ]
I used this No-Heat Foil technique to create the Snowflakes on the card I'm sharing today. The dies I used are the Die D-Lites Snowflake Dies and Four Seasons Wreath Element Dies provided to me by Spellbinders and Scrapbook.com. I've fallen in love with their gorgeous dies and these beautiful snowflakes just screamed to be foiled!
Before I did the foiling, I created the background for the card using a piece of kraft cardstock. I then flicked it with white paint and a paint brush to give it a look of falling snow. I then stamped the sentiment in brown pigment ink and heat embossed it with clear embossing powder.
No-Heat Foil Die Cuts
Now let's get to the foiling fun! Along with some dies and a manual die cutting machine, you'll also need Therm O Web Adhesive Sheets (Easy Cut Adhesive) and some Deco Foil or Fancy Foils by Therm O Web.
To get started take your die and a piece of the Adhesive Sheet and trim a piece slightly larger than the die. Repeat this process with a piece of foil and then again with a piece of cardstock.
Peel off the liner on one side of the Adhesive Sheet and adhere the cardstock to this side.
Next, turn the paper over and peel off the liner on the other side of the Adhesive Sheet and adhere the foil. I recommend going in this order. I originally tried to adhere the foil first, but it's much more difficult to remove the liner since the foil is more pliable. You also run the risk of peeling off the transfer sheet that is part of the foil. This is what you peel off when you use the heat method to apply the foil to your project.
Finally, place your die on top of your foiled cardstock and run it through your die cutting machine.
And there you have it... beautifully foiled die cuts without having to use a laminator all thanks to the No-Heat Foil Technique with Die Cuts!
Supplies
Here are the supplies I used on the card I created and shared with you. Affiliate links have been used to Scrapbook.com. Thank you so much for your support!


No comments
Every time you smile at someone, it is an action of love, a gift to that person, a beautiful thing. ~Mother Teresa
HUGS!
JULIANA