Showing posts with label Spellbinders. Show all posts

Spring Wreath Card | Spellbinders + Scrapbook.com

I know Punxsutawney Phil just saw his shadow and we're supposed to be in for 6 more weeks of winter, but I'm in the mood for spring. Aren't you?! With that in mind, I pulled out some beautiful new dies from Spellbinders called the Four Seasons Wreath Element Dies to create a spring wreath card.

Spring Wreath Card | Spellbinders Four Seasons Wreath Element Dies


[All supplies are linked at the end of this post. Compensated affiliate links to Scrapbook.com are used at no cost to you.]

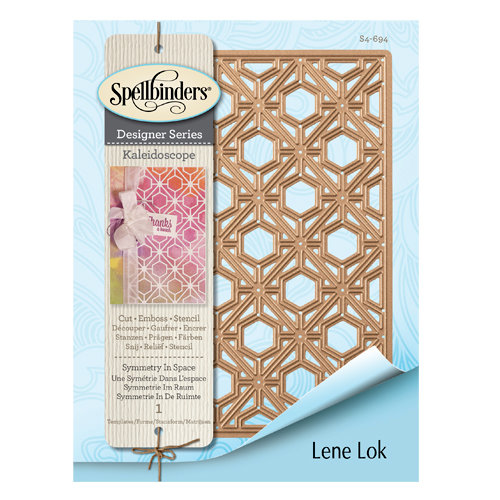
To get started, I created the background of the card, using the Spellbinders Symmetry in Space Die. Yes, this is a die, but I embossed with it using the Spellbinders Platinum 6 Die Cutting and Embossing Machine and appropriate plates. Instructions on how to do this can be found on the base plate of this machine.


Once the background was finished, it was time to work on creating the focal point of the card. To do this, I used the Spellbinders Four Seasons Wreath Element Die Set. This set contains 4 die strips with shapes that are perfect for each season. I die cut the shapes from the Spring and Summer die strips from white cardstock. I then inked them up using Distress Oxide Ink. I used a foam blending applicator to apply more ink to the edges than the middle. I really love the subtle bit of texture from the embossing and by inking the shapes, it really helps bring out the embossed design.

After I had inked all of the die cuts, I cut a circle from white cardstock to use as a "wreath". I centered the sentiment stamp in the middle of the circle and stamped it with black ink.

Happy Thoughts Card by Juliana Michaels featuring Spellbinders Four Seasons Wreath Element Dies Tutorial

I then began adhering the die cuts around the circle, using the edge of the circle as a guide for placing the shapes. I used double sided foam adhesive on some of the flowers and the butterflies to give it more dimension.

Happy Thoughts Card by Juliana Michaels featuring Spellbinders Four Seasons Wreath Element Dies Tutorial

There you have it! A cheerful spring wreath card sure to bring a bit of warmth and happiness to it's recipient!


EDITED TO ADD:
All Spellbinders at Scrapbook.com is on sale today only...
Save 15% on all Spellbinders items, today ONLY! All discounts are reflected on the individual Spellbinders product pages. This sale ends tonight at midnight MST, so shop now for the best selection.

Supplies


Here are the supplies I used on the Spring Wreath Card I created and shared with you. Affiliate links have been used to Scrapbook.com. Thank you so much for your support!


-->

No-Heat Foil Technique with Die Cuts | Spellbinders + Scrapbook.com

Hello friends! You might not have noticed, but foiling is still going strong and today, I'm sharing a No-Heat Foil Technique with Die Cuts that you are going to love. Seriously, no-heat means you don't need a laminator to add foil to die cuts! All you need are some fabulous dies...such as those by Spellbinders, a die cutting machine and a couple of other supplies that I'll get to in just a bit.

Snowflake Card by Juliana Michaels featuring No Heat Foil Technique with Die Cuts using Spellbinders Dies and Therm O Web Deco Foil

[All supplies are linked at the end of this post. Compensated affiliate links to Scrapbook.com are used at no cost to you. ]


I used this No-Heat Foil technique to create the Snowflakes on the card I'm sharing today. The dies I used are the Die D-Lites Snowflake Dies and Four Seasons Wreath Element Dies provided to me by Spellbinders and Scrapbook.com. I've fallen in love with their gorgeous dies and these beautiful snowflakes just screamed to be foiled!

Snowflake Card by Juliana Michaels featuring No Heat Foil Technique with Die Cuts using Spellbinders Dies and Therm O Web Deco Foil

Before I did the foiling, I created the background for the card using a piece of kraft cardstock. I then flicked it with white paint and a paint brush to give it a look of falling snow. I then stamped the sentiment in brown pigment ink and heat embossed it with clear embossing powder.

No-Heat Foil Die Cuts


Now let's get to the foiling fun! Along with some dies and a manual die cutting machine, you'll also need Therm O Web Adhesive Sheets (Easy Cut Adhesive) and some Deco Foil or Fancy Foils by Therm O Web.

Snowflake Card by Juliana Michaels featuring No Heat Foil Technique with Die Cuts using Spellbinders Dies and Therm O Web Deco Foil

To get started take your die and a piece of the Adhesive Sheet and trim a piece slightly larger than the die. Repeat this process with a piece of foil and then again with a piece of cardstock.

Peel off the liner on one side of the Adhesive Sheet and adhere the cardstock to this side.

Next, turn the paper over and peel off the liner on the other side of the Adhesive Sheet and adhere the foil. I recommend going in this order. I originally tried to adhere the foil first, but it's much more difficult to remove the liner since the foil is more pliable. You also run the risk of peeling off the transfer sheet that is part of the foil. This is what you peel off when you use the heat method to apply the foil to your project.

Finally, place your die on top of your foiled cardstock and run it through your die cutting machine.

Snowflake Card by Juliana Michaels featuring No Heat Foil Technique with Die Cuts using Spellbinders Dies and Therm O Web Deco Foil


And there you have it... beautifully foiled die cuts without having to use a laminator all thanks to the No-Heat Foil Technique with Die Cuts!

Supplies


Here are the supplies I used on the card I created and shared with you. Affiliate links have been used to Scrapbook.com. Thank you so much for your support!

Christmas Ornaments Card | Embossing with Spellbinders Dies

There are only 60 days until Christmas! Are you ready? I've already begun my Christmas card crafting and today I'm sharing a Christmas Ornaments Card I created using some fabulous supplies from Spellbinders and Scrapbook.com.

Christmas Ornaments Card | Embossing with Spellbinders Dies


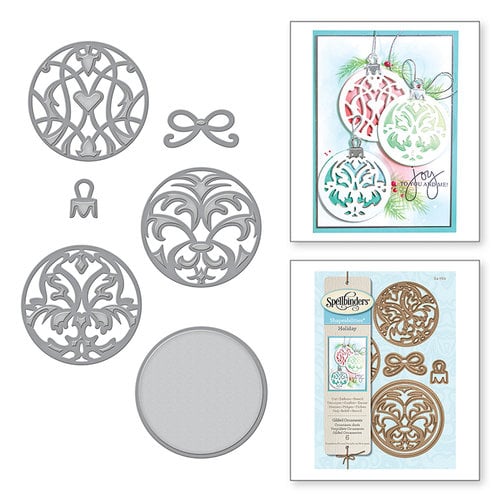
Christmas ornaments have always held a special place in my heart. Since I was a born, I've collected a new ornament every year to add to the Christmas tree. And yes, I have quite the collection now! With this in mind, I was immediately drawn to the gorgeous Gilded Ornaments Die by Spellbinders.

Christmas Ornaments Card by Juliana Michaels featuring Spellbinders Gilded Ornaments Die

To create this card, I began by die cutting several circles from white cardstock using the circle die included in this set.

Embossing with Spellbinders Dies

I knew I wanted to do something different with the dies, so I decided to try embossing. Following the instructions on the machine I layered the various plates to emboss with dies. To ensure proper alignment, I placed the dies in the center of the white die cut circles and used temporary adhesive to hold them in place.

Embossing with Spellbinders Dies

I then ran everything through the Platinum 6 and out popped these gorgeous embossed circles.

Embossing with Spellbinders Dies

Next, I added some ink to the ornaments to give them a bit of color and to bring out the embossed details. You could also do this embossing technique with colored cardstock for a bolder design.

The background on this card was created using the Spellbinders Circles and Diamonds Embossing Folder. I also inked the edges of this to again bring out some of the embossed details.

Detail image - Christmas Ornaments Card by Juliana Michaels featuring Spellbinders Gilded Ornaments Die

Before adding the ornaments to the card front, I added the ornament hanger which I die cut from gold foiled cardstock. The final touch was some gold cord for "hanging" them and a fun little bow. 

Detail image - Christmas Ornaments Card by Juliana Michaels featuring Spellbinders Gilded Ornaments Die

Embossing with dies has now become one of my favorite new techniques thanks to the amazing Spellbinders Platinum 6 Embossing and Die Cutting machine.

Spellbinders and Scrapbook.com were kind enough to send me a Platinum 6, Tool N One and a couple of dies to create with and I recently shared a Halloween Witch Card I created using the Witch On A Broom Die. I want to thank Spellbinders and Scrapbook.com for this fun opportunity and for introducing me to my new favorite manual die cutting machine!

Supplies


The supplies I used to create this project can be found at Scrapbook.com. Affiliate links have been used at no additional cost to you.


This post was sponsored by:


Halloween Witch Card | Spellbinders

Halloween is right around the corner and I'll be sending out my Halloween cards this week to make sure they arrive in time to celebrate one of my favorite holidays! Today, I'm thrilled to share a Halloween Witch Card I created using some fabulous supplies from Spellbinders and Scrapbook.com.

Halloween Witch Card | Spellbinders Witch On A Broom Die


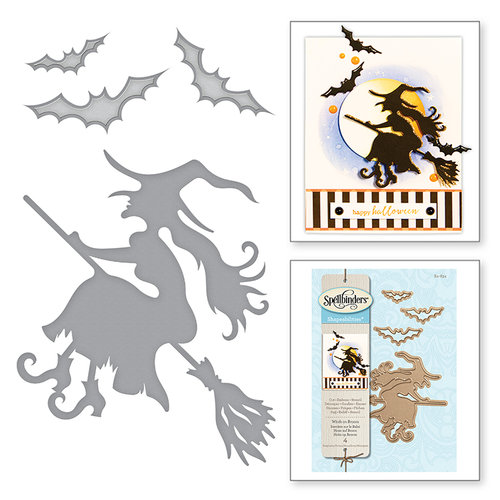
I'm a sucker for all things Halloween and this Witch On A Broom Die from Spellbinders is eekingly perfect for creating a Halloween card.

Halloween Witch Card by Juliana Michaels featuring Spellbinders Witch On A Broom Die

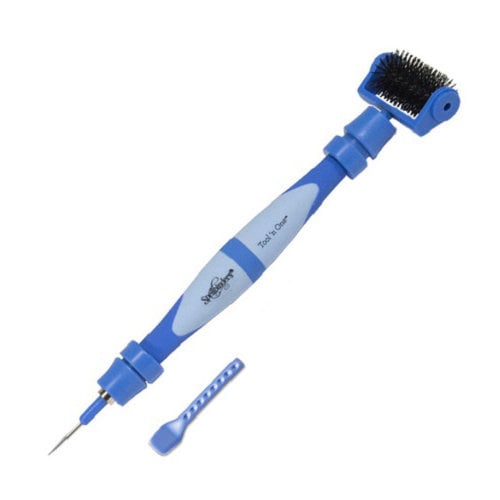
I began by die cutting the witch and bats from black cardstock. There are a few small pieces to pop out from this die and the Spellbinders Tool N One was perfect for poking out some of those small pieces. As you can see I cut several of the witch. I glued and layered all of these on top of each other to give this detailed design a little more sturdiness.

Using the Spellbinders Tool N One to clean out a die

To create the background, I used the Spellbinders Symmetry in Space Die and one of my new to me favorite techniques...embossing with a die! I love how easy it is to do this with the various plates included with the Spellbinders Platinum 6 Die Cutting and Embossing Machine.

Embossing with a die using the Spellbinders Platinum 6

After I trimmed the embossed panel to size, I blended several colors of ink to give it the look of a night sky look.

Detail image - Halloween Witch Card by Juliana Michaels featuring Spellbinders Witch On A Broom Die

The witch and bats, of course needed a full moon behind them so I die cut a circle from white cardstock and inked it just around the edges for a touch of color. I then added all of the die cut elements and popped up the witch and bats with some double sided foam adhesive to give them a bit of dimension.

Detail image - Halloween Witch Card by Juliana Michaels featuring Spellbinders Witch On A Broom Die

I hope this Halloween Witch Card created using these fabulous products from Spellbinders inspires you to get your Halloween craft on!

Supplies


The supplies I used to create this project can be found at Scrapbook.com. Affiliate links have been used at no additional cost to you.
Subscribe