Long time, no post. Well, I have an excuse. I've been a tad busy the past few weeks getting ready for our annual Halloween party, which was this past weekend. I love Halloween and I love decorating for Halloween. And as you know, I also love to create stuff, so I usually end up making a lot of my decorations for the party. Every year I seem to create and add a few more things. This year I decided to create a center piece for our island. While looking for ideas, I came across this set of paper mache tombstones at my local craft store and knew they would be the perfect thing.
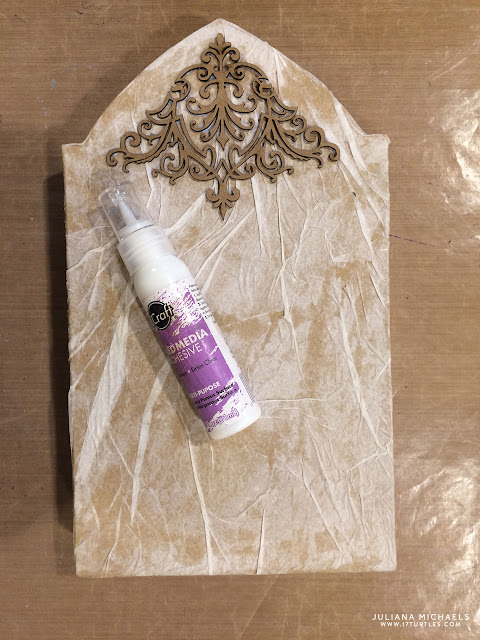
I began by covering each of them with tissue paper. I wrinkled it up really good and then glued it to each one using a foam brush and matte medium. Some other options would be Mod Podge or even watered down Elmer's Glue. You want to use some sort clear drying liquid adhesive that spreads easily.
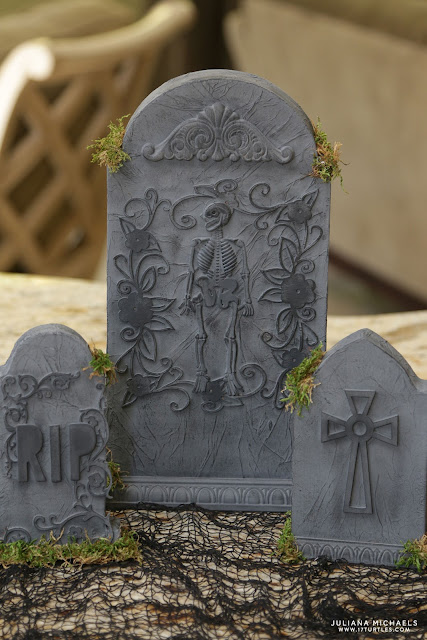
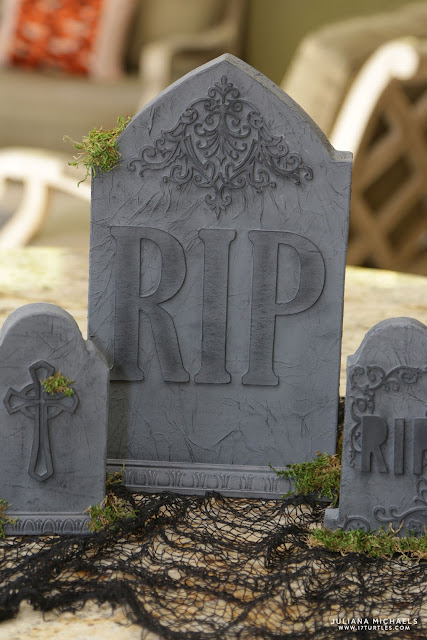
To give the tombstones some character, I went through my stash of chipboard, wood shapes and Halloween crafting supplies. I found some wood crosses, chipboard letter stickers, decorative chipboard flourishes, a decorative wood applique, a plastic skeleton and some wood molding. As I was laying out what I wanted on each tombstone, I realized I needed something more, so I cut out the large RIP from chipboard using my Silhouette Cameo. I cut 2 of each letter and glued them together to give it more dimension.
Once the glued on tissue paper had dried, I adhered the various pieces of chipboard, wood and plastic from my stash using Therm O Web's Mixed Media Liquid Adhesive.
I hope you enjoyed learning how to create your own Halloween Papermache Tombstone Centerpiece. Thanks for stopping by today!
To give the tombstones some character, I went through my stash of chipboard, wood shapes and Halloween crafting supplies. I found some wood crosses, chipboard letter stickers, decorative chipboard flourishes, a decorative wood applique, a plastic skeleton and some wood molding. As I was laying out what I wanted on each tombstone, I realized I needed something more, so I cut out the large RIP from chipboard using my Silhouette Cameo. I cut 2 of each letter and glued them together to give it more dimension.
Once the glued on tissue paper had dried, I adhered the various pieces of chipboard, wood and plastic from my stash using Therm O Web's Mixed Media Liquid Adhesive.
The next step was to paint each of the tombstones with gray acrylic paint. Once this was completely dry, I dry brushed black acrylic paint onto each piece to help bring out the details. If you aren't familiar with dry brushing, here are some pointers:
- Make sure to use a stiff and dry brush.
- Dip your brush into the paint, but try not to get a lot of paint onto the brush.
- Wipe the paintbrush onto a piece of scrap paper or some other surface to remove more of the paint.
- Lightly wipe the brush onto your surface to apply the paint.
You basically end up with hardly any paint on the brush. This is what you are going for. This allows you to bring out the detail and texture in the pieces you are dry brushing. And, you can always add more if you want it a little darker.
For the final touch of graveyard fun, I added some sheet moss to the edges and crevices of the tombstones using a hot glue gun.
I love how the wrinkled tissue paper gives them a faux stone look. By dry brushing them with the black paint it really enhanced the wrinkles and brought out the texture and detail on all the decorative pieces I glued onto the tombstones.
Here you can see them in action the night of the party. I really love how they turned out and how they added some ghoulish fun to the center of the island!
I hope you enjoyed learning how to create your own Halloween Papermache Tombstone Centerpiece. Thanks for stopping by today!


No comments
Every time you smile at someone, it is an action of love, a gift to that person, a beautiful thing. ~Mother Teresa
HUGS!
JULIANA