Newton's Nook Designs September Release | Day 3

It's Day 3 of Newton's Nook Designs September Release and the Halloween fun continues with two new stamp sets - Beautiful Bones and Spooky Skeletons. You can win one of these new stamp sets, so make sure to check out all of the details below.

Happy Halloween Card | Spooky Skeletons Stamp Set


These spooky, but still cute skeleton critters called out to be made into a background pattern. I pulled out my MISTI and some black in and went to town creating my pattern.
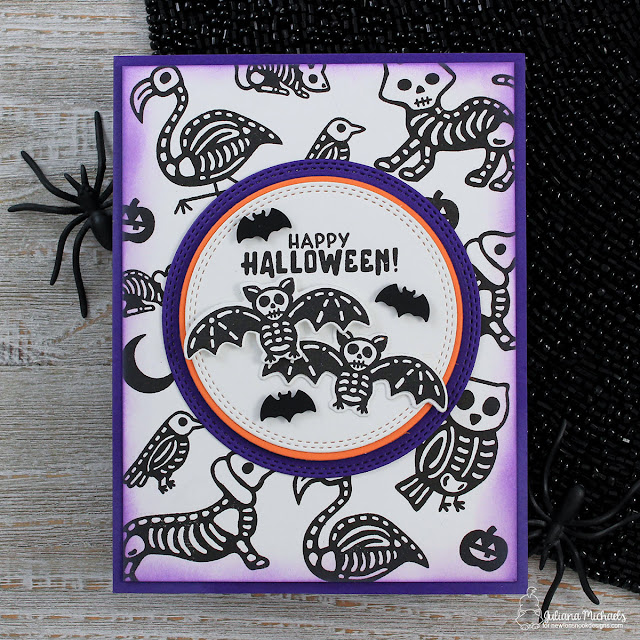
Happy Halloween Card by Juliana Michaels featuring Newton's Nook Designs Spooky Skeletons Stamp Set

Once I was finished, I inked up the edges with some Wilted Violet Distress Oxide. I then stamped two bats and die cut them using the coordinating Beautiful Bones Dies. For a touch of extra fun, I added a few bat sequins and adhered them with double sided foam adhesive.

Detail image of Happy Halloween Card by Juliana Michaels featuring Newton's Nook Designs Spooky Skeletons Stamp Set

Trick or Treat Card | Beautiful Bones


The second set is called Beautiful Bones and it features a set of four skulls and a heart that have a gorgeous swirly design reminiscent of sugar skulls. This set is the perfect addition to the Beautiful Swirls line of stamps! I also love that this set can be used for either Halloween or Dia de los Muertos, depending on how you stamp and color the images.


For my card, I choose to go with a Halloween theme. To achieve this look, I did not color the skulls to look like sugar skulls. I stamped them with Versamark Embossing Ink and embossed them with white embossing powder. I then ink blended the entire background using Distress Oxide in Wilted Violet. For a touch of distress, I sprinkled the paper with water and then blotted it dry.


To create the frame, I used the Cameo Frame Die and the frame die from the Creepy Cameos Die Set to cut out a layer a frame for my sentiment. We shared about these new dies and stamps on Day 2. I then stamped the "trick or treat" and bats onto the white cardstock. For a touch of texture, I added some Glossy Accents to the bats.


Here's a peek at these two new stamp set!


Blog Hop & Giveaway

Would you like to win the “Spooky Skeletons” or the "Beautiful Bones" Stamp Set? For your chance to win one of these stamp set, all you have to do is comment on the NND blog and each of the Design Team blogs. The winner will be chosen at random from one of the reveal posts. You have until Thursday September 14th at 9pm CST to comment and the winners will be announced on the Newton's Nook blog post on Friday, September 15th.

Check out all the awesome Design Team Blogs below to enter:

Newton's Nook Designs
Amanda Bodine
Holly Endress
Ellen Haxelmans
Larissa Heskett
Samantha Mann
Juliana Michaels (you are here)
Naki Rager
Maria Russell
Jennifer Timko
Tatiana Trafimovich


Just a reminder...all of the new stamps and dies will be available in the Newton's Nook Designs Store this Friday, September 15.

Newton's Nook Designs September Release | Day 2

Hello friends and welcome to Day 2 of the Newton's Nook Designs September Release. Today we are getting our Halloween on and for those of us who love Halloween, that's always a good thing!

Happy Halloween Card | Creepy Cameos and Cameo Frame Die


The set I'm using for this card is called Creepy Cameos. I began by stamping the Mr. and Mrs. Skeleton with black ink onto white cardstock and then die cut them using the coordinating Creepy Cameo dies.

Happy Halloween Card by Juliana Michaels featuring Creepy Cameos Stamp Set and Cameo Frame Die by Newton's Nook Designs

To create the frames, I used the new Cameo Frame Die to cut a frame from black cardstock. To mat this, I used the frame die from the Creepy Cameos set with a piece of silver foiled cardstock. I love that this die works perfectly to layer with the Cameo Frame Die AND the Cameo Frame stamp in the Creepy Cameos Stamp Set.

Detail Photo of Happy Halloween Card by Juliana Michaels featuring Creepy Cameos Stamp Set and Cameo Frame Die by Newton's Nook Designs

This set is so much fun to mix and match and I also love how all of the sentiments fit inside the frame as well.

Cameo Frame Die, Creepy Cameos Stamp Set and Coordinating Die by Newton's Nook Designs

Blog Hop & Giveaway


Would you like to win the “Creepy Cameos” Stamp Set? This set will be given away to one lucky winner! To win all you have to do is comment on the NND blog and each of the Design Team blogs. The winner will be chosen at random from one of the reveal posts. You have until Thursday September 14th at 9pm CST to comment and the winners will be announced on the Newton's Nook blog post on Friday, September 15th.

Check out all the awesome Design Team Blogs below to enter:

Newton's Nook Designs
Amanda Bodine
Holly Endress
Ellen Haxelmans
Larissa Heskett
Samantha Mann
Juliana Michaels (you are here)
Naki Rager
Maria Russell
Jennifer Timko
Tatiana Trafimovich

Simon Says Stamp | Stamptember with Newton's Nook Designs

The Stamptember® Celebration continues today and I'm so excited to share that Newton's Nook Designs has an exclusive stamp set being released as part of this month long celebration with Simon Says Stamp.

 This new stamp set by Newton's Nook is called Loads of Thanks and it also has a coordinating die to go along with it. The Loads of Thanks stamp and die sets are only available at Simon Says Stamp while supplies last. So, make sure you head on over to grab yours today - because once these are gone, they're gone forever!


Loads of Thanks Card


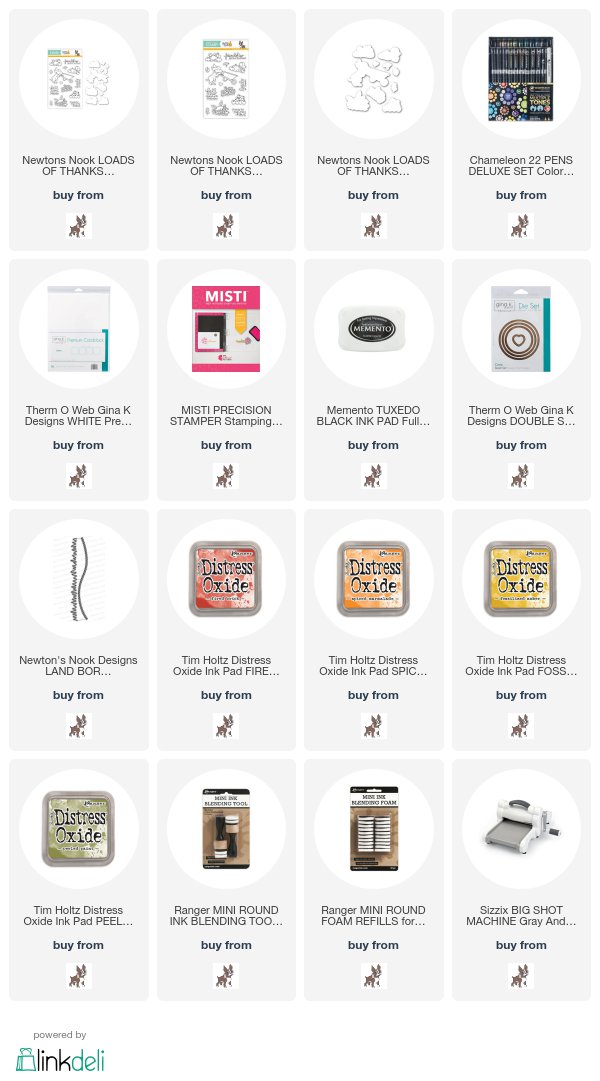
To create my card, I stamped and colored the images with my Chameleon Pens. The green base below the images was die cut from white cardstock using the Newton's Nook Land Borders hill die. I used Distress Oxide in Peeled Paint to color it. I then used the same circle die to cut it out so that it lined up with the stitched circle die behind the main images.

Loads of Thanks Card by Juliana Michaels featuring Newton's Nook Designs Loads of Thanks Stamp Set created for Simon Says Stamps Stamptember®

The background on this card was created using the new Newton's Nook Designs Falling Leaves Stencil. I taped it down over a piece of white cardstock and used foam blending tools to apply Distress Oxide in Fired Brick, Fossilized Amber, Spiced Marmalade and Peeled Paint. I also want to share that this stencil was JUSt revealed as part of the Newton's Nook Designs September Release Day 1 and it will be available for purchase on Friday, September 15.

Detail image of Loads of Thanks Card by Juliana Michaels featuring Newton's Nook Designs Loads of Thanks Stamp Set created for Simon Says Stamps Stamptember®

Here's a peek at the Loads of Thanks stamp set and all the cute critters and images you can put in the wheelbarrow! It's such a great set to build and create a variety of fun fall scenes.
Newton's Nook Designs Loads of Thanks Stamp Set created for Simon Says Stamps Stamptember®
As I mentioned above, here is the Newton's Nook Falling Leaves Stencil that was just revealed and it will be available for purchase this Friday, September 15.
Newton's Nook Designs Falling Leaves Stencil
I hope you enjoyed some inspiration using the Newton's Nook Designs Loads of Thanks Stamp Set for Simon Says Stamp Stamptember®!

Supplies


Are you interested in the supplies I used to create this card? To make them easy for you to find, I have listed them below. Affiliate links are used at no additional cost to you and I've linked to them because I use them and love them! When you click on these links, they help support my blog and allow me to continue to bring you inspirational posts such as this one.


Newton's Nook Designs September Release | Day 1

Hello Friends and welcome to Day 1 of the Newton's Nook Designs September Release! This release is packed full of all things fall and you are sure to fall head over heels in love with it!

Truly Grateful Card | Shades of Autumn Stamp Set


First up I'm sharing a card I created using the Shades of Autumn Stamp Set. This set is so unique in that the stamps have a textured look to them that makes them a blast to stamp with. I used the stamps to create a custom background that has the look of falling leaves. This is always one of my favorite ways to create a card.

Truly Grateful Card by Juliana Michaels featuring Shades of Autumn Stamp Set by Newton's Nook Designs

I then stamped the sentiment with Versamark Embossing Ink and heat set it with gold embossing powder. The final touch was a bit of green twine for a touch of color and texture.

Detail photo of Truly Grateful Card by Juliana Michaels featuring Shades of Autumn Stamp Set by Newton's Nook Designs

Be Thankful Card | Falling Leaves Stencil


Next up, I'm sharing a card I created using the new Falling Leaves Stencil. If you didn't know, Newton's Nook has added stencils to their product offering and this is one of their latest designs.

Be Thankful Card by Juliana Michaels featuring Falling Leaves Stencil and Autumn Newton Stamp Set by Newton's Nook Designs

I used the stencil to create the background for my card. After taping the stencil in place on my craft mat, I inked it up with a mix of Distress Oxide Inks in Fired Brick, Peeled Paint, Spiced Marmalade and Fossilized Amber. I then sprinkled a little water on and dabbed it dry to give it a bit more interest.

Detail photo of Be Thankful Card by Juliana Michaels featuring Falling Leaves Stencil and Autumn Newton Stamp Set by Newton's Nook Designs

To embellish the card, I created a tag. First I stamped and colored the cute Newton from the Autumn Newton Stamp Set using my Chameleon Pens. I then took a die cut tag and inked the edges with some Vintage Photo and Walnut Stain Distress Ink. Finally, I added the sentiment, adhered Newton with some double sided foam tape and attached a bow.

Shades of Autumn Stamp Set by Newton's Nook Designs


Blog Hop & Giveaway


Would you like to win the “Shades of Autumn” Stamp Set? This set will be given away to one lucky winner! To win all you have to do is comment on the NND blog and each of the Design Team blogs. The winner will be chosen at random from one of the reveal posts. You have until Thursday September 14th at 9pm CST to comment and the winners will be announced on the Newton's Nook blog post on Friday, September 15th.

Check out all the awesome Design Team Blogs below to enter:

Newton's Nook Designs
Amanda Bodine
Holly Endress
Ellen Haxelmans
Larissa Heskett
Samantha Mann
Juliana Michaels (you are here)
Naki Rager
Maria Russell
Jennifer Timko
Tatiana Trafimovich

Simon Says Stamp | Stamptember with Gina K Designs

Stamptember® is here and today I'm excited to share that Gina K Designs has an exclusive stamp set being released as part of this month long celebration with Simon Says Stamp. Gina designed this new stamp set called Warmer With You, that also has a coordinating die to go along with it. The Warmer With You stamp and die sets are only available at Simon Says Stamp while supplies last and they won't be available in the Gina K Designs store. So, make sure you head on over to grab yours today because once these are gone, they are gone forever!


Seriously check out all the cuteness with those adorable snow people and that gorgeous birch tree stamp in this set!
Warmer With You Stamp Set by Gina K Designs for Simon Says Stamp Stamptember

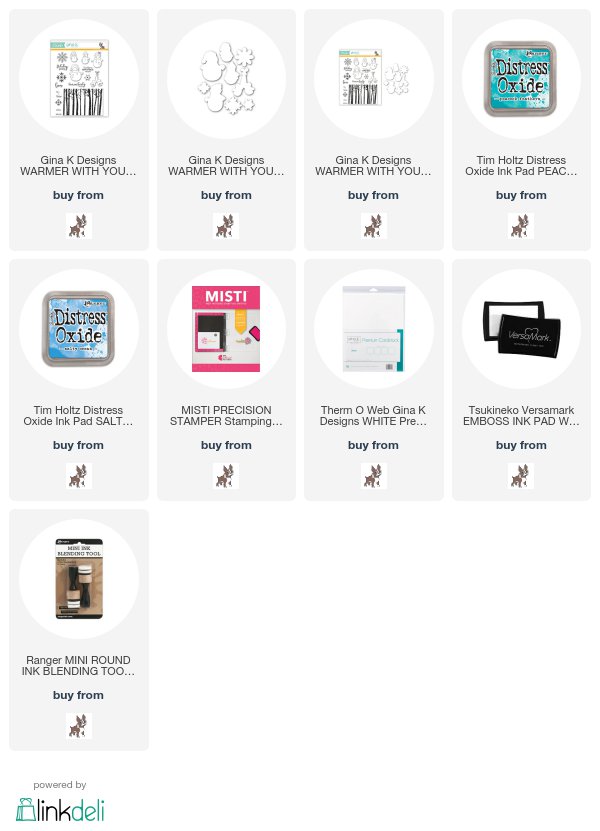
I was quickly drawn to the birch trees and snowflakes and during my creative play came up with 3 ways to use this background image to create a trio of Holiday cards. For all three cards the trees where stamped onto white cardstock with Versamark Embossing Ink and then heat set with white embossing powder. I then ink blended over them with Distress Oxide Ink in Salty Ocean and Peacock Feathers. Keep reading for more specific details on how I created each card.

Winter Birch Trees Background 3 Ways


1. Die Cutting 

For this first card, I stamped the image onto white cardstock and simply die cut it out using a stitched rectangle die. I popped it up and then layered it onto another die cut stitched rectangle before adhering it to the card front.

Winter Birch Trees Holiday Card with Die Cutting and Distress Ink by Juliana Michaels. Stamp set is Warmer With You by Gina K Designs for Simon Says Stamp Stamptember.

For the snowflake on each card, I used the same stamping and embossing method that I used on the trees. I then fussy cut out the snowflake and adhered it with some double sided foam tape for a touch of dimension.

Winter Birch Trees Holiday Card with Die Cutting and Distress Ink by Juliana Michaels. Stamp set is Warmer With You by Gina K Designs for Simon Says Stamp Stamptember.

2. Masking 

The second technique I used was masking. I began by stamping the image onto white cardstock and heat embossed it with white embossing powder.

Winter Birch Trees Holiday Card with Masking and Distress Ink by Juliana Michaels. Stamp set is Warmer With You by Gina K Designs for Simon Says Stamp Stamptember.

I used Post It Tape to mask of a rectangle around the trees and then applied the Distress Oxide.


These images help give you a better sense of how it started before I added the Distress Oxide Ink and how it looked after the ink blending was complete.


I used the same sentiment as the first card and attached another snowflake.


3. Shaker Card 

For my final Winter Trees Background, I created a shaker card. For this card, I stamped the image as noted above in the center of the white cardstock. To create the shaker I die cut the frame using an stitched rectangle die and cut out the center rectangle to create a window. I repeated this 5 times and glued all of these layers together to create the shaker box.

Winter Birch Trees Holiday Shaker Card with Embossing and Distress Ink by Juliana Michaels. Stamp set is Warmer With You by Gina K Designs for Simon Says Stamp Stamptember.

To create the window, I cut a piece of transparency to the size of the shaker box and glued it to the top of the 5 layers. I then die cut one more frame and glue it on top of the transparency. Next, I flipped it over and filled the shaker with a mix of sequins. The final step was to adhere the birch tree background to the back side of the window to complete the shaker.

Winter Birch Trees Holiday Shaker Card with Embossing and Distress Ink by Juliana Michaels. Stamp set is Warmer With You by Gina K Designs for Simon Says Stamp Stamptember.

Here you can see each of the techniques - die cutting, masking and shaker card - before they were added to finish the card.


I hope you enjoyed this bit of inspiration! Now have some fun hopping along with the Gina K Design Team to see what everyone has created using this new set and make sure you check out Simon Says Stamp for all the Stamptember details!

Blog Hop

Gina K
Bethann Silaika
Cathy Tidwell
Chris Dayton
Claire Brennan
Donna Green
Juliana Michaels
Karen Hightower
Melanie Muenchinger
Rema DeLeeuw


Supplies


Are you interested in the supplies I used to create this card? To make them easy for you to find, I have listed them below. Affiliate links are used at no additional cost to you and I've linked to them because I use them and love them!

Subscribe