Showing posts with label Valentine's Day. Show all posts

The Secret to Easy Alcohol Ink Color Combinations

Are you looking for some easy alcohol ink color combinations? If so, then I've got you covered! Check out my latest YouTube Video where I share the secret to creating easy color combinations using Ranger Ink Alcohol Inks. And if you're looking for a little Valentine's Day card inspiration I've got you covered as well. Here I'm sharing two cards I created using the backgrounds I made in the video.

Love You So Valentines Day Card by Juliana Michaels featuring the secret to easy alcohol ink color combinations

You can either watch the video below or head over to my YouTube Channel HERE to check it out.


Please feel free to use products from your stash to recreate something similar. However, if you are interested in any of the products I’m using, you can find the supply list with links in the description box below. Just click on “more” to see more. Using these links does not cost you anything extra and it helps support my business. It also allows me to continue offering free content and keep my class costs low. I appreciate your support!

LOVE YOU SO VALENTINE'S DAY CARD

For this card I added a mix of die cuts from Scrapbook.com and Concord & 9th. The finished card size is 4 ¼ x 5 ½ inches. I used the Scrapbook.coom Heart Doilies and Nested Stitched Ticket Dies to cut papers from the Scrapbook.com Vintage Paper Pad. I added some stamping to the tickets using the Scrapbook.com Sweet Valentine Stamp Set. I finished it off with a sentiment cut from black cardstock using the Just Saying die set from Concord & 9th.

Love You So Valentines Day Card by Juliana Michaels featuring the secret to easy alcohol ink color combinations

YOU & ME VALENTINE'S DAY CARD

On this You and Me Valentine's Day Card I finished off the background by adding some rub ons from the Scrapbook.com Confetti Hearts. I then layered on a mix of die cuts and ephemera from Scrapbook.com and 49 and Market. The die cuts I used are the Scrapbook.com Bold Numbers, Heart Doilies, Nested Stitched Tickets and Valentine Die Sets. The sentiment is from the Scrapbook.com Sweet Valentine stamp set. The finished card size is 4 ¼ x 5 ½ inches. 

You and Me Valentines Day Card by Juliana Michaels featuring the secret to easy alcohol ink color combinations

SUPPLIES

Below you can find the supplies I used to create this card and the swatches. When you shop through the links below, I receive a small commission from Scrapbook.com. These links are at no cost to you and the commission I receive helps me cover the costs of my blog and other expenses, and allows me to continue to provide you with FREE inspiration and tutorials. If you want to learn more about what an affiliate link is, you can see my full affiliate and product disclosure statement here. Thank you so much for your love and support!


Loads of Ideas for Love Notes

Hello there! Whether you celebrate Valentine's Day or not, I truly believe love should be celebrated all year long and it's always a great excuse for making stuff. And to give you a little more incentive, Tim Holtz just released a special loved themed stamp set called Love Notes that is available NOW!

Valentine's Day Cards by Juliana Michaels featuring Tim Holtz Stampers Anonymous Love Notes Stamp Set

In my latest video I'm sharing multiple ways to use the new Love Notes Stamp Set from Tim Holtz and Stampers Anonymous. I’m mixing it up with everything from Embossing Glaze, to Distress Sprays and even Watercolor Pencils. There are loads of ideas, techniques, tips and tricks sprinkled throughout. You can follow along and create one of each like I did, or you can pick your favorite and mass produce it. And even if you don’t have this exact stamp set, feel free to use something similar that you already have. I just recommend that you use a stamp set that has a more solid bold design like this one.

You can watch the video below or head over to my YouTube channel to watch it HERE. And while you're there, make sure to subscribe and turn on notifications so you never miss one of my videos.


If you’re interested in any of the supplies I’m using in this video, you can find a supply list at the bottom of this post.

LOADS OF IDEAS FOR LOVE NOTES | TIM HOLTZ STAMP SET

Below you can find photos of each of the cards I create and share in the video. I've shared them in here the order that I share how I created them in the video.

BACKGROUND NO. 1

XOXOXO Valentine's Day Card by Juliana Michaels featuring Tim Holtz Stampers Anonymous Love Notes Stamp Set

BACKGROUND NO. 2

With All My Heart Valentine's Day Card by Juliana Michaels featuring Tim Holtz Stampers Anonymous Love Notes Stamp Set

BACKGROUND NO. 3

Friendship is Another Word for Love Valentine's Day Card by Juliana Michaels featuring Tim Holtz Stampers Anonymous Love Notes Stamp Set

BACKGROUND NO. 4

Love Isn't Valentine's Day Card by Juliana Michaels featuring Tim Holtz Stampers Anonymous Love Notes Stamp Set

BACKGROUND NO. 5

Something Tells Me Valentine's Day Card by Juliana Michaels featuring Tim Holtz Stampers Anonymous Love Notes Stamp Set

BACKGROUND NO. 6

Why I Love You Valentine's Day Card by Juliana Michaels featuring Tim Holtz Stampers Anonymous Love Notes Stamp Set

Thanks so much for stopping by today. I hope you got loads of ideas for using the Tim Holtz Stampers Anonymous Love Notes Stamp Set or for your next crafty project. Until next time stay crafty my friend!

SUPPLIES

Below you can find the supplies I used to create these cards. When you shop through the links below, I receive a small commission from Scrapbook.com. These links are at no cost to you and the commission I receive helps me cover the costs of my blog and other expenses, and allows me to continue to provide you with FREE inspiration and tutorials. If you want to learn more about what an affiliate link is, you can see my full affiliate and product disclosure statement here. Thank you so much for your love and support!

6 More Ways To Use A Coverplate Die

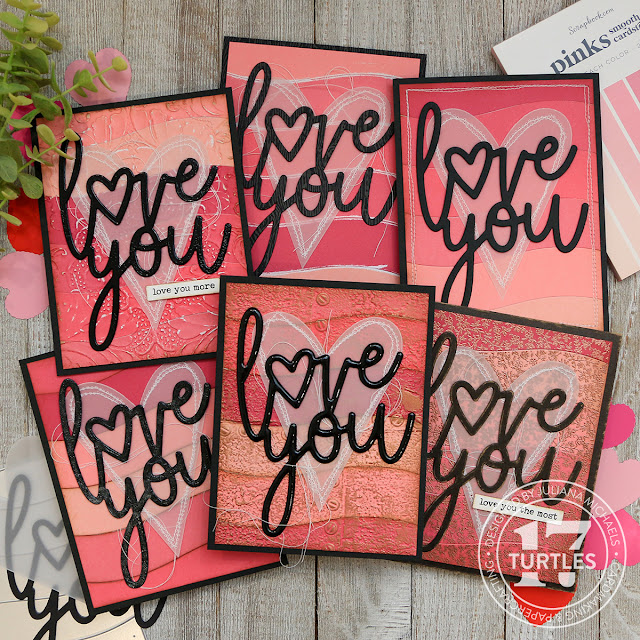
Hello and welcome! I don’t know about you but I love stretching my supplies and getting the most from them. I’m Juliana Michaels and in this video I’m sharing six more ways you can use a coverplate die. With just one die I’m sharing six different background ideas and as a bonus I’m also sharing six different ways to use a sentiment die to embellish the card. And while the finished projects I’m sharing are Valentine’s Day cards, you can take any of these techniques and use them to create a card for any occasion.

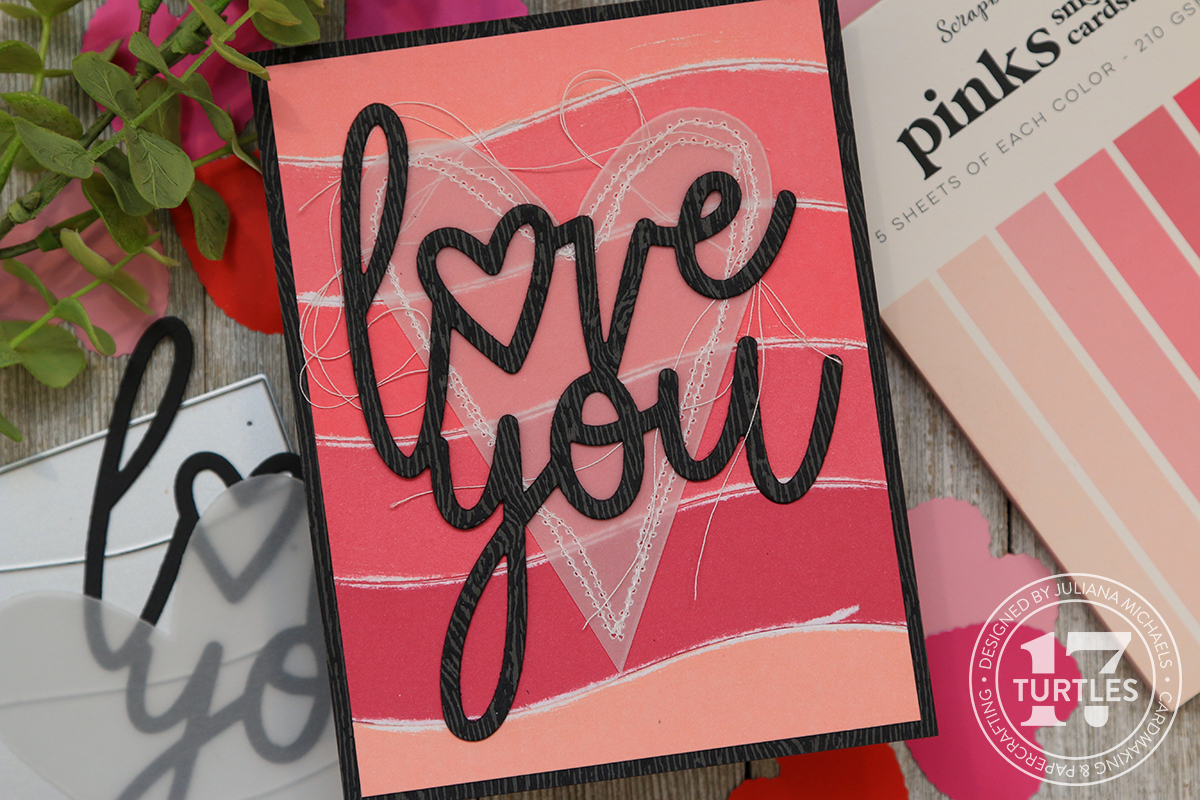
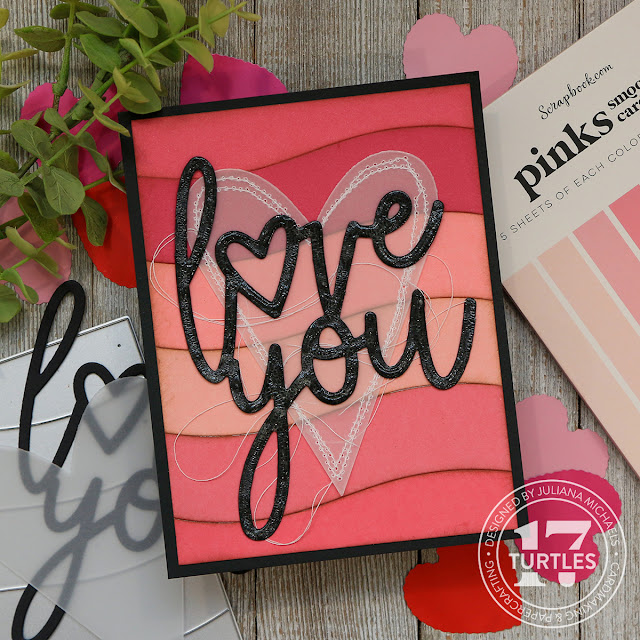
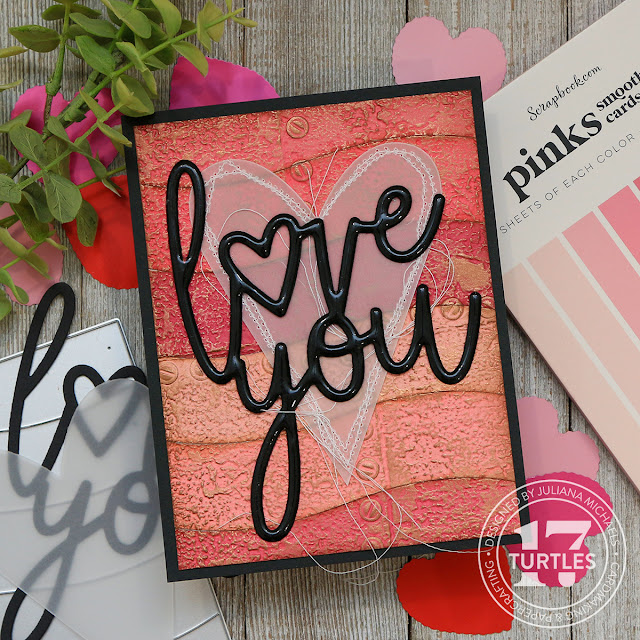
6 More Ways To Use a Coverplate Die - Love You Cards by Juliana Michaels featuring Scrapbook.com Coverplate Dies - Ombre Bold Curves A2 Coverplate Die

If you’re looking for more ideas on how to use cover plate dies make sure you check out my original 6 Ways To Use A Coverplate Die blog post HERE or my video HERE or you can watch below.
 

VIDEO | 6 MORE WAYS TO USE A COVERPLATE DIE

You can either watch the video below or head over to my YouTube Channel HERE to check it out. All of the supplies I used to create the cards are linked at the bottom of this post. When you shop through these links it supports me and I really appreciate that so very much!


Below is a look at the cards from my video. The finished size of each card is 4.25 x 5.5 inches.

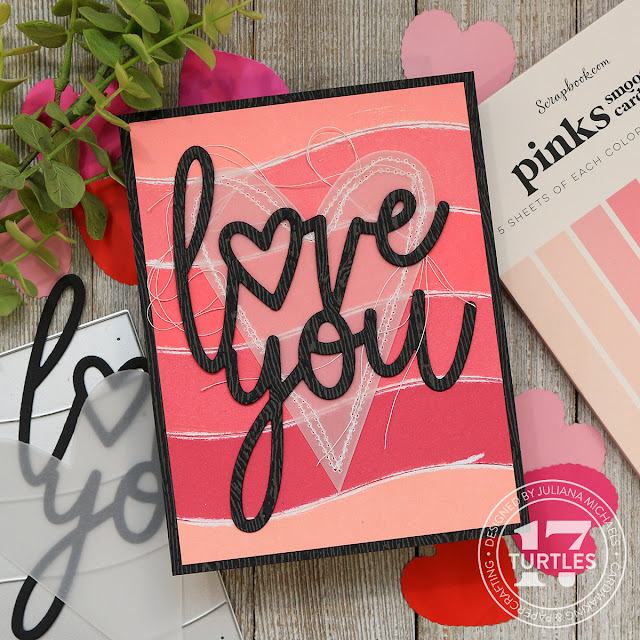
BACKGROUND NO. 1 | SIMPLE OMBRE WITH CARDSTOCK


Love You Card by Juliana Michaels featuring Scrapbook.com Coverplate Dies - Simple ombre with cardstock


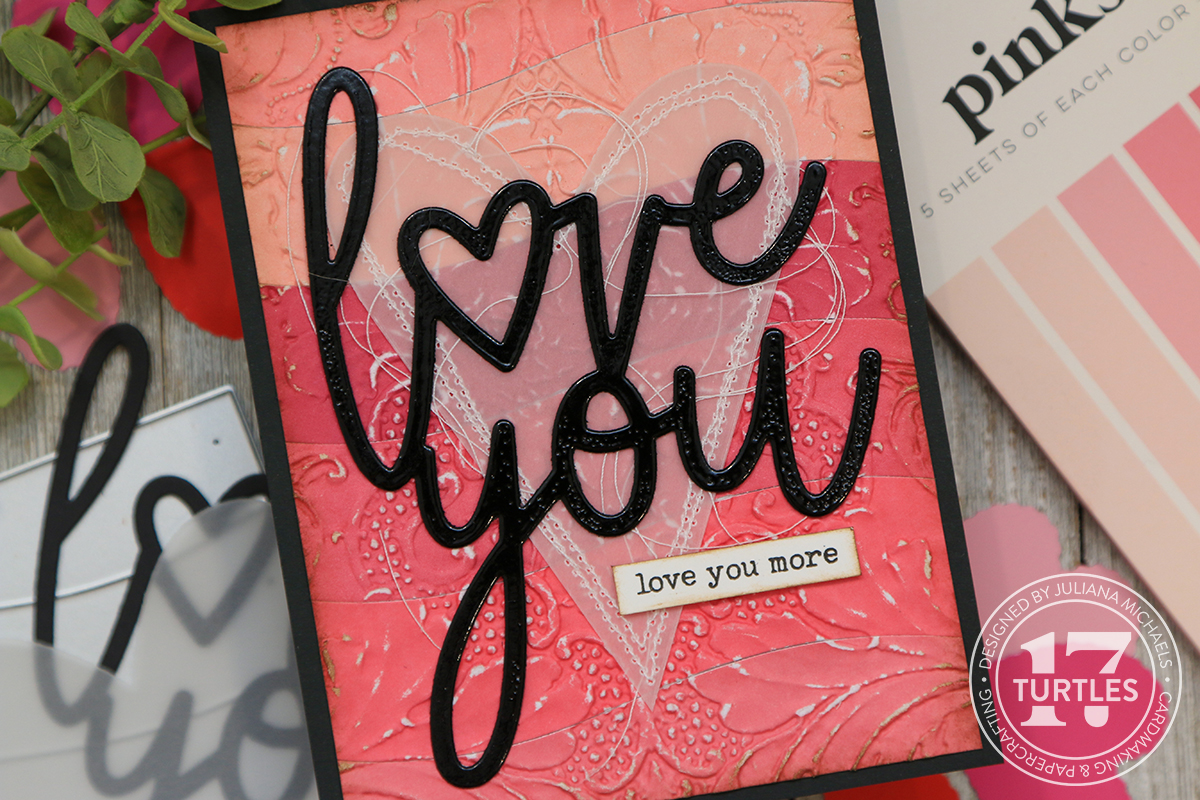
BACKGROUND NO. 2 | EMBOSSED OMBRE


Love You Card by Juliana Michaels featuring Scrapbook.com Coverplate Dies - Embossed ombre


BACKGROUND NO. 3 | STAMPED AND HEAT EMBOSSED OMBRE


Love You Card by Juliana Michaels featuring Scrapbook.com Coverplate Dies - Stamped and heat embossed ombre


BACKGROUND NO. 4 | OMBRE WITH SANDED EDGES


Love You Card by Juliana Michaels featuring Scrapbook.com Coverplate Dies - Ombre with sanded edges


BACKGROUND NO. 5 | OMBRE WITH INKED EDGES


Love You Card by Juliana Michaels featuring Scrapbook.com Coverplate Dies - Ombre with inked edges


BACKGROUND NO. 6 | OMBRE WITH INKED EDGES, EMBOSSING AND LUSTER WAX


Love You Card by Juliana Michaels featuring Scrapbook.com Coverplate Dies - Ombre with inked edges, embossing and Luster Wax


Thanks so much for stopping by and check out my 6 More Ways to Use A Coverplate Die post and video!

SUPPLIES

Below you can find the supplies I used to create my swatches and card. When you shop through the links below, I receive a small commission from Scrapbook.com. These links are at no cost to you and the commission I receive helps me cover the costs of my blog and other expenses, and allows me to continue to provide you with FREE inspiration and tutorials. If you want to learn more about what an affiliate link is, you can see my full affiliate and product disclosure statement here. Thank you so much for your love and support!

Love Is In The Air Series | Love Birds Mixed Media Cards

Hello there! On my YouTube Channel I’m kicking off my Love Is In the Air series. Over the next few weeks, look for a series of mixed media card videos with love as the theme. I’m not huge into celebrating Valentine’s day, but it’s a great reminder that we can let our loved ones know how much they mean to us ANY day of the year. The card I'm sharing today features some of the 2024 Sizzix Spring Collection and Tim Holtz Vault Collection.

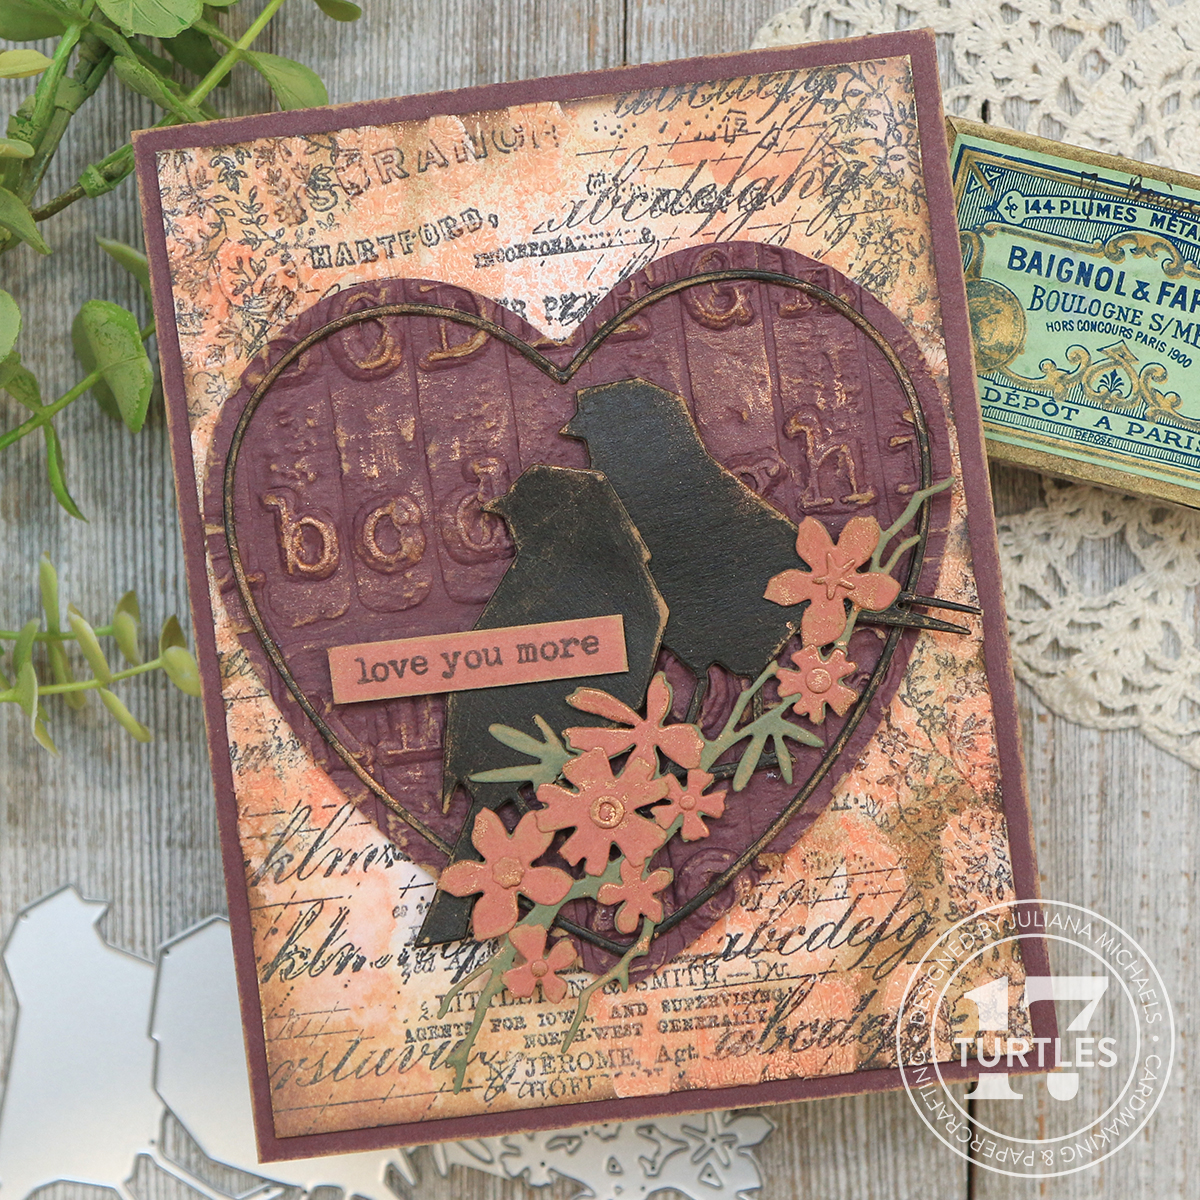
Love Is In The Air Love Birds Love You More Love You Most Cards by Juliana Michaels featuring Sizzix Woodland Borders, Tim Holtz Vault Love Birds, True Love Colorize and Typewriter 3D Embossing Folder

You can either watch the video below or head over to my YouTube Channel HERE to check it out.


If you're interested in the supplies I used to create these Love Birds Mixed Media Cards, you can find a complete supply list at the bottom of this post. When you shop through these links it supports me and I really appreciate that so very much!

For those of you would like to look at the project in more detail, here are some additional photos for both the pillow box and the art journal. I didn't take photos of every page inside the journal, but I have shared the ones that contain both the stamping and die cuts.

LOVE YOU MORE CARD 

Finished size: 4.25 x 5.5 inches

Love Is In The Air Love You More Card by Juliana Michaels featuring Sizzix Woodland Borders, Tim Holtz Vault Love Birds, True Love Colorize and Typewriter 3D Embossing Folder


LOVE YOU THE MOST CARD

Finished size: 4.25 x 5.5 inches

Love Is In The Air Love You The Most Card by Juliana Michaels featuring Sizzix Woodland Borders, Tim Holtz Vault Love Birds, True Love Colorize and Typewriter 3D Embossing Folder


Thanks so much for stopping by to check out these Love Birds Mixed Media Cards.

SUPPLIES

Below you can find the supplies I used to create these Love Birds Mixed Media Cards. When you shop through the links below, I receive a small commission from Scrapbook.com. These links are at no cost to you and the commission I receive helps me cover the costs of my blog and other expenses, and allows me to continue to provide you with FREE inspiration and tutorials. If you want to learn more about what an affiliate link is, you can see my full affiliate and product disclosure statement here. Thank you so much for your love and support!

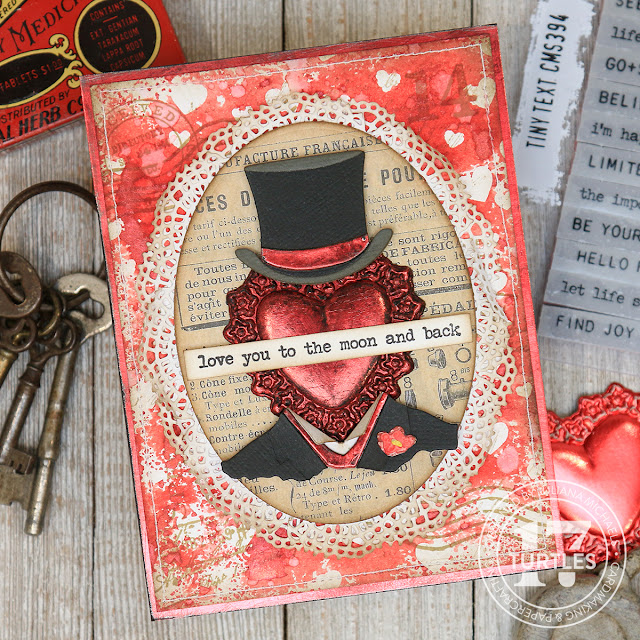
Tim Holtz Tailored Vintage Valentine's Day Card

Happy Valentine's Day! Even if you don't celebrate this holiday, there's always a reason to let someone you know that you love them and what better way than with a mixed media vintage styled card. On this card I've incorporated a mix of Scrapbook.com and Tim Holtz products including stencils, stamps, and dies. 

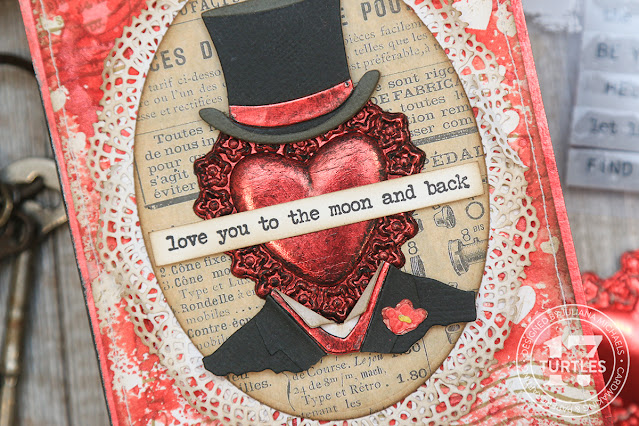
Tim Holtz Tailored Vintage Valentine's Day Card by Juliana Michaels

TIM HOLTZ TAILORED VINTAGE VALENTINE'S DAY CARD

So let's start off with the background. I began with the Scrapbook.com Scattered Hearts Stencil and used it to create a monoprint. Do this, I placed the stencil in my Splat Box and sprayed it with Tim Holtz Tart Cranberry Mica Stain (this is a seasonal product, but you can use any color of spray ink). Off to the side, I had a piece of Distress Watercolor Paper placed on top of a paper towel and an extra paper towel as well. I placed the inked stencil on top of the paper and used the extra paper towel to push down while at the same time dabbing up any ink that seeped under the stencil openings. To see this technique in action make sure to check out my How To Monoprint with Stencils video.

I lifted off the stencil and they dried the ink with my heat gun. Once the ink was dry, I added some stamping using Frayed Burlap Archival Ink and stamps from the Tim Holtz Field Notes, Merchant and Christmas Postmarks. I then inked in the edges with a little Walnut Stain Distress Ink and added some machine stitching around the border. I then adhered this to a piece of red metallic Kraft Stock that I had lightly sanded and then inked with Walnut Stain Distress Ink.
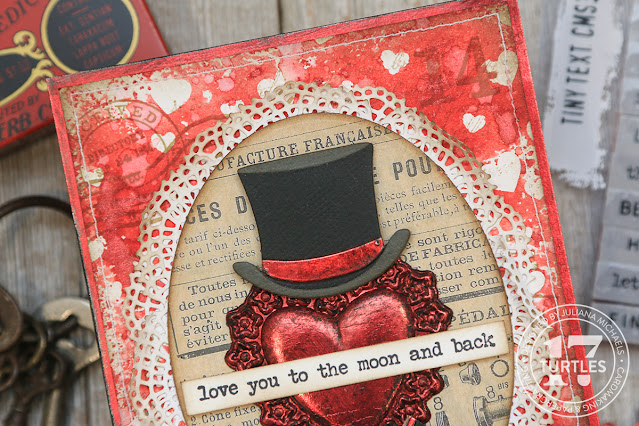
For the focal point, I used the Tim Holtz Tailored Thinlits Die Set and cut the various layers from colored and metallic cardstock and adhered them together using Distress Collage Medium. Before adhering the metallic papers, I lightly sanded them, and inked them with Walnut Distress Stain using a foam blending tool. The small flower is from the Mini Brushstroke Flowers Thinlits and was cut from Distress Watercolor Paper and then watercolored using a waterbrush and Distress Ink in Lumberjack Plaid and Fossilized Amber.

The embossed heart was created using the Tim Holtz Lucky Love 3D Impresslits Embossing Folder. Impresslits,  actually cut and emboss all in one step!  I used it with a piece of red metallic Kraft Stock and to give it the slightly grungy look I used a technique that Tim shared recently. After die cutting the shape,  I painted it with Black Soot Distress Paint. Allowed it to start to dry and then used a paper towel to wipe off some of the excess paint. You have to let the paint slightly dry so it will start to stick to the paper but still wet enough that you can wipe some of the paint away and reveal the metallic paper. The end result is so good! If you want to see this technique in action check out Tim's Sizzix Everyday 2023 Release YouTube Live at around the 3:05 mark.
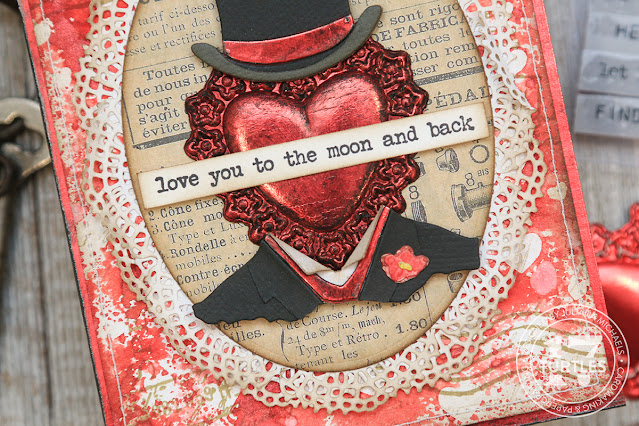
To frame the focal point, I used one of dies from the Scrapbook.com Nested Oval Dies and cut it from a piece of Tim Holtz Idea-ology paper and inked the edges with Walnut Stain Distress Ink. To give it a more vintage valentine feel, I added some paper lace around the edge using the Tim Holtz Crochet Thinlits. I cut it from printer paper, very lightly inked the edges with a little Walnut Distress Stain. I then wrapped it around the backside of the oval die cut letting it bend as needed and even trimmed it here and there to make it wrap around a little easier. 

The final touch was the sentiment...love you to the moon and back. This is a stamp from the Tim Holtz Tiny Text Stamp Set which I stamped onto Distress White Heavystock with Black Soot Archival Ink, trimmed it into a strip and then inked the edged with Walnut Stain Distress Ink. I then adhered it to the card with a bit of foam tape on the two ends so that it was the supported as it went over the embossed heart.
Thanks as always for stopping by and taking a closer look at this Tim Holtz Tailored Valentine's Day Card!

SUPPLIES

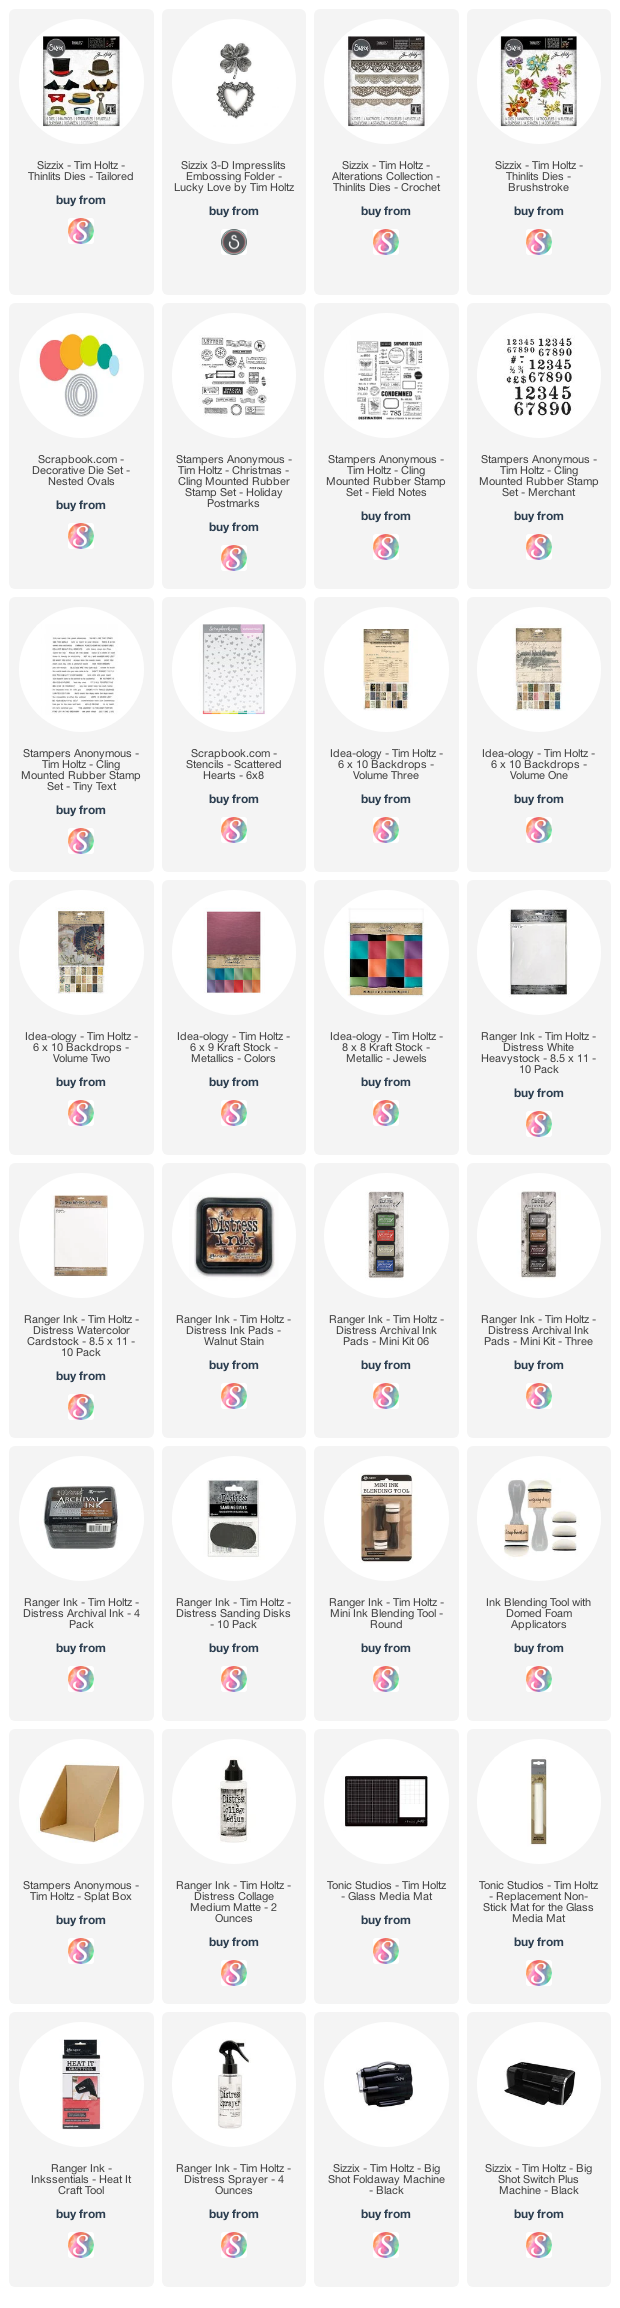
Below you can find the products I used to create this card along with compensated affiliate links to Scrapbook.com. These links are at absolutely no cost to you. When you shop through the links below, I receive a small commission from Scrapbook.com. These links are at absolutely no cost to you and the commission I receive helps me cover the costs of my blog and other expenses, which allows me to continue to provide you with FREE inspiration and tutorials. If you want to learn more about what an affiliate link is, you can see my full affiliate and product disclosure statement here. Thank you so much for your love and support!
Let's Make A Mixed Media Valentine's Day Card

Today I've got something a little different for you. Over on my YouTube channel I'm sharing a new video that's a more live version of me crafting. Not truly live, but it's me crafting and chatting in real time. It's the first time I've recorded a video in this way. Normally, I do a voiceover which means I record what I'm doing then go back and record my voice explaining what I'm doing and then put them together. I thought it might be fun to mix it up a little and share a video that's not perfectly edited and with all the oops moments deleted! With that said, this video is a bit longer than my normal videos because of this. I hope you will check it out and I hope you enjoy what you see. If you all seem to enjoy it, I'll consider doing another one in the future.

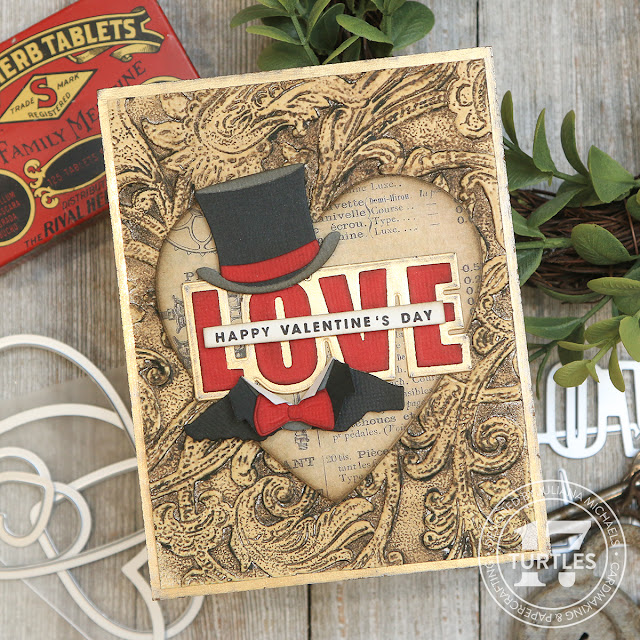
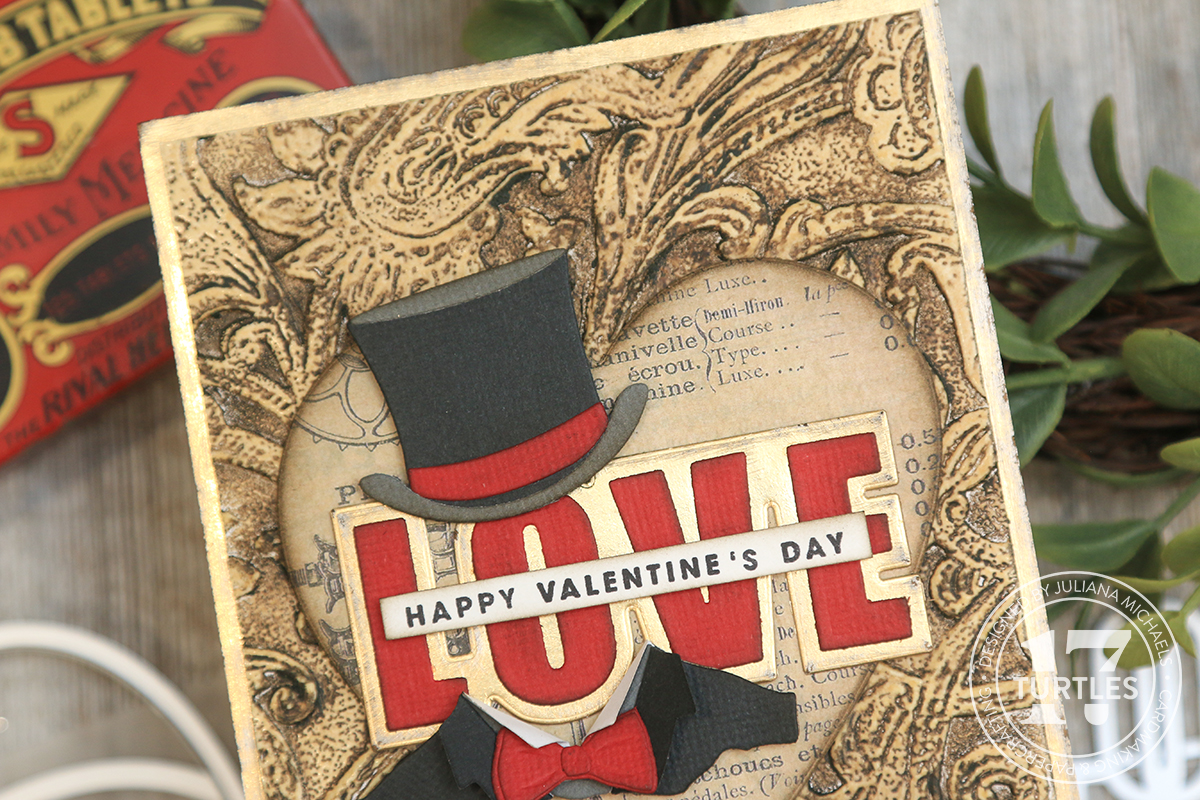
Happy Valentine's Day Mixed Media Card by Juliana Michaels featuring Tim Holtz Embossing Glaze, Entangled Embossing Folder, Tailored Thinlits, Scrapbook.com Love Block Word Dies and Creative Expressions Stamp Set

In the video I'm sharing how I created this Mixed Media Valentine's Day Card, so I'm not going to go into too many details in this post. I will share some of the main techniques and you can still find a complete supply list at the bottom of this post.
 

HAPPY VALENTINE'S DAY CARD

For the background, I used the Tim Holtz Entangled 3D Embossing Folder to emboss a piece of Distress Watercolor Paper. I then applied embossing ink over the embossed paper, sprinkled it with Antique Linen Embossing Glaze and embossed it with my heat gun.
Next, I applied Walnut Stain Distress Crayon over the entire surface using a stencil brush to push the pigment from the crayon into all of the cracks and crevices. I then wet my finger and rubbed lightly over the surface to remove some of the crayon and better reveal the details of the embossed design.


For the focal point, I die cut a heart from a piece of Idea-ology paper and inked the edges with Walnut Stain Distress Ink. I then die cut the word love using the Scrapbook.com Block Word Die Set from gold Metallic Kraft Stock (which I distressed by rubbing a sanding block over) and red cardstock. I also used the Tim Holtz Tailored Die Set and cut it out from colored cardstock as well. I used Distress Collage Medium to adhere the various layers together and then adhered them to the die cut heart. For a little dimension, I used double sided foam adhesive to adhere the hat and coat.


Next up, I added the sentiment which is from the Scrapbook.com Celebrate Everyday Stamp Set. It is stamped onto white cardstock using Black Soot Archival Ink, trimmed into a strip and then adhered with a strip of foam tape.

The final step was to layer the panel onto a piece gold Metallic Kraft Stock which I distressed with a sanding block.


Thanks so much for stopping by today and checking out my Mixed Media Valentine's Day Card.

SUPPLIES

Below you can find the products I used to create this card along with compensated affiliate links to Scrapbook.com. These links are at absolutely no cost to you. When you shop through the links below, I receive a small commission from Scrapbook.com. These links are at absolutely no cost to you and the commission I receive helps me cover the costs of my blog and other expenses, which allows me to continue to provide you with FREE inspiration and tutorials. If you want to learn more about what an affiliate link is, you can see my full affiliate and product disclosure statement here. Thank you so much for your love and support!

>

Die Cut Stenciled Ombre Background | Newton's Nook Designs

Hi and hello friends! Today, I'm excited to share a Happy Valentine's Day card with a Die Cut Stenciled Ombre Background using some lovely new products from Newton's Nook Designs! Their recent January release included a new set featuring Newton called Newton's Sweetheart Stamp Set and a fun new stencil called Tumbling Hearts. I'm using both of those along with a couple of other products to create the card I'm sharing with you today.

Happy Valentine's Day Card with Distress Oxide Die Cut Stenciled Ombre Background by Juliana Michaels featuring Newton's Nook Designs Newton's Sweetheart Stamp Art and Tumbling Hearts Stencils

[All supplies are linked in the text below. Compensated affiliate links used at no cost to you.]


Die Cut Stenciled Ombre Background


To get started, take a piece of white cardstock and center the heart die from the Darling Hearts Die Set. Use low tack tape to hold it in place and run it through your die cut machine. You might notice the fun purple colored tape I'm using here. It's a brand new product from Therm O Web called Purple Tape and it's it perfect for holding your dies in place from this sort of technique. The tape is repositionable and doesn't tear your paper when you remove it.


After the die cutting is complete, take the same tape and position the Tumbling Hearts Stencil on top of the cardstock. Ink blend it using Distress Ink or Distress Oxide and a blending tool. To achieve the Ombre look, begin by applying the ink at the bottom of the card and work your way up. This way more ink will be applied at the bottom and the ink color with fade as you progress toward the top.


Remove the stencil and your background is ready to use. For this card, I started with a 4.25 x 5.5 inch piece of cardstock. I then trimmed it down to 4 x 5.25 inches.


I wanted to give the die cut stenciled panel some depth when I attached it to the card front. To do this, place the heart die on a piece of craft foam and run it through your die cut machine. Trim the foam to just smaller than the card front and adhere it to the back side of the card front.


Adhere the panel to the card base. Stamp, color and die cut one of the adorable Newton's Sweetheart images and tuck it behind the die cut heart opening. Use a bit of double sided foam adhesive to adhere the image inside the opening for even more depth and dimension.

Happy Valentine's Day Card with Distress Oxide Die Cut Stenciled Ombre Background by Juliana Michaels featuring Newton's Nook Designs Newton's Sweetheart Stamp Art and Tumbling Hearts Stencils

Stamp the sentiment from the Love Bites Stamp Set onto black cardstock using Versmark Embossing Ink and then heat emboss it with white embossing powder. Trim to size and then adhere it to the card front, again popping it up with some double sided foam adhesive. For the final touch add some clear gems or sequins.

Happy Valentine's Day Card with Distress Oxide Die Cut Stenciled Ombre Background by Juliana Michaels featuring Newton's Nook Designs Newton's Sweetheart Stamp Art and Tumbling Hearts Stencils

Supplies


Here are the supplies I used on the card I created and shared with you. Affiliate links have been used to Simon Says Stamp. Thank you so much for your support!


Subscribe