Showing posts with label Sizzix Chapter 1 2023. Show all posts

Letterpress Effects with Embossing Folders and Dies

Hello friends! Today I have a new card and video to share featuring some of the new dies and embossing folders from the Tim Holtz 2023 Sizzix Everyday Release. There are so many great dies and embossing folders in this release and they are perfect for all those everyday moments, as well as special occasions and holidays. The card I've created would be perfect for Mother's Day, Father's Day or anyone special in your life. In the video I'm sharing how to get a letterpress effect with embossing folders and dies that is really quite easy.

One Of A Kind Card by Juliana Michaels featuring Tim Holtz Sizzix Wood Slices Thinlits, Brushstroke Mini Flowers Thinlits, 3D Mosaic Embossing Folder

If the video isn't showing up for you, click HERE to watch it.


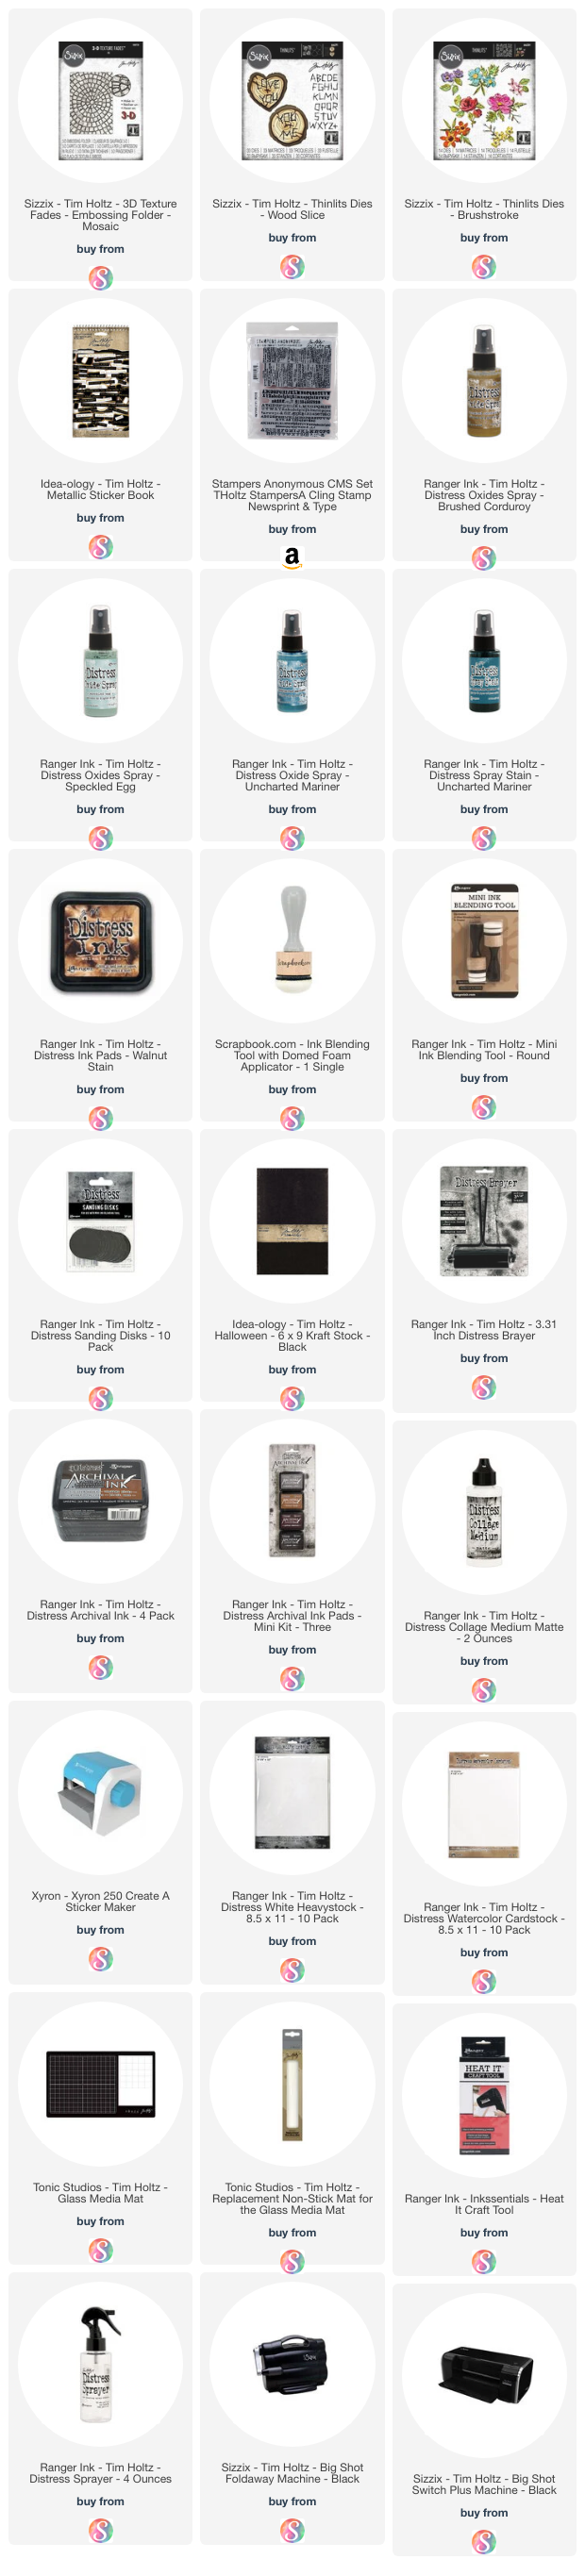
Here are some close up images of the card I created. The dies I used include Wood Slices Thinlits, Brushstroke Mini Thinlits and the 3D Mosaic Embossing Folder. You can find a complete supply list below.


Thanks so much for stopping by and checking out my video! I hope you enjoyed learning how I created this card and how to create letterpress effects with embossing folders and dies!

If you're looking for more inspiration using some of the dies and embossing folders from the Tim Holtz 2023 Sizzix Everyday Release feel free to check out one of the following projects:


Hello Card by Juliana Michaels featuring Tim Holtz Tailored Thinlits, Brushstroke Flowers Mini Thinlits,Alphanumeric Emporium Thinlits


Life Is Full of Beauty Tag by Juliana Michaels featuring Tim Holtz Brushstroke Flowers Mini Thinlits


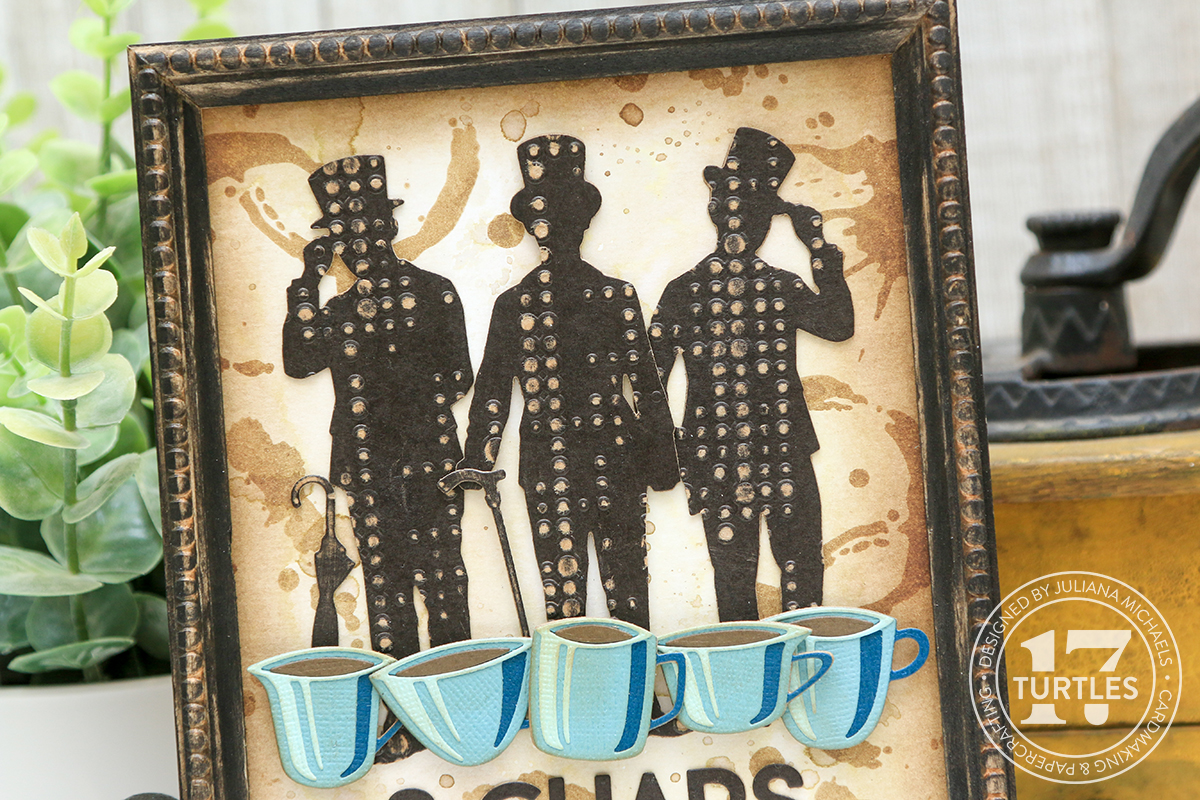
3 Chaps Coffee Company Framed Panel by Juliana Michaels featuring Tim Holtz Gentlemen Thinlits, Papercut Cafe Thinlits, Alphanumeric Emporium Thinlits and Dotted Embossing Folder


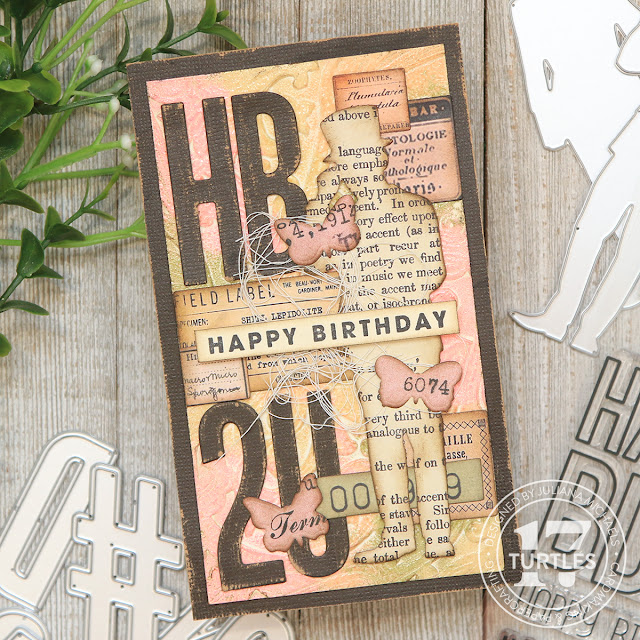
Happy Birthday Cards by Juliana Michaels featuring Tim Holtz Gentlemen Thinlits, Alphanumeric Bulletin Thinlits and 3D Entangled Embossing Folder


Thinking Of You Card by Juliana Michaels featuring Tim Holtz Blossom Thinlits and Dotted Embossing Folder


Blossom Birthday Cards by Juliana Michaels featuring Tim Holtz Blossom Thinlits

SUPPLIES

Below you can find the products I used to create this card along with compensated affiliate links to Scrapbook.com. These links are at absolutely no cost to you. When you shop through the links below, I receive a small commission from Scrapbook.com. These links are at absolutely no cost to you and the commission I receive helps me cover the costs of my blog and other expenses, which allows me to continue to provide you with FREE inspiration and tutorials. If you want to learn more about what an affiliate link is, you can see my full affiliate and product disclosure statement here. Thank you so much for your love and support!

Tailored Hello Card | Tim Holtz 2023 Sizzix Everyday

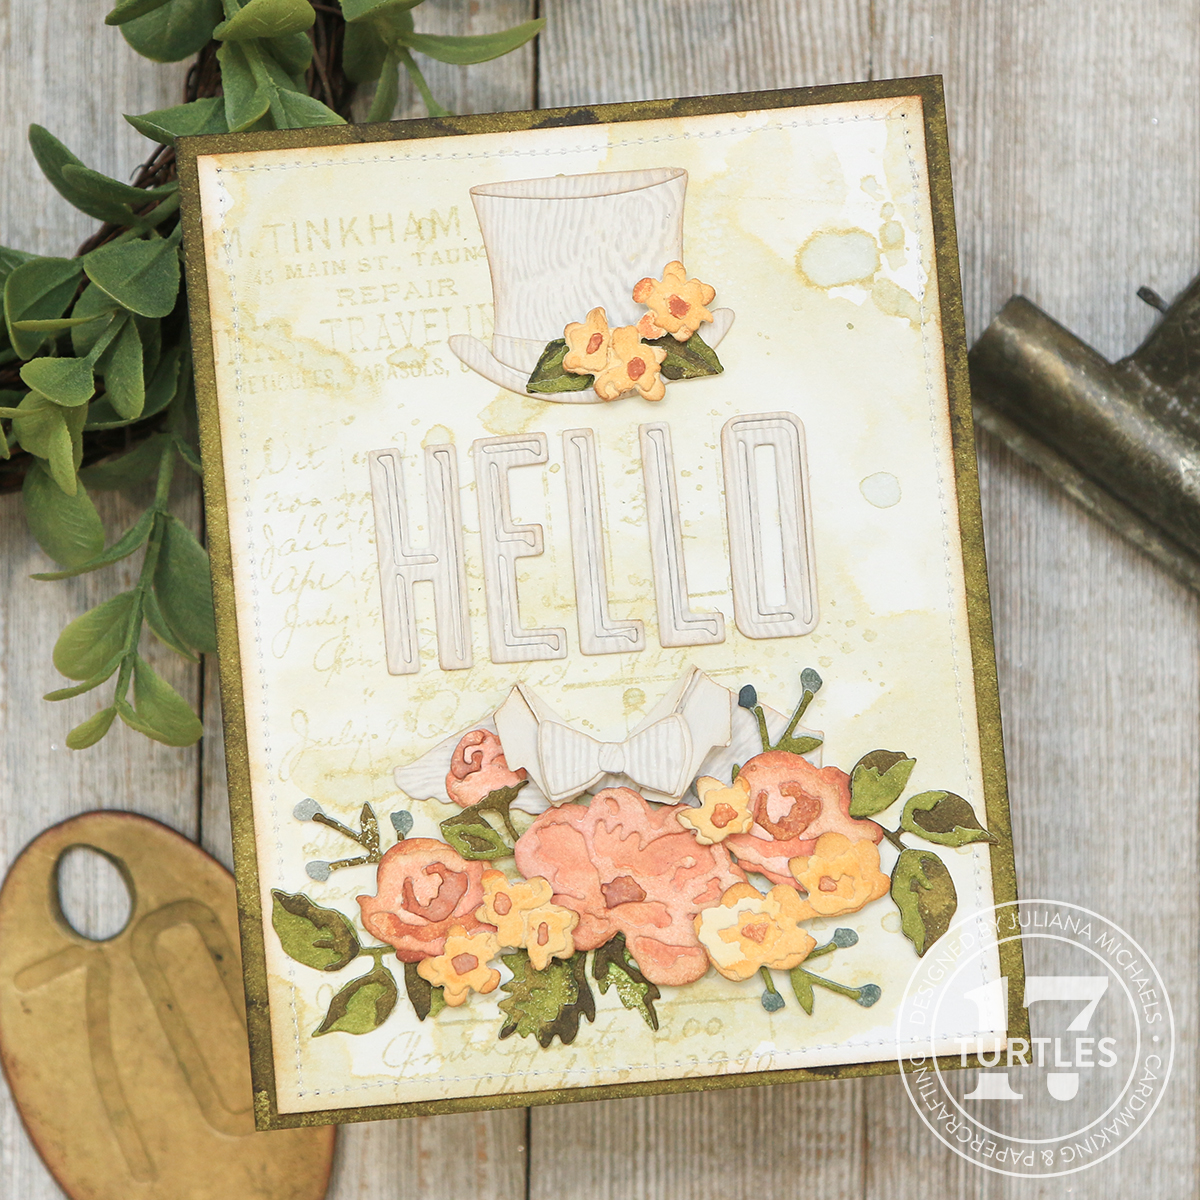
Hello crafty friend! I'm back today with my second make from the Tim Holtz 2023 Sizzix Everyday YouTube Live. For this make, I created a card using several of the new dies including Tailored, Brushstroke and Alphanumeric Emporium. Below, I'm sharing all the little details that helped bring this card to life.

TAILORED HELLO CARD


Before I get started, I want to share a little back story on some of the inspiration for this card. In November 2022, Tim did several YouTube Lives that he called his Holiday Hoopla 2022 and in each one he shared some fantastic holiday crafting ideas. In Holiday Hoopla Part 2 he shared a simple, yet gorgeous idea that really spoke to me and when I started thinking about what I might create with his new Sizzix release, I knew that I wanted to incorporate his Two-tone Wood Grain Die Cutting idea in somewhere. As I said, it's a rather simple idea, but he does share some great tips for it in his video so feel free to take a few minutes to check it out. You can go straight to this technique here.

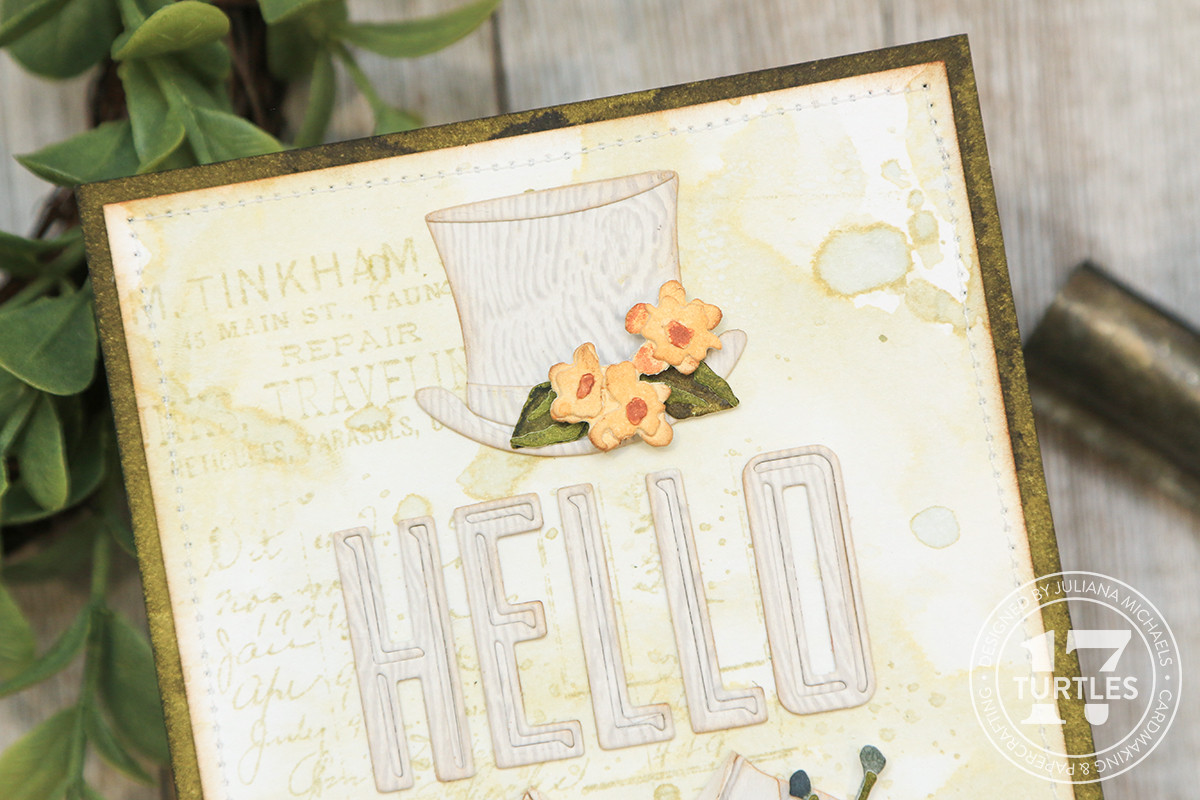
Tailored Hello Card by Juliana Michaels featuring Tim Holtz Sizzix 2023 Tailored, Brushstroke and Alphanumeric Emporium

For this technique you'll need some of his Gray Two-tone Woodgrain Paper. Hopefully you snagged some while it was available. It was part of his seasonal Christmas release and it seems to be sold out now. I personally hoarded 5 packs of it because I knew I'd want to use it throughout the coming making season.

Using the Gray Two Tone Woodgrain Paper, I die cut the top hat, one of the folding shirts/coats and the bow tie from the Tailored Thinlits die set. I made sure to place the dies with the most surface area that would be visible once assembled in a vertical position on the paper. This really helps add to the woodgrain look. Before die cutting the pieces, I ran the paper through my Xyron Create-A-Sticker to apply adhesive to the backside of the paper and to make assembly faster, but you can certainly use your favorite adhesive to do this.

I used this same technique to cut out Hello using the Alphanumeric Emporium Thinlits. I cut the letters out twice and adhered the letter along with the negative inside pieces and just the letter to build them up and create a little dimension. I also inked the edges of the assembled die cuts with Vintage Photo Distress Ink before adhering them to the card.


The sweet little flowers are from the Brushstroke Thinlits Die Set. I also used the Xyron Create-A-Sticker to apply adhesive to the paper before I die cut and assembled the flowers. These dies are super small and the Xyron Create-A-Sticker saved me loads of time when I started assembling the flowers.

Before any of this though, I took several pieces of Distress Watercolor Paper (you just need pieces that are large enough to die cut, so you could also use scraps) and sprayed each piece with a different color of Distress Spray Stain to create my own colored cardstock. I used Peeled Paint, Forest Moss, Tea Dye, Tattered Rose, Scattered Straw and Iced Spruce. I also created a panel that was 4.25 x 5.5 using the Peeled Paint Distress Spray Stain and I used this as my card base.

Once the die cutting was completed, I began assembling the flowers and creating the clusters that I adhered to the card.


Now let me discuss the background. I created this after I had done all of my die cutting, but if you are wanting to recreate this idea, you can certainly do this first so that it's ready to go once you're finished with all of the die cutting.

To create the background I took a piece of Distress Watercolor Paper trimmed to 4 x 5.25 inches and ink smooshed it into some Old Paper Distress Ink and water. I dried it with my heat tool and repeated the process until I was happy with the look. Next, I used the text stamp from the Distinguished Stamp Set and the ledger stamp from the Etcetera Stamp Set. I inked the stamps with Old Paper Distress Ink. I very lightly inked the edges with Vintage Photo Distress Ink and then added some machine stitching around the outside edge.


Thanks for stopping by and taking a look at how I created this Tailored Hello Card using some of the new dies from the Tim Holtz Sizzix 2023 Release.

SUPPLIES

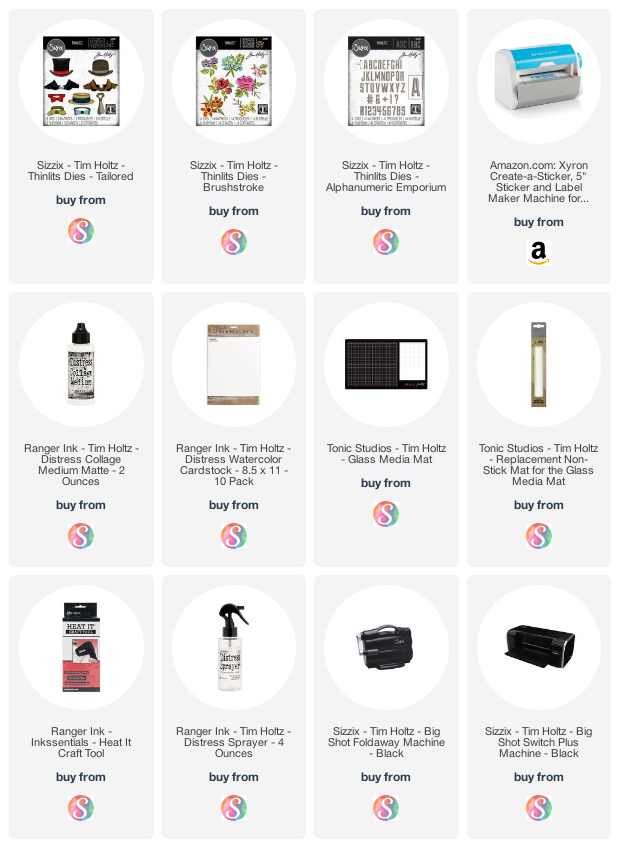
Below you can find the products I used to create this card along with compensated affiliate links to Scrapbook.com. These links are at absolutely no cost to you. When you shop through the links below, I receive a small commission from Scrapbook.com. These links are at absolutely no cost to you and the commission I receive helps me cover the costs of my blog and other expenses, which allows me to continue to provide you with FREE inspiration and tutorials. If you want to learn more about what an affiliate link is, you can see my full affiliate and product disclosure statement here. Thank you so much for your love and support!

3 Chaps Coffee Company | Tim Holtz 2023 Sizzix Everyday Release

Coffee lovers unite! I'm a huge coffee lover myself, so when I saw the Papercut Cafe Die set from the Tim Holtz 2023 Sizzix Everyday Release, the creative ideas began to brew!

Those ideas turned into this 3 Chaps Coffee Company Framed Panel that I created for the Tim Holtz Sizzix 2023 YouTube Live. To create this panel I used a combination of the new dies, one of the new embossing folders, along with an older Alphanumeric set and a stencil. To learn all the details on how this came together, grab yourself a cup, sit back and continue the scroll.

3 CHAPS COFFEE COMPANY FRAMED PANEL


3 Chaps Coffee Company Framed Panel by Juliana Michaels featuring Tim Holtz Sizzix 2023 Gentlemen Thinlits, Alphanumeric Emporium, Papercut Cafe Thinlits and Dotted Embossing Folder

To get started, I used the Tim Holtz Framed Panel as my base. I applied a thin layer of Black Soot Acrylic Paint to the frame and sanded it lightly to reveal the wood beneath. I then took the base, measured it and cut a piece of Distress Watercolor Paper to the same size.


I placed the Tim Holtz Splatters Stencils on the paper and applied Vintage Photo Distress Ink through the stencil using a blending brush. I moved the stencil around to create splatters across the entire background. Next, I ink blended the edges of the paper using Vintage Photo Distress Ink, making sure to leave the area toward the center with minimal to no ink. I then used Distress Collage Medium to adhere the stenciled background to the base and then adhered the frame.


Next, up I die cut the 3 Chaps from Black Kraft Stock using the Gentlemen Thinlits Die Set. I then placed each one into the Dotted Embossing Folder and ran it through my die cutting machine to emboss the paper making sure to place each one onto a different area of the embossing folder so they would each have a slightly different embossed design. To add some interest, I very lightly sanded over the embossed design to reveal the kraft paper core.


For the coffee cups, I used the Papercut Cafe Thinlits Die Set. I cut out one of each of the five different cup designs using textured cardstock. Before I die cut the pieces, I ran the paper through my Xyron Create-A-Sticker which applies adhesive to the backside of the paper. I then die cut the various pieces. Once the paper is cut, all you have to do is peel and stick to assemble the die cuts. This makes assembling these more detailed die cuts a breeze! Tim has mentioned using a Xyron machine to do this and I'll admit to not seeing the need for it. However, as a little Christmas present to myself, I purchased one. Now that I've tried it and realized how much time it saves (as compared to applying liquid adhesive to those tiny pieces) AND the frustration it alleviates, I am SOLD! It's definitely a great tool for applying adhesive to small layered die cuts and something I'll be using going forward when working with small layered die cuts.


Now onto the title. As I was assembling the gentlemen and coffee cups the name 3 Chaps AKA Gentlemen came to me and I was sold! I used the Alphanumeric Bold to cut out 3 Chaps from Black Kraft Stock and from Distress Kraft Heavystock and you guessed it, I used my Xyron Create-A-Sticker! I layered them to give the letters a little more dimension. I then used the new Alphanumeric Emporium to cut out Coffee Co and yep....I used the Xyron Create-A-Sticker on this as well. For this part, I cut out the letters from Distress Kraft Heavystock keeping the negative pieces and then a second time from Black Kraft Stock keeping only the letter. Having the adhesive on them made the assembly so fast and easy!

3 Chaps Coffee Company Framed Panel by Juliana Michaels featuring Tim Holtz Sizzix 2023 Gentlemen Thinlits, Alphanumeric Emporium, Papercut Cafe Thinlits and Dotted Embossing Folder

Well there you have it! I hope you enjoyed learning out my 3 Chaps Coffee Company Framed Panel came together and that you got some inspiration on how to use some of the new dies from the Tim Holtz Sizzix 2023 Release.

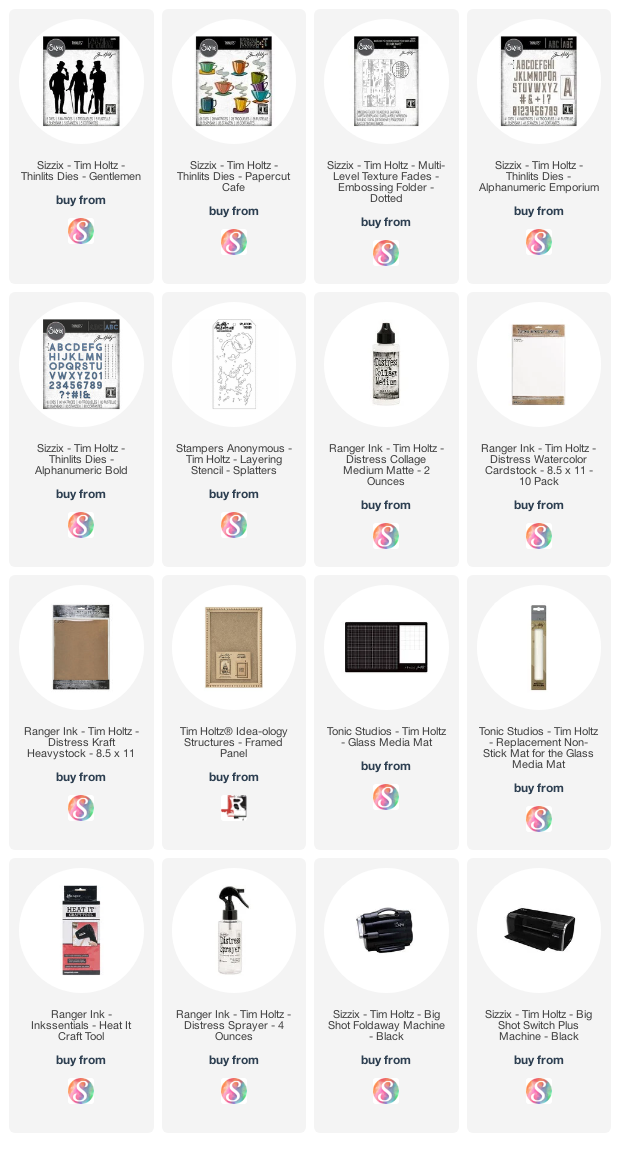
SUPPLIES

Below you can find the products I used to create these project along with compensated affiliate links to Scrapbook.com. These links are at absolutely no cost to you. When you shop through the links below, I receive a small commission from Scrapbook.com. These links are at absolutely no cost to you and the commission I receive helps me cover the costs of my blog and other expenses, which allows me to continue to provide you with FREE inspiration and tutorials. If you want to learn more about what an affiliate link is, you can see my full affiliate and product disclosure statement here. Thank you so much for your love and support!

Happy Birthday Cards | Tim Holtz Sizzix 2023

Hello crafty friend and welcome! Today I'm celebrating in more ways than one. I'm celebrating the Tim Holtz 2023 Sizzix Release and I'm doing it by sharing some birthday cards! The new release is now available at Scrapbook.com and I want to thank them for sending some of the new products to me to create with. This new release has you covered from New Year's to Summer Vacation, and includes dies that are perfect for Valentine's Day, Easter, Spring, Mother's Day, Father's Day, 4th of July and so much more! 

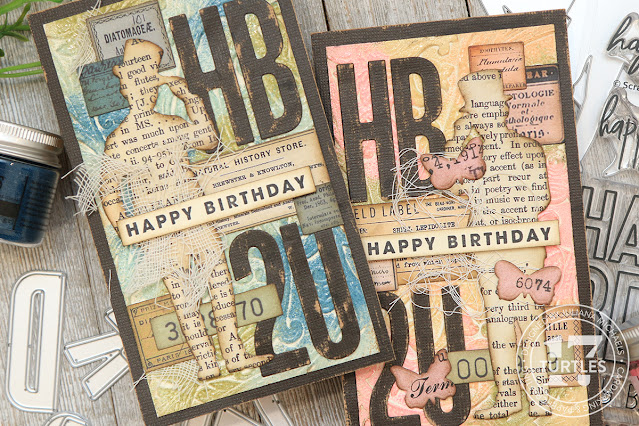
It also got me in the mood to start working on my birthday cards for the year and what better way to do that than to create two versions of the same card. Just by switching out the colors I was able to create a masculine and feminine version of the same card. If you prefer a different color choice you can always go neutral or even rainbow or choose the intended recipients favorite color! You may also notice that I didn't use traditional looking birthday dies to create my cards (even though there is a set that is perfect for celebrations) and went with ones that fit my design style. Even though they are nontraditional, they still lend themselves perfectly to creating birthday cards and it shows just how versatile these die sets can be!

Happy Birthday Cards by Juliana Michaels featuring the Tim Holtz Sizzix 2023 release including Entangled 3D Embossing Folder, Gentlemen Thinlit Dies and Alphanumeric Bulletin Thinlit Dies.

Blue Masculine Happy Birthday Card

Before I go into the details, I want to share that both of these cards are a modified/mini slimline and measure 3.5 x 6 inches. I ended up with this size because I started off with the idea of making a tag using the Tim Holtz Mixed Media Heavystock Number 8 Tag as my base. After creating the first tag though, I decided to trim off the top just below the hole reinforcer mount it onto a piece of black Kraftstock and turn it into a card.

Blue Masculine Happy Birthday Card by Juliana Michaels featuring the Tim Holtz Sizzix 2023 release including Entangled 3D Embossing Folder, Gentlemen Thinlit Dies and Alphanumeric Bulletin Thinlit Dies.

To get started, I began with the Tim Holtz Mixed Media Heavystock Number 8 Tag and embossed it using the 3D Entangled Embossing Folder. I did not spritz the paper with water and only ran it through my die cutting machine once.


Next, I rubbed an embossing ink pad over the surface of the tag and then sprinkled a mix of Distress Embossing Glazes over the inked tag. I used my fingers to pick up the powder and sprinkle it onto the tag. On this card I used the following colors: Uncharted Mariner, Peeled Paint, Speckled Egg and Weathered Wood. Once I had covered the surface, I tapped off the excess into the trash can and then used my embossing gun to melt the embossing glaze. If you want an even more distressed effect, you can rub a brown Distress Crayon over the surface and then use your finger to rub it into the cracks and crevices. I've used this Glazed Ceramic Effect in the past and had planned to do it on this tag, but I ended up changing my mind and went for the less distressed look.


After the background was completed, I began adding the layers of labels and die cuts. The small labels are from the Tim Holtz Ephemera Snippets. I selected some that were cream, blue and green to coordinate with the background.

Blue Masculine Happy Birthday Card by Juliana Michaels featuring the Tim Holtz Sizzix 2023 release including Entangled 3D Embossing Folder, Gentlemen Thinlit Dies and Alphanumeric Bulletin Thinlit Dies.

Next, I took the Gentlemen Thinlits and die cut one of them from a piece of text paper from the Tim Holtz Backdrops Volume One. I also cut it from a thin piece of chipboard and glued these layers together to give the die cut a little more stability. I then inked the edges with Walnut Stain Distress Ink. Next, I die cut the HB2U from Black Kraftstock using the Alphanumeric Bulletin Dies (minus the outside border piece) and sanded it slightly to reveal the kraft core.

I used Distress Collage Medium to adhere the labels and die cuts to the background. Because the surface is covered with the embossing glaze, I recommend placing something heavy on top of the piece and giving it some time to dry.

Blue Masculine Happy Birthday Card by Juliana Michaels featuring the Tim Holtz Sizzix 2023 release including Entangled 3D Embossing Folder, Gentlemen Thinlit Dies and Alphanumeric Bulletin Thinlit Dies.

For some added texture I tucked it some small pieces of Mummy Cloth which looks a bit like cheese cloth. It is a wonderful way to add some texture. Unfortunately it is only available during Halloween, so you may have a tough time locating it if you don't already have some in you stash.

The final touch was the sentiment, which is from the Scrapbook.com Happy Birthday Stamp Set. I stamped it onto a piece of Distress Mixed Media Heavystock using Black Soot Archival Ink. I then trimmed it down, inked the edges with Walnut Stain Distress Ink and adhered it to my card using double sided foam tape.

Blue Masculine Happy Birthday Card by Juliana Michaels featuring the Tim Holtz Sizzix 2023 release including Entangled 3D Embossing Folder, Gentlemen Thinlit Dies and Alphanumeric Bulletin Thinlit Dies.

Pink Feminine Happy Birthday Card

On this card, I used all the same techniques as the blue version. The only differences are that I used different embossing glaze colors, a different Gentlemen die and added some small butterfly die cuts.

Pink Feminine Happy Birthday Card by Juliana Michaels featuring the Tim Holtz Sizzix 2023 release including Entangled 3D Embossing Folder, Gentlemen Thinlit Dies and Alphanumeric Bulletin Thinlit Dies.

For the background I used Peeled Paint, Tattered Rose, Antique Linen and Kitsch Flamingo Embossing Glazes.


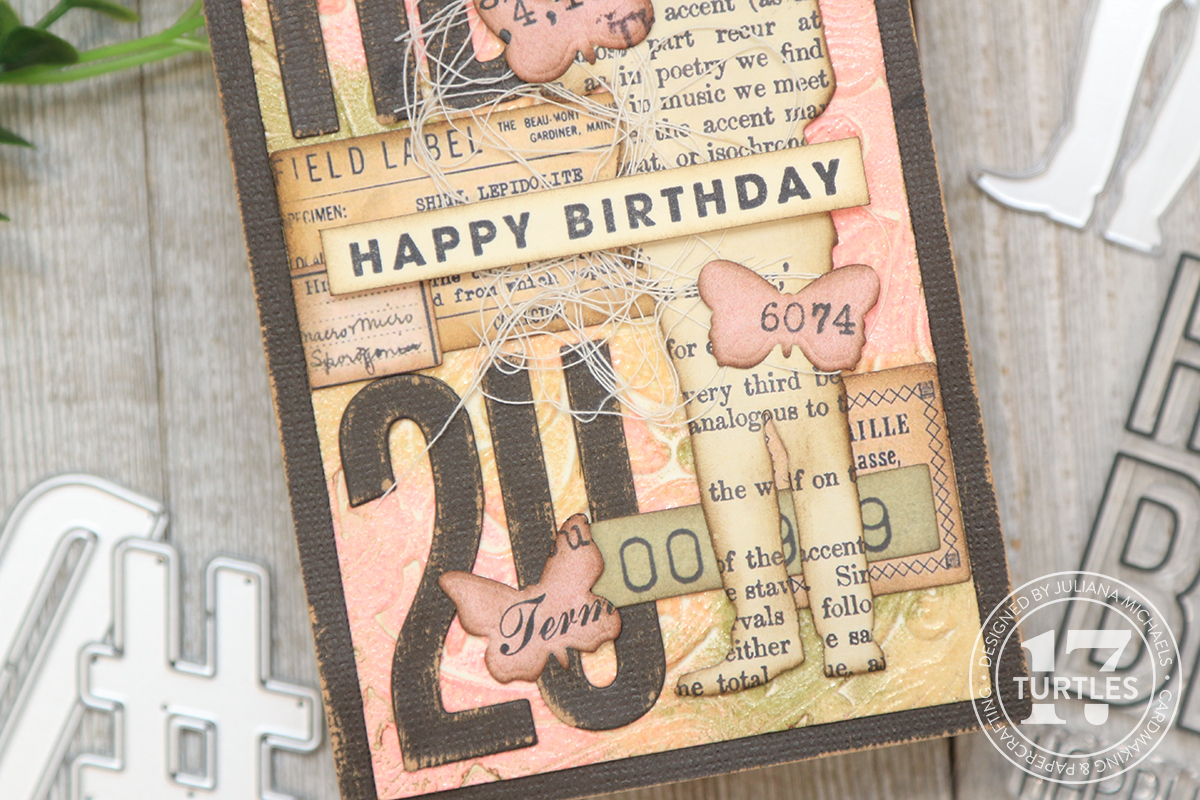
I selected labels that were cream, pink and green ink color. For the butterflies, I used a piece of pink paper from the Backdrops Volume One Paper Pad and cut it using the Scrapbook.com Butterflies 2 Die Set. Before adhering them to the card, I bent up the wings and then only applied adhesive to the body part so that they would have a little dimension.

Pink Feminine Happy Birthday Card by Juliana Michaels featuring the Tim Holtz Sizzix 2023 release including Entangled 3D Embossing Folder, Gentlemen Thinlit Dies and Alphanumeric Bulletin Thinlit Dies.

I once again used some of the Mummy Cloth for added texture, but this time I used some piece that had pulled loose and where like long threads that I swirled and twisted together.

Pink Feminine Happy Birthday Card by Juliana Michaels featuring the Tim Holtz Sizzix 2023 release including Entangled 3D Embossing Folder, Gentlemen Thinlit Dies and Alphanumeric Bulletin Thinlit Dies.

The final touch was once again the stamped happy birthday sentiment.

Pink Feminine Happy Birthday Card by Juliana Michaels featuring the Tim Holtz Sizzix 2023 release including Entangled 3D Embossing Folder, Gentlemen Thinlit Dies and Alphanumeric Bulletin Thinlit Dies.

Thanks so much for stopping by today! I hope you enjoyed this bit of birthday card inspiration using the Tim Holtz Sizzix 2023 release including Entangled 3D Embossing Folder, Gentlemen Thinlit Dies and Alphanumeric Bulletin Thinlit Dies.

Happy Birthday Cards by Juliana Michaels featuring the Tim Holtz Sizzix 2023 release including Entangled 3D Embossing Folder, Gentlemen Thinlit Dies and Alphanumeric Bulletin Thinlit Dies.

SUPPLIES

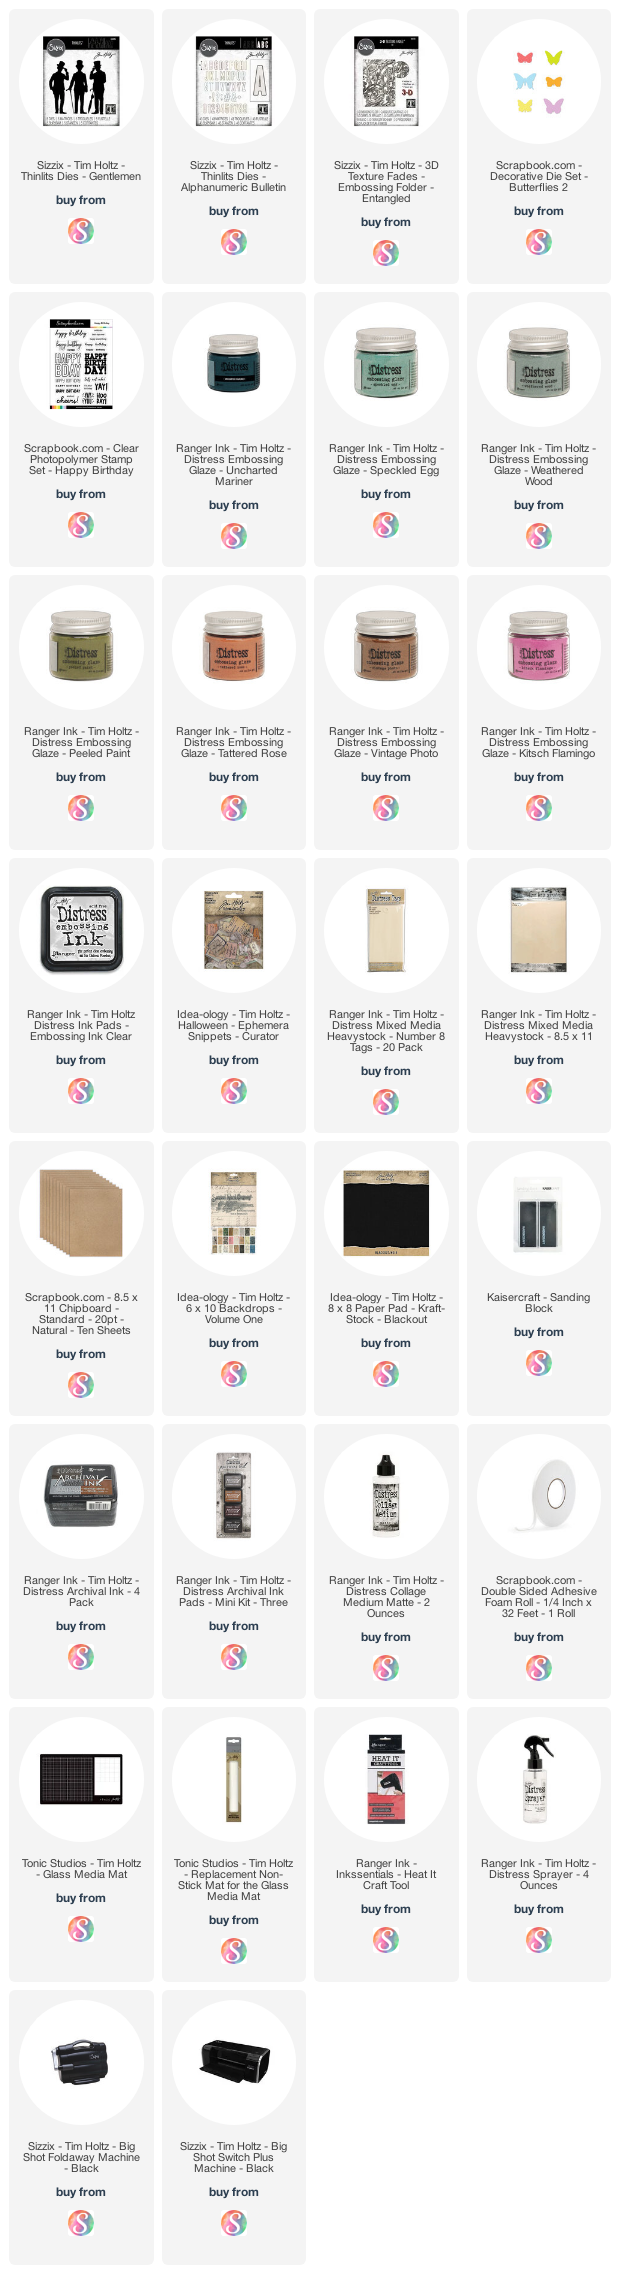
Below you can find the products I used to create these cards along with compensated affiliate links to Scrapbook.com. These links are at absolutely no cost to you. When you shop through the links below, I receive a small commission from Scrapbook.com. These links are at absolutely no cost to you and the commission I receive helps me cover the costs of my blog and other expenses, which allows me to continue to provide you with FREE inspiration and tutorials. If you want to learn more about what an affiliate link is, you can see my full affiliate and product disclosure statement here. Thank you so much for your love and support!
Subscribe