Showing posts with label Blog Hop. Show all posts

Sunny Studio Stamps 5th Birthday Blog Hop

Hello friends! Welcome to the Sunny Studio Stamps 5th Birthday Blog Hop! I'm thrilled to be a part of this event and to help Mendi (the owner) celebrate this very special milestone for her company! There are loads of fun things going on along with the blog hop, including some great promotions that will save you money and some amazing giveaways. You can check out all of the details below and learn more about the Slimline Christmas Card I created and am sharing with you today. 


As part of the blog hop, you'll be seeing some fabulous inspiration using the brand new Sunny Studio Stamps Fall/Winter Release. You should be arriving here from the talented Isha and your next stop from here is the amazing Leanne.

I'm a huge fan of all things Christmas and a Santa lover, so I choose to create and share a card featuring the North Pole Stamp Set. I used this along with the new Slimline Scallop Frame Dies to create my card.


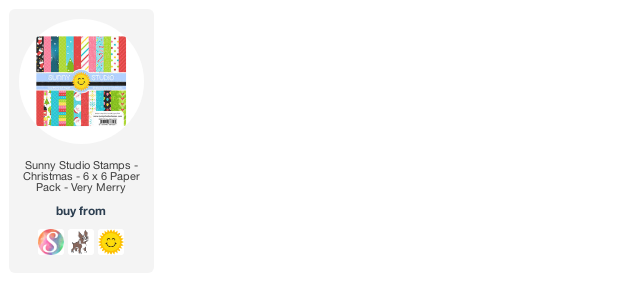
I stamped and colored all of the images from the North Pole Stamp Set using Copic Markers and then die cut them using the coordinating die set. Making scenes with stamped images is something I love to do, so I thought it would be fun to divide the space on the front of the card into three sections. Each one is 2.75 x 2.5 inches and cut from a piece of green patterned paper that can be found in the Very Merry 6x6 Paper Pad. I adhered each section onto a piece of white cardstock that I had die cut using the new Slimline Scallop Frame. I then went about creating a small scene on each section using the various images I had colored. When doing this sort of scene creating, I always try to color a bunch of extra "filler" images. In this case, it was presents, and I used them to fill in the spaces here and there on each section.


I hope you enjoyed this Slimline Christmas Card inspiration using the Sunny Studio Stamps North Pole Stamp Set. Now it's time to learn about all the good stuff!

BLOG HOP INFO, PROMOS & GIVEAWAYS

Here is the full blog hop order so you don't miss a stop along the way to enter for the giveaways!

Juliana (you are here)

Sunny Studio has a couple different promotions going on right now. Only one discount code can be used per order, so you will need to choose the one that has the biggest savings for you. There is free US shipping on all orders over $25 using the code FREESHIP or 20% off all Sunny Studio Branded Products (excluding the new release and retired products) using the code FIVEYEARS through Wednesday, August 26th at 11:59pm PDT.

Now, how about the giveaways?! Each stop along the blog hop will have a $25 gift code to give away. 
To enter, leave a comment below telling me one of your favorite things about the holiday season! 

You can hop and comment to win now through Wednesday, August 26th 11:59 pm PDT. All winners will be emailed their shopping codes and shared on the Sunny Studio blog on Sunday, August 30th.

Happy Hopping!

Supplies

You can find a supply list of the products I used to create this project below. This post contains compensated affiliate links to Sunny Studio Stamps, Scrapbook.com and Simon Says Stamp at no cost to you. If you want to learn more about what an affiliate link is, you can see my full affiliate and product disclosure statement here.
Papercrafts Unite Against Racism Blog Hop

Hello friends! Welcome to the Papercrafters Unite Against Racism Blog Hop. I’m happy to be coming together to stand with the papercrafting community to stand behind our crafty sisters and brothers of colour and to show my support in the never-ending fight for racial equality all over the world.

Now Is The Time Mixed Media Card by Juliana Michaels

If you are looking for more information about the Papercrafters Unite Against Racism Blog Hop and a full list of participants, ways to help etc. head over to Justine Hovey's blog.

NOW IS THE TIME

As I was thinking about what to create for this blog hop, I was struck by the saying "now is the time". Racism and racial injustice have gone on for too long in this country and now is the time for change.

With this idea in mind, I began selecting elements that went together to support this theme. Clocks and gears seemed the perfect fit to represent time and the butterfly was of course perfect to represent change.

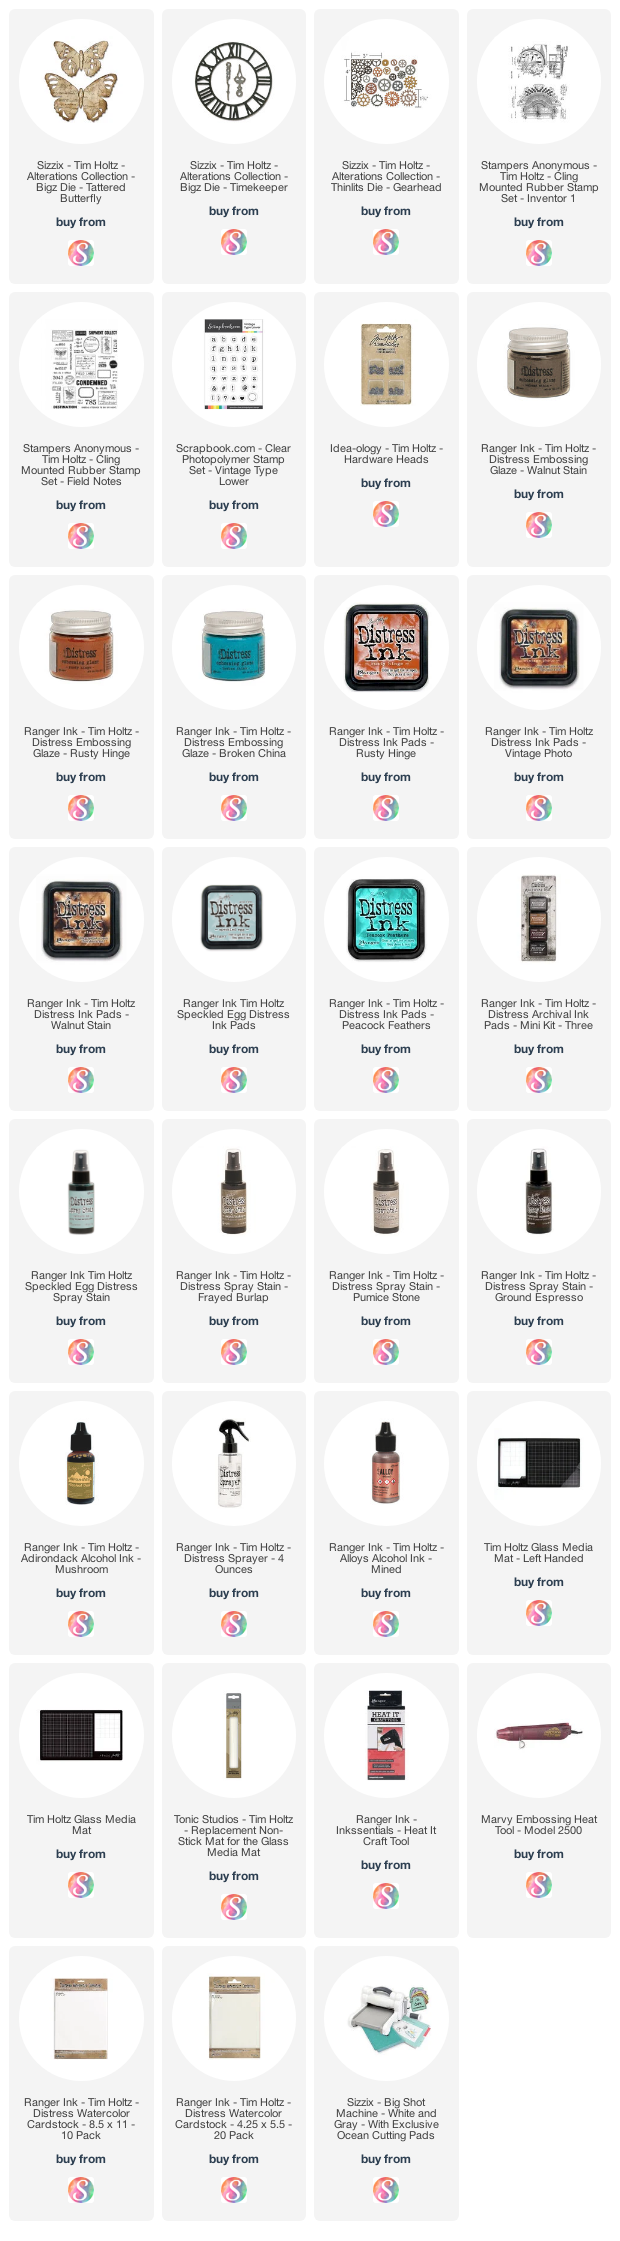
The background was created by spraying watercolor paper with Distress Spray Stains in Speckled Egg, Frayed Burlap and Pumice Stone and just a touch of Ground Espresso. I spritzed it with water and then dried it with my heat tool. Next I smooshed some Rusty Hinge Distress Ink onto it. For this I smashed the ink pad onto my non-stick craft mat, spritzed it with water and then dabbed my paper into the ink. I dried the paper and then repeated the dabbing until I was happy with the look. I also did some water spritzing and dabbed the water dry to give it a bit more grunge. Once the background was dry, I stamped several images onto it using Vintage Photo Archival Ink. This included the clock from Inventor 1 and images from Dapper and Field Notes.

Now Is The Time Mixed Media Card by Juliana Michaels

The clock was created using the Timekeeper Bigz Die. I cut it from watercolor paper and then applied the Distress Embossing Dauber to different areas, sprinkled it with Walnut Stain Embossing Glaze and heat set it. I then added the embossing ink to some of the open areas not covered with the Walnut Stain Glaze and added Rusty Hinge Glaze. I then added Broken China Glaze to the final spots. The main thing to keep in mind for this look is don't cover the entire surface with the same color. Apply the colors to different section and occasionally allow the colors can overlap a bit. I used this same technique on the clock hands and the Hardware Head was distressed with a bit of Mushroom and Mined Alcohol Inks.

The gears were die cut from watercolor paper using the Gearhead Thinlits Die. I inked them with Peacock Distress Ink and added a tiny bit of Vintage Photo using my finger tip.

On top of all of this, I layered a butterfly cut from watercolor paper using the Tattered Butterfly Bigz Die. I smooshed Fossilized Amber Distress Ink onto my non-stick craft mat and dipped and dabbed the die cut into the ink, drying it in between. I then stamped it with the clock from the Inventor 1 Stamp Set using Vintage Photo Archival Ink.

Now Is The Time Mixed Media Card by Juliana Michaels

To finish off the card, I added the sentiment which was stamped using the Vintage Type Lower Stamp Set from Scrapbook.com. Each word was stamped onto a piece of white cardstock that was inked with Old Paper and then edged with Vintage Photo Distress Ink.

Now Is The Time Mixed Media Card by Juliana Michaels

BLOG HOP INFO

You may be arriving to my blog from Martha Lucia Gomez of Joy Clair Designs.  Your next stop on the hop is Amy Hill.  

Thanks so much for stopping by today and I hope you enjoy all the inspiration you find during the Papercrafters Unite Against Racism Blog Hop.


SUPPLIES

You can find a supply list of the products I used to create this project below. This post contains compensated affiliate links to Scrapbook.com at no cost to you. If you want to learn more about what an affiliate link is, you can see my full affiliate and product disclosure statement here. 

Sunny Studio 4th Birthday Blog Hop + Giveaway

Hello friends and welcome to the Sunny Studio 4th Birthday Blog Hop! I'm so excited to be a part of this fun hop and to celebrate this wonderful milestone with Sunny Studio. Let me share a bit about what's going on today. As you hop along, you're going to be inspired with projects featuring the upcoming Sunny Studio Stamps Fall Release! AND...you will be able to PRE-order the new release during the blog hop! Yep, you read that correctly! Also, no blog hop would be complete without some fabulous prizes! You'll have the chance to win a $25 gift code from me to the Sunny Studio Online Shop! In fact, there is a total of $450 in prizes being given away during this hop, so make sure you check out all the details below.


You should be coming here from the fabulous Ana Anderson, but if not, you can certainly start here and continue along the hop. But first, let me share a set of Christmas Tags featuring the gorgeous new Layered Poinsettia Die! I've created 2 versions of the same tag...one clean and one distressed! I'd love to know which one you like the most!

CLEAN & DISTRESSED LAYERED POINSETTIA CHRISTMAS TAGS

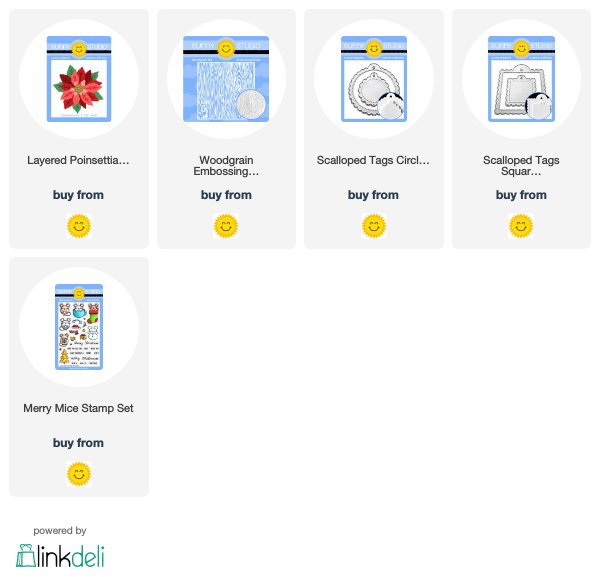
For the clean set of tags, I began by taking the Scalloped Circle and Square Tag Dies and die cutting a piece of off white cardstock to create the tag base. I then repeated the die cutting with a piece of brown cardstock.

Clean Layered Poinsettia Christmas Tag featuring Sunny Studio Stamps Layered Poinsettia Die, Wood Grain Embossing Folder and Scalloped Tags

Next, I used scissors to trim off the scalloped part of the die cut which left me with the inside piece. I then embossed this using the Woodgrain Embossing Folder and adhered it to the center of the tag. I then die cut the gorgeous Layered Poinsettia Die using several shades of red cardstock to create the main flower part. I also used some green and yellow cardstock to create the leaves and center.
Clean Layered Poinsettia Christmas Tag featuring Sunny Studio Stamps Layered Poinsettia Die, Wood Grain Embossing Folder and Scalloped Tags

Using a fine tipped adhesive applicator, I adhered all of the layers together. I found it helpful to refer to the instructions that come with the die to help line up all the layers. I then adhered the finished poinsettia to the tag using double sided foam adhesive. To finish off each tag, I added a sentiment stamped from the Merry Mice Stamp Set and added a bit of green and white bakers twine.
Clean Layered Poinsettia Christmas Tag featuring Sunny Studio Stamps Layered Poinsettia Die, Wood Grain Embossing Folder and Scalloped Tags

For my second set of tags, I went a bit more distressed and grungy. I once again started off by die cutting cream cardstock with the Scalloped Circle and Square Tag Dies. This time instead of using brown cardstock for the inside piece, I die cut a piece of water color paper. I once again trimmed off the scalloped part and then embossed it with the Woodgrain Embossing Folder. I then took Distress Ink in Gathered Twig and Espresso and ink blended over the embossed paper. To add to the grungy look, I also distressed the edges of the paper using the backside of an X-acto knife.

Distressed Layered Poinsettia Christmas Tag featuring Sunny Studio Stamps Layered Poinsettia Die, Wood Grain Embossing Folder and Scalloped Tags


For the poinsettia, I created my own custom red and green paper using Distress Sprays and Distress Oxide Sprays.

RED: I spritzed watercolor paper with water and then sprayed it with a mix of Distress Spray in Fired Brick, Festive Berries and Aged Mahogany. I dried it with a heat tool and then sprayed the paper with Distress Oxide Spray in Fired Brick and Peeled Paint. I then sprayed the paper with a bit of water to activate the oxide. I then dried it and then sprayed on just a bit of Distress Spray in Old Paper.

GREEN: I spritzed watercolor paper with water and then sprayed it with a mix of Distress Spray in Peeled Paint, Bundled Sage and Old Paper. I dried it with a heat tool and then sprayed the paper with Distress Oxide Spray in Iced Spruce and Peeled Paint. I then sprayed the paper with a bit of water to activate the oxide. I then dried it and then sprayed on just a bit of Distress Spray in Old Paper.
Distressed Layered Poinsettia Christmas Tag featuring Sunny Studio Stamps Layered Poinsettia Die, Wood Grain Embossing Folder and Scalloped Tags

For the yellow parts, I inked a piece of watercolor paper with Fossilized Amber Distress Oxide.

Once all of the papers were ready to go, I die cut each of the layers from its respective color. I then inked the edges of each piece with Vintage Photo Distress Ink and then began assembling each Poinsettia.

To finish off each tag, I again added the sentiment from the Merry Mice Stamp Set and then for a vintage touch I added crinkle ribbon died with Distress Spray to coordinate with the tags.
Distressed Layered Poinsettia Christmas Tag featuring Sunny Studio Stamps Layered Poinsettia Die, Wood Grain Embossing Folder and Scalloped Tags

I hope you enjoyed these two versions of Christmas tags using the Layered Poinsettia Die! You can find the full list of Sunny Studio products used below.


BLOG HOP DETAILS & GIVEAWAY

Here are a few more details about the blog hop and giveaway...


Along with being able to PRE-order the new release Sunny Studio will be offering FREE shipping within the USA and a mini light bulb die on all orders (or a $4 discount + a free mini light bulb die on international orders) + a FREE enamel pin on orders over $50 through September 30th.  See that cute little mouse in the mug? That's the adorable enamel pin you can get!


If you are interested in winning a $25 gift code from me to the Sunny Studio shop, leave me comment below! (Please make sure I have a way to contact you if you are the winner.) The contest is open through Friday, September 27th 11:59 pm PDT and the winner will be announced on the Sunny Studio blog on Tuesday, October 1st. Good luck and thanks so much for stopping by today!

Now hop along to your next stop which is the amazingly talented Anja Bytyqi.

Just in case, here is the complete hop list:
Sunny Studio
Nichol Spohr
Sandy Allnock
Laura Bassen
Kay Miller
Michelle Short
Francine Vuillème
Teri Anderson
Rachel Alvarado
Angelica Conrad
Francesca Vignoli
Leanne West
Vanessa Menhorn
Eloise Blue
Ana Anderson
Juliana Michaels
Anja Bytyqi
Candice Fisher

SUPPLIES


This post contains affiliate links to Sunny Studio Stamps. If you buy anything through my links, it adds no extra cost to you, but it does help me keep my blog up and running and allows me to share this content with you! I truly appreciate and thank you so very much for your support! (If you're interested, you can see my full disclosure statement here.)


Deck the Halls with Inky Paws Blog Hop | Newton's Nook Designs

Hello friends and welcome to Newton's Nook Designs Deck the Halls with Inky Paws Blog Hop! I'm so happy you are joining us today as we celebrate this holiday season with this super fun hop featuring the Newton's Nook Design Team along with some amazing guest designers. At each stop you'll find some Christmas or holiday inspiration using products from Newton's Nook Designs. You'll also have the chance to win a fun prize, so keep reading for all the details!

Merry & Bright Card | Newton's Nook Designs


As I sat down to create my card, I just couldn't decide on a what stamp set to use. I pulled out all of my favorites and as I was looking at them I had a light bulb moment! What if I combined some of my favorite Newton and friends images onto one card? That's exactly what I did. I stamped and colored all of the images using Copic markers and then die cut each one using the coordinating die set.

Merry and Bright Christmas Card by Juliana Michaels featuring Newton's Nook Designs

This card uses the following stamp sets: Happy Howl-idays, Slothy Christmas, Llama Delivery, Naughty or Mice, and Santa Paws Newton.

Merry and Bright Christmas Card by Juliana Michaels featuring Newton's Nook Designs

The sentiment is from the Sentiments of the Season Stamp Set. I cut a piece of red cardstock using the Frames & Flags Die Set. I then stamped the sentiment with Versamark Embossing Ink and heat embossed it with white embossing powder. I finished off the card by placing Newton and his friends onto a piece of white cardstock cut using the postage edged die from the Framework Die Set.

Merry and Bright Christmas Card by Juliana Michaels featuring Newton's Nook Designs

Thanks so much for stopping by today! I wish each and everyone of you a very Merry Christmas and I hope you have the happiest of holidays!


Deck the Halls with Inky Paws Exclusive!

Newton's Nook Designs is also releasing a NEW mini 2x3 stamp set today called Ginger Snap!! This fun new stamp set will only be available at Newton's Nook Designs online shop and you can get it for FREE this week with a $30 purchase! Offer is valid until Friday, December 14, 2018 or while supplies last. This new stamp set is also available for purchase for $4.99.


Blog Hop and Giveaway

No blog hop is complete without a giveaway! We'll be choosing two lucky winners to win a $25 store credit for Newton's Nook Designs online shop! To enter, just leave a comment on each of the Design Team Member and Guest blogs (see the list below)! The more posts you comment on the better your chances are of winning! You have until Sunday, December 9th at 9 pm EST to comment -- winners will be announced on the NND blog on Monday, December 10th.

Deck the Halls with Inky Paws Blog Hop List:

Newton's Nook Designs November Release Day 3

Welcome to Newton's Nook Designs November Release Day 3! Today is the final day of this release and we have two new stamp sets to share with you. They're perfect for ringing in the New Year or any other special day you want to celebrate! Just a reminder that all of the new products will be available in the Newton's Nook Designs shop on Friday November 23 AND their Black Friday Sale will be going on as well.

Happy New Year Card | Newton's New Year

For this first card, I actually combined both of the new stamp sets today. I thought Newton needing a drinking buddy! I colored the images using Copic Markers and then die cut them with the coordinating dies. I added touches of gold to their hats and the streamers with a gold gel pen. I then adhered them to a piece of black cardstock cut using the Frames and Flags Die Set.

Happy New Year Card by Juliana Michaels featuring Newton's Nook Designs Newton's New Year and Newton Celebrates Stamp Sets

For the background, I wanted a bit of shimmer and shine with foil. I took the Confetti Stencil and applied Therm O Web Deco Foil Transfer Gel over it. Once that was dry, I foiled it using a laminator and Therm O Web Gold Shattered Glass Deco Foil.
Happy New Year Card by Juliana Michaels featuring Newton's Nook Designs Newton's New Year and Newton Celebrates Stamp Sets

Here's a look at the Newton's New Year Stamp Set.

Let's Party Card | Newton Celebrates

My second card today features the Newton Celebrates Stamp Set. I combined it with the Cocktail Mixer stamp set to add in an extra martini glasses for Newton to enjoy! I colored the images using Copic Markers and then die cut the using the coordinating die set.

Let's Party Card by Juliana Michaels featuring Newton's Nook Designs Newton Celebrates Stamp Set

The background was created using the ink smooshing technique with Distress Ink on a piece of watercolor paper. I have had the best luck with this on watercolor paper as it can handle the water better. It will still warp, but once you glue it down to the card base it flattens out just fine. For the final touch, I added a few sequins to a touch of festive fun!

Let's Party Card by Juliana Michaels featuring Newton's Nook Designs Newton Celebrates Stamp Set

Here you can see the full Newton Celebrates Stamp Set.

Blog Hop and Giveaway

So what do you think of today's release? They are just perfect for ringing in the New Year and anything else worth celebrating! Keep reading for the blog hop and giveaway details.


For this reveal, you have the chance to win a $25 store credit to Newton’s Nook Designs. Would you like to win? If you said yes, all you have to do is leave a comment on the Newton's Nook Designs Blog and on each of the Design Team Members Blog. The winner will be chosen at random from one of the blogs, so the more comments you leave, the better your chance is of winning! You have until Wednesday November 21st at 9pm EST to comment -- winners will be announced on the blog post on Friday, November 23rd.

Check out all the awesome Design Team Blogs below to enter:

Newton's Nook Designs November Release Day 2

Hello friends and welcome to Newton's Nook Designs November Release Day 2! Today we have 2 beautiful new stamp sets to share with you. They are perfect for the upcoming holiday and winter season. After you check out the inspiration I have to share with you today, continue reading to get all the details on today's blog hop and giveaway.

Joy Christmas Card | Winter Birds Stamp Set

First up, I'm sharing a card using the new Winter Birds Stamp Set. Actually this card uses, both new sets. I couldn't resist combining them!

I first stamped the images and then colored them with Copic Markers. Then, I die cut them using the coordinating dies. Next, came the part of piecing and layering all the parts to create the design. Once I got them how I wanted them, I placed a piece of Therm O Web Purple Tape over them to hold them in place. Then I flipped them over and adhered double sided foam tape to the back of the flowers and some of the leaves to give the piece a bit of dimension.

Joy Christmas Card by Juliana Michaels featuring Newton's Nook Designs Poinsettia Blooms and Winter Birds Stamp Set

To create the background, I used the new Plaid Stencil. I love these new layering stencils and I can't wait to keep playing with them. I inked each layer using Distress Ink in Fired Red Brick and Peeled Paint. To center the stencil on the paper I started with a slightly larger than normal card front. Once I had the design inked up, I trimmed it to size so the design would be centered on the card front. I love that the stencil was designed to allow you to create a larger design by simply sliding it over a little as you finish inking each section.

Joy Christmas Card by Juliana Michaels featuring Newton's Nook Designs Poinsettia Blooms and Winter Birds Stamp Set

Merry Christmas Card | Poinsettia Blooms

For this second card, I used the Poinsettia Blooms stamp set again and combined it with the Sentiments of the Season stamp set. I stamped and colored the images with Copic Markers and die cut them using the coordinating dies.

Joy Christmas Card by Juliana Michaels featuring Newton's Nook Designs Poinsettia Blooms and Sentiments of the Season Stamp Set

To add a bit of texture, I used the stitched rounded rectangle die from the Frames and Flags Die Set to emboss a frame in to the center of a piece of white cardstock trimmed to 4 x 5.25 inches. Embossing with a die is super easy, however the plates and layers you need to do it vary with each die cutting machine. I recommend referring to your machines instruction manual for details on how to do this.

Joy Christmas Card by Juliana Michaels featuring Newton's Nook Designs Poinsettia Blooms and Sentiments of the Season Stamp Set

Once the embossing was complete, I stamped the sentiment in the center and embossed it with gold embossing powder. I then finished off the card by adhering the poinsettias to the corners with double sided foam adhesive.

Joy Christmas Card by Juliana Michaels featuring Newton's Nook Designs Poinsettia Blooms and Sentiments of the Season Stamp Set

Here's a full look at the new Poinsettia Blooms Stamp and Die Set
Here's a look at the Winter Birds Stamp and Die Set.

Blog Hop and Giveaway

So what do you think of today's release? Aren't they just gorgeous? Keep reading for the blog hop and giveaway details.

For this reveal, you have the chance to win a $25 store credit to Newton’s Nook Designs. Would you like to win? If you said yes, all you have to do is leave a comment on the Newton's Nook Designs Blog and on each of the Design Team Members Blog. The winner will be chosen at random from one of the blogs, so the more comments you leave, the better your chance is of winning! You have until Wednesday November 21st at 9pm EST to comment -- winners will be announced on the blog post on Friday, November 23rd.

Check out all the awesome Design Team Blogs below to enter:

Newton's Nook Designs November Release Day 1

Hello and welcome to Newton's Nook Designs November Release Day 1! I'm so excited to share all of the new products with you this week as we count down the days until they are available to purchase! We will be revealing new products today through Wednesday, November 21. They will all be available to purchase on Friday, November 23 AND this will be just in time for Newton's Nook Designs Black Friday Sale!

Now let's get started on today's new product reveal. And make sure to keep reading after the inspiration I have to share for the blog hop and giveaway details!

Fabulous Christmas Card | Christmas Haul Stamp Set

First up we have Christmas Haul. The classy lady is back and ready to help you celebrate the holidays! This set joins the family of similar style stamps....Classy Teachers and Holding Happiness. 

Fabulous Christmas Card by Juliana Michaels featuring Newton's Nook Designs Christmas Haul stamp set.

For this card, I stamped and colored the images using Copic Markers. I then die cut them using the coordinating Christmas Haul Die Set. I adhered the images with double sided foam adhesive to a panel of white cardstock cut with the scallop edged die from the Framework Die Set. This was then adhered to a piece of black plaid patterned paper.

Fabulous Christmas Card by Juliana Michaels featuring Newton's Nook Designs Christmas Haul stamp set.

Here is a full peak at the Christmas Haul Stamp and Die Set.

Moose Out Of Life Card | Moose Mountain Stamp Set

Next up we have Moose Mountain...an adorable set perfect for making the "moose" out of life! I stamped the images and colored them with Copic Markers. I then die cut them using the coordinating die set.

Moose Out of Life Card by Juliana Michaels featuring Newton's Nook Designs Moose Mountain stamp set.

The background was created by inking up a piece of Bristol Paper with Distress Ink in Salty Ocean and Blueprint Sketch. Once that was dry, I placed the Petite Snow Stencil on top and added a layer of Ranger Texture Paste using a palette knife. For the snowy hills, I die cut white cardstock using the hill dies from the Land Border Dies and then lightly inked the edges with Tumbled Glass Distress Ink.

Moose Out of Life Card by Juliana Michaels featuring Newton's Nook Designs Moose Mountain stamp set.

Here's a look at the Moose Mountain Stamp Set and coordinating die set.

Snowman Advice Card | Snowman Advice Stamp Set

For the final card I used the new Snowman Advice stamp set and combined it with the Frozen Fellowship stamp set. I stamped and colored the snowmen using Copic Markers. I then die cut the image using the postage edge die from the Framework Die Set.

Snowman Advice Card by Juliana Michaels featuring Newton's Nook Designs Snowman Advice stamp set.

Next, I stamped the sentiment from the Snowman Advice set and die cut it using a stitched rectangle die. I finished off the card by layering both pieces onto teal cardstock.

Snowman Advice Card by Juliana Michaels featuring Newton's Nook Designs Snowman Advice stamp set.

 Here's what the Snowman Advice stamp set looks like. 

Layering Stencils | Argyle and Plaid Stencils

Along with these new stamp and die sets, we are also revealing 2 new stencil sets. These new stencils are a bit different than the other stencils from Newton's Nook. These are layering stencils and I have to tell you, they are going to be quickly become your new favorite stencils! They help you easily create an argyle pattern with one set and a plaid pattern with the other. You simply apply your color to one layer then using the lines etched into the die, line up the the next layer and apply the your other color. The possibilities are endless with each of these designs. I'll be sharing how I used one of them later this week and make sure to check out what the other designers have created with them.


Blog Hop and Giveaway

WOW, so many fun new goodies and it's only Day1! Keep reading for the blog hop and giveaway details.

For this reveal, you have the chance to win a $25 store credit to Newton’s Nook Designs. Would you like to win? If you said yes, all you have to do is leave a comment on the Newton's Nook Designs Blog and on each of the Design Team Members Blog. The winner will be chosen at random from one of the blogs, so the more comments you leave, the better your chance is of winning! You have until Wednesday November 21st at 9pm EST to comment -- winners will be announced on the blog post on Friday, November 23rd.

Check out all the awesome Design Team Blogs below to enter:
Subscribe