Prickly Before Coffee Shaker Card + Giveaway

Coffee Lover's Summer Blog Hop + Giveaway


Hello and Happy Summer! To kick off the summer, I'm sharing a coffee themed shaker card I created using the brand new Cuppa Cactus stamp and die set from Newton's Nook Designs.

Prickly Before Coffee Shaker Card by Juliana Michaels featuring Newton's Nook Designs Cuppa Cactus

I always love a good coffee themed card and combing coffee and cacti with a shaker card seems like a perfect combination to me! Wouldn't you agree?

Prickly Before Coffee Shaker Card by Juliana Michaels featuring Newton's Nook Designs Cuppa Cactus

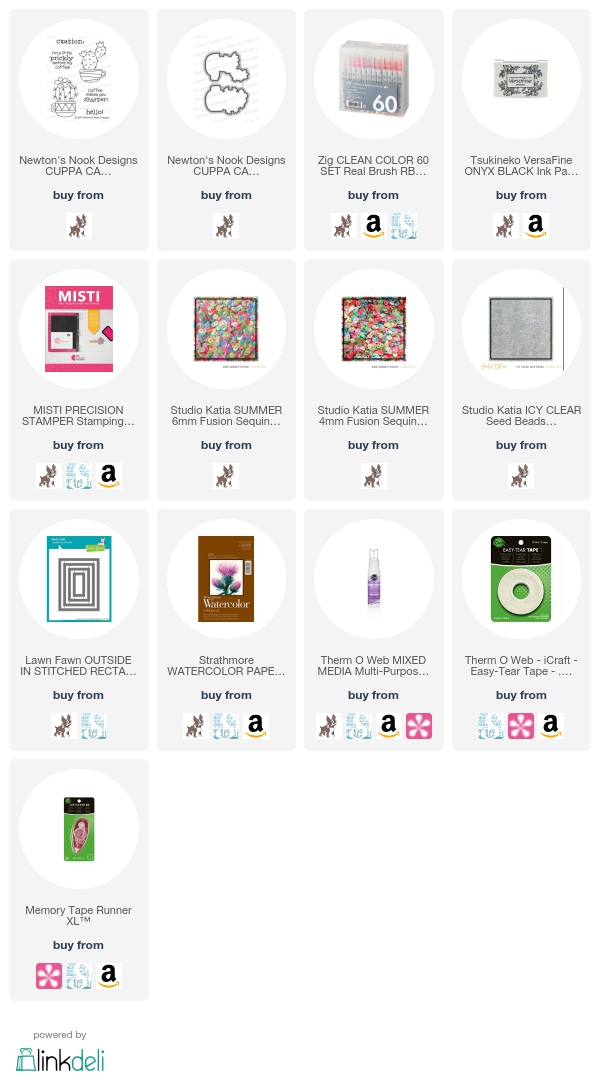
I stamped the adorable cactus onto watercolor and then colored the image using Zig Clean Color Real Brush Markers. To create the shaker, I die cut the rectangle stitched frame 5 times from white cardstock and then glued the layers together using Therm O Web Mixed Media Liquid Adhesive. The shaker is filled with a mix of sequins and seed beads. You can find a detailed supply list at the bottom of this post.

Prickly Before Coffee Shaker Card by Juliana Michaels featuring Newton's Nook Designs Cuppa Cactus

Coffee Lover's Blog Hop

I create this card for the Coffee Lover's Summer Blog Hop. The hops starts today and continues through June 30. You can check out the Coffee Lover's Blog for all the details. By the way, Newton's Nook is one of 77 Super Sponsors that will be giving away tons of great prizes!

Summer Coffee Lover's Blog Hop 2017

Giveaway

To celebrate the beginning of Summer and all things coffee, I'm having a little giveaway! One lucky winner will receive the Newton's Nook Designs Cuppa Cactus Stamp AND Die Set. For your chance to win all you have to do is leave a comment below telling me your favorite thing about summer. You have until June 30 at 12PM EST to enter.
Newton's Nook Designs Cuppa Cactus Stamp and Die Set

Supplies

Are you interested in the supplies I used to create this old paper background and the completed card? To make them easy for you to find, I've listed them below. Affiliate links are used at no additional cost to you and I've linked to them because I use them and love them! Click on the image below each picture to go to your favorite store.


How To Create An Old Paper Background With Distress Ink

Newton's Nook just had their June Release and one of the new stamp sets was called Newton Rides West. With its Western theme, it immediately inspired me to create a wanted poster design as the base for my card. Today I'm sharing how to create an old paper wanted poster effect using Ranger Distress Ink. 

Wanted Birthday Card with Old Paper Background by Juliana Michaels featuring Newton's Nook Designs Newton Rides West

How To Create An Old Paper Background With Distress Ink

Begin by gathering your supplies. This includes: Strathmore Watercolor paper (always a must for me with ink blending), Distress Ink in Walnut Stain and Vintage Photo and an ink blending tool.

How To Create An Old Paper Background With Distress Ink

Use the ink blending tool to apply Vintage Photo Distress Ink to the watercolor paper. Tap off the excess and then blend the ink toward the middle of the paper.

How To Create An Old Paper Background With Distress Ink

To distress the edges of the paper, use the backside of a craft knife and/or your finger nail. You can also use a sanding block along the edges to distress it even more. Feel free to tear and bend the paper to add to the old paper effect.

How To Create An Old Paper Background With Distress Ink

For the final step, use the ink blending tool to apply Walnut Stain Distress Ink to the edges of the paper. 

How To Create An Old Paper Background With Distress Ink

Extra Details

As you can see on my card, I further framed my sentiment and image with a rectangle die cut. This was cut out of the center of my old paper. To help the die cut rectangle stand out even more, I inked the edges using the Walnut Stain Distress Ink. I then added a bit of dimension but adhering a piece of chipboard behind it. I then adhered this to the card front.


Wanted Birthday Card with Old Paper Background by Juliana Michaels featuring Newton's Nook Designs Newton Rides West

One final touch of interest was the addition of a lasso. No cowboy would be complete without one. Right?! I created it by coiling a small piece of twine and then I adhered it using a Zot.

Wanted Birthday Card with Old Paper Background by Juliana Michaels featuring Newton's Nook Designs Newton Rides West

There you have it! Now you know how to create an old paper wanted poster effect with Distress Ink. And, if you like this idea, make sure to Pin it on Pinterest to save for future reference and to share it with your friends!

Supplies

Are you interested in the supplies I used to create this old paper background and the completed card? To make them easy for you to find, I've listed them below. Affiliate links are used at no additional cost to you and I've linked to them because I use them and love them! Click on the image below each picture to go to your favorite store.


Newton's Nook Designs June Release | Day 4

Howdy Newton's Nook Fans! It's the fourth and final day of the Newton's Nook Designs June Release. Today we are hitting the trails and heading west with Newton as we check out the Newton Rides West Stamp Set! With a horse-loving cowboy type in my house, this set became an instant favorite of mine!

 Newton's Nook Designs June Release 2017

Yee-Haw Birthday Card | Newton's Nook Designs Newton Rides West


As I mentioned, I fell in love with the Newton Rides West stamp set immediately and I knew I wanted to figure out a way to combine all three of the Newton images onto one card. After playing around with the placement, I came up with this design. I placed all of the images onto my MISTI and stamped them all at once onto a piece of watercolor paper.

Yee Haw Birthday Card by Juliana Michaels featuring Newton's Nook Designs Newton Rides West Stamp Set

I used Zig Clean Color Real Brush Markers and a Kuretake Waterbrush to color in the images. When working with watercolor markers, I have found that it works really well to add just a bit of color to the edge of the image and then use the waterbrush to blend and move the color around. As you can see, I don't go all the way to the edge of the images. This gives it a fun, playful effect and also helps decrease the chance of your colors bleeding into another area. I also try to color sections that are not next to each to help avoid unwanted color mixing.

Yee Haw Birthday Card by Juliana Michaels featuring Newton's Nook Designs Newton Rides West Stamp Set

To add to the western feel of the design and to frame in the design, I wrapped pieces of jute around the edges of the card.  The final touch was the addition of a few wood veneer stars from my stash.

Yee Haw Birthday Card by Juliana Michaels featuring Newton's Nook Designs Newton Rides West Stamp Set

Giveaway + Blog Hop

Now, let's get to the good stuff! Would you like to win the “Newton Rides West" stamp set? Today you have the chance to win this new stamp set!

Newton's Nook Designs Newton Rides West Stamp Set

If you want to be the lucky winner, all you have to do is leave a comment on the Newton's Nook Designs blog and each of the Design Team blogs! The winner will be chosen at random from all of the blog posts, so the more you comment, the better your chances are of winning! You have until Thursday June 15th at 9pm CST to comment -- winners will be announced on the blog post on Friday, June 16th.

For ever more inspiration and to enter to win, visit all the awesome Design Team Blogs:

Juliana Michaels (you are here)

Supplies


Are you interested in the supplies I used to create this card? To make them easy for you to find, I've listed them below. Affiliate links are used at no additional cost to you and I've linked to them because I use them and love them! Click on the image below each picture to go to your favorite store.


Newton's Nook Designs June Release | Day 3

It's Day 3 of Newton's Nook Designs June Release and today we have not one, but two stamp sets to share with you! We're showing the love for all things succulent with both of these sets. First up is a stamp set called Cultivated Cacti. It's a great set for those who are not into all the coloring and want to create a fun card by just inking up some stamps. The second set is perfect for all the coffee lover's out there and it's called Cuppa Cacti.
 Newton's Nook Designs June Release 2017

Aloe Hello Cactus Card - Newton's Nook Designs Cultivated Cacti


For My Aloe card, I pulled out my favorite inks - Ranger Archival - and went to town stamping the succulents and pots from the Cultivated Cacti stamp set using my MISTI. I then die cut each of the images using the coordinating Cultivated Cacti die set.

Aloe Hello Cactus Card by Juliana Michaels featuring Newton's Nook Designs Cultivated Cacti

To give some of the images a bit of dimension, I used some scrap pieces of chipboard. I always seems to have a ton of chipboard lying around from my scrapbooking days and it has come in super handy to help "pop up" my die cuts on my cards.

Aloe Hello Cactus Card by Juliana Michaels featuring Newton's Nook Designs Cultivated Cacti

I just love the bit of dimension it adds to the die cuts.


Aloe Hello Cactus Card by Juliana Michaels featuring Newton's Nook Designs Cultivated Cacti

Caution Coffee Cactus Card - Newton's Nook Designs Cuppa Cactus


For my second card, I used the new Cuppa Cactus stamp set and coordinating die set. Coffee and cacti! How can you not love them?! As a coffee lover, I can't wait to use this set for the upcoming Coffee Loving Cardmaker's Summer Blog Hop. Newton's Nook is a sponsor for the hop, so check back here on June 23 to see how I use it!


After stamping the images, I colored them using Prismacolor colored pencils. Once again, I used scrap chipboard to pop up my die cuts.

Caution Coffee Cactus Card by Juliana Michaels featuring Newton's Nook Designs Cuppa Cactus Stamp Set

To create the background, I used a stencil and Distress Ink in Tumbled Glass.  I then quickly poured clear embossing powder over the image, dumped off the excess and heat set it using a heat gun. Distress Ink is not ideal for heat embossing, as it dries pretty fast. However, if you move quickly, it will work.

Caution Coffee Cactus Card by Juliana Michaels featuring Newton's Nook Designs Cuppa Cactus Stamp Set

Giveaway + Blog Hop

Now, let's get to the good stuff! Would you like to win the “Cultivated Cacti” or "Cuppa Cactus" Stamp Set? Today you have the chance to win one of these two new stamp set!

Newton's Nook Designs Cultivated Cacti Stamp Set

Newton's Nook Designs Cuppa Cacti Stamp Set

If you want to be the lucky winner, all you have to do is leave a comment on the Newton's Nook Designs blog and each of the Design Team blogs! The winner will be chosen at random from all of the blog posts, so the more you comment, the better your chances are of winning! You have until Thursday June 15th at 9pm CST to comment -- winners will be announced on the blog post on Friday, June 16th.

For ever more inspiration and to enter to win, visit all the awesome Design Team Blogs:

Juliana Michaels (you are here)

Supplies

Are you interested in the supplies I used to create this card? To make them easy for you to find, I've listed them below. Affiliate links are used at no additional cost to you and I've linked to them because I use them and love them! Click on the image below each picture to go to your favorite store.


Newton's Nook Designs June Release | Day 2

Hello and welcome to Day 2 of the Newton's Nook Designs June Release! Today, we're featuring Furrever Friends and it's the most perfect cat and dog sympathy stamp set I've ever seen. It has a wonderful simplicity to it along with heart felt sentiments, that are sure to bring comfort to anyone who has recently lost a pet.

Newton's Nook Designs June Release 2017

Forever Dog Sympathy Card - Newton's Nook Designs Furrever Friends


When a pet passes, we often mention the Rainbow Bridge. Well the rainbow concept inspired me to create a rainbow like background for my card. I began by stamping the awesome heart shape filled with paw prints stamp with Versamark Embossing Ink onto watercolor paper. I then heat embossed it with white embossing powder. Once I completed all the stamping, it was time to add my rainbow of colors. To achieve this rainbow effect, I used the Loosey Goosey Watercolor Background technique by the talented Laura Bassen. It's a simple technique for creating a rainbow watercolored background that involves using Distress Ink, water and a paint brush to slap down the ink in a loosey goosey way. For my background I used Distress Ink in the following colors: Festive Berries, Spiced Marmalade, Squeezed Lemonade, Mowed Grass, Salty Ocean and Wilted Violet.

Forever Dog Sympathy Card by Juliana Michaels featuring Newton's Nook Designs Furrever Friends Stamp Set

For the focal piece, I stamped one of the dog images using Black Ink onto a piece of white cardstock and then added the sentiment in black as well.  I then used the Newton's Nook Designs Darling Hearts Die to cut out two hearts from red cardstock.

Forever Dog Sympathy Card by Juliana Michaels featuring Newton's Nook Designs Furrever Friends Stamp Set

I really do love how this card came together. I also love that I was able to capture the comforting thought that the Rainbow Bridge brings to so many people when they loose a beloved pet.

I love how this card came together and I love that I was able to capture the comforting thought that the Rainbow Bridge brings to many people when they loose a beloved pet.


Giveaway + Blog Hop


Now, let's get to the good stuff! Would you like to win the “Furrever Friends” Stamp Set? One lucky winner will win this set!

Furrever Friends Newton's Nook Designs Stamp Set


If you want to be the lucky winner, all you have to do is leave a comment on the Newton's Nook Designs blog and each of the Design Team blogs! The winner will be chosen at random from all of the blog posts, so the more you comment, the better your chances are of winning! You have until Thursday June 15th at 9pm CST to comment -- winners will be announced on the blog post on Friday, June 16th.

For ever more inspiration and to enter to win, visit all the awesome Design Team Blogs:

Juliana Michaels (you are here)

Supplies

Are you interested in the supplies I used to create this card? To make them easy for you to find, I've listed them below. Affiliate links are used at no additional cost to you and I've linked to them because I use them and love them! Click on the image below each picture to go to your favorite store.


Gina K Designs | Sentimental Summer StampTV Kit Inspiration Blog Hop

Hello friends! Today I'm excited to share some card ideas and inspiration as part of a blog hop featuring the brand new Gina K Designs Sentimental Summer StampTV Kit! Below you'll find links to the other Gina K Designer's blogs, where they'll be sharing even more fabulous project ideas and inspiration with you. You'll also have the chance to win a $50 Gina K Designs gift certificate. You can check out all the details below.

For my first card, I used the Your Own Kind Of Beautiful Stamp Set. which is included in the kit. I stamped and colored the flower basket image with Prismacolor colored pencils which I blended with Gamsol and a blending stump. I then used the coordinating die to cut it out. The stitched rectangle piece was created using the Gina K Designs Single Stitched Nested Rectangle Dies.

Be Your Own Kind of Beautiful Card by Juliana Michaels featuring the Your Own Kind of Beautiful Stamp Set from the Gina K Designs Sentimental Summer Stamp TV Kit

I stamped the sentiment on the rectangle die cut and then adhered the flower basket image with double sided tape. I finished off the card front by using a polka dot embossing folder to emboss a piece of Gina K cardstock in Jelly Bean Green. 

Be Your Own Kind of Beautiful Card by Juliana Michaels featuring the Your Own Kind of Beautiful Stamp Set from the Gina K Designs Sentimental Summer Stamp TV Kit

For my second card, I used the Dazzling Dahlia stamp set. The flowers in this set include both an outline and solid image of each shape. This combination gives you so many options and I'm sure you'll see tons of different ways you can use and combine these images along the hop today.

Thank You Black and White Floral Card by Juliana Michaels featuring the Dazzling Dahlia Stamp Set from the Gina K Designs Sentimental Summer Stamp TV Kit

I choose to stamp the images using black ink and create my own background patterned paper.  I then stamped the flowers and leaf images and die cut them using the coordinating dies.  To create the focal point of my card, I used the Gina K Designs Single Stitched Nested Rectangle Dies to die cut a piece of white cardstock and then I used the Gina K Designs Double Stitched Nested Rectangle Dies to die cut a piece of Turquoise Sea cardstock. I layered these images and centered them onto my stamped background. I then used adhesive to adhere the stamped flower and leaf images. I used double sided adhesive to pop up the two largest flower images. The final touch was the addition of a few turquoise sequins.

Thank You Black and White Floral Card by Juliana Michaels featuring the Dazzling Dahlia Stamp Set from the Gina K Designs Sentimental Summer Stamp TV Kit

Here's a peek at everything that is included in the Sentimental Summer StampTV Kit. It seriously has everything you need to create tons and tons of gorgeous cards! If you aren't familiar with the Gina K Designs StampTV Kits, let me just tell you... they are amazing! This kit is perfectly coordinated and packed full of wonderful products, including 24 sheets of Gina K Designs Pure Luxury Card Stock, a 6X6 patterned paper pack, 2 beautiful stamp sets, and coordinating dies. All of this comes in a handy clear storage box to keep it all organized. To view the full kit, make sure to visit the Gina K Designs store.
Gina K Designs Sentimental Summer Stamp TV Kit

Before you go, I have one more card to share with you. Gina K also released a new Incentive Stamp Set called Rose Bouquet and I couldn't resist creating a card with it to share with you today. If you aren't familiar with the Incentive Stamps, they are stamp sets that you can get for free when you order $75 or more of product from Gina K Designs.

To create this card, I stamped the rose image onto a piece of water color paper. I then colored the image using Zig Clean Color Real Brush markers and a water brush.

Hello Watercolor Rose Card by Juliana Michaels featuring Gina K Designs Rose Bouquet Incentive Stamp Set

After the coloring was complete, I stamped the sentiment. The final touch was some ink splatters. I accomplished this by coloring with the Zig Marker onto my craft mat. I then added some water using a paint brush. With the brush full of water and ink, I then flicked it onto the paper to achieve the splattered look.

Hello Watercolor Rose Card by Juliana Michaels featuring Gina K Designs Rose Bouquet Incentive Stamp Set

Blog Hop Details


As I mentioned above, the Cast & Crew of Gina K Designs will be featuring tons of projects to inspire you during this hop! As you visit each design team member's blog, make sure you leave a comment for your chance to win a $50 Gina K Designs gift certificate! One lucky commenter will be selected at the end of the hop from a combination of all the comments. Just click on the next person on the list - Karen Hightower - to continue along the hop. 

Gina K
Beth Silaika
Cathy Tidwell
Chris DaytonClaire BrennanDonna Idlet
Juliana Michaels (you are here)
Karen HightowerLaurie Schmidlin
Melanie Muenchinger
Rema DeLeeuw
Sean Fetterman
Sheri Gilson
Silke Ledlow
Susie Moore
Theresa Momber


Supplies

Are you interested in the Gina K Designs supplies I used to create these cards? To make them easy for you to find, I have listed them below. Affiliate links are used at no additional cost to you and I've linked to them because I use them and love them! Click on the image below each picture to go to Gina K Designs Store.


Newton's Nook Designs | June Release Day 1

Hello friends and welcome to Day 1 of the Newton's Nook Designs June Release! Today we're sharing inspiration using the Terrific Terrier's Stamp Set and Coordinating Die Set. This set is perfect for all the dog lover's out there, with it's two cute terriers and totally terrific sentiments!

Newton's Nook Designs June Release 2017

You're Pawsome Card -  Newton's Nook Designs Terrific Terriers Stamp Set


I love using the small coordinating stamps that are often included in the Newton's Nook stamp sets to create my own background paper. The Terrific Terriers stamp set includes a heart and pawprint that were perfect for this.

You're Pawsome Card by Juliana Michaels featuring Newton's Nook Designs Terrific Terriers Stamp and Die Set

Now, just so you know how bad of a stamper I am, I tried to stamp this background using a stamping block. After messing up twice, I ended up stamping each image using my MISTI. It took me forever, but it would have been so much faster if I'd done it that way from the beginning. From now on, I'm going to just start with using my MISITI. #badstamper

You're Pawsome Card by Juliana Michaels featuring Newton's Nook Designs Terrific Terriers Stamp and Die Set

The totally cute terriers are colored with Prismacolor colored pencils and blended with Gamsol and a blending stump. I then die cut them using the coordinating dies and mounted them onto the die cut circle using double sided foam tape.

You're Pawsome Card by Juliana Michaels featuring Newton's Nook Designs Terrific Terriers Stamp and Die Set

Giveaway + Blog Hop


Now, it's time to get to the good stuff! Would you like to win the “Terrific Terriers” Stamp Set?

Newton's Nook Designs Terrific Terriers Stamp Set

If you want to be the lucky winner, all you have to do is leave a comment on the Newton's Nook Designs blog and each of the Design Team blogs! The winner will be chosen at random from all of the blogs, so the more you comment, the better your chances are of winning! You have until Thursday June 15th at 9pm CST to comment. The winners will be announced on the Newton's Nook blog on Friday, June 16th.

For even more inspiration and to enter to win, visit all the awesome Design Team Blogs:


Supplies

Are you interested in the supplies I used to create this card? To make them easy for you to find, I've listed them below. Affiliate links are used at no additional cost to you and I've linked to them because I use them and love them! Click on the image below each picture to go to your favorite store.


Creating An Underwater Scene with Sunny Studio Stamps & Dies

Hello friends! Today, I'm excited to share with you how to create a fun underwater scene featuring the new Oceans of Joy Stamp set by Sunny Studio Stamps. These stamps and dies are part of their recent, oh so cute, summer release!

The new Oceans of Joy Stamp Set and Coordinating Die Set contain some of the most adorable sea creatures and I couldn't resist creating a little underwater scene with them and sharing all the how-to details with you!


Creating An Underwater Scene


To create the underwater background I used the inlaid die cutting technique. To achieve this look, position one of the Sunny Studio Stitched Scallop Border Dies across the top edge of a piece of watercolor paper cut to 4 x 5.25 inches. Run it through your die cut machine.


Move the die down, offset it slightly and die cut it again. Repeat this process until the entire piece is cut. 


Use Distress Ink in Tumbled Glass and Salty Ocean with an ink blending tool to add color to the edges of each piece of paper.


Once all the pieces are inked, flip them over, put them all together and use double sided tape to hold them together. Adhere this piece to the card base or another piece of cardstock cut to 4.25 x 5.5.


To create the sea floor, I stamped the sand image onto a piece of light brown cardstock using brown ink and the cut it out using the coordinating die from the Oceans of Joy Die Set. I added a little interest along with edge with Vintage Photo Distress Ink and an ink blending tool.

When it came time to add the adorable sea creatures, I stamped them onto white cardstock using Versafine Black Ink and then colored them using Prismacolor pencils. After die cutting each image, I used Sakura Gelly Roll Glaze Pens to add little dots of color and detail to each creature.

Sunny Studio Guest Designer

I'm also guest posting over on the Sunny Studio Blog. I'd love for you to head over to their blog to check out three more card I created using the Oceans of Joy and Magical Mermaids stamp sets!

Supplies

Are you interested in the supplies I used to create this card? To make them easy for you to find, I've listed them below. Affiliate links are used at no additional cost to you and I've linked to them because I use them and love them! Click on the image below each picture to go to your favorite store.


Subscribe