Lost In The Inky Darkness | Halloween Tag

I know the other day I said I had a Halloween Banner to share with you, well I had my dates wrong and that will be coming sometime next week. Stay tuned...it will be part of something super fun that I can't wait to share with you!

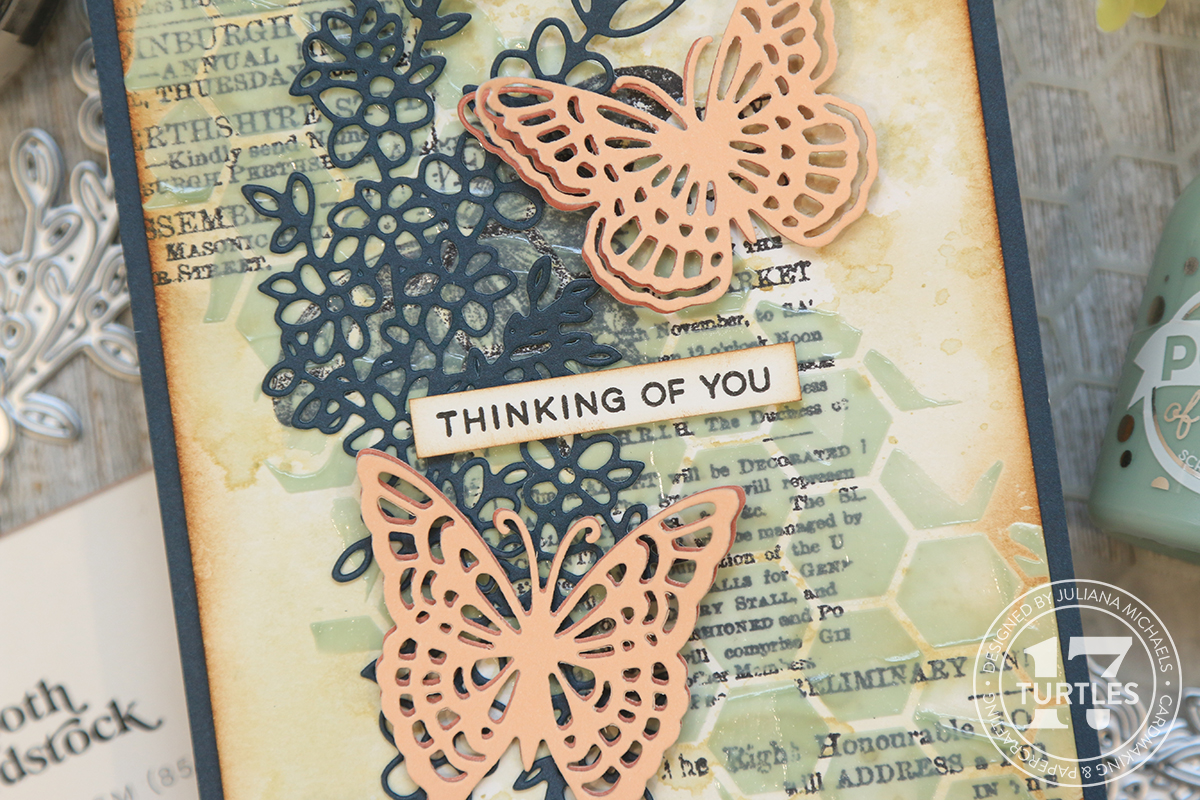
As for today, never fear, I still have some Halloween inspiration to share! I recently created this Lost In The Inky Darkness Halloween Tag featuring a mix of delightfully wicked stamps, stencils, dies and more!

Lost In The Inky Darkness Halloween Home Decor Thickboard Tag by Juliana Michaels featuring Scrapbook.com and Tim Holtz

LOST IN THE INKY DARKNESS HALLOWEEN TAG

The base of this project is a Tim Holtz Stampers Anonymous Thickboard Mini Tag. These are made from a thick material (kind of like MDF) and are perfect for creating home decor type pieces. This particular tag is 4.5 x 8 inches and about 3/16 inch thick.

I adhered a strip of Halloween Design Tape around the outer edge to make it look pretty and give it a finished look from the side. You could use washi tape or even paint it if you prefer. 


I then adhered a piece of patterned paper from my stash using Collage Medium, trimmed off the excess using a craft knife and then inked the edges with Walnut Stain Distress Ink. I then used the tag as a template and traced it onto a piece of Black Kraftstock. Using a ruler, I measured in an 1/8 of an inch on all sides and trimmed off the excess to create a slightly smaller tag shape that I could layer onto the main panel.


Next, I stamped a mix of images from various Halloween stamp sets onto the black tag using Picket Fence Distress Ink and then dried it with a heat tool. I then applied a layer of Distress Collage Medium over the entire tag. In doing this, you will notice that the white ink will start to smudge and smear a little. I love that it kind of gave it a ghostly effect! If this bothers you, you might consider adding some white embossing powder and heat embossing the stamped images.

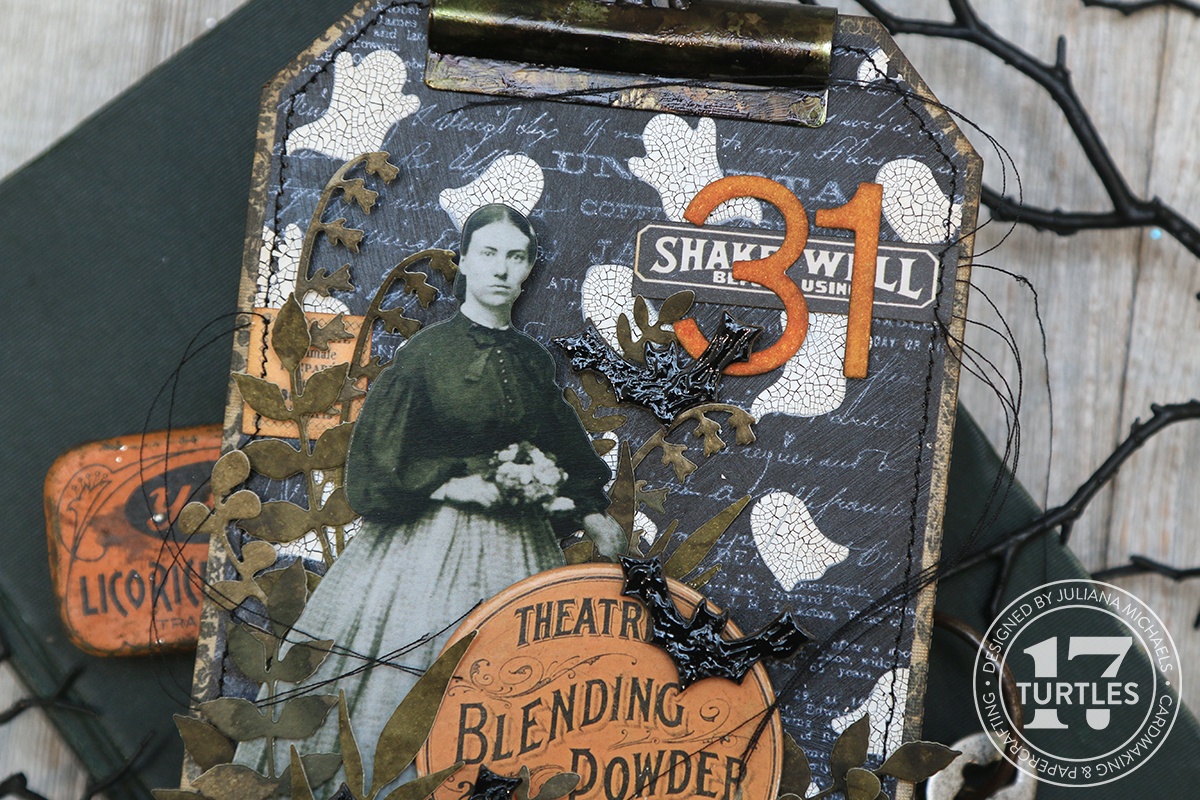
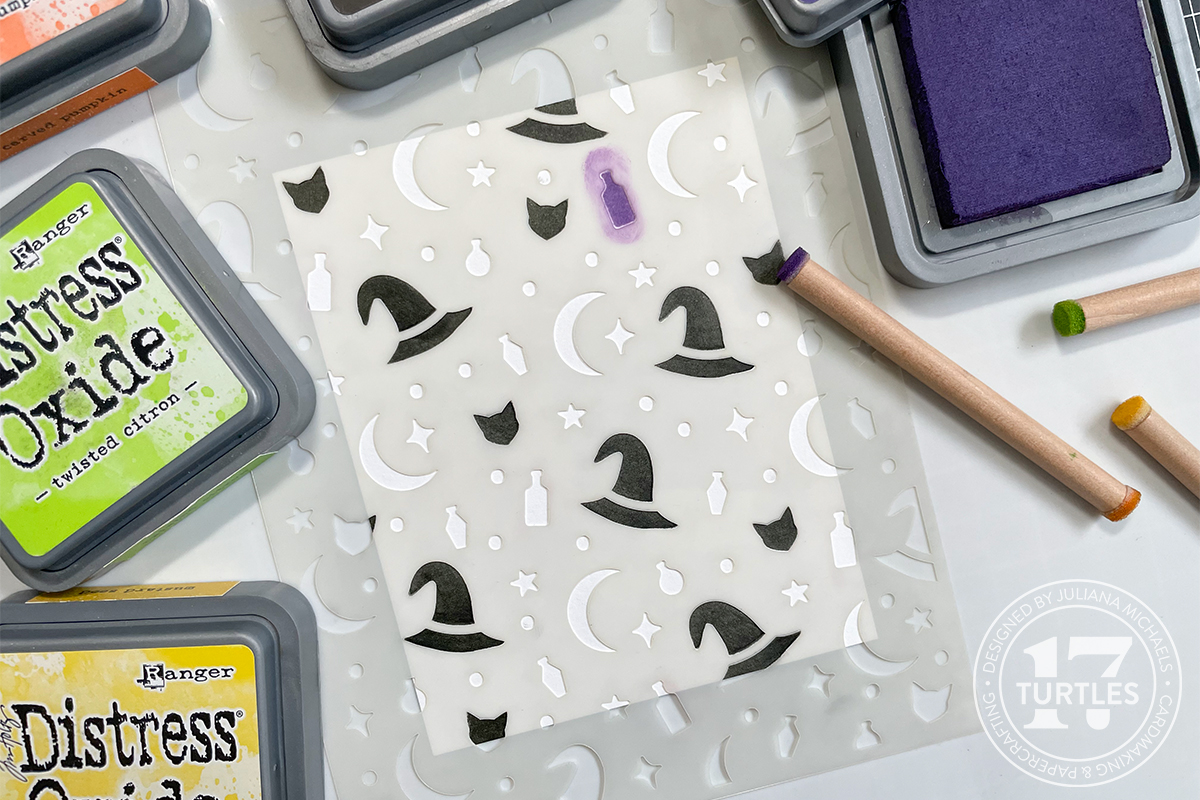
After the Collage Medium was dry, I placed the Little Ghosts Stencil over the paper and applied Distress Crackle Paste through the stencil. I left the bottom 1.5 inches plain to have room for the title piece. I then removed the stencil, washed it immediately and set the paper to the side to dry and crackle.

The reason I applied the Collage Medium before the Crackle Paste was so that the Crackle Paste would have something to adhere to. If you apply the Crackle Paste directly to the paper it will just crack right off the paper once it is dry.

Once the paste was dry, I lightly rubbed a bit of Walnut Stain Distress Ink over the ghosts to give them a slightly aged look. I also added some machine stitching around the outside edge. This will cause some of the paste to crack off, but most of it will stay put. Once this was completed, I adhered this layer to the tag.


Next I took a trim piece from the Thickboard Pinked Trims and a strip from the Thickboard Bats and Webs. I used the Decorate Trims Dies to cut a piece of Black Kraftstock to adhere onto the pinked one and cut a strip of the same paper for the other strip. If you don't have the dies, you could also just paint these pieces with black paint. I adhered the paper using Distress Collage Medium. To give them the same look as the black background paper, I applied Distress Collage Medium and while it was still wet, I used my finger to dab on and smudge a bit of Picket Fence Distress Ink. If you attempt this, just make sure to use a clean finger if you need to add more ink so that you don't add the Collage Medium from your finger onto your ink pad. I then adhered these two pieces together to create a shelf and then adhered the shelf to the tag using Distress Collage Medium.  I recommend using some sort of clamp to hold the shelf together while the glue dries and then to hold it onto the tag while the glue dries.

Lost In The Inky Darkness Halloween Home Decor Thickboard Tag by Juliana Michaels featuring Scrapbook.com and Tim Holtz

To create the scene, I die cut a bunch of leaves from the Scrapbook.com Delicate Leaves Die Set. I die cut them from pieces of Distress Watercolor paper that I had sprayed with Forest Moss and Frayed Burlap Distress Spray Stains. I then added a paper doll that I popped up with some Double Sided Foam Adhesive. Next I added a couple of Tim Holtz Halloween Baseboard pieces, using the foam adhesive to adhere them and create dimension.


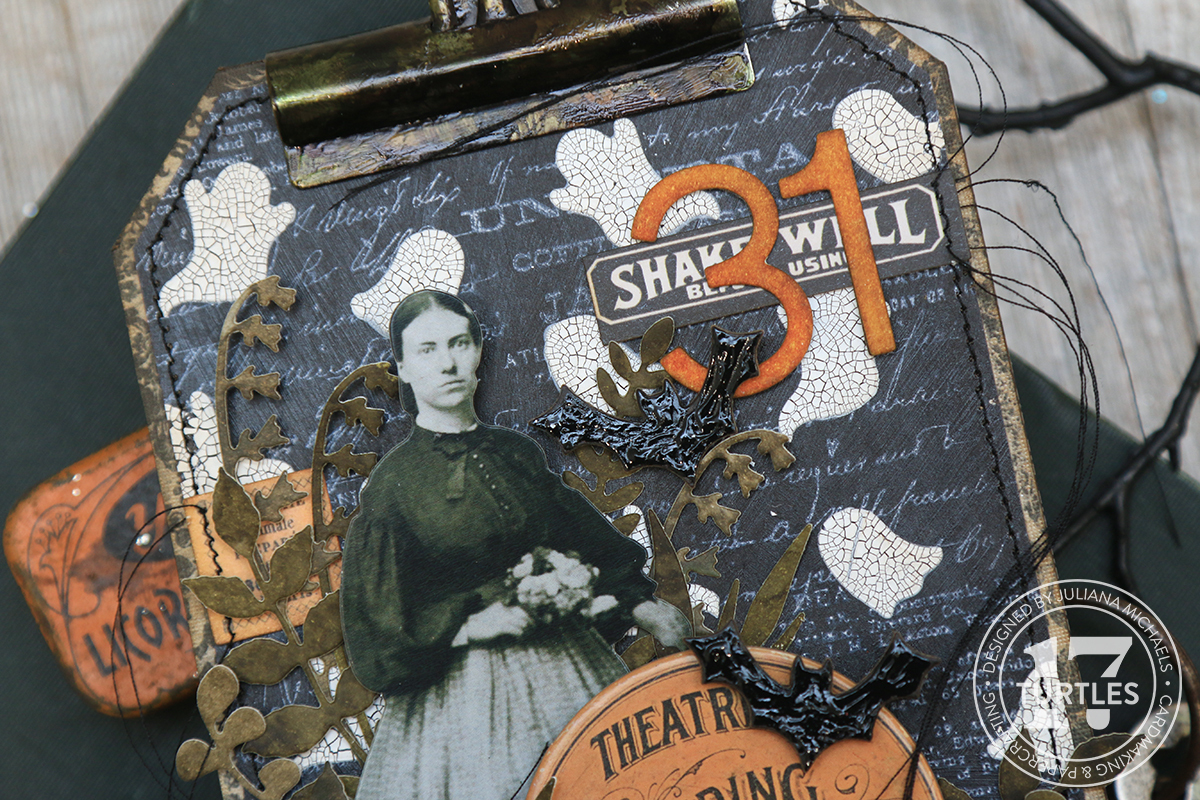
Next, I adhered a couple of ephemera/label pieces. I added machine stitching to the ends of them so they looked like they had been sewn on to the piece. The number 31 is from the Scrapbook.com Modern Number Die Set. I cut it out of Distress Watercolor paper and inked it with Rusty Hinge, Spiced Marmalade and Vintage Photo Ink so that it would coordinate with the Baseboard piece.


The final touch to the scene was the addition of some die cut bats. I used the Scrapbook.com Halloween Bats Dies and cut them from Black Kraftstock. I then applied Black Pops Of Color to give them a shiny textured appearance. Once the Pops of Color was dry, I adhered them with Double Sided Foam Adhesive.


For the title, I die cut the word Lost from Black Kraftstock using the Scrapbook.com Modern Alphabet Die Set. I cut them out 3 times and adhered them together to make the letters more substantial.  Next, I applied Distress Collage Medium, allowed it to dry and then applied Distress Crackle Paste. Again, I applied the collage medium so that the crackle would adhere and not fall off. Once the letters were dry, I inked them lightly with Walnut Distress Ink and adhered them to the tag. I then stamped the sentiment "in the inky darkness" using embossing ink and heat embossed it with white embossing powder.  I also applied the Distress Collage Medium and a bit of Picket Fence Distress Ink as I did on the trim pieces so that the papers all matched. I trimmed the strip to size and adhered a Hardware head to each end. To give them a slightly aged look, I inked them with some Mushroom Alcohol Ink.

I finished off the tag with a Tim Holtz Vintage Clip. I applied some Distress Collage Medium to it for a little texture and once that was dry, I inked it with a combination of Mushroom Alcohol Ink and a tiny bit of Moss Alcohol Ink.


I appreciate you stopping by to see my Lost In The Inky Darkness Halloween Home Decor Thickboard Tag. I will be switching gears here soon and sharing some Christmas inspiration, but I promise the Halloween inspiration is not complete and that banner I promised is coming soon!
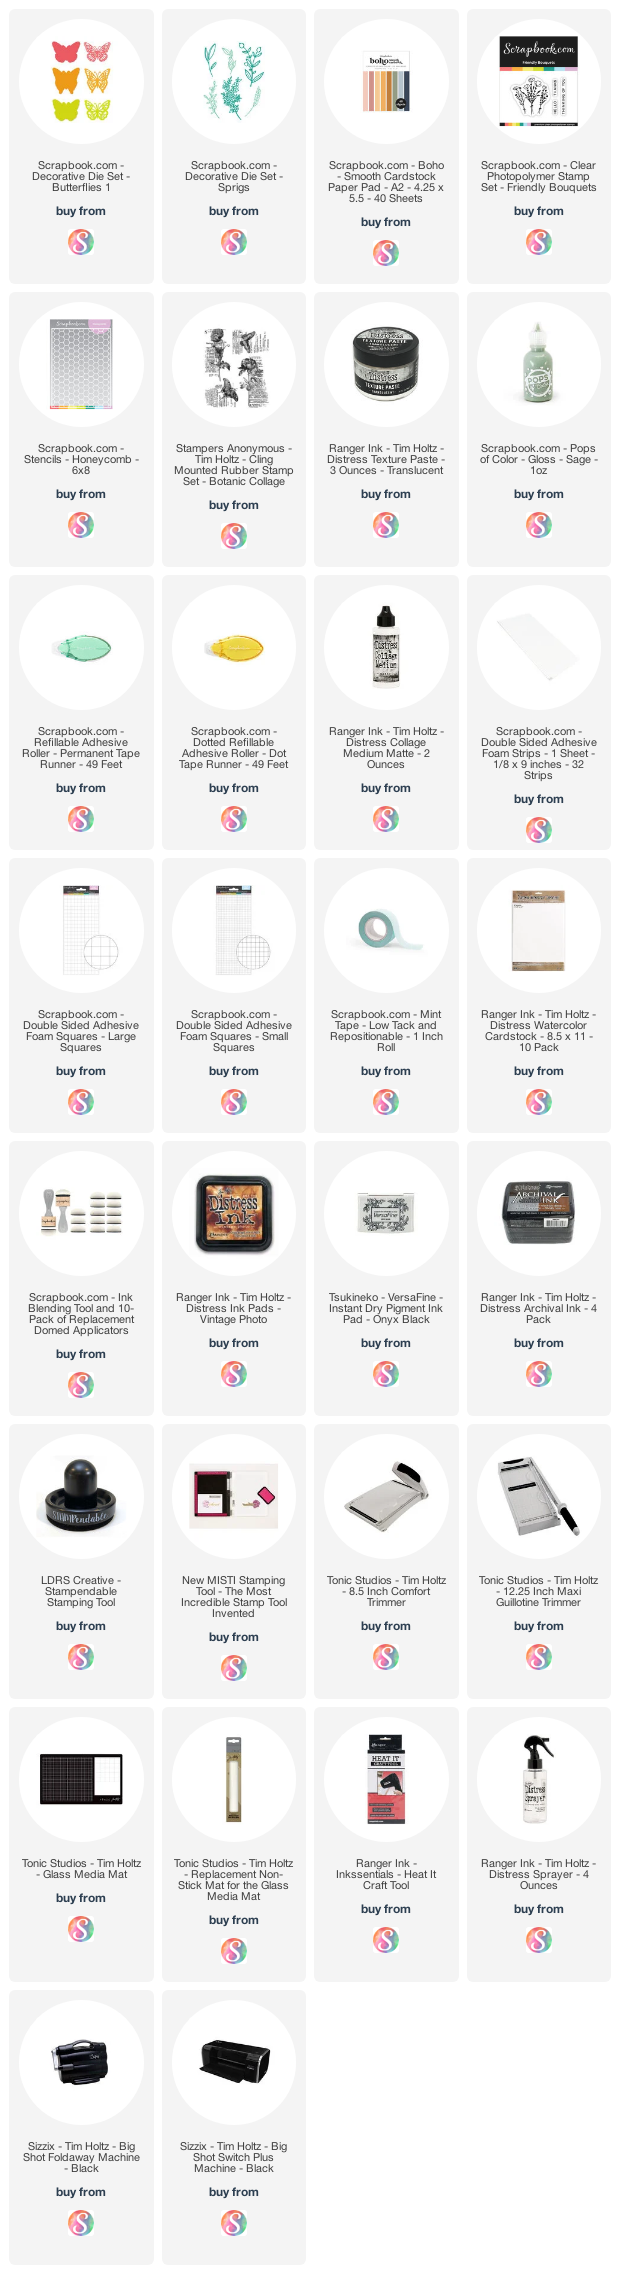
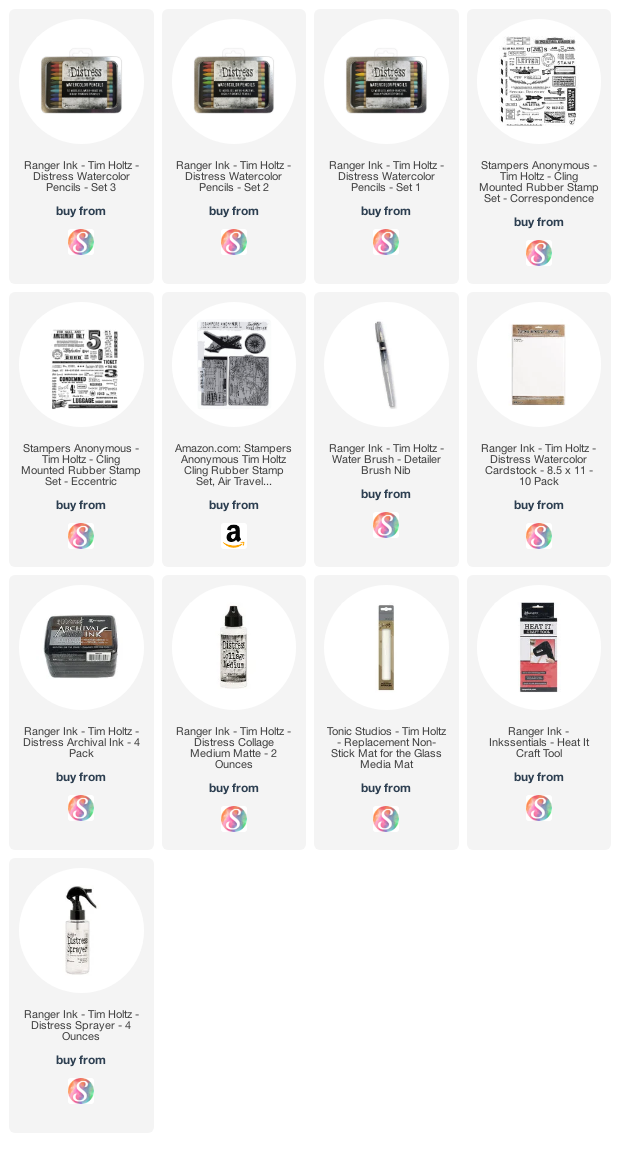
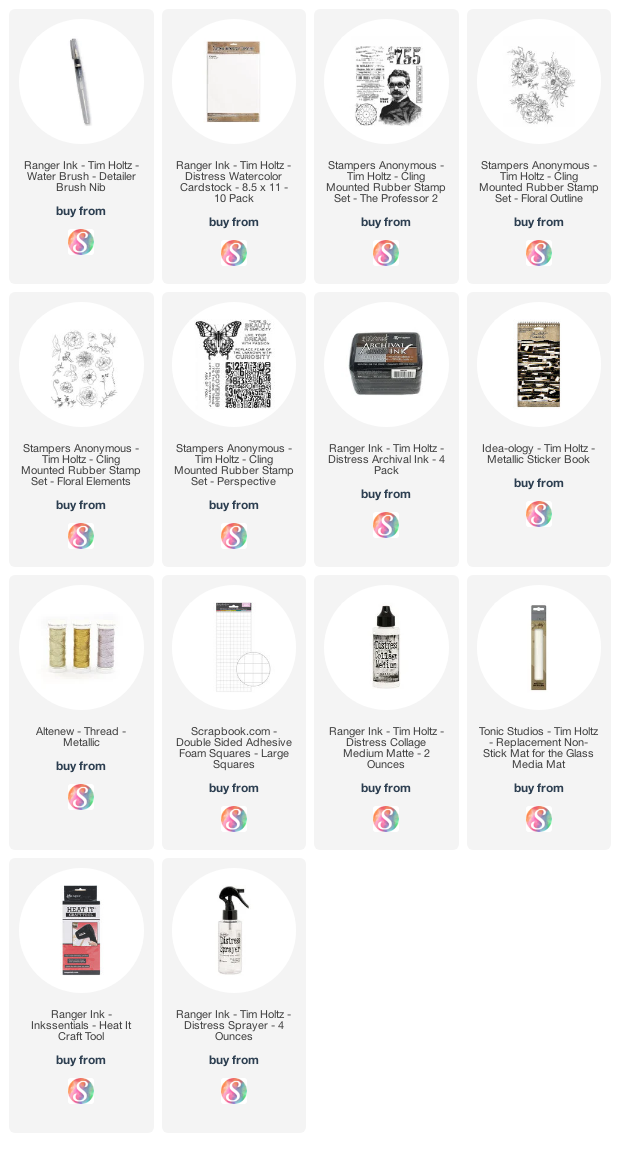
SUPPLIES

Below you can find the products I used to create this project along with compensated affiliate links to Scrapbook.com. These links are at absolutely no cost to you. When you shop through the links below, I receive a small commission from Scrapbook.com. These links are at absolutely no cost to you and the commission I receive helps me cover the costs of my blog and other expenses, which allows me to continue to provide you with FREE inspiration and tutorials. If you want to learn more about what an affiliate link is, you can see my full affiliate and product disclosure statement here. Thank you so much for your love and support!

Trick Or Treat Card with Halloween Bat Dies and Stencils

Trick or Treat smell my feet! Give me something good to eat! Today, I have this Trick or Treat Halloween Card to share with you featuring one of the new faBOOlous Halloween stencils from Scrapbook.com. I sure hope you're in the mood for more Halloween inspiration, because later in the week I'll be sharing my first ever Halloween Banner!

Halloween will have to take a little break though, because on Saturday, October 1st, I'll be switching gears as Tim Holtz begins sharing his new Christmas products with his Sizzix Christmas YouTube Live!

Trick Or Treat Card by Juliana Michaels featuring Scrapbook.com with Halloween Bat Dies and Magic Potion Stencil

To get started, I began with a piece of Distress Watercolor Paper placed the Magic Potion stencil over the paper and used Ranger Ink Detail Blending Brushes to apply a variety of Distress Oxide Inks.


When working with multiple ink colors on the same stencil, I found that doing the larger shapes first, such as the hats, and then going back and doing the smaller shapes helped prevent any accidental ink smudging. I also cleaned off the stencil after doing the hats and cats (since they were both done in black ink) and then added the other ink colors.


Once I had the stencil work completed, I spritzed the design with a bit of water to activate the oxide ink and add a bit of distress. You could certainly skip this part if that's not your style. Once the water/ink was dry, I stamped some images from the Exquisite and Undertaker Stamp Sets in Hickory Smoke Archival Ink. I also added some ink splatters using Distress Halloween Mica Spray Stain in Fortune Teller and Wicked Elixir. I then trimmed the piece to 4 x 5.25 inches and added some machine stitching with black thread around the outside edge.


Next, I die cut some bats from black glitter cardstock using the Scrapbook.com Mixed Metals Glitter Paper Pad and the Halloween Bats Dies. I adhered them to the front of the card with double sided foam adhesive and trimmed off the parts that overlapped the stenciled panel.


I die cut 31 from silver cardstock using the Scrapbook.com Tall Skinny Number Dies. I then added the sentiment is from the Tim Holtz Unraveled Stamp Set. To finish of the card, I layered it onto a piece of black glitter cardstock from the Scrapbook.com Mixed Metals A2 paper pack which is already cut to 4.25 x 5.5 inches. 

Trick Or Treat Card by Juliana Michaels featuring Scrapbook.com with Halloween Bat Dies and Magic Potion Stencil

I hope you enjoyed a bit more Halloween inspiration today with this Trick or Treat Halloween Card!

• • • • • • • • • • • • • • • • • • • • • •

I also just wanted to share that World Cardmaking Day is this coming Saturday, October 1 and Scrapbook.com is celebrating all week long with sales of up to 50% off on 8 Card Making Brands including Ranger Ink, Sizzix, Spellbinders, Pinkfresh Studio, Photoplay, Paper Rose, Hero Arts and Doodlebug Designs. 

In addition to great sales there were be at least 2 FREEBIES every day! Visit the coupons page to see which ones are free when you shop!
 

They also have this amazing Crafter's Companion bundle that's FREE with $30 purchase! If you're already shopping, make sure you add this one too your basket before you check out!

Supplies

Below you can find the products I used to create this Trick or Treat Halloween Card. Each product is attached to an affiliate link with Scrapbook.com. When you shop through the links below, I receive a small commission from Scrapbook.com. These links are at absolutely no cost to you. The commission I receive helps me cover the costs of my blog and other expenses and it allows me to continue to provide you with FREE inspiration and tutorials. If you want to learn more about what an affiliate link is, you can see my full affiliate and product disclosure statement here. Thank you so much for your love and support!

Creepin' It Real Halloween Card

I'm in full on Halloween crafting season right now and I couldn't be happier! Today I'm sharing my latest Halloween card with you and this one showcases an idea I've had in my head for over a year now. Ever since I got the Monster Reunion Stamp Set by Tim Holtz, I've wanted to color them, fussy cut them and create my own Halloween Monster Reunion Party! Well I finally made this dream a reality and here's the card I created! To make the party complete, I've mixed it with some fun new patterned papers and dies from Scrapbook.com.

Creepin' It Real Halloween Card by Juliana Michaels featuring Tim Holtz Monster's Reunion Stamp Set, Scrapbook.com Delicate Leaves and Autumn Leaves Die Set and Harvest Paper Pad

CREEPIN' IT REAL HALLOWEEN CARD

I began by stamping each of the images onto Distress Watercolor Paper using Black Soot Archival Distress Ink and then colored them using the Distress Watercolor Pencils. These pencils made coloring them a breeze and BONUS...the colors I picked are my favorite Distress Halloween colors! I used Villainous Potion, Twisted Citron, Spiced Marmalade, Black Soot, Hickory Smoke, Antique Linen (skin and mummy) and Barn Door (lips and cheeks). I seriously love that I now have any easy coloring option that matches my go-to inks!

To color these images, instead of coloring with the pencils directly onto the paper, I pulled the color off the pencil using a waterbrush and then added the color to the image. To see me doing this in action, check out my latest YouTube video. I love the control I have of adding the color when I do it this way and I don't feel like I'm wasting so much ink as compared to using my ink pads for watercoloring.


Once the coloring was completed, I commenced with the fussy cutting. I have to admit, fussy cutting is not my favorite thing to do. But, there are times and ideas when it's necessary; and for me, this card idea was one of them! I do love them all gathered together and ready to hit the Monster Reunion Party!


To create the background, I selected some fabulous patterned papers from the Scrapbook.com Harvest 6x8 Paper Pad. For some added interest, I stamped some images from the Exquisite and Undertaker Stamp Sets using Hickory Smoke Archival Ink onto the spider web paper. I then inked the edges with Black Soot Distress Ink before mounting it onto another piece of paper from the paper pad. The finished card size is 4.5 x 6.25.

Next, I adhered the Monster's to the background paper. I used double sided foam squares behind each monster's head and behind the pumpkin for a little dimension.


To add a little texture, I added some die cuts using the Scrapbook.com Delicate Leaves and Autumn Leaves Die Set. The Delicate Leaves Set is fast becoming a new go-to for me! I cut them from a piece of Distress Watercolor Paper that I had sprayed with Frayed Burlap Distress Spray.


For the final touch, I added a sentiment from the Monster's Reunion Stamp Set.

Creepin' It Real Halloween Card by Juliana Michaels featuring Tim Holtz Monster's Reunion Stamp Set, Scrapbook.com Delicate Leaves and Autumn Leaves Die Set and Harvest Paper Pad

Thanks so much for stopping by today and checking out my Creepin' It Real Halloween Card!

Supplies

Below you can find the products I used to create this card featuring the Tim Holtz Distress Watercolor Pencils. Each product is attached to an affiliate link with Scrapbook.com. When you shop through the links below, I receive a small commission from Scrapbook.com. These links are at absolutely no cost to you. The commission I receive helps me cover the costs of my blog and other expenses and it allows me to continue to provide you with FREE inspiration and tutorials. If you want to learn more about what an affiliate link is, you can see my full affiliate and product disclosure statement here. Thank you so much for your love and support!

Did You Catch SBC Fest?

SBC Fest may be over, but never fear! You can catch the replay over on Scrapbook.com's YouTube Channel any time! All of the classes, content and supply lists will be available forever, so if you happened to miss it, I highly recommend checking it out. Each day has a variety of instructors teaching classes on cardmaking, mini albums, and scrapbook pages with a mix of styles. And even if you think a class or technique may not be your style, I can assure you each and every class had some great tips and tricks that anyone can incorporate into their paper crafting projects. I learned SO much including some great techniques and how to work with some new to me products! I'm also still on cloud 9 about have been an instructor for this event! Especially considering some of the "famous" people that were also part of it...including Vicki Boutin, Ali Edwards and Simon Hurley!

For my class, I shared some do-able mixed media techniques and how to create this card using stencils, stamps and die cuts. I also shared how to add some texture using Pops of Color and a great trick to keep this medium from bleeding under under your stencil! You can check it out here! I'm at 3:35 into Day 1 of SBC Fest.

Thinking Of You Card by Juliana Michaels for Scrapbook.com SBC Fest 2022

Here are some close-up images of the card I shared.

I just love the texture you get with the Pops of Color and a stencil!

And aren't those die cuts just gorgeous! These Sprigs and Butterflies are some of my favorite dies!

If you see something that I used that you loved, you can check out my full supply list here (just scroll down until you see my name) or you can use the links below. 

Also, if you have ANY questions, comments or thoughts about SBC Fest, don't hesitate to reach out! I'd love to hear from you!

SBC Fest Class Supplies

P.S. Scrapbook.com also has FREE SHIPPING going on right now!

Below you can find the products I used to create this card for SBC Fest. Each product is attached to an affiliate link with Scrapbook.com. When you shop through the links below, I receive a small commission from Scrapbook.com. These links are at absolutely no cost to you. The commission I receive helps me cover the costs of my blog and other expenses and it allows me to continue to provide you with FREE inspiration and tutorials. If you want to learn more about what an affiliate link is, you can see my full affiliate and product disclosure statement here. Thank you so much for your love and support!

If any of the products you're looking for is currently out of stock, make sure to click on the "Notify Me When In Stock" button and you'll be on the list to get notified as soon as they are back in stock.

Tim Holtz Distress Watercolor Pencils | Not Just For Coloring

After a lot more time playing around with the Tim Holtz Distress Watercolor Pencils, I've found that they're not just for coloring! I mean, yes, you can certainly color all the things with them, but that's not all you can do with them! In this blog post I'm going to share with you how you can use them to create a background.

Happy Birthday Card by Juliana Michaels featuring Tim Holtz Distress Watercolor Pencils

If you would prefer a video, head on over to my YouTube channel to check it out or watch it below.

HAPPY BIRTHDAY TO YOU CARD

When creating an inky background, one of my go-to techniques has always been the old ink smoosh. To do this, you simply smoosh the ink pad onto your craft mat, spritz it with a bit of water and then smoosh your paper into the ink. Dry it with a heat tool and repeat as desired.

Most recently, I came across Tiffany Solorio doing this with the Distress Spray Stains and sharing how this is a way to use spray stains with a bit more control rather than spraying directly onto your paper. 

I've since tried that technique and would definitely agree that you have WAY more control as compared to spraying them directly onto the paper. I have always been a bit scared of sprays, but Tiffany's technique has made me much more likely to pull my sprays out to create inky backgrounds!

After watching her video, it got me to thinking about using the new Watercolor Pencils. Could I use them to have even more control when adding color to my backgrounds? I'm here to tell you, that the answer is yes! So, if you too would like even more control when creating inked backgrounds or if sprays scare you, then the Distress Watercolor Pencils may be the answer!


To get started, I used the largest tag die from the Stacked Tags Thinlits and die cut a piece of Distress Watercolor Paper. I then began creating my background. The first thing I did was spray some Frayed Burlap Distress Spray onto my craft mat, spritzed it with some water, mixed it together with my finger, smooshed my paper into the ink, added a bit more water and then dried it with my heat tool. By doing this and not spraying direct to paper, I was able to have some areas that had little to no ink on them, which I really like because it gives a bit of contrast. And as always, you could use an ink pad to do this part.

Next, I used the Happy Birthday from the Bold Text Set 1 Thinlits and die cut it from the bottom part of the tag. I kept the negative bits for later so I could use them to fill in the inside of the letters. The actual letters could also be used on another project.

After doing the die cutting, I decided to add some stamping. This, as well as the die cutting could be done later, but I choose to do them at this point.

I first stamped the map image from the Air Travel Stamp Set in Ground Espresso Archival Ink. I knew I'd be adding some water later, so this is the perfect ink to use since it's waterproof. Next, I stamped the 5 image from the Eccentric Stamp Set using Distress Oxide Inks in Frayed Burlap and then rubbed over the image with a dry paper towel to smudge the ink. Next I took several images from the Eccentric and Correspondence Stamp Sets and stamped them using Ground Espresso Archival Ink.


CREATING AN INKED BACKGROUND WITH DISTRESS WATERCOLOR PENCILS

With all of the stamping completed, I moved onto the reason you're here...the Distress Watercolor Pencils. It is seriously SO easy to add color to create what looks like a ink smooshed background. To do this, take your watercolor pencil and a water brush and pick up some of the ink from the pencil with the wet brush. You could also use a regular paint brush with water. Then just add the color where you want it! Because these are so pigmented, the color will be bold especially with darker colors like Prize Ribbon. To lighten it, all you have to do is dab off some of the excess color onto a paper towel or add some more water. If you want more color, just add more color or use less water.

ADDING SPLATTERS WITH DISTRESS WATERCOLOR PENCILS

Next, added some splatters using the pencils. Here I'm picking up some color with my water brush and then applying it to my craft mat.  I then add a little more water and use a longer brush to pick up the ink and splatter it onto my background!

Another thing I'm loving about pencils is not wasting so much ink. These are all techniques I used to do with ink pads and I always felt like I was wasting so much ink. By using the pencils, I hardly waste any at all! Does that mean I won't be using my ink pads anymore? No, but it does give me other options when I want to add some color to my projects.

COLORING WITH DISTRESS WATERCOLOR PENCILS

With the background completed, I moved on to creating some embellishments for my card. I stamped some images from the Dapper Stamp Set with Black Soot Archival Ink onto a piece of Distress Watercolor Paper and left the paper in my stamping tool. I have found that if I stamp, then watercolor some of the stamped detail gets lightened by the pigment. After I finish watercoloring the images, I reinked the stamps and stamped them again to add the detail back to the image.

To color the images, I pulled the color directly from the pencil using my water brush instead of coloring with the pencil on the paper and then blending it with the water brush. After adding a color, I used my heat tool to dry the ink and paper before adding a second color so that I would avoid mixing colors.

Once again, I seriously love that I can color in such small areas, not waste any ink AND everything matches since it's all part of the Distress Palette!

After I finished the watercoloring, I used a pair of scissors to fussy cut the images. To finish off the card, I adhered an Idea-ology Gauge Dial and the fussy cut images. I also added a piece of Mummy Cloth colored with Prize Ribbon Distress Spray Stain and some machine stitching around the outer edge. I then adhered the tag to a piece of the Distress Halloween Black Woodgrain Cardstock and then onto a piece of black Kraftstock. Once it was assembled, the finished card ended up being 3.5 x 6.75 inches.


I hope you enjoyed learning some ways that I'm using the new Distress Watercolor Pencils! Have you tried them out yet? I can't wait to continue exploring all the possibilities for creating with them! If you're looking for more ideas and inspiration you can check out my Tim Holtz Distress Watercolor Pencils blog post and video or check out Tim's Distress Watercolor Pencils Highlights on Instagram.

Supplies

Below you can find the products I used to create this card featuring the Tim Holtz Distress Watercolor Pencils. Each product is attached to an affiliate link with Scrapbook.com. When you shop through the links below, I receive a small commission from Scrapbook.com. These links are at absolutely no cost to you. These commission I receive helps me cover the costs of my blog and other expenses and it allows me to continue to provide you with FREE inspiration and tutorials. If you want to learn more about what an affiliate link is, you can see my full affiliate and product disclosure statement here. Thank you so much for your love and support! 

Tim Holtz Distress Watercolor Pencils

Hello friends! Today Tim Holtz had a YouTube Live where he shared all about his latest addition to the World Of Distress...Distress Watercolor Pencils! If you missed it, make sure to head over to his channel and check it out! 

In this blog post I'm going to share with you my first thoughts on the brand new Tim Holtz Distress Watercolor Pencils. I'm so excited that I was able to work with them and I couldn't wait to share my thoughts about them, so I put together this blog post and a short video for you.

Do What You Love Card by Juliana Michaels featuring Tim Holtz Distress Watercolor Pencils

If you would prefer a video, head on over to my YouTube channel to check it out or watch it below.


DISTRESS WATERCOLOR PENCILS

These watercolor pencils are woodless which means the entire pencil is pigment. The wrapper is not removable, but when you go to sharpen the pencils, you can easily sharpen right through the wrapper. They come in 3 sets of 12 colors and each tin has a rainbow of colors...making it perfect to color all the things with just one set if you're just wanting to try them out before investing in all 3 sets.

Tim Holtz Distress Watercolor Pencils

On my card, I stamped some images from the Floral Outlines Stamp Set onto Distress watercolor paper using Archival Ink. This ink is perfect for using with watercoloring because it's permanent and won't bleed when you add the water or ink. When doing watercoloring, I prefer to use Distress Watercolor Paper because it holds up well to the addition of water and ink AND it has a smooth side if you don't like the traditional bumpy texture of most watercolor papers. The only other tool I'll be using is a waterbrush, but you can also use a paint brush to blend out the pigment.

DO WHAT YOU LOVE CARD

You might not think you need watercolor pencils, and maybe you don't. Watercoloring isn't for everyone and there are a lot of options out there if that is your thing. I'm no watercolor expert, but I love to do a bit of amatuer watercoloring every now and then. In the past, I've done it using Distress Ink Pads by tapping the pad onto my craft mat and using a waterbrush to pick up the ink and apply it to my paper.

One of the first things I love about these pencils versus the ink pads is that I'm not wasting so much ink. With the pencils, you can color just a tiny bit right where you want it and use the waterbrush to spread it over the area.

Next, I love that I can get a lot of pigment right where I want it. When I colored these flowers, I apply the color where the darkest shadow area is and then use the waterbrush to thin it out and create the variation in dark and light. Having that control with smaller areas is really great! To get that much color with the ink pads usually requires making sure that your brush doesn't have too much water on it or the color gets washed out, which then requires applying more layers of ink. Which is fine, but doesn't make it a very fast process.

For the background I stamp the text image from the Professor 2 Stamp set with Tea Dye Oxide Ink onto Distress Watercolor paper and smudge the ink with a paper towel before it dries. Next I spritz the paper with water using my Distress Sprayer to activate the ink and dry it using my heat tool. I then blended a bit of Salvaged Patina Distress Ink using a foam blending tool to the center of the panel.

The next thing that is great about these Watercolor Pencils is that after fussy cutting the flowers, I was able to use the pencils to apply color right where I wanted it...in the spaces that I couldn't get to with my scissors! I used the Salvaged Patina Watercolor pencil to match the Salvaged Patina Distress Ink blended area that I created behind the floral bouquet.

MY FAVORITE THING ABOUT THE TIM HOLTZ DISTRESS WATERCOLOR PENCILS

This ability to color match leads me to my next and probably favorite thing. These watercolor pencils are part of the Distress Line so they match the Distress Line! Salvaged Patina is Salvaged Patina! And in my book, that color matching is everything! So if you're already a Distress color lover these pencils are a perfect fit if you're looking for a matching coloring option!

The next step on the background was to place the Polka Dots Layering Stencil over the image. I then used the Kitsch Flamingo watercolor pencil to add some color in the openings of the stencil. After applying the color, I used the waterbrush to blend the ink. It's a subtle effect but I love what it adds to the background! To make it pop just a bit more, I added a little Picked Raspberry to some of the polka dots and then blended it out using the waterbrush.


As I mentioned earlier, you can easily sharpen the pencils using a pencil sharpener. I have the Prismacolor Pencil sharpener which works perfectly and it's not very expensive.

ADVENTURE AWAITS CARD

Here's a look at a second card I created using the Tim Holtz Distress Watercolor Pencils. I used them to color the butterfly from the Perspective Stamp Set and I also used them to add some polka dots to the background like I did in the first card.

Adventure Awaits Card by Juliana Michaels featuring Tim Holtz Distress Watercolor Pencils

The background on this card using the watercolor stamping technique that Stacy Hutchison uses so often. I sprayed some Gathered Twigs Distress Spray onto my craft mat, spritzed it with water and then stamped the text image from The Professor 2 Stamp set into the ink and then stamped it onto my paper.


I repeated this same technique using some of the Floral Elements Stamp Set with Old Paper, Peeled Paint and Shabby Shutters Spray Stains. I finished off the panel by ink blending some Salvaged Patina Distress Ink to the center, splattering some Salvaged Patina Spray Stain and inking the edges with Vintage Photo Distress Ink.


I hope I've answered some of the questions you might have about these Tim Holtz Distress Watercolor Pencils. If you have a question that I haven't answered, feel free to ask. I'd be more than happy to answer any questions you might have!

Supplies

Below you can find the products I used to create these cards featuring the Tim Holtz Distress Watercolor Pencils. Each product is attached to an affiliate link with Scrapbook.com. When you shop through the links below, I receive a small commission from Scrapbook.com. These links are at absolutely no cost to you. The commission I receive helps me cover the costs of my blog and other expenses and it allows me to continue to provide you with FREE inspiration and tutorials. If you want to learn more about what an affiliate link is, you can see my full affiliate and product disclosure statement here. Thank you so much for your love and support!

SBC Fest 2022 - What you need to know!

Hey friends! I wanted to share a bit more about SBC Fest 2022 with you today. It will be here before you know it and I don't want you to miss out on this amazing event! I shared about it recently, but in case you missed it, I thought I shared about it one more time. P.S. There is a little surprise at the very bottom! So keep reading or scrolling. LOL


WHO: Me, Simon Hurley, Vicki Boutin, Ali Edwards, and many more!

WHAT: SBC Fest is a FREE 2 day, virtual event hosted by Scrapbook.com. It will be packed with card making and scrapbooking classes from some of the top makers in the industry...including yours truly along with Simon Hurley, Vicki Boutin, Ali Edwards, and so many more! Each day!for a fun-filled weekend of online classes, crafting and so much more! During the event, you'll have the opportunity to chat along with the instructors and fellow crafters, plus enter giveaways that pop up!

WHEN: Friday, September 16th, and Saturday, September 17th from 9 AM PST to 4 PM PST

WHERE: Scrapbook.com YouTube Channel

Now that you know the main details, make sure you head over to Scrapbook.com to sign up for the SBC Fest Newsletter so you can stay up to date and informed on all the details!

BASIC SUPPLIES

One other thing I wanted to share with you is that each of the instructors has their own supply list and some even have kits that are available for a great deal! You can check out what supplies I'll be using here (scroll down until you get to my name and photo).

Besides the supplies I'll be using to create my project, I also wanted to share some of the basic supplies I'll be using. These are the supplies that I literally use on every single project I make and it includes everything from adhesives to the tools that I use over and over again.

I hope you find this list and the information I've shared about SBC Fest 2022 to be helpful! Please feel free to ask me any questions you might have. I'd love to hear from you! And I sure hope to see you at SBC Fest!

GIVEAWAY

Now if you're still with me...I also want to let you know about a fun GIVEAWAY I have going on over on my Instagram! To celebrate SBC Fest, I'm giving away an awesome bundle of Scrapbook.com Exclusive products and a $25 gift card! Just hop on over to my IG post with the giveaway image, like it and leave me a comment for you chance to win!


Subscribe