Scrapping Our Stash May Blog Hop + Giveaway

Happy Friday and welcome to the Practical Scrappers Scrapping Our Stash May Blog Hop! You may have arrived here from Alison's blog, but if not, make sure you head over to check out what she has to share with you today too.

The Scrapping Our Stash Blog Hop is a group of scrappers who are using up their scrappy stash and sharing some inspiration along the way. Today, I'm sharing a scrapbook page that I created of my sweet husband - I totally love this guy! To create my layout, I used some Heidi Swapp papers and other embellishments that have been in my stash for a bit along with one of my older downloadable cut files called Unending Circles.

Love This Guy Scrapbook Page by Juliana Michaels featuring Heidi Swapp and 17turtles Digital Cut File

If you are interested in this cut file for yourself, you can download it below. To to see another layout I made with this same cut file you can check it out HERE.

Downloadable Digital Cut File | Unending Circles


Here are some close ups so that you can see all the little stash goodies that I added to my layout. I don't know about you, but I'm really digging puffy stickers lately and it was fun adding the little triangle and arrow stickers to this layout.

Love This Guy Scrapbook Page by Juliana Michaels featuring Heidi Swapp and 17turtles Digital Cut File

Love This Guy Scrapbook Page by Juliana Michaels featuring Heidi Swapp and 17turtles Digital Cut File

Love This Guy Scrapbook Page by Juliana Michaels featuring Heidi Swapp and 17turtles Digital Cut File

Love This Guy Scrapbook Page by Juliana Michaels featuring Heidi Swapp and 17turtles Digital Cut File

I used my sewing machine to sew along the outside edge of all of the green triangles - which I cut with my Silhouette. And, a little trick you might enjoy is that I used washi tape to hold the loose threads in place instead of tying a knot. I love finding new ways to use my stash of washi tape! 

Use washi tape to hold the loose threads when you sew on your scrapbook paper.

Now, it's your turn to help me bust my stash! And to do this, I'm having a

MYSTERY PRIZE PACKAGE GIVEAWAY!

So, if you are OK with winning a mystery prize package, leave me comment below and let me know how you like to use washi tape. You have until Monday, June 1 at 12 midnight EST to leave your comment. I will then pick one lucky person to win a fabulous mystery surprise package. And I promise, you will not be disappointed!

Now, head on over to Katrina's blog to see what awesome inspiration she has to share with you today!

You can check out the full hop list below:

Happy Hopping!!!

Watercolored Die Cuts | Scrapbook Process Video

Hello everyone! Today, I'm sharing a new scrapbook page along with a new process video (you can view it below) on how to create watercolored die cuts using a simple technique that helps prevent scrapbook paper and cardstock from warping. I love the watercolor and mixed media trend that is showing up on scrapbook pages and cards lately, but I really don't care for how it warps and sometimes destroys the paper. This simple technique has made me more willing to pull out my paints and play with them and I bet it will do the same thing for you!

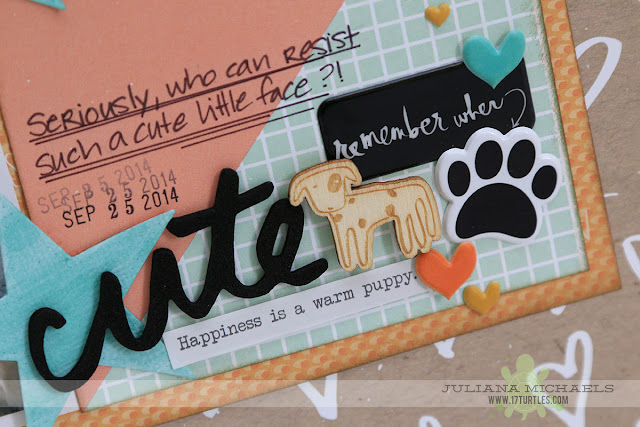
Cute Puppy Scrapbook Page using Watercolored Die Cuts by Juliana Michaels featuring MFT Stamps and Studio Calido

To create this layout, I used the Die-namics Pierced Star Stax by MFT Stamps and the new Baxter collection from Studio Calico. With it's super cute dog theme, the Baxter collection is just perfect for scrapping all the photos I've taken of Lincoln. I just hope you all don't get tired of all the puppy and dog themed layouts!

Cute Puppy Scrapbook Page using Watercolored Die Cuts by Juliana Michaels featuring MFT Stamps and Studio Calido

I really love the wood veneers and puffy stickers that coordinate with this collection!  I also added a couple more puffy stickers from Heidi Swapp and Me & My Big Ideas. I have been eyeing those puffy paw print stickers at Michael's for quite some time and they finally ended up in my basket!

Cute Puppy Scrapbook Page using Watercolored Die Cuts by Juliana Michaels featuring MFT Stamps and Studio Calido

Here's the process video that I created to share with you today. I hope you enjoy the tutorial on watercolored die cuts along with the other little tips that I share. I loved for you to leave me a comment and even subscribe to my YouTube Channel to let me know what you think about it.

Supplies:
Patterned Paper, Stickers, Wood Veneer: Studio Calico | Baxter
Puffy Stickers: Studio Calico, Me & My Big Ideas, Heidi Swapp
Dies: My Favorite Things / MFT Stamps - Die-namics Pierced Star Stax
Watercolors: Michaels
Ink: Ranger Distress Ink | Walnut Stain
Clear Gesso: Liquitex

Jillibean Soup Happy Hues & Stencils Tutorial

All this month, Jillibean Soup has been challenging their Design Team to create a variety of projects showcasing their new Happy Hues Acrylic Paint. I decided to play along with the challenge and used the paints and one of their super cute stencils to create a fun handmade title. Below, you can check out a quick little tutorial on how I created the title.

Happy Moments Scrapbook Page by Juliana Michaels featuring Jillibean Soup Yellow Pepper Saffron,Happy Hues Paints and Stencils

Handmade Scrapbook Page Title Using A Stencil, Modeling Paste and Acrylic Paint | Tutorial

Supplies:
Modeling Paste: Liquitex
Stencil, Acrylic Paint: Jillibean Soup
Water Color Paper
Spatula
Scissors
Washi Tape

Use washi tape to attach the stencil to your paper and apply the modeling paste using the spatula. Remove the stencil and let the modeling paste dry. Make sure to wash your stencil to remove the modeling paste before it dries.  I choose to use water color paper because it is more tolerant to paint and other such media and you won't have much (if any) warping.

Tutorial for creating a handmade scrapbook page title using a stencil, modeling paste and acrylic paint by Juliana Michaels featuring Jillibean Soup Stencils and Happy Hues Paint

After the modeling paste has dried, reattach the stencil to your paper using the washi tape and apply paint using a small paint brush.  Remove the stencil, wash it and let the paint dry.

Tutorial for creating a handmade scrapbook page title using a stencil, modeling paste and acrylic paint by Juliana Michaels featuring Jillibean Soup Stencils and Happy Hues Paint

Tutorial for creating a handmade scrapbook page title using a stencil, modeling paste and acrylic paint by Juliana Michaels featuring Jillibean Soup Stencils and Happy Hues Paint

After the paint has dried use a pair of fine tip scissors to trim around the word.

Tutorial for creating a handmade scrapbook page title using a stencil, modeling paste and acrylic paint by Juliana Michaels featuring Jillibean Soup Stencils and Happy Hues Paint

Now your handmade title is ready to be used on your layout. I told you this was a simple and fun technique!

Happy Moments Scrapbook Page by Juliana Michaels featuring Jillibean Soup Yellow Pepper Saffron,Happy Hues Paints and Stencils

Here you can see the texture and dimension it adds to the layout without adding a lot of bulk.

Happy Moments Scrapbook Page by Juliana Michaels featuring Jillibean Soup Yellow Pepper Saffron,Happy Hues Paints and Stencils

You might have noticed these painted circles when you were looking at the layout above. I created them by dipping the lip of a glass jar into the paint and using it as a stamp. I love how it adds a little bit more color to the design along with a touch of playfulness!

Happy Moments Scrapbook Page by Juliana Michaels featuring Jillibean Soup Yellow Pepper Saffron,Happy Hues Paints and Stencils

Supplies:
Patterned Paper, Stickers, Twine, Stencil: Jillibean Soup
Acrylic Paint: Jillibean Soup | Amiable Aqua
Punch: Stampin' Up
Sewing Machine: Kenmore
Ink: Ranger Distress Ink | Walnut Stain
Pen: LePen by Marvy | Black

Thanks so much for stopping by today! Are you inspired to pull our your acrylic paint and add some to your next scrapbook page?

Offset Images In Silhouette Studio | Getting The Most From Your Scrapbook Paper

When you first looked at this layout, did you think that I used 2 sheets of each piece of patterned paper to cut the large hearts that I used behind my photos? Well, guess what? I only used one of each sheet of paper and today I want to share with you how to offset an image in Silhouette Studio and get the most from your scrapbook paper. I am always looking for ways to get the most from my products and I'm confident that this easy tip will help you too!

This Is Pure Happiness Puppy Scrapbook Page by Juliana Michaels featuring Elle's Studio Cienna Collection

Begin by opening a heart shaped cut file image in your Silhouette Studio software and make sure it is centered. This heart is about 9 inches wide by 8.25 inches tall.

How to offset an image in Silhouette Studio and how to get the most from your scrapbook paper

To Offset the image open the Offset Option. Select your heart image, click on Offset, set Distance to 0.25 inches, select Corner and then hit Apply. It will then offset the heart by 0.25 inches.

How to offset an image in Silhouette Studio and how to get the most from your scrapbook paper

Next, select the offset heart and repeat this offset process until you have a total of 4 heart. Remember to select the new heart each time you are ready to offset.


How to offset an image in Silhouette Studio and how to get the most from your scrapbook paper

Tada! You now have four offset hearts!

How to offset an image in Silhouette Studio and how to get the most from your scrapbook paper

Now that you understand how to offset images, I'm going to share with you the trick I used that allowed me to only use two sheets of paper.  To make it easier for you to understand, I have colored the hearts with two different colors to mimic the two patterns of paper that I used for my layout. As you can see the colors and/or patterns alternate just like in my layout.

How to offset an image in Silhouette Studio and how to get the most from your scrapbook paper

Before you begin cutting, select the two hearts that are the light pink in color and move them off of the cutting area. To select two images together, click on one of the images, hit the shift key and while holding down shift click on the other image. They will now both be selected and you can move them together off of the mat. It is important to keep the images together like this for this technique.

How to offset an image in Silhouette Studio and how to get the most from your scrapbook paper

Now, you are ready to cut the two dark pink hearts from one sheet of paper. As you will see after you are finished cutting, one shape will be a solid heart shape and the other shape with be an outline of the heart. Remove the cut hearts from the cutting mat and set them to the side.

How to offset an image in Silhouette Studio and how to get the most from your scrapbook paper

Next, place the other color or pattern of paper that you are going to use onto your cutting mat. Move the image (the dark pink hearts) you just cut off of the cutting area in the Silhouette Software and replace it with the other light pink hearts. Cut this image and remove it from your cutting mat.

How to offset an image in Silhouette Studio and how to get the most from your scrapbook paper

Once you have all four hearts cut, layer the hearts starting with the largest shape to the smallest shape. You will see that the images overlap perfectly and that you have just cut four hearts from only 2 pieces of paper! Way to go!!!

Before I adhered my hearts together and onto my layout, I added some machine stitching along the edges of each heart and then I inked the edges too. This is an easy way to add texture and dimension without added bulk.

This Is Pure Happiness Puppy Scrapbook Page by Juliana Michaels featuring Elle's Studio Cienna Collection

I then added some fun embellishments including die cuts, wood veneers, and hearts.

This Is Pure Happiness Puppy Scrapbook Page by Juliana Michaels featuring Elle's Studio Cienna Collection

Thanks so much for stopping by today! I hope this little tutorial taught you some new things that you can do to help you save paper as well as more ways to use your Silhouette and cut files!

Supplies:
Patterned Paper, Die Cuts, Wood Veneer: Elle's Studio | Cienna Collection
Enamel Hearts: Pebbles Inc
Pen: LePen by Marvy | Black
Sewing Machine: Kenmore
Electronic Cutting Machine: Silhouette Cameo

Scrapbook Generation Create Magazine | May 2015

If you are looking for a great free source of scrapbooking and card making inspiration, then I invite you to check out Scrapbook Generation's Create Magazine. They publish a new issue every other month and the May 2015 Issue is now live!


As one of their Design Team Members I have several projects in this issue and today, I'm sharing some sneak peeks to entice you to check out this awesome FREE magazine...

Sneak Peek of project by Juliana Michaels in the Scrapbook Generation CREATE Magazine May 2015 Issue

I used the new Elle's Studio Cienna collection for the above layout and the Jillibean Soup Birthday Bisque to create a double page layout which is pictured below.

Sneak Peek of project by Juliana Michaels in the Scrapbook Generation CREATE Magazine May 2015 Issue

This month, Create has two featured manufactures: Paper House Productions and My Favorite Things.  The sneak peek below is a layout I created using some fabulous goodies from Paper House Productions.

Sneak Peek of project by Juliana Michaels in the Scrapbook Generation CREATE Magazine May 2015 Issue

Here are several sneaks of three cards that I created using some of the new stamps and dies from My Favorite Things!

Sneak Peek of project by Juliana Michaels in the Scrapbook Generation CREATE Magazine May 2015 Issue

Sneak Peek of project by Juliana Michaels in the Scrapbook Generation CREATE Magazine May 2015 Issue

Sneak Peek of project by Juliana Michaels in the Scrapbook Generation CREATE Magazine May 2015 Issue

In celebration of these companies, Scrapbook Generation just added over 200 more of their items to their inventory. Starting now, they have a special offer for Create readers at


Take 10% off ALL items by Paper House and My Favorite Things until Friday, May 22.

So what are you waiting for? Head on over and check out the May 2015 Create Magazine and maybe do a little shopping while you're at it too!

BoBunny Sweet Life Scrapbook Process Video + Digital Cut File

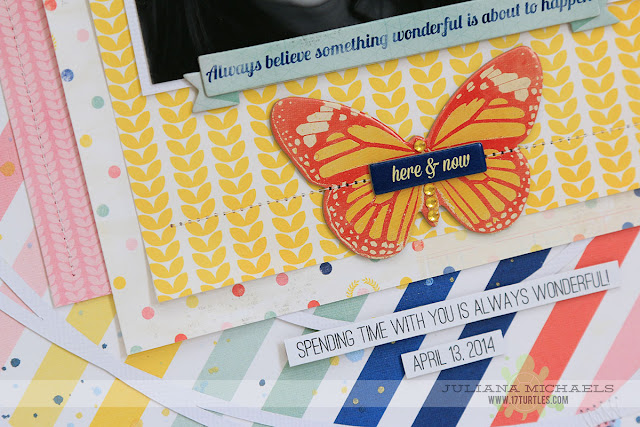
Hello and Happy Hump Day my fellow crafty friends! Today I have a new layout to share with you using the BoBunny Sweet Life Collection and a Digital Cut File that you can download at no cost! I also created my very first scrapbook process video about my layout. It was quite the learning experience for me! I actually learned some things about myself and I how create just by making the video. For example, I knew I liked to move things around a lot, but I never realize just how much I move them around. I also want to apologize for my head! It is in the way and I know that, but I also learned that I lean over and look at my layouts a lot while I am creating them, so this "head in the way thing" is really me doing what I do when I'm creating a layout. So bear with me and hopefully, I can remember to keep my head out of the way for future videos! You can check out the video at the bottom of the post along with a full supply list for the products I used on my layout.

Always Believe Scrapbook Page by Juliana Michaels featuring a FREE 17turtles Digital Cut File and the BoBunny Sweet Life Collecttion

FREE DIGITAL CUT FILE | SCRIBBLED CIRCLE

This free cut file can be used for a full range of projects, including cards, home decor, scrapbook pages and more. This digital file is available in SVG, PNG, DXF and Studio formats and you may download this digital cut file for FREE for your own personal use. Please refer to my terms of use for more information if you wish to use these for more than your own personal projects.

Scribbled Circle Free Digital Cut File by Juliana Michaels 17turtles.com

I am in love with the BoBunny Sweet Life collection and I have to say that it is probably one of my all time favorite BoBunny collections! The colors - especially the yellow - makes me super happy!!!

Always Believe Scrapbook Page by Juliana Michaels featuring a FREE 17turtles Digital Cut File and the BoBunny Sweet Life Collecttion

Check out the awesome font I used for my journaling! It's called Ostrich Sans and you can download it from Font Squirrel.

Always Believe Scrapbook Page by Juliana Michaels featuring a FREE 17turtles Digital Cut File and the BoBunny Sweet Life Collecttion

I hope you enjoy the video and I would love for you to subscribe to my YouTube Channel and of course feel free to leave any comments you have about the video. I'd love to hear your feedback!


SUPPLIES:
Patterned Paper, 6x6 Paper Pad, Chipboard Stickers: BoBunny | Sweet Life
Cardstock: American Crafts
Jewels: BoBunny
Spray Ink: Heidi Swapp Color Shine | Butter, Ocean and Navy
Sewing Machine: Kenmore
Electronic Cutting Machine: Silhouette Cameo
Digital Cut File: 17turtles | Scribbled Circle
Font: Ostrich Sans

Mother's Day Shaker Card | MFT Stamps

I don't know about you, but I'm so happy to see that shaker boxes are back! I remember the first time I made one. It was probably 10 years ago and I can honestly say that they are just as much fun to make now as they were back then! After recently getting the new MFT Stamps Stitched Circle Frames I was inspired to try my hand at making them for my Mother's Day cards. I thought they would be super fun to use for creating a shaker box filled with sparkly sequins!

Happy Mothers Day Shaker Box Card by Juliana Michaels featuring MFT Stamps Modern Blooms and Die-namics Stitched Circle Frames

I used a great technique that I saw on a video by Jennifer McGuire where she used Fun Foam to create the thickness in the shaker window instead of a bunch of foam tape (which is what I have normally used). I really loved this technique and the foam cut like butter with my Cuttlebug.

Happy Mothers Day Shaker Box Card by Juliana Michaels featuring MFT Stamps Modern Blooms and Die-namics Stitched Circle Frames

To decorate the shaker box window frame, I used the new MFT Modern Blooms stamp set and die set. These are one of my new favorite stamp sets right now! I love that that stamps have coordinating dies. With the use of a little foam tape, you can add some great dimension to your projects.

Happy Mothers Day Shaker Box Card by Juliana Michaels featuring MFT Stamps Modern Blooms and Die-namics Stitched Circle Frames

Along with the sequins, I also included some tiny little glass micro beads that I found in my stash. I'm pretty sure that I've had these since I made those first shaker box cards all those years ago. LOL!

I didn't have a Mother's Day sentiment stamp, so I printed my sentiment on white cardstock using my printer and a font called Ostrich Sans...my new favorite font!

Happy Mothers Day Shaker Box Card by Juliana Michaels featuring MFT Stamps Modern Blooms and Die-namics Stitched Circle Frames

SUPPLIES
Cardstock: Darice 110 lb White, BoBunny (Yellow and Green Dot)
Stamps: Modern Blooms
Dies: MFT Stamps | Stitched Circle Frames and Modern Blooms
Ink: MFT Stamps, Colorbox
Fun Foam: Darice
Clear Overlay Film: Grafix Dura-Lar (This is what I used instead of acetate or transparency)
Other: Sequins, Glass Micro Beads

So have you tried making a shaker box card yet? The Mom or Mom's in your life might love one, don't you think? Thanks for stopping by today!

Keeping The Focus On Your Photos | Horizontal & Vertical Stripes

I hope you all enjoyed the National Scrapbook Day weekend! I know I did!!! I spent part of the day on Saturday scrapbooking and actually finished 2 layouts...which is really good for me considering how slow I am! I will be sharing both of those layouts very soon, but in the meantime, I thought I would share a layout I made recently using the Fancy Pants True Friend collection. I totally love the colors in this collection (I really adore orange and yellow) and thought it was perfect for scrapping some photos of puppy Lincoln! When I look at him now and then look at his puppy pictures, it's hard to believe he was ever this tiny!!!

Lincoln Puppy Scrapbook Page by Juliana Michaels featuring Fancy Pants True Friend collection

When I started this layout, I knew I really wanted to keep the focus on the sweet photo of puppy Lincoln. To do this I began by cutting varied widths of patterned paper to create a series of horizontal stripes with the main one containing my photo and embellishments. I also placed the journaling and title in a horizontal stripe as well.

Lincoln Puppy Scrapbook Page by Juliana Michaels featuring Fancy Pants True Friend collection

To help keep the focus on my photo and to contrast the horizontal stripes, I created a vertical "stripe" with circle punches, white cardstock and a variety of buttons. I centered this vertical stripe in the middle of the photo of Lincoln. The intersection of these stripes creates an  "X"  that helps draw your eye to that sweet little puppy face!

Lincoln Puppy Scrapbook Page by Juliana Michaels featuring Fancy Pants True Friend collection

What tricks do you use to keep the focus on your photos and make them the center of attention?

Mother's Day Gift Idea | Shadow Box Frame & Free Cut File

With Mother's Day approaching next weekend, I thought I would re-share a project that I created last year for my Mom for Mother's Day. I created a shadow box frame filled with quilled flowers and a quote by Abraham Lincoln - All that I am or hope to be I owe to my angel mother.

I created a digital cut file for the quote using my own hand writing and then cut it from gold foil paper. The cut file is available for you to download for FREE and use to create your own special gift just in time for Mother's Day!

All That I Am Quilled Shadow Box Frame Mother's Day Gift by Juliana Michaels

FREE DIGITAL CUTTING FILE | ALL THAT I AM

This free cut file can be used for a full range of projects, including cards, home decor, scrapbook pages and more. This digital file is available in SVG, DXF and Studio formats and you may download this digital cut file for FREE for your own personal use. Please refer to my terms of use for more information if you wish to use these for more than your own personal projects.

Click on this Link to download: ALL THAT I AM


17turtles Free Digital Cut File | All That I Am Free

Here are a few details images of the quilling and the die cut quote. Creating all of the quilled flowers took some time, but I find quilling kind of relaxing, so I didn’t mind the time it took at all.

All That I Am Quilled Shadow Box Frame Mother's Day Gift by Juliana Michaels

All That I Am Quilled Shadow Box Frame Mother's Day Gift by Juliana Michaels

All That I Am Quilled Shadow Box Frame Mother's Day Gift by Juliana Michaels

Thanks for stopping by today! So will you be making anything for your Mom for Mother's Day this year?

Subscribe