Moth Study Curio Card | Tim Holtz Stampers Anonymous Halloween

I love all things entomology related. Maybe it's the nature side of it or the colors. Either way, it's something that has always caught my eye. When I saw the Tim Holtz Stampers Anonymous Moth Study Stamp Set I was immediately inspired to create some sort of curio / specimen box display. I didn't have anything that fit the size I was looking for, so I started playing around with the idea of creating my own. With a bit of trial and error I ended up with this Moth Study Curio Card that was shared during the Tim Holtz Stampers Anonymous Halloween YouTube Live. Today I'm going to walk you through the steps of how I created it.

Moth Study Curio Card by Juliana Michaels featuring Tim Holtz Stampers Anonymous Moth Study and Tiny Toadstools

I began with a piece of Distress Watercolor, the Square Stacked Thinlits and the Rectangle Stacked Thinlits. To create the various windows, I laid out a combination of the rectangles and squares to create a rectangle shaped layout. I used repositionable tape to hold the dies together and then placed them onto the paper and ran it through my die cut machine. By taping the dies together, I was able to easily cut the same pattern multiple times. I cut it once from the Distress Watercolor and then again from a piece of thin white craft foam. I cut each piece down to 4 5/8 x 5 7/8 inches making sure to keep each layer the same size and then glued all of the layers together to create a shadow box effect. I ink blended the top layer with Brushed Corduroy Distress Ink. I also adhered a back to the shadow box that I cut from Distress Heavy Kraftstock.


As I was cutting the layers I had a lot of "scrap" rectangles and squares, so I took one of each window shape and created a background to go into each opening. Using a mix of ink smooshing and stamping with the Moth Study and Tiny Toadstools Stamp Sets I created a scene for each window.


Next, I stamped several moth's to fit into the openings. Once the stamping was done, I watercolored the images using Distress Ink and a water brush. I then fussy cut the moths and adhered them using thin strips of double sided foam adhesive. The sentiment is from the Tiny Text Stamp Set.


With the inside of the curio box complete it was time to create the frame. As you can see, it actually opens, but you could certainly adhere the frame so that it doesn't.


To create the frame I took a piece of Distress Kraft Heavystock and embossed it with the 3D Lumber Embossing Folder. I then cut it into strips to create the top, bottom and both sides of the frame. To make things more challenging, I cut each piece twice (because I wanted the frame to look good on the inside when you opened the curio box) and I cut the corners to be at 45 degrees. With all of the frame pieces cut I heavily ink blended them with Brushed Corduroy Distress Ink, making sure to get the ink down into the cracks. I then lightly rubbed the Ground Espresso Archival Ink Pad over the paper to hit the high spots of the embossed design which really brings out the wood grain.


Before assembling the frame, I cut a piece of acetate to 4 5/8 x 5 7/8 inches. I then adhered each piece of the frame to both the front and back of the acetate.


 To create the hinges, I cut a piece of champagne colored metallic kraftstock and inked it with a bit of Mushroom Alcohol Ink. I also added some Hardware Heads that were inked with the Mushroom Alcohol Ink as well.


Well, there you have it! This is how my Moth Studio Curio Specimen Box Card came to be. I hope you enjoyed learning how I put it together and that you are inspired to try making one of them yourself. If you do, I'd love to see it, so make sure and tag me on social media!
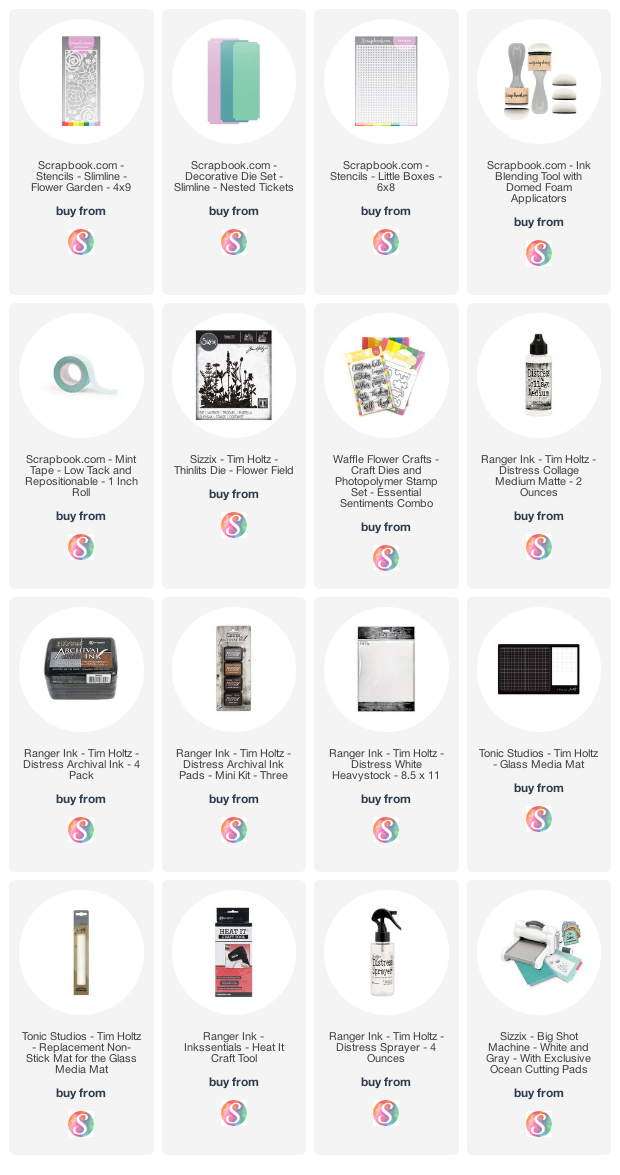
Supplies

As always, you can find the products I used to create this project along with compensated affiliate links to Scrapbook.com. These links are at absolutely no extra cost to you. If you want to learn more about what an affiliate link is, you can see my full affiliate and product disclosure statement here.

Bold Frights, Halloween Doodles & Snarky Cats | Tim Holtz Stampers Anonymous Halloween

The Snarky Cats are back! Well, kind of. They're actually making an appearance dressed up with some new Halloween accessories using the Tim Holtz Stampers Anonymous Halloween Doodles Stamp Set. As soon as I saw this set, I knew it would be perfect to mix in with these crazy cats for some new looks this Halloween season. If you missed Tim's Stampers Anonymous Halloween YouTube Live release, you can check out the replay on Tim's blog.

Halloween Slimline Cards by Juliana Michaels featuring Tim Holtz Stampers Anonymous Snarky Cats, Halloween Doodles and Bold Frights Stamp Sets

The backgrounds for both of these cards were created using the Distress Oxide, Gel Plates and Stencils technique I've shared in the past. You can check out my How to Create Backgrounds with Distress Oxides, Gel Plates and Stencils post for more details. Using this technique, I sat down one day and made a bunch of backgrounds using a mix of stencils and colors that would work for Halloween. The Distress Oxide colors I used included: Wilted Violet, Twisted Citron, Carved Pumpkin and Black Soot.

Hocus Pocus Halloween Slimline Card by Juliana Michaels featuring Tim Holtz Stampers Anonymous Snarky Cats, Halloween Doodles and Bold Frights Stamp Sets

I selected a couple of these backgrounds to use for my cards and trimmed them down to 3.75 x 7 inches. I then added some stamping using Hickory Smoke Archival Ink and some of the ephemera images from the Rest In Peace Stamp Set.


Now onto those Snarky Cats. I stamped the cats and various images from the Halloween Doodles Stamp Set onto Distress Watercolor paper using Black Soot Archival Ink. I then watercolored them using Distress Ink and a waterbrush. The Distress Ink colors I used included: Black Soot, Wilted Violet, Twisted Citron, Carved Pumpkin, Gathered Twigs and Antique Linen.


Once the coloring was completed, I fussy cut all the images and added some Glossy Accents to the candy pieces and the glass vial.


You might notice the cats are "holding" what is in their paws. To achieve this, I used a craft knife to carefully cut around their paws so that I could tuck the cany and vial into their paws for them to hold.

Here For The Candy Halloween Slimline Card by Juliana Michaels featuring Tim Holtz Stampers Anonymous Snarky Cats, Halloween Doodles and Bold Frights Stamp Sets

The sentiments were created using the Bold Frights Stamp Set. I stamped them onto Distress Heavystock with Twisted Citron and Wilted Violet Distress Oxide. To create the outline detail, I used a Sharpie marker and drew the outlines using the stamped letters as my guide and not worrying about it being too perfect.


Before assembling the cards, I added some Carved Pumpkin Distress Oxide to the edges of the hocus pocus card and Wilted Violet to the candy card.


To give the design a bit of dimension, I adhered various parts of the cats and other images with Scrabook.com double sided foam adhesive squares.


I hope you enjoyed learning how these Snarky Cats got a new look for Halloween these season using the Halloween Doodles and Bold Frights Stamp Sets.

Supplies

As always, you can find the products I used to create this project along with compensated affiliate links to Scrapbook.com. These links are at absolutely no extra cost to you. If you want to learn more about what an affiliate link is, you can see my full affiliate and product disclosure statement here.

Alcohol Ink and Stamped Backgrounds | Tim Holtz 2021 Stampers Anonymous Halloween

I don't know about you, but when it comes to creating, I always try to take some time to just play around with products and techniques and see what happens. Maybe it's a technique you've done a million times with a particular product. Then you get a new product and wonder what will happen if you try that technique with it. Maybe you try a new technique that someone else had shared but decide to add a twist to it to see what happens. Sometimes it works, and sometimes it doesn't. The main thing to remember is to have fun and play. 

On the cards I'm sharing today I used a technique I've done a million times, this time with new products, and I was inspired by a technique Zoe Hillman shared on her Instagram using Pitch Black Alcohol Ink and an embossing folder. When I started, I had no idea what the end result would be, but the play time led me to some fun discoveries that I can't wait to share with you today! Both of these cards were created for the Tim Holtz 2021 Stampers Anonymous Halloween YouTube Live. If you happened to have missed it, you can catch the replay over on Tim's blog or YouTube channel.

A Wicked Thing Halloween Card by Juliana Michaels featuring Tim Holtz Stampers Anonymous Rest In Peace Stamp Set and Alcohol Ink

To begin you will need Yupo paper, 91% Rubbing Alcohol, Pitch Black Alcohol Ink, Black Staz On Ink, Paper towels (I actually prefer the ones with texture), and a stamp with a large bold design to it. Here I'm using the skull from the new Tim Holtz Stampers Anonymous Rest In Peace Stamp Set.

This first part was inspired by the technique Zoe had shared. I began by trimming a piece of Yupo paper to size and instead of embossing it with the embossing folder, I just coated the paper with 91% Rubbing Alcohol. While the rubbing alcohol was still wet, I applied Pitch Black Alcohol Ink to the paper making sure to apply enough ink that I covered the entire piece of paper with ink. Once it was dry, I held the paper upright and poured rubbing alcohol over the paper allowing it to flow down the paper. I suggest placing a paper towel underneath to absorb the run off. As you will see, this will remove the ink but not entirely, as the paper has been stained. You are left with a piece of dark blue colored paper. Once the paper was dry, I then stamp the skull using Staz On, allowed the ink to dry and then poured the rubbing alcohol over the paper again. You will see that the sections with the Staz On ink will turn purple, so if you want to leave some of the image black, don't pour alcohol over that section. The final step before the paper is completely dry, but not still totally soaked with the rubbing alcohol, is to use a dry paper towel to "stamp" off even more of the ink. 

SIDE NOTE: From my understanding the blue color I achieved here has occured because I used an older bottle of alcohol ink. Per Tim and Zoe, the formulations change through the years based on raw material availability like colorants, etc. The newer formulation has warmer tones instead of blue. Tim said the final colour of Alcohol Ink is what the chemists achieve and undertones in Alcohol Inks will obviously vary as colorants change. So, if you attempt this technique you may or may not achieve this exact look depending on how old or new your bottle of Alcohol Ink is. A good reminder to either use your stuff when it's new or hoard it until it's vintage!

Now I have to admit, these last two parts with the Staz On and the paper towel were total happy accidents. I had no idea what would happen when I tried either of these, but once I saw what happened I had to try it again to make sure it wasn't a fluke. There are a couple of tips I do want to share with you. The first is that a larger and more bold stamp design will allow you to see more purple when you pour the rubbing alcohol over the Staz On. Second, the paper towel part is a bit tricky. If the paper is too wet with rubbing alcohol or if it's too dry, nothing much happens. There is this sweet spot between the wet and dry when the ink will lift. I recommend just giving it a go and let yourself have fun no matter what!


To create the background, I used the ink smooshing technique with the Empty Tomb Mica Stain. I simply sprayed some ink onto my craft mat, added a spritz of water with my Distress Sprayer and then smooshed my paper into the ink. Once the ink was dry, I added a light spritz of Empty Tomb Mica Stain to get some tiny splatters of shimmer and then dried the paper with my heat tool. I then selected images from the Rest In Peace Stamp Set and stamped them onto the paper using Hickory Smoke Archival Ink.

For the sentiment I used a new favorite technique shared by Stacy Hutchison recently. I stamped a sentiment from the Tiny Text Halloween Stamp Set with embossing ink onto white cardstock. I then heat embossed it with clear embossing powder. Once the powder was set, I used a paint brush to apply Black Soot Distress Paint over the embossed area. While the ink was still wet, I rubbed a paper towel over the paper to remove the ink from the embossed words. I absolutely love how this creates a grunged label effect!


Once I had done the technique several times with the Pitch Black Alcohol Ink, I began to wonder what might happen with other inks. That is where this second card comes into play. On this card, I used Sepia Alcohol Ink and repeated the same process as the first card.

Dearly Departed Halloween Card by Juliana Michaels featuring Tim Holtz Stampers Anonymous Rest In Peace Stamp Set and Alcohol Ink

You don't get the dramatic change from black to blue as in the first card, but I still love the effect achieved by removing the alcohol ink with the rubbing alcohol. I also loved the peek of purple that still showed up after stamping the image with Staz On.


The background on this card uses the same process that I used above however this time I used Broomstick Mica Stain with the ink smooshing part. I then stamped images from Rest In Peace using Vintage Photo Archival Ink. The sentiment was also done the same as above as well.


As always, I appreciate your visit! I hope you enjoyed learning how I created these Alcohol Ink and Stamped Backgrounds using the Rest In Peace Stamp Set by Tim Holtz.

Supplies

As always, you can find the products I used to create this project along with compensated affiliate links to  Scrapbook.com. These links are at absolutely no extra cost to you. If you want to learn more about what an affiliate link is, you can see my full affiliate and product disclosure statement here.

The Legend of Sleepy Hollow Tombstone | Tim Holtz Sizzix Halloween

Happy Halloween Friends! Well, it feels like Halloween to me! I've been creating away with all things Halloween as a seasonal maker for Tim Holtz and as a Halloween lover this makes my heart super happy! Today I'm sharing one of my makes from the Tim Holtz Sizzix Halloween 2021 YouTube Live. So without further ado, Pumpkin Head welcomes you to Sleepy Hollow!

The Legend of Sleepy Hollow Tombstone by Juliana Michaels featuring Tim Holtz Sizzix Halloween Pumpkin Head Thinlits

I began this project by first creating Pumpkin Head. I have to admit, originally I had NO idea what I was going to do with him. I just thought he was so cool, so I took the time to enjoy putting him together and decided to figure what to do with him later.

I die cut most of the suit pieces from Black Alcohol Ink cardstock and then applied Distress Oxide Ink in Black Soot to some of the pieces in order to achieve the various shades of black and grey. I cut the other pieces, including the pumpkin from Distress Watercolor. For the bow tie and shirt I used Hickory Smoke, for the skin I used Antique Linen and for the Pumpkin I used Carved Pumpkin and Peeled Paint. And the inside of the pumpkin was cut from a piece sprayed with the new Candlestick Mica Spray which gives it an awesome candlelight like shimmer!


Once Pumpkin Head was assembled, I started the process of trying to figure out what to do with him. My first thought was of the Headless Horseman from The Legend of Sleepy Hollow, which led me down the path of that idea, which then morphed into the project I'm sharing with you here. I decided to use an Etcetera Mini Tombstone as the base since it fit in with the theme of the story and painted all the pieces with Hickory Smoke Distress Paint. Next, I die cut the spider web from Distress Watercolor, gave it a light ink smooshing with Hickory Smoke Distress Ink, and once dry adhered it to the front piece with Collage Medium. I then began to assemble the tombstone and adhered all the pieces together using Collage Medium. Once the tombstone was assembled, I applied Crypt Grit Paste here and there by dabbing it on with my fingers, but you could certainly apply it with a brush or palette knife.


To create the graveyard scene, I die cut the trees (Ghost Town Thinlits), the bats and 2 sets of gates (Vault Series Halloween) from Black Alcohol Ink Cardstock. I took the second set of gates and painted them with the Tombstone Mica Spray. I also dabbed a bit of this onto the trees.

The tombstones (Vault Series Halloween) were cut from Distress Watercolor cardstock and ink blended with Black Soot Distress Oxide Ink. I then applied a bit of Crypt Grit Paste for some texture.


To complete the scene I created a full moon using a circle die from my stash which I ink smooshed with a bit of Pumice Stone and Hickory Smoke Distress Ink. I then added a bit of Antique Linen to the edges.


For the final touch, I die cut the letters from Black Alcohol Ink Cardstock using the Alphanumeric Tiny Type Upper Thinlits and adhered them with Collage Medium.


Thanks so much for visiting Sleepy Hollow and learning how I created Pumpkin Head and this fun Halloween scene using some of the latest Tim Holtz Sizzix Halloween dies.

Supplies

As always, you can find the products I used to create this project along with compensated affiliate links to  Scrapbook.com. These links are at absolutely no extra cost to you. If you want to learn more about what an affiliate link is, you can see my full affiliate and product disclosure statement here.

Christmas Card Head Start 2021 | Stencils & Die Cuts

It's August and yes, I'm still working on my Christmas cards! Today, I'm sharing a slimline card featuring a stenciled background and die cuts. This design came together easily using some Scrapbook.com exclusive slimline products combined with a new favorite die by Tim Holtz called Wise Men.

Noel Christmas card by Juliana Michaels featuring Scrapbook.com Stripes Slimline Stencil, Tall Skinny Alphabet Dies and Tim Holtz Wise Men Thinlits

I began with a piece of the lighter blue paper from the Slimline Jewels Paper Pad. I placed the Slimline Stripes onto the paper and used Mint Tape to hold the stencil in place while applied Chipped Sapphire Distress Oxide with a Domed Foam Ink Blending Tool. Next I added a little bit of stamping using some sentiments from the Tiny Text Christmas Stamp Set with Black Soot Archival Ink. I then finished it off with some ink splatters created using the Scrapbook.com Metallic Gold Re-inker.


Next I took the darkest blue paper from the Slimline Jewels Paper Pad and die cut it using the Wise Men Thinlits Die. I placed the die off to one side on the paper and then used scissors to cut the paper so that it fit across the background. Using my finger, I applied a bit of Sizzix Luster Wax in Gold to the edges of the die cut.


I wanted to add a little more shimmer so I took a piece of gold glitter cardstock and die cut the star from the Wise Men Thinlits and the letters from the Tall Skinny Alphabet Dies. To finish off the card, I adhered all of the layers onto a piece of gold glitter cardstock.


Thanks for stopping by today! I hope you enjoyed another round of Christmas card inspiration featuring stencils and die cuts.

Supplies

Below you can find the products I used to create this project along with compensated affiliate links to Scrapbook.com. These links are at absolutely no extra cost to you. If you want to learn more about what an affiliate link is, you can see my full affiliate and product disclosure statement here.

Halloween Cards | Tim Holtz Sizzix Halloween Toil & Trouble Thinlits

Double, double toil and trouble; Fire burn and caldron bubble.

Hello friends and welcome back! Today I have double the fun to share with you. Not one, but two Halloween cards I created using the Toil and Trouble Thinlits by Tim Holtz. These cards were shared by Tim during his recent Sizzix Halloween YouTube Live. If you are looking for more Halloween inspiration I recommend checking out the replay!

Halloween Cards by Juliana Michaels featuring Tim Holtz Sizzix Halloween Toil & Trouble Thinlits

The background and area just behind each die cut was created using the Ink Smoosh Technique using Distress Ink and then a background or image was stamped onto it using Distress Oxide Ink. If you aren't familiar with this technique, you simply smoosh your Distress Ink pad onto your craft mat, spritz it with a little water using the Distress Sprayer and then smoosh your paper into the ink. Dry the ink using your heat tool and repeat until the paper is covered to your liking with ink.

Hocus Pocus Halloween Card by Juliana Michaels featuring Tim Holtz Sizzix Halloween Toil & Trouble Thinlits

On this first card, the green background was created with Twisted Citron Distress Ink for the ink smooshing. I then stamped the tapestry image using Mowed Lawn Distress Oxide. The purple background was created with Wilted Violet Distress Ink for the ink smooshing, Wilted Violet Distress Oxide for the stamping with the script stamp and then die cut using the Stacked Archway Thinlits.

For the main image I die cut some of the images from the Toil and Trouble Thinlits from black cardstock, applied a layer of Glossy Accents, sprinkled it with Nightfall Glitter and set it to the side to dry. FYI, Nightfall Glitter is part of the Halloween Distress Mica Flakes Sparkle Set that is only available while supplies last. Before the glitter was dry, I ran my Craft Pick around the edges to smooth out any glitter that was hanging over the edge.

Once the glitter was dry, I adhered the die cut to the card. I finished it off with a sentiment from the Life Of The Party Stamp Set.


For the background on this second card I used Milled Lavender Distress Ink for the ink smooshing and stamped the tapestry image using Wilted Violet Distress Oxide. For the moon, I used Carved Pumpkin Distress Ink for the ink smooshing and Carved Pumpkin Distress Oxide to stamp the spider web. 

Wicked Fun Halloween Card by Juliana Michaels featuring Tim Holtz Sizzix Halloween Toil & Trouble Thinlits

Once again, I used  some of the dies from the Toil and Trouble Thinlits and repeated the same process as above to apply the glitter. To complete this card, I added a sentiment from the Life Of The Party Stamp Set.


As you might have noticed, sometimes I used the same Distress Ink and Distress Oxide color to get the contrast between the ink smooshing and the stamped image and sometimes I didn't. Not all colors work well together for this technique, which is why on the first card, I used Twisted Citron and Mowed Lawn. When I tried this with Mowed Lawn for both layers, the stamping didn't show up because the stamp design is a bit more bold, which picks up more ink, which in turn covers up more of the background. If you use a stamp that is more detailed, such as the script or spider web stamp, you can use the same colors and still see the stamped image well. So, if you attempt this technique, I recommend that you do a little test run to make sure your colors and stamps work to get the look I'm sharing here. If they don't work, try using a lighter color for the ink smooshing layer.


Thanks so much for flying by today and checking out my Halloween cards featuring the Tim Holtz Sizzix Halloween Toil and Trouble Thinlits.

Supplies

You can find the products I used to create these projects along with compensated affiliate links to Scrapbook.com. These links are at absolutely no extra cost to you. If you want to learn more about what an affiliate link is, you can see my full affiliate and product disclosure statement here.

Slimline Stencils and Rainbow Backgrounds

Rainbow colors are still on trend, and there is loads of rainbow card inspiration out there. Most of these ideas scream rainbow! Which is totally good, but...what if you aren't totally into rainbows, or maybe you don't want your card to scream rainbow? Can you have your rainbow, but not? Of course you can! The card I'm sharing today has a rainbow background created with a slimline stencil from Scrapbook.com, but with the addition of some black die cuts, I was able to tone it down a bit and keep it from screaming rainbow while still having all the rainbow color goodness!

Thank You Card by Juliana Michaels featuring Scrapbook.com Flower Garden Slimline Stencil and Rainbow Background

I began with a piece of Distress White Heavystock cut to 3.5 x 8.5 inches, the Flower Garden Slimline Stencil, Mint Tape, Ink Blending Tools, and a rainbow of Distress Inks. The Distress Ink colors I used are Picked Raspberry, Carved Pumpkin, Mustard Seed, Mowed Lawn, Salty Ocean and Wilted Violet. I applied the colors in rainbow order along a diagonal angle. After all of the colors were applied I then spritzed the piece with my Distress Sprayer and dried it with my heat tool.


After I finished ink blending the background, I used the smallest Nested Ticket Slimline die to cut the stenciled background paper and the next largest to die cut a piece of white cardstock to layer behind it.

What about the yellow background paper you ask? This was actually some scrap paper from the gel plate backgrounds I recently created using the Little Boxes Stencil. Gotta love when something you could consider "trash", gets a new life!


Before I adhered the panels together, I used the Tim Holtz Flower Field Thinlits to die cut black cardstock.  I cut out the flowers twice and placed one on the top and the other on the bottom and then trimmed off any that was hanging over the side.

To finish off the card, I added a sentiment from the Waffle Flower Crafts Essential Sentiments Stamp Set and popped it up with some double sided foam adhesive.


Thank you for stopping by today and checking out this Slimline Stencils and Rainbow Backgrounds blog post. I hope you enjoyed learning how keep the rainbows without them having to scream at you!

Supplies

As always, you can find the products I used to create this project along with compensated affiliate links to Scrapbook.com. These links are at absolutely no extra cost to you. If you want to learn more about what an affiliate link is, you can see my full affiliate and product disclosure statement here.

Slimline Cards Made Easy with Scrapbook.com Stencils, Paper Pads, and Dies

Slimline cards are one of my favorite sizes to create these days and Scrapbook.com has created some fabulous go-to products for creating this size of card. By simply combining these products with some of your other favorites and you'll be creating slimline cards in no time!

Thank You Card by Juliana Michaels - Slimline Cards Made Easy with Scrapbook.com Stencils, Paper Pads and Dies

You can check out a quick video on how this card came together over on my Instagram feed if you are interested.

This card features the Scrapbook.com Harvest and Jewels Paper Pads which comes in both A2 and Slimline sizes, Scrapbook.com Nested Tickets Slimline Dies, and the Scrapbook.com Lattice Slimline Stencil.


After selecting what colors of paper I wanted to use, I used them with the gorgeous Tim Holtz Brushstroke Flowers No. 3 Thinlits Dies. Most of the colors came from the Harvest Paper Pad, except for the darker teal which you can find in the Jewel Paper Pad. The weight of the paper in these paper pads make them perfect for layering and using with layered die cuts such as these flowers.


For the background, I took a piece of Distress White Heavystock and cut it to 3.5 x 8.5 inches. I then layered the Lattice Stencil on top and used Mint Tape to hold it in place. Using a foam blender, I ink blended Weather Wood Distress Oxide onto the paper. I applied the ink darker toward the middle left side and then went lighter with it toward the right, top and bottom.


To create the framed border, I die cut a piece of the Distress White Heavystock with two of the Nested Tickets Dies to create a frame. You can use Mint Tape to hold the dies together and cut it in one pass through your die cutting machine, or you could cut it twice but cutting the largest die first then place the second die on the paper, use Mint Tape to hold it in place and then die cut the paper again. 

Once the frame was completed, I inked the edges of the frame, background panel and each of the flower and leaf die cuts. I then assembled all of the pieces using foam adhesive to pop up the flowers. To finish off the card, I added a stamped sentiment from the Hero Arts Message Strips Stamp Set.


Thanks so much for stopping by today to check out my Slimline Cards Made Easy with Scrapbook.com Paper Pads, Stencils and Dies post.

Supplies

You can find the products I used to create these projects along with compensated affiliate links to Scrapbook.com. These links are at absolutely no extra cost to you. If you want to learn more about what an affiliate link is, you can see my full affiliate and product disclosure statement here.
Subscribe