Adventures in Distressing Paper

This card was an experiment in distressing. I'm still not totally sure how I feel about it, but I do love all the layers I created with the butterflies. So there's that to like about it!

Everything here started off with the Scrapbook.com Joyful Patterned and Smooth Cardstock Paper Pads. They are a beautiful set of warm jewel toned patterns filled with flowers and butterflies, as well as coordinating solids. When I started playing around with it though, the colors were just a little too bright for my taste so I thought I'd experiment with distressing the papers. During the process I came across several ways to distress papers and I'm thinking that I will share those as part of a future video. Is this something that sounds interesting to you? I'd love to know your thoughts. Until then, I wanted to go ahead and share what I created.

Hi Thank You So Much Card by Juliana Michaels featuring Scrapbook.com Joyful Papers, Stamps and Dies  - Adventures in Distressing Paper

I began with the butterfly patterned paper, cut it down to 4 x 5.25 inches and I applied a light coat of white gesso using a brayer. This immediately toned down the colors, but I still felt like it needed a little something more. Next, I used a script stamp and added some random stamping here and there using Brushed Corduroy Distress Oxide Ink. The script stamp is from the Tim Holtz Tiny Toadstools stamp set. I then inked the edges with the same Distress Oxide Ink. The final step was some messy machine stitching around the outer edge. I layered this onto a piece of the dark green paper from the Joyful Smooth Cardstock Paper Pad. This color is so dark it almost looks black. To distress this piece, I rubbed a sanding disk along the edges of the paper and then inked them with more of the Brushed Corduroy Distress Oxide Ink.


Now onto the embellishments. I die cut loads of butterflies and leaves from various different colors of the Joyful paper pads using the Scrapbook.com Joyful Thank You Die Set and the Mini Layered Butterflies Die Set. Once again the colors were a bit too bright for me and especially after I had distressed the background paper so much. So I did the same treatment with them and applied a light layer of white gesso to each of the butterflies. To distress the leaves, I sanded them with a sanding disk to reveal a bit of the white paper core.


I then took the same dark green paper and die cut it using the circle frame from the Scrapbook.com Joyful Thank You Die Set. I sanded it, adhered it to the card front and trimmed off the excess that was hanging over the edge.

For the sentiment, I used the Hi die from the Scrapbook.com Joyful Wishes Die Set. I cut the word from the same dark green paper and the shadow layer from white cardstock. Before I adhered them, I inked the edges of the white piece with Brushed Corduroy Distress Oxide Ink and sanded the edges of the dark green paper. I then used the Scrapbook.com 1mm Double Sided Foam Adhesive to pop up the die cut. I absolutely love this thinner foam adhesive and I'm kind of wondering where this has been my whole life! I do use a lot of foam adhesive, but I've always thought it was just a little too thick for my taste. This new thickness is just perfect!


I then finished it off by stamping the rest of the sentiment using the Scrapbook.com Joyful Wishes Stamp Set. I trimmed this to size, inked the edges with Brushed Corduroy Distress Oxide Ink and adhered it with the 1mm Foam Adhesive. Yep...I'm going to need another roll of that real soon!


Thanks so much for your visit! I hope you enjoyed coming along on this creative detour today and learning how experimenting is part of the creative process!

SUPPLIES

Below you can find the supplies I used to create this card. When you shop through the links below, I receive a small commission from Scrapbook.com. These links are at absolutely no cost to you and the commission I receive helps me cover the costs of my blog and other expenses, which allows me to continue to provide you with FREE inspiration and tutorials. If you want to learn more about what an affiliate link is, you can see my full affiliate and product disclosure statement here. Thank you so much for your love and support!

Purple Halloween Junk Journal

I never imagined that the color of a pack of paper would inspire me so much, but that's exactly what happened when I saw the Purples Paper Pad from Scrapbook.com. The purples screamed at me...make me into a Halloween Junk Journal! And that's exactly what I did.

Purple Halloween Junk Journal by Juliana Michaels featuring Scrapbook.com Purples Paper Pad and Tim Holtz Halloween Idea-ology

In the post below I'm going to walk you through each page of this project. There are loads of photos, along with lots of tips and tricks, so you might want to grab a cup of coffee (or your beverage of choice) and sit back and enjoy the scroll.

ALTERING THE FOLIO

I began with a Tim Holtz Accordion Folio but as I began to assemble the journal the pages became thicker and thicker so I had to do a little surgery to expand the book. With that said, in the future, I won't adhere the papers to the folio base until I know whether or not the folio will close. I suggest you might want to do the same thing if you attempt this yourself. 

For the first fold with the angle, I cut along the fold. I then cut a piece of Distress Mixed Media Heavystock to 1/4" x 6" and adhered it to the adjoining pages with Tim Holtz Halloween Design Tape. When you do this, you also need to leave a small gap between the papers so that the folio can open and close. (Refer the images below for reference.)

I then enlarged the folding spine from 1/2" to 3/4". To do this, I cut the folio and removed that section. I then cut a piece of Distress Mixed Media Heavystock to 3/4" x 6" and adhered it to the adjoining pages with Tim Holtz Halloween Design Tape. Once again, make sure to leave a small gap between the papers so that the folio can open and close. (Refer the images below for reference.)

Once the folio is the size you need, you can then begin covering the folio with the papers and embellishments of you choice.

DECORATING THE FOLIO

Here's a look at the first pages as you open the junk journal.


On this section, I cut a piece of Tim Holtz Halloween Idea-ology Backdrops Paper and adhered it to the folio using Distress Collage Medium and trimmed it to size. You will notice that I used this paper throughout the journal to help me repeat the purple theme, so make sure to save the scraps as you trim them. I then inked the edges with Ground Espresso Distress Oxide Ink, spritzed with some water using my Distress Sprayer and then dried it with my heat tool. 

Next, I created a collage with a Paper Doll Portrait and some Halloween Ephemera. There are portraits in the Halloween Layers and Paper Doll package, but this one is actually from the regular Idea-ology Paper Doll Portraits package. I had used all of mine from the Halloween package for my Fluffy Grunge Halloween Junk Journal. 

With regards to the ephemera I used throughout this journal, I used the back side of a craft knife to distress the edges. You can also use a distress tool. I then crumpled the paper, lightly sanded over the wrinkles with a sanding disk and then inked the edges with Ground Espresso Distress Oxide Ink. To activate the ink and grunge them up a little more, I spritzed them with water and dried them with my heat tool.

For all of the Paper Dolls, Portraits, and Layers I applied a thin layer of Distress Collage Medium to them. This takes down the shine and adds a subtle bit of distress to them. I apply the Collage Medium with my finger, but you can also use a brush.


As you open this page, you find the next layout.


Here I've used another Tim Holtz Halloween Idea-ology Backdrops Paper and repeated the same process of inking the edges with Ground Espresso Distress Oxide Ink. Next, I cut a piece of white cardstock using the spider web die from the Tim Holtz Spider Web die set. I inked it with Ground Espresso Distress Oxide Ink and adhered it to the page. I created a little pocket with the ephemera piece which I distressed by applying a layer of Distress Collage Medium. Once that was dry, I distressed the edges with a distress tool, sanded it with a sanding disk and then rubbed over it Ground Espresso Distress Oxide Ink to grunge it up a little more.

The tickets are from the Tim Holtz Ticket Booth Stamp Set. I stamped them with Black Soot Archival Ink onto a piece of purple paper from the Scrapbook.com Purples Paper Pad. I then distressed them just like I did the other paper ephemera. Throughout the journal I used three different shades of purple paper from this paper pad.

The numbers are from the Scrapbook.com Bold Numbers with Flowers Die Set. I cut them from a piece of purple paper from the Scrapbook.com Purples Paper Pad. I sanded them with the sanding disk and inked the edges with Ground Espresso Distress Oxide Ink.

And last but not least, the spider is from the Tim Holtz Frightful Things Die Set. I cut it from a piece of black glitter paper from the Scrapbook.com Mixed Metals Glitter Paper Pad.

Here you can see the Halloween Design Tape I used to adhere the new section I added to expand the folio. If you don't have the design tape, feel free to use any washi tape you might have. I used Distress Collage Medium to help the tape hold a little better as well.


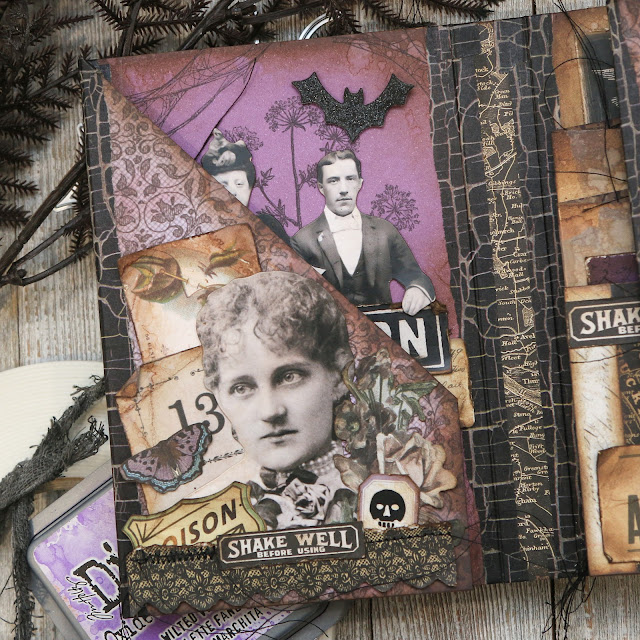
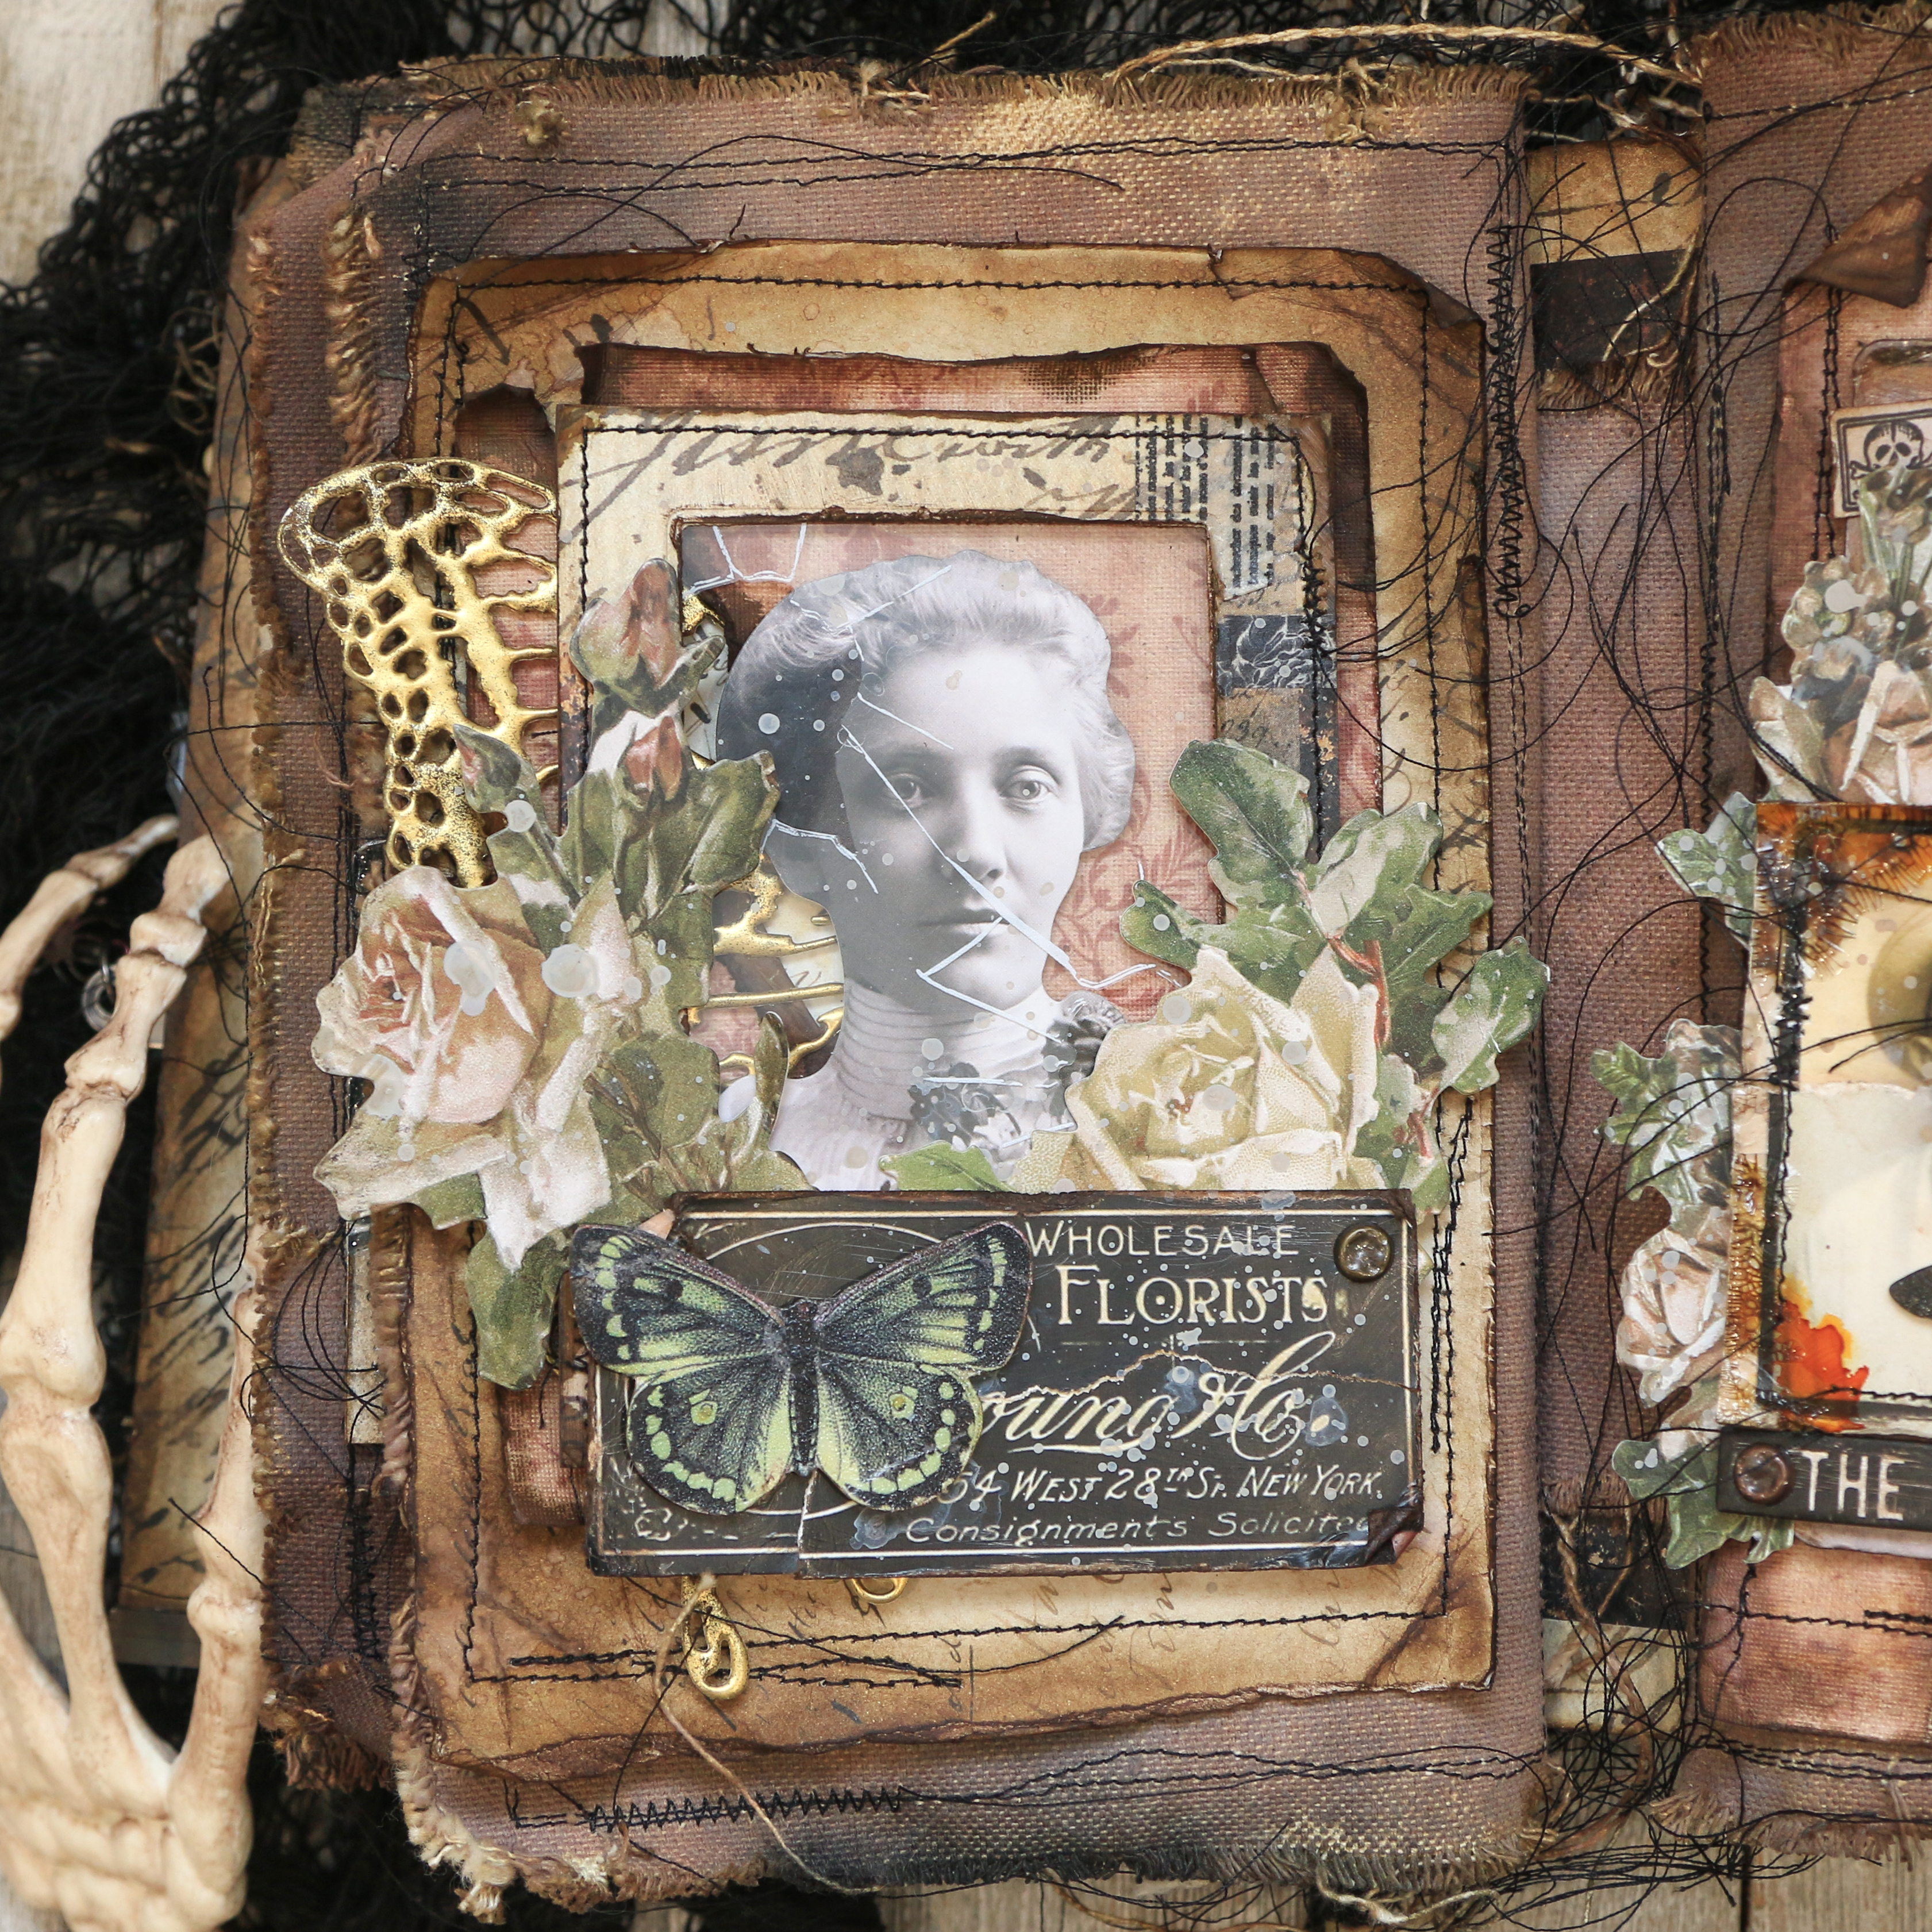
On this next page, the background is a piece of purple paper from the Scrapbook.com 6x8 Purples Paper Pad. Once cut to size, I stamped some images from the Tim Holtz Tangled Webs and Obscure stamp set using Black Soot Archival Ink. I then inked the edges, spritzed it with water and dried it with my heat tool. I then added a paper doll, some ephemera and black glitter die cuts. The bats are from the Scrapbook.com Halloween Bats Die Set.

You will also noticed I added some machine stitching here and there with black thread and left the excess thread to add to the grungy feel.


Now onto the central flap. I decorated the bottom with leftover bits of patterned paper, ephemera and more Ticket Booth stamped tickets. The skull is from the Tim Holtz Halloween Sticker Book and is adhered to a circle cut from black glitter paper and then adhered to a piece of purple paper.


Inside this flap there is a pull out accordion piece. Before I started decorating this piece, I used a brayer to apply Pumice Stone Distress Paint here and there to the back side of this piece. I then inked the edges of each section with Ground Espresso Distress Oxide Ink, spritzed it with water and then dried it with my heat tool.


Here is what it looks like with the accordion piece removed and the flap opened.


Here is what it looks like with the accordion piece in place and the flap opened.


This piece is probably one of my favorites and it was inspired by 
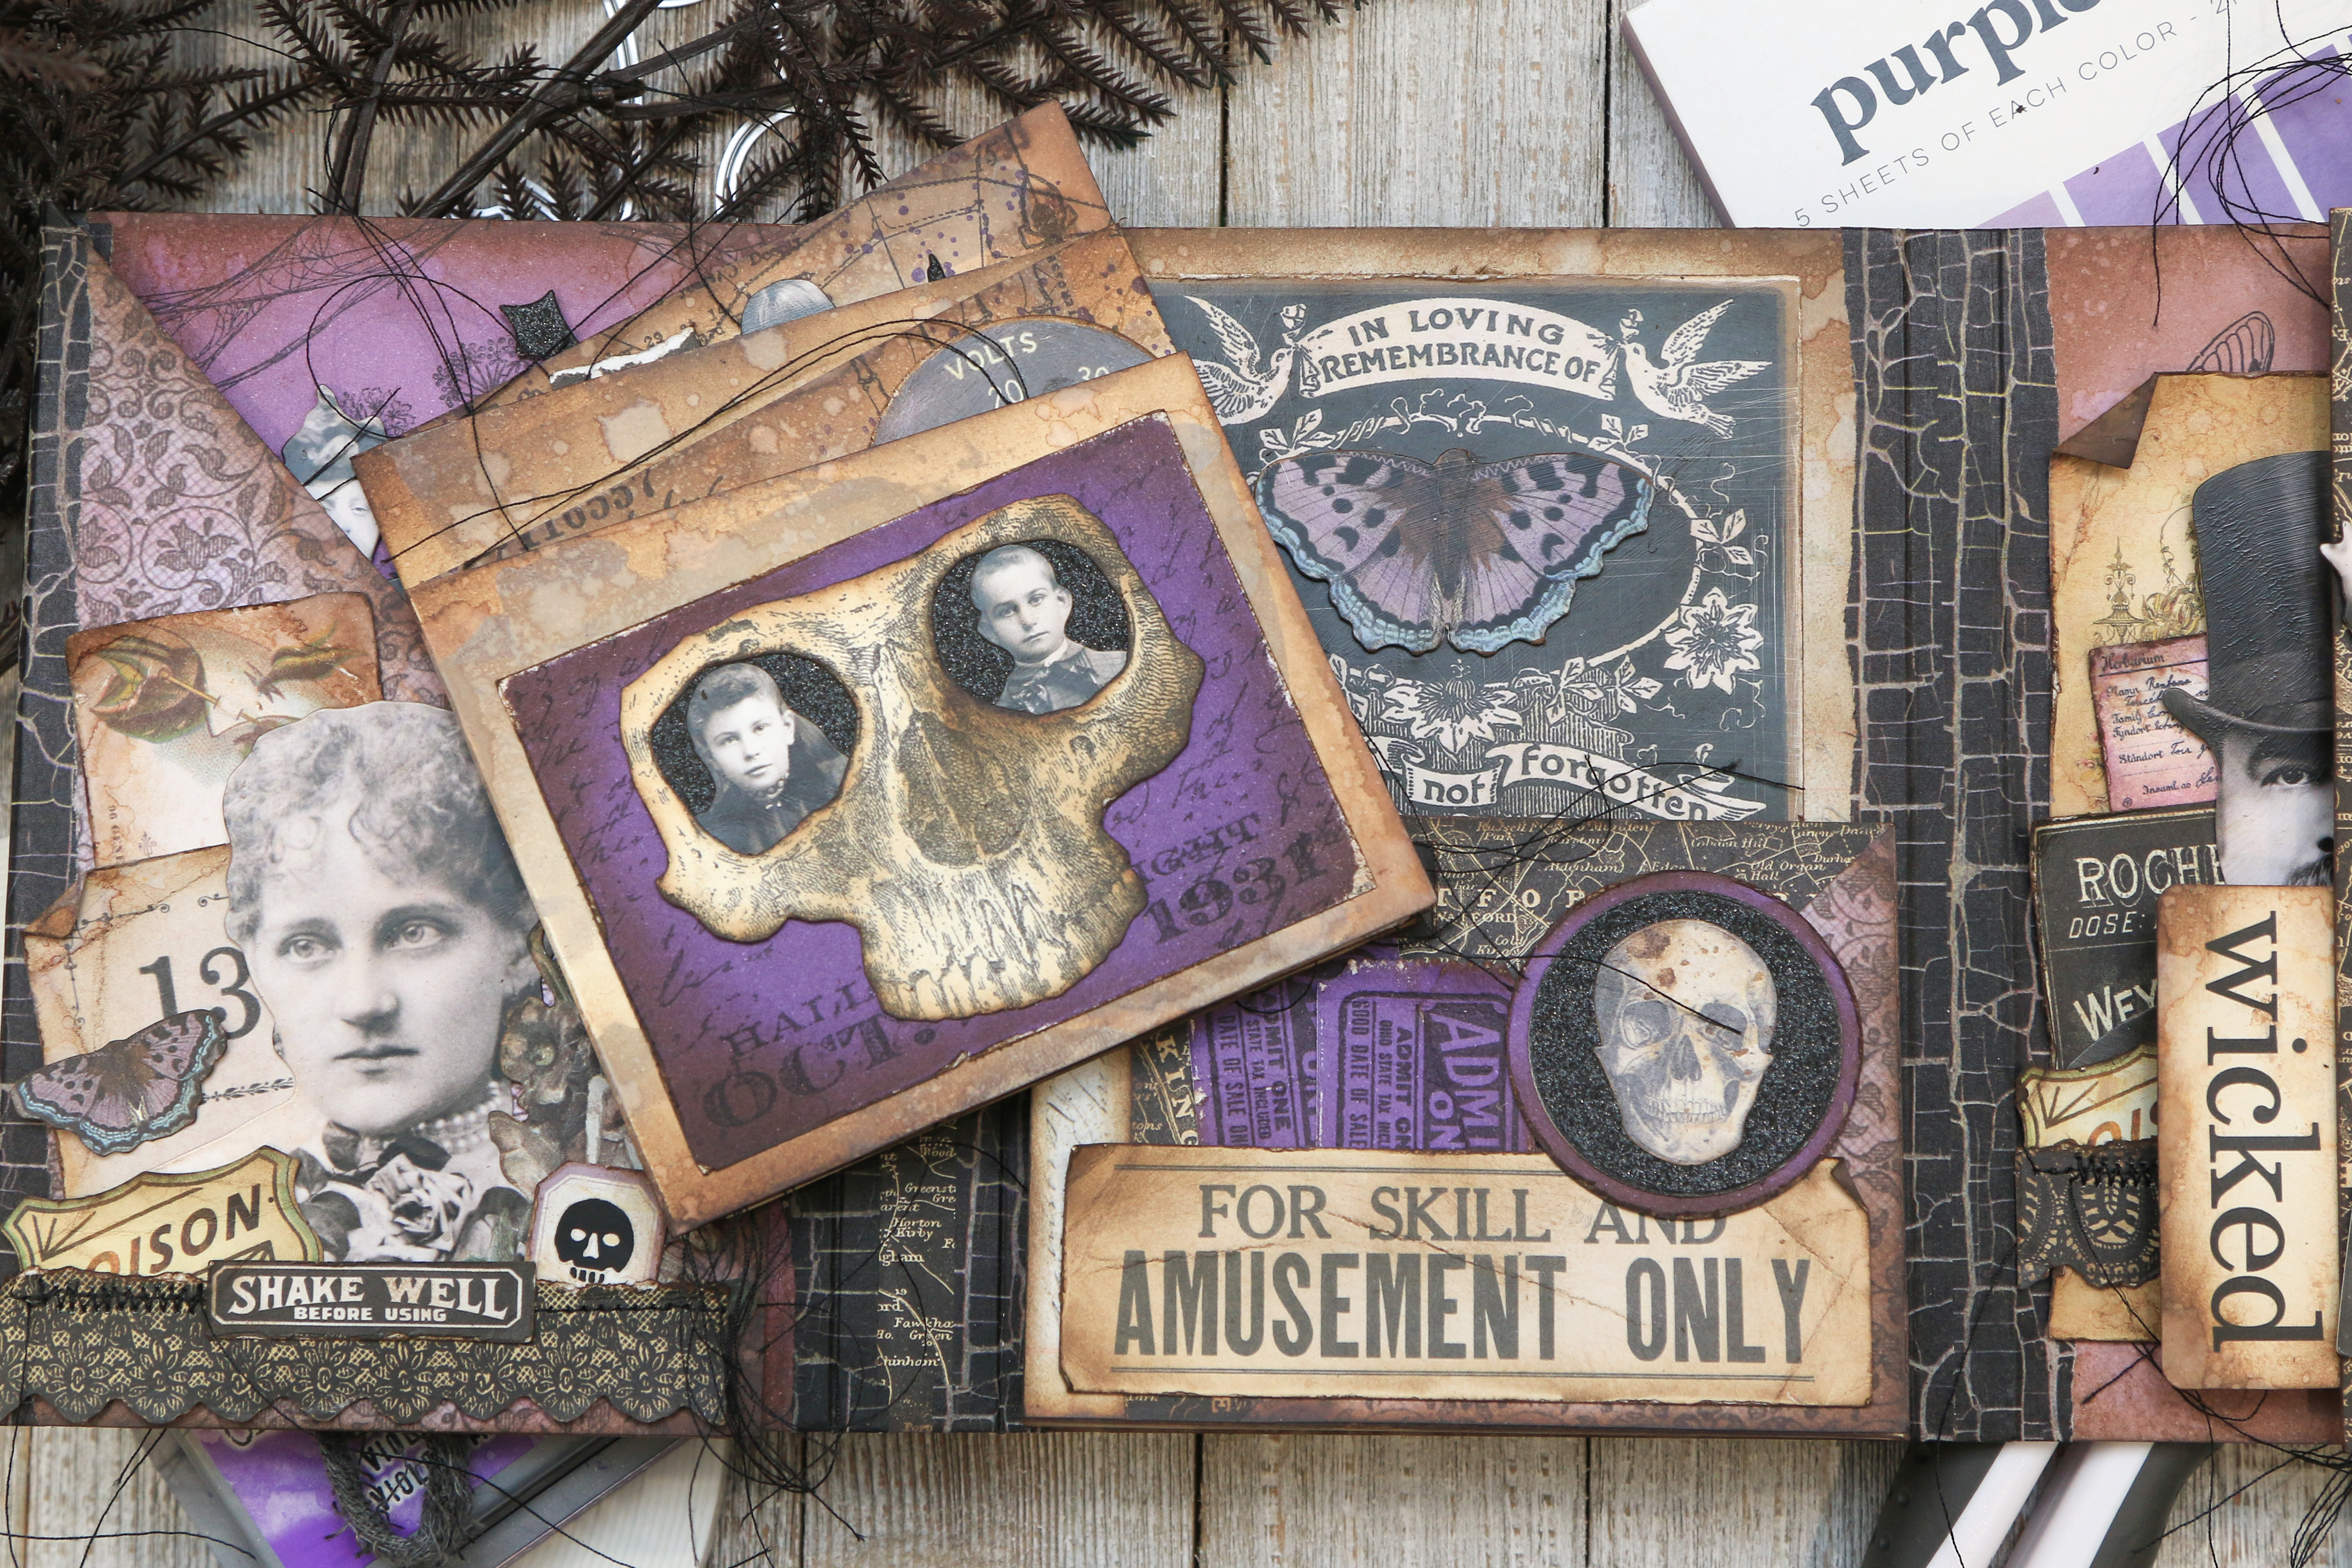
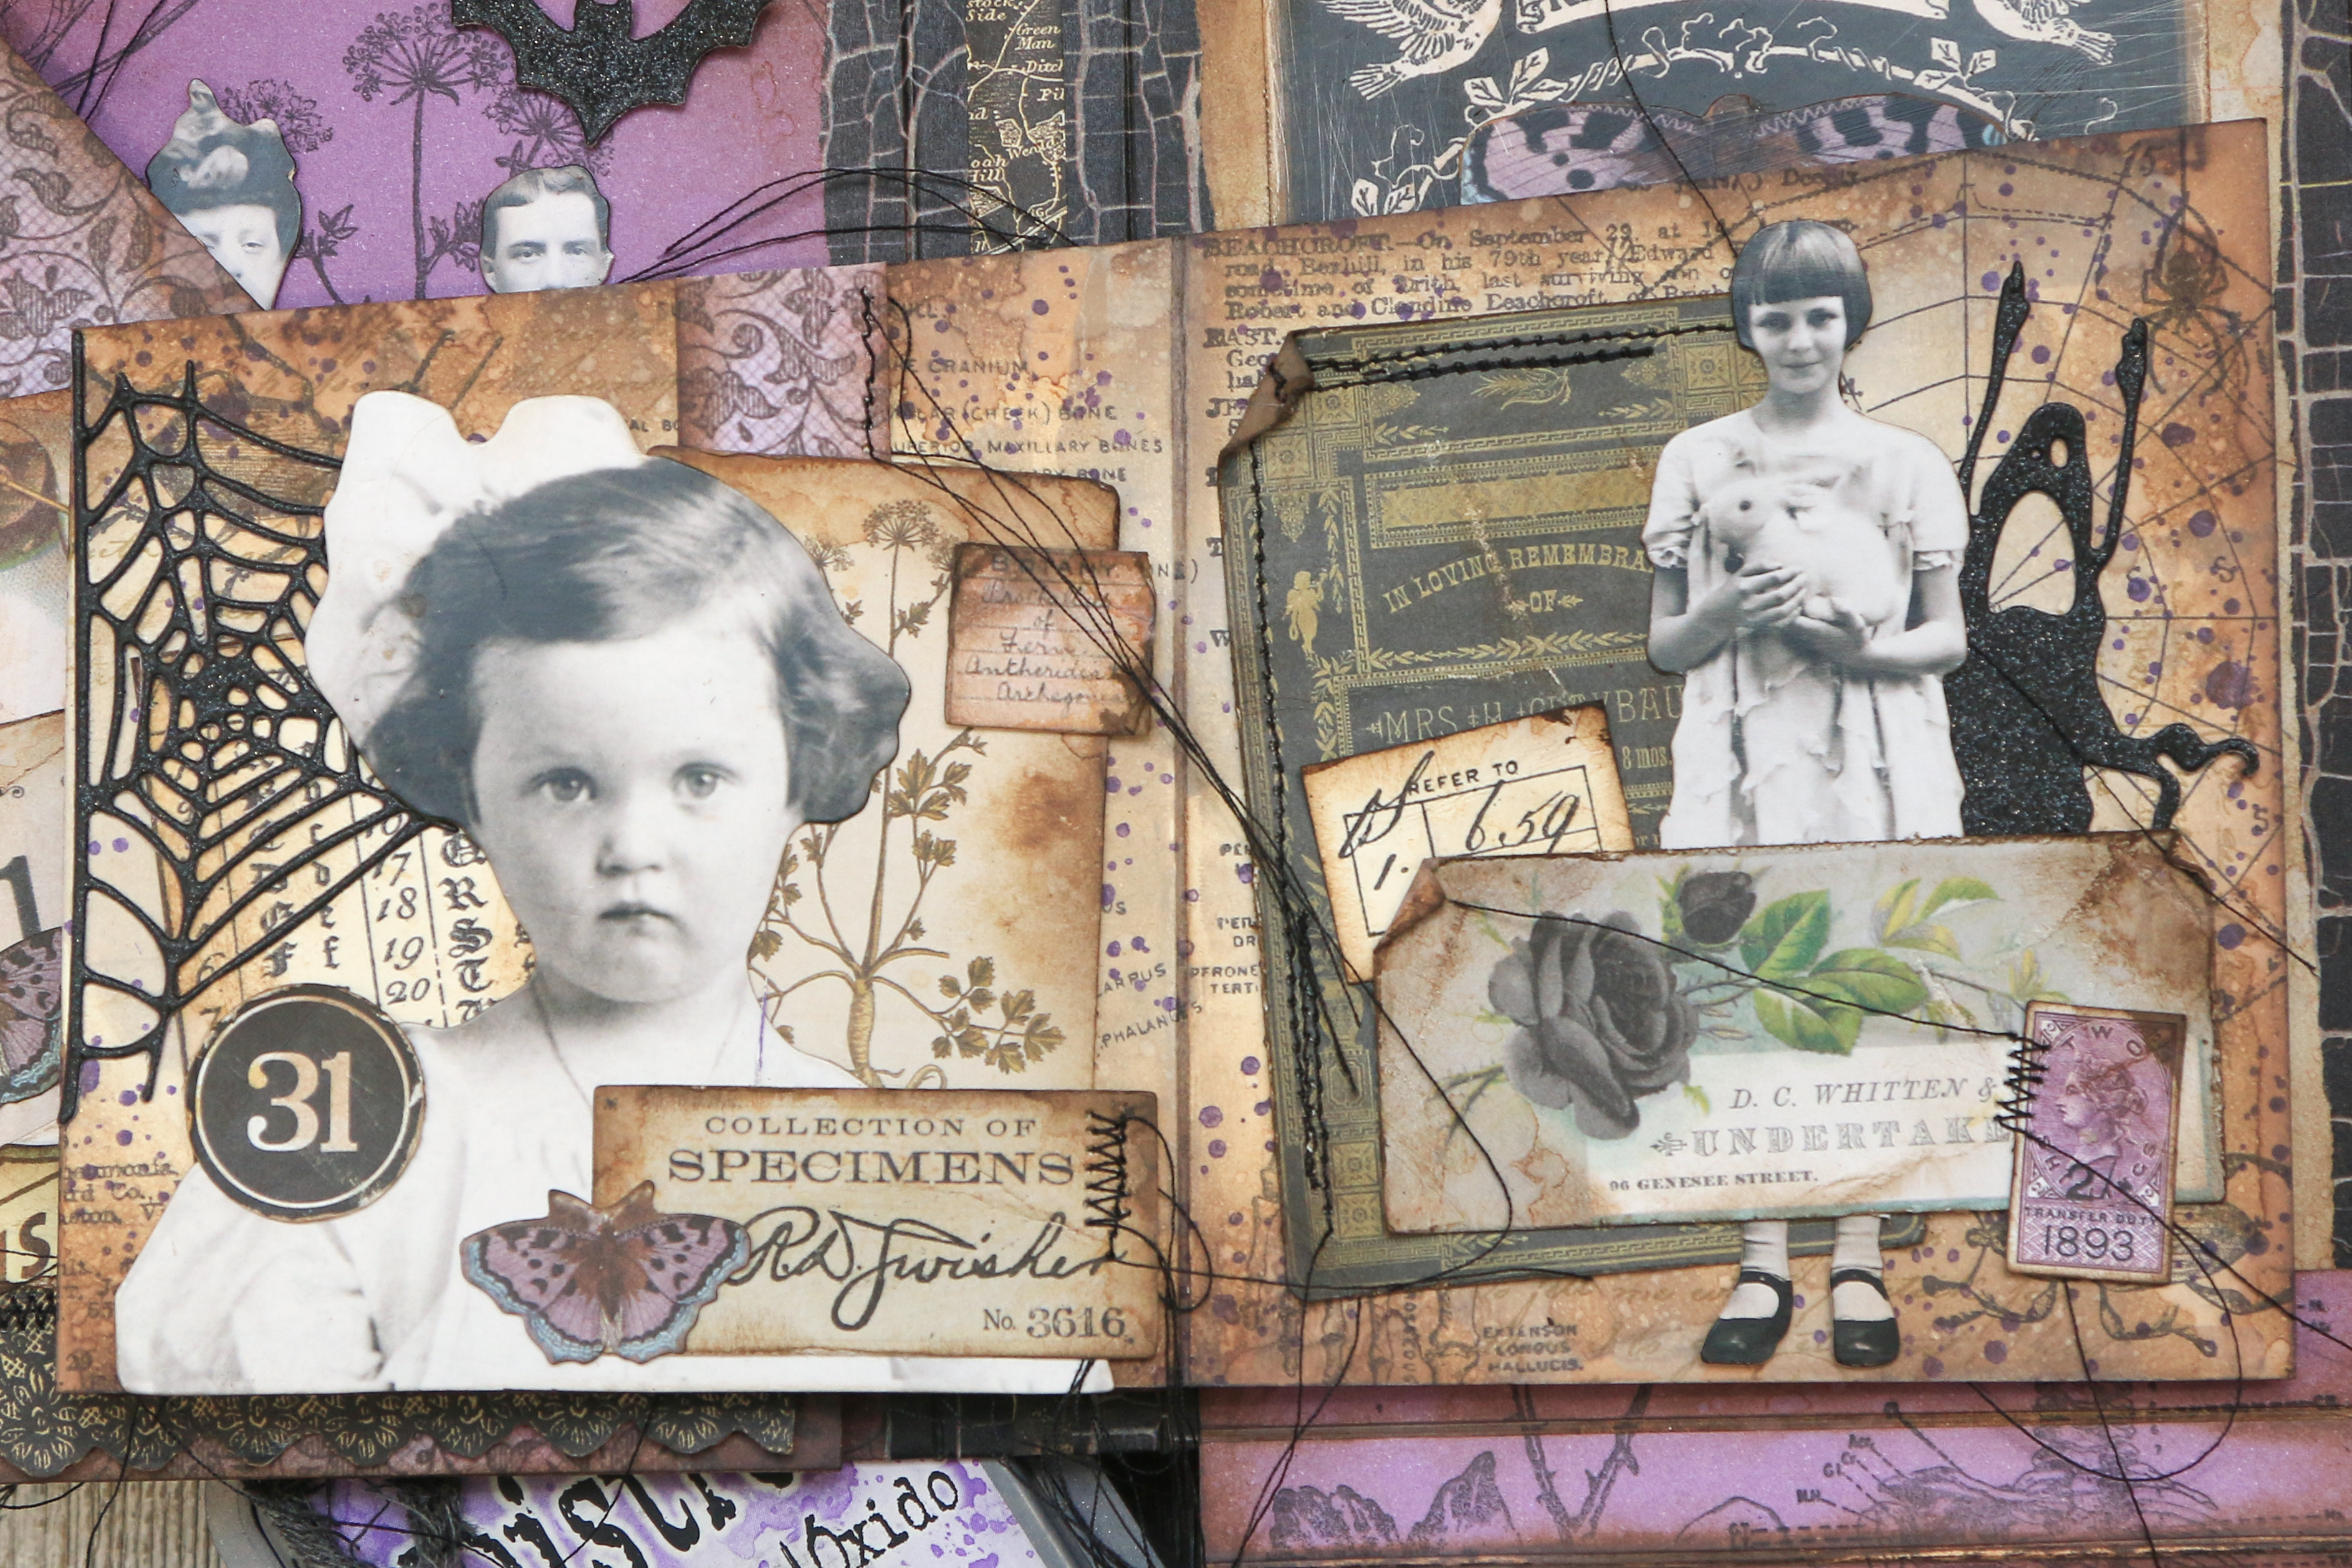
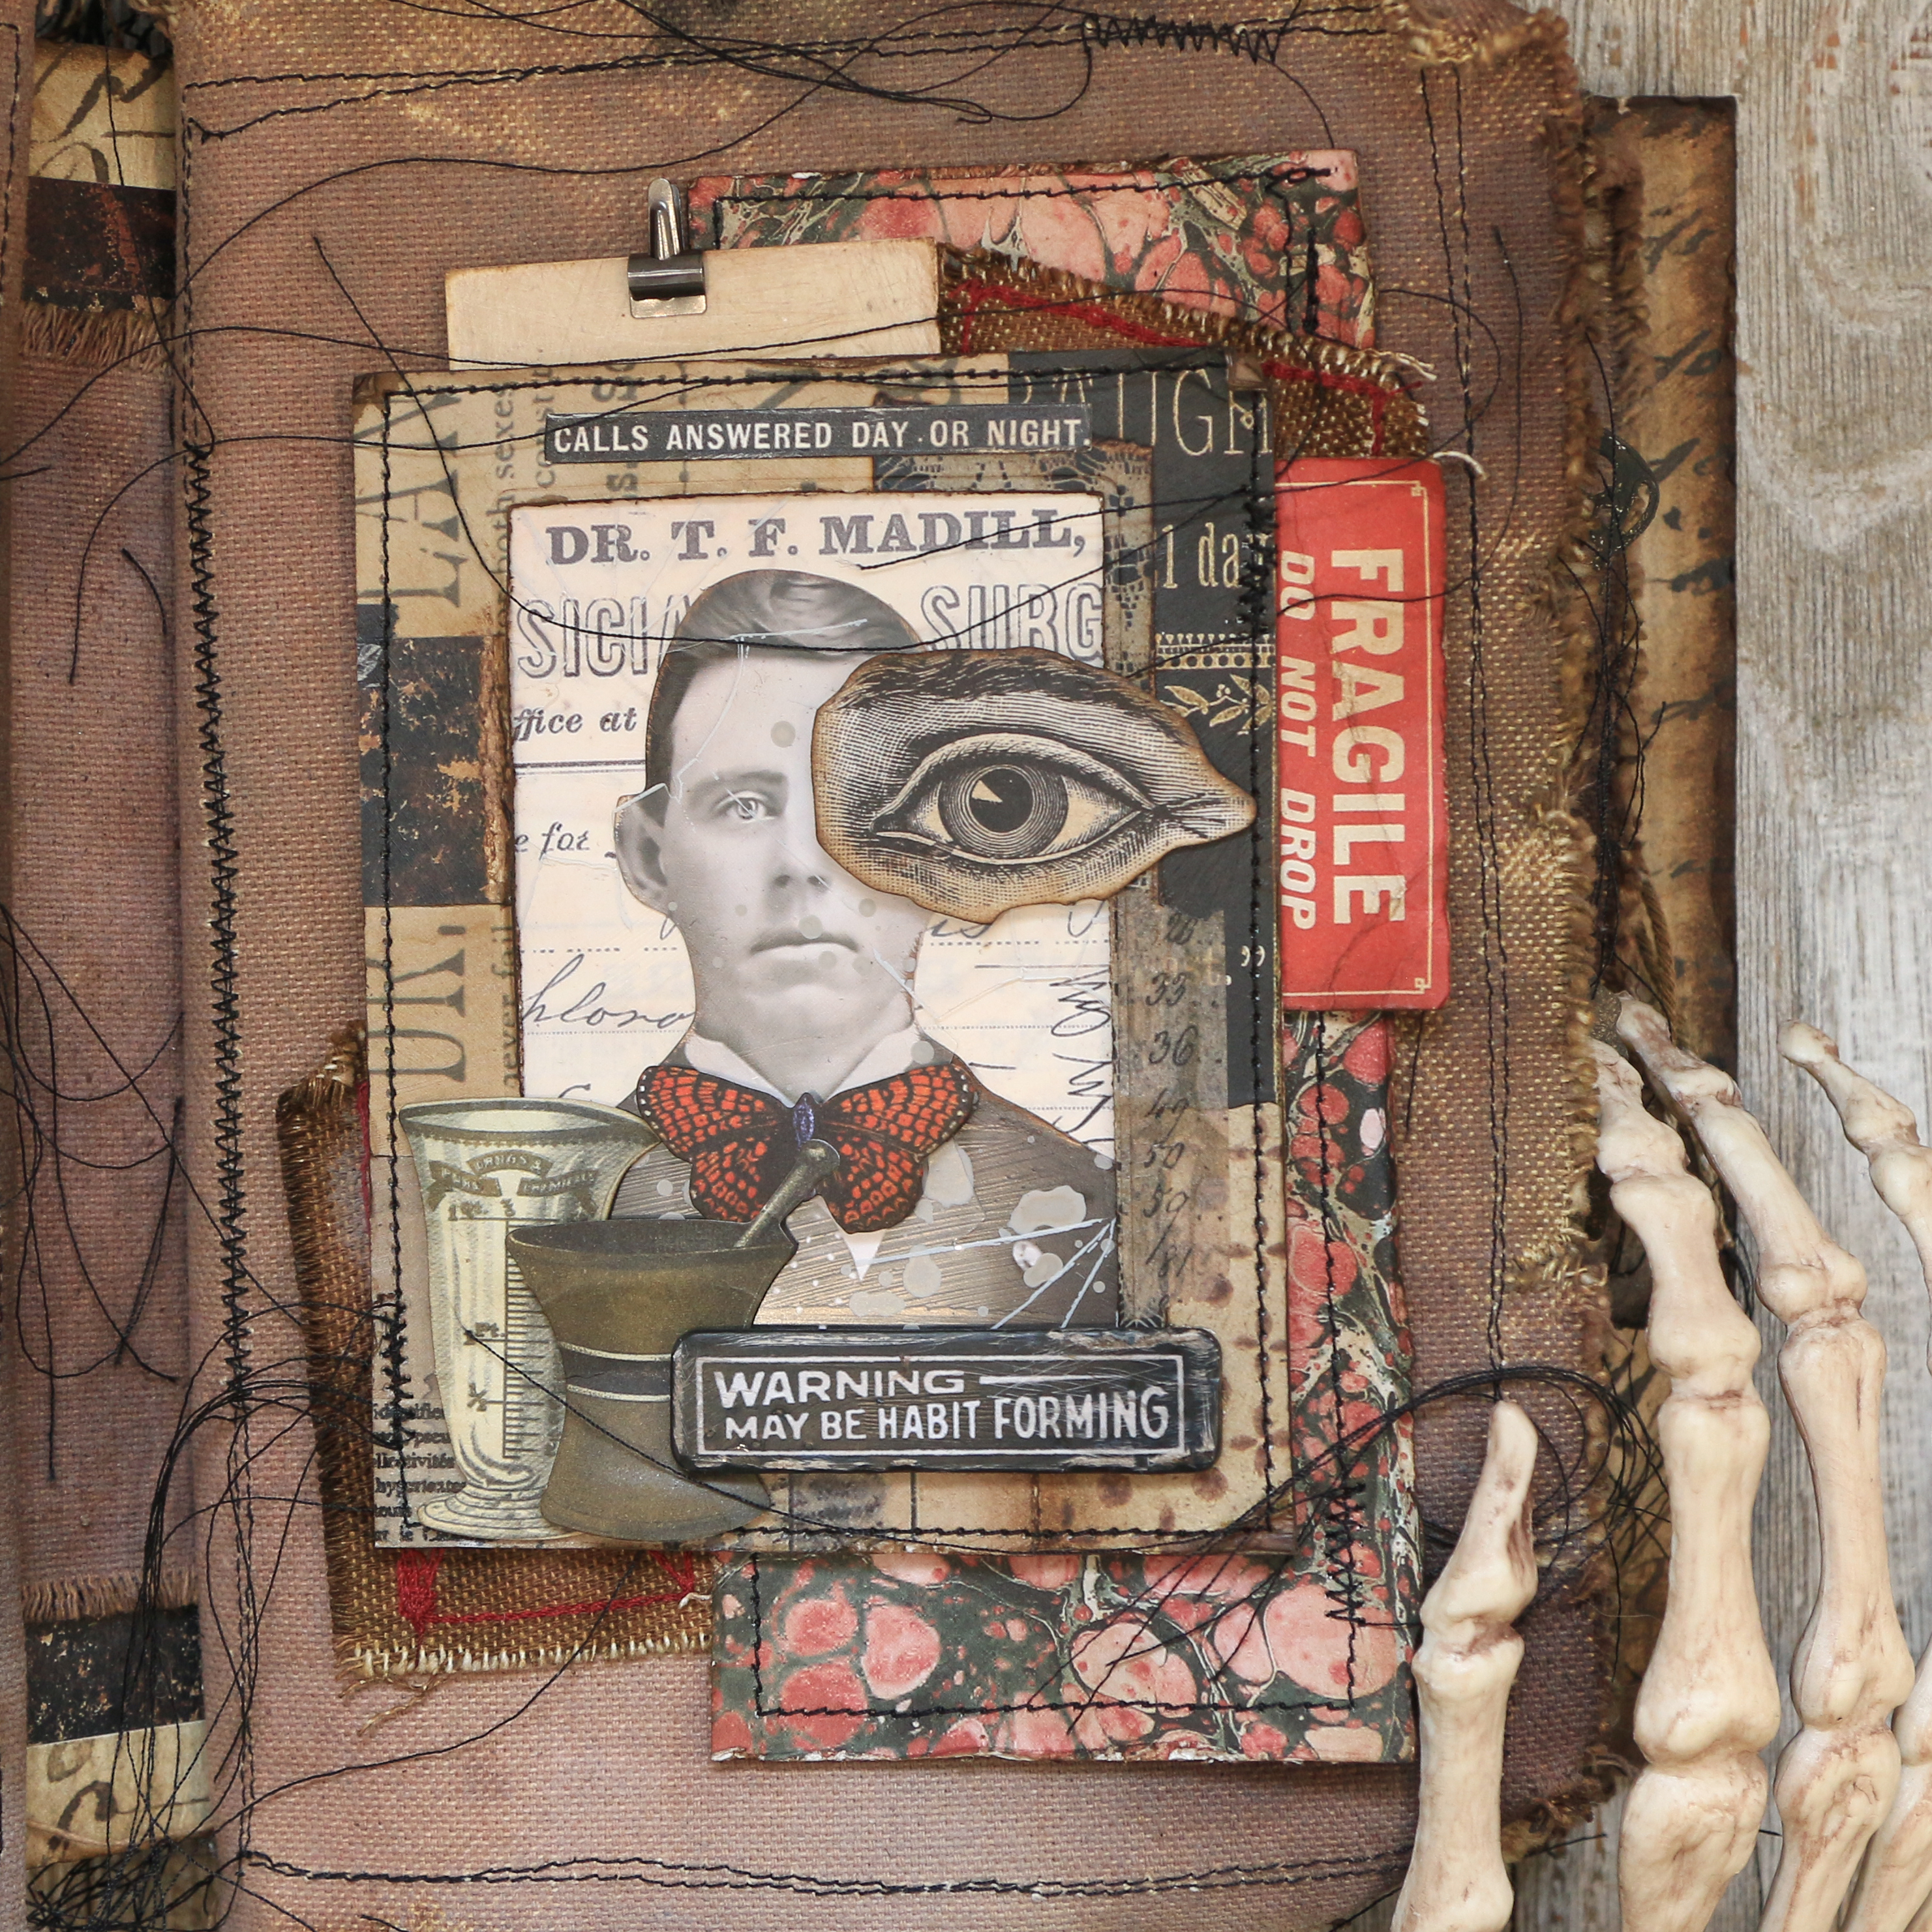
Marina Blaukitchen. I stamped the skull from the Tim Holtz Obscure Stamp Set onto a piece of Distress Mixed Media Heavystock with Black Soot Archival Ink. I then fussy cut the image. Next, I cut out the eye socket of the image. I then inked the edges with Ground Espresso Distress Oxide Ink. Next, attached the heads of some Paper Dolls on the backside of the skull. I then placed a piece of black glitter paper behind them.The skull was then adhered to a piece of purple paper from the Scrapbook.com Purples Paper Pad that I stamped with some images from the Tim Holtz Obscure Stamp Set using Black Soot Archival Ink. I then distressed the edges as I did the other ephemera. 


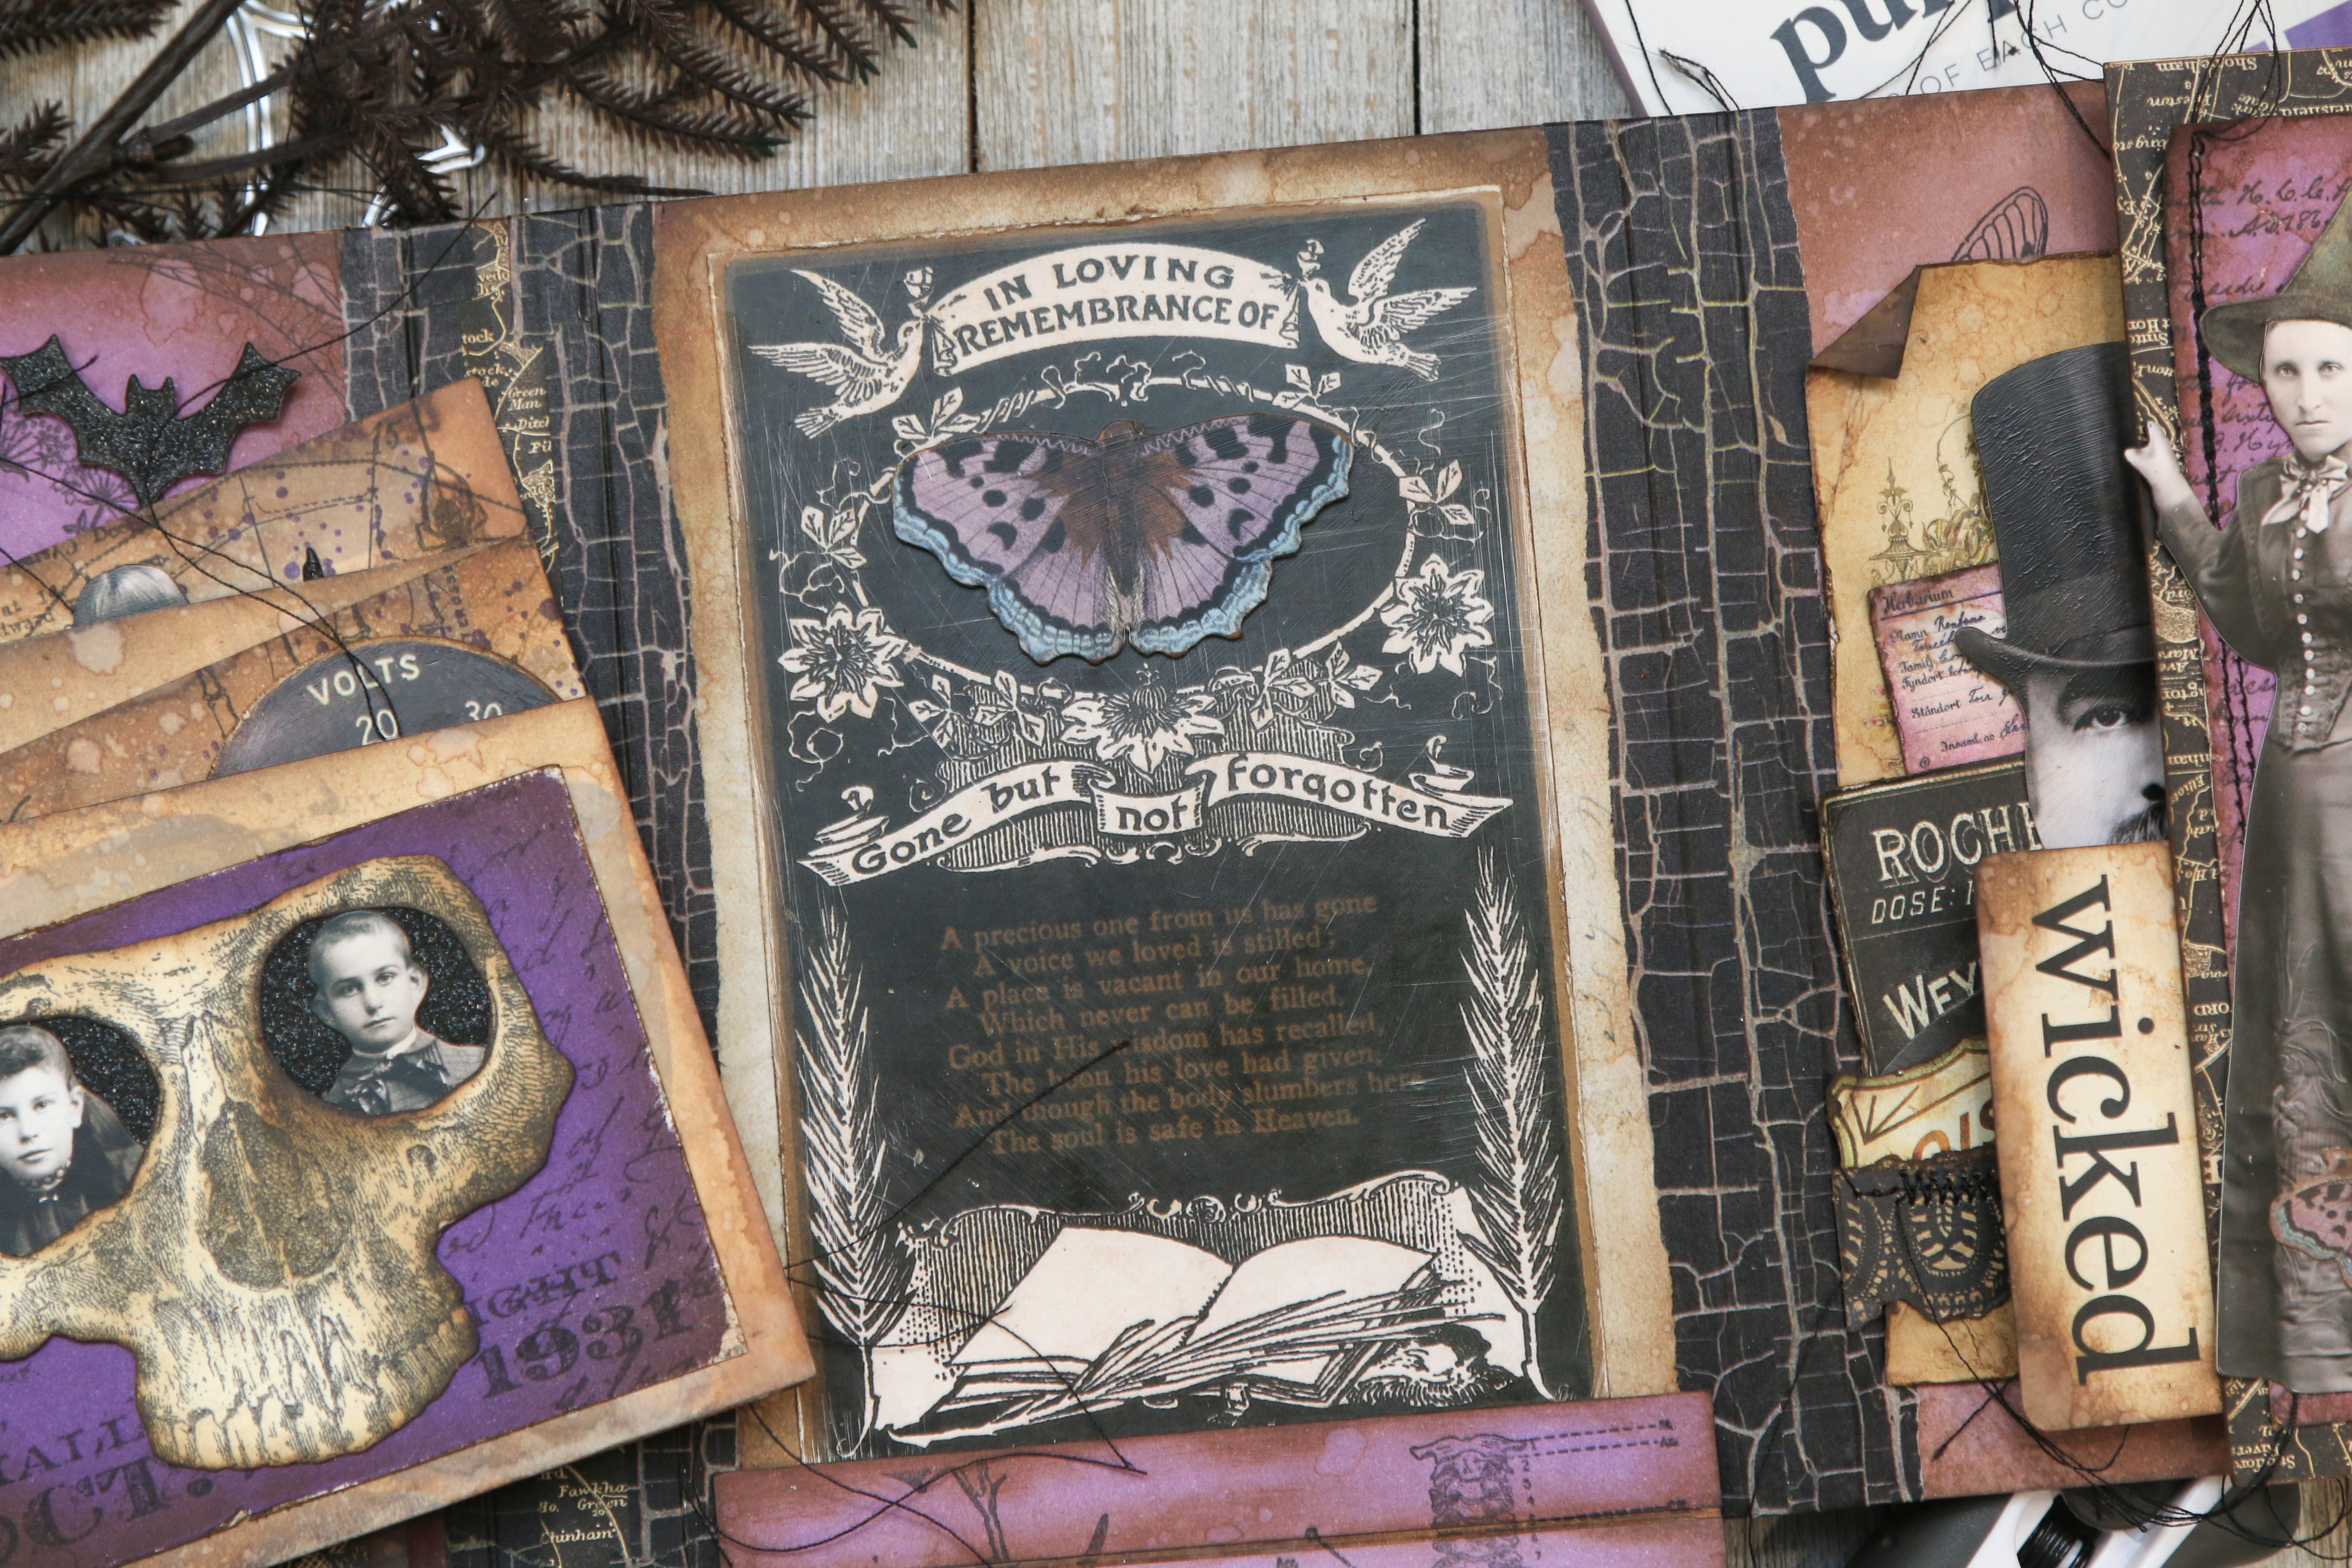
Here's a look at the inside of the flap that holds the accordion book. This is covered with purple paper from the Scrapbook.com Purples Paper Pad. Each section is cut and then adhered the folio. Before adhering them I inked the edges with Ground Espresso Distress Oxide Ink, spritzed them with water and dried them with my heat tool. After they were adhered I stamped them with various images from the Tim Holtz Examination and Dearly Departed Stamp Sets using Black Soot Archival Ink. I then layered on some ephemera and a black glitter spider die cut.


For the section behind the accordion piece, I adhered a Halloween Layer that I had distressed. I then added the purple butterfly. I loved that Tim included some purple elements in this years Halloween Ephemera pack!


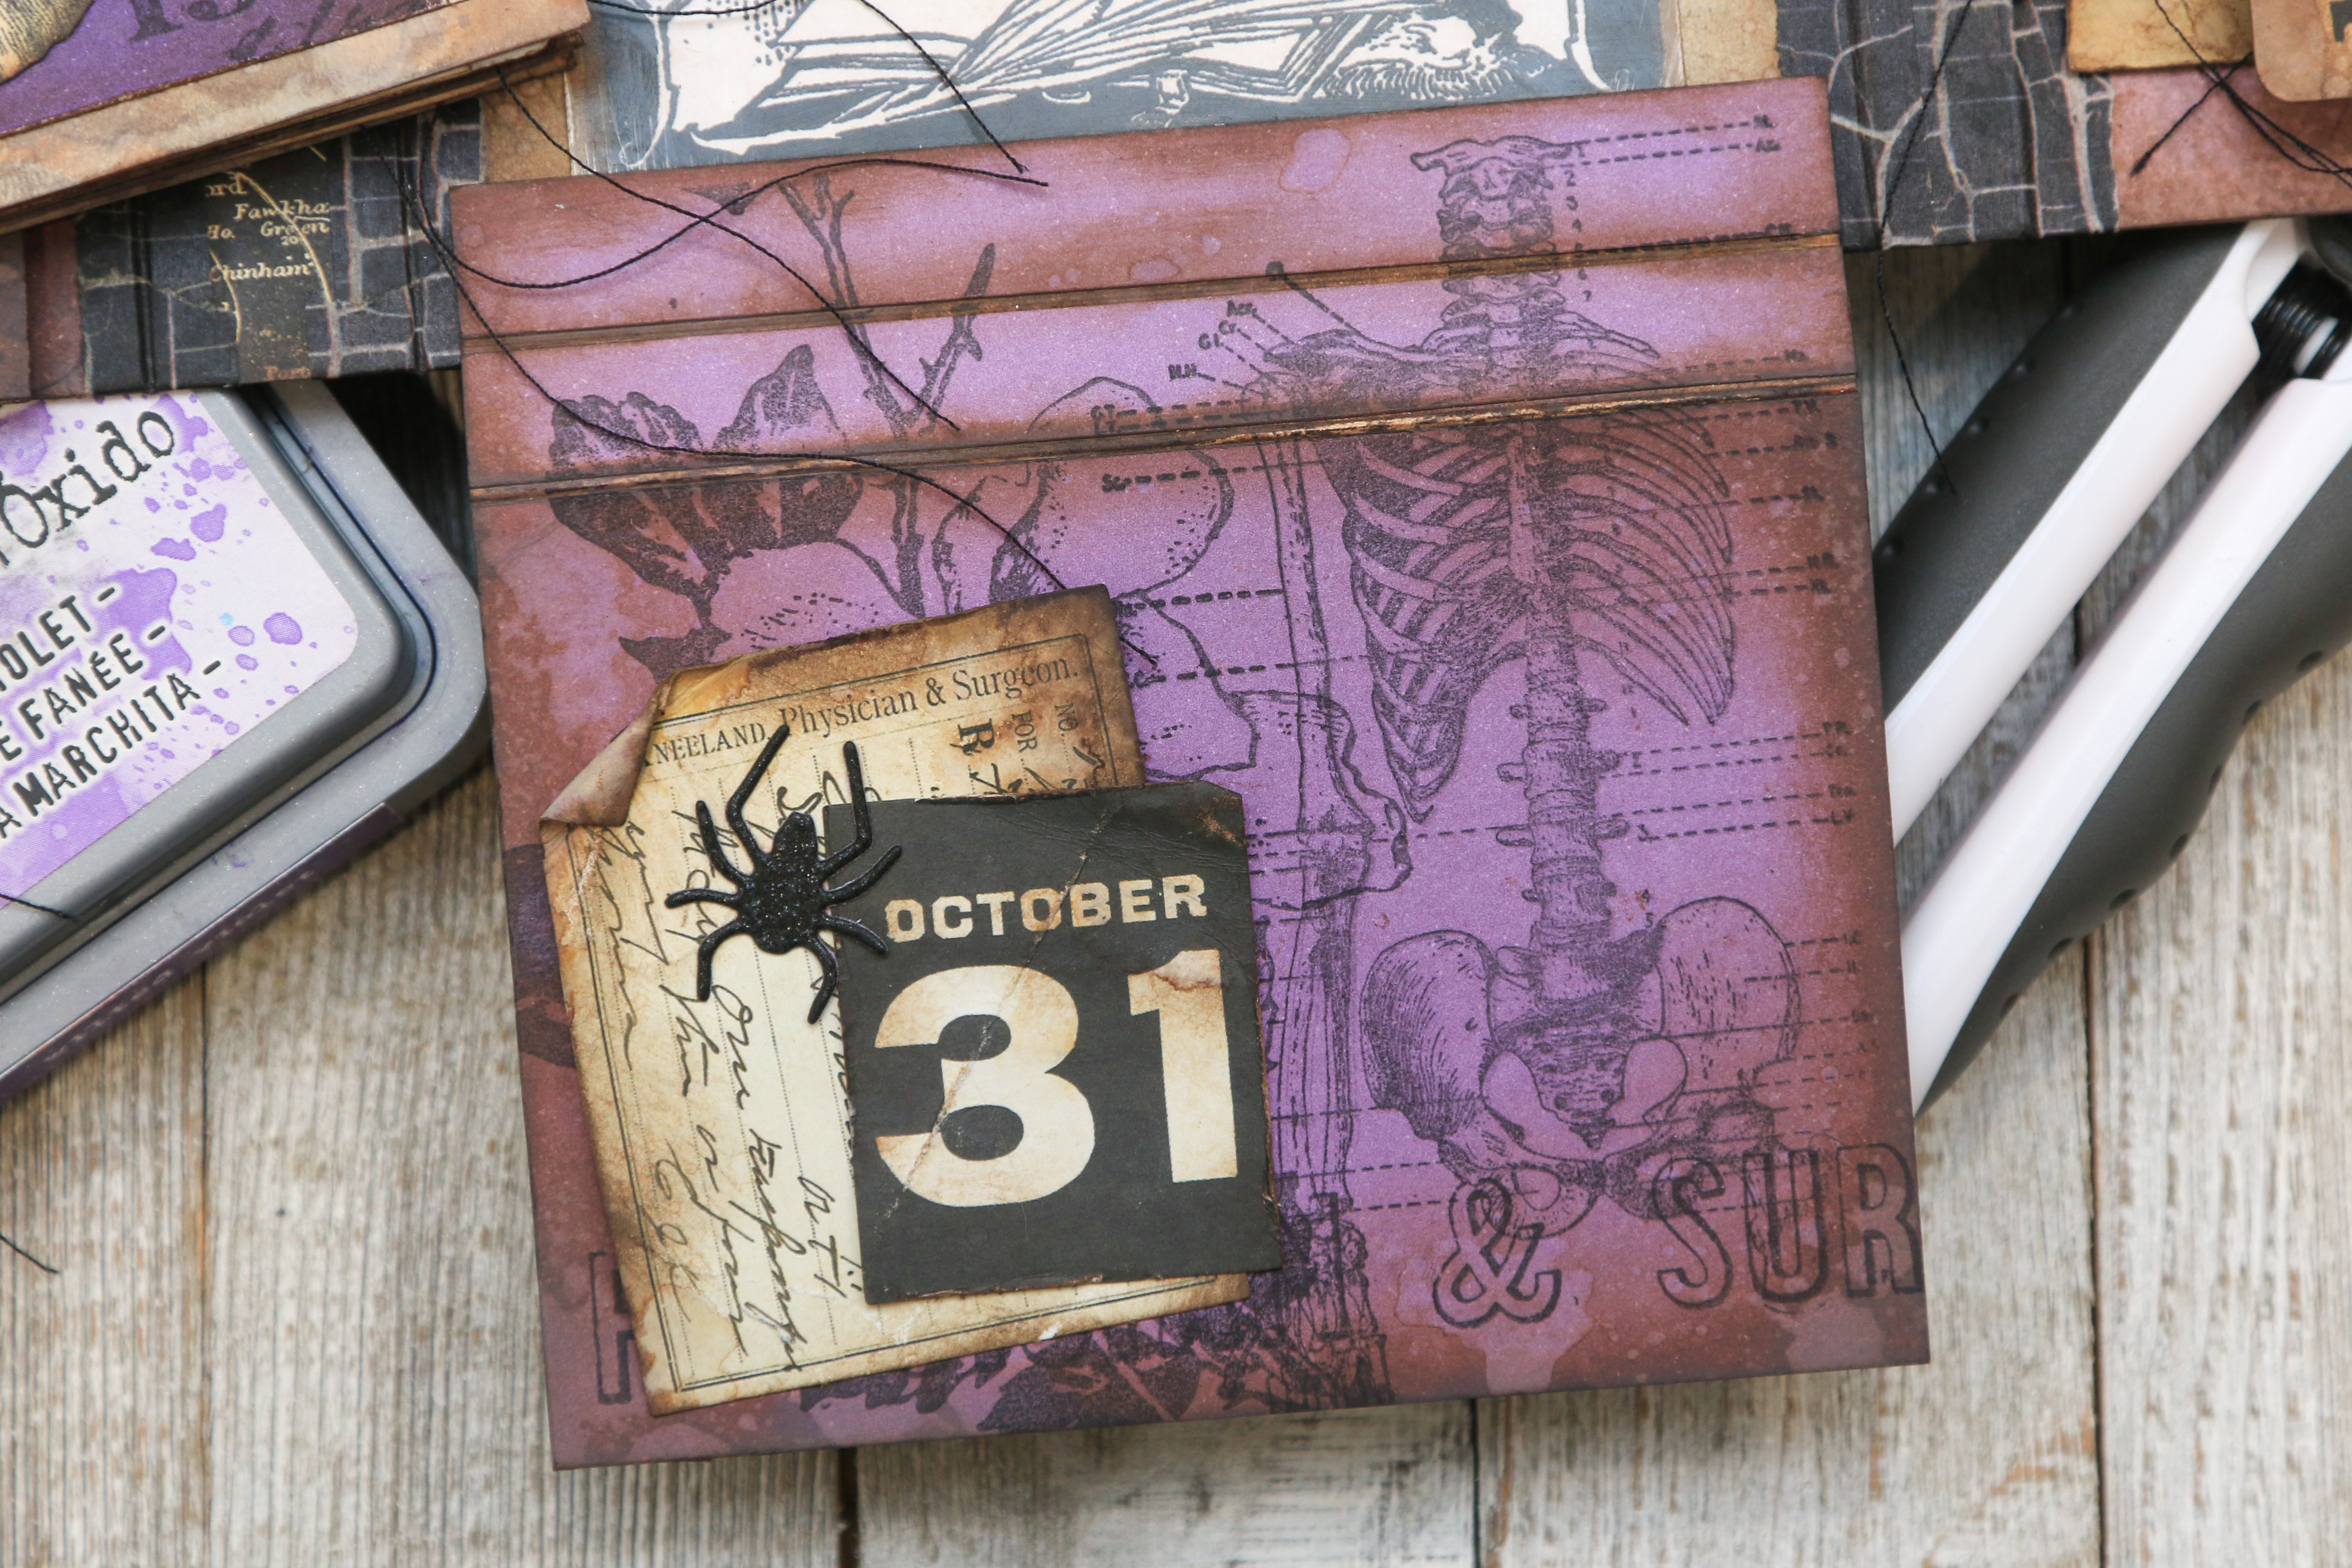
Now back to the accordion piece. For the inside of it, I created my own patterned paper by stamping various Tim Holtz Halloween Stamps here and there using Black Soot Archival Ink. Next, I added some stamped splatters using the splatter stamp from the Tim Holtz Examination Stamp Set and Villainous Potion Archival Ink. I then inked the edges with Ground Espresso Distress Oxide Ink, spritzed it with water and then dried it with my heat tool.

I stamped the paper instead of adhering more paper in an attempt to control the thickness of the journal. Once the background was completed, I decorated each page with a collage created with Paper Dolls, Portraits, Ephemera and die cuts.


Here is a look at the first page of the inside of the accordion piece. You might notice a little scrap of that purple patterned paper on this page and the third page. I didn't want any of it to go to waste! The Portrait used here is from the regular Paper Doll Portraits Pack.


This is the second page. The ghost is die cut from Scrapbook.com black glitter paper using the Sizzix Tim Holtz Frightful Things die set.


Here are the next two pages.


This is the third page. The spider web is cut from black glitter paper using the Sizzix Tim Holtz Frightful Things die set. This Portrait is also from the from the regular Paper Doll Portraits Pack.


Last but not least is the fourth page. The ghost is from the Sizzix Tim Holtz Frightful Things die set. The paper doll I used here is from a past Halloween Paper Doll package. I have quite the collection of these and I'm on a mission to use them up this year!


Now onto the last pages with this half page fold.


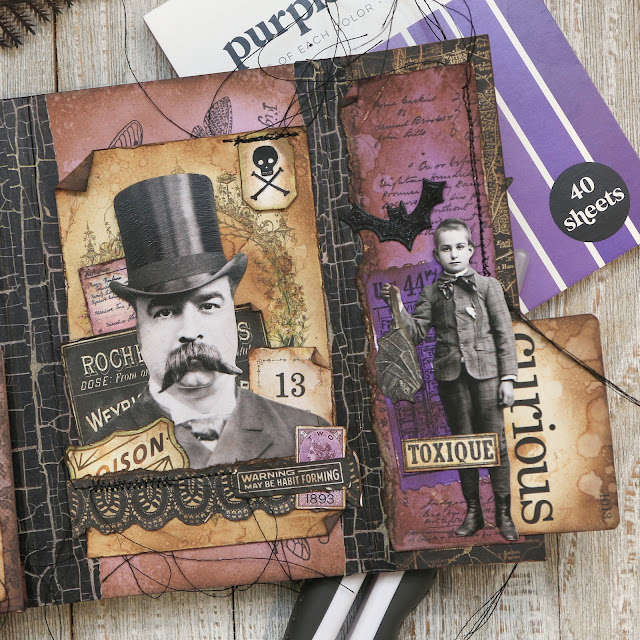
When I was playing around with what to put here, I had put the Paper Doll on top to make it appear as if she was opening it to reveal something lurking behind it. But I wasn't quite sure what to hide behind there. The gentleman was going to go elsewhere originally, but then I stuck him behind the fold and when I saw his eye peeking out, I knew I had found the spot for him.

The purple background behind him was created by stamping the script stamp from the Entomology Stamp Set with Black Soot Archival Ink onto a piece of purple paper from the Scrapbook.com Purples Paper Pad. I used a strip of the paper on this side of the fold and the other half on the inside of the fold. I finished off the Paper Doll by adding a witch hat from the Halloween Sticker Book. I sure would love to have a few more of these witch hats!


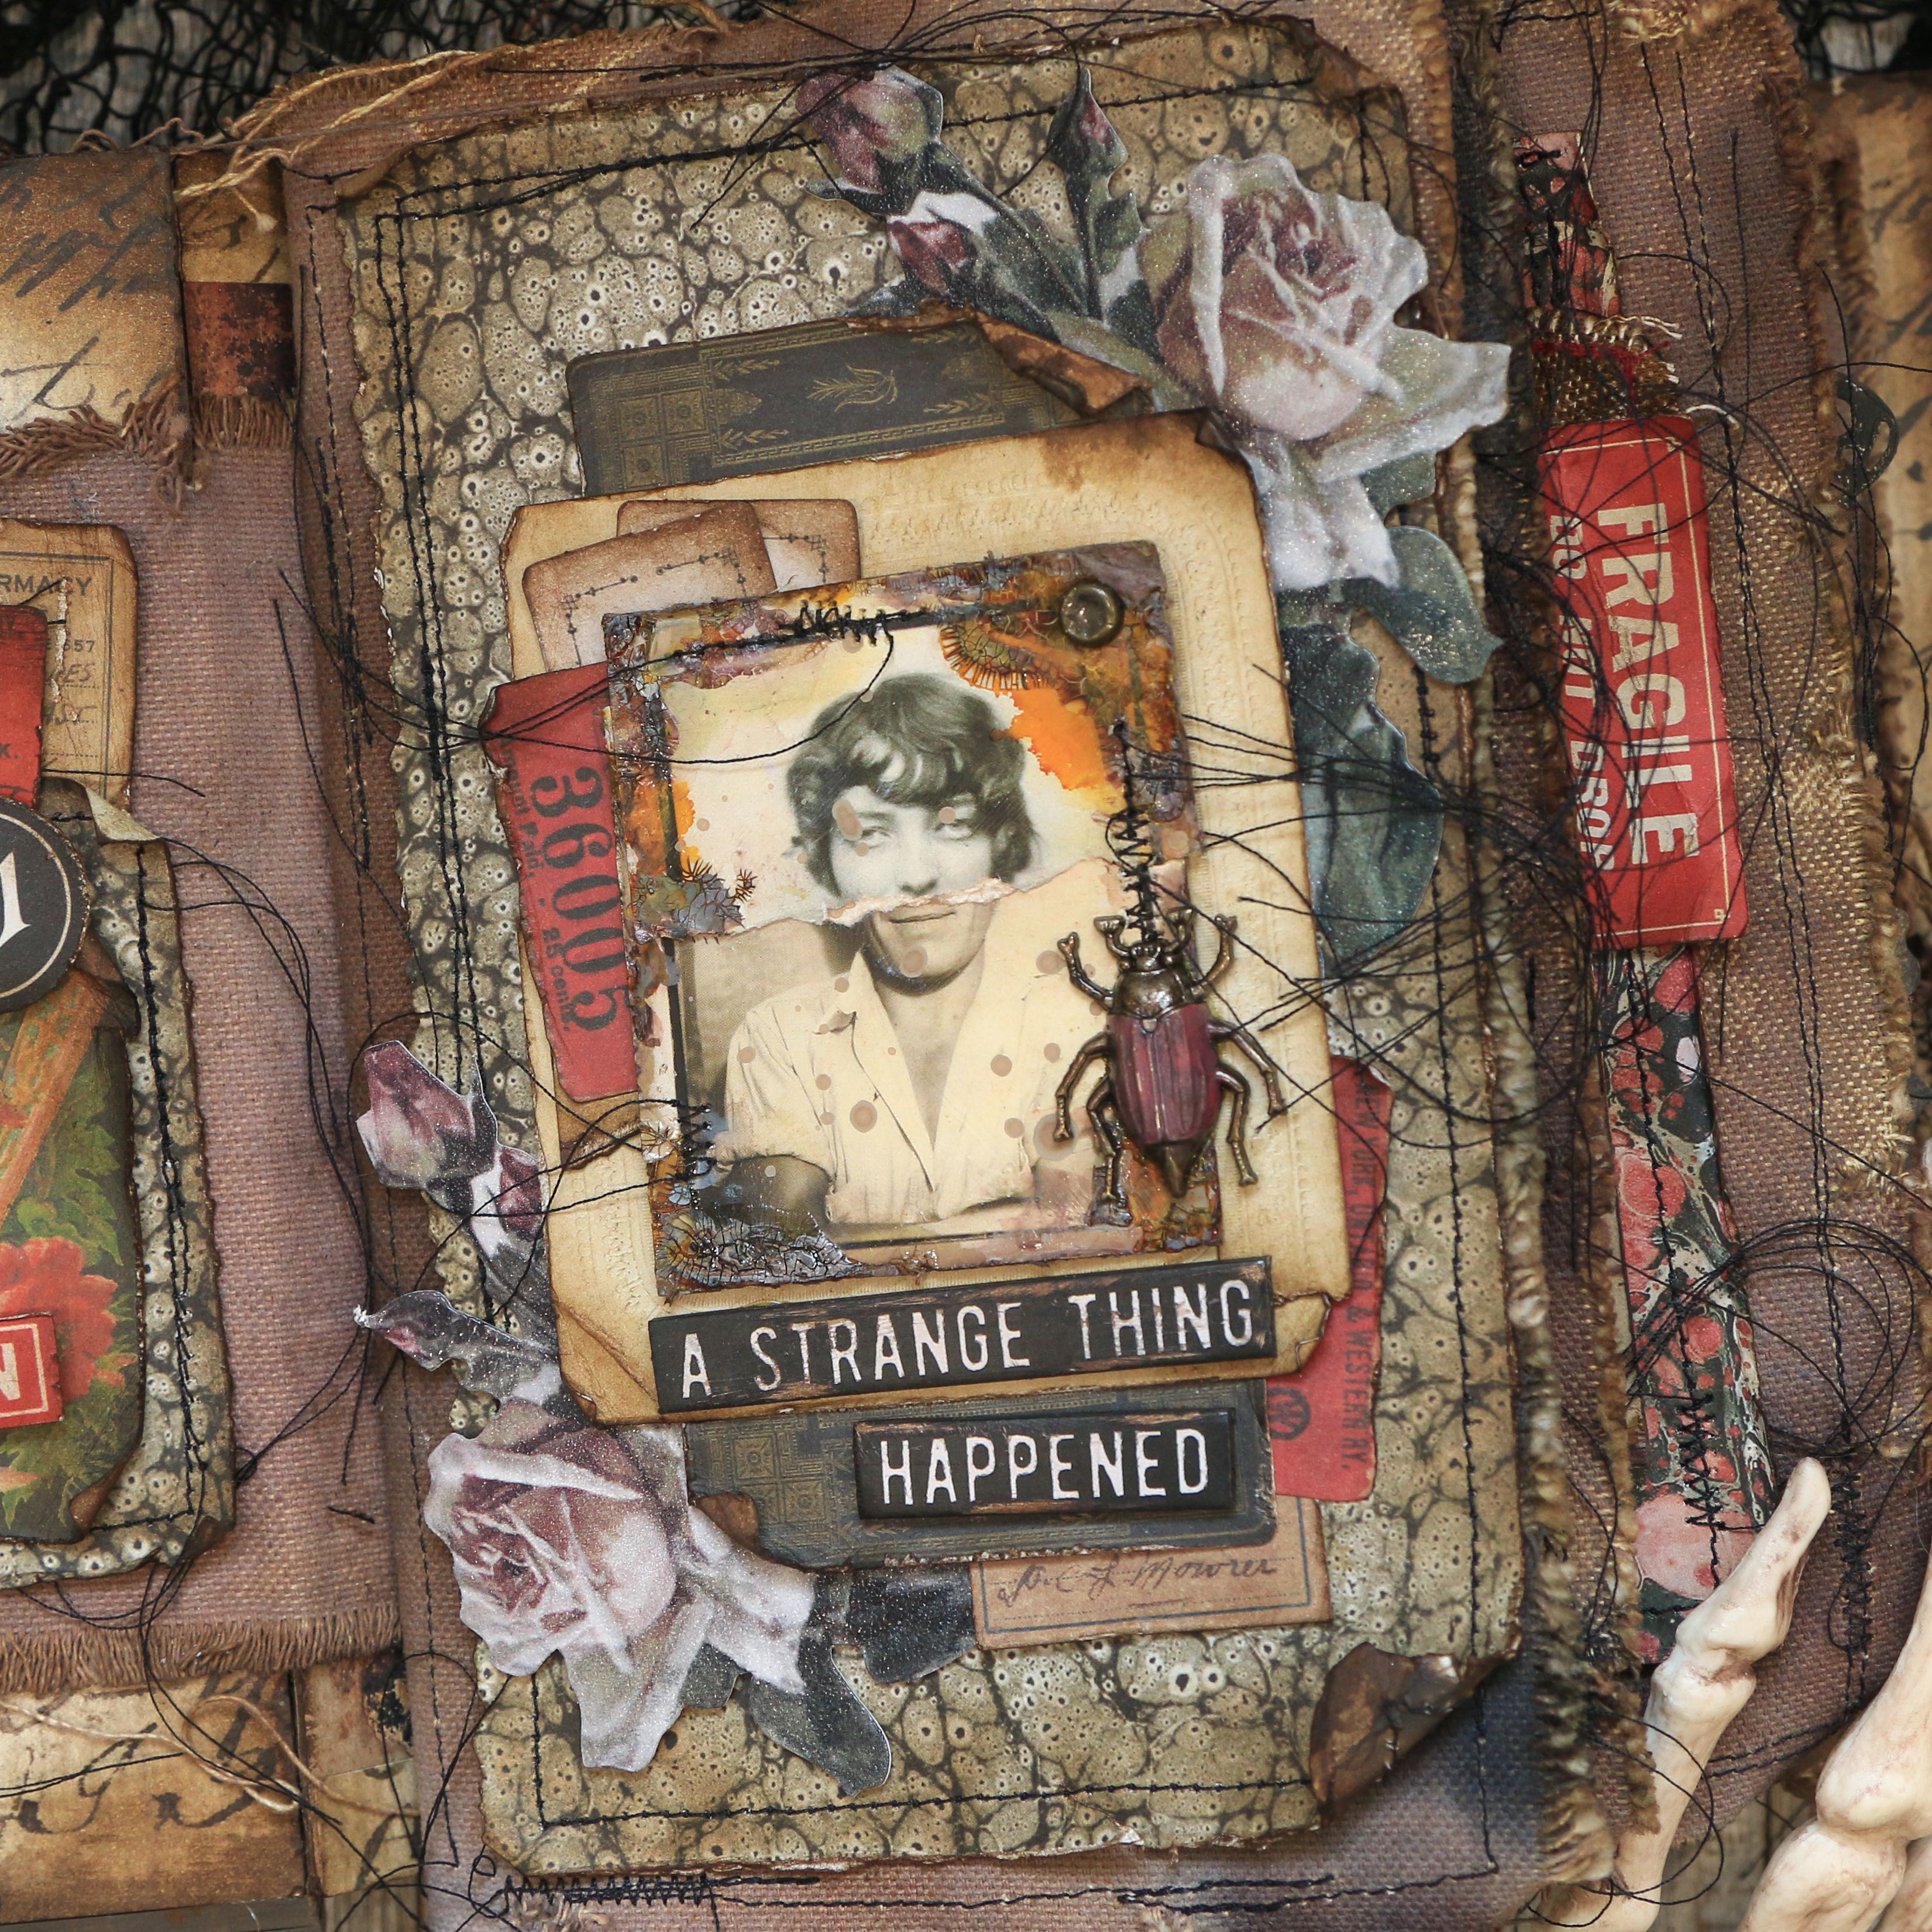
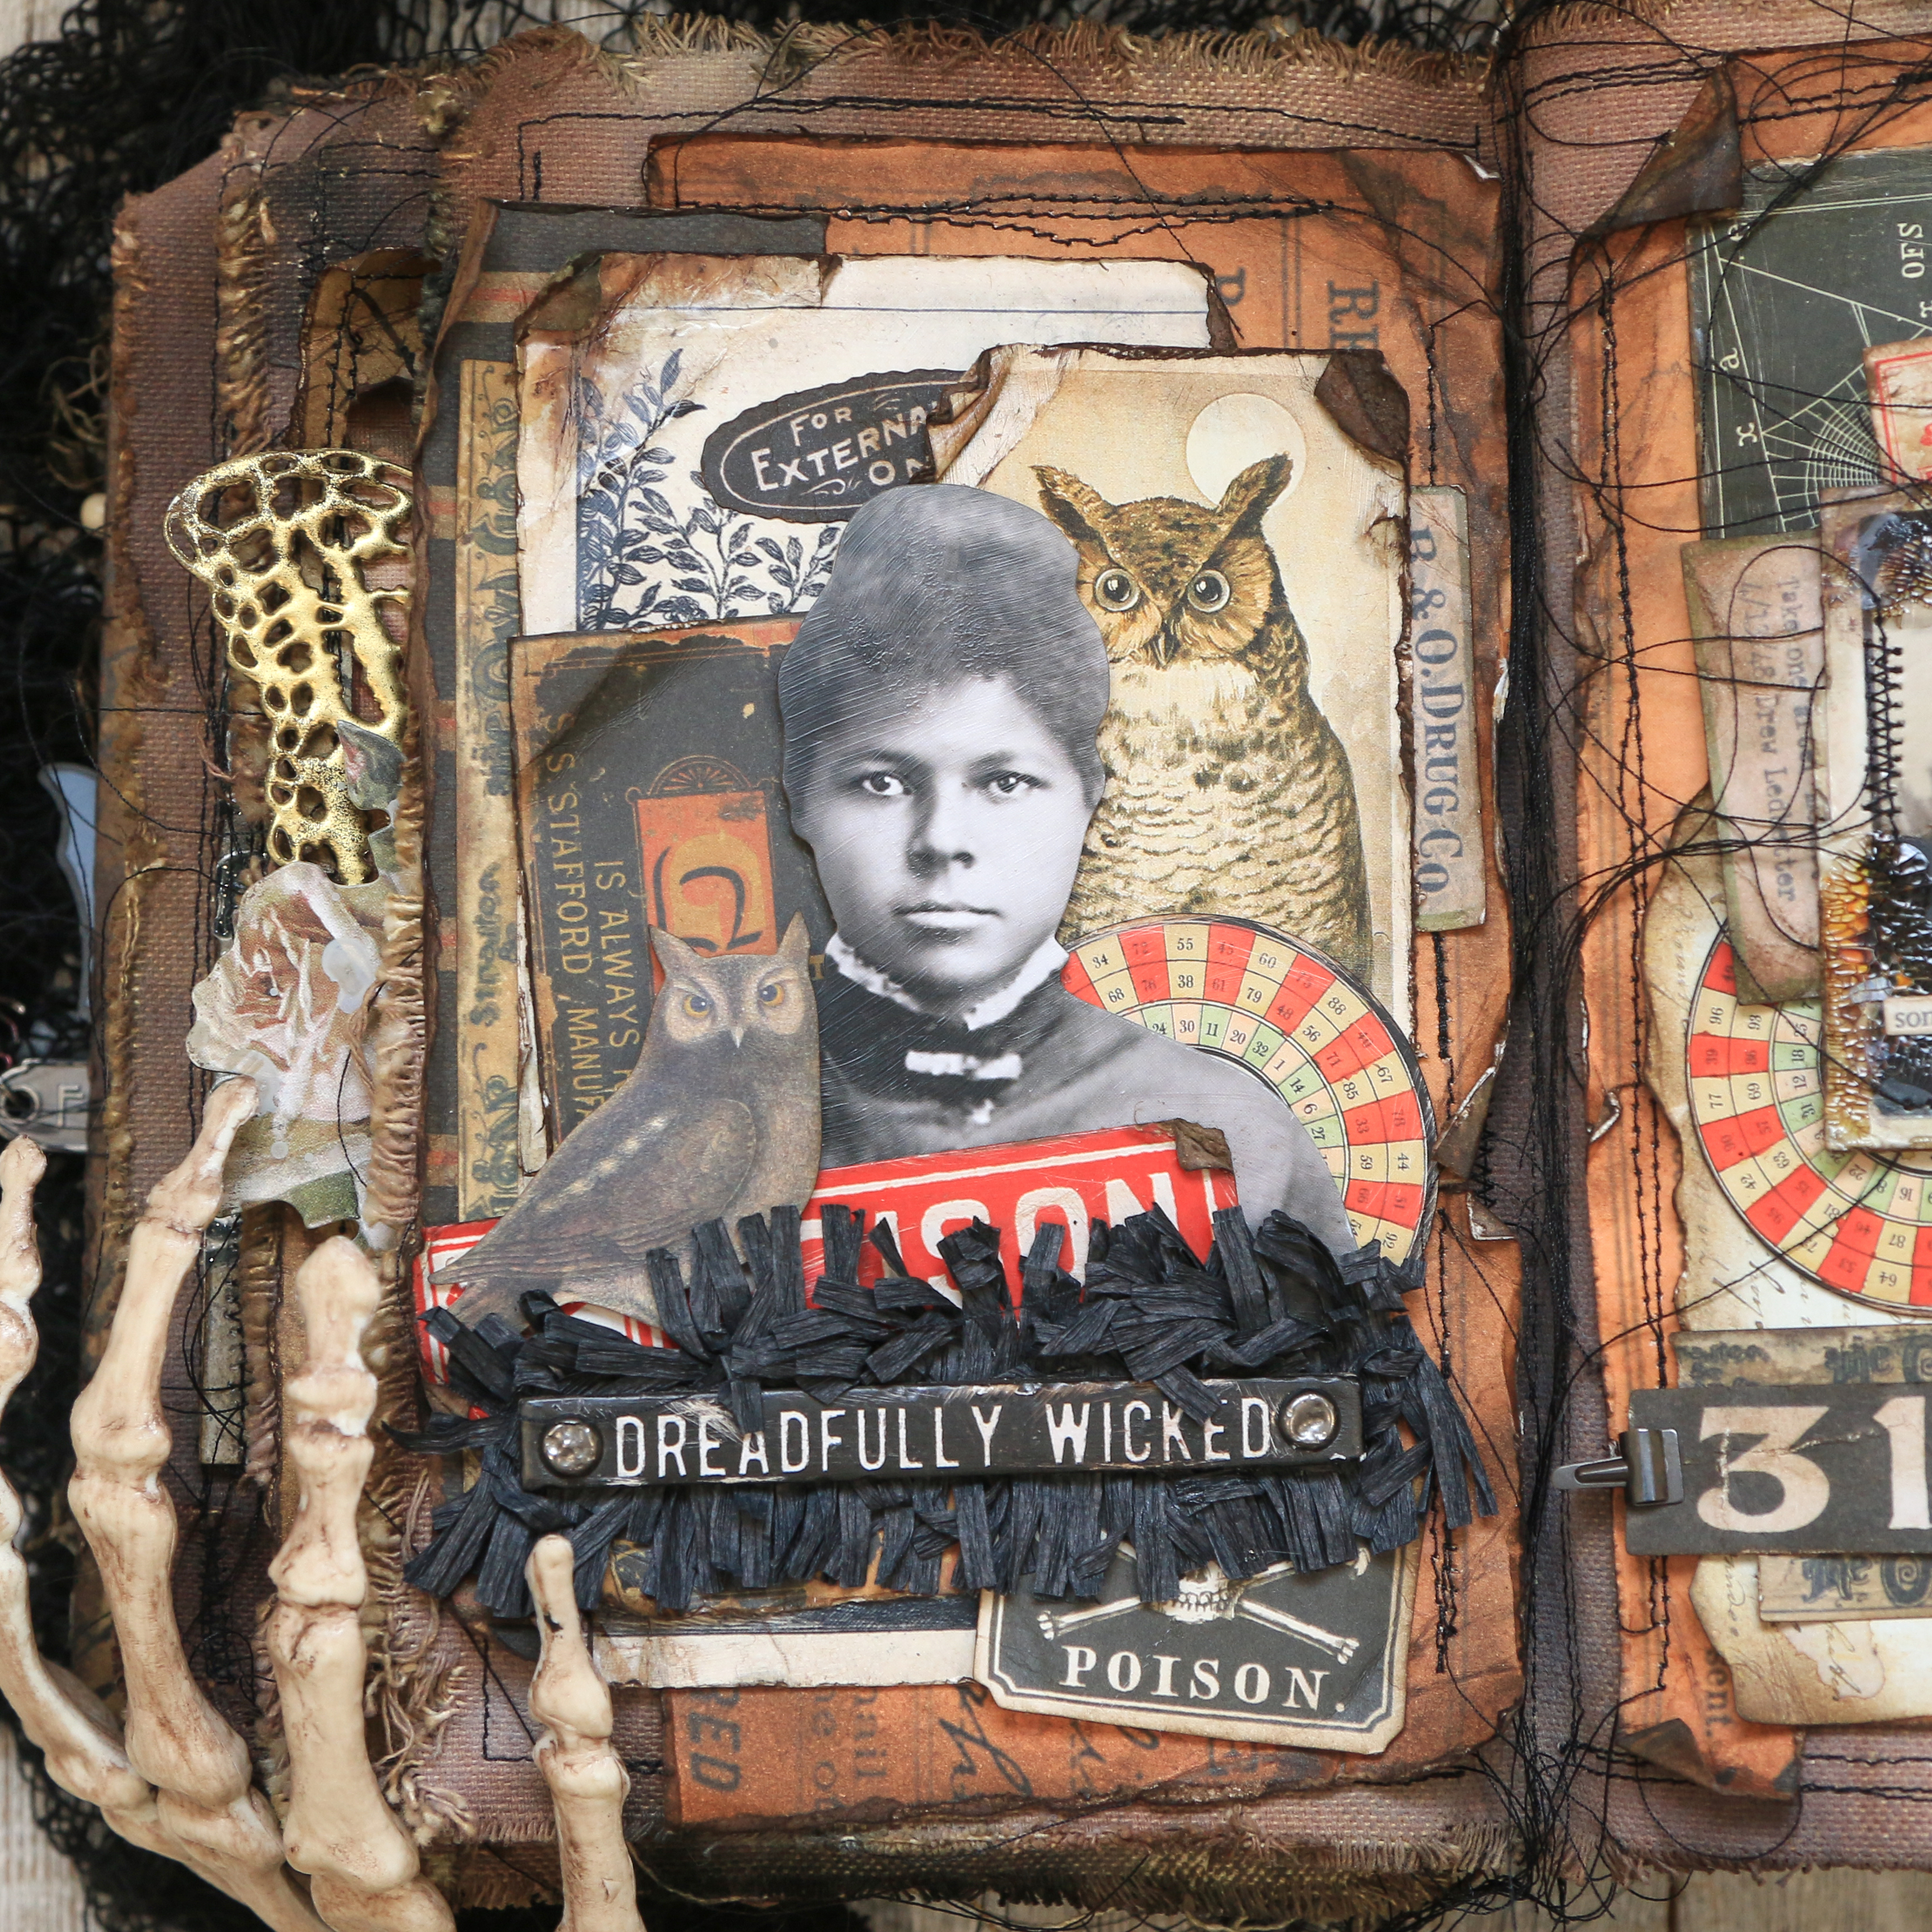
Once you open the fold you will find a gentleman Portrait from the 2023 Halloween Paper Dolls and Layers Package. I created another collage of ephemera around him, aging and distressing the papers as I did previously. I added the skull onto the label in the upper right hand corner using some Halloween Remnant Rubs, which are rub ons and are from a past Halloween release.

The purple paper behind the collage is another piece of purple paper from the Scrapbook.com Purples 6x8 Paper Pad. I created mine own purple patterned paper by stamping various insects and moths in Black Soot Archival Ink. The stamp sets I used are the Tim Holtz Entomology and Moth Study Stamp Sets. I stamped enough of this paper to create extra panels to use throughout the journal. One of them is used on the cover.


Inside the fold over section, I have another Paper Doll with more ephemera and a stamped label and ticket. The purple background behind him is the other half of the paper that is behind the witch.


When you close this section you will find this poisonous moth! I stamped this image with Black Soot Archival Ink onto Distress Mixed Media Heavystock paper using the Tim Holtz Specimen Stamp Set. I fussy cut, inked the edges with Ground Espresso Distress Oxide Ink and added some machine stitching to the body. I finished it off with a poison label and then adhered it with a strip of 1mm Double Sided Foam Adhesive. This added just a little bit of dimension without adding a lot of bulk.


Now to the back of the journal. I adhered a piece of patterned paper from the Halloween Backdrops. I then added the cigar box piece from the Halloween Paper Dolls and Layers package. The paper and the layer piece were both distressed like I shared previously. 

The cigar box originally had some blue tape in the upper left and right hand corners which obviously didn't go with my purple color theme. So to make it coordinate, I took a piece of Scrapbook.com Mint Tape and applied Wilted Violet Distress Oxide Ink to the tape. I then ripped it to size, inked the edges with Ground Espresso Distress Oxide Ink and adhered it to the piece. I also had a couple more scraps of that purple patterned paper that I layered in as well.

As for the eye peeking through. I actually tore a hole through the layer piece and applied Walnut Stain and Ground Espresso Distress Stain to the torn edges with the nozzle tip. You could also use a paint brush to do this. I then adhered the eye ephemera piece behind the opening to create the illusion of someone peeking out through the hole. The final touch was the addition of "the end" sticker from the Halloween Sticker Book.


DECORATING THE COVER

Last but not least is the cover. I saved it for last here because I actually created it last myself. Not sure how you might do this, but I always seem to do the cover last.


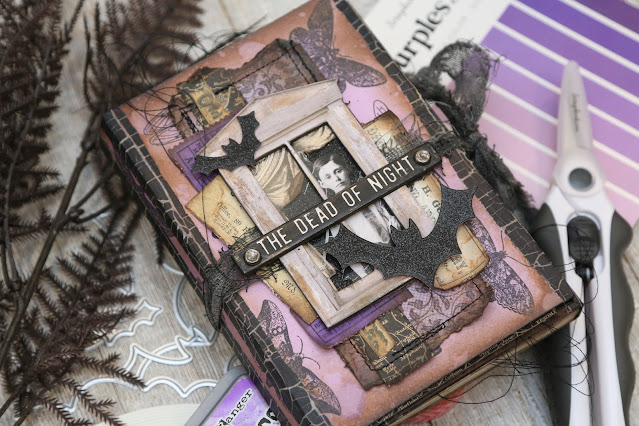
To begin, I took the window piece from the Halloween Baseboard and Transparencies and applied Distress Collage Medium to it to take down the shine. Once that was dry, I painted the edges of the window with Black Soot Distress Paint. Next, I sanded it here and there with a sanding disk to remove some of the printed design and then I applied some Ground Espresso Distress Oxide Ink to distress it a bit more.
Behind this I have several layers including one of the Shattered Window Transparencies, a curtain and a paper doll, both from the Halloween Layers and Paper Dolls. These are all layered onto a piece of black glitter paper.
To further embellish the window piece, I added a quote strip which I distressed in the same manner that I did the window. I then poked holes in each end and added some brads. I then used the Texture Hammer to distress them.

Next, I adhered another piece of the custom purple patterned paper as the background. I then took some of the last scraps of the purple and black patterned paper that I used inside the journal and added them. I also layered in some ephemera pieces including another stamped purple ticket.

Before I adhered the window, I took a piece of Mummy Cloth and sprayed it with Black Soot Distress Spray and dried it. I then wrapped this around the journal so that it would tie on the right side. I then adhered the window on top of the Mummy Cloth. The final touch was the addition of the die cut black glitter paper bats!


Thanks so very much for stopping by! I hope you enjoyed a peek into my Purple Halloween Junk Journal. I'm thinking an orange one would be quite fun as well!

SUPPLIES

Below you can find the supplies I used to create this Purple Halloween Junk Journal. I used a variety of Tim Holtz Halloween Idea-ology products from 2023 to create this journal. Because these are a seasonal release, once they sell out they are no longer available. When you shop through the links below, I receive a small commission from Scrapbook.com. These links are at absolutely no cost to you and the commission I receive helps me cover the costs of my blog and other expenses, which allows me to continue to provide you with FREE inspiration and tutorials. If you want to learn more about what an affiliate link is, you can see my full affiliate and product disclosure statement here. Thank you so much for your love and support!

Fluffy Grunge Halloween Journal

Hello there! I'm still in Halloween crafting mode and I just completed my take on a Fluffy Grunge Halloween Journal, inspired by the talented Luise Heinzl. If you aren't familiar with her, she is a junk journal and digital printable paper designer and creator and also a fellow Maker for Tim Holtz. Make she you check out her YouTube channel for loads of inspiration! She created a Fluffy Grunge Halloween Journal for the recent Tim Holtz Halloween Idea-ology release and my mind was blown away when I saw it and I knew I had to create something similar. From the front to the back cover and every page in between I was so inspired. It was also a great excuse for me to use up all of the Tim Holtz Halloween Idea-ology that I seem to hoard every year!

Fluffy Grunge Halloween Journal by Juliana Michaels Tim Holtz Halloween Idea-ology

Below, I'm sharing a look at the Fluffy Grunge Halloween Journal I created. I've also put together a flip through that you can view over on my YouTube channel where I share a bit more about the journal and how it came together.


I don't got into much detail on all the techniques however, because I followed a lot of the techniques Luise shared in her videos. She has a playlist of videos on her YouTube channel where she shares how she created everything from the cover to the inside pages, so make sure you check those out. Because of this, I didn't see the need to rehash it all myself. Also during the process of making this, I wanted to just enjoy the making process and not have to worry about filming everything.

After I filmed the flip through, I thought it might be nice to have some still photos for reference if you are wanting a closer look at the cover and inside pages. And of course, if you do have any questions, please feel free to reach out to me.

So without further ado, here is my Fluffy Grunge Halloween Journal!

THE COVER

Fluffy Grunge Halloween Journal by Juliana Michaels Tim Holtz Halloween Idea-ology

Here you can see the cover I created. I was greatly inspired by the one Luise created. Above the door is open so you can see the witch who has been locked away and below the door is closed.


These are some detail images of the front cover.


PAGE NO. 1


PAGE NO. 2


PAGE NO. 3


PAGE NO. 4


PAGE NO. 5


PAGE NO. 6


PAGE NO. 7


PAGE NO. 8


PAGE NO. 9


PAGE NO. 10


PAGE NO. 11


PAGE NO. 12


PAGE NO. 13


PAGE NO. 14


PAGE NO. 15


Thanks so much for stopping by and taking a look at my Fluffy Grunge Halloween Journal. I hope you are inspired to create your own!

Fluffy Grunge Halloween Journal by Juliana Michaels Tim Holtz Halloween Idea-ology

SUPPLIES

Below you can find the some of supplies I used to create this Fluffy Grunge Halloween Journal. I used a variety of Tim Holtz Halloween Idea-ology products from 2023 and years past to create this journal. Because these are a seasonal release, once they sell out they are no longer available. Below are just some of the supplies I used that are still available. I highly recommend going through your stash and working with all the awesome Halloween products you may already have!
When you shop through the links below, I receive a small commission from Scrapbook.com. These links are at absolutely no cost to you and the commission I receive helps me cover the costs of my blog and other expenses, which allows me to continue to provide you with FREE inspiration and tutorials. If you want to learn more about what an affiliate link is, you can see my full affiliate and product disclosure statement here. Thank you so much for your love and support!

Subscribe