Showing posts with label Seth Apter. Show all posts

Celebrate 25 Years of Sizzix: A Grungy Industrial Birthday Card with Seth Apter Word Wafers Birthday Die Set

The Sizzix 25th Birthday celebration continues, and today I'm sharing some inspiration using the Word Wafers Birthday die set designed by Seth Apter. In true Seth Apter fashion, these dies have a wonderful grunginess built right in, making them absolutely perfect for creating a grundy industrial birthday card.

Celebrate Birthday Card by Juliana Michaels featuring Sizzix Seth Apter Word Wafers Birthday Die Set for Sizzix 25th Birthday

Creating the Background

For this card, I did something I don't normally do — I dug into my scrap bin and found a background I hadn't used yet. Because of that, I'm not 100% sure of the exact colors, but I believe it started with a piece of black cardstock. I used a brayer to lightly apply acrylic paint in what look to be Distress Paint colors of Rusty Hinge, Salvaged Patina, and possibly Walnut Stain.

I took that piece of cardstock and embossed it with the Seth Apter Dot Matrix embossing folder, then rubbed Sizzix Luster Wax in Gold over the surface to bring out the textured design and enhance the distressed effect.

Creating the Sentiment

For the sentiment, I used the Celebrate die from the Word Wafers Birthday set. I cut the base layer from Distress Watercolor Cardstock and ink smooshed it into Old Paper Distress Ink, then inked the edges with Ground Espresso Distress Ink. I die cut the detail layer from Tim Holtz Black Kraftstock and lightly sanded it to reveal the kraft-colored core underneath, adding even more to that distressed feel. The numbers are from the Seth Apter Borderlines die set — I cut those from Kraftstock, sanded them the same way, then trimmed them into several pieces and tucked them behind the focal image.

Finishing the Card

To finish the card, I layered everything onto a piece of Sizzix Sandable Cardstock in brown and burnt orange, then sanded the edges to reveal the lighter core color underneath.

And there you have it — a grungy industrial birthday card perfect for anyone who loves this style or color combination! I hope this gave you a bit of inspiration using the Seth Apter Word Wafers Birthday dies as we continue celebrating 25 years of Sizzix. I'd love to see what you create if you give this style a try — feel free to share in the comments or tag me on Instagram!

Happy crafting! ~ Juliana

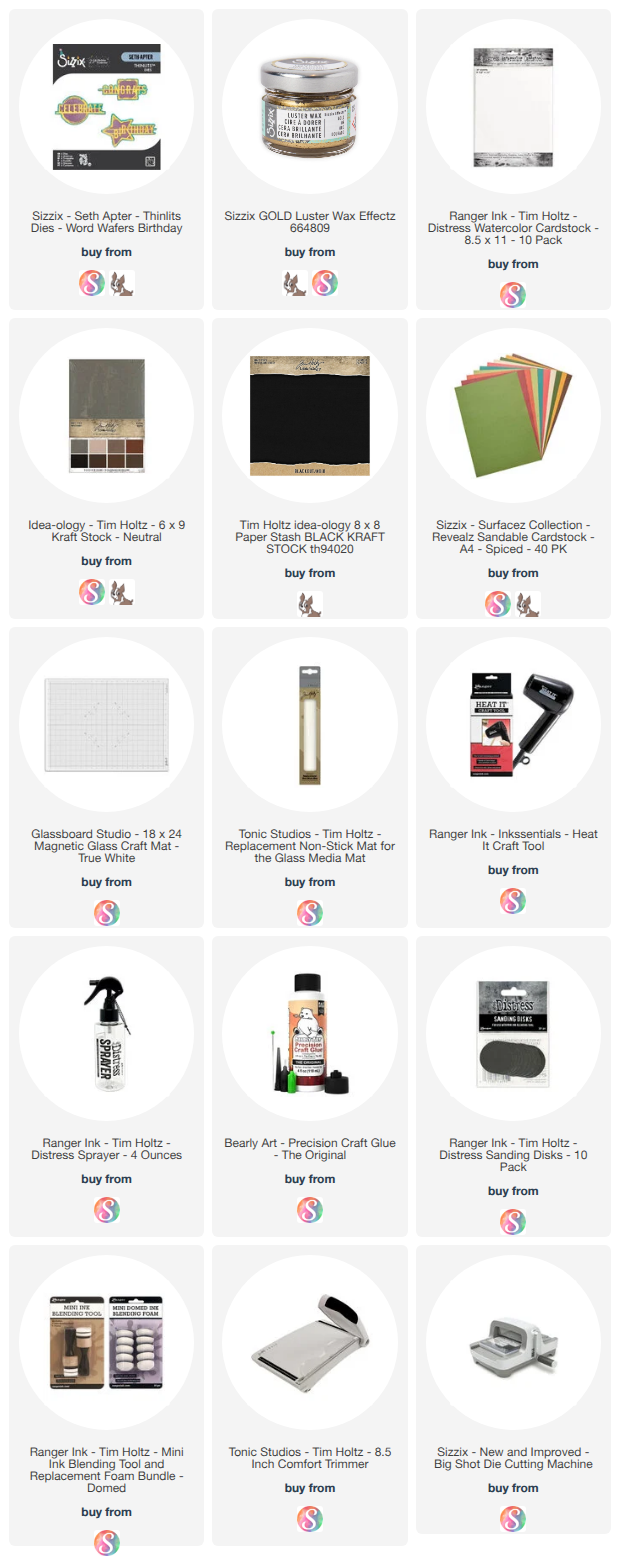
Supplies

Below you will find links to the supplies I used to create these cards. When you shop through these links—whether you purchase that exact item or something else entirely—you're supporting me at no extra cost to you. The commission I receive helps me cover the costs of my blog and other expenses, and allows me to continue providing you with FREE inspiration and tutorials. If you want to learn more, you can see my full affiliate and product disclosure statement here. Thank you so much for your love and support!
Seth Apter Sizzix Mixed Media Card | Creative Die Cut Technique

If you've been crafting for a while, you probably have a collection of dies that you use the same way every single time. Today I want to challenge that! I'm sharing a mixed media card made with the latest Seth Apter Sizzix release, and my favorite part of this project is how I pushed the dies beyond their intended use. Sometimes the most interesting results come from asking "what else can this do?"

Be The Artist Card by Juliana Michaels featuring Seth Apter Sizzix

Think Outside the Die

The Seth Apter Mini Pages die set is designed to create a folded mini book or page, but here I used it purely as a design element — no folding required. I layered it with the dotted die from the Seth Apter Paper Cutz 2 die set, positioning it to cut the design the full length of the Mini Pages die cut. The result is a beautifully detailed panel that looks intentional and intricate, and nobody would ever guess it started as a booklet die!

The other technique I want to highlight is using the Seth Apter Magic Mesh embossing folder on a die cut rather than on flat cardstock. I embossed the butterfly after die cutting it from the Tim Holtz Tattered Butterflies die set, and the mesh texture on those irregular butterfly edges is just chef's kiss. It adds so much depth and visual interest to the focal element.

How to Make This Card

Start with a piece of white cardstock cut to 4.5 x 6.25 inches and ink the edges with Walnut Stain Distress Ink.

Cut a piece of blue kraft stock or cardstock to 2.75 x 6 inches. Stamp across the surface using the dotted stamp from the Seth Apter Viewfinder Stamp and Die Set with Twilight Versafine Clair Ink, or a slightly darker ink than your cardstock color. If you're using kraft stock, lightly sand the edges with fine grit sandpaper or a Ranger Sanding Disk. If you're using regular cardstock, ink the edges with Walnut Stain Distress Ink. Adhere this to the card front, but leave the right-hand side unattached so you can tuck the circle die cuts underneath later.

Cut circles from black kraft stock using the Seth Apter Twisters Die Set and lightly sand the edges with fine grit sandpaper or a Ranger Sanding Disk. Tuck these under the right side of the blue panel and adhere in place.

Now for the Mini Pages panel. Die cut a piece of Distress Watercolor Cardstock using the Seth Apter Mini Pages die set. Then take the dotted die from the Seth Apter Paper Cutz 2 die set and position it to cut the design across the full length of the Mini Pages die cut — you're using it as a design element here, not as a folded booklet. Use a baby wipe to apply Distress Paint in Salvaged Patina across the surface. Ink the edges and here and there over the surface with Walnut Stain Distress Ink. Adhere this layer to the card.

Next, take one of the outer dies from the Paper Cutz 2 set and cut another piece of Distress Watercolor Cardstock. Spray with Old Paper Distress Spray Stain and a little water, then dry with a heat tool. Stamp the splatter image from the Seth Apter Viewfinder Stamp and Die Set using Walnut Stain Distress Ink. Ink the edges with Walnut Stain Distress Ink and adhere to the card with double-sided foam tape for dimension.

For the butterfly, die cut a piece of Distress Watercolor Cardstock using the larger butterfly from the Tim Holtz Tattered Butterflies die set. Emboss it using the Seth Apter Magic Mesh embossing folder — this is where the magic happens, because that mesh texture on the shaped butterfly edges is incredible. Apply Distress Paint in Salvaged Patina and Uncharted Mariner using a baby wipe. Once dry, add Distress Paint in Peeled Paint here and there. When the paint is fully dry, apply Sizzix Luster Wax in Rose Gold to the raised embossed design using your finger. For the butterfly body, cut a piece of black kraft stock using a cross image from the Seth Apter Roundabouts Die Set and lightly sand the edges. Adhere both the body and the butterfly to the card with double-sided foam tape for dimension.

I tucked a few vintage postage stamps here and there for an extra pop of color and visual interest. Mine happen to be Queen Juliana stamps sent to me by my friend Saskia from the Netherlands — they're quite special to me, and yes, you can probably guess why! If you don't have vintage stamps, the Tim Holtz Postmarked Sticker Book is a great alternative and would give you a similar look.

The final touch is the sentiment, a sticker from the Minty Art Journal Essentials Paper Stickers in Black. "Be the artist of your own life" felt like the perfect note to end on for a card built around creative experimentation.

I hope this card inspires you to look at your die collection with fresh eyes! I'd love to know — have you ever used a die in an unexpected way? Tell me about it in the comments!

Happy crafting!
~ Juliana

Supplies

Below you will find links to the supplies I used to create this card. When you shop through these links—whether you purchase that exact item or something else entirely—you're supporting me at no extra cost to you. The commission I receive helps me cover the costs of my blog and other expenses, and allows me to continue providing you with FREE inspiration and tutorials. If you want to learn more, you can see my full affiliate and product disclosure statement here: https://www.17turtles.com/p/affiliate-and-product-disclosure.html. Thank you so much for your love and support!


Stretch Your Supplies | One Die Three Ways — Seth Apter Sizzix Release

If you've ever looked at a die and thought "I could get more out of this" — this post is for you! I am so excited to share three mixed media cards using the Gridiron Die from the new Seth Apter Sizzix release, and you guys, we are squeezing every last bit of mileage out of this one die. We're using it as a die cut, an embossing folder, AND a stencil — and the three cards couldn't look more different. 

Mixed Media Cards by Juliana Michaels featuring Seth Apter Sizzix Gridiron Die Set, Tim Holtz Brushstroke Flowers 1 Die Set, and Tim Holtz Brushstroke Flowers 2 Die Set

Watch the Full Tutorial

Watch the video below or head over to my YouTube channel to see all three die techniques in action, then come back here for all the finishing details for each card.

Technique No. 1 — Die as a Die Cut

Art Heals Card by Juliana Michaels featuring Seth Apter Sizzix Gridiron Die Set and Tim Holtz Brushstroke Flowers 1 Die Set

The number die cut is from the Seth Apter Borderlines Die Set, cut from Black Kraft Stock and lightly sanded with fine grit sandpaper, then trimmed and adhered above and below the flower.

For the flower, I die cut the layers from Distress Watercolor Cardstock using the Tim Holtz Brushstroke Flowers 2 Die Set and painted each layer using a water brush with Distress Paints in Seedless Preserves, Dusty Concord, Peeled Paint, Forest Moss, Fossilized Amber, and Vintage Photo. One thing I've been loving about painting my die cuts lately — once the paint is dry it's permanent, so I never have to worry about liquid adhesive reacting with the ink and causing issues when I'm assembling the layers.

The ephemera pieces are stamps from the Tim Holtz Tidbits and Curator Stamp Sets, stamped with Black Soot Archival Ink onto Distress Watercolor cardstock lightly sprayed with Old Paper Distress Spray Stain, trimmed to size, and edged with Walnut Stain Distress Ink.

To finish off the card I used a sentiment from the Mintay Art Journal Essentials Paper Stickers Black.

Technique No. 2 — Die as an Embossing Folder

Just Begin Card by Juliana Michaels featuring Seth Apter Sizzix Gridiron Die Set and Tim Holtz Brushstroke Flowers 2 Die Set

For the full background details, be sure to watch the video! The finished card is 4.25 x 5.5 inches, layered onto white cardstock with Walnut Stain inked edges.

The wonky circle die cut is from the Seth Apter Twisters Die Set, cut from Black Kraft Stock, lightly sanded, trimmed, and adhered above and below the flower.

The off-white layers were made using the Seth Apter Viewfinder Stamp and Die Set, the same way as described for the Art Heals card above.

The ephemera pieces are stamps from the Tim Holtz Tidbits and Curator Stamp Sets, stamped with Black Soot Archival Ink onto Distress Watercolor cardstock lightly sprayed with Old Paper Distress Spray Stain, trimmed, and edged with Walnut Stain Distress Ink.

For the flower, I die cut the layers from Distress Watercolor Cardstock using the Tim Holtz Brushstroke Flowers 2 Die Set and painted each layer with a water brush using Distress Paints in Mustard Seed, Fossilized Amber, Peeled Paint, Forest Moss, Vintage Photo, and Ground Espresso. I used double-sided foam adhesive to add dimension to some of the die cuts.

The ephemera pieces are stamps from the Tim Holtz Tidbits and Curator Stamp Sets, stamped with Black Soot Archival Ink onto Distress Watercolor cardstock lightly sprayed with Old Paper Distress Spray Stain, trimmed, and edged with Walnut Stain Distress Ink.

To finish off the card I used a sentiment from the Mintay Art Journal Essentials Paper Stickers Black.

Technique No. 3 — Die as a Stencil

Stay Brave Card by Juliana Michaels featuring Seth Apter Sizzix Gridiron Die Set and Tim Holtz Brushstroke Butterflies Die Set

For the full background details, be sure to watch the video! The finished card is 4.25 x 5.5 inches, layered onto white cardstock with the edges inked with Walnut Stain Distress Ink.

The off-white layers were made using the Seth Apter Viewfinder Stamp and Die Set, the same way as described for the Art Heals card above.

The black number die cut is from the Seth Apter Stretchers Die Set, cut from Black Kraft Stock, lightly sanded, trimmed, and adhered on top of the previous layer.

For the butterflies, I die cut the layers from Distress Watercolor Cardstock using the Tim Holtz Brushstroke Butterflies Die Set and painted each layer with a water brush using Distress Paints in Seedless Preserves and Dusty Concord. The bodies of the butterflies are cut from Black Kraft Stock and lightly sanded using fine grit sand paper. I used double-sided foam adhesive to add dimension to some of the die cuts.

The ephemera pieces are stamps from the Tim Holtz Curator Stamp Sets, stamped with Black Soot Archival Ink onto Distress Watercolor cardstock lightly sprayed with Old Paper Distress Spray Stain, trimmed, and edged with Walnut Stain Distress Ink.

To finish off the card I used a sentiment from the Mintay Art Journal Essentials Paper Stickers Black.

I'd love to know which technique is your favorite — drop a comment below and let me know which one you're excited to try first!

Supplies

Below you will find links to the supplies I used to create these cards. When you shop through these links—whether you purchase that exact item or something else entirely—you're supporting me at no extra cost to you. The commission I receive helps me cover the costs of my blog and other expenses, and allows me to continue providing you with FREE inspiration and tutorials. If you want to learn more, you can see my full affiliate and product disclosure statement here: https://www.17turtles.com/p/affiliate-and-product-disclosure.html. Thank you so much for your love and support!

Mixed Media Christmas Card Ideas | Seth Apter + Distress Oxides

I’m switching gears from spooky to merry today with a festive twist on mixed media! You may remember the two Halloween cards I recently shared using Seth Apter’s newest Sizzix release. Those designs had me completely inspired — and I couldn’t resist seeing how the same dies and embossing folder could work for a Christmas card.

Most Wonderful Christmas Card by Juliana Michaels featuring Seth Apter Dies and Embossing Folder 

His Sizzix designs are so versatile — full of organic texture and layered detail — that they’re perfect for every season. In this new video, I’m showing you how I combined Seth’s collection with a few Tim Holtz favorites to create a Christmas card that’s full of dimension, shine, and that signature pretty grunge vibe.


IN THE VIDEO

In my latest YouTube video, you’ll see how I:
  • Use Distress Oxides and embossing powders to build a richly textured background
  • Layer Seth Apter’s dies with Tim Holtz elements for a festive focal point
  • Add simple mixed media touches that work with any dies or embossing folders you already have
These techniques aren’t limited to holiday cards — you can easily adapt them for any season or occasion.

🎥 Watch the full video HERE or below.


Please feel free to use products from your stash to recreate something similar. However, if you are interested in any of the products I’m using, you can find the supply list with links down below. Using these links does not cost you anything extra and it helps support my business. It also allows me to continue offering free content and keep my class costs low. I appreciate your support!

MORE INSPIRATION

If you missed my earlier projects featuring Seth’s new release, you can check them out below. Each one explores a different way to use his dies and embossing folder to build layers, color, and texture — and you’ll see how easily these same techniques transition from spooky to sparkly!


Caught In A Spider's Web Halloween Card by Juliana Michaels featuring Seth Apter Dies and Embossing Folder


A Wicked Thing Halloween Card by Juliana Michaels featuring Seth Apter Dies and Embossing Folder

I hope these project inspire you to look at your favorite dies and embossing folders in a whole new way. With a little color, texture, and shine, you can create cards that feel festive and full of mixed media magic.

SUPPLIES

Below you can find the supplies I used to create this card. When you shop through those links and whether you purchase that exact item or something else entirely, you’re supporting me at no extra cost to you. The commission I receive helps me cover the costs of my blog and other expenses, and allows me to continue to provide you with FREE inspiration and tutorials. If you want to learn more about what an affiliate link is, you can see my full affiliate and product disclosure statement here. Thank you so much for your love and support!

Caught in a Spider's Web | Mixed Media Halloween Card with Seth Apter Dies and Distress Oxides

Hello there and welcome! Today I'm sharing my second make as part of the Seth Apter Creative Collective, which I am so excited to be part of. This is a group of six creatives hand-picked by Seth to help showcase his latest release of dies and embossing folders from Sizzix.


I absolutely love his style, and while it's quite different from mine, the core elements he uses are SO GOOD for layering and adding texture—two things I love to do!

Using some of the new goodies from his release, I created another Halloween-themed card because, well... Halloween! I just can't get enough of it!

Now let's get into the details!

CREATING THE BACKGROUND


I began with a piece of watercolor cardstock and embossed it using the Grid Graph embossing folder. Next, I applied Distress Oxide Sprays in Wilted Violet, Twisted Citron, Fossilized Amber, and Lucky Clover, then dried it with my heat tool. I rubbed an Archival Ink Pad in Black Soot over the embossed areas, then gave the entire panel a light misting of Distress Spritz in Hickory Smoke for a touch of shimmer and shine.


BUILDING THE LAYERS

For the back layer, I die-cut the Diamond District die from white cardstock, applied embossing ink, and heat embossed it using Seth Apter's Wow Embossing Powder in Amethyst Ice.

Next, I used the Stretchers die set to cut three shapes from white cardstock. I applied Distress Oxide Ink using a brayer in Wilted Violet, Twisted Citron, and Carved Pumpkin.


THE FOCAL POINT


For the main focal point, I used the Tim Holtz Witchcraft die set. I die-cut the witch from black cardstock and heat embossed it using Seth Apter's Wow Embossing Powder in Asphalt. The cat was inked with Distress Oxide Ink in Wilted Violet.


FINISHING TOUCHES


The final touch was the sentiment, stamped using black ink on white cardstock with the Tim Holtz Tiny Text Halloween Stamp Set. I trimmed it into small strips and inked the edges with Distress Ink in Black Soot.

I then adhered all the layers to the card base, and it was complete!

Thanks so much for stopping by, and I hope you enjoyed this bit of Halloween inspiration featuring the latest Seth Apter Sizzix release. The new release is now available from your favorite retailer or Seth Apter's online store HERE.

A Wicked Thing Halloween Card | Seth Apter Sizzix

Seth Apter’s second release with Sizzix is now available, and I’m beyond thrilled to share that I’m part of his Creative Collective Team for this launch! I’ll be sharing two projects using his new collection—starting with today’s card and another coming very soon.

I’ve always loved Seth’s artistic style. His dies feel so organic, with shapes that flow and move in a way that makes them incredibly versatile. They’re perfect for adding texture, dimension, and interest to your projects—and that’s exactly my jam.

Handmade grungy Halloween card featuring a large layered butterfly with purple and glittered wings, a small skull centerpiece, and the sentiment “A Wicked Thing.” The textured background is bright green with embossed, distressed details, and metallic die cut accents.

The new release is now available from your favorite retailer or Seth Apter's online store HERE.


BUILDING THE BACKGROUND

For this first card, I started by embossing white cardstock with the Seth Apter Grid Graph Embossing Folder. To bring the design to life, I rubbed an embossing ink pad over the raised surface, sprinkled on Tim Holtz Twisted Citron Embossing Glaze, and heat set it. Once cool, I brushed black acrylic paint over the embossed piece, let it set for a few seconds, and then wiped away the excess with a damp towel. After it dried, I highlighted the raised areas with a touch of Sizzix Gold Luster Wax for that gorgeous grungy shine.
 

LAYERING WITH DIES

Next came the die cutting. I used the Seth Apter Stretchers dies to cut both purple kraftstock and white cardstock. I lightly sanded the kraftstock to distress it, cut it in half, and adhered it to the background. For the white piece, I heat embossed it in black for bold contrast.

I also cut the circular shape from the Seth Apter Twister die set using rose gold metallic cardstock, then sanded it lightly for texture. These elements formed the layered base for my focal point.
 

CREATING THE FOCAL POINT

The centerpiece of this card is a layered butterfly. I started with the Tim Holtz Tattered Butterfly die (a retired favorite) cut from white cardstock. To add more detail, I ran it through again with one of the speckled designs from Seth’s Paper Cutz 1 die set—this created grungy cut-outs for extra texture.

For the larger butterfly layer, I heat embossed it with Tim Holtz Seedless Preserves Embossing Glaze. For the smaller top layer, I used Seth Apter WOW Amethyst Ice Embossing Powder for a sparkly pop of purple.

The finishing touches included a small skull die cut from the Tim Holtz Vault Coffin Box set (embossed with clear powder for shine) and a stamped sentiment from the Tim Holtz Tiny Text Halloween set, heat embossed in white on black cardstock.


THE FINISHED CARD

And there you have it—layers upon layers of grungy, textured Halloween goodness! Between Seth’s organic die designs and a mix of embossing techniques, this project came together with just the right balance of spooky and stylish.


I can’t wait to share my second project with this release soon—so stay tuned for even more Seth Apter inspiration! In the meantime, I hope this card encourages you to mix, layer, and play with your favorite dies and embossing powders to create something wonderfully grungy of your own.

The new release is now available from your favorite retailer or Seth Apter's online store HERE.

One Die. Two Cards. Endless Possibilities (Almost)

One die set. Two cards. Honestly, it could’ve been three or four—but time wasn’t on my side. (The leftovers are still sitting on my desk though… so never say never!)

Grungy Seth Apter Tim Holtz Cards by Juliana Michaels featuring Seth Apter Waffles Die Set

Before we dive in, just a heads-up: these cards are big. Like 4 x 8 inches big. If that feels oversized to you, you can totally scale things down—and bonus, you’ll get even more cards from all the pieces! I combined dies from Seth Apter and Tim Holtz for this duo. Their styles work beautifully together—Seth brings the organic, abstract vibes, while Tim adds that perfectly grungy vintage touch.

Card One: Layered Texture & Floral Accents


I started with a panel of Distress Watercolor Cardstock cut to 5.5 x 8.5 inches—big enough to work with the Seth Apter Waffles Die. I sprayed the panel with Distress Spray Stains in Milled Lavender, Tea Dye, and Speckled Egg, plus a bit of Milled Lavender Distress Oxide Spray for that chalky glow.

Life Doesn't Have To Be Perfect Card by Juliana Michaels featuring Seth Apter and Tim Holtz Sizzix Dies

After the background dried, I stamped some texture using Tim Holtz stamps with Vintage Photo Archival Ink, then die cut the panel using the Waffles Die—making sure to save every little negative piece.


For the top layer, I die cut a second Waffles piece from watercolor cardstock, applied embossing ink, sprinkled on Seth Apter Brick Embossing Powder, and heat embossed it. This became my dimensional focal point, which I layered onto two die cuts from Scrapbook.com Mixed Media Cardstock (super thick = great dimension), and trimmed to fit.


The base panel—cut to 3.75 x 7.75 inches—was ink blended with Vintage Photo Distress Oxide Ink, spritzed with water, and edged with Vintage Photo Distress Ink. I glued the stacked Waffles die cut on top and began the fun part—inlaying all those tiny sprayed and stamped negative pieces. It’s a tight fit, but the Scrapbook.com Craft Pick Pro made it much easier. A little liquid glue kept everything locked in.

To finish it off, I sprayed three panels of watercolor cardstock—each with a different Spray Stain (Milled Lavender, Tea Dye, Speckled Egg)—then die cut them with Tim Holtz Wildflower Stems 03.


A stamped sentiment from the Tiny Text Stamp Set, some inked edges, and a foam strip for dimension wrapped it up. I mounted everything onto a 4 x 8 inch white card base inked around the edges with—you guessed it—Vintage Photo.

Card Two: Inky Layers & Heat Embossed Details


This time, I ink smooshed a panel (3.75 x 7.75 inches) into Old Paper Distress Ink, splattered it with water, and inked the edges with Vintage Photo Distress Oxide Ink.

Make The Days Count Card by Juliana Michaels featuring Seth Apter and Tim Holtz Sizzix Dies

I trimmed down the leftover Waffles die cut from the sprayed/stamped panel and layered it onto two thick cardstock pieces, just like before. To add something new, I used the Ranger Embossing Pen to apply ink inside the open areas and heat embossed them with Brick Embossing Powder.


For embellishments, I sprayed more panels in the same trio of colors and die cut pieces from the Seth Apter Borderlines and Twisters die sets.


I finished with another stamped and foam-mounted sentiment from the Tiny Text set, and mounted the final panel to a white 4 x 8 inch card base inked with—say it with me—Vintage Photo.


And there you have it—one die, two unique cards! You could easily keep going by changing the size, colors, or leftover pieces. I hope this inspires you to stretch your supplies and mix up styles.

Want to see this in action? Let me know in the comments if you'd like a video tutorial!

Supplies Used


Below you can find the supplies I used to create these cards. When you shop through those links and whether you purchase that exact item or something else entirely, you’re supporting me at no extra cost to you. The commission I receive helps me cover the costs of my blog and other expenses, and allows me to continue to provide you with FREE inspiration and tutorials. If you want to learn more about what an affiliate link is, you can see my full affiliate and product disclosure statement here. Thank you so much for your love and support!

Rusty Grunge 3 Ways | Distress Kraft Stock + Seth Apter Embossing Folder & Dies

I’m so excited to wrap up my Rusty Grunge 3 Ways series with this final look—a softer, more earthy grunge full of color and bold texture.

For this version, we’re diving into Distress Kraft Stock. It’s the perfect base when you want that warm, worn-in look that still delivers all the rusty grungy vibes. I’m once again featuring the Seth Apter embossing folder along with a mix of his new Sizzix dies. And like in the first two videos, I took some inspiration from Tim Holtz’s techniques and added my own spin.

Rusty Grunge with Distress Kraft Stock by Juliana Michaels featuring Seth Apter Embossing Folder and Die Techniques

The background came together with plenty of layered color, grit, and splatter. And while the tones are more neutral and vintage compared to Parts 1 and 2, the texture is still bold and dimensional.
To finish it off, I used a mix of grungy die cuts—including a few butterflies (because let’s be honest, they’re one of my favorite embellishments ever!).

Rusty Grunge with Distress Kraft Stock by Juliana Michaels featuring Seth Apter Embossing Folder and Die Techniques

WHAT TO EXPECT

In this first video, I’m walking you through how I created a rusty industrial metal effect on the background and embellishments using:
  • Distress Kraft Stock
  • Seth Apter’s New Embossing Folder and Dies
  • Distress Oxides
  • Distress Spritz
  • and a technique inspired by a recent Tim Holtz demo
Rusty Grunge with Distress Kraft Stock by Juliana Michaels featuring Seth Apter Embossing Folder and Die Techniques

WATCH THE VIDEO 

Check out the video and the rusty grunge techniques I'm sharing below or you can watch it on my YouTube channel HERE.

RUSTY GRUNGE 3 WAYS 

This is Part 3 of my Rusty Grunge 3 Ways series. In the other two videos we explore: 
  • Distress Watercolor Cardstock for a bold, rusty oxidized effect
  • Metallic Kraft Stock for an industrial rusty metal effect
Missed a video? Check out the entire Rusty Grunge Playlist HERE.

Rusty Grunge with Distress Kraft Stock by Juliana Michaels featuring Seth Apter Embossing Folder and Die Techniques

If you’ve made it through all three parts of this series—thank you! I hope it’s inspired you to pull out your embossing folders, grab some Distress products, and explore your own version of rusty grunge.

Let me know in the comments which version was your favorite—Watercolor, Metallic, or Kraft Stock?

SUPPLIES

Below you can find the supplies I used to create this card and the swatches. When you shop through those links and whether you purchase that exact item or something else entirely, you’re supporting me at no extra cost to you. The commission I receive helps me cover the costs of my blog and other expenses, and allows me to continue to provide you with FREE inspiration and tutorials. If you want to learn more about what an affiliate link is, you can see my full affiliate and product disclosure statement here. Thank you so much for your love and support!
 

Rusty Grunge with Distress Metallic Kraft Stock | Industrial Texture with Seth Apter Embossing Folder and Dies

Welcome back to Part 2 of my Rusty Grunge 3 Ways series: Bold Texture. Moody Color. Endless Possibilities.

Today I’m diving into one of my absolute favorite surfaces for creating gritty, industrial effects: Distress Metallic Kraft Stock. This cardstock is amazing for adding a touch of shimmer to those rusted textures we love.

Rusty Grunge with Distress Metallic Kraft Stock by Juliana Michaels featuring Seth Apter Embossing Folder and Die Techniques

Once again, I’m using the new Seth Apter embossing folder from Sizzix, along with his bold new die designs and a tried-and-true favorite from Tim Holtz to finish the piece with layered embellishments. Tim’s recent technique demo sparked this entire project, and in this video, I’m sharing my spin on it.


WHAT TO EXPECT

In this first video, I’m walking you through how I created a rusty industrial metal effect on the background and embellishments using:
  • Distress Metallic Kraft Stock
  • Seth Apter’s New Embossing Folder and Dies
  • Distress Paint
  • Distress Crayons
  • Distress Embossing Glaze
  • Embossing Powder
  • and a technique inspired by a recent Tim Holtz demo


Remember to check your stash for similar items—it’s all about making it work with what you’ve got! If you’re interested in anything I used, you’ll find a complete supply list in the video description. Your support through those affiliate links means so much and helps me keep making content like this.

WATCH THE VIDEO 

Check out the video and the rusty grunge techniques I'm sharing below or you can watch it on my YouTube channel HERE.


RUSTY GRUNGE 3 WAYS 

This is Part 2 of my Rusty Grunge 3 Ways series. In the other two videos we explore: 
  • Distress Watercolor Cardstock for a bold, rusty oxidized effect
  • Kraft Stock for a deep, earthy patina look
Check out the entire Rusty Grunge Playlist HERE.


THE RESULTS

This card is a rich mix of shiny metallics and rusty decay. The alchemy that happens when you apply paint and alcohol to Metallic Kraft Stock is seriously magical. Add in that bold blue butterfly, those die-cut layers, and the simple reminder—“Don’t forget to fly”—and it all just clicks.

Be sure to stay tuned for Part 3, where I’ll be working with Distress Kraft Stock for a softer, more earthy take on rusty grunge.

SUPPLIES

Below you can find the supplies I used to create this card and the swatches. When you shop through those links and whether you purchase that exact item or something else entirely, you’re supporting me at no extra cost to you. The commission I receive helps me cover the costs of my blog and other expenses, and allows me to continue to provide you with FREE inspiration and tutorials. If you want to learn more about what an affiliate link is, you can see my full affiliate and product disclosure statement here. Thank you so much for your love and support!

Rusty Grunge with Distress Watercolor Cardstock | Seth Apter Embossing Folder and Die Techniques

Have you seen Tim Holtz’s recent demo with the new A5 embossing folders? (If you missed it you can check it out HERE.) I was so inspired by the texture and techniques he shared that I had to try them out myself and in doing so have put together a 3-part video series I'm calling Rusty Grunge 3 Ways—Bold Texture. Moody Color. Endless Possibilities.

In this series, I’m putting my own spin on the grungy, industrial techniques Tim shared using Seth Apter’s new embossing folder and dies, along with a few of my favorite Tim Holtz supplies.

Rusty Grunge with Distress Watercolor Cardstock by Juliana Michaels featuring Seth Apter Embossing Folder and Die Techniques

First up, we’re kicking things off with Distress Watercolor Cardstock — and as you know, this is my favorite paper to use when it comes to mixed media!


WHAT TO EXPECT

In this first video, I’m walking you through how I created a bold, rusty background full of layered color and rich texture as well as the grungy embellishments using:
  • Distress Watercolor Cardstock
  • Seth Apter’s New Embossing Folder Dot Matrix
  • Distress Oxide Sprays
  • Distress Spritz 
  • Distress Archival Ink 
  • Embossing Powder
  • and a technique inspired by a recent demo by Tim Holtz


But I didn’t stop at the background — I’ll also show you how I finished the card using Seth Apter’s new die sets along with a favorite Tim Holtz die to create coordinating embellishments that bring the whole look together.

WATCH THE VIDEO 

Check out the video and the rusty grunge techniques I'm sharing below or you can watch it on my YouTube channel HERE


RUSTY GRUNGE 3 WAYS 

This is just Part 1 of my Rusty Grunge 3 Ways series. In the next two videos, we’ll explore: 
  • Metallic Kraft Stock for an industrial rusty metal effect
  • Kraft Stock for a deep, earthy patina look
Check out the entire Rusty Grunge Playlist HERE


So what do you think of this technique using Distress Watercolor Cardstock? Would you try this look yourself? I’d love to hear your thoughts in the comments — or tag me on social if you give it a try!

SUPPLIES

Below you can find the supplies I used to create this card and the swatches. When you shop through those links and whether you purchase that exact item or something else entirely, you’re supporting me at no extra cost to you. The commission I receive helps me cover the costs of my blog and other expenses, and allows me to continue to provide you with FREE inspiration and tutorials. If you want to learn more about what an affiliate link is, you can see my full affiliate and product disclosure statement here. Thank you so much for your love and support!
Subscribe






