Welcome to my 2026 Craft Room Tour! I'm excited to take you through my creative space and show you how I organize and store my craft supplies. When you compare this year's tour to 2025, you'll notice the changes are fairly subtle, but I wanted to share where my craft room stands at this stage of my creative journey. The lack of major changes really speaks to finding an organizational system that works beautifully with both my workflow and the supplies I reach for most often. That said, I'm always tweaking things here and there as my creative process evolves, and you'll catch some of those smaller adjustments as we move through the space.
One constant in my craft room? I'm still committed to regularly purging supplies. My dedicated "spare box" continues to serve its purpose, collecting items I no longer use or love. When it fills up, I find those products new homes—whether through donations or sharing them with fellow crafters who will appreciate them. This ongoing practice keeps my space functional without requiring additional storage solutions or furniture. I've discovered that having too many choices actually limits my creativity, so curating my collection allows me to work with only the products and supplies that truly inspire me.
2026 CRAFT ROOM TOUR
If you'd like to watch a video tour of my craft room, you can find that HERE or watch it below.
If you're interested in any of the storage items you see in the video, you can find links to those that are still available in the description box below. When you shop through those links, you're supporting me, and I truly appreciate that. This is just a peek at some of the storage in my craft room—for a better look at everything, I highly recommend watching the full video tour above.
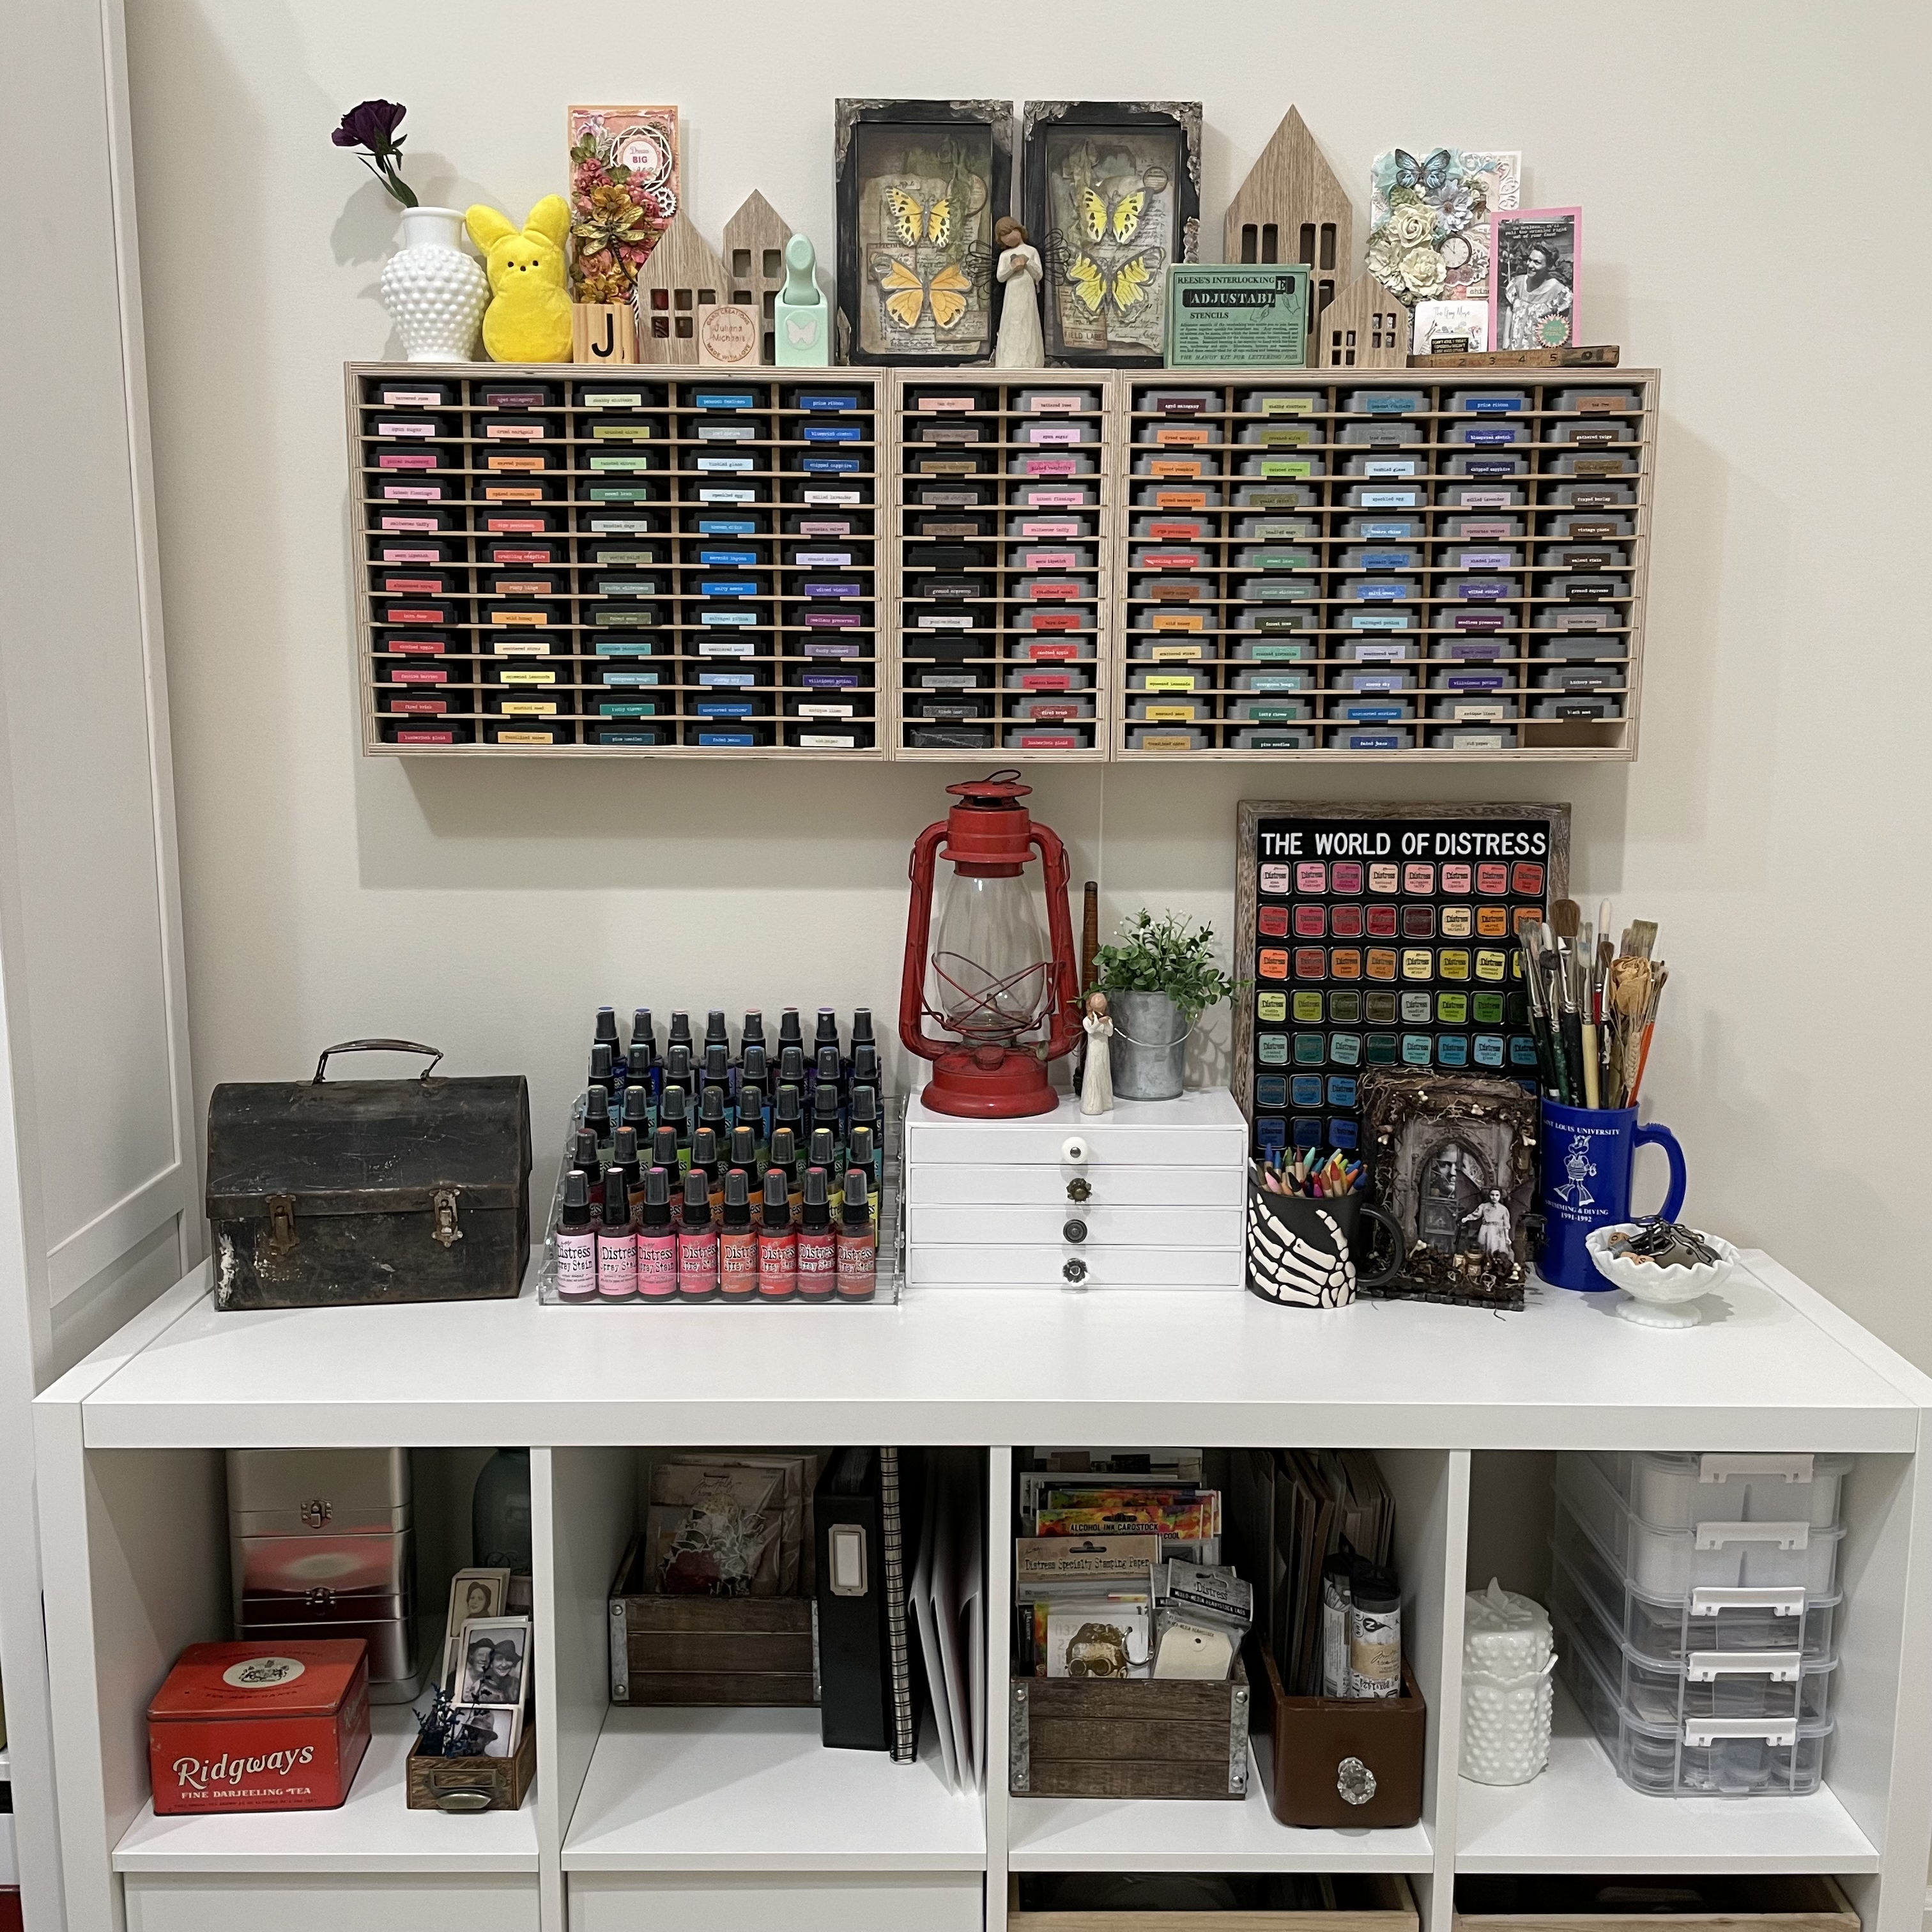
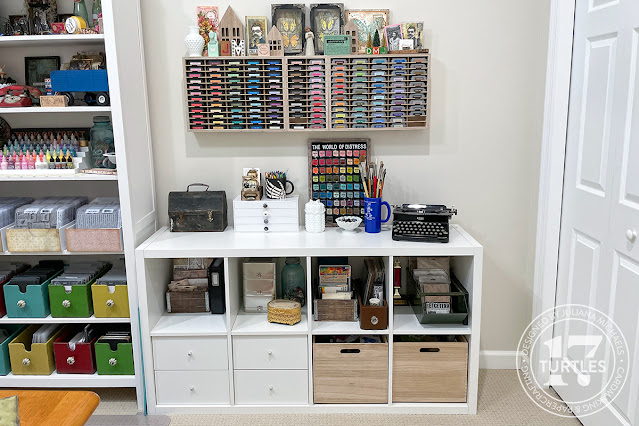
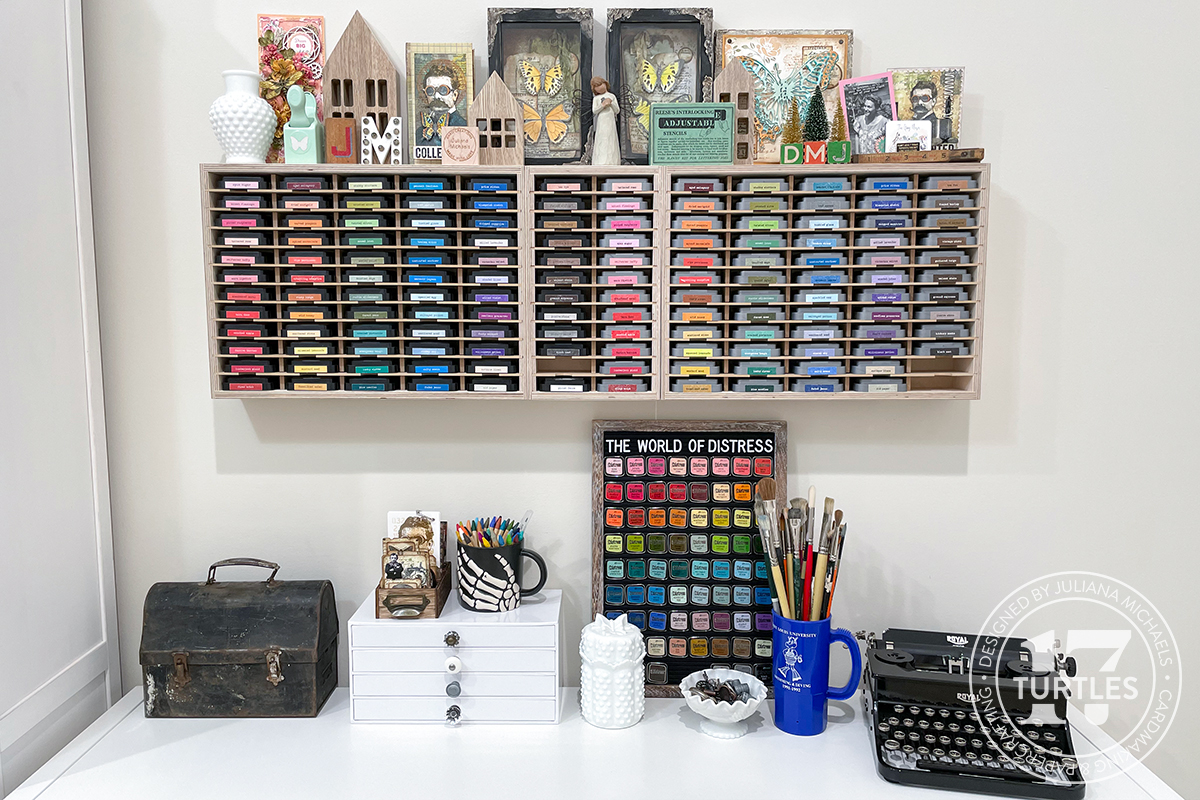
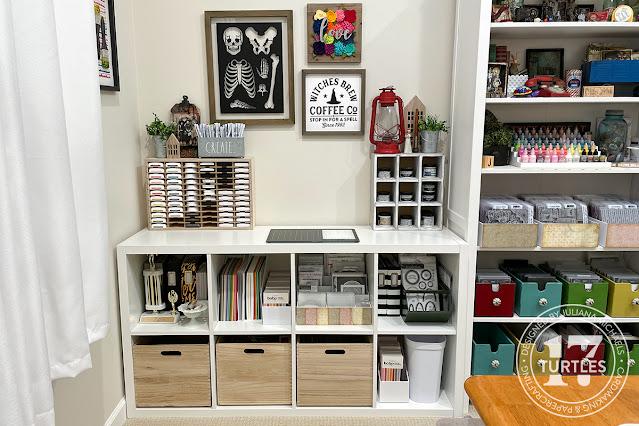
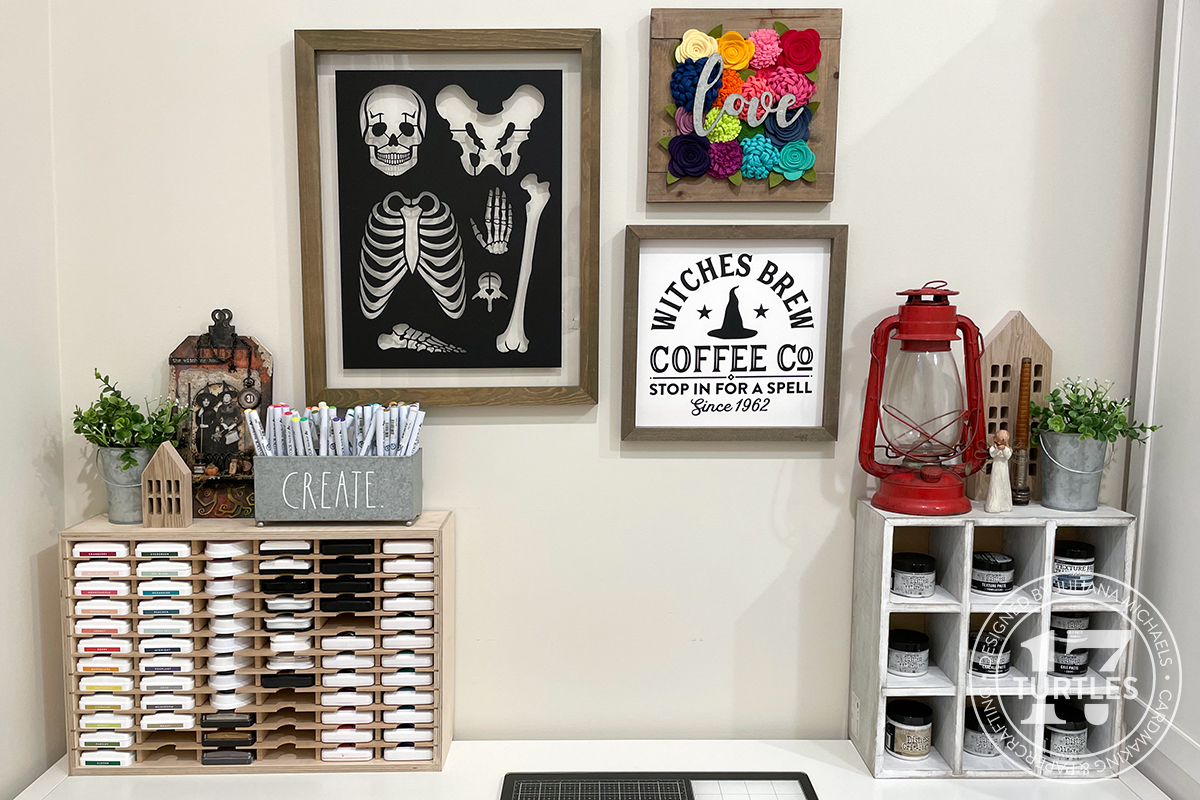
Behind my desk is a wall of shelving and organization that holds all of my most-used supplies, from stamps and dies to my Tim Holtz Distress Inks and more. This unit sits to the right of my desk, which is in the center of the room as you face that wall. Here you can see my Tim Holtz Distress Ink and Distress Oxide Ink Pads stored in Stamp N Storage Distress Ink Pad Holders.
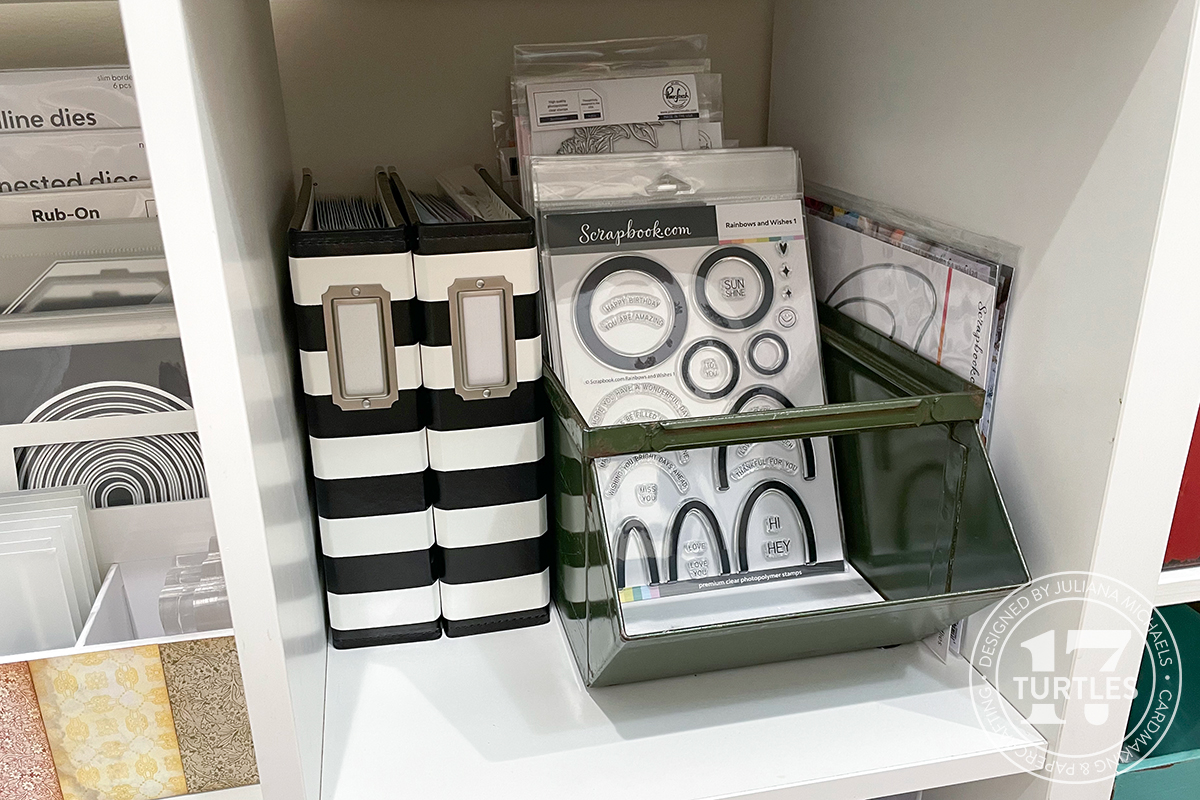
New to my room this year are the Scrapbook.com TiltBins! I'm currently trying them out to hold some of my everyday Tim Holtz Ideaology pieces, hoping that having them out where I can see them will inspire me to use them more frequently. They come in various sizes, and each size stacks together beautifully. If you don't have tabletop space for them, you can also hang them on the wall with the included hardware.
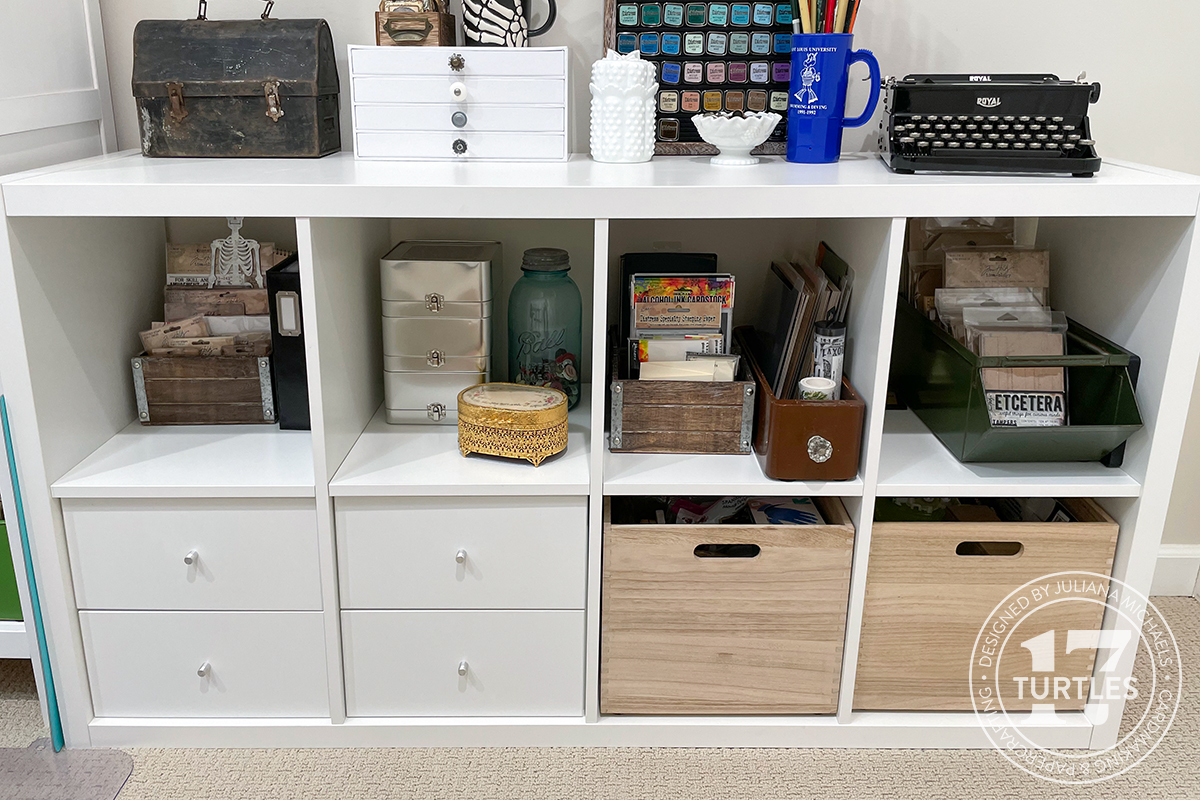
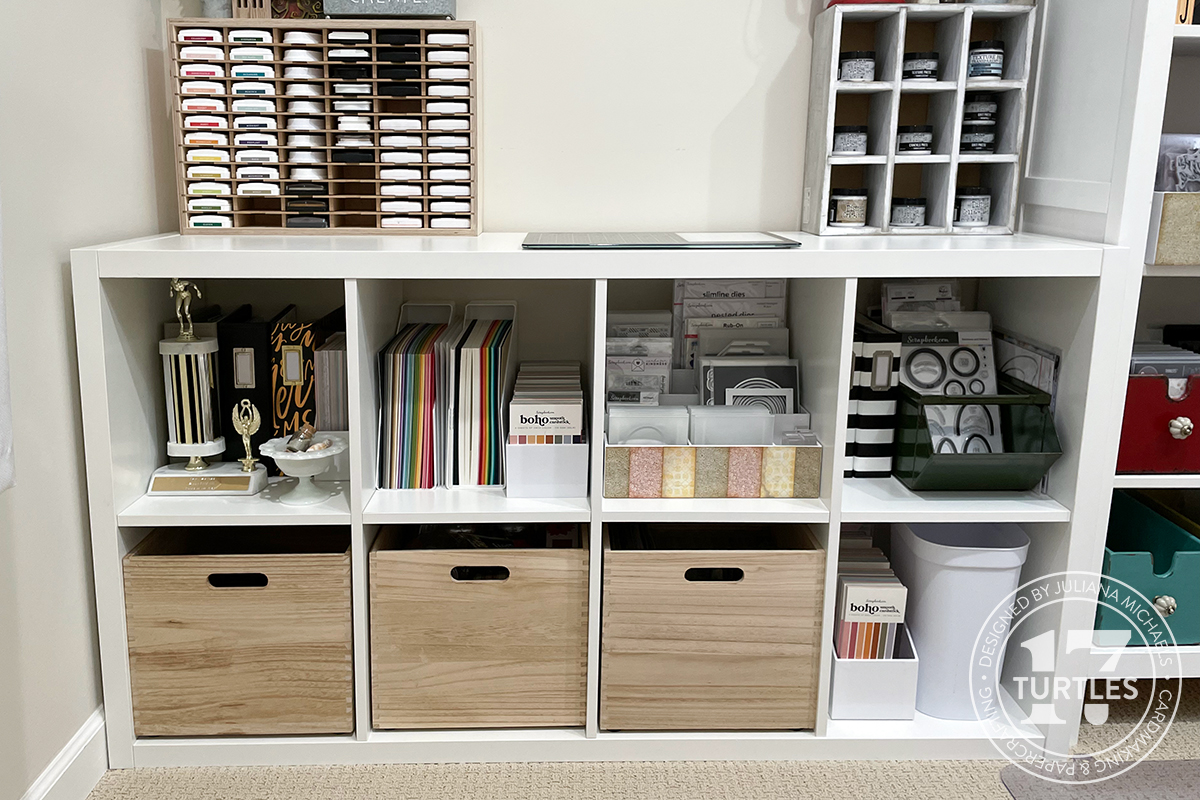
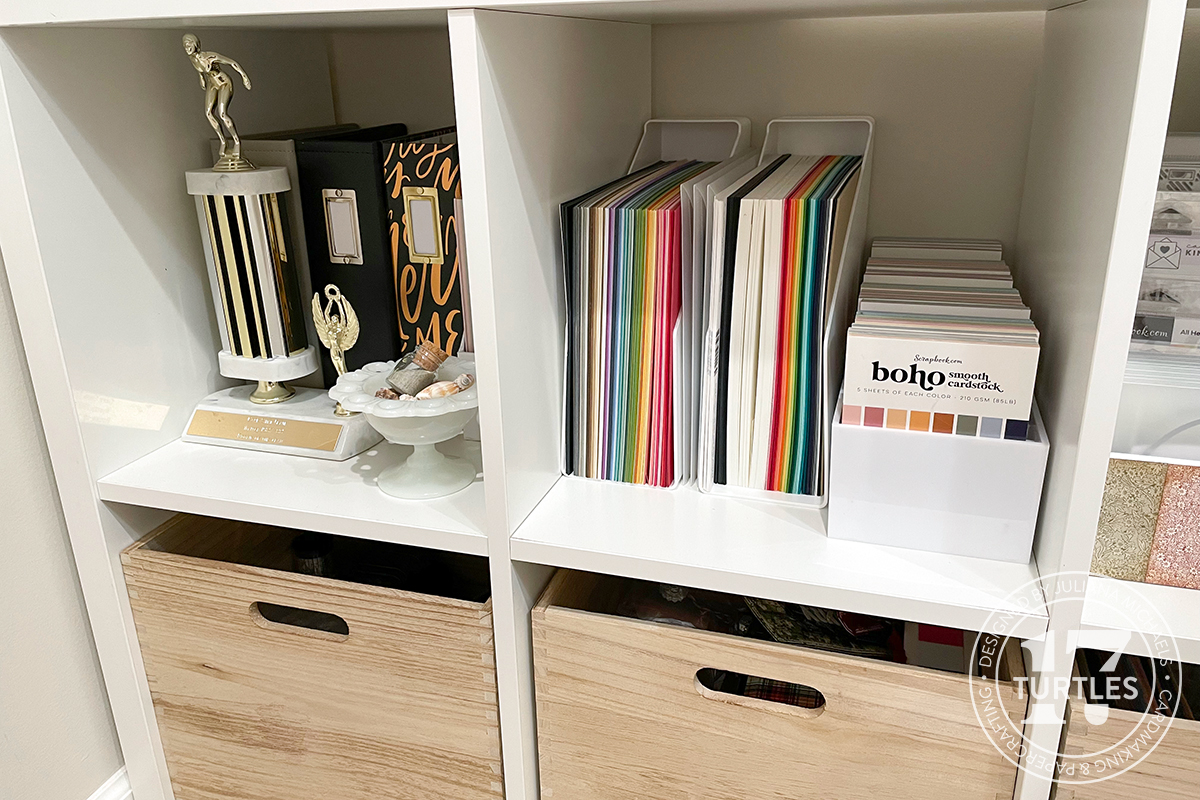
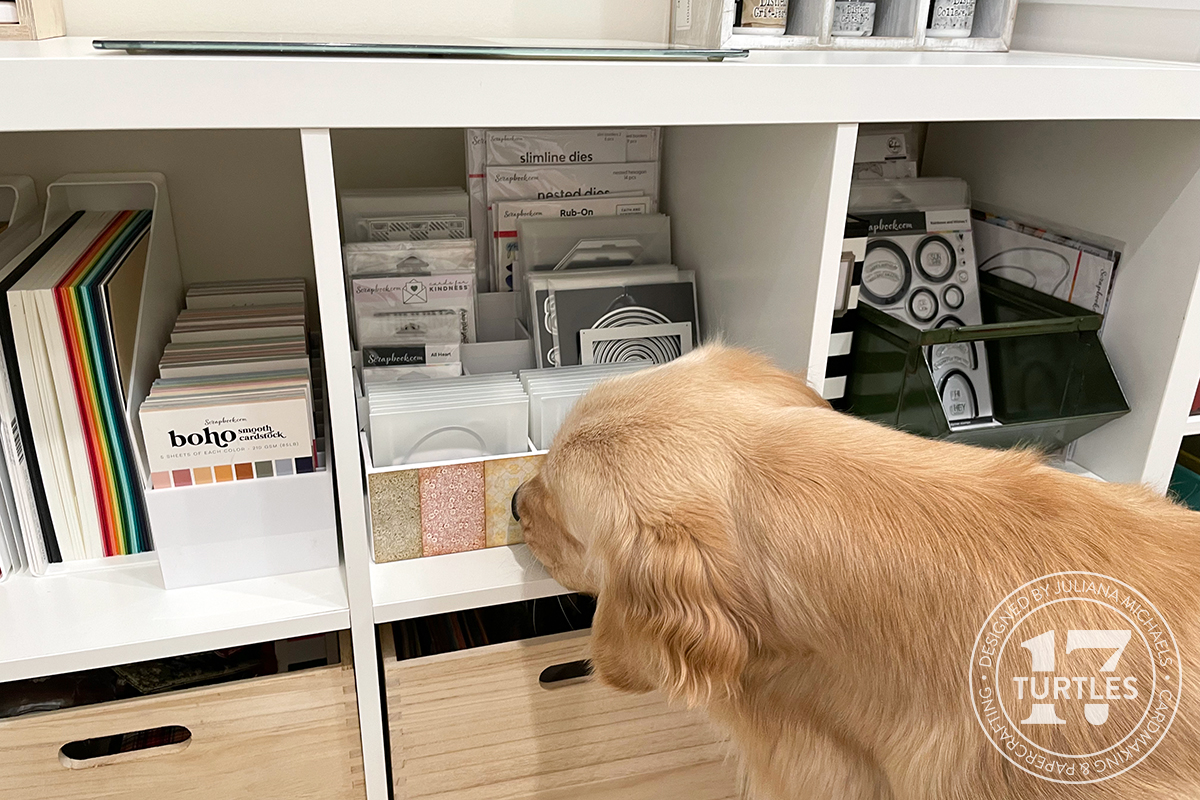
Here's a look at the Ikea Kallax unit where they sit, along with some of the other storage and organization I have in these cubes. The wood bins are from Target, but I'm not sure if they're still available.
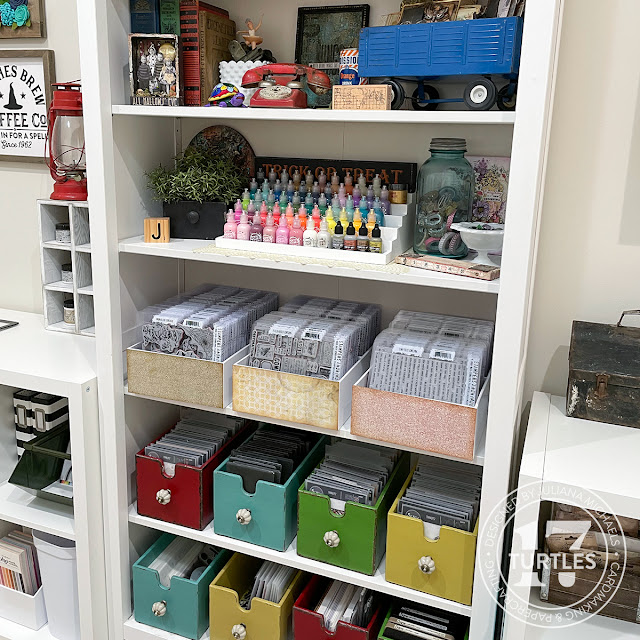
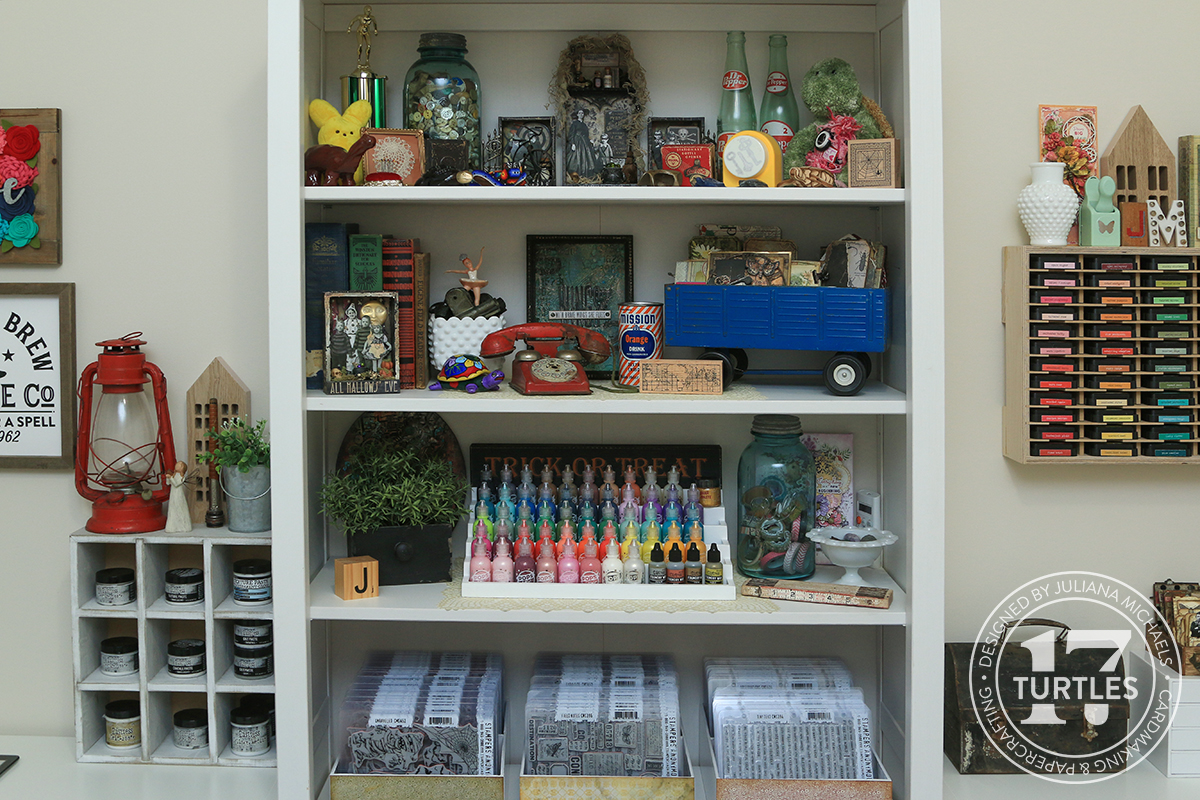
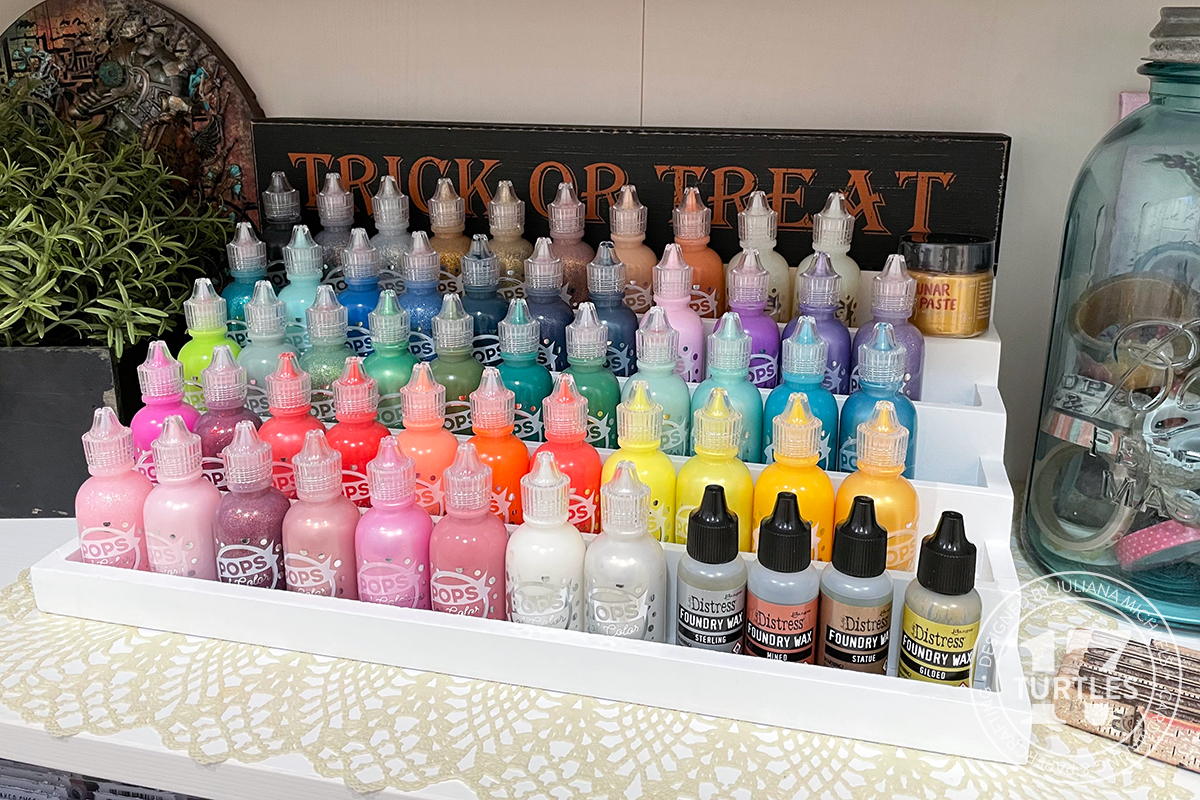
Right behind my desk is an IKEA Billy Bookcase with a couple of shelves that hold some of my vintage treasures and handmade items. Here you can see my Totally Tiffany Stadium Organizer, which is now holding my Distress Spritz and Distress Mica Stain Sprays.
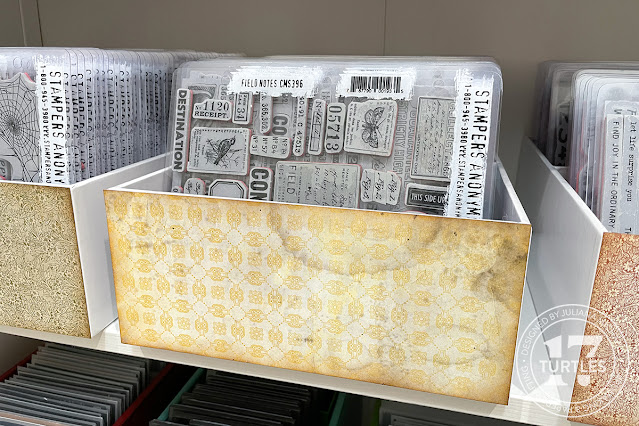
Below this is my Tim Holtz stamp set collection. I continue to use the Scrapbook.com Medium Envelope Organizer to store them, but my collection has grown beyond just these three units! You'll see additional organizers in other areas of my craft room—I have a dedicated unit just for my Christmas stamps and another for my Halloween stamps.
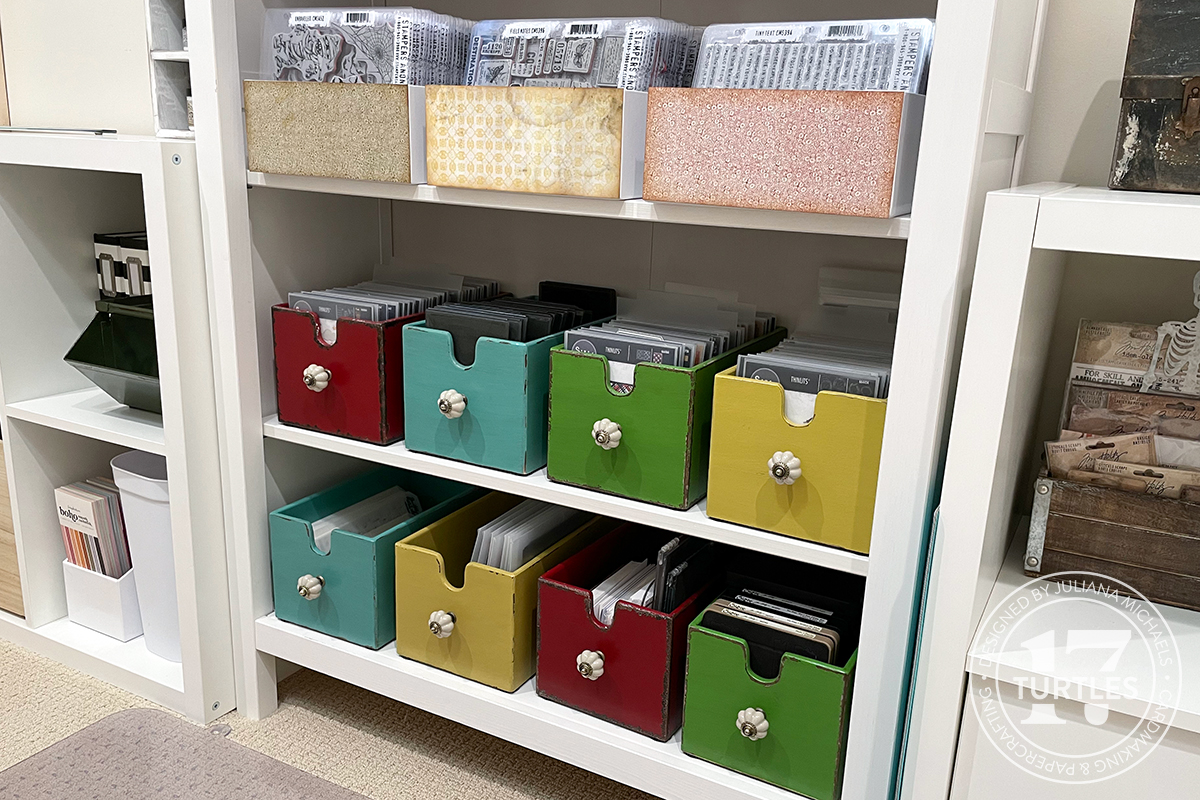
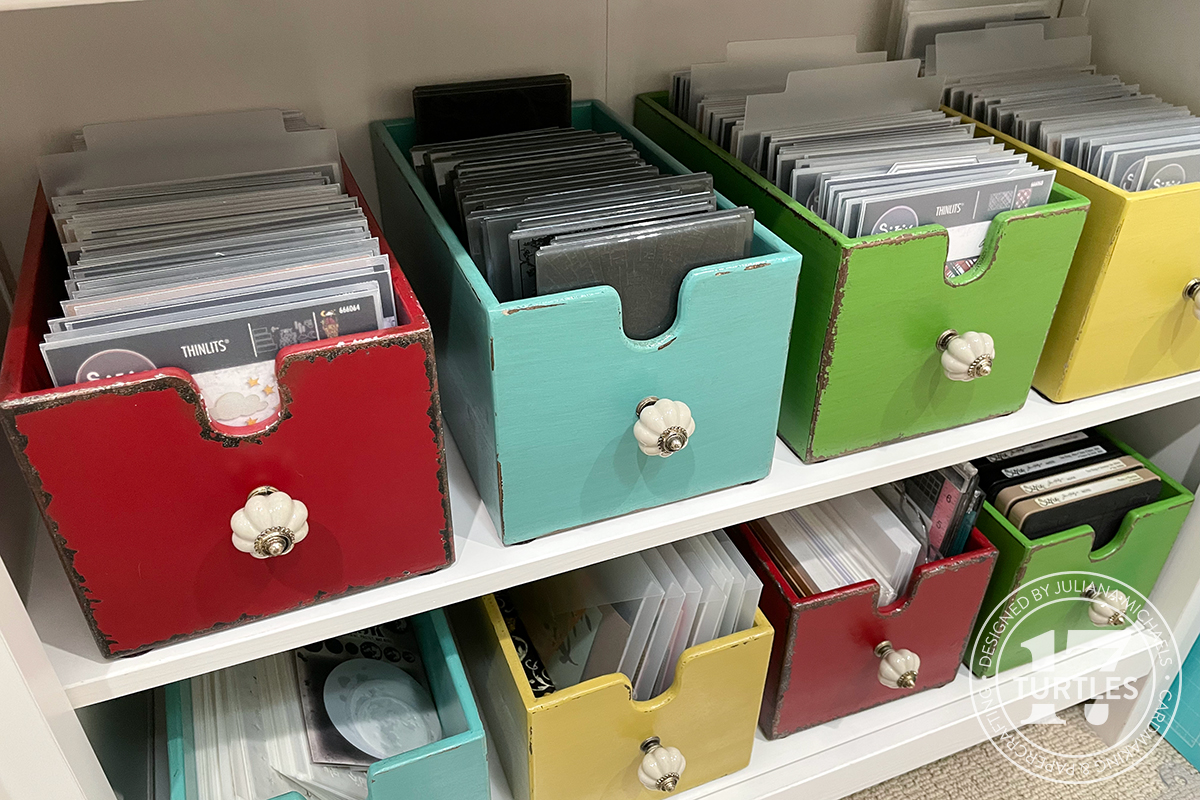
Below that are my Tim Holtz Sizzix dies and embossing folders, stored in my absolute favorite storage pieces in my entire craft room. These wooden drawers from Hobby Lobby are sadly no longer available.
On the other side of the room you'll find another Kallax unit with even more supplies. The ink pads are stored in Stamp N Storage Ink Pad Organizers, and this is my collection of Ranger Archival, 49 and Market, Versafine Clair, and other miscellaneous ink pads.
Here are a couple of photos showing the storage setup I have in this Kallax unit, including the Scrapbook.com Stadium Organizer, Ink Pad Holder (which I use to hold A2 size paper pads), and Skinny Stadium Organizer.
The green bins are vintage hardware bins that are heavy-duty and perfect for holding heavier items like dies. They're not the easiest to lift and carry around, but I absolutely love the vintage look. These are still available brand new—minus the rust!
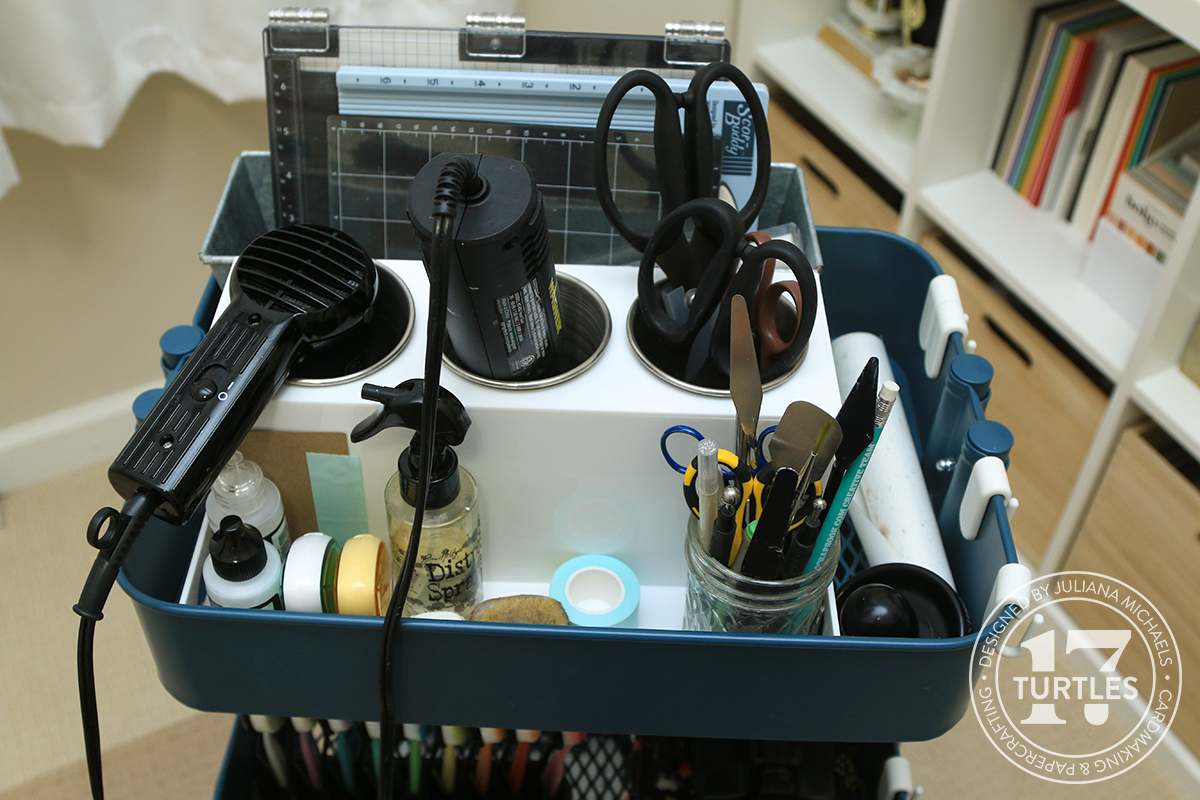
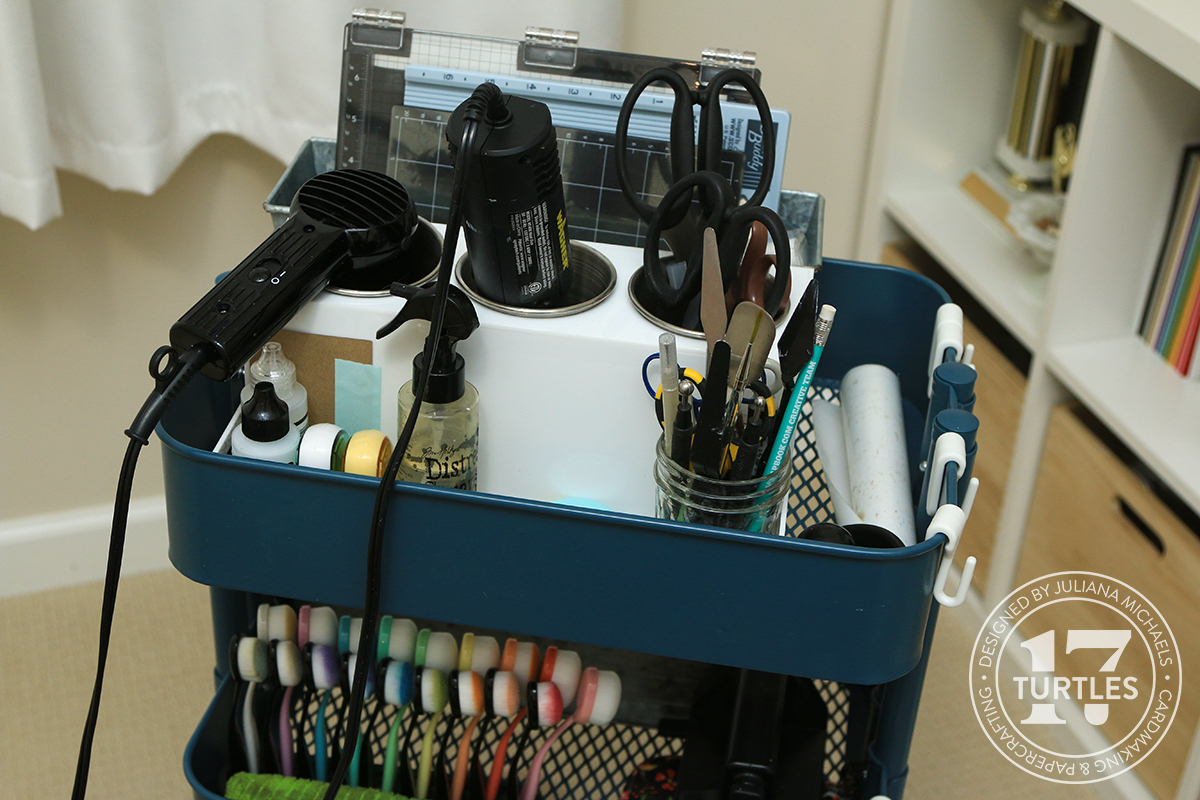
Next to my desk I have an IKEA Raskog Cart loaded with all of my most-used tools. This is the Scrapbook.com Heat Tool Organizer.
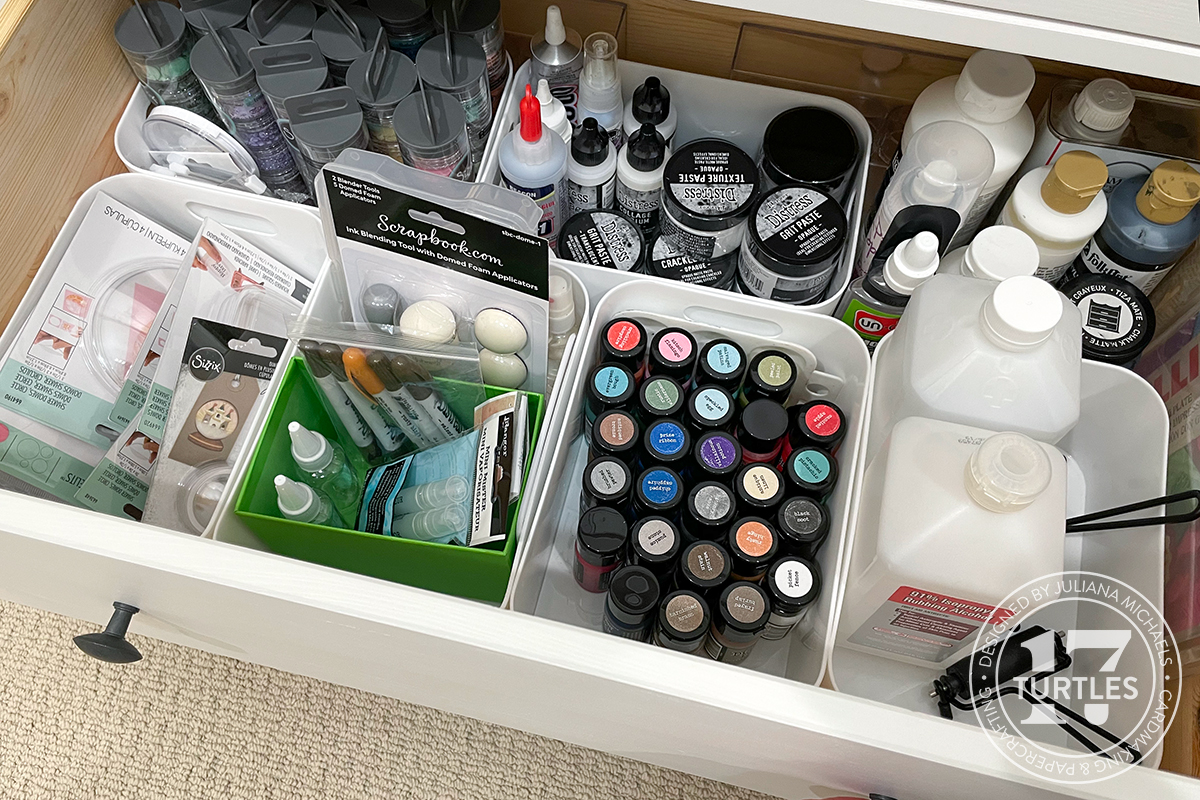
In front of my desk, I have an IKEA dresser. Here's a look inside some of the drawers, which hold many of my essential craft supplies—things I need but don't necessarily use on every project. Here you can see my Distress Paints.
And here's a look at my Distress Spray Stains and Distress Oxide Sprays. I'm absolutely loving the new Ranger Distress Labels and have replaced all my old labels with these! They can be wiped clean, won't be impacted by inky fingers, and they're easily removable.
Here's a look at all of my reinkers, stored in Scrapbook.com Storage Bins—the same bins I use for all of my sprays.
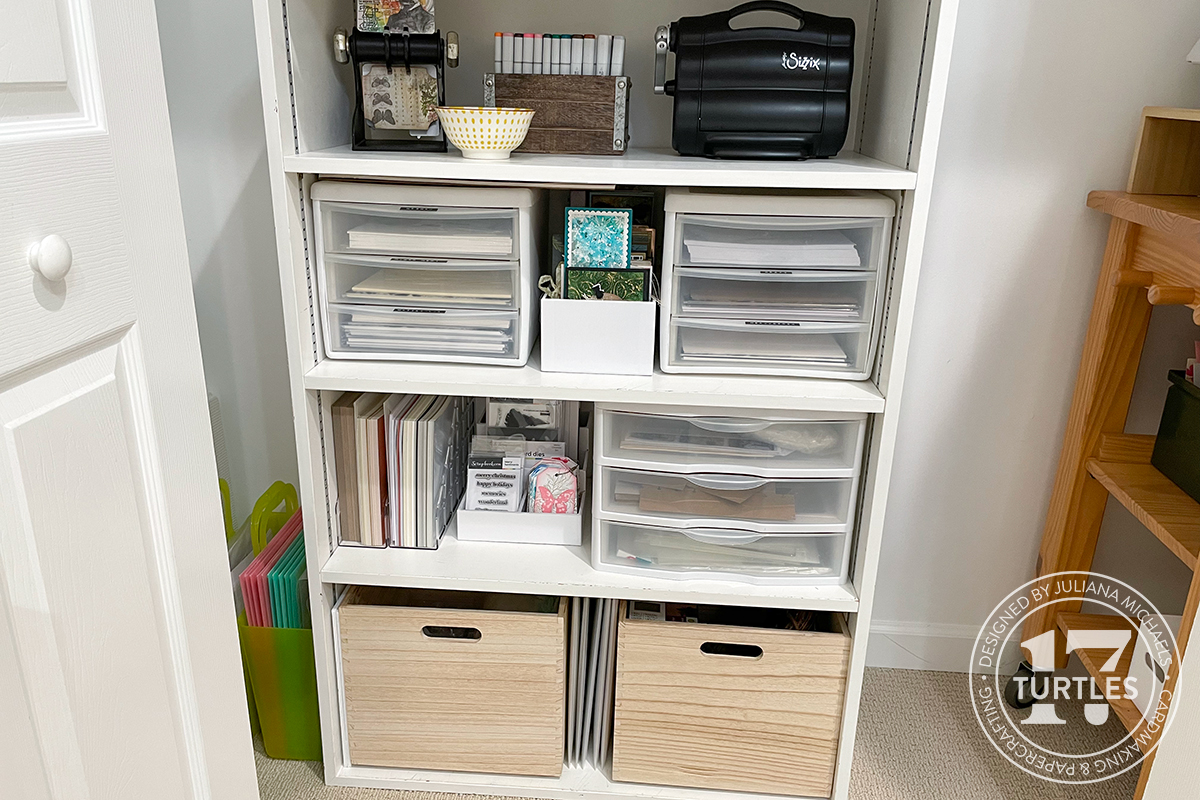
Finally, here's a look inside my craft closet. I tend to keep most of my paper and cardstock on the second shelf, and I really like using drawers for my most frequently used papers. The drawers are also perfect for holding paper scraps!
Here's a look at some of the other shelves with various storage pieces, including more drawers, more Scrapbook.com Bins and Multi-Craft Storage Bins, along with more of those wood crates that hold a variety of miscellaneous craft items.
And there you have it, a quick craft room tour of how I like to store and organize my supplies. Again I highly recommend checking out the video for even more details and ideas.
SUPPLIES
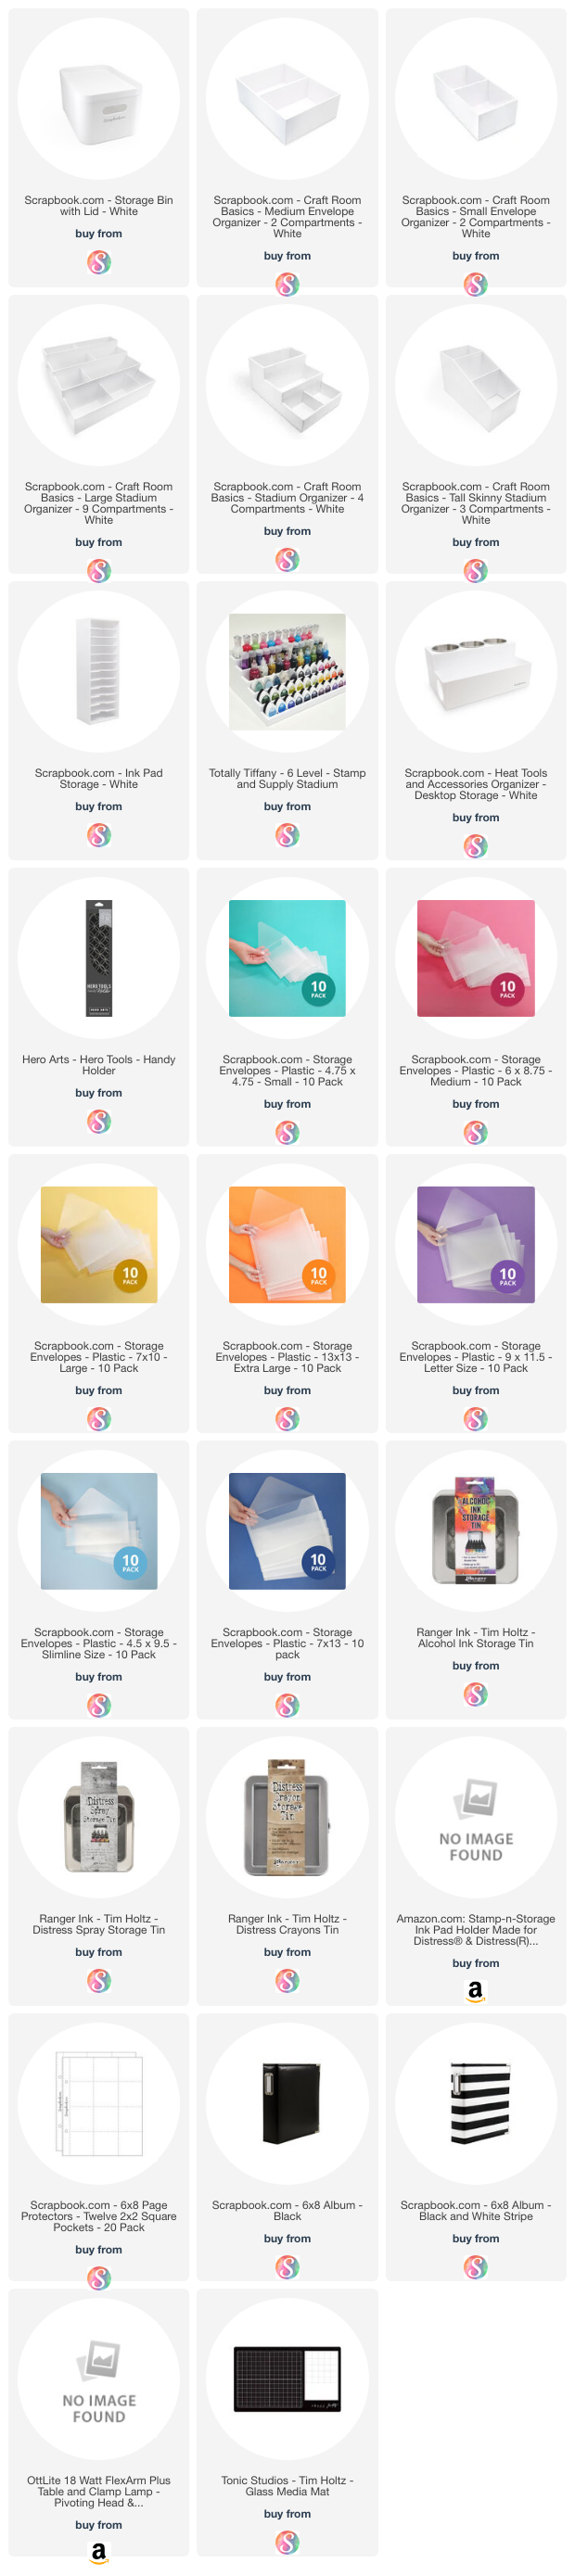
Below you can find the storage and organization pieces I've shared in this craft room tour. When you shop through those links and whether you purchase that exact item or something else entirely, you’re supporting me at no extra cost to you. The commission I receive helps me cover the costs of my blog and other expenses, and allows me to continue to provide you with FREE inspiration and tutorials. If you want to learn more about what an affiliate link is, you can see my full affiliate and product disclosure statement here. Thank you so much for your love and support!
Welcome to my 2025 Craft Room Tour! I'm going to take you on a tour of my craft room and give you a look into how I store my craft supplies. Not a lot has changed when you look at my craft room tour from last year, but I still wanted to share a tour of my craft room and where it is at this point in my creative journey. I attribute the minimal change to having found a really nice flow with my current set up AND the products I’m using the most. As always, as the creative journey continues, I do move things around here and there and you will see some of these small changes throughout the tour.
And of course some things never change. I still continue to be a relentless purger and my spare box for collecting these items is still there and doing it's job. Once it's full I continue to find the products a new home by either donating them or giving them away to fellow crafters. This process continues to help me stay in my space without having to constantly add more storage options or furniture. I've also found that too many options tend to stifle my creativity so the purging allows me to surround myself with the products and supplies I love and that inspire me.
I continue to find that a neat and tidy room help me be the most creative. And I still continue to clean up after every project. I also continue to use a combination of open and closed storage depending on what type of supply I am organizing.
Open storage is perfect for letting me see the things I want to see or that have a decorative element to them, such as my ink pads, and closed storage let's me hide the things I don't want to see.
2025 CRAFT ROOM TOUR
If you would like to watch a video tour of my craft room, you can find that HERE or watch it below.
If you are interested in any of the storage items that you see in the video you can find links to those that are still available in the description box below when you shop through those links, you are surprising me supporting me and I appreciate that so very much. Now let's get on with the tour!
Behind my desk I continue to have my wall of storage. These are all Ikea bookcases and continue to work pretty well for me.
In the center bookcase you can see that the top 2 shelves are mostly decorative items and a few of my makes.
I love having this section of inspiration and I continue to add to and edit it as I collect new pieces or create new makes.
Below that you will find this stadium organizer with my Scrapbook.com Pops of Color. This is definitely one of those open storage pieces that creates a great decorative piece as well.
On the next shelf I have my collection of Tim Holtz Stamp Sets stored in the Medium Storage Envelope Organizer form Scrapbook.com.
And then below that I have my collection of Tim Holtz Sizzix dies and embossing folders. These wooden drawers are from Hobby Lobby, but they are no longer available. They are definitely one of my favorite storage pieces in my craft room.
On the wall to the right of the central bookcase you can see my Distress Ink and Distress Oxide Ink Pads organized in Stamp N Storage Ink Pad Holders.
To the right side of the central bookcase you will find the majority of my Tim Holtz products.
This cubby has a vintage hardware bin filled with some of the recent cards I've made, along with my Distress Ink Swatch Book.
This cubby contains my Alcohol Inks and some Idea-ology products.
Here is where I store the smaller Tim Holtz papers such as his Kraftstock, Yupo Paper, and tags.
This section holds more Idea-ology and that container in the back is the 4 Tiered Storage Unit from Scrapbook.com that is perfect for storing all the trinkety bits. If you want to see more about how I store my Tim Holtz products make sure you check out my Storage and Organization Ideas for Tim Holtz Supplies Video.
Here's a look into a couple of the drawers in this unit. This one has my Distress Embossing Glazes and that small tin is a Distress Crayon Tin that I use to keep my embossing supplies such as ink pads, antistatic pouch, embossing pens and other tools organized. The drawer below this one has my other embossing powders.
This drawer has my Distress Crayons, Archival Inks, Perfect Pearls and Sizzix Luster Wax. I also have a drawer for my Distress Pastes and Alcohol Ink supplies.
To the left of the center bookcase I have my other craft supplies that aren't Tim Holtz except for his stencils, but it works for me to have them over here as you'll see.
On the top of the bookcase I have two more Stamp N Storage Ink Pad Holders. These are the Slim Ink Pad Holders and I have my collection of Ranger Archival Inks and other miscellaneous ink pads in the one to the left and the one to the right has my Versafine Clari collection.
Now onto the cubbies below.
The next two hold a lot of my Scrapbook.com dies, stamps and paper pads. Here I'm using some more of those vintage green hardware bins to hold the stamps and dies. And I love to use the Scrapbook.com ink pad holders to house my A2 paper pads.
Always a favorite storage piece of mine is the Scrapbook.com Stadium Storage Organizer. I like to switch this out with the seasons and it currently has winter and Valentine's themed products in it along with a few of my favorite basics.
Next to that I have my stencil cubby. There are two 6x8 albums that I use to store my Scrapbook.com stencils and then I have my Tim Holtz stencils in a Scrapbook.com Tall Skinny Stadium Organizer. I also have my blending brushes stored here in a Make It By Marco Rotating Blending Brush Holder. As you can see, the Tim Holtz stencils just make sense here.
I also have a few wooden crates in the bookcase cubbies on each side. Each one holds a different group of supplies. One has my junk journal products, another one hold my fabric, felt, ribbons and twine.
I also have one that holds my Halloween Idea-ology and another one that holds my Christmas Idea-ology.
Next is a look at my Raskog cart. It holds my most used tools and adhesives. On the top I have the Scrapbook.com Heat Tool Organizer along with a lot of my most used tools and adhesives.
On the second tier, I have more adhesives, stamping blocks and crafty clean up cloths.
On the bottom tier I have my Tim Holtz 8.5 inch Trimmer and the lids to the Scrapbook.com Storage Bins. I use these as trays to sort and hold things when I'm working on projects.
Across from my desk I have an Ikea dresser. You can see more of what is in each drawer in the video tour. Here I'm just sharing a couple of the drawers. This one holds my Tim Holtz Distress Spray Stains and Distress Oxide Sprays.
This drawer hold my extra liquid adhesives and extra pastes. It also holds my Distress Spritz, Distress Mica Stains and Distress Paints.
I also have a closet that holds even more craft supplies, including my cardstock, specialty papers, and more. You can find a look at that in my 2025 Craft Room Tour Video.
I hope you enjoyed my 2025 Craft Room Tour and seeing how I store and organize my craft supplies. If you have any questions, don't hesitate to reach to me.
SUPPLIES
Below you can find the links to the storage and organization pieces that I use and that are still available. When you shop through the links below, I receive a small commission from Scrapbook.com. These links are at no cost to you and the commission I receive helps me continue to provide you with FREE inspiration and tutorials. If you want to learn more about what an affiliate link is, you can see my full affiliate and product disclosure statement here. Thank you so much for your love and support!
Hello crafty friend! With the start of the new year, I thought it was a great time to share my Craft Room Tour and Closet Makeover with you. While there weren't a lot of changes in my craft space, I did make a few small changes here and there that I wanted to share with you. Along with these small changes, I made a rather large change with a makeover of the closet in my craft room. I've been wanting to do this for awhile now and I can't wait to see how it works for me in the coming year.
If you'd like to watch my craft room tour, I invite you to head over to my YouTube Channel or you can watch the video below.
If you're looking for more organization ideas check out my How to Organize You Tim Holtz Supplies over on the Scrapbook.com YouTube Channel or watch it below.
Below you can find the storage and organization products I have used in my craft room and that are still available. When you shop through the links below, I receive a small commission from Scrapbook.com. These links are at no cost to you and the commission I receive helps me cover the costs of my blog and other expenses, and allows me to continue to provide you with FREE inspiration and tutorials. If you want to learn more about what an affiliate link is, you can see my full affiliate and product disclosure statement here. Thank you so much for your love and support!
Hello there crafty friend! In this blog post I'm going to take you on a tour of my craft room and give you a look into how I store my craft supplies. Before I begin, I want to let you in on a little secret. I'm a relentless purger of things I haven't used within the past 6 months to a year. Between what I purchase myself and what I receive from the companies I work for, the amount of product adds up quickly, so the purging was something I started doing years ago to help me manage my stash. I place the items into a spare box and once it's full find the products a new home by either donating them or giving them away to fellow crafters. This process has helped me stay in my space without having to constantly add more storage options or furniture. I've also found that too many options tend to stifle my creativity so the purging allows me to surround myself with the products and supplies I love and that inspire me.
Along with the purging, I'm also obsessed with organization. I find I do my best crafting and feel more inspired in a neat a tidy space. This is a personal preference, but one I've learned to embrace over the years. And yes, I clean up after every project! The products I create with are often what inspire me the most so being able to see them is very helpful for me. That is where open storage comes in handy and why you will see some of my products are more visible than others. At the same time though, I don't want to see all the things, so that's where the drawers and closets come in handy. I hope you enjoy this little tour and please let me know if you have any questions in the comments below. I've also included links to where you can purchase these storage options if they are still available. Now let's get on with the tour!
If you would like a video tour of my craft room, you can find that HERE or watch it below.
This is a long post with LOTS of photos, so feel free to grab a cup of your favorite beverage and sit back and enjoy the scroll. I'm sharing what I can with photos, but I highly encourage you to check out my video for more details.
My craft room is a spare room in my home. I'm going to be focusing on my craft room storage here, so you won't see a photo of where I actually work, but if you watch the video you will see it. I use an old kitchen table to work on and hope to refinish it this year to better match my room and get rid of the red oak stain on it!
Behind my desk, I have a wall of storage using IKEA bookshelves and Kallax units. On this wall you can see my Distress Ink Storage. I have units from Stamp-N-Storage and have mounted them to the wall to free up counter space.
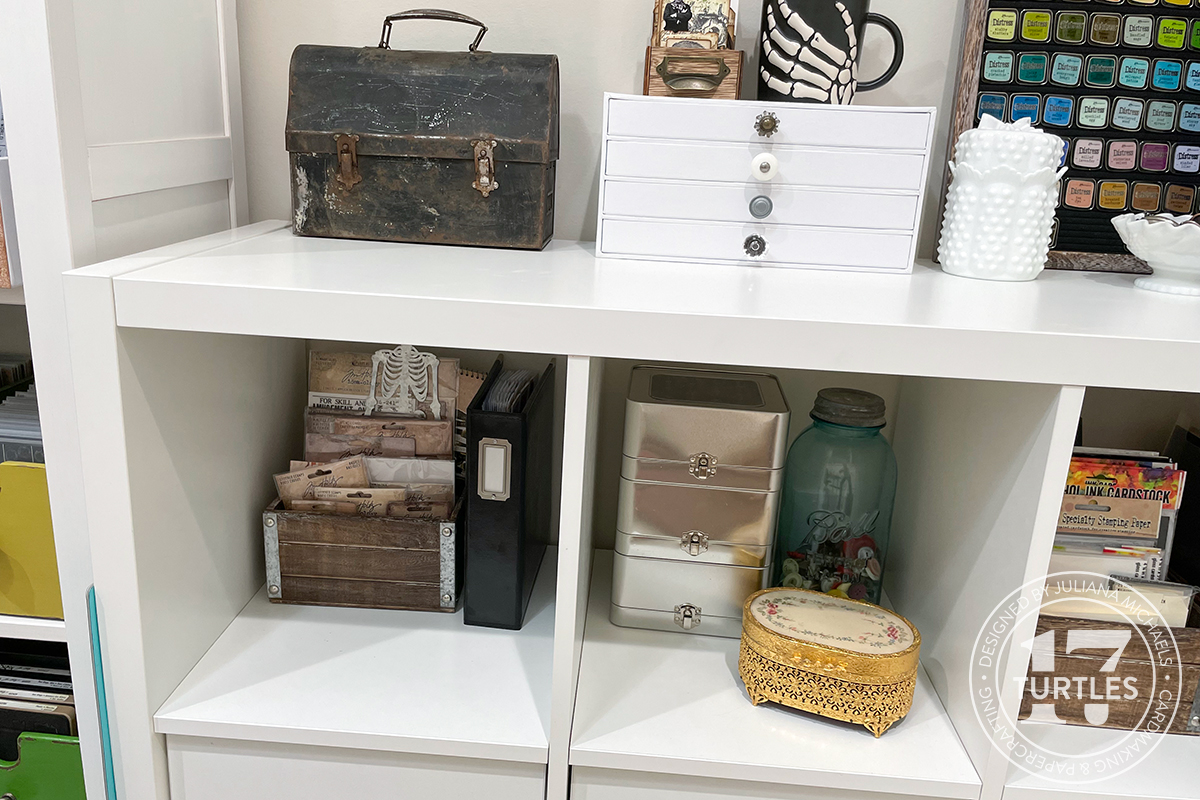
Below that is a Kallax unit turned on it's side and I actually use the top of it as a work surface at times. The black lunch box is where I store a lot of my Tim Holtz Idea-ology pieces. I also keep some in the white drawer unit. This is from Scrapbook.com but is sadly, no longer available.
In the cubbies below I have stored my Tim Holtz products using a mix of storage options.
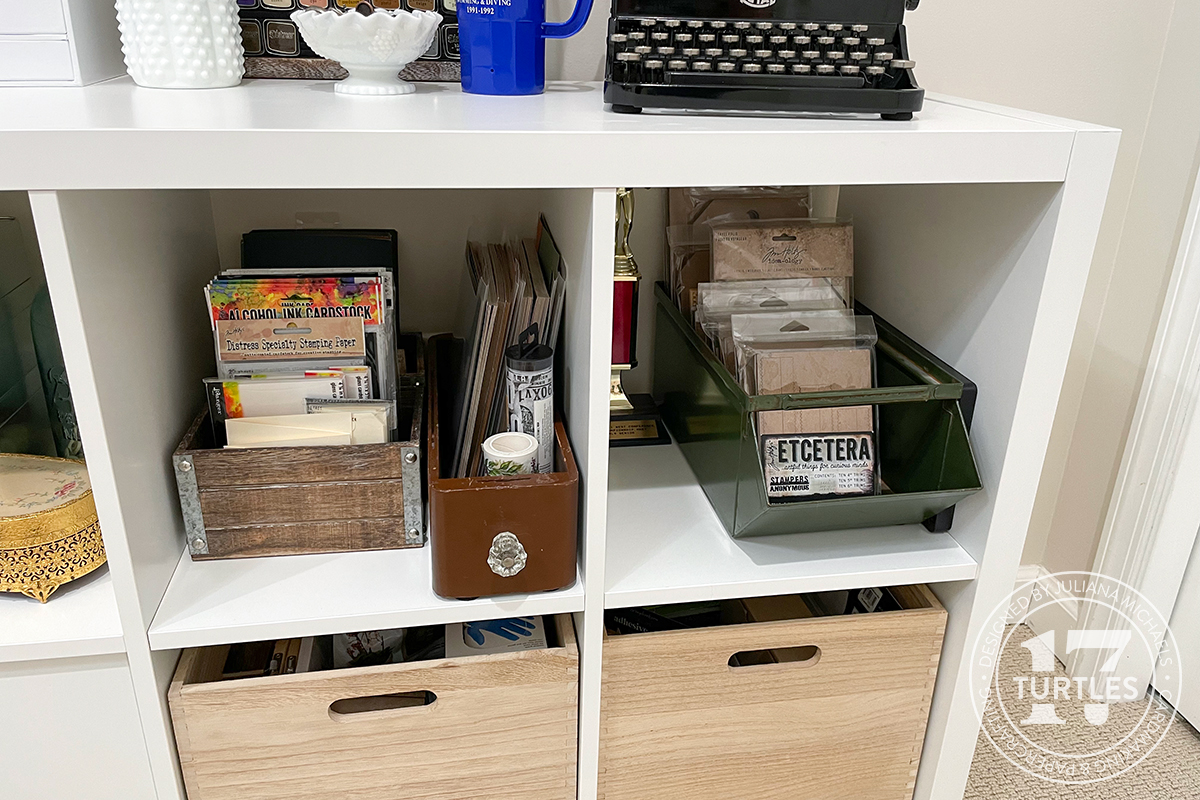
The small wood crates were purchased several years ago at JoAnn in the garden/floral section and I use these to hold my Idea-ology paper and stickers. The black binder is a 6x8 album from Scrapbook.com and is where I store my ink swatches.
The brown drawer is an old sewing machine drawer and perfect for storing longer paper pads and sticker sheets. The green bin is a vintage hardware bin and I'm using it here to house my Tim Holtz Etcetera Thickboard. You might also notice the wood crates. I love these for storing items that I just don't want or need to see. The one on the left holds a mix of Idea-ology Vignettes and other surfaces and the one on the right holds my extra adhesives, foam squares, tape runners, refills, etc.
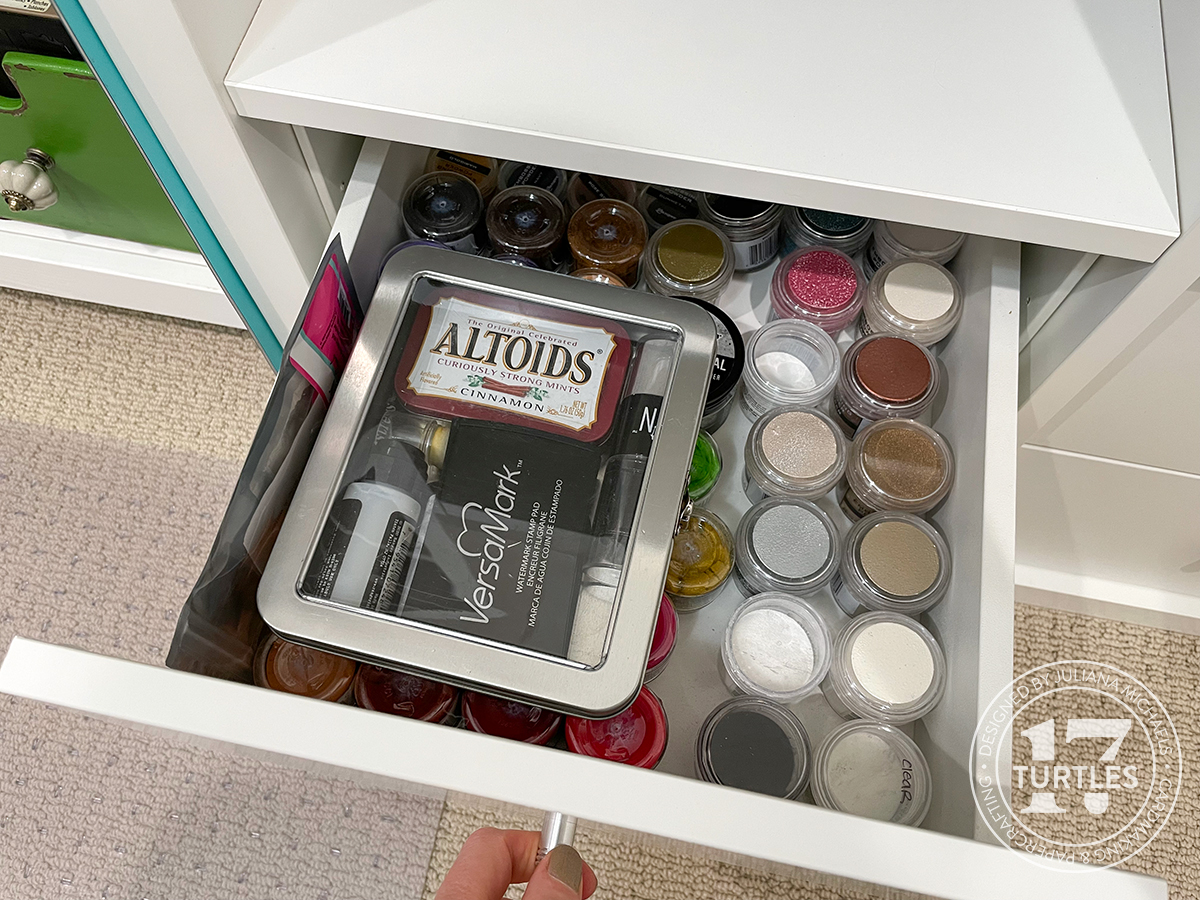
Also in the Kallax unit I have some drawers and in one of them I have my embossing powders organized.
On the middle bookcase, I saved the top 2 shelves as a place to keep my knick knacks and to display some of my makes. It is also a place to add a little more color and interest!
Below that I resume my product storage. Here I'm using a Totally Tiffany 6 Level Stadium to store and organize my Scrapbook.com Pops Of Color and Tim Holtz Foundry Wax. To the right of it, I have my washi tape in a vintage Ball Jar.
On the lower shelves is my Tim Holtz stamp and die collection.
I have the stamps stored in these Medium Envelope Organizer from Scrapbook.com and each organizer will hold 40 stamp sets. They were originally meant as a way to store and organize their medium storage envelopes, but once I realized my Tim Holtz stamps fit in them so perfectly, I began using them for that purpose. I just recently covered the front of each one with a piece of paper from one of Tim's Idea-ology Backdrops Paper Pads and love the color they add to my space.
Next I have these wood drawers/crates where I store my Tim Holtz Sizzix dies and embossing folders. These are from Hobby Lobby and I've had them since at least 2016, but they're probably a couple years older than that. Unfortunately, they're no longer available, but if you're looking for something similar you might try getting a wood crate, spray painting it and adding a decorative knob or drawer pull. The wood makes these a bit heavy, especially with the added weight of the dies, but the wood also makes it a nice and sturdy option for that weight.
On the lower shelf you can find my Tim Holtz stencils (still looking for a better solution for these), Scrapbook.com Medium Storage Envelopes filled with paper scraps sorted by manufacturer/color, extra envelopes and card bases, extra stamping platforms and large stamp blocks and my Sizzix Bigz dies.
Over on the left hand side, I have a similar set up as on the right with the use of another Kallax unit.
Above the unit, I have some of my own creations hanging on the wall. The ink storage on the left is from Stamp-N-Storage and houses all my non-Distress Ink Pads. The cubby on the right side was a Jillibean Soup sample that never went to market, but it has become a great place to store my collection of Tim Holtz mediums.
Within the unit, I have a lot of my Scrapbook.com products stored in the top cubbies.
This is the Scrapbook.com Large Stadium Organizer. I'm using it to store a lot of my stamps and dies. This unit has 9 compartments in a variety of sizes that are perfect for storing so many crafting supplies. In the front I'm using the Scrapbook.com Small Storage Envelopes to organize some of my die sets. As with the other organizers, I adhered patterned paper to the front of the unit from a bit of color and interest.
In this cubby is another one of those vintage hardware bins and this one holds my larger stamp sets and stamps from other manufacturers, such as Pinkfresh Studio. The 6x8 albums are from Scrapbook.com and this is where I store my 6x8 stencils.
On the right hand side you can see the Scrapbook.com Ink Pad Organizer that I'm using to store my A2 Paper Pads. Next to this is my colored cardstock divided by manufacturer and stored in white plastic magazine holders.
In the wood crates, starting on the far left, I have my Tim Holt Halloween Idea-ology. The next one holds my Christmas Idea-ology and the one next to that holds my felt, ribbon and twine.
And just in case you were wondering, this is all Ziva approved!
Next to my desk I have a Raskog cart. On the top, I have the Scrapbook.com Heat Tools and Accessory Organizer. This has quickly become one of my new favorite organizers and I love that I now have a safe place to store my heat guns after using them. I'm also using it to house my most frequently used tools, adhesives and other items. Behind it I have a metal planter I got from the craft store and I use that to hold my MISTI, scoring tool, and sticky mats.
On the second tier I have my blending brushes in a holder from Hero Arts, another metal planter holding more adhesives (foam squares, foam tape rolls, easy tear tape, etc) and my Sizzix Sidekick. On the very bottom shelf (not pictured) I store my Tim Holtz Tonic Comfort Trimmer and a roll of paper towels.
In front of my desk, I have a dresser drawer unit from IKEA. I show a bit more of this in my video. I use the top of it as my cutting station and you will find my Tim Holtz Tonic Guillotine Trimmer and Tim Holtz Sizzix Switch Die Cutting Machine here. The drawers are quite large and hold a ton of stuff.
The top drawers are a mix of junk drawers, small tools and die cutting plates and adaptors.
In the left middle drawer I have my Minc Machine and foil sheets. In the right middle drawer I have my Silhouette and Canon Selphy.
The bottom drawers are where I store some of the heavy products. In the left bottom drawer I have used Scrapbook.com White Bins to organize my sequins, liquid adhesives, extra mediums, paint and other miscellaneous supplies.
On the right hand side I have my collection of Tim Holtz Distress Inks Sprays, Mica Stains and Oxide Sprays and Reinkers. I'm once again using the White Bins from Scrapbook.com. I really love using these to help organize and the bins make it easy for me to pull them out and bring over to my desk when I want to use them.
Last but not least, is the closet. Here I have an old book case where I store a mix of products that includes things I use frequently, such a paper, and others general craft items that I don't use as often.
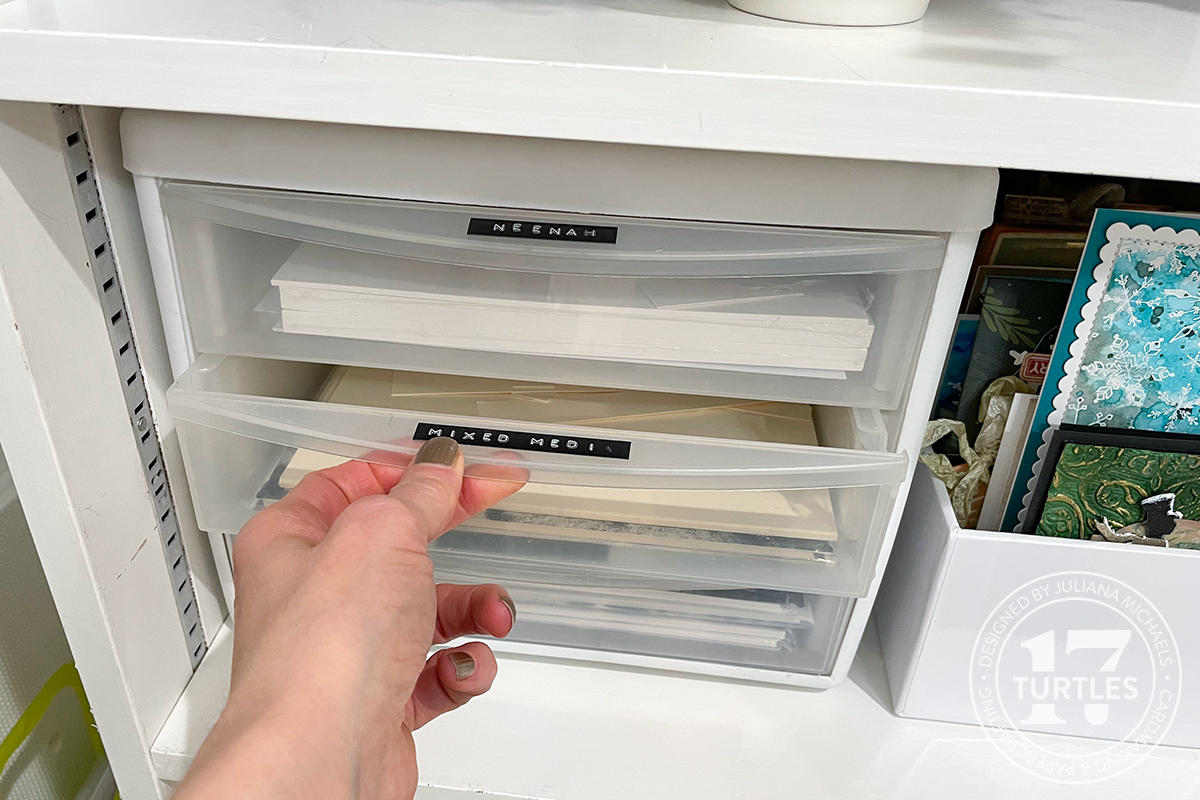
I use these plastic drawers to hold my Tim Holtz Ranger Ink Papers, Neenah cardstock and chipboard. I've used an old school label maker to label each drawer. In between the drawer units I have the Scrapbook.com Small Envelope Organizer and I'm using it to hold the cards I make.
Below that I have my specialty cardstock (glitter, foil, etc) on the left hand side and another plastic drawer unit for miscellaneous supplies such as plastic bags, extra storage envelopes and more chipboard. In between these is the Scrapbook.com Stadium Organizer that I'm using to house my seasonal stamps, dies and paper pads.
On the bottom shelf I have two more of the wood crates to house some generic craft supplies such as vinyl and my splat box.
I hope you enjoyed this tour of my craft room and found some ideas that might help you as you organize your craft room. I also promise that it's not always this nice and neat, but it is close to it most of the time. As I mentioned above, this is really integral to my creative process. And just as I thrive in neatness you may thrive in chaos. Neither one is wrong or right. We should each strive to find what makes us the most creative and efficient with the time we have to create and to enjoy the process!
ORGANIZATION AND STORAGE
Below you can find the organization and storage options I have mentioned above along with compensated affiliate links to Scrapbook.com. These links are at absolutely no cost to you. When you shop through the links below, I receive a small commission from Scrapbook.com. These links are at absolutely no cost to you and the commission I receive helps me cover the costs of my blog and other expenses, which allows me to continue to provide you with FREE inspiration and tutorials. If you want to learn more about what an affiliate link is, you can see my full affiliate and product disclosure statement here. Thank you so much for your love and support!