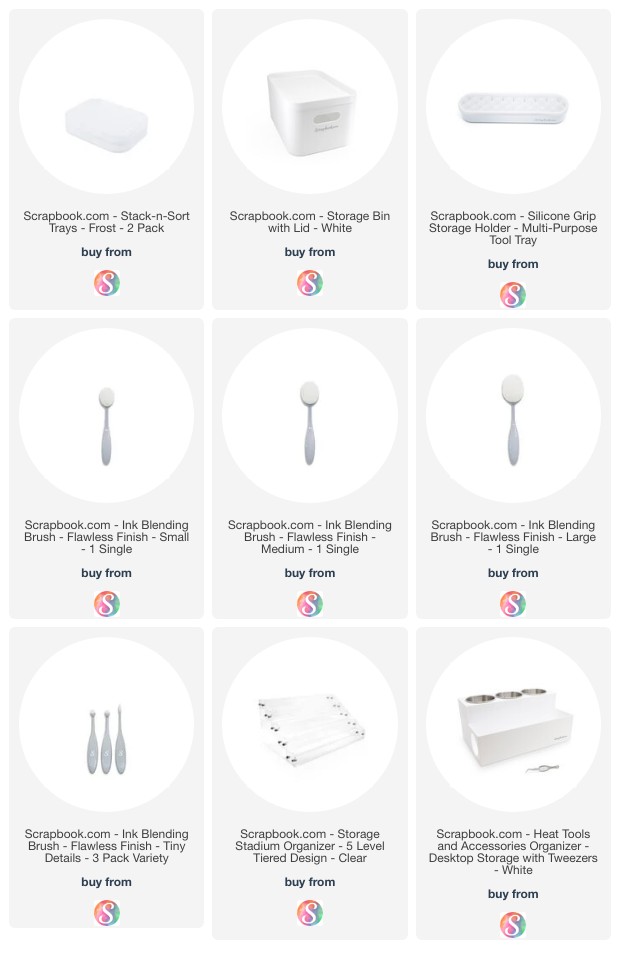
Showing posts with label Craft Room. Show all posts

Workspace Wednesday | Tiered Storage For Distress Spray Stains & Oxide Sprays and More

I'm back with another Workspace Wednesday and this week I wanted to share some new tools and storage products from Scrapbook.com that have found a home in my craft room. The ones I'm sharing here are already making big improvements in my creative making flow and that's why I wanted to share them with you!

Scrapbook.com 5 Level Tiered Stadium Organizer with Tim Holtz Distress Spray Stains and Distress Oxide Sprays

I have a new YouTube Video that shares all about these new tool and storage ideas. You can watch it below or head over to my YouTube channel.

STACK-N-SORT TRAYS

First off are these new Stack and Sort trays. They come in a frost color and 2 to a package. I'm personally hoping they will come out with them in white as well so they match the other storage pieces I currently have. They are 6 x 4.5 inches in size and 0.75" tall and they stack. I'm using them to hold die cuts and ephemera and to help keep them organized on my desk.

Scrapbook.com Stack-N-Sort Trays for storing die cuts and ephemera

I've been using the lids from the Scrapbook.com Storage Bins to do this and they are pretty much the same thing, just much larger. And what is super awesome is they all stack together! So that gives you so more options for how to use them. As for the actual Storage Bin, I've been using them to store my Distress Spray Stain and Oxide Sprays. But...I may have a new storage option for these, as you'll soon see!

Scrapbook.com Storage Bins for storing Tim Holtz Distress Spray Stains and Distress Oxide Sprays

MULTI-PURPOSE TOOL TRAY

Another thing is their new Multi-purpose Tool Tray. Which they are showing on the packaging with their new blending brushes. It's pretty substantial and has a nice weight to it. Besides the brushes you could also use it to hold scissors, tweezers, and other craft tools.

Scrapbook.com Multi-purpose Tool Tray in Ikea Raskog Cart


I've got mine in my Raskog cart next to my Heat Tools & Accessories Organizer.

Scrapbook.com Multi-purpose Tool Tray in Ikea Raskog Cart

Scrapbook.com Multi-purpose Tool Tray in Ikea Raskog Cart

BLENDING BRUSHES

Scrapbook.com is now offering blending brushes that come in a variety of sizes. While these aren't anything new, these are Scrapbook.com branded and the light grey color is a great neutral if you don't care for the black or rainbow colored ones that are available. They come in a variety of sizes that would suit any type of use you can think of.

Scrapbook.com Blending Brushes with Stencil

They come in Large, Medium, Small and a pack of Detail Brushes. The brush heads range in size from 1.5 x 2 inches for the Large all the way down to 3/8 of an inch for the round detail brush.

Scrapbook.com Blending Brushes with Stencil

I'm reaching for brushes more and more, instead of the foam blending tools because they making blending a lot easier and smoother. I especially love using them for stencil work as they get into all the nooks and crannies on stencils and really create a nice crisp image.

5 LEVEL TIERED STADIUM ORGANIZER

Last, but not least is their 5 Level Tiered Stadium Organizer and I'm pretty excited about this one! At first I thought it could only be used for storing small bottles such as Pops of Color, Nuvo Drops, Reinkers, etc. So imagine my surprise when I realized it could hold Distress Spray Stains and Oxide Sprays! If you're wondering about whether or not it will hold a certain product, make sure to check out the Scrapbook.com website for a full list of all the different products it will hold.


Scrapbook.com 5 Level Tiered Stadium Organizer with Tim Holtz Distress Spray Stains and Distress Oxide Sprays

The organizer comes in pieces and there is some assembly required, but it has great instructions and if you follow them you will find it comes together with a little elbow grease and patience. In my video, I share that I originally didn't intend to film putting it together, but then decided to just to see how long it took me. It ended up taking me about 13 minutes to put it together. Which isn't too bad, but I will say trying to hold onto those little screws was a challenge. The biggest thing I can recommend is to read the instructions and follow them because they definitely made all the difference in getting this assembled properly. In the video I share some of my biggest takeaways that you might find helpful when you go to assemble yours.

Once assembled the organizer is 12.25 inches wide, 7.75 inches deep. It's 1.125 inches tall in the front, 5.75" tall at the back and each row is just under 1.5" wide.

Of course, the first thing I had to try after I got it assembled was to see if my Distress Spray Stains and Oxide Sprays fit. And they do! Each organizer will hold 40 of these bottles, so if you have the entire collection, you're going to need several of these to hold them all. I'm still working out where to put them. As I mentioned, mine are currently in Storage Bins which I keep in my Ikea Dresser, but I'd like to use them more and I think if they are out where I can get to them easier, I'll be more likely to do that.


Scrapbook.com 5 Level Tiered Stadium Organizer with Tim Holtz Distress Spray Stains and Distress Oxide Sprays

Thanks for stopping by to check out my latest Workspace Wednesday installment. I hope you enjoyed learning about these new tools and storage products from Scrapbook.com.

SUPPLIES

Below you can find the products I've mentioned in this post along with compensated affiliate links to Scrapbook.com. These links are at absolutely no cost to you. When you shop through the links below, I receive a small commission from Scrapbook.com. These links are at absolutely no cost to you and the commission I receive helps me cover the costs of my blog and other expenses, which allows me to continue to provide you with FREE inspiration and tutorials. If you want to learn more about what an affiliate link is, you can see my full affiliate and product disclosure statement here. Thank you so much for your love and support!

Craft Room Storage Ideas

Does the beginning of a new year make you want to organize and purge? Are you looking for some new craft room storage ideas? This time of year definitely gets me motivated to organize and purge, but I'll admit that organizing and purging is a constant thing for me. It's almost part of my creative process. As new products come into my space I'm always moving things around to find a better workflow. Nearly 2 years ago, we moved into our current home and I've struggled with the placement of everything in this new space. I've rearranged my room multiple times, but just recently I went back to a set up I had several years and two houses ago. This set up worked great for me then and I'm finding that it still works for me now and I'm wondering why I was fighting that set up from the start. My desk is in the middle of the room facing out toward the door and all my supplies (at least the most used ones) are behind me on shelves.

Scrapbook.com Exclusive Craft Room Storage Ideas featuring their 4 Drawer Organizer, Stadium Storage, 4x6 Clear Storage Case and Storage Jars

I still have some work to do in finalizing things and once that's done, I'll do a full room tour. For now though, the next step in getting my space completed is to find a counter height long table of some sort to place opposite my desk. On this I want to place all of my larger craft tools - such as my Big Shot, Silhouette, Minc, and paper trimmer. I found one from Ikea that might work, but of course it's out of stock, so I'm going to have to be patient until it becomes available again. Until then, I'm going to be hanging curtains, which will add some texture but also to unfortunately cover the lower part of the large window in my craft room. I love the natural light, but in the summer it faces west and it gets over 90 degrees in my room and in the winter their is quite the draft and it gets rather cold. So some insulating curtains will help and I'm going with white to keep it bright. It also helps that my husband installed 4000K can lights in the ceiling, so the room is quite bright with those. After that, I'm going to finally hang some art on the walls and make this space more me!

Scrapbook.com Exclusive Craft Room Storage Ideas featuring their 4 Drawer Organizer, Stadium Storage, 4x6 Clear Storage Case and Storage Jars

Until the room is completed though, I thought I'd share some of the new storage options I've recently added to the tops of my Kallax units thanks to some new products from Scrapbook.com. They released several new items including a Stadium Organizer and a 4 Drawer Organizer that I've fallen in love with. They are made from heavy duty 4mm ultra thick greyboard wrapped in sturdy white glossy paper. I'm not a huge fan of plastic storage, most of what I have is wood or upcycled vintage containers, so these make my reduce/reuse/recycle heart happy!

The Stadium Organizer is perfect for storing all sorts of things, from stencils to stamps to dies and pretty much anything you can think of. If you are into pocket scrapbooking, they are perfectly sized to hold 3x4 and 4x6 cards. Two of them can fit side by side on an Ikea Raskog and they can also fit in your Kallax units.

The other product I'm loving is the 4 Drawer Organizer. It's made from the same material and has 4 drawers that you can fill with all kinds of goodies. You might have noticed that I customized mine a bit by adding some Tim Holtz Idea-ology knobs. To do this, remove the drawer, flip it around so that notch is to the back, drill a hole in the center of the drawer and then insert the knob. It took just a few minutes to dress them up with these knobs. As for the storage part, I'm using mine to hold my collection of Tim Holtz Idea-ology Ephemera, and I'm kind of thinking I might need another one! Also, 2 of these will stack on top of each other to fit inside the Kallax units. They won't fill the entire space, but I love that they fit!

Speaking of storing paper bits, another option I love even though it's plastic, are the 4x6 Clear Photo Craft Storage Case. I'm currently using several of them to store extra die cuts, and other Idea-ology bits.

If you are looking for something to hold small embellishments such as sequins, beads, buttons, or as in my case any of the metal Idea-ology bits, the Scrapbook.com Storage Jars are a great solution. I love that they have a secure lid that is easy to remove, but when you close them you don't have to worry about things spilling. I also love that I can see what I have due to the clear plastic.

I hope you enjoyed learning about some of my new Craft Room Storage Ideas. If you have any specific questions about them or my craft room in general, please don't hesitate to reach out. And as I already mentioned, I'll be sharing a full craft room tour here as soon as I can.

Supplies

Here you can find the craft room storage products that I shared in this post along with compensated affiliate links to Scrapbook.com. These links are at absolutely no cost to you. If you want to learn more about what an affiliate link is, you can see my full affiliate and product disclosure statement here.

My Creative Space and Craft Supply Storage

Hello friends! Today I'm sharing my full creative space over on the CardMaker Magazine Blog, and I thought it would be fun to share here on my blog about specific storage ideas for craft supplies. This includes embellishments, stamps, dies, ink pads, twine, spray ink, paint and more.  I love to organize things and I especially enjoy keeping my craft supplies neat and orderly. Over the years, I've developed a few tricks that help me stay on top of my stash of scrapbooking and card making supplies.
  • Purge and purge often. Seriously. I purge at least every 6 months. I go through my products and pull out things that I haven't used. They get put into a giveaway pile and I donate them to the local thrift stores and schools. I also give stuff away to friends and family who enjoy this hobby.
  • Clean up after each project. I tend to work best when I don't have a lot of clutter around. This is also why I tend to purge so often.  That's not to say that I can't make a mess, because I certainly can. However, I always put things back in their place when I'm finished. My space is then ready to go the next time I sit down to create.
  • Use open storage or clear containers/drawers. I have found that if I can see it, I am 10 times more likely to use it. If it's hidden away, I forget about it and then guess what happens in 6 months? It ends up in the giveaway pile!
Scrapbook and card making storage ideas - Juliana Michaels of 17turtles shares her creative space and craft supply storage

Here are some of my favorite storage containers. First up are these fabulous wood boxes that look like drawers. I picked these up several years ago from Hobby Lobby and I seriously love them. They are perfect for holding embellishments, stamps, dies, embossing folders, 6x6 paper pads and more. Unfortunately, they aren't available anymore, but I think it could be fun to make your own using old dresser drawers, paint and fun knobs to match your decor! There are lots of great options out there. Just keep your eyes open for fun containers that are at least 6 inches wide and then most of your products will fit inside.

Scrapbook and card making storage ideas - Juliana Michaels of 17turtles shares her creative space and craft supply storage

Many people use the clear refrigerator storage bins, and of course those work great and are probably a little less expensive, however I think these are so much prettier to look at.  Don't you agree?!

Scrapbook and card making storage ideas - Juliana Michaels of 17turtles shares her creative space and craft supply storage

For my stamps and dies, I love the Clear Pocket Storage by MFT Stamps. I used to keep my stamps and dies in their original packaging, however since I've started doing more card making I was starting to tear the packages. I knew I needed a better solution and so far this is working really well for me.

Scrapbook and card making storage ideas - Juliana Michaels of 17turtles shares her creative space and craft supply storage

Another type of storage that I like to use are Sterilite Modular drawers and small Sterilite storage baskets. The drawers hold 2 of these baskets. I love that it lets me keep like things together and I can easily take the basket out of the drawer and over to my craft table to create. Currently, I have my ink pads in these drawers, but I'm quickly starting to realize I'm going to need a new system as my card making supplies continue to grow! I'm not sure what I'll do, but once I switch over, I'll have to share with you and if you have any suggestions, I'd love to hear them.


This same basket and drawer system also works well for my twine and ribbon.

Scrapbook and card making storage ideas - Juliana Michaels of 17turtles shares her creative space and craft supply storage

Recently I came across this Darice Bead Container (on the left) that works great for my sequins. It has 24 little canisters that allow me to keep all of my colors separated and I can just flip open the top to easily shake out the sequins I want to use for my project. On the right are Artbin Twisterz. They work great for secure storage and they even stack. However, because they are round, they take up a lot of space in my baskets. 

Scrapbook and card making storage ideas - Juliana Michaels of 17turtles shares her creative space and craft supply storage

This Akro-Mils Plastic Storage Case has separate compartments that are great for small embellishments such as wood veneer, flair, buttons, brads and more. I have several of them and I use each one to store a different type of embellishment. The lid snaps closed securely and I love that I can remove the dividers to make the compartments larger if needed.

Scrapbook and card making storage ideas - Juliana Michaels of 17turtles shares her creative space and craft supply storage

Last, but not least, I use a cupcake stand to store my spray ink and paint. I love the rainbow of color it adds to my creative space!

Scrapbook and card making storage ideas - Juliana Michaels of 17turtles shares her creative space and craft supply storage

I hoped you learned some fun new storage ideas today. If you're interested in seeing a full view of my creative space and more craft room ideas, I invite you to head over to the CardMaker Magazine Blog. Each day this week they'll be sharing the creative spaces of each of the new design team members, so I'm sure you'll find loads of great ideas with each visit!

Are you interested in any of the storage ideas I shared with you today? Just click on the image below to check it out. Where available, I use affiliate links.  If you make a purchase after clicking, this means I'll receive a small commission at no extra cost to you. Thanks so much for your support!


Scrapbook Room Makeover Part 2


The scrapbook room progress has been slow, and it is actually almost finished. I still need to hang a few things on the wall and I'm looking to get a new computer desk. I need something that is a little more ergonomically correct than what I have been using. That's the Physical Therapist in me that is talking out loud and telling me I need a better set up so my neck and shoulders don't bother me so much!

Today, I thought I share you some of the progress photos. Above and below are photos of how things looked and how I tried to function once the wall was painted but I still didn't have my book shelves done. I seriously had stuff everywhere. At least on the one side of my room. The area right around me desk wasn't too bad.


PAINT COLORS

Wall | Valspar - Spritz of Lime 
Book Shelves and Dresser | Sherwin Williams - Snowbound

I initially tried to use a Valspar paint on my bookshelves, but it went on horribly when I attempted the second coat. I'm not sure what the problem was and I was unable to get any assistance on what to do about it from my local Lowe's. Because of this, I re-sanded all of them, applied another coat of Kilz and then switched to the Sherwin Williams. It went on beautifully and dried perfectly! I highly recommend it if you are doing any furniture makeovers. Two of my book shelves were stained wood and the other was pressboard and laminate. Now, they all look the same and it makes me so very happy!


I was also a very happy lady when I finally finished painting my shelves. It was now time for one of my favorite things...ORGANIZING!


I moved a few of my craft and scrapbooking tools and supplies to a new locations, but a lot of things went right back where they had been before. The things that stayed in the same place just worked for me there, so I didn't see the need to get totally crazy moving things around.


I will of course be sharing more details in another post once I finish up the last bits I mentioned. Overall, I really love the wall color and the white shelves really lighten up the room.

If you have any specific questions about anything regarding my Scrapbook Room Makeover or about how I store and organize things, feel free to leave me a comment below and I will give you an answer.


Scrapbook Room Makeover Part 1

I'm finally doing something that I have been dreaming of doing for years...I'm giving my scrapbook room a makeover! I have always wanted to personalize and decorate my scrapbook room, however, because we have moved so many times over the years, I have always just moved into the space that was available and left it as it was. I have never taken the time to make it my own. I have never hung anything on the walls.  I have always just moved my hand me down furniture into place and used it as it was.

Juliana Michaels Scrapbook Room Before The Makeover

Now, the time has come! I'm so excited that my dream is finally becoming a reality! I know my space probably looks great to a lot of people, but I have had this dream for years! I have collected some fun storage pieces and containers over the years that I love, but the furniture is what I have really wanted to change. The book shelves are a combination of "permanently borrowed" dorm room furniture, an old kitchen table, and salvage pieces found in the alley on garbage day. I've moved some of these pieces of furniture 6-7 times over the years, and I guess you could say that I'm just tired of looking at them! 

Juliana Michaels Scrapbook Room During The Makeover

Juliana Michaels Scrapbook Room During The Makeover Painting Bookshelves

So a couple of weeks ago, I decided it was time to make this dream a reality. I knew I couldn't afford to buy new furniture, so I decided to paint everything. I settled on a nice white color called Sunday Times. At this moment, I am in the process of painting all 3 book shelves and the chest of drawers this color. I have one more coat and they will be finished! I'm not much of painter and as you can see by my hand, I tend to get a little messy when I paint! I guess I could wear gloves, but that wouldn't be much fun!

Juliana Michaels Messy Hand while Painting Bookshelves

Juliana Michaels Scrapbook Room Makeover During Painting Bookshelves #sundaytimes

I also decided to paint the wall behind the bookshelves to create an accent wall with a super fun color called Spritz of Lime. It is an awesome color of green and my husband was sweet enough to paint the wall for me. He has one more coat and it will be complete. If you think my hands were messy from painting the shelves, I can promise you it would have been even worse if I had tried to do the walls!

Juliana Michaels Scrapbook Room Makeover During Painting The Walls #sprizoflime

As always, Milo has been supervising the entire process!

Juliana Michaels Scrapbook Room Makeover During Painting The Walls #sprizoflime

Once I finish painting the shelves and get things moved back into place I plan to paint my desk and determine whether or not I want to paint any of my storage boxes and containers or get rid of the plastic bins. I'm not really sure about all that yet. I also want to hang some things on the walls and really make it my own creative space!

This is just Part 1 of my Scrapbook Room Makeover. I plan to continue to share the process and the final result. If you have any questions or comments about things, please feel free to share or ask in the comment section below or message me on Facebook!

Evolution of My Scrap Space | Part 2

Today is a follow up to my post from last week about the evolution of my new scrap space. I have a ton of photos to share with you today, but it will give you an idea of how I store and organize my paper, embellishments, tools and other essential items.

These first few photos are of the continued evolution of my room.


Here is my finished scrap space!


This is another angle from the other side of the room. Here you can see my new table for my sewing machine. The prior owners left it and as soon as I saw it I knew what to do with it!!!
  

So, now let's take a closer look at my storage. This is the tall shelf in the middle. I have a row of glass jars, a couple of them are antique, that hold some of my ribbon. I love the colors of these particular Bo Bunny Ribbons, so I used them to add some color to my space.


I love to use some unique storage items to add a little character to my room because as you will see I have a bit of plastic storage as well.  I prefer that things are easy to see because it helps remind me what I have to work and play with. Out of sight, out of mind is totally me at times, so I try my best to avoid that dilemma!!!


Isn't this little toy wagon adorable?! I found it at a antique store and it is the perfect thing for storing my altered art mediums such as Gesso and Molding Paste.


My favorite storage containers however, are these awesome wood box drawers from Hobby Lobby. 


They are perfect to hold Cuttlebug folders, spray inks/mists, paint, stamps, jewels and other embellishments. I would love to have more and hopefully in the future I will be able to get a few more of them.


My patterned papers are organized in plastic paper holders. I group them into folders or sections by manufacturer and if I am on their Design Team, such as for Bo Bunny, I group each collection together as well. 


I also use Sterilite Drawers to organize and store a lot of my embellishments. Inside each drawer I have Sterilite Trays to further corral items such as my embroidery thread, ribbon and twine.


I also use these drawers without the trays to store my flowers.


Another fun storage item I found is this 3-tiered holder. It is perfect for holding my Distress Stains and Inks as well as other miscellaneous scrapping items.


I use a chest of drawers to organize and story my punches. I placed a piece of drawer liner on the bottom of the drawer to keep the punches from sliding around so much. I just came up with this idea the other day and love it!!!


Well, there you have it. As I was writing this post, I realized that I could easily take more photos of more things. I didn't show you my button or cardstock storage, but there are several other things you might enjoy seeing. If you have any questions, just ask! I'll be happy to share.  I did have one comment asking about the flooring. It is carpet. Not my first choice for a scrapbook room because of paints and inks and such! I put down some plastic floor mats for now under my chair and desk to hopefully help protect the carpet until the day we can replace it with something a little more durable.  I still have a few more things I want to organize, including all the items I use for altering projects and other craft supplies. I will then be done with the organizing for now. It is always an evolving process for me. At least now I can use the room to scrap and create and I will be sharing some projects as soon as I can!
Subscribe