Showing posts with label Stampers Anonymous Halloween 2023. Show all posts

Happy Halloween Card | Tim Holtz Stampers Anonymous Halloween 2023

Hello Crafty Friend! Thanks for stopping by today. In this blog post I'm sharing how I created this Halloween Card for the Tim Holtz Stampers Anonymous Halloween 2023 Live. I'm going to take you step by step through all the wonderful layers that came together and the process I went through to create the final version of this card.
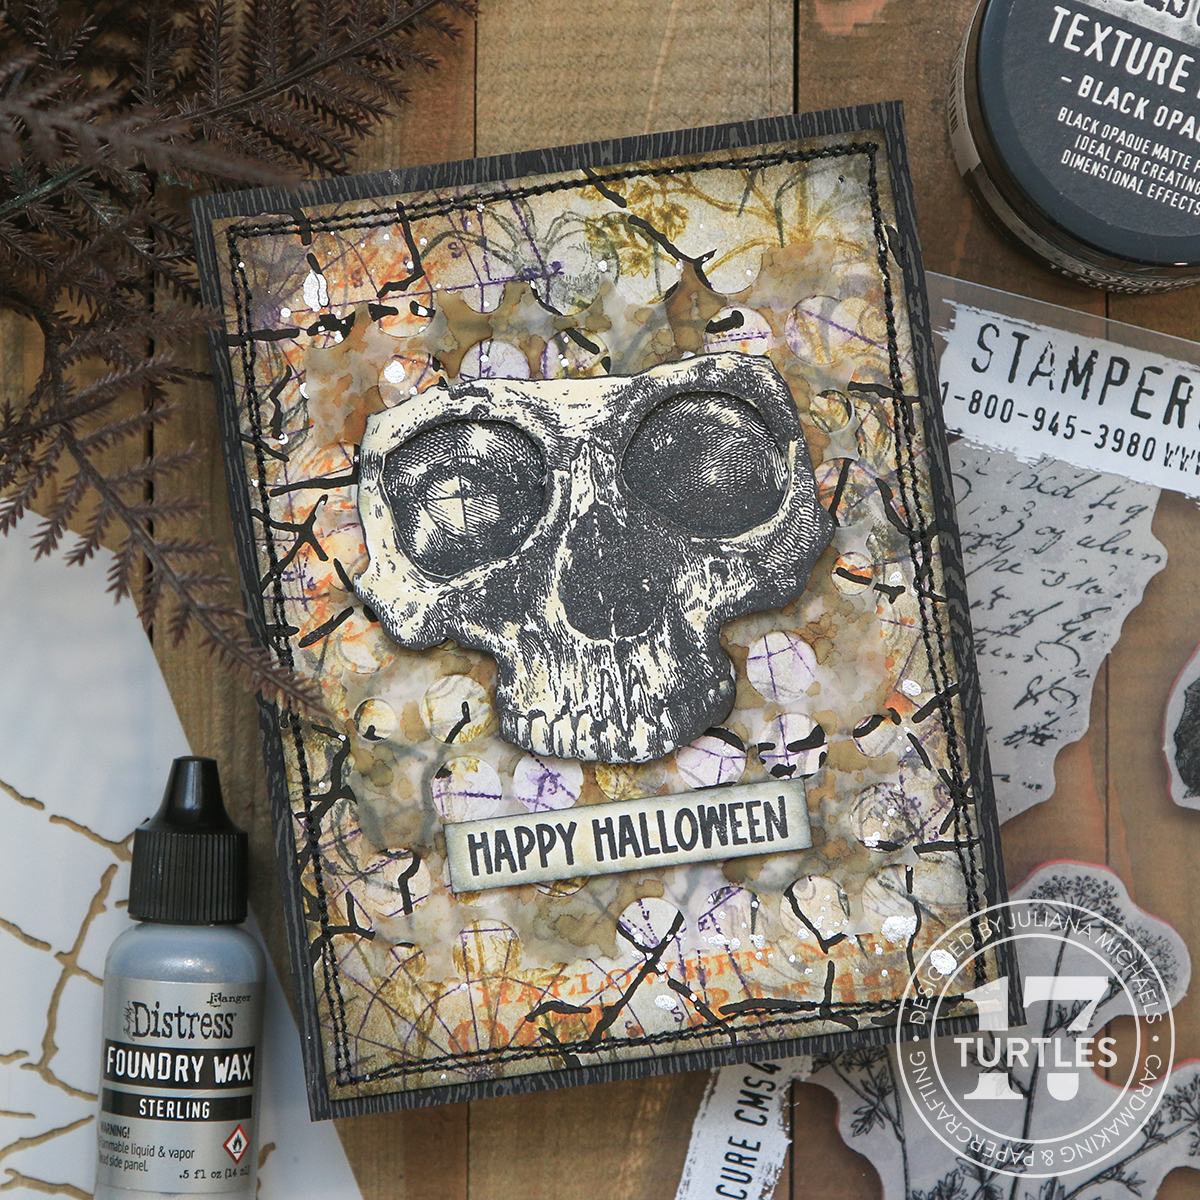
Happy Halloween Card by Juliana Michaels featuring Tim Holtz Stampers Anonymous Halloween 2023 Foreboding and The Obscure Stamp Sets and the Shattered Layering Stencil

If you prefer a video format, you can watch the process below or over on my YouTube channel.


If you're interested in the supplies I've used, you can find links to them in the description box below. When you shop through those links it supports me and I really appreciate that so very much! There is also a blog post available with written details and more photos if you prefer a that.

Now let's get on with the making.

STAMP AND SMUDGE TECHNIQUE

I started by creating the background for this card using the Stamp and Smudge Technique. I used the Tim Holtz Stampers Anonymous The Obscure and Foreboding stamp sets. These are some of my favorites from this release! I also used Distress Oxide Inks in Forest Moss, Carved Pumpkin, Villainous Potion, Black Soot and Hickory Smoke.

I began by placing a piece of Distress Watercolor cardstock cut to 4 x 5.25 inches into my stamping platform and began stamping that super cool spider web image from The Obscure Stamp Set. I inked the stamp with Villainous Potion Distress Oxide Ink, stamped the image and then while the ink was still wet, I used a paper towel to dab some of the ink dry and then used that same paper towel to smudge the ink by lightly rubbing over the stamped image. Next I used the same technique and stamped the weed image using Forest Moss Distress Oxide Ink. I then used Carved Pumpkin Distress Oxide Ink to stamp three more images and to help spread that color across the background. The next images I used were the two flourishes from the Foreboding stamp set with Hickory Smoke Distress Oxide Ink. The final stamp and color was the creepy spider stamped with Black Soot Distress Oxide Ink.


BLACK OPAQUE TEXTURE PASTE

The background was good at this point, but I felt like it needed more texture. I placed the Fractured Stencil toward the upper left hand corner and applied Black Opaque Distress Texture Paste through the stencil using a palette knife. I then carefully lifted off the stencil, flipped it around and applied some paste to the bottom right hand corner. I carefully removed the stencil, set the paper to the side to dry and immediately washed my stencil.

THE OBSCURE EMBELLISHMENTS

While the paste was drying, I move on to the embellishment layers. I stamped the skull image onto Distress White Heavystock using Black Soot Archival Ink and used a pair of detail scissors to fussy cut the image. While I was cutting out the skull, I thought it might be cool to make this more dimensional somehow. So I stamped the image a second time. This time I used my craft knife and scissors to carefully cut out the eye sockets. Once I got the eye sockets cut out, I repeated the fussy cutting process for the skull.

After I finished cutting out the second skull I colored both of them using Distress Watercolor Pencils in Old Paper. I like to pull the pigment from the pencil using a water brush and then paint it onto the paper. You could achieve the same result with water and a paint brush and if you don't have the watercolor pencils, you could also use a Distress Re-inker or even a Distress Ink Pad. Just smoosh the ink pad onto your craft mat and pick up the ink with your brush. I colored both images, but I probably could have gotten away with just coloring the top layer and the eye sockets of the bottom layer.

To make this dimensional, I added foam adhesive squares and adhered the skull with the cut out eye sockets on top of the full skull image. I then inked the edges of my skull embellishment with Black Soot Distress Ink.


BACK TO THE BACKGROUND

Once the paste was is dry, I went back to the background to add some more interest. I applied Walnut Stain Distress Ink to the edges of the paper. To add a bit more distress, I applied some water by slowly pulling the trigger on my Distress Sprayer to make larger droplets. The water rewets the ink and causes it to flow and move. I then used my heat tool to dry the ink. Next, I darkened the edges a bit more by inking the edges with Black Soot Distress Ink. I then added a few more water droplets, dabbed them with a paper towel to lift some of the ink and then dried the paper with my heat tool.

THE SENTIMENT

For the sentiment, I used the Happy Halloween stamp from Tiny Frights Stamp Set. I stamped it onto a piece of white cardstock using Black Soot Archival Ink and then trimmed it into a strip leaving a small border around the the edge. I then inked the edge with Black Soot Distress Ink. To grunge it up a little, I applied some color using the Old Paper Watercolor Pencil and my water brush.


MORE TEXTURE WITH A DIE CUT

I still felt like it need more texture, so I took the Sizzix Layered Dots Die Set and cut a piece of vellum using the top layer die. This felt a little to neat and clean though, so I took my old school deckle edge scissors and trimmed off the edges. I used the placement of the skull and sentiment to help me figure out what size to cut it to and it ended up being about 3 x 4 inches in size. To grunge this up a bit more, I dabbed Sepia, Mushroom and Espresso Alcohol Inks onto the vellum using a felt alcohol ink applicator tool. This grunged it up just perfectly!

BLACK WOODGRAIN BASE

For the card base, I cut a piece of Distress Black Woodgrain Cardstock to 4.25 x 5.5 inches and adhered the background on this to complete the card.

FINAL DETAILS

To finish off the card, I added machine stitching with black thread to the edge of the background piece before I adhered all of the layers together. I also added some Sterling Distress Foundry Wax splatters by mixing a little rubbing alcohol with a drop of the Foundry Wax. I used a paint brush to splatter the wax onto the paper and then I used my heat embossing tool to set the wax. I love the tiny bit of sparkle they add to the background.
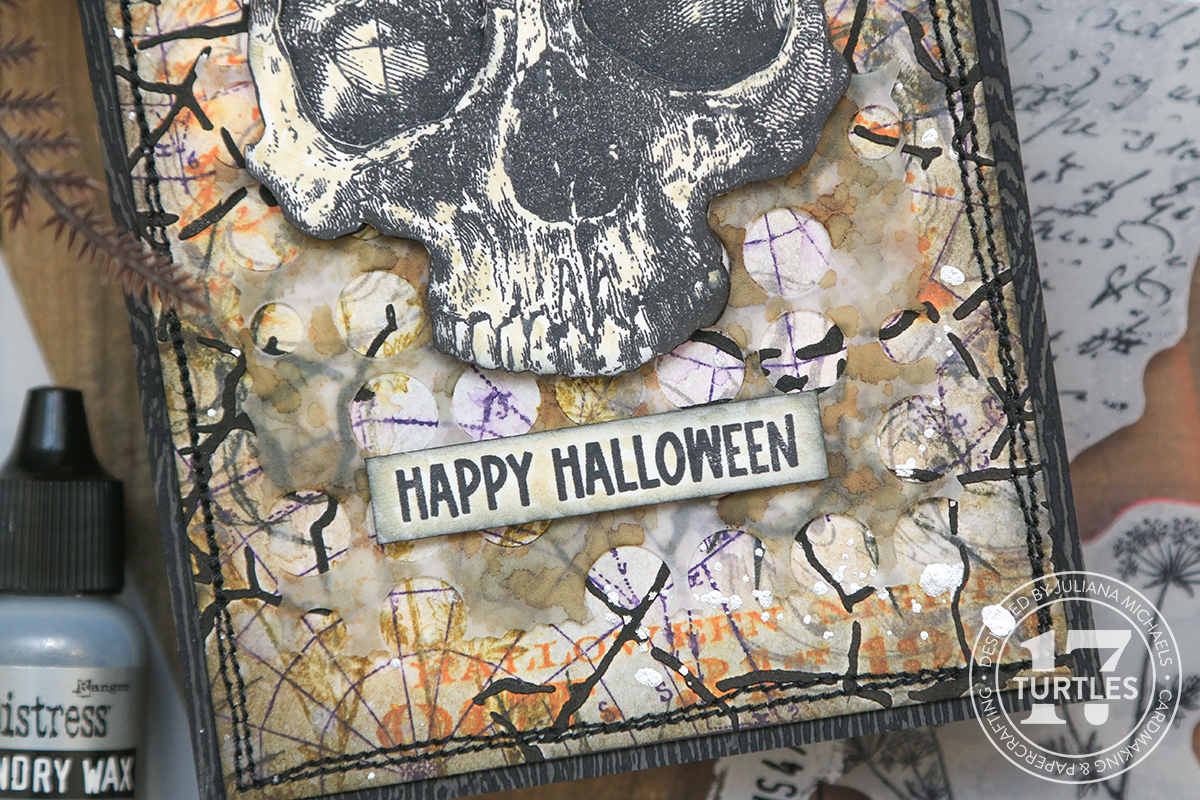

Thanks for stopping by today to check out this Halloween Card featuring stamps and stencils from the Tim Holtz Stampers Anonymous 2023 Release. I hope you enjoyed learning how it came together and found some inspiration for your next make! Until next time...stay crafty my friend!
 

SUPPLIES

Below you can find the supplies I used to create this October 31 Halloween Card. When you shop through the links below, I receive a small commission from Scrapbook.com. These links are at absolutely no cost to you and the commission I receive helps me cover the costs of my blog and other expenses, which allows me to continue to provide you with FREE inspiration and tutorials. If you want to learn more about what an affiliate link is, you can see my full affiliate and product disclosure statement here. Thank you so much for your love and support!

October 31 Halloween Card | Tim Holtz Stampers Anonymous Halloween 2023

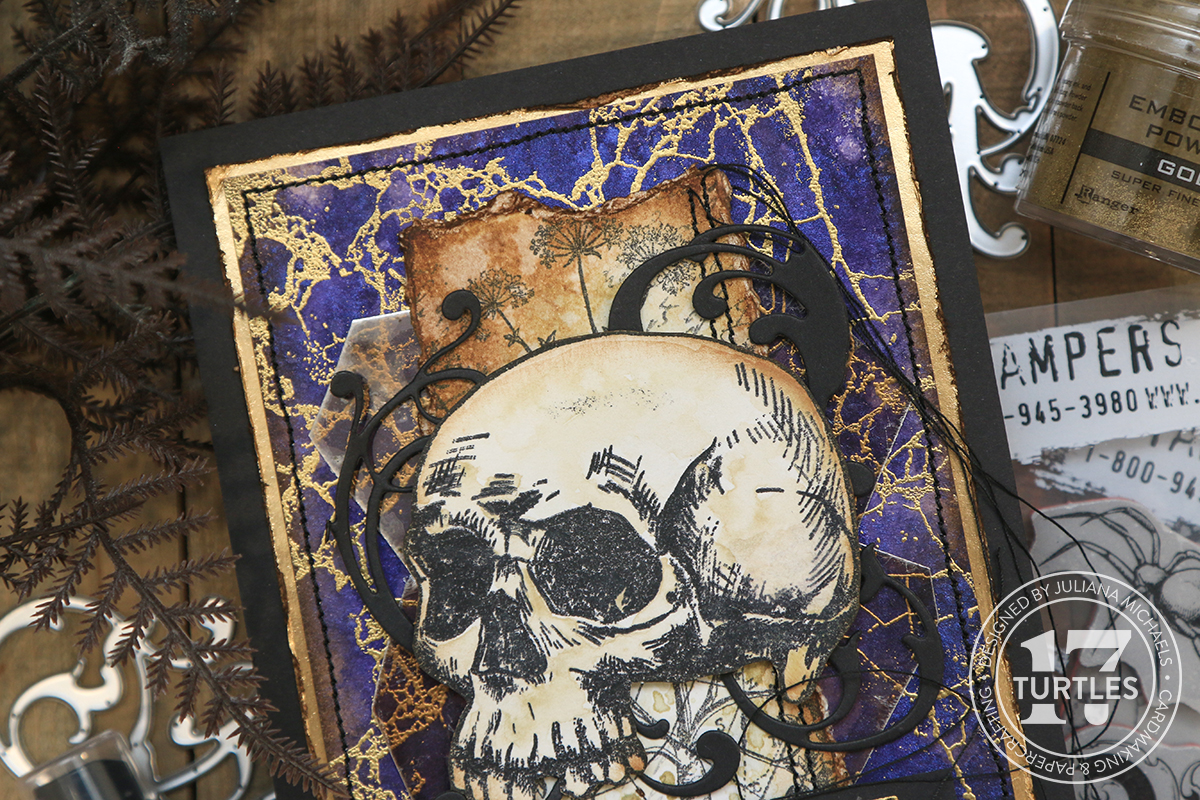
Hello my crafty friend! In this blog post I'm going to be sharing how I created this Halloween card featuring some of the new stamp sets from the Tim Holtz Stampers Anonymous 2023 Halloween release. For this card I'll be working with Shattered, Foreboding and The Obscure Stamp Sets and as I share how this card came together I'll take you step by step through how I used the various stamp sets and more. The finished size of this card is a little larger than my normal A2. This one is A6 in size which is 4.5 x 6.25 inches. I actually started off with my standard size but during the creative process, I decided to enlarge it so that all of the elements weren't so crowded and that more of the background paper would show. If you are looking for more inspiration from the release make sure check out Tim's YouTube Live and his blog for links to all of the projects created by the other Makers.

October 31 Halloween Card by Juliana Michaels featuring Tim Holtz Stampers Anonymous Halloween 2023 Foreboding, The Obscure and Shattered Stamp Sets

If you prefer a video format, you can watch below or head over to my YouTube channel to see the process in more detail.


If you're interested in the exact products I used to create this card, you can find links to them in the supplies list below. When you shop through those links, it supports me and I appreciate that so very much! Now let's get on with the making!

SHATTERED BACKGROUND


I began by placing a piece of Distress Watercolor Paper cut to 4 x 5.75 inches into a Splat Box. I used watercolor paper because I'm adding Distress Mica Spray Stain in Ominous Twilight and this kind of paper is perfect for using with wet mediums such as sprays. And I'm working in the Slat Box so that I don't get spray ink all over my craft space. Before I begin spraying I make sure to shake the spray until the mica is well mixed into the liquid. If you can see the mica on the bottom of the bottle you need to keep shaking it until that is mixed in. Once it was well mixed, I sprayed the ink onto the paper. To get the ink to move over the paper a bit I spritz it lightly with some water using my Distress Sprayer. I then use my heat tool to dry the paper. The Mica Spray Stains add so much gorgeous shimmer and shine!

To add some interest, I added some larger water droplets by slowly pulling the trigger of the Distress Sprayer. I used my heat tool to start the drying process. I then placed a paper towel over the paper to dab dry and lift off some of the ink and then dried it again with my heat tool. I love the interest this step adds to the already gorgeous shimmery background.

I'm going to be heat embossing during the next step, so you want to make sure your paper is completely dry because embossing powder can stick to wet paper.

For the heat embossing on the background I used the Shattered Stamp Set. This stamp actually comes with it's own stamping block, but I prefer to use a stamping platform just in case I need to restamp the image for any reason.

I placed the paper into my stamping platform and applied repositionable adhesive to the backside of the paper to help hold it in place. This is particularly helpful when working with large background stamps such as the Shattered Stamp Set which is actually larger than my paper and will keep me from being able to really use the magnets to hold the paper in place.

As I mentioned, I'm going to be heat embossing the image, so next I applied embossing ink to the stamp. I used Versamark Watermark Ink, but feel free to use any embossing ink you like.

After I stamped the image, I removed the paper from my stamping platform and placed it over a piece of computer paper folded in half. I then poured Gold Embossing Powder over the paper. I continued to add embossing powder until the entire image was covered with the powder. I then tapped off any excess powder and returned it to the jar.

To make the embossing powder permanent, you must apply heat. So next, I use a pair of tweezers to hold the paper so that I don't accidentally burn my fingers. I then apply heat using a heat embossing tool. As the powder and paper heat up, the powder begins to melt and turn shiny! It's seriously the most magical thing and I absolutely love watching the transformation every single time I heat emboss!


FOREBODING EMBELLISHMENTS


Next up I'm going to create some stamped embellishments for the card using images from the Foreboding Stamp Set. I placed a piece of Distress Watercolor Paper into my stamping platform and stamped the images using Black Soot Archival Ink. I originally played around with using the scroll like images but after thinking about the placement of them on the card, I decided to just stamp the candle and skull. I stamped the image several times to get a nice dark stamped image.

Once the images were stamped, I colored them using Distress Watercolor Pencils. When I work these, I like to pull the pigment from the pencil using a waterbrush. You could also use a wet paintbrush to do the same thing. I applied the pigment that I picked up with the waterbrush onto the paper and colored in the image. Here I'm using Antique Linen to color on the skull. Remember to start off with less color on your brush as you can always add layers of color to build them up and make them darker.

When working with the Distress Watercolor Pencils over stamped images, you will notice that they will layer over the ink and cause it to become less bold. To remedy that, I like to place the image back into my stamping platform and restamp the image. If you're worried about getting things lined back up, you can always leave the paper in the stamping platform and color it in there. After I re-stamped the image, I used a pair of detail scissors to fussy cut the skull image from the paper.


THE OBSCURE BACKGROUND


Next up, I wanted to create a stamped piece to layer behind the skull. I took a piece of Distress Watercolor Paper and adhered it inside my stamping platform using re-positionable adhesive. I then began stamping the images from The Obscure Stamp Set onto the paper using Black Soot Archival Ink. I choose this permanent ink for my stamping because I knew I was going to add some ink smooshing during the next step. As I stamped the script image I decided to hold the stamp with my fingers as I didn't want to stamp the entire image each time, but just parts of here and there to fill in the design.

With the stamping completed I went on to use ink smooshing to add some color to the paper I just stamped. I took an Old Paper Distress Ink pad and smooshed the ink pad onto my craft mat. I then spritzed the ink with some water and then smooshed my paper into the ink. I used my fingers to push sections of the paper into the ink. I repeated this several times until I'm happy with how it looked and then I used my heat tool to dry the paper. Once it was dry, I decided to add a bit more ink by smooshing the paper back into the ink that was still on my craft mat and then dried the paper once more. To add a little more interest, I then added some larger water droplets by slowly pulling the trigger of the Distress Sprayer. I began to dry the paper with my heat tool and then used a paper towel to dab dry and lift off some of the still wet ink. I then finished drying the paper with my heat tool.

The stamped layer was a bit too large to fit on my background paper, so I tore the edge of the paper and used the distress head of the Sizzix Surfacez Multi-Tool Set along the edges of the torn paper to give it a more distressed look. I continued tearing the paper and distressing the edges of it until I was happy with the size. It ended up being about 2 x 5 inches once I was done with it.

Next, I inked the edges of this piece and the skull with Gathered Twigs Distress Ink. Then, once again, I add some larger water droplets by slowly pulling the trigger of the Distress Sprayer. I dabbed the ink dry, lifted off some of the ink with a paper towel and then dried it with my heat tool.


MICA TILES


Some of you may have seen Mica Tiles before, but they are new to me and this was my first time to add them to a project. If you aren't familiar with them, Mica Tiles are compressed layers of naturally mined mica. They are heat resistant, multi-layered, transparent, acid-free, and archival safe. Because it's a natural product each tile has unique variations and markings which makes it perfect for adding a wonderfully organic touch and texture to just about any project. Here I'm using them quite simply as another layer of interest on my card, but there are many ways they can be used to add texture and interest to your project.

FINISHING DETAILS


Earlier I had thought about using the flourishes from the Foreboding stamp set, but instead I choose to add some die cuts. Using the Tim Holtz Adorned Thinlits Die Set I cut black cardstock for an additional layer of texture and interest.

For the sentiment, I stamped the October 31 image from The Obscure Stamp Set with embossing ink onto black cardstock and heat embossed it with gold embossing powder, just like I did earlier for the background paper. I then trimmed this down leaving a small border around the date.

To create the layer behind the purple embossed layer, I cut a piece of Gold Metallic Kraft Stock to 4.25 x 6 inches and distressed the edges using the same distress tool as before. I then inked the edges with Black Soot Distress Ink to darken it up.

I adhered the skull and date piece using double sided foam adhesive to add a little more dimension. I then added some machine stitching around the outside edge before I adhered all of the layers together. And then to finish it off, I layered everything onto a piece of black cardstock cut to 4.5 x 6.25 inches.


I hope you enjoyed learning how this Halloween card came together using some of the new stamp sets from the Tim Holtz Stampers Anonymous 2023 Halloween release. Until next time...stay crafty my friend!

SUPPLIES

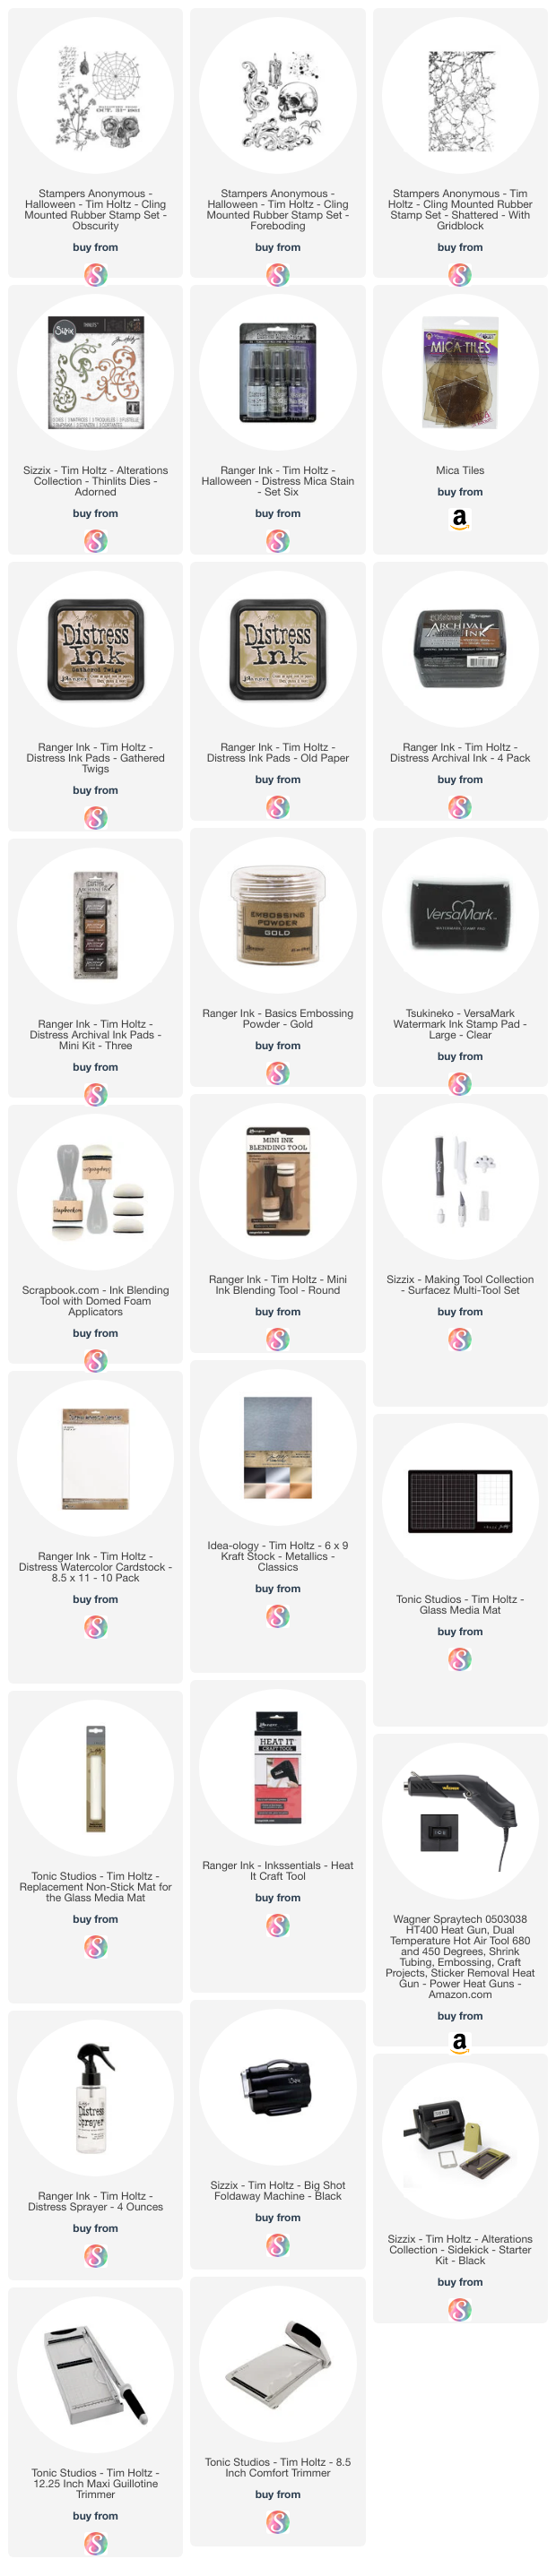
Below you can find the supplies I used to create this October 31 Halloween Card. When you shop through the links below, I receive a small commission from Scrapbook.com. These links are at absolutely no cost to you and the commission I receive helps me cover the costs of my blog and other expenses, which allows me to continue to provide you with FREE inspiration and tutorials. If you want to learn more about what an affiliate link is, you can see my full affiliate and product disclosure statement here. Thank you so much for your love and support!

Subscribe