Showing posts with label Stampers Anonymous Halloween 2022. Show all posts

By The Light Of The Moon Halloween Cards | Tim Holtz Stampers Anonymous Halloween 2022

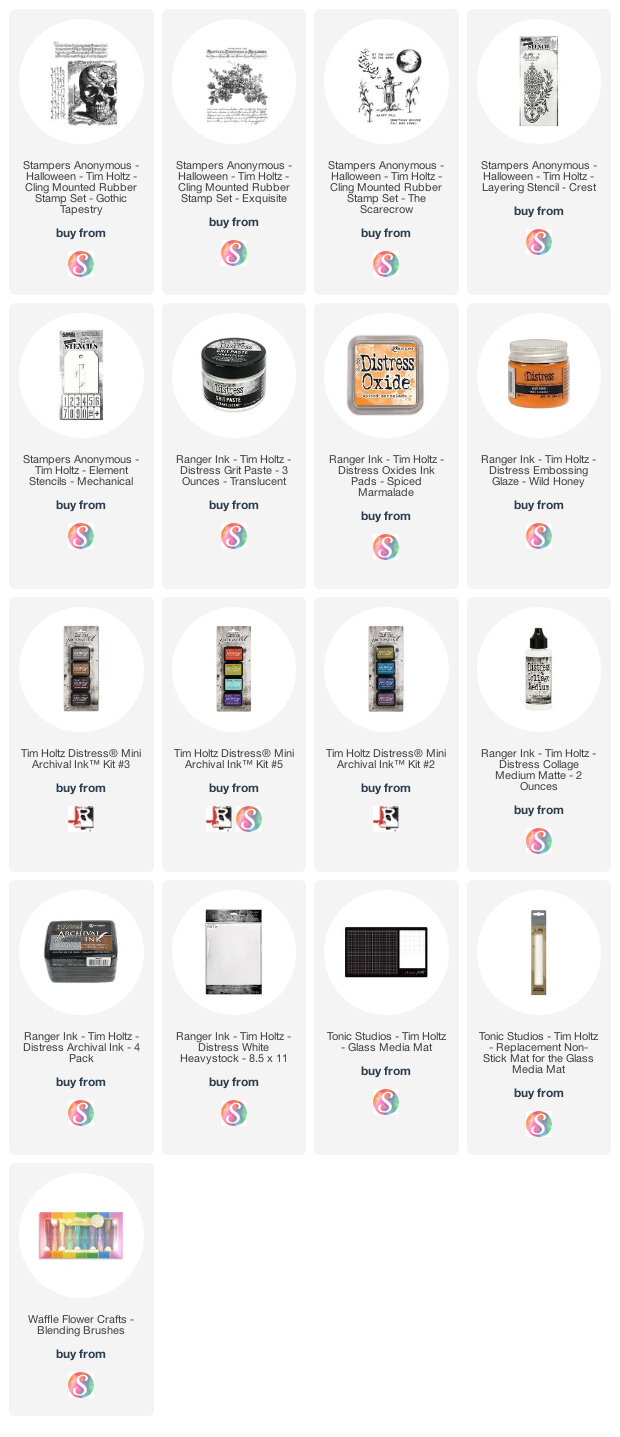
Did you catch the Tim Holtz Stampers Anonymous Halloween YouTube Live? If not, make sure you head over to Tim's YouTube channel to check it out and all of the amazing inspiration shared by the makers for this release. Today, I'm sharing a couple of cards I created using stamps from the brand new Tim Holtz Stampers Anonymous Halloween Release including Gothic Tapestry, Unraveled, Exquisite and The Scarecrow.

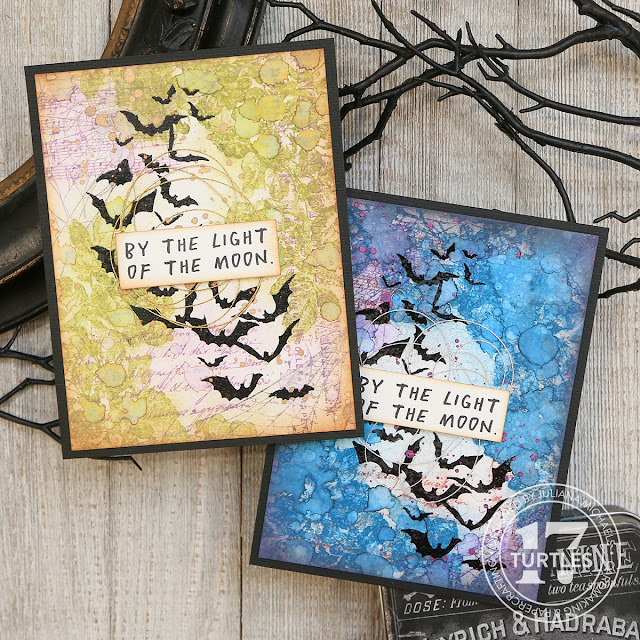
By The Light Of The Moon Halloween Card by Juliana Michaels featuring stamps from the Tim Holtz Stampers Anonymous Halloween 2022 - Gothic Tapestry, Exquisite, Unraveled and The Scarecrow

Below, I've got a full written tutorial for you, but I also have a YouTube video where you can see how it came together. I'll only be showing the blue card in the video. I used the same exact process for both cards, I just used different colors.


By The Light Of The Moon Halloween Cards

To get started, I began with a piece of Distress Watercolor Paper cut to 4 x 5.25 inches and placed it in my stamping tool. For this card, I'm using Distress Oxide Inks and will be using the stamp and smudge technique. This technique quite literally involves stamping the image and then smudging the ink. Distress Oxide works well for this since it is pigmented based and dries slower. This gives you time to stamp and smudge!
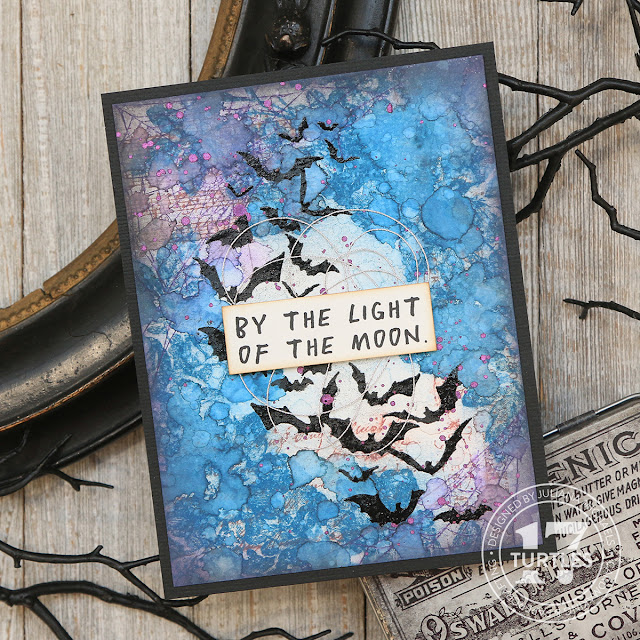
By The Light Of The Moon Halloween Card by Juliana Michaels featuring stamps from the Tim Holtz Stampers Anonymous Halloween 2022 - Gothic Tapestry, Exquisite, Unraveled and The Scarecrow

On the first layer of stamping I used Aged Mahogany and 3 stamps (the script, music note and advert from the Exquisite and Gothic Tapestry set) and placed them so they are in somewhat of a triangle from each other. After I stamp the images, I use a paper towel to smudge the ink. This is one of my favorite techniques for creating stamped backgrounds!

The next layer used the gorgeous floral from the Exquisite stamp set with Uncharted Mariner. Sometimes I stamp the image twice to get a good ink coverage. However, if the ink is too thick, I dab off some of the excess with a paper towel before I smudge it. I've found that if you have too much ink on the paper and go to smudge it, that it will blur the image so much that you can no longer see any of the detail. After I stamped the floral in the upper right hand corner, I flipped it around and stamped it in the bottom left hand corner using the same technique and ink color.

For the final stamped layer, I used the spider webs from the Unraveled stamp set and stamped them in Villainous Potion Distress Oxide. With the stamping completed, I inked the edges of the card with Villainous Potion Distress Oxide using a blending tool.
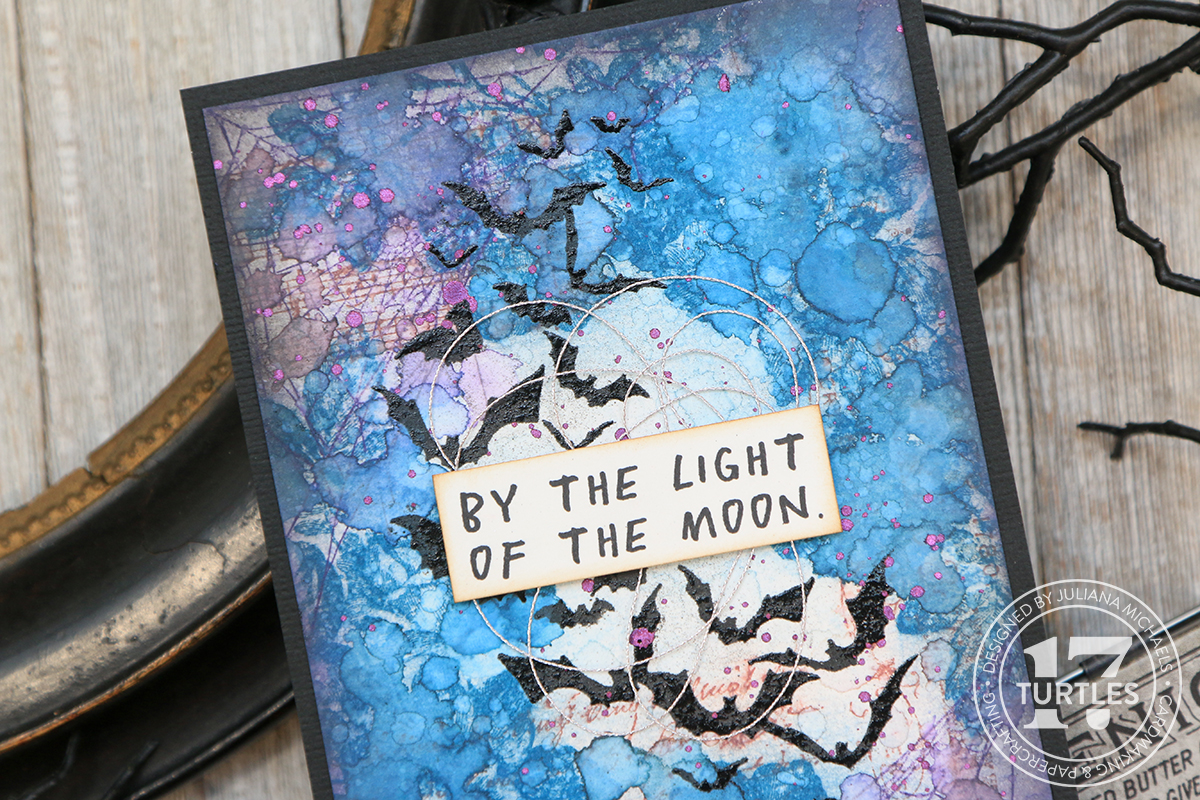

To create a more distressed effect, I spritzed the paper with a bit of water using my Distress Sprayer. I pulled the trigger slowly to get larger droplets of water and then dried it with my heat tool. I tried to keep the water droplets toward the outer stamped areas so that I don't get a lot of ink or color in the center. I repeated the spritzing process to add a bit more interest and once again dried the paper with my heat tool. I then added some smaller droplets by flicking the water onto the paper using the end of the spray nozzle. This is a great way to have a little more control over where the water goes and how much water you apply. Next I'm inking the edges with some Black Soot Distress Oxide to darken them and bring the focus toward the open area in the center. And yes, I added a bit more water but this time I did a quick mist and dabbed it dry with a paper towel to remove the ink where the water came into contact with it and then dried it.
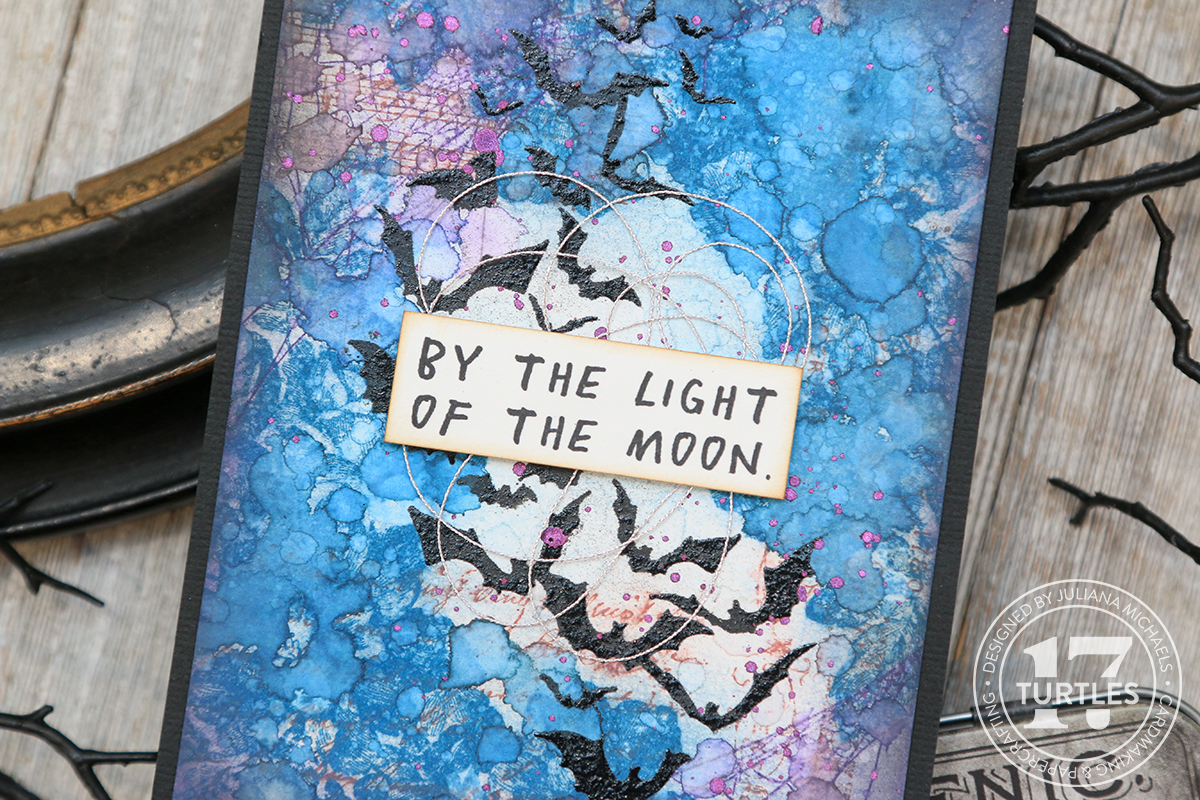

Next up, I added some more stamping using the awesome bat stamp from the Unraveled Stamp Set. I wiped an anti-static powder over the paper to decrease any static that's on the paper and to prevent the powder from sticking where you might not want it. It's also very important to make sure that the ink and paper are completely dry before this step as well, or the embossing powder will stick to those areas. After wiping the paper with the powder, I stamped the image using an embossing ink, removed the paper from my stamping tool and poured black embossing powder over the stamped image. I then tapped the excess off onto a piece of typing paper folded in half and returned the excess embossing powder to the jar. The folded piece of typing paper makes this easy to do! I then turned on my embossing gun, allowed it to warm up and then melted the embossing powder. I don't know why, but even after all these years, watching the powder melt and transform is just magical to me!

For the final touch to the background, I added some splatters of Tim Holtz Halloween Fortune Teller Distress Mica Stain. Before you use the Mica Stains, makes sure to shake them until you hear the mixing ball rattle and then turn the bottle over and make sure all of the mica is mixed in. Then you can proceed with using it. I just wanted some little splatters, so I used the nozzle to flick some onto my paper. Another option, is to use a small thin paint brush to splatter the ink.

To finish the card, I added a bit of silver thread and a sentiment from The Scarecrow stamp set.
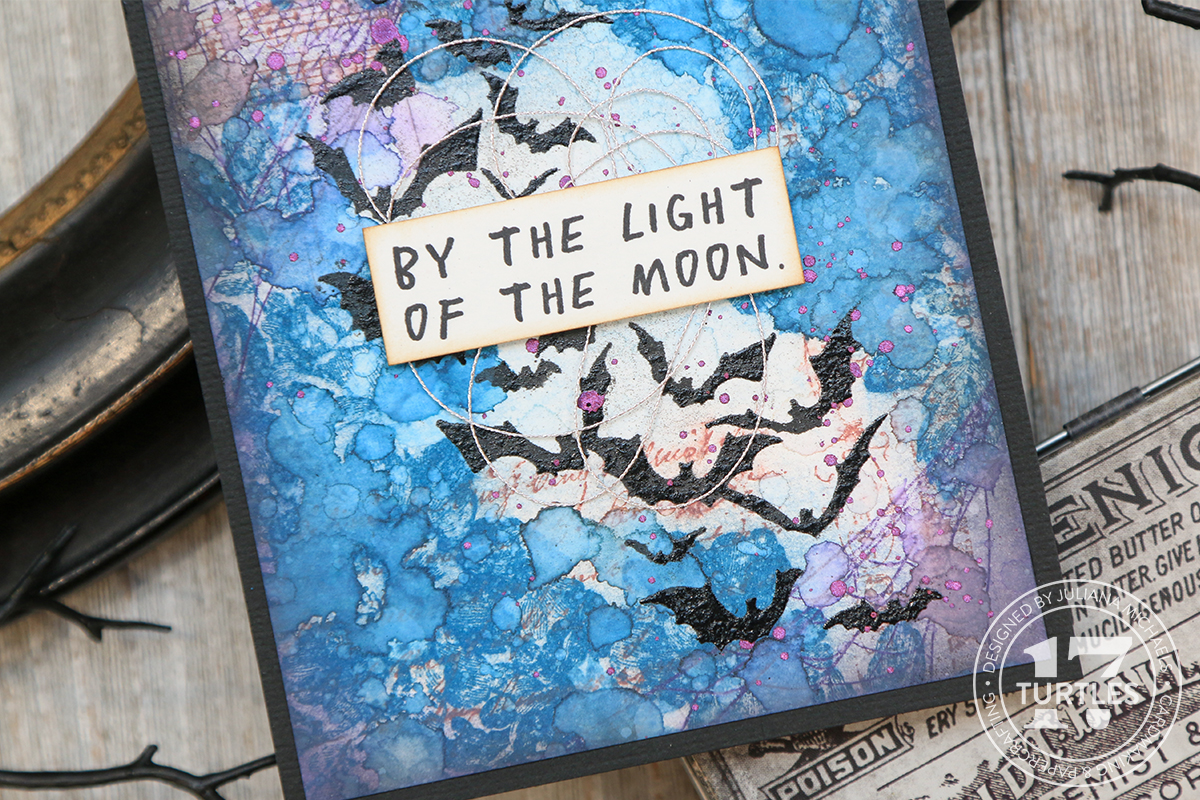

I also did a second card, this one was featured in Tim's Stampers Anonymous Halloween YouTube Live.
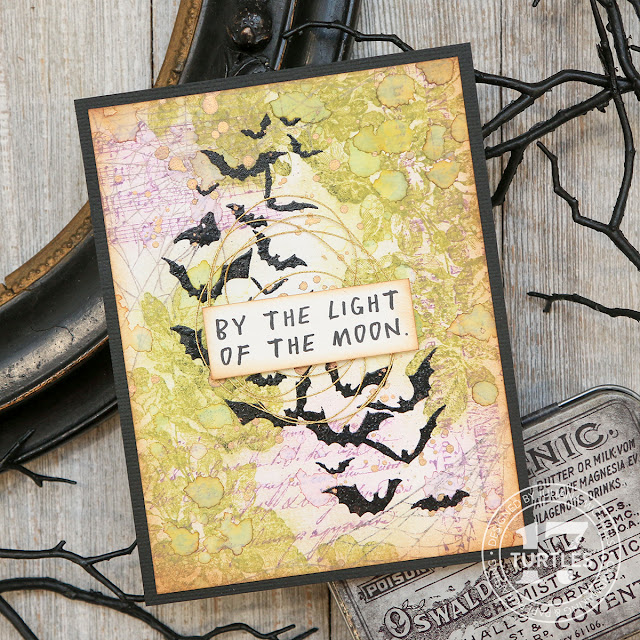
By The Light Of The Moon Halloween Card by Juliana Michaels featuring stamps from the Tim Holtz Stampers Anonymous Halloween 2022 - Gothic Tapestry, Exquisite, Unraveled and The Scarecrow

I used Dusty Concord, Peeled Paint and Black Soot Oxide Ink for the Stamp and Smudge. I then inked the edges with Vintage Photo Oxide Ink.


Instead of silver thread, I used gold and I splattered Decayed Mica Stain instead of Fortune Teller.


Other than the colors, I used the same techniques to create this card as I did the one above.


Thanks as always for your visit! I hope you enjoyed learning how this By The Light Of The Moon Halloween Card featuring stamps from the Tim Holtz Stampers Anonymous Halloween 2022 Release came together.

Supplies

Below you can find the products I used to create these Halloween cards. Each product is attached to an affiliate link with Scrapbook.com. When you shop through the links below, I receive a small commission from Scrapbook.com. These links are at absolutely no cost to you. These commission I receive helps me cover the costs of my blog and other expenses and it allows me to continue to provide you with FREE inspiration and tutorials. If you want to learn more about what an affiliate link is, you can see my full affiliate and product disclosure statement here. Thank you so much for your love and support!
Something Wicked Halloween Card | Tim Holtz Stampers Anonymous Halloween 2022

Halloween Making Season is now upon us and I couldn't be more excited to share one of the cards I made for the Tim Holtz Stampers Anonymous Halloween 2022 YouTube Live! In this blog post I'm sharing one of the cards I created using the new Gothic Tapestry and Exquisite Stamp Sets, along with the new Crest Layering Stencil.

Something Wicked Mixed Media Halloween Card by Juliana Michaels featuring Gothic Tapestry and Exquisite Stamp Sets and the Crest Layering Stencil from the Tim Holtz Stampers Anonymous Halloween 2022 Release

If you aren't into reading, I also have a video over on my YouTube Channel that shows you how I created this card. 

I began with a piece of Distress Heavystock cut to 5.5 x 8.5 inches. I found that by starting with this larger piece of paper it gave me more options when it came to trimming it down later for the final card size. In the end this card ended up being 5x7 inches.

For the stamping, I first stamped the skull image from the Gothic Tapestry stamp set with Distress Archival Ink in Black Soot. Next, I did some layer stamping over the skull using various images from both the Gothic Tapestry and Exquisite stamp sets using Archival Ink in Black Soot, Villainous Potion and Peeled Paint. I choose to use this particular type ink so that it wouldn't bleed when I add the next layers.


Once I had the stamping completed, I took the Crest Layering Stencil and placed it over the right hand side of my paper. I actually flipped the stencil over and applied the ink through the backside of the stencil. Just something to keep in mind if you want your design facing the opposite direction! I used Mint Tape to hold the stencil in place and used a blending brush to apply Distress Oxide Ink in Spiced Marmalade. I then moved the stencil to the upper left hand side and stenciled the design there as well.

Next I used the Mechanical Elements Stencils to add the number 31 to the bottom left hand side and applied Distress Oxide Ink in Spiced Marmalade through the stencil. To add some textural interest, I applied Distress Translucent Grit Paste through the stencil with a palette knife. Because I wanted the numbers close together, I could only do one number at a time. After I applied the paste, I removed the stencil and then sprinkled the paste with Wild Honey Embossing Glaze. I choose the Wild Honey embossing glaze because it's the most similar color to the Spiced Marmalade that I used with the Crest stencil. After I applied the embossing glaze, I set the paper to the side to dry for about 30 minutes or so. I then used my embossing gun to melt the powder. Both the grit paste and the embossing glaze are translucent so you can still see the stamped images through them! If you happen to be impatient you can skip the drying part, and just heat emboss it. However, if you go straight to the heat embossing, the Grit Paste tends to melt and you get a more smooth finish instead of the bumpy gritty look.


I will share that at first I only using the Embossing Glaze, but when I tried that, it just didn't match in color like I was hoping it would. By applying the Distress Oxide first, in a similar color, I got the look I was hoping for. Now if there was just a Spiced Marmalade Embossing Glaze, everything probably would have been just fine! In the end though, it worked perfectly and I enjoyed the process of playing around and coming up with the final look.

With the background completed, I trimmed the panel down to 4½ x 6½ inches, lightly inked the edges with Vintage photo Distress ink and added some machine stitching around the outside edge. I then adhered it to a piece of white cardstock that's 4¾  x 6¾ inches and also lightly inked with Vintage photo around the edges.

The sentiment is from The Scarecrow Stamp Set in Black Soot Archival Ink, trimmed into strips and the edges inked with Vintage Photo Distress Ink. To complete the card, I mounted these layers onto a piece of Tim Holtz Black Halloween Distress Woodgrain.


I hope you enjoyed seeing how this Something Wicked Mixed Media Halloween Card came together! So what is on your must have list from the Tim Holtz Stampers Anonymous Halloween 2022 Release?

Supplies

Below you can find the products I used to create this Halloween card. Each product is attached to an affiliate link with Scrapbook.com. When you shop through the links below, I receive a small commission from Scrapbook.com. These links are at absolutely no cost to you. These commission I receive helps me cover the costs of my blog and other expenses and it allows me to continue to provide you with FREE inspiration and tutorials. If you want to learn more about what an affiliate link is, you can see my full affiliate and product disclosure statement here. Thank you so much for your love and support!

Subscribe