
This card was an experiment in distressing. I'm still not totally sure how I feel about it, but I do love all the layers I created with the butterflies. So there's that to like about it!
Everything here started off with the Scrapbook.com Joyful Patterned and Smooth Cardstock Paper Pads. They are a beautiful set of warm jewel toned patterns filled with flowers and butterflies, as well as coordinating solids. When I started playing around with it though, the colors were just a little too bright for my taste so I thought I'd experiment with distressing the papers. During the process I came across several ways to distress papers and I'm thinking that I will share those as part of a future video. Is this something that sounds interesting to you? I'd love to know your thoughts. Until then, I wanted to go ahead and share what I created.

I began with the butterfly patterned paper, cut it down to 4 x 5.25 inches and I applied a light coat of white gesso using a brayer. This immediately toned down the colors, but I still felt like it needed a little something more. Next, I used a script stamp and added some random stamping here and there using Brushed Corduroy Distress Oxide Ink. The script stamp is from the Tim Holtz Tiny Toadstools stamp set. I then inked the edges with the same Distress Oxide Ink. The final step was some messy machine stitching around the outer edge. I layered this onto a piece of the dark green paper from the Joyful Smooth Cardstock Paper Pad. This color is so dark it almost looks black. To distress this piece, I rubbed a sanding disk along the edges of the paper and then inked them with more of the Brushed Corduroy Distress Oxide Ink.

Now onto the embellishments. I die cut loads of butterflies and leaves from various different colors of the Joyful paper pads using the Scrapbook.com Joyful Thank You Die Set and the Mini Layered Butterflies Die Set. Once again the colors were a bit too bright for me and especially after I had distressed the background paper so much. So I did the same treatment with them and applied a light layer of white gesso to each of the butterflies. To distress the leaves, I sanded them with a sanding disk to reveal a bit of the white paper core.
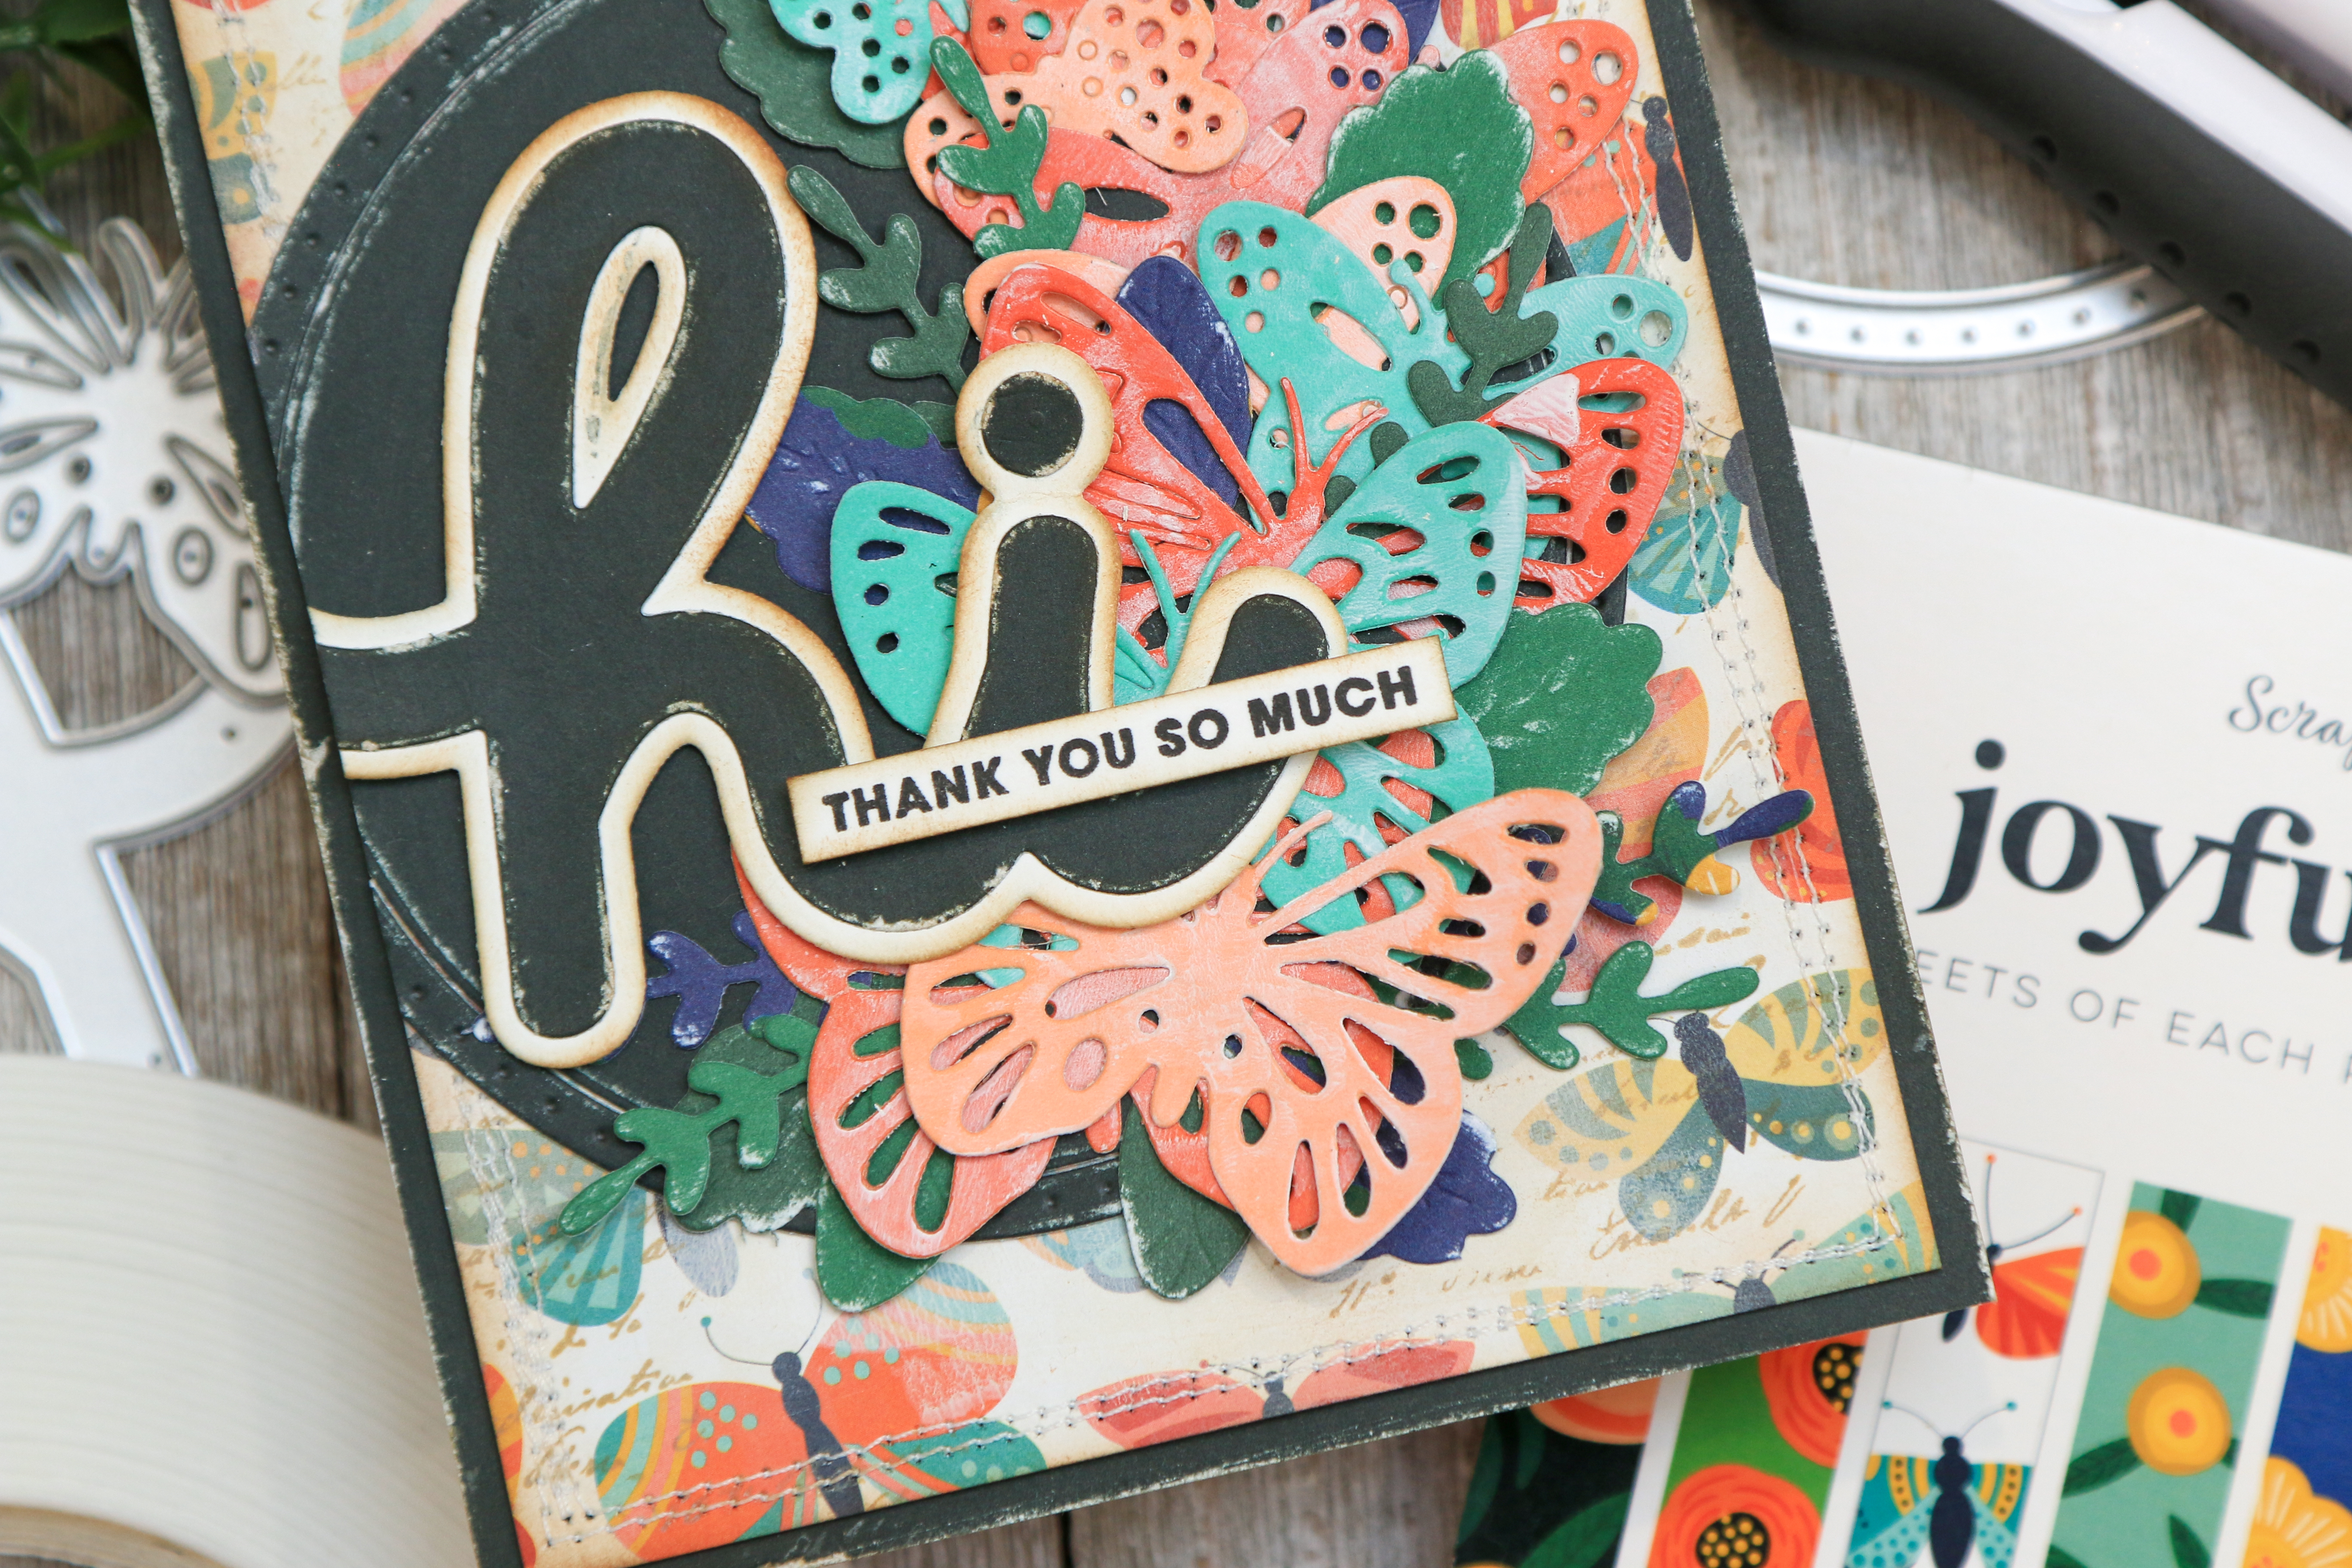
I then took the same dark green paper and die cut it using the circle frame from the Scrapbook.com Joyful Thank You Die Set. I sanded it, adhered it to the card front and trimmed off the excess that was hanging over the edge.
For the sentiment, I used the Hi die from the Scrapbook.com Joyful Wishes Die Set. I cut the word from the same dark green paper and the shadow layer from white cardstock. Before I adhered them, I inked the edges of the white piece with Brushed Corduroy Distress Oxide Ink and sanded the edges of the dark green paper. I then used the Scrapbook.com 1mm Double Sided Foam Adhesive to pop up the die cut. I absolutely love this thinner foam adhesive and I'm kind of wondering where this has been my whole life! I do use a lot of foam adhesive, but I've always thought it was just a little too thick for my taste. This new thickness is just perfect!
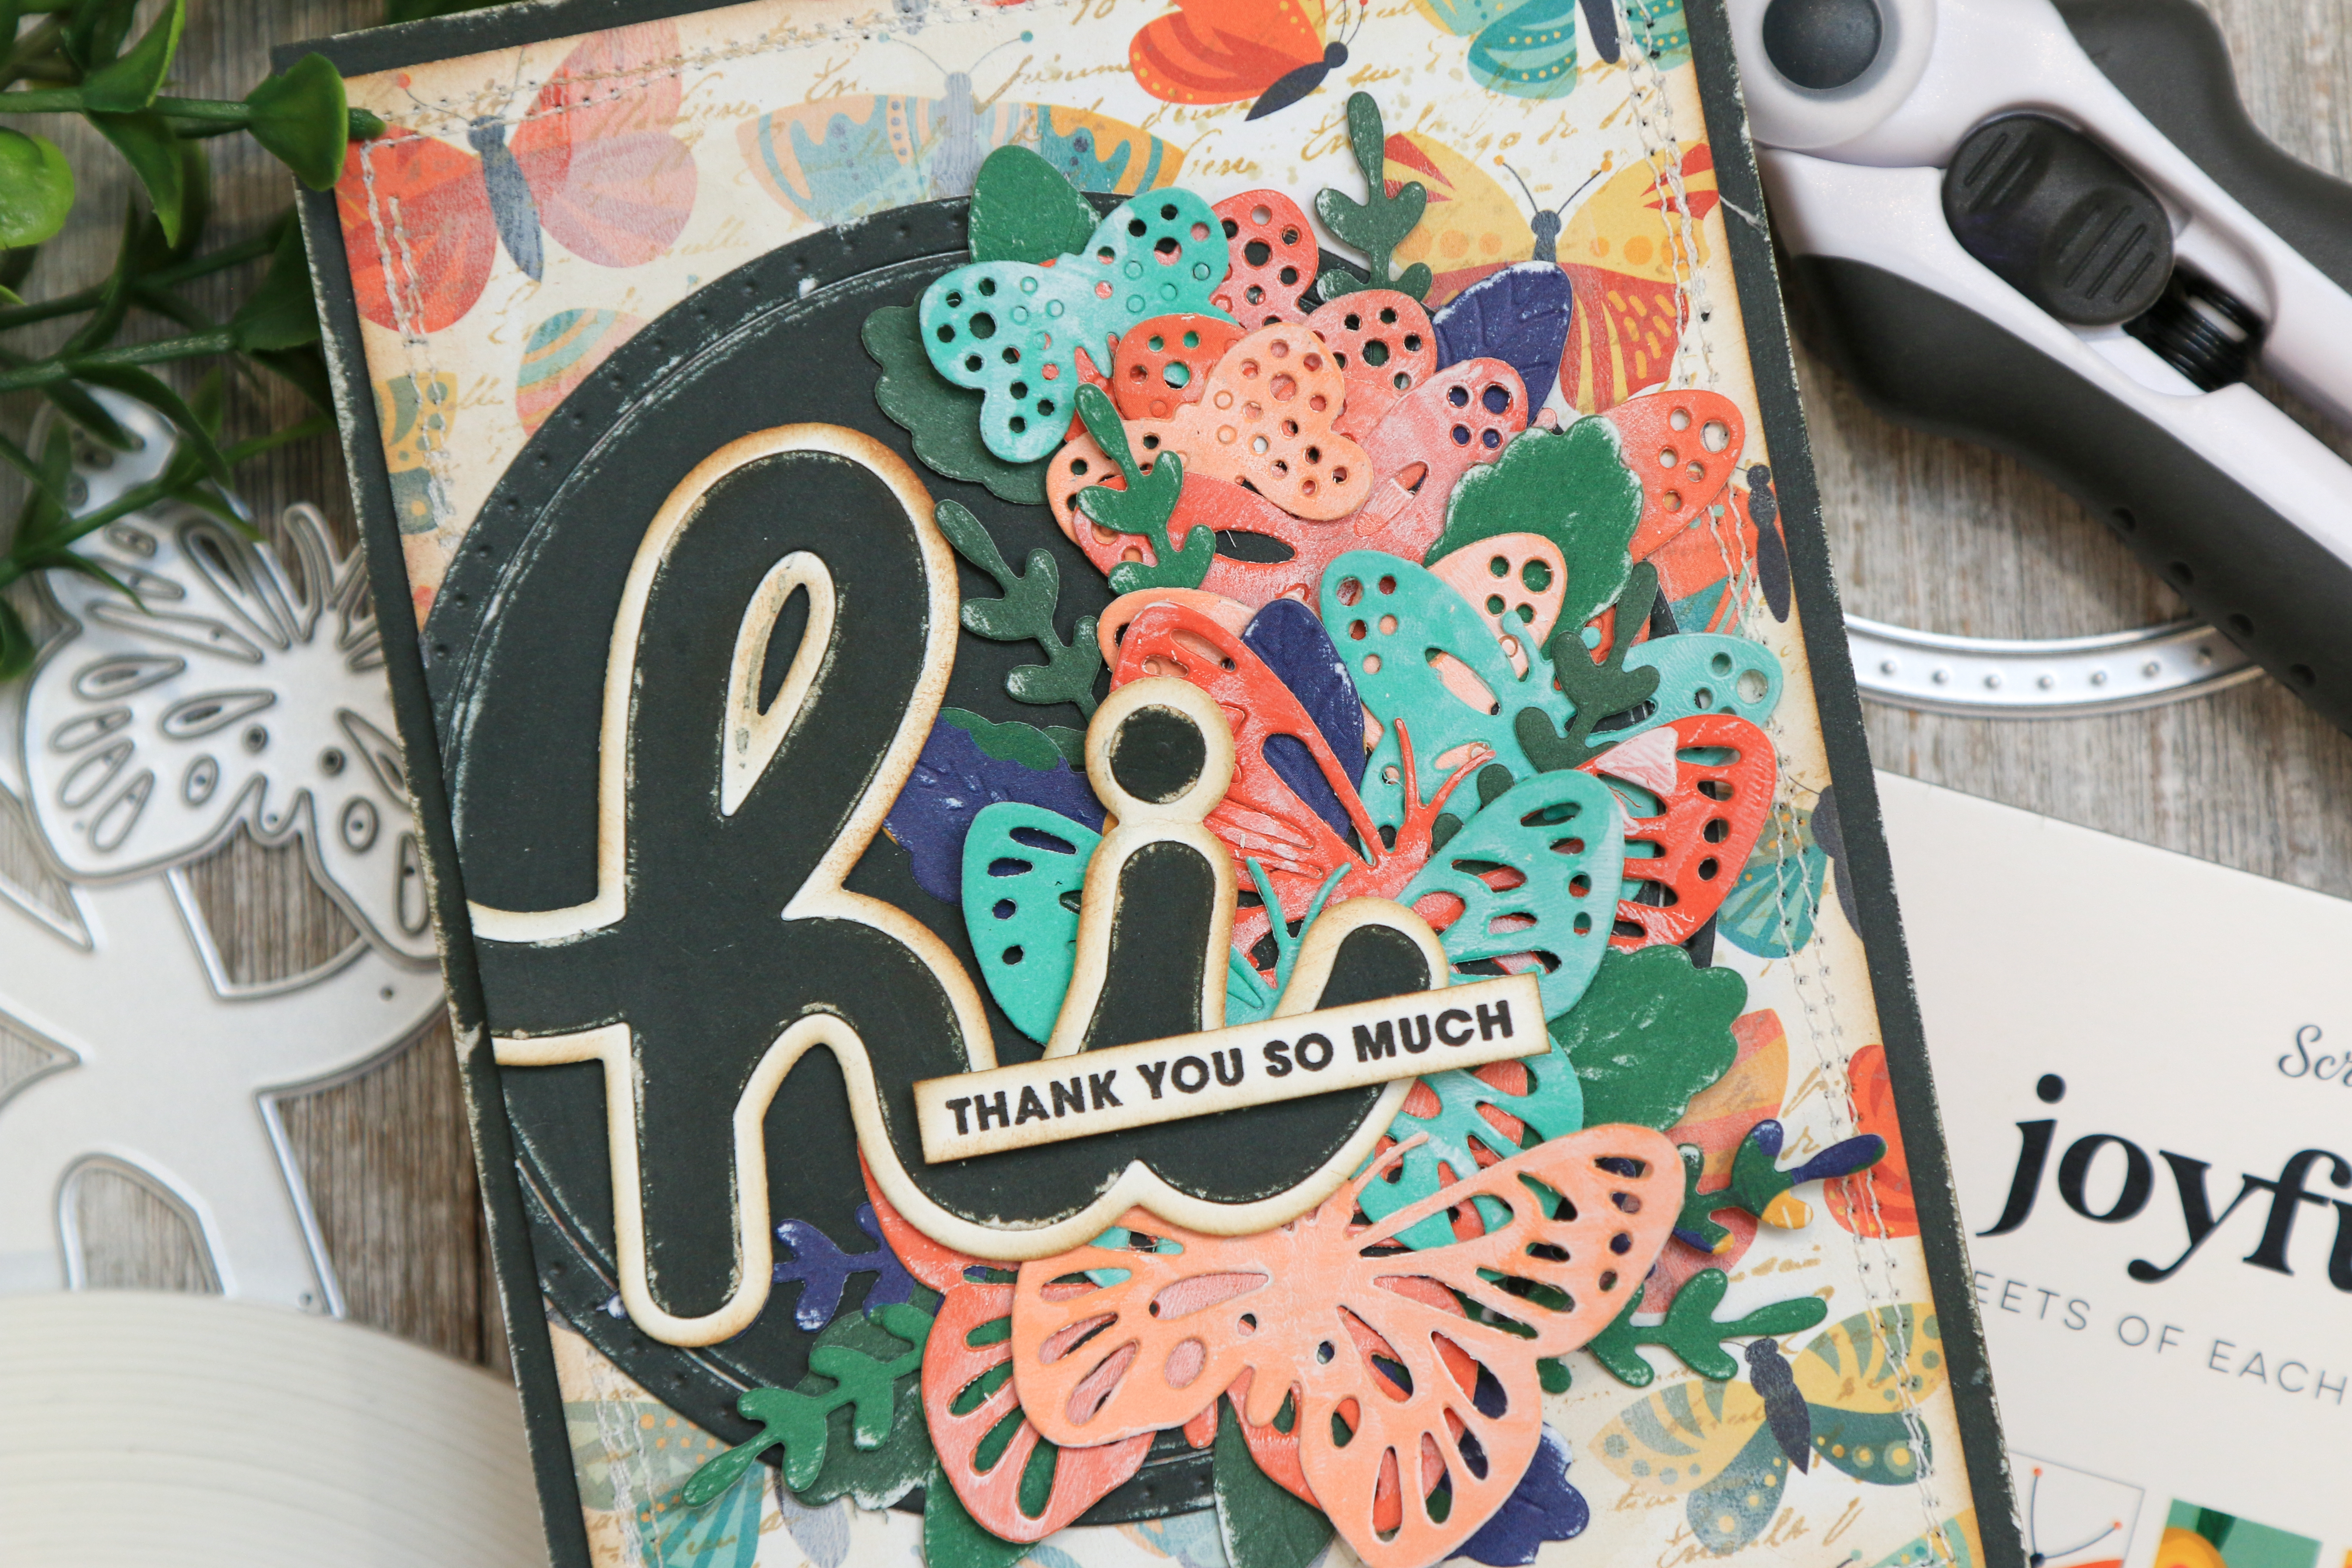
I then finished it off by stamping the rest of the sentiment using the Scrapbook.com Joyful Wishes Stamp Set. I trimmed this to size, inked the edges with Brushed Corduroy Distress Oxide Ink and adhered it with the 1mm Foam Adhesive. Yep...I'm going to need another roll of that real soon!

Thanks so much for your visit! I hope you enjoyed coming along on this creative detour today and learning how experimenting is part of the creative process!
SUPPLIES
Below you can find the supplies I used to create this card. When you shop through the links below, I receive a small commission from Scrapbook.com. These links are at absolutely no cost to you and the commission I receive helps me cover the costs of my blog and other expenses, which allows me to continue to provide you with FREE inspiration and tutorials. If you want to learn more about what an affiliate link is, you can see my full affiliate and product disclosure statement here. Thank you so much for your love and support!


No comments
Every time you smile at someone, it is an action of love, a gift to that person, a beautiful thing. ~Mother Teresa
HUGS!
JULIANA