
If you haven't heard, Tim Holtz just released his Village Collection with Sizzix. This set of dies was inspired by his original Village Die Series (that has long been retired) and includes all of the pieces you need to create a wide variety of village buildings. Along with the die set, he also created 3 new mini texture fades that are perfect for adding textural details.
Today I want to share with you the first project I've created using the Village Collection. From regions beyond I present to you my Haunted Halloween Manor! This is also my very first time playing with any of Tim's Village dies and I learned a ton, but it was definitely a fun crafty adventure. Today I'm going to share tons of tips and tricks so you can learn from my mistakes, the products I used to create my haunted manor and background, along with some organization and storage tips.
During the live, Tim mentioned that this is one of those makes that you really have to enjoy the process of making. You can't be ready for it to be over with before you get started. This is a time to play and enjoy the process. Also, as you go through the process you have to think in steps and phases. After going through this process for the first time, I agree with each and every word he said. Take your time and enjoy the process. If that isn't your thing, then this type of project might not be for you and that's ok!
(P.S Consider yourself warned. This is a long post full of tons of details. So take your time reading through it and I hope you enjoy all the tips and tricks I've shared.)

LEARN FROM MY MISTAKES
Here are some of the mistakes I made along the way and the suggestions I have for you when you make your first village piece:
I should have planned out where to cut the windows and run the window dies through with the main house dies. Instead I added the windows after the fact, which is why I totally forgot about adding windows to the sides of my manor. I didn't realize this until I was nearly finished with the entire piece, so there was no going back and adding them.
I would also recommend adding the shingles and roofing details before you attach the house to the roof.
Another thing to keep in mind is if you are planning to add shingles and you want a window, die cut the window after you add the shingles. I cut a window, then added shingles then had to cut the window again and it was a total pain to try to line up the die with the already cut window.
If you want to add any texture to the pieces using the embossing folders or a medium such as texture paste or even ink, make sure to do this before you assemble the piece.
Now that I've shared my mistakes and organizing tips with you, let me share some details on the products and techniques I used to create the manor along with how I created the base and background for it.

BUILD YOUR HAUNTED HALLOWEEN MANOR
Now onto the Haunted Halloween Manor itself! For the paper, I used grey and black papers from the Scrapbook.com 6x8 Christmas Paper Pad. These papers are thinner than standard cardstock or heavystock, so to give the pieces more structure, I cut the main building pieces twice. I didn't glue these layers together until after I had completely assembled them. So once the piece was glued together, I then slid the second one inside it and added a bit of glue to hold them together. You don't need to fully adhere them to get the necessary support.

To add some texture to the main structure, I used the Mini 3D Lumber Embossing Folder and then inked it lightly with Black Soot Distress Ink.
For the shingles I used black glitter paper from the Scrapbook.com Mixed Metals Paper Pad. Each piece is double layered with plain black paper from the Christmas Paper Pad to give them a little more structure. I used Distress Collage Medium to glue them together after I die cut them. I had better luck gluing the layers together after die cutting than when I attempted to glue and then die cut. Once I had all the piece die cut, I used my finger to wrinkle and bend the edges just a bit. For an extra touch of shimmer, I dabbed Sizzix Silver Luster Wax along the edges.

The chimneys were embossed with the 3D Cobblestone Embossing Folder and I added a bit of Distress Grave Texture Paste to them.

You might have noticed that the windows look slightly frosted. To achieve this look, I actually cut up a plastic storage envelope and adhered it to the inside. I love how this diffuses the Tiny Lights that I placed inside to light up my Haunted Halloween Manor.

The final touch was the addition of some floral moss from my local craft store. Sometimes you can find this at your dollar store, so check there as well.

CREATE YOUR BACKGROUND AND BASE
The background piece for my Haunted Halloween Manor was made from a Stampers Anonymous Mini Thickboard Tag. I painted the entire piece with white gesso. I then adhered torn pieces of paper from an old book using Distress Collage Medium. I let this dry and then added another layer of Distress Collage Medium over the entire surface. Once this was dry, I dry brushed Chipped Saphire Distress Paint over the entire surface and used a dry paper towel to wipe some of the paint off of the paper so you could still see the print.

With the paint dry, the next step was to add some texture by applying Distress Crackle Paste with a palette knife over the Scrapbook.com Stars Stencil. After I applied the paste, I carefully removed the stencil and immediately washed the stencil to prevent the paste from drying on the stencil.

Once the paste was dried and all the crackly goodness could be seen, I applied some color and shine using the new Distress Mica Crayons in Flickering Candle and Empty Tomb. I applied the color to a specific area and used my finger to rub it in.

With the main background completed, I took the Thickboard Web and Bats Trim Set and pulled out several sizes of the web trims. I painted them with white gesso and once that was dry, I applied some Distress Crackle Paste and set them to the side to dry.


I really recommend applying the gesso to the Thickboard because it helps the Crackle Paste adhere better. If you skip this step, the Crackle Paste tends to flake off quite a bit. At least more than I care for. Once these were dry, I adhered them to the edges of the tag. To grunge them up a bit, I rubbed some Crooked Broomstick Distress Mica Crayon into the cracks. Even though it's shiny, Crooked Broomstick has a wonderful grungy color to it!

As you may or may not have noticed, I adhered the tag upside down to an upside down Vignette Box. Before I adhered the tag to the box, I applied more torn book pages to the box using Distress Collage Medium and the applied a layer to the entire box. Next, I dry brushed Black Soot Distress Paint onto the box and wiped away some of the excess using a paper towel. I then added another Web Trim to the front of the box and finished it off with a spider die cut from black cardstock.

ORGANIZE YOUR VILLAGE COLLECTION DIES
Another bit I want to share with you is how I'm organizing my dies. Zoe Hillman shared a great method for sorting and organizing her Village Collection dies. I took this concept and used what I had on hand to create my own version, and after using it to create this project it felt like the best way for me to keep things sorted and organized for all of my future makes.
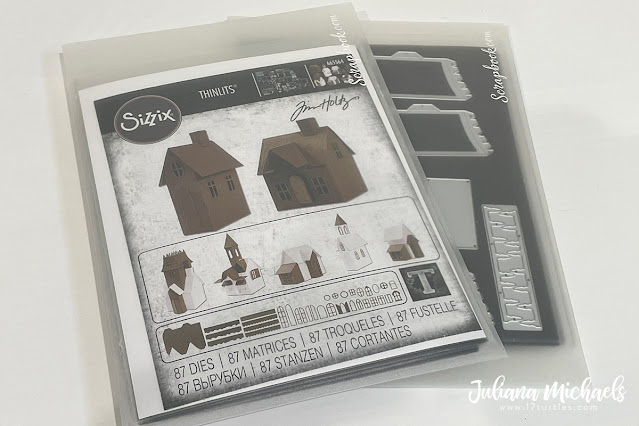
I began by sorting the dies into groups following how Zoe had organized them per magnet sheet. I then took magnet sheets and stamp and die storage pockets that I had in my stash. I labeled each magnet sheet using a permanent marker. I also slid the packaging sheet into a pocket as well. In total I ended up using 9 pockets. To keep them all together a bit more, I then grabbed 2 Scrapbook.com Medium Storage Envelopes. I was able to fit 4-5 pockets/sheets per envelope. I really love that all of the dies are held together like this. Now I just have to grab the 2 envelopes instead of a 9 of them.


Supplies
You can find the products I used to create these projects along with compensated affiliate links to Scrapbook.com. These links are at absolutely no extra cost to you. If you want to learn more about what an affiliate link is, you can see my full affiliate and product disclosure statement here.


Just adorable and thanks for the tips and tricks and great tutorial. I will try the gesso before the crackle medium cause I don't like that half of it flakes off either--thanks so much for that!! Great job!!
ReplyDelete