Stickles Glitter Gel + Ink Blended Background

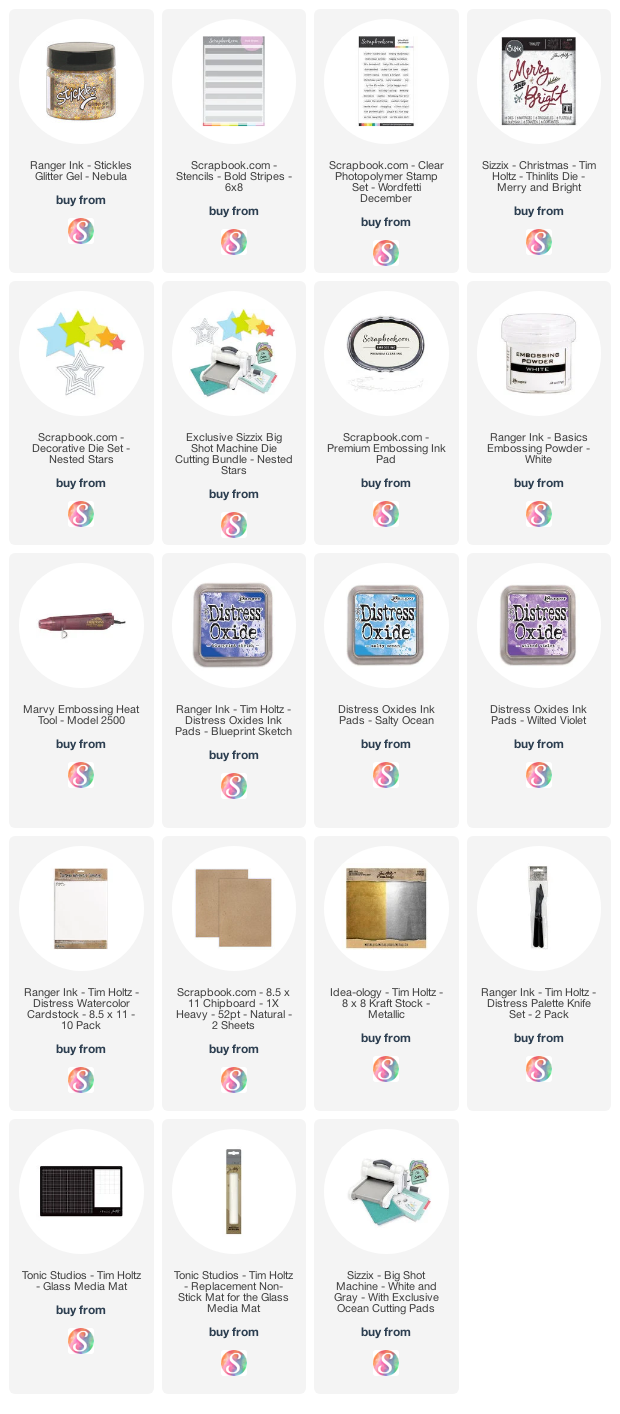
Hello friends! Today I'm excited to share a card I created that features a fabulous and new to me product...Stickles Glitter Gel. I've used Stickles in the past, but this gel takes it to a whole new level. Because it's now in a gel format, you can add that same beautiful sparkle and shine to larger surfaces and even use it with stencils. On this card, I've combined the Stickles Glitter Gel with a Distress Oxide ink blended background to create a very merry Christmas card!

Merry Christmas Card by Juliana Michaels featuring Ranger Stickles Nebula Glitter Gel and Distress Oxide Ink blended background

To create this card, I began with a piece of watercolor cardstock cut to 4 x 5.25 inches. I used this type of paper because I was planning on working with the gel and ink and I needed paper that would hold up to all that moisture.


Next, I placed the Scrapbook.com Bold Striped Stencil at an angle over the paper and used Mint Tape to hold the stencil in place. I also placed a rolled up piece of tape behind the paper to hold it in place on my glass mat. I then ink blended the stripes using Distress Oxide in Salty Ocean at the top, Blueprint Sketch in the middle, and Wilted Violet at the bottom.


Once I was finished with the ink blending, I cleaned off my stencil so I could use it again with the Stickles Glitter Gel.  I used a large wide palette knife to apply a coat of the gel over the inked design. Once the gel was applied I again cleaned off the stencil and set the paper to the side to dry. And can we just pause a moment to enjoy the sparkle and shine! I mean come on, it's really quite fabulous!


While the paper was drying, I worked on the sentiment and embellishments. Using the Scrapbook.com Magic Mat with the Nested Star Dies, I cut a star from Tim Holtz Metallic Kraftstock in gold. I cut it again from thin chipboard and adhered the chipboard to the back side of the star die cut.


To get the embossed star design, I placed the next two smallest star dies on the the star die cut and used Mint Tape to hold them in place as I ran it through my die cutting machine. I did each die separately, but you could easily do them both in one pass. The thickness of the chipboard kept the die from cutting all the way through the paper and made it easier to keep this all as one piece as I adhered it to the front of my card.


For the sentiment, I die cut merry using the Tim Holtz Merry and Bright Thinlits die from black cardstock. I then stamped "merry & bright" from the Scrapbook.com Wordfetti December Stamp Set with embossing ink onto black cardstock. I then heat set it using white embossing powder and trimmed the strip into a banner.


Once the background was dry, I adhered the star and sentiment to the front of the card. I then finished it off by adding a some sequins for another bit of sparkle and shine.


I hope you enjoyed seeing how this Merry Christmas card featuring Stickles Glitter Gel and a Distress Oxide Ink blended background came together and I super appreciate your visit!


Now, just a bit of an enabler alert....Stickles Nebula Glitter Gel is today's FREEBIE at Scrapbook.com as part of their Cyber Monday Sale. So if you're planning on shopping you might as well enjoy an awesome freebie while your at it right?! 


And to make this all a little sweeter...ALL Tim Holtz is on sale! So what are you waiting for my friend?!


Supplies

You can find a supply list of the products I used to create this project below. This post contains compensated affiliate links to Scrapbook.com at no cost to you. If you want to learn more about what an affiliate link is, you can see my full affiliate and product disclosure statement here. 

MemoryDex with a Tim Holtz Twist

Raise your hand if you're a MemoryDex Fan? Did you know that Scrapbook.com has partnered with Heidi Swapp to release an Exclusive Blush MemoryDex? I can now say I am a huge MemoryDex Fan!  I remember when it was first out on the market in 2014, but at the time I was into other crafty things and it didn't really catch my attention. That all changed recently when one was given to me by Scrapbook.com and I was told to have fun with it and make it my own. That's exactly what I did! I took the beautiful Scrapbook.com Exclusive Blush MemoryDex and made it my own, with a bit of a Tim Holtz twist.

Scrapbook.com Exclusive Heidi Swapp MemoryDex with a Tim Holtz Twist by Juliana Michaels

Despite the beautiful Blush color, I knew that in order to make it my own, the color would have to change. Thanks to the help of a can of Krylon Spray Paint, I was easily able to transform it from Blush to Black.  So, if Blush is not your color, don't be afraid to switch it up with a can of spray paint. If you plan on doing this, I recommend using a spray paint that also includes a primer.  Before you begin, remove the turning knobs and then lightly sand the entire piece. Wash and dry it to remove any dust and then follow the directions on the bottle of spray paint. I let mine sit for a couple of days after I spray painted it to let it cure. I then reassembled it and was ready to go. Well almost. The crystal knobs weren't working for me either, so I pulled out some Alcohol Inks and went to work to give them an aged mirror effect. To achieve this, I applied Pebble and Gilded Alloy Alcohol Inks and used just a touch of Alcohol Ink Blending Solution and an Alcohol Ink Blower to move the ink around until I was pleased with the result. Once they were dry, I assembled my MemoryDex and I was ready to begin creating cards for it.


During the process of making the MemoryDex my own style, I had decided that I wanted to use mine as a pretty inspiration piece on my desk. My cards will be a chance for me to just play on a small canvas with whatever strikes my fancy at the moment. Maybe it's a new color (like Rustic Wilderness Distress Ink) or a technique or maybe there is a quote that has inspired me. With each card, I'm going to take the time to enjoy the creative process while adding a touch of inspiration and beauty to my desk.


So now, let me share one of the cards I've created for my MemoryDex. This started from a piece of Distress White Heavystock cut to 4x4" and then punched with the MemoryDex Hole Punch. I then used the dab and dry technique by placing some Rustic Wilderness Distress Ink on my craft mat, spritzed it with water, dabbed my paper into it and dried it with my heat tool. I repeated this until I was happy with the look. I then added some stamping using Archival Ink in Black Soot for the large butterfly from the Tim Holtz Specimen Stamp Set. I also used some Vintage Photo and Peacock Feathers for some small detail stamping using images from the Tiny Toadstools Stamp Set. After the stamping was completed, I inked the edges with some Vintage Photo Distress Ink and a bit of Fossilized Amber and then spritzed the card with my Distress Sprayer and dabbed it dry.  I then added some splatters of gold ink using the Metallic Gold Reinker. I squirted some of the ink onto my craft mat, added a tiny bit of water, used a paint brush to pick up the ink and then flicked the brush over the paper to create the splatters.


Next I went about adding the die cut flowers from Wildstems 1 and 2 which are both cut from Distress White Heavystock and lightly inked with Vintage Photo Distress Ink.


For the saying, I die cut the title using the Scrapbook.com Inspirational Life Sentiments Die Set from a piece of rose gold paper found in the Metallic 2 Kraftstock Paper Pad. I finished it off with a sticker from the Scrapbook.com Charcoal and Blush with Rose Gold Accents Sticker Book.


I thought the card was finished at this point, but then I decided to add a little more texture with a stencil. I placed the Scrapbook.com Teardrop Floral Stencil over the card and applied some Distress Translucent Grit Paste through it using a palette knife. Once this was dry, I rubbed some Rustic Wilderness Distress Crayon over it and blended it in with my finger so the design would show a bit more. It's a subtle touch of texture, but I loved what it added to the overall design.


Thanks so much for your visit today! So if you weren't a MemoryDex Fan are you one now? I'd love to know your thoughts on it.

Enabler alert! If you are interested in getting your hands on a Memory Dex, they are on sale NOW at Scrapbook.com during their Black Friday sale! Make sure to check out their coupon page for ALL the details, coupon codes AND freebies!

Supplies

You can find a supply list of the products I used to create this project below. This post contains compensated affiliate links to Scrapbook.com at no cost to you. If you want to learn more about what an affiliate link is, you can see my full affiliate and product disclosure statement here.

Merry Merry Christmas Shaker Card

I don't know about you, but I'm always a sucker for a shaker card. Surely I'm not the only person who shakes a package of die cuts the first time they pick up the package. I just love to shake it and see what's inside! The same thing holds true for me and shaker cards. Today for my 12th and final day of the 12 Days of Christmas Card Ideas I'm sharing this Merry Merry Christmas Shaker Card that features some fun products from Tim Holtz and Sizzix.

Merry Merry Christmas Shaker Card


Merry Merry Christmas Shaker Card by Juliana Michaels featuring Tim Holtz and Sizzix Shaker Domes

You may or may not know that Sizzix has a line of shaker products that is part of their Maker Essentials and it includes Shaker Domes in various sizes of circles along with a fabulous assortment of Sequins & Beads to fill them. 

To create this shaker card I've used their 3.5 inch Shaker Dome. I choose this size so I would have on opening large enough to fit the Papercut Christmas Number 1 that features this adorable Santa! I then filled the shaker with Festive Sequins and Beads. However, before I got to filling the shaker, I had to create the rest of the card.

I started by die cutting, coloring and assembling the Papercut Christmas Santa. I die cut all the pieces from Bristol Smooth Paper and then ink blended each piece with Distress Ink. The colors I used were Fired Brick and Candied Apple, Black Soot, Spun Sugar and then just a touch of Vintage Photo on the edges. As I was creating and assembling the Santa, I trimmed off his lower half using the circle die as a guide, so that he would fit inside the shaker.

The background was created on a piece of Bristol Smooth cut to 4.5 x 6.25 inches. I ink blended it with Blueprint Sketch Distress Ink and a blending tool. I then placed the Flurries Layering Stencil over it and applied Scrapbook.com Metallic Frost Pigment Ink to give the snowflakes a bit of shimmer and shine. I then splattered it with some of the ink by squeezing a few drops of the Metallic Frost Reinker onto a craft mat. I added some water to thin it slightly and then used a paint brush to splatter the ink. Once this was completed, I sat it to the side. 


Next, I worked on the frame around the shaker. For this I die cut a 3.5 inch circle into the center of a piece of Bristol Smooth cut to 4.25 x 6 inches. I stamped some snowflakes from the Vintage Holidays Stamp Set in the corners using Blueprint Sketch Distress Ink. I then inked the edges with Vintage Photo Distress Ink and added some machine stitching. To finish off the card front, I added a die cut sentiment from the Merry and Bright Thinlits and a heat embossed sentiment from the Tiny Text Christmas Stamp Set.


As I mentioned earlier, I filled the shaker with some of the sequins and beads from the Festive Sequins and Beads set. I adhered the Santa onto the background paper. I then poured the sequins and beads on top. Next, I peeled off the liner on the shaker and adhered it on top of everything. The final step was then to attach the frame on top.

I hope you've enjoyed these past 12 Days of Christmas Card Ideas and found some an idea, tip, trick or technique to inspire you during your holiday cardmaking. Thanks so much for your support and love!

Supplies

You can find a supply list of the products I used to create this project below. This post contains compensated affiliate links to Scrapbook.com and Simon Says Stamp at no cost to you. If you want to learn more about what an affiliate link is, you can see my full affiliate and product disclosure statement here.
 

Jingle All The Way Snowflake Tag

I love snowflakes! Not necessarily the real ones, but when it comes to papercrafting I always love a good snowflake die! Today for my Day 11 of my 12 Days of Christmas Card Ideas, I'm sharing a tag that features the Scrapbook.com Snowflake Winter Wishes Die and its coordinating stamp set. Read on to learn more!

Jingle All The Way Snowflake Tag

Jingle All The Say Snowflake Tag by Juliana Michaels featuring Scrapbook.com Snowflake Winter Wishes Die

This is a rather simple project and we all need that every now and then. To get started I die cut the Snowflake Winter Wishes Die from silver glitter paper and then once again from thin chipboard. I glued both layers together using Smart Glue to give the die cut more stability.


Next, I die cut the banner from white cardstock and stamped the sentiment from the Merry Sentiments Stamp Set (which coordinates with the Snowflake Winter Wishes Die) using Vintage Photo Archival Ink.  And as always, I inked the edges with Vintage Photo Distress Ink.


To finish it off, I added a velvet trim bow and tied on some Tiny Bells and a charm using embroidery thread. To turn the snowflake into a tag, I poked a hole through the top and threaded embroidery thread through the hole.


Thanks so much for your visit today on my 11th day of the 12 Days of Christmas Card Ideas. I hope you are inspired to create your own version of this Jingle All The Say Snowflake Tag!

As of the writing of this post, both the Snowflake Winter Wishes Die and Merry Sentiments Stamp Set are sold out. If you are interested in these products make sure to sign up over at Scrapbook.com to be notified when they are back in stock.

Supplies

You can find a supply list of the products I used to create this project below. This post contains compensated affiliate links to Scrapbook.com at no cost to you. If you want to learn more about what an affiliate link is, you can see my full affiliate and product disclosure statement here.


Special Delivery Christmas Card Alcohol Lift Ink Background

Alcohol ink backgrounds can be so dreamy! Don't you agree? Especially when you use Alcohol Lift Ink and stamps from Tim Holtz to add to the design. This has become a favorite holiday background for me and I've spent some time working out the details on getting a good stamped image with this technique when using more detailed stamped images. Today for my Day 10 of the 12 Days of Christmas Card Ideas I'll be sharing all about this with you.

Special Delivery Christmas Card

Around Halloween, I created a card using this Alcohol Lift Ink technique and it seemed to work so easy for me. However, when I had the idea to try it for a Christmas card I was on the struggle bus trying to get it to work and give me a similar look. Well, I think I've found the secret, or at least what works for me. I've found that if I use one, maybe two similar alcohol ink colors to create the background AND cover the paper with Alcohol Blending Solution before I add the ink I seem to get the larger more solid cells of color which allow the Alcohol Lift Ink to really show the stamped detail. Once I apply the ink, I use the Air Blower to move the ink around with long squeezes on the blower. Of course you still need to following the recommendations of dabbing the ink off with a clean paper towel to lift off the ink. So, with this technique now down to a "science" I was able to create and share today's card with you.

Special Delivery Christmas Card Alcohol Lift Ink Background by Juliana Michaels featuring Tim Holtz Forest Floor Stamp Set

For this Alcohol Lift Ink background I used Everglades and a tiny bit of Mojito Alcohol Ink. I then stamped the images using Alcohol Lift Ink with the Forest Floor Stamp Set.


After the background was completed, I followed the design of that original Halloween inspiration piece. However, since this background didn't have it's own focal point, I added some die cut greenery using the Mini Holiday Greens Thinlits and Metallic Kraftstock 2.

The sentiment along the left hand side is from the Tiny Text Christmas Stamp Set and is heat embossed with Rose Gold Embossing Powder. I added a couple of brads to each end to attach it to the card front. I then finished it off with the Special Delivery label from the Vintage Holidays Stamp Set and heat embossed it as well.


To finish off the card, I layered the entire panel onto a piece of white cardstock, inked the edges with Vintage Photo Distress Ink and adhered it to a piece of Metallic Kraftstock.


Thanks so much for your visit today on my Day 10 of the 12 Days of Christmas Card Ideas! I hope you enjoyed learning more about this Special Delivery Christmas Card and the Alcohol Lift Ink Technique.

Supplies

You can find a supply list of the products I used to create this project below. This post contains compensated affiliate links to Scrapbook.com at no cost to you. If you want to learn more about what an affiliate link is, you can see my full affiliate and product disclosure statement here.

Peace On Earth Christmas Card

Hello friends! I'm back to share more Christmas card inspiration with you today on this Day 9 of my 12 Days of Christmas Card Ideas. This Peace on Earth card displays an elegant color palette of white and gold and features the Tim Holtz Bold Tiding Number Three as the focal point.

Peace on Earth Christmas Card


Peace On Earth Christmas Card by Juliana Michaels featuring Tim Holtz Bold Tidings Stamp Set

To create the background for this card I began with a piece of Bristol Smooth Paper cut to 4 x 5.25 inches. I applied Distress Texture Paste over the Flurries Layering Stencil. Once the paste was dry, I splattered the paper with Scrapbook.com Metallic Gold Reinker. I squeezed out a bit of the ink onto my craft mat, added a bit of water and used a paint brush to splatter it onto the paper.


While the ink was drying, I die cut some gold Metallic Kraftstock using the Stunning Snowflake Thinlits Die. I adhered one to each corner using Distress Collage Medium and trimmed off any that was overhanging the edge.


For the sentiment, I die cut a piece of vellum using the Stacked Labels Thinlits (retired). I then stamped it with embossing ink and heat embossed it with gold embossing ink. I definitely recommend rubbing over the vellum with an anti-static pouch before you stamp and emboss.


I finished off the background with some machine stitching using a gold thread and layered this onto a piece of gold Metallic Kraftstock.


Thanks so much for your visit today. You can find more of my 12 Days of Christmas Card Days visiting the previous post if you missed.

Supplies

As always you can find a complete supply list below. This post contains compensated affiliate links to Scrapbook.com at no cost to you. If you want to learn more about what an affiliate link is, you can see my full affiliate and product disclosure statement here.

Santa Christmas Tags

Ho Ho Ho! It's Day 8 of the 12 Days of Christmas Card Ideas and today I'm sharing a set of Santa Christmas Tags to inspire you. My favorite Santa is making another appearance as I feature him along with the Scrapbook.com Wordfetti Holly Jolly Stamp Set.

Santa Christmas Tags

Santa Christmas Tags by Juliana Michaels featuring Tim Holtz Vintage Holidays and Scrapbook.com Wordfetti Holly Jolly Stamp Set

As I've mentioned before, tags are great for both gift wrap and cards. When I put this much effort into a tag, it definitely becomes the focal point of the gift wrap and I love to write a little note on the back for the recipient.


To create this set of tags, I die cut Neenah Classic Crest cardstock using the one of the dies from the Scrapbook.com Jumbo Nested Tag Dies. This set of dies is seriously my new fave die set! The sizes got from itty bitty at 0.75 x 1.25 inches to literally jumbo size at 4.25 x 7"! I placed the tag inside my MISTI and stamped the Santa image from the Vintage Holidays Stamp Set using Tuxedo Black Memento Ink. I then colored in the images using Copic Markers.

Once all the coloring was finished, I inked the edges of the tags with Vintage Photo Distress Ink. Another fun touch, that I unfortunately was unable to capture in the photos, was the addition of some sparkle using the Scrapbook.com Glitter Brush Marker. I colored in the trim on Santa's Hat and Coat. In person, it adds such a festive touch!


For the sentiments, I stamped the Wordfetti Holly Jolly images onto white cardstock using Peeled Paint Archival Ink. I then used a small circle die from the Tim Holtz Stacked Circles Thinlits to cut out each sentiment. I then inked the edges and adhered them to the tag.


To finish off each tag, I added a bow of velvet ribbon and tied on a few Tiny Bells with some embroidery thread. If you happen to only have gold bells you can age them by coloring them with some Mushroom Alcohol Ink.


Thanks so much for stopping by today! I hope you enjoyed learning how these Santa Christmas Tags came together and that they inspire you during your next crafting project!

Supplies

As always you can find a complete supply list below. This post contains compensated affiliate links to Scrapbook.com at no cost to you. If you want to learn more about what an affiliate link is, you can see my full affiliate and product disclosure statement here.

A Merry Christmas Vintage Holidays Card

Hello friends and welcome to Day 7 of the 12 Days of Christmas Card Ideas! Do you have a go-to favorite technique for card making? I do! When it comes to creating card backgrounds one of my favorites is the Stamp and Smear Distress Oxide Technique. Using a tried and true technique is always a great idea when you want to mass produce the same design such as when you're making Christmas cards. 

So what is this Stamp and Smear Distress Oxide Technique you ask? Well, you simply stamp the image with Distress Oxide Ink onto your paper, wait a bit to let it slightly dry and then smear the ink with an ink blending tool or paper towel. If waiting isn't your thing, which it usually isn't for me, you can dab the wet ink with a paper towel to speed up the drying part and then smear the ink.

A Merry Christmas Vintage Holidays Card

A Merry Christmas Vintage Holiday Card by Juliana Michaels featuring Tim Holtz Vintage Holiday and The Poinsettia Stamp Set

To create the background for this card, I used the Stamp and Smear Distress Oxide Technique. I stamped various images from the Tim Holtz Vintage Holidays and The Poinsettia Stamp Sets onto Bristol Smooth Paper cut to 4 x 5.25 inches. The Distress Oxide Inks I used for stamping were: Broken China, Fired Brick, Pine Needles and Frayed Burlap. Once the background stamping was completed, I inked the edges with some Walnut Stain Distress Oxide and then spritzed the surface with my Distress Sprayer. I then dried it with my heat tool and inked the edges with some Vintage Photo and Walnut Stain Distress Ink. I then spritzed again and dabbed the water droplets dry with a paper towel.


For the focal point, I used the awesome Santa from the Vintage Holidays Stamp Set. (Yes, you have seen him three times already, but when you love a stamp this much, it deserves the love!) This was stamped onto Neenah Classic Crest 110lb. with Memento Ink in Tuxedo Black and then colored with Copic Markers. The shading that is already present from the stamped image actually makes the coloring super easy. I then fussy cut the image and inked the edges with a black marker so the white edges wouldn't show. For a bit of bling, I added Glossy Accents to the trim on Santa's hat, coat and pants and then sprayed it with Rock Candy Glitter Dust using the Glitter Duster and let it dry. Once dry, I inked the edges with a bit of Vintage Photo Distress Ink.


After adhering the Santa to the card front, I stamped the sentiment using Black Soot Archival Ink. I love how the sentiment fits inside Santa's boots!


To finish off the card, I added some machine stitching and layered the card panel onto a piece of coordinating cardstock.


Thanks again so much for stopping by today! I hope you enjoyed learning about my go-to Stamp and Smear Distress Oxide Technique and how I used it to create this A Merry Christmas Vintage Holidays Card. In case you missed it, I've been sharing a new card idea for the 12 Days of Christmas Card Ideas here on my blog. The first one I shared was 12 Days of Christmas Card Ideas | Vintage Santa Card. I invite you to check out each day after that for more ideas and inspiration.

If you are planning to do any card making supply shopping, I wanted to let you know that the Holiday Festival is happening now at Scrapbook.com! Shop and SAVE on Holiday, Winter, December Days, Christmas, and Seasonal Themes! Shop and SAVE on Giftmaking, DIY, Albums, and Papercrafting Kits. This sale only lasts through Monday, November 16th at midnight MST, so stock up today!

Supplies

As always you can find a complete supply list below. This post contains compensated affiliate links to Scrapbook.com at no cost to you. If you want to learn more about what an affiliate link is, you can see my full affiliate and product disclosure statement here.


Subscribe