Halloween Banner | Tim Holtz Sizzix Halloween 2023

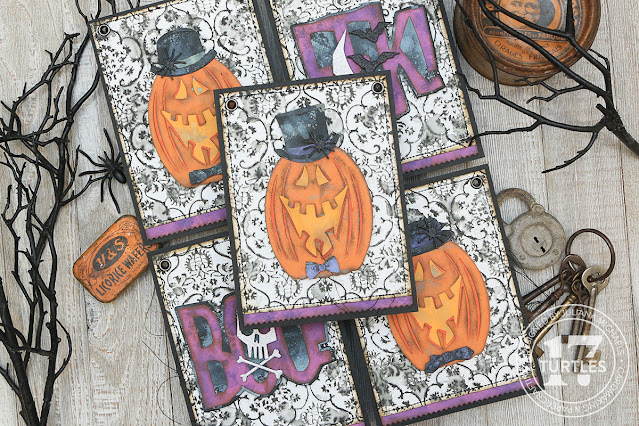
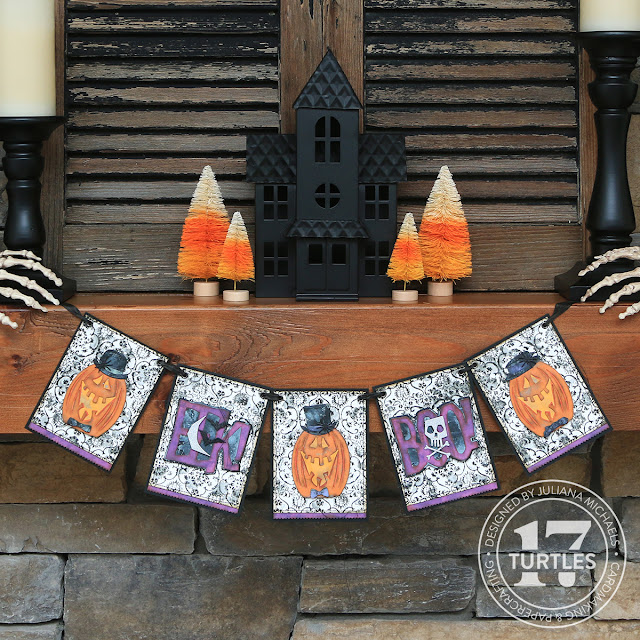
Happy Halloween Crafty Friends! I'm delighted to have you join as I share how I created this Halloween Banner for the Tim Holtz Sizzix Halloween 2023 Live. In this blog post I'm going to take you step by step through how I created all the components for each panel.

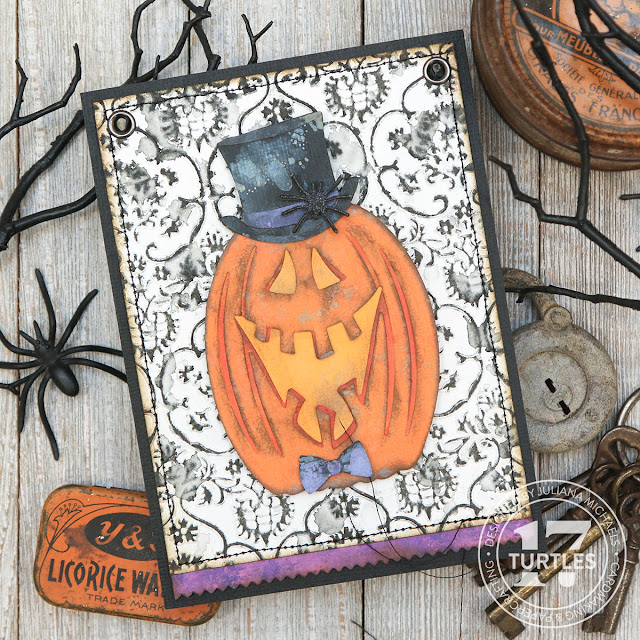
Halloween Banner by Juliana Michaels featuring Tim Holtz Sizzix Halloween 2023 Edison, Big Frights Thinlits Die Sets, and Tapestry Embossing Folder

If you prefer a video format, you can watch below or head over to my YouTube channel to see the process in more detail.


If you're interested in the supplies I've used to create this banner, you can find a complete list and links to them in the supply list below. When you shop through those links it supports me and I really appreciate that so very much!

Now let's get on with the making.

Halloween Banner by Juliana Michaels featuring Tim Holtz Sizzix Halloween 2023 Edison, Big Frights Thinlits Die Sets, and Tapestry Embossing Folder

HALLOWEEN BANNER 2023

To create this banner, I'll be working with the Edison Colorize, Big Frights and Tailored Thinlits Die Sets by Tim Holtz and Sizzix. I'll be using the Tailored die set to help get my Jack-O-Lantern Gents ready for Halloween! For the base of each banner, I'll be using the Tapestry Embossing Folder and Decorative Trims Thinlits Die Set.

Halloween Banner by Juliana Michaels featuring Tim Holtz Sizzix Halloween 2023 Edison, Big Frights Thinlits Die Sets, and Tapestry Embossing Folder

I'll be using various Distress Oxide Inks in Villainous Potion, Crackling Campfire, Fossilized Amber, Rusty Hinge, Forest Moss, Black Soot and Frayed Burlap. I'll also be using textured cardstock in black, green, purple, a dark orange and a lighter orange that coordinate with the Distress Oxide Inks.


Now I'm going to share how I transformed the solid cardstock to create a more distressed and spooky effect using the Ink Smooshing Technique. I cut the base layer of Edison from a lighter orange cardstock. I then smooshed the Fossilized Amber Distress Oxide Ink pad onto my craft mat, spritzed it with water to activate the ink and then I smooshed the paper into the ink. This is why it's called the ink smooshing technique! I repeated the smooshing until I liked how much ink was on the paper and then used my heat tool to dry the paper. I then repeated the ink smooshing process using Frayed Burlap Distress Oxide Ink.


Next, I took the second layer of Edison, which I cut from a darker orange cardstock and I ink smooshed it into Crackling Campfire Distress Oxide Ink and then dried it with my heat tool. I wanted to make this paper a little darker in the areas where it would show after under the top layer, so I used a foam blending tool to add more Crackling Campfire Distress Oxide Ink to those areas.


For the top layer of Edison, I did the ink smooshing using Rusty Hinge Distress Oxide Ink. To add some distress to this layer, I also added some ink smooshing with the Frayed Burlap Distress Oxide Ink. To help the top layer stand out a bit more, I used a foam blending tool to ink the edges with Walnut Stain Distress Ink. I then assembled the layers using Distress Collage Medium for my adhesive.


Now I'm going to do some ink smooshing with the hats and bow ties from the Tailored Die Set using Frayed Burlap Distress Oxide Ink. To save some time, I left these smaller die cuts in the paper I cut them from and adhered strips of Mint Tape to the back side of the paper to help hold them in place. This allowed me to dip and smoosh them all at once, instead of having to do each die cut separately.


For the bands and the bow ties, I used Villainous Potion and Twisted Citron Distress Oxide Inks. On the finished banner, I ended up with two of the hats having purple bands and one with green. I also die cut some spiders from black glitter cardstock. I then assembled each of the pumpkins using Distress Collage Medium and adhered the spiders and bow ties with a small pieces of foam tape to add some dimension.

Halloween Banner by Juliana Michaels featuring Tim Holtz Sizzix Halloween 2023 Edison, Big Frights Thinlits Die Sets, and Tapestry Embossing Folder

Next I used the Big Frights Die Set to cut Boo and Eek from purple and green cardstock. I use Forest Moss for the ink smooshing on the Eek. I then repeated the ink smooshing on the purple Boo using Villainous Potion. When it came time to assemble the banner, I ended up creating a purple Eek just to make things a little more balanced. I die cut the base layer for both words from black cardstock and ink smooshed it into Frayed Burlap Distress Oxide Ink. I then inked the edges of the words with Walnut Stain Distress Ink and adhered the layers together with Distress Collage Medium.


For the banner, I took 5 pieces of Distress Watercolor Paper cut to 4 x 5.25 inches and embossed them using the Tapestry Embossing Folder. I then took a Black Soot Distress Oxide Ink pad and rubbed it over the surface of the embossed paper to highlight the embossed design. Next, I took the Distress Sprayer filled with water and pulled the trigger slowly to create large water droplets over the inked panel. I then dried the ink with my heat tool.


To finish off each panel, I took the embossed paper and inked the edges with Walnut Stain Distress Ink. I then ink smooshed a piece of purple cardstock using Villainous Potion Distress Oxide Ink and die cut it into strips using the Tim Holtz Decorative Trims Die Set. I adhered a strip to the backside of each panel so that a 1/4 inch of it would hang below the bottom of panel. I then some machine stitching around the outer edge using black thread. Next, I adhered each panel to a piece of black cardstock cut to 4.25 x 5.5 inches.


On the word panels, I embellished them by adding some of the small icons from the Big Frights Die Set that I cut from silver and black glitter cardstock and the adhered them with foam tape.


To assemble the banner, I added eyelets to the top corner of each panel. For the string, I took a piece of seam binding and dyed it using Black Soot Distress Spray Stain.


And there you have it! A frightfully fun Halloween Banner perfect for decorating your haunt this Halloween season! I hope you enjoyed seeing how this came together and are inspired to create your own! Until next time...stay crafty my friend!

Halloween Banner by Juliana Michaels featuring Tim Holtz Sizzix Halloween 2023 Edison, Big Frights Thinlits Die Sets, and Tapestry Embossing Folder

SUPPLIES

Below you can find the products I've used to create this Halloween Banner. When you shop through the links below, I receive a small commission from Scrapbook.com. These links are at absolutely no cost to you and the commission I receive helps me cover the costs of my blog and other expenses, which allows me to continue to provide you with FREE inspiration and tutorials. If you want to learn more about what an affiliate link is, you can see my full affiliate and product disclosure statement here. Thank you so much for your love and support!

6 Ways To Use A Cover Plate Die

Hello crafty friend and welcome back to my blog! In today's post and video, I'm sharing 6 ways to use a cover plate die to create 6 different backgrounds for your cards. I've got everything from simple to all the mixed media! While the main focus is on the backgrounds, I do share a few tips about how I've embellished the cards as well.


6 WAYS TO USE A COVER PLATE DIE

You can watch the video below or head over to my YouTube channel to check it out.


You can find a full list of the supplies I've used at the bottom of this post. When you shop through those links, it helps support me and I really do appreciate that so very much!

The cover plate die I'll be using to create each card is this Geo Squares cover plate by Scrapbook.com.


EMBELLISHMENTS

I'm going to be using a similar cluster of die cuts on each of the cards I'm creating, so I wanted to share a little about that with you. As I mentioned, I used the Scrapbook.com Cozy Autumn Foliage and Delicate Leaves Die Sets and I cut them out of some of the solid colored papers from the Cozy and Boho Paper Pads.

To add some interest and distress to the die cuts, I sanded them using a Ranger Sanding Disk, but you could also use a piece of fine grit sandpaper. I share lots of tips and tricks on doing this in my video.I then arranged and adhered the cluster of die cuts. In the video I have a great trick for making this super easy!

BACKGROUND No. 1

This first background is rather simple and just the basic way to use a cover plate die. I cut it from a piece of colored cardstock from the Cozy Patterned Paper Pad. To take this to the next level, I sanded it using a sanding disk, but you can use a piece of fine grit sandpaper. I then adhered the die cut to a piece of patterned paper from the Cozy Patterned Paper Pad.

Hello Card - 6 Ways to use a Cover Plate Die by Juliana Michaels Scrapbook.com Geo Squares A2 Cover Plate Die Set

To embellish this card, I die cut a couple of rectangles from the same colors and patterns of paper. I sanded the edges of the blue paper and inked the edges of the patterned paper with Walnut Stain Distress Ink. I then added a piece of ephemera I made using a stamp from the Spellbinders Sign Here Stamp Set. I created a cluster with die cuts using some of the solid colored papers from the Cozy and Boho Paper Pads. The die sets I used are the Scrapbook.com Cozy Autumn Foliage and Delicate Leaves Die Sets. On top of 

the cluster I added another ephemera piece using the Tim Holtz Correspondence Stamp Set. The sentiment is from the Scrapbook.com Friendly Bouquets Stamp Set.

BACKGROUND No. 2

For this second background technique I used the cover plate to emboss a piece of colored cardstock from the Cozy Patterned Paper Pad. In the video I share the sandwich I used for this with my Sizzix Big Shot. If you have a different machine, please check with that manufacturer for the proper sandwich to achieve these results.


Thanks Card - 6 Ways to use a Cover Plate Die by Juliana Michaels Scrapbook.com Geo Squares A2 Cover Plate Die Set

To add some interest I applied Gold Sizzix Luster Wax over the surface of the embossed paper. The wax highlights the embossed design and really makes for a stunning background. After the wax dried, I embellished this card with another cluster of die cuts using the Scrapbook.com Cozy Autumn Foliage and Delicate Leaves Die Sets. I also added a couple of butterfly die cuts using the Scrapbook.com Patterned Butterflies Die Set. The sentiment is from the Scrapbook.com Friendly Bouquets Stamp Set.

BACKGROUND No. 3

For background number 3, I embossed a piece of Distress Watercolor Paper using the same method I used for the second background. Next I sprayed the paper with Distress Mica Stain in Unraveled. Once the ink was dry, I added some more interest by applying Sizzix Luster Wax in Charcoal.

Thinking Of You Card - 6 Ways to use a Cover Plate Die by Juliana Michaels Scrapbook.com Geo Squares A2 Cover Plate Die Set

For the embellishment on this card, I added a Bingo card cut from a piece of patterned paper. I then added a cluster of the greenery die cuts along with some pieces of ephemera I made using stamps from the Tim Holtz Ticket Booth and Correspondence Stamp Sets. The sentiment is from the Scrapbook.com Friendly Bouquets Stamp Set.

CREATING A REUSABLE PAPER STENCIL

The next 3 techniques all involve using the cover plate die as a stencil! I take a piece of white heavyweight cardstock, die cut it and use this to create a reusable paper stencil. You may have tried this before by cutting a piece of paper and then using that as your stencil, but if you want to use it with any mediums, you'll be lucky to get one or two uses out of it before it just won't hold up anymore. I came up with a way to prolong the life of the paper stencil.

After I die cut the paper, I applied Distress Collage Medium to it using a brush. Distress Collage Medium will protect the paper and allow you to reuse this paper stencil multiple times. After I applied a coat to one side of the die cut, I lifted it off my craft mat and set it to the side to dry. Once that side was dry, I repeated the process on the other side. Once it was completely dry, my reusable stencil was ready to go!


BACKGROUND No. 4

Now it's time for the fourth background and for this one I started by stamping on a piece of the Distress Watercolor Paper cut to 4 x 5.25 inches using Snippets of Nature by Sam Poole and Creative Expressions and Etcetera by Tim Holtz and Stampers Anonymous. I stamped the images using Onyx Black Versafine Pigment.

Once I finished with the stamping, I took the reusable stencil I created with the cover plate die and placed it over the stamped background. I then used a palette knife to apply Distress Texture Paste through the stencil. After I've applied the Paste, I gently peeled up the stencil and set the background paper to the side to dry. I then use my palette knife to scrape off the excess paste from the stencil. You can also use a damp paper towel to wipe some of the excess off as well.

Hello Card - 6 Ways to use a Cover Plate Die by Juliana Michaels Scrapbook.com Geo Squares A2 Cover Plate Die Set

After the Paste had dried, I sprayed the background paper with Distress Oxide Sprays in Antique Linen, Speckled Eggs, Rusty Hinge and Bundled Sage. One thing about sprays though, is you never know just how they're going to come out of the bottle. Sometimes more comes out than you might want, which is what happened here with Rusty Hinge. Thankfully, because Oxide Inks are pigment based, you can actually layer colors and cover up the color underneath, which is what I'm doing here! I then used my Heat Tool to dry the ink. Next added some shimmer by spraying the paper with Unraveled Distress Mica Stain.

Next, I inked the edges with Walnut Stain Distress Ink. I then used my Distress Sprayer to add some water droplets by squeezing the trigger slowly. This reactivates the ink where the water comes in contact with it. I then dabbed at the water droplets with a paper towel to lift off some of the ink and then dried the paper using my heat tool.

To complete this card, I matted it with a piece of patterned paper from the Cozy Paper Pad. I then adhered another embellishment cluster I created using the greenery die cuts, some pieces of ephemera made using stamps from the Tim Holtz Ticket Booth and Field Notes Stamp Sets, and a butterfly die cut. The sentiment is from the Scrapbook.com Friendly Bouquets Stamp Set.

BACKGROUND No. 5

Now onto background number 5. To get started, I took a piece of  Distress Watercolor Paper cut to 4 x 5.25 inches and stamped onto it using the Journal Notes stamp set by Sam Poole and Creative Expressions with Versafine Pigment Ink in Onyx Black. 

Next, I placed the stencil over the paper and sprayed it with Distress Oxide Sprays in Antique Linen, Speckled Eggs, Rusty Hinge and Bundled Sage and once again the Rusty Hinge is took over, so I added more of the other colors to help tone it down. After I used the stencil, I wiped it off with a damp paper towel to remove the excess ink.


Thinking Of You Card - 6 Ways to use a Cover Plate Die by Juliana Michaels Scrapbook.com Geo Squares A2 Cover Plate Die Set

I then removed the stencil and use my heat tool to dry the ink. I then took my Distress Sprayer and pulled slowly on the trigger to create larger droplets of water over the paper. I dried it a bit with my heat tool and then dabbed the rest of the wet ink up with a paper towel. To finish off the background, I ink the edges with Walnut Stain Distress Ink. I then spritz the paper again with water, dab off some of the ink with paper towel and then dry it with my heat tool.

To complete this card, I layered it onto a piece of patterned paper from the Cozy Paper Pad. I then adhered a cluster I created by tucking the greenery die cuts into a little pocket I created. For the final touch, I added some stamped ephemera I made using the Tim Holtz Correspondence and Field Notes Stamp Sets, and finished it off with die cut butterfly. The sentiment is from the Scrapbook.com Friendly Bouquets Stamp Set.

BACKGROUND No. 6

Last but not least, is background number 6. I placed the stencil on top of a piece Distress Watercolor Paper cut to 4.25 x 5.5 inches. I then applied Distress Oxide Inks in Antique Linen, Speckled Egg and Bundled Sage using blending brushes. I applied the ink across the panel, adding colors and blending them until the paper was covered. I then removed the stencil to reveal the design and wiped it off with a damp paper towel.

Next I took my Distress Sprayer and pulled the trigger slowly to create larger water droplets and used my heat tool to dry them.

To finish off this card, I added another cluster of the greenery die cuts layered on top of some stamped ephemera I created using Tim Holtz Ticket Booth and Field Notes Stamp Sets. The sentiment is from the Scrapbook.com Friendly Bouquets Stamp Set.


Thanks Card - 6 Ways to use a Cover Plate Die by Juliana Michaels Scrapbook.com Geo Squares A2 Cover Plate Die Set

Thanks so much for stopping by today! I hope you enjoyed learning these 6 ways to use a cover plate die and where inspired to look at these kind of dies in a whole new way!


SUPPLIES

Below you can find the products I've mentioned in this post along with compensated affiliate links to Scrapbook.com. These links are at absolutely no cost to you. When you shop through the links below, I receive a small commission from Scrapbook.com. These links are at absolutely no cost to you and the commission I receive helps me cover the costs of my blog and other expenses, which allows me to continue to provide you with FREE inspiration and tutorials. If you want to learn more about what an affiliate link is, you can see my full affiliate and product disclosure statement here. Thank you so much for your love and support!

Workspace Wednesday | Tiered Storage For Distress Spray Stains & Oxide Sprays and More

I'm back with another Workspace Wednesday and this week I wanted to share some new tools and storage products from Scrapbook.com that have found a home in my craft room. The ones I'm sharing here are already making big improvements in my creative making flow and that's why I wanted to share them with you!

Scrapbook.com 5 Level Tiered Stadium Organizer with Tim Holtz Distress Spray Stains and Distress Oxide Sprays

I have a new YouTube Video that shares all about these new tool and storage ideas. You can watch it below or head over to my YouTube channel.

STACK-N-SORT TRAYS

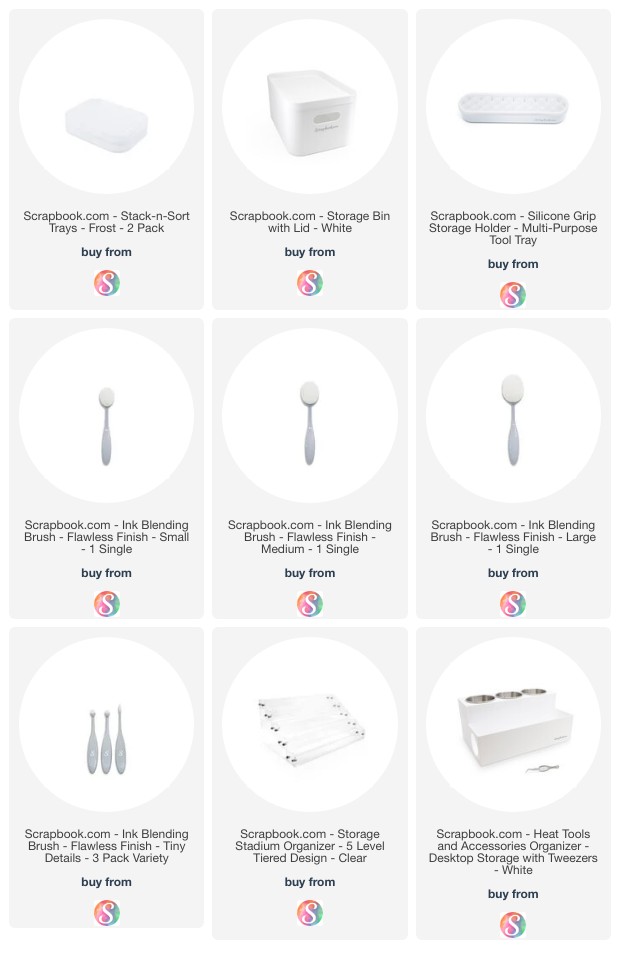
First off are these new Stack and Sort trays. They come in a frost color and 2 to a package. I'm personally hoping they will come out with them in white as well so they match the other storage pieces I currently have. They are 6 x 4.5 inches in size and 0.75" tall and they stack. I'm using them to hold die cuts and ephemera and to help keep them organized on my desk.

Scrapbook.com Stack-N-Sort Trays for storing die cuts and ephemera

I've been using the lids from the Scrapbook.com Storage Bins to do this and they are pretty much the same thing, just much larger. And what is super awesome is they all stack together! So that gives you so more options for how to use them. As for the actual Storage Bin, I've been using them to store my Distress Spray Stain and Oxide Sprays. But...I may have a new storage option for these, as you'll soon see!

Scrapbook.com Storage Bins for storing Tim Holtz Distress Spray Stains and Distress Oxide Sprays

MULTI-PURPOSE TOOL TRAY

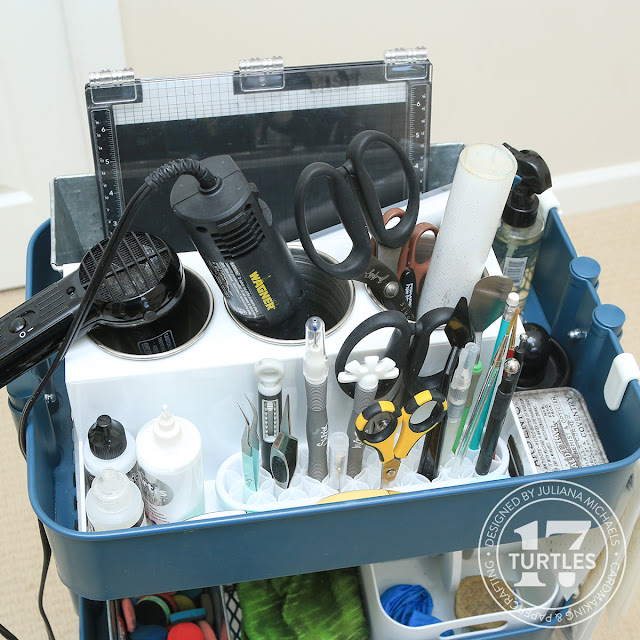
Another thing is their new Multi-purpose Tool Tray. Which they are showing on the packaging with their new blending brushes. It's pretty substantial and has a nice weight to it. Besides the brushes you could also use it to hold scissors, tweezers, and other craft tools.

Scrapbook.com Multi-purpose Tool Tray in Ikea Raskog Cart


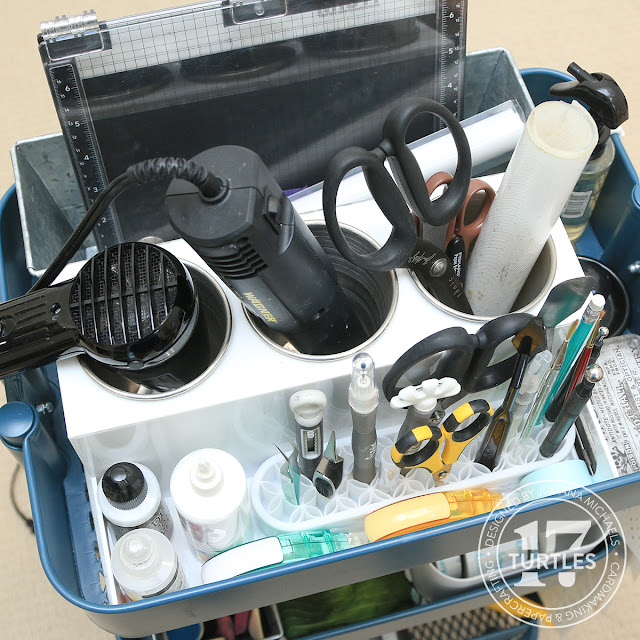
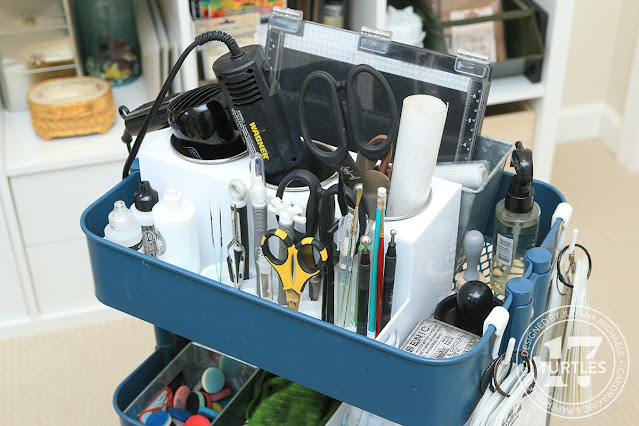
I've got mine in my Raskog cart next to my Heat Tools & Accessories Organizer.

Scrapbook.com Multi-purpose Tool Tray in Ikea Raskog Cart

Scrapbook.com Multi-purpose Tool Tray in Ikea Raskog Cart

BLENDING BRUSHES

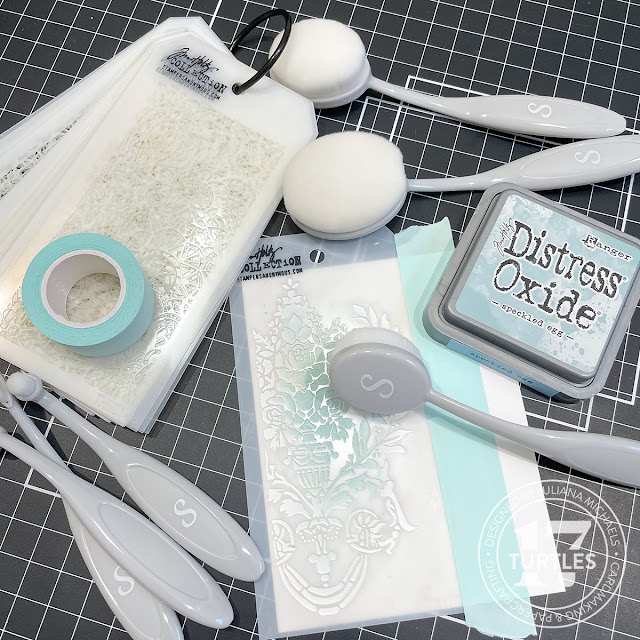
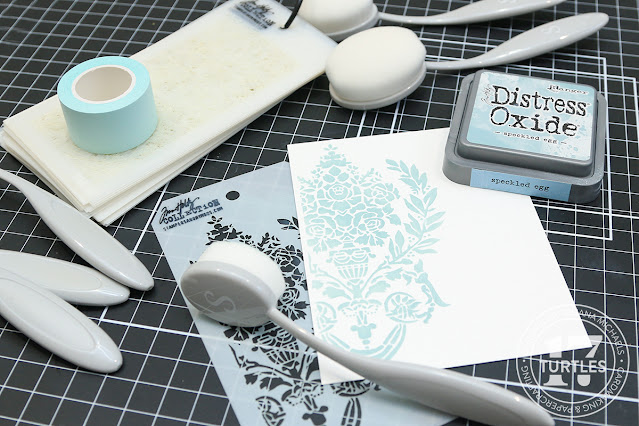
Scrapbook.com is now offering blending brushes that come in a variety of sizes. While these aren't anything new, these are Scrapbook.com branded and the light grey color is a great neutral if you don't care for the black or rainbow colored ones that are available. They come in a variety of sizes that would suit any type of use you can think of.

Scrapbook.com Blending Brushes with Stencil

They come in Large, Medium, Small and a pack of Detail Brushes. The brush heads range in size from 1.5 x 2 inches for the Large all the way down to 3/8 of an inch for the round detail brush.

Scrapbook.com Blending Brushes with Stencil

I'm reaching for brushes more and more, instead of the foam blending tools because they making blending a lot easier and smoother. I especially love using them for stencil work as they get into all the nooks and crannies on stencils and really create a nice crisp image.

5 LEVEL TIERED STADIUM ORGANIZER

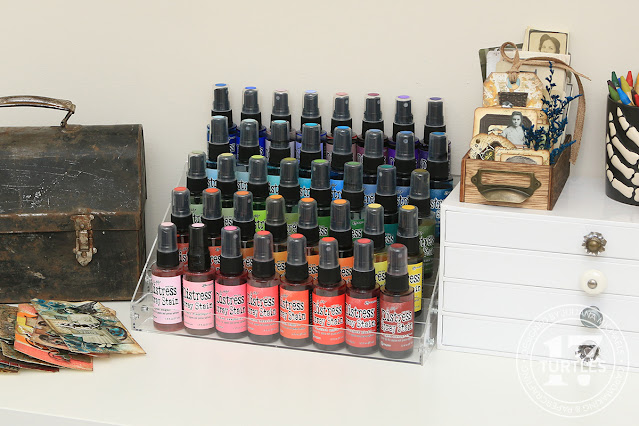
Last, but not least is their 5 Level Tiered Stadium Organizer and I'm pretty excited about this one! At first I thought it could only be used for storing small bottles such as Pops of Color, Nuvo Drops, Reinkers, etc. So imagine my surprise when I realized it could hold Distress Spray Stains and Oxide Sprays! If you're wondering about whether or not it will hold a certain product, make sure to check out the Scrapbook.com website for a full list of all the different products it will hold.


Scrapbook.com 5 Level Tiered Stadium Organizer with Tim Holtz Distress Spray Stains and Distress Oxide Sprays

The organizer comes in pieces and there is some assembly required, but it has great instructions and if you follow them you will find it comes together with a little elbow grease and patience. In my video, I share that I originally didn't intend to film putting it together, but then decided to just to see how long it took me. It ended up taking me about 13 minutes to put it together. Which isn't too bad, but I will say trying to hold onto those little screws was a challenge. The biggest thing I can recommend is to read the instructions and follow them because they definitely made all the difference in getting this assembled properly. In the video I share some of my biggest takeaways that you might find helpful when you go to assemble yours.

Once assembled the organizer is 12.25 inches wide, 7.75 inches deep. It's 1.125 inches tall in the front, 5.75" tall at the back and each row is just under 1.5" wide.

Of course, the first thing I had to try after I got it assembled was to see if my Distress Spray Stains and Oxide Sprays fit. And they do! Each organizer will hold 40 of these bottles, so if you have the entire collection, you're going to need several of these to hold them all. I'm still working out where to put them. As I mentioned, mine are currently in Storage Bins which I keep in my Ikea Dresser, but I'd like to use them more and I think if they are out where I can get to them easier, I'll be more likely to do that.


Scrapbook.com 5 Level Tiered Stadium Organizer with Tim Holtz Distress Spray Stains and Distress Oxide Sprays

Thanks for stopping by to check out my latest Workspace Wednesday installment. I hope you enjoyed learning about these new tools and storage products from Scrapbook.com.

SUPPLIES
Below you can find the products I've mentioned in this post along with compensated affiliate links to Scrapbook.com. These links are at absolutely no cost to you. When you shop through the links below, I receive a small commission from Scrapbook.com. These links are at absolutely no cost to you and the commission I receive helps me cover the costs of my blog and other expenses, which allows me to continue to provide you with FREE inspiration and tutorials. If you want to learn more about what an affiliate link is, you can see my full affiliate and product disclosure statement here. Thank you so much for your love and support!

Christmas In July Series No. 4 | Merry Christmas Card

Merry Christmas in July friends! This is my fourth card as part of my Christmas in July series. Even if you're not quite ready to start on your Christmas cards, you can always save my videos and come back to them when you are. My biggest hope is to inspire you as you begin creating your Christmas cards, whether it's now or later.

For this card I'm sharing a faux bleach technique, which I shared recently using Distress Inks. This time however, I'm using Distress Oxide Inks. I'm also going to share some tips and tricks for adding sparkle and shine with Distress Embossing Glaze, Embossing Powder and Distress Foundry Wax.

Merry Christmas Card by Juliana Michaels featuring Faux Bleach Technique with Tim Holtz Distress Oxide Inks, Distress Embossing Glaze, Embossing Powder, and Distress Foundry Wax
In each video I'm sharing some great techniques, along with some helpful tips and tricks to make your Christmas crafting more enjoyable. Here on my blog, I'll be sharing the basic steps to complete the card. you can watch the video below or head over to my YouTube Channel. And while you're there, I'd love for you to consider subscribing to my channel!

If you're interested in using the exact products I've used, I'll have them linked in the supplies list below and when you shop through those links, it helps support me and I really appreciate that so much!

MERRY CHRISTMAS CARD

To get started I cut piece of Distress Watercolor Cardstock to 4 x 5.25 inches. Using Ground Espresso Distress Archival Ink, I stamped the beautiful poinsettia image from the Tim Holtz The Poinsettia Stamp Set three times to create a border along the left hand side of the paper. 

Next, I stamp the script image from the same stamp set, using Versamark Watermark Ink. After I apply the ink, I pour gold embossing powder over the inked area. I tap off the excess powder and heat set it using my heat embossing tool. To create some movement across the design, I repeat this process and stamp the image in the upper left hand corner.

FAUX BLEACH TECHNIQUE WITH DISTRESS OXIDE INKS

Next I use a blending brush to apply Lumberjack Plaid Distress Oxide Ink to the center of the watercolor paper. I then apply Aged Mahogany Distress Oxide Ink to the outer edge of the card. I go back and add more Lumberjack Plaid and then more Aged Mahogany. I continue this process of going back and forth between the two colors until I'm pleased with the blending.

Now it's time for the Faux Bleach Technique. Although I use the word bleach, there is no bleach involved in the process. The finished look just creates the appearance of what it looks like when bleach removes color from things and that is why it's called faux bleach. I use a waterbrush filled with water and paint with the brush over the inside of the stamped design. Because Oxide Inks are water reactive, when you apply water to them, it rewets the ink. I then take a paper towel and dab up the wet ink to lift and remove the ink. Once the entire piece has been bleached, I use my heat tool to dry the paper.

For the next step, I use a finger dabber to apply Versamark Watermark Ink through the Halftone stencil from the Mini Layering Stencil Set No. 48 to the upper left hand corner of the background paper. After I apply the ink, I remove the stencil and pour Walnut Stain Embossing Glaze over the inked area. I tap off the excess powder and heat set it using my heat embossing tool.

Before I add the Embossing Glaze to the bottom right hand corner, I stamp the music note image and the registered image using Vintage Photo Archival Ink. Before I stamp the image, I use a paper towel to remove some of the ink from the stamp so that the image kind of fades out at an angle along the bottom. I then repeat the same process on the opposite corner, but with just the music stamp.

I then go back to the Embossing Glaze and stencil and apply them to the bottom right hand corner. I absolutely love the layered effect I achieved with the gold heat embossing, embossing glaze and stamping!

For the next steps I focus on adding splatters. First I add some splatters using water from my Distress Sprayer, but instead of spraying with it I unscrew the sprayer and flick the nozzle to add the splatters. I then dry the ink with my heat. 

The next type of splatters I add are with Distress Foundry Wax. If you're not familiar with Foundry Wax feel free to check out my Distress Foundry Wax video. I add some isopropyl alcohol to the Foundry Wax to make it easier to splatter and then use a paint brush to pick up the wax and flick it to create the splatters. I then use my heat embossing tool to heat set the Distress Foundry Wax. If you don't do this, it will just rub off. I love the gorgeous shine the Foundry Wax adds to the background and how all of these layers keep adding to the depth and interest!

The final bit of splatters are made using Black Soot Distress Paint. I use a paint brush to flick the paint onto the background. I then set the paper to the side to dry.

Once dry, I complete the background by inking the edges with Walnut Stain Distress Oxide Ink using a foam blending tool.

To finish off the card, I die cut the word Merry from the Tim Holtz Merry and Bright die Set from Black Kraftstock and then twice more from regular black cardstock. I glue them together to create a little dimension and sand the paper to reveal the kraft core. Before adhering it the the background, I add a couple of evergreen die cuts I cut from green cardstock using the Tim Holtz Mini Holiday Greens Die Set. Next, I stamp the word Christmas using a stamp from the Tim Holtz Tiny Text Christmas Stamp Set with Versamark Watermark Ink onto a piece of Black Kraftstock and heat emboss it with gold embossing powder. I then trim it down, sand the edges and adhere it to the card. The final touch was to take a piece of gold metallick kraftstock cut to 4.25 x 5.5 inches, sand the edges and layer it behind the background panel.


Thanks so much for stopping by today! I hope you've enjoyed my Christmas in July Series and are inspired to begin making your Christmas cards using some of the techniques I've been sharing. Until next time, keep on crafting!

SUPPLIES FOR MERRY CHRISTMAS CARD
Below you can find the products I used to create this card along with compensated affiliate links to Scrapbook.com. These links are at absolutely no cost to you. When you shop through the links below, I receive a small commission from Scrapbook.com. These links are at absolutely no cost to you and the commission I receive helps me cover the costs of my blog and other expenses, which allows me to continue to provide you with FREE inspiration and tutorials. If you want to learn more about what an affiliate link is, you can see my full affiliate and product disclosure statement here. Thank you so much for your love and support!

9 Amazing Distress Embossing Glaze Techniques

Hello beautiful crafty people! In this post I'm sharing 9 Amazing Distress Embossing Glaze Techniques using the new Tim Holtz Distress Embossing Glaze colors. There are 12 new colors which are being added to the current 29 colors for a total of 41 colors. I've created a video that is now live on my YouTube channel where I'm sharing all of the techniques I used to create 9 different backgrounds using everything from stamps to stencils to embossing folders!

If you are looking for even more inspiration make sure to watch the Tim Holtz YouTube Live and check out what the other Makers are creating and sharing on social media. You can find links to the Makers here.


In the write up below I'm sharing the highlights for creating these tags. If you would like more details, including tips and tricks on working with Embossing Glazes, make sure to watch the video below or you can check it out over on my YouTube Channel.


To create my samples, I used Distress Tags, but if tags aren't your thing you can certainly do these techniques on card size pieces of paper. The other supplies I'll be using are embossing folders, stencils, stamps, embossing ink, Distress Crayons, Distress Spray Stains, Distress Oxide Sprays, Distress Ink and Distress Pastes including...Opaque Texture Paste, Translucent Crackle Paste and Translucent Texture Paste. I know this seems like a lot of supplies, but I'm not using all of them for every technique. and definitely feel free to use any embossing folders, stencils and stamps you already have in your stash as well as whatever colors of inks, sprays or even embossing glazes you have as well. If you are interested in the supplies I'm using, I'll have all of them linked below in the supply list and when you shop through those links it helps support me and I really appreciate that so much!

EMBOSSING GLAZES VS EMBOSSING POWDERS

If you're not familiar with embossing glazes, you might be wondering how are these different from regular embossing powder. Well, embossing glazes and embossing powders are similar in that they are both powders that need something to stick to and then you must heat set them using a heat tool. How they are different is that embossing glazes are actually translucent so you can see through it. This is in comparison to regular embossing powder which you can't see through it. So with embossing glazes, if you put them over something you can see what is underneath and some of the techniques I'm going to share will explore that quality and show you how you can use it to add depth and interest to your cards.

To embellish each tag, I added a mix of Paper Dolls, Idea-ology Ephemera with the edges inked using Walnut Stain Distress Ink. I also layered in some Black Kraftstock that I die cut and lightly sanded with a Distress Sanding Disk to reveal the kraft colored core of the paper.

EMBOSSING FOLDERS & EMBOSSING GLAZE

To start off I'm going to show you some techniques for working with embossing folders and Embossing Glaze. I began by taking three Distress Tags and I embossed each one with a different embossing folder.

TAG No. 1

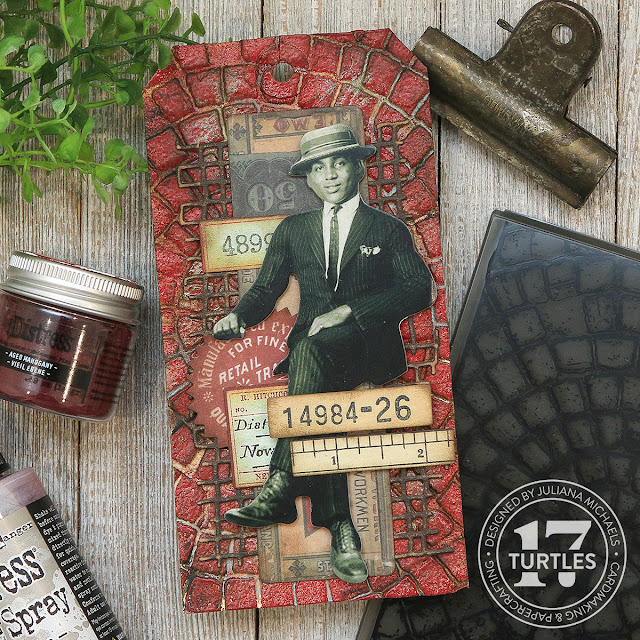
On this first tag, I embossed the tag using the Mosaic Embossing Folder. Next, I lightly rubbed an embossing ink over the raised surface of the tag. I then applied Aged Mahogany Embossing Glaze and heat set it with my heat tool.

Mosaic Embossing Folder and Aged Mahogany Embossing Glaze Tag by Juliana Michaels featuring Tim Holtz Embossing Glaze

To add some interest to this tag I applied Frayed Burlap Distress Oxide Spray, spritzed it with some water and dried the paper with my heat tool. I then added more color to the cracks with some Walnut Stain Spray Stain, spritzed it with more water, dabbed off the excess ink and then dried it with my heat tool. Next, I used Distress Crayons in Crooked Broomstick (a limited edition Halloween color with a pearlescent shimmer) and Walnut Stain Distress Crayon. I really love how this turned out and the shimmer from the pearl is really cool!

The die I used on this tag is the Paper Rose Texture 3 Die.

TAG No. 2

On this tag, I embossed it with the Tim Holtz Damask Embossing Folder. I then used a finger dauber sponge to apply the embossing ink. This allowed me to push the ink down into all the cracks and crevices created by the embossing folder. If you have the Distress Embossing Dabber you could also use that. I then applied Seedless Preserves Embossing Glaze.

Damask Embossing Folder and Seedless Preserves Embossing Glaze Tag by Juliana Michaels featuring Tim Holtz Embossing Glaze

To add some grunge and interest I applied Walnut Stain Distress Crayon using a stencil brush and just a tiny bit of water to work the crayon into the embossed design. I kept adding more of the Distress Crayon until I had the entire piece covered with the crayon. I then took a paper towel, spritzed lightly with water and gently rubbed here and there over the embossed areas to lift off some of the crayon. I then lightly applied Sizzix Luster Wax in Gold over the raised surfaces of the tag.

The die I used on this tag is the Tim Holtz Adorned Thinlits Dies. 

TAG No. 3

For this third tag I embossed it using the Tim Holtz Typewriter Embossing Folder. I gently rubbed over the raised part of the embossed design with an embossing ink pad. I then added three different colors of embossing glaze in Walnut Stain, Peacock Feathers and Rusty Hinge. Because I'm used several colors on this one, I'm spread the colors out across the paper, tap off the excess and then heat set it.

Typewriter Embossing Folder and Walnut Stain, Rusty Hinge and Peacock Feathers Embossing Glaze Tag by Juliana Michaels featuring Tim Holtz Embossing Glaze

To add interest to this tag, I spritzed it with some water and then added Pumice Stone Distress Oxide Spray, dried the paper with my heat tool and dabbed off the excess ink with a paper towel. Next I added a bit of Salvaged Patina Distress Oxide Spray and repeated the same process. I then finish it off by inking the edges with Walnut Stain Distress Ink, spritzed it with some water and dabbed the water droplets with a paper towel to lift the ink in those areas and then I dried it with my heat tool.

The die used on this tag is the Tim Holtz Gearhead Thinlits Dies.

STENCILS & EMBOSSING GLAZE

Now I'm going to share some techniques for working with stencils and Embossing Glaze.

TAG No. 4

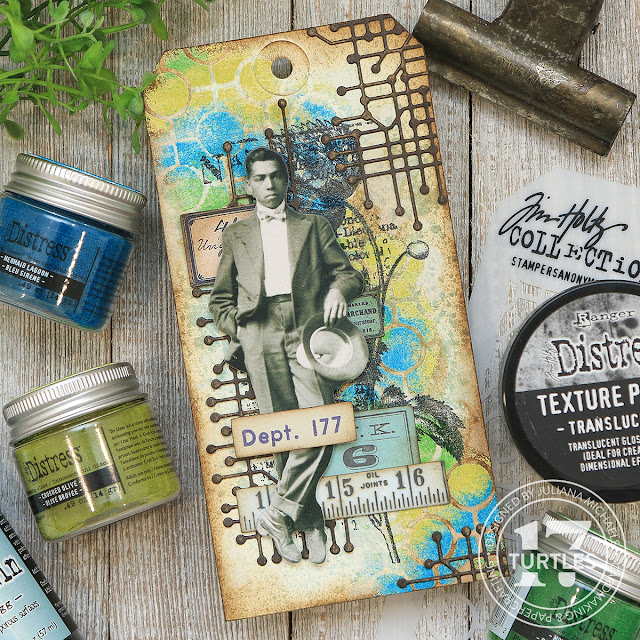
On this tag I applied Distress Opaque Texture Paste through the Tim Holtz Mosaic Layering Stencil. This paste dries white and is less see through than the translucent pastes. Once I get the paste applied I'm going to set this tag to the side and let it dry completely. After the paste had dried, I placed the stencil back over the stenciled design and used a finger dauber to apply embossing ink to the areas with paste. Once the entire surface was covered with ink, I removed the stencil and applied Pumice Stone Embossing Glaze, tapped off the excess and then used my heat tool to heat set the glaze.

Mosaic Layering Stencil and Pumice Stone Embossing Glaze Tag by Juliana Michaels featuring Tim Holtz Embossing Glaze

To add some grunge and interest to this tag I spritzed the paper with water and then added Walnut Stain Distress Spray. I dabbed off the excess ink and dried the paper with my heat tool. I then added various colors of Distress Crayons in Crooked Broomstick, Salvaged Patina, Rusty Hinge, and Walnut Stain.

The die I used on this tag is Tim Holtz Leaf Fragments Thinlits Die Set.

TAG No. 5

For this next tag, I show you how the translucent nature of these glazes comes into play by first stamping one of the floral images from the Tim Holtz Botanic Collage Stamp Set onto the tag using Black Soot Archival Ink. Next, I applied Translucent Texture Paste through the Tim Holtz Typo Layering Stencil. This paste dries transparent so you can see the stamping underneath it. In retrospect, I wish I had picked a stencil with a slightly larger design so I could apply more paste which would allow for an even cooler effect.

After removing the stencil and while the paste is still wet, I applied Abandoned Coral and Pumice Stone Embossing Glaze. I used my fingers to pinch small amounts of the glaze onto the wet paste, making sure to spread the colors out across the pasted areas. I then tapped off the excess glaze and set this to the side to give the paste time to dry. Once the paste was dry, I used my heat tool to heat set the glaze.

Typo Layering Stencil and Pumice Stone and Abandoned Coral Embossing Glaze Tag by Juliana Michaels featuring Tim Holtz Embossing Glaze

To add little grunge and interest to this tag I spritzed it with some water and then added Distress Spray Stain in Tattered Rose. I used my heat tool to dry the paper and dabbed off any excess ink that was sitting on top of the glaze. Once the glaze has been heat set, the ink will not dry on it. I then repeated this process with Pumice Stone Distress Oxide Spray. The final step on this tag was to ink the edges with Walnut Stain Distress Ink, spritz it with some water and dab the ink dry.

The die I used on this tag is Tim Holtz Adorned Thinlits Die Set.

TAG No. 6

For this next tag, I'm going again stamp some images from the Tim Holtz Botanic Collage Stamp Set and Black Soot Archival Ink. This time I stamped the butterflies. I then applied Translucent Crackle Paste through the Tim Holtz Brush Hex Layering Stencil. I removed the stencil and then added Mermaid Lagoon, Peacock Feathers and Bundled Sage Embossing Glaze over the wet Translucent Crackle Paste making sure to spread the various colors across the pasted area. I then tapped off the excess glaze and and set the tag to the side to allow the paste time to dry. After the paste dried, I used my heat tool to heat set the embossing glaze.

Brush Hex Layering Stencil and Mermaid Lagoon, Peacock Feathers and Bundled Sage Embossing Glaze Tag by Juliana Michaels featuring Tim Holtz Embossing Glaze

Next, I spritzed the tag with water and added some Speckled Egg Distress Spray Stain. I used my heat tool to dry the paper and then dabbed off any excess ink with a paper towel because, as we learned earlier, the ink will not dry on the embossing glaze once the glaze is heat set..

Once the paper was dry, I applied Walnut Stain Distress Crayon to bring out the cracks from the Crackle Paste. Next, I inked the edges of the tag with some Walnut Stain Distress Ink. I then spritzed it with some water, dabbed the water droplets to lift the ink and then set it to the side to dry. You could also use your heat tool to dry the paper is so desired.

The die I used on this tag is Tim Holtz Adorned Thinlits Die Set.

TAG No. 7

For this tag, I wanted to apply the embossing glaze to very specific areas of the design, but first, I started off by stamping the tag with the ledger image from the Tim Holtz Ledger and Script Stamp Set with Black Soot Archival Ink. I then applied Opaque Texture Past through the Tim Holtz Roses Layering Stencil. I was a bit surprised, that I could see the stamped design through the opaque paste after it had dried.

Once the paste was dry, I lined up the stencil over the dry texture paste and used a finger sponge dauber to apply embossing ink through the stencil, making sure I get ink over the entire design. I removed the stencil and began to apply the embossing glaze. I like to refer to this as painting with the embossing glaze. I pinched different colors over different sections of the stenciled design. I applied Abandoned Coral to the flower areas and Crushed Olive to the leaf and stem areas. I then tapped off the excess powder and used my heat tool to set the embossing glaze.

Roses Layering Stencil and Abandoned Coral and Crushed Olive Embossing Glaze Tag by Juliana Michaels featuring Tim Holtz Embossing Glaze

To add some grunge and interest to this tag, I spritzed the tag with water and then added some Distress Spray Stains in Old Paper and Tea Dye and then dry the paper with my heat tool. I then finished it off by inking the edges with Walnut Stain Distress Ink, spritzing it with water. I then dried it with my heat tool and used a paper towel to dab up some of the larger water droplets.

The die I used on this tag is Tim Holtz Mini Detailed Butterflies Thinlits Die Set.

TAG No. 8

This is the last tag I used with a stencil and I only used a stencil, no pastes or other mediums. The first thing did was stamp a floral image from the Tim Holtz Botanic Collage Stamp Set onto the tag using Black Soot Archival Ink. I then placed the Tim Holtz Linked Circles Layering Stencil over the tag and applied embossing ink through the stencil at a diagonal across the tag using a finger sponge dauber. You could also use an Embossing Dabber.

I removed the stencil and applied Mowed Lawn, Mermaid Lagoon and Crushed Olive Embossing Glaze to various sections of the inked stencil. I then tapped off the excess embossing glaze and used my heat tool to set the glaze.

Linked Circles Layering Stencil Mowed Lawn, Mermaid Lagoon and Crushed Olive Embossing Glaze Tag by Juliana Michaels featuring Tim Holtz Embossing Glaze

To add some grunge and interest to this tag, I sprayed it with Speckled Egg Distress Spray Stain and dried the paper with my heat tool. Next, I inked the edges of the tag and also added some ink toward the center of the tag with Walnut Stain Distress Ink. The glaze acts as a resist to the ink and I really love the way it looked when I added the ink over some of the glazed areas. I then spritzed the tag with water, dried it and dabbed off some of the excess ink with a paper towel. I then re ink the edges to darken them up again.

The die I used on this tag is Paper Rose Circuit Texture Die Set.

STAMPS & EMBOSSING GLAZE

Now I'm going to share one last tag that only uses stamps and embossing glaze.

TAG No. 9


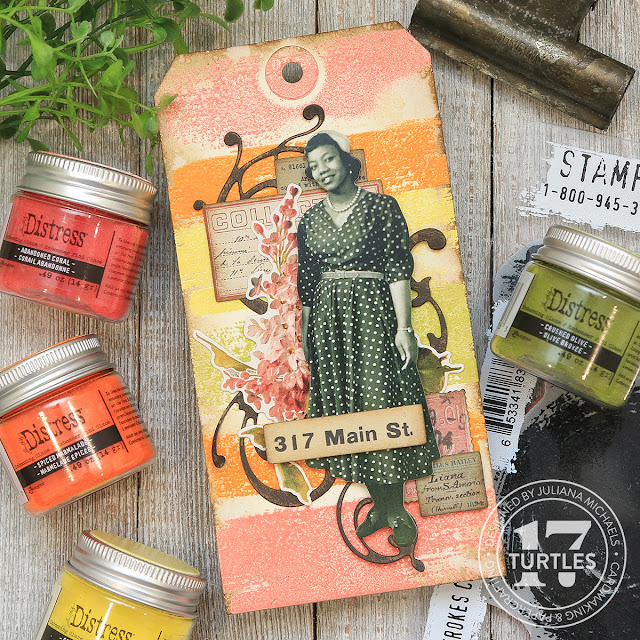
Now onto the final tag! For this one I went super simple and used only stamps. For this technique, I recommend using stamps that are more solid in their design such as the Tim Holtz Brushstrokes Stamp Set. I stamp the top of the tag with one of the brushstroke images from the Tim Holtz Brushstrokes Stamp Set with Embossing Ink. I then applied Abandoned Coral Embossing Glaze over the stamped image, tapped off the excess and heat set it with my heat tool. I repeated this process down the length of the tag using different brushstroke stamps from the set to provide a little variety. Each time I applied a different embossing glaze color to include Abandoned Coral, Spiced Marmalade, Squeezed Lemonade and Crushed Olive. After I had stamped and embossed each of the four colors, I repeated Spiced Marmalade and Abandoned Coral to finish off the design.

Brushstrokes Stamp Set with Abandoned Coral, Squeezed Lemonade, Spiced Marmalade and Crushed Olive Embossing Glaze Tag by Juliana Michaels featuring Tim Holtz Embossing Glaze

The final touch on this tag was to ink the edges with Walnut Stain Distress Ink. I then spritzed it with some water, dabbed it dry with a paper towel to lift off some of the ink and dried the tag with my heat tool.

The die I used on this tag is Tim Holtz Adorned Thinlits Die Set.

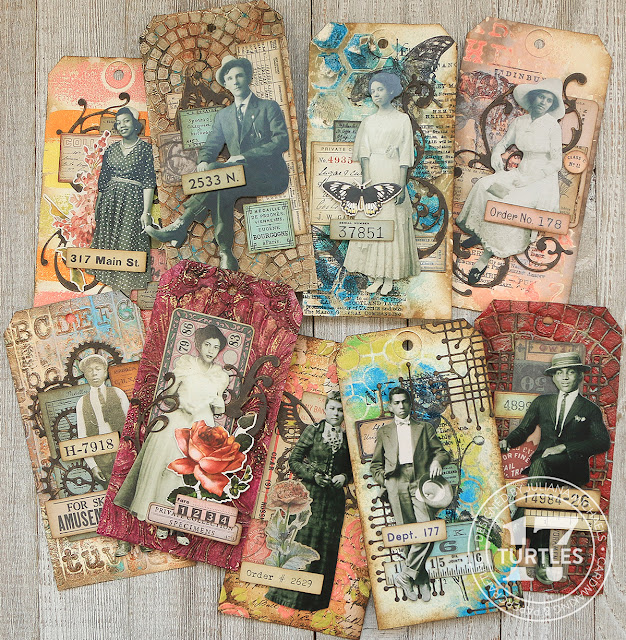
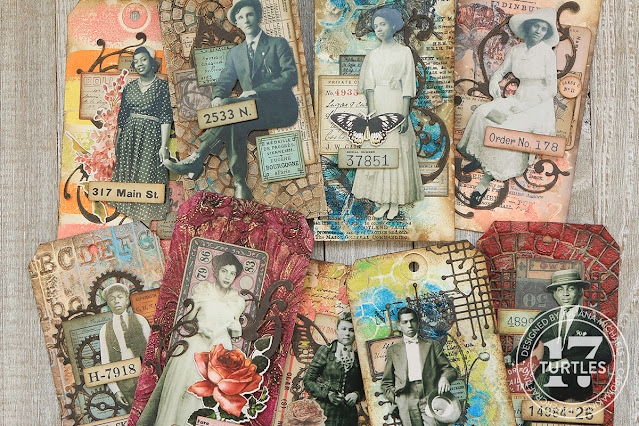
9 Amazing Embossing Glaze Techniques on Distress Tags by Juliana Michaels featuring Tim Holtz Embossing Glaze

So there you have it! Nine tags created using nine amazing Embossing Glaze Techniques and a mix of different mediums and supplies! To decorate each tag, I added a mix of die cuts cut from Black Kraftstock that I lightly sanded with a sanding disk, a paper doll and ephemera from my stash. I inked the edges of the ephemera with Walnut Stain Distress Ink. I then adhered the clusters with a mix of Scrapbook.com Clear Double Sided Adhesive Roll and Double Sided Adhesive Foam Roll. The dies I used are listed below each tag.

SUPPLIES FOR EMBOSSING GLAZE TECHNIQUES TAGS
Below you can find links to the Self-Healing Workspace Mat and Stackable Paper Trays. These are compensated affiliate links to Scrapbook.com and there is absolutely no cost to you when you click on them. When you click on them and then shop through them, I receive a small commission from Scrapbook.com. This helps support me and I truly appreciate that so very much! If you want to learn more about what an affiliate link is, you can see my full affiliate and product disclosure statement here. Thank you so much for your love and support!

Subscribe