I love playing with products and making fun backgrounds for my cards. On this card, I used my Distress Inks and Die Cuts to create a bit of a spooky look - just perfect for a Halloween card.
For all the details on how I created this spooky background check out my tutorial below:
Die Cut Masking and Distress Ink Blending Spooky Night Scene Background
2. Stamp images with waterproof ink onto watercolor paper.
3. Reposition stamps on MISTI and complete stamping of images.
4. Create masks by die cutting shapes from cardstock.
5. Apply repositionable adhesive to help hold masks in place.
Tip: To make your adhesive repositionable, apply the adhesive to the die cut images and then stick them to a piece of fabric, such as your clothes, peel them off and repeat sticking them to your clothes. The adhesive will then be less sticky and less likely to tear your paper when you remove them later.
6. Apply Distress Ink with ink blending tool.
7. Apply the ink in a circular motion, starting on the edges of the paper and blend in toward the center to keep the center lighter in color.
8. Repeat the blending process with second color. Then blend again with the first color. Continue repeating colors until they are nicely blended.
9. Remove masks to reveal stamped images
10. Gather watercolor marker, water and small paintbrush.
11. Color in stamped images and blend the ink with water and a small paint brush.
12. Flick water onto the paper using a larger paint brush and remove excess water with a paper towel.
13. Pour clear embossing powder onto paper.
14. Use heat gun to melt the embossing powder.
Tip: Keep the heat gun at least 6 inches away from paper to help minimize blowing off all of the embossing powder. The powder will tend to only stick to the areas that have more ink applied.
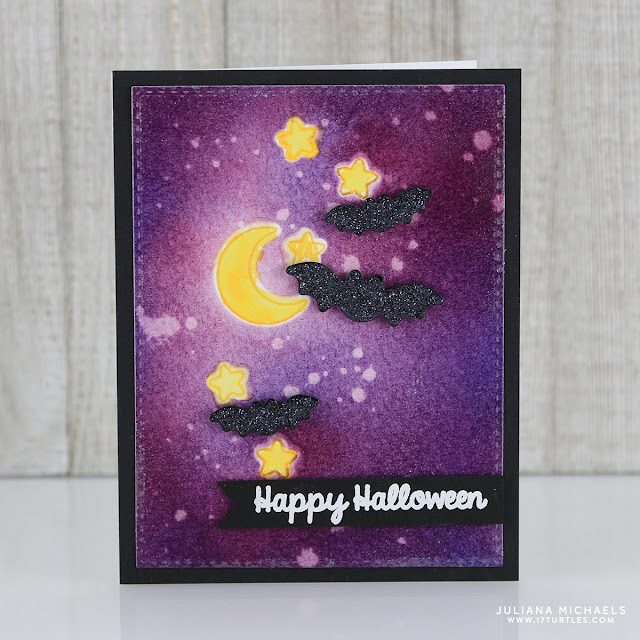
Along with the fun background, I used the dies from the Halloween Cuties Dies to create the embellishments on my card. I simply die cut the bats from black cardstock, covered them with Glossy Accents and then sprinkled on black glitter. After everything was dry, I adhered them to the card front with Foam Squares to give them a bit more dimension.

The sentiment is heat embossed with white embossing powder. The final touch before adhering the main piece to the card base was to die cut it with a stitched rectangle die.

• • • • • • • • • • • • • • • • • • • • • •
I'm so thrilled to be a part of this amazing group of talented card makers and to help celebrate this wonderful milestone for Sunny Studio. I really adore the owner,
Mendi Yoshikawa and she has always been a favorite designer of mine.
The hop officially starts on the Sunny Studio blog, however, here is the full hop list in case you are just joining in the fun...
Now on to the good stuff! To celebrate, Sunny Studio is giving away 16 chances for people to win a $20 gift certificate to their online store. That is one prize per each stop along the way. All you need to do is leave a comment below and at each stop along the way to increase your chance of winning! The blog hop is open until Monday, August 15, so you have plenty of time to hop along.
Sunny Studio is also offering 15% off all purchases to their
online store using the code "SUNNYBIRTHDAY" through Monday, August 15th at midnight PST.
Thanks so much for stopping by today and helping Sunny Studio celebrate their first birthday!
• • • • • • • • • • • • • • • • • • • • • •
Are you interested in any of the products I used to create the card I shared with you today? Just click on the image below to check it out. Where available, I use affiliate links. If you make a purchase after clicking, this means I'll receive a small commission at no extra cost to you. Thanks so much for your support!
Sunny Studio Stamps: Halloween Cuties Stamps and Halloween Cuties Dies





