
Hello friends! I'm so happy to have you joining me here! In this blog post I'm going to be sharing how to use Stencils, Distress Ink and the new Distress Texture Paste Sparkle to create a trio of backgrounds that will get you ready for Fall, Halloween AND Christmas! And the possibilities with this technique are endless...all you have to do is switch out the stencils and colors to fit your style or the theme of your card.

If you're interested in the supplies I've used, you can find affiliate links to them at the bottom of this post. When you shop through those links it supports me and I really do appreciate that so very much!
Now let's get on with the making.

STENCILS & DISTRESS INK
For this technique I'm going to be working with the Autumn, Crossbones and Pinecones Layering Stencils from Tim Holtz, but you can use any stencils you like. I'm also going to be using Distress Texture Paste Sparkle. The other thing you will need are some Distress Inks. I'm going to be using Black Soot, Forest Moss, Gathered Twigs, Iced Spruce, Tea Dye and Dried Marigold. I'm also going to be using some blending brushes and Mint Tape for masking. The paper I'm working with is Distress Watercolor Paper cut to 4 x 5.25 inches and the surface I'm working on is the Scrapbook.com 12 x 12 Project Grip Mat which is a double sided silicone mat. I like that it can help hold the stencils, ink pads and paper in place and it makes clean up nice and easy.
For the second background, I used the Pinecones stencil and I applied Gathered Twigs to the pine cone areas and Forest Moss to the pine needle areas. I then flipped the stencil around and angled it just a little to fit in with the already stenciled areas. I used some Mint Tape to mask off some sections that I didn't want to ink over from the previously stenciled areas. I then applied the Distress Ink as before. On the third background I used the Autumn stencil. The Distress Inks I used are Iced Spruce, Dried Marigold and Tea Dye. Again, I only applied ink to the outer edge of the design and then flipped it over to do the other side of the paper and I used Mint Tape to mask off the areas that already had ink on them.
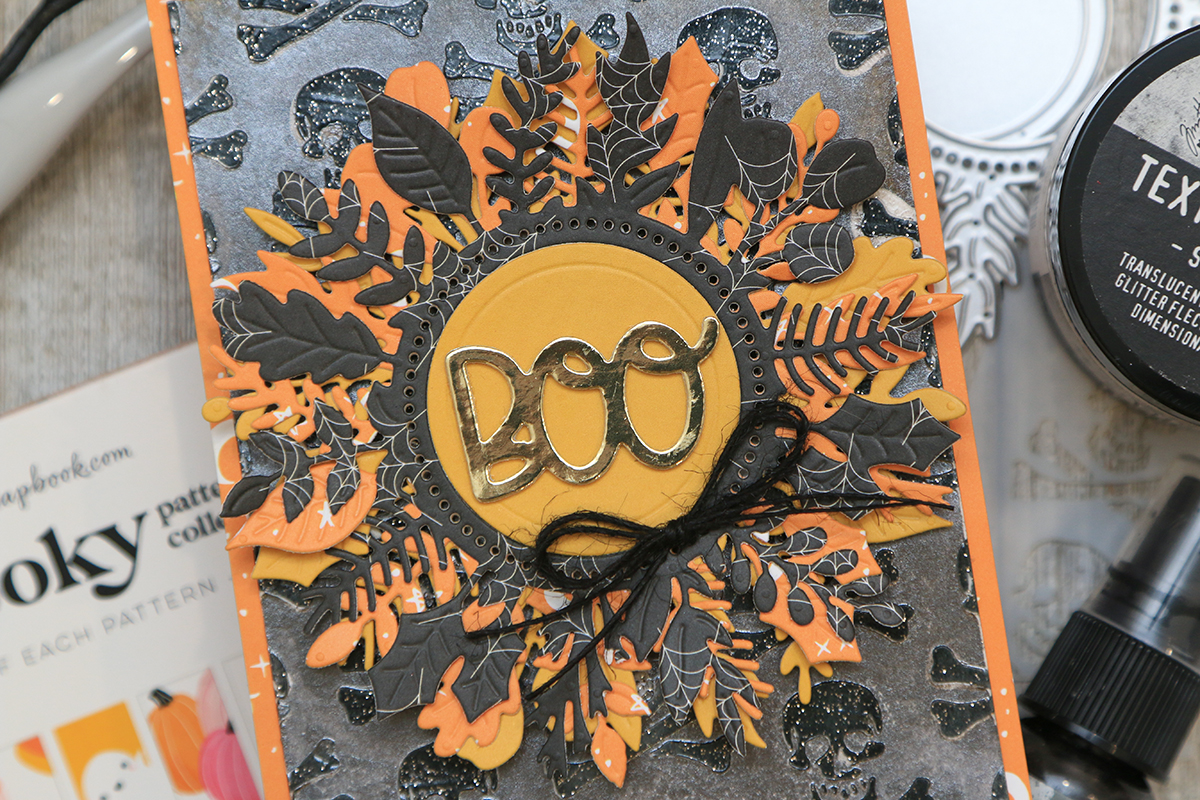
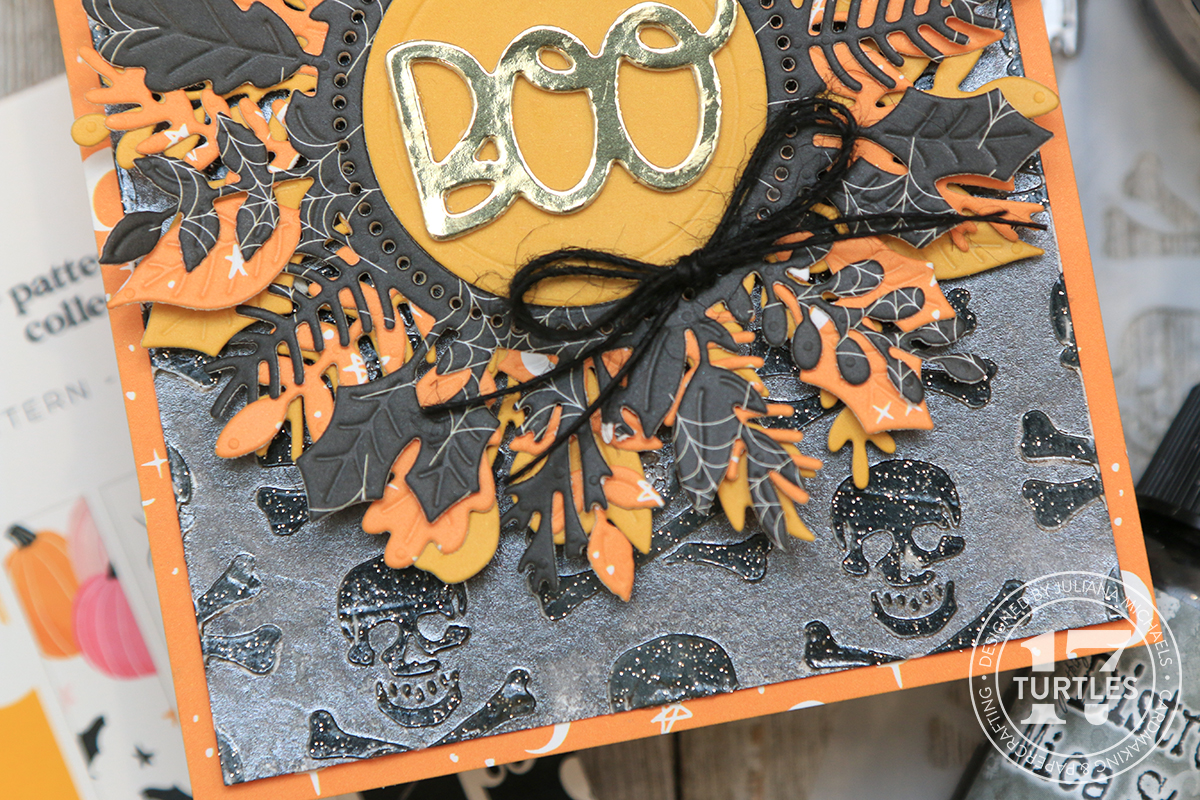
To get started, I took the Distress Watercolor Paper and placed it onto the Project Grip Mat and then placed the stencil on top making sure to push it down so that it sticks to the mat. On the first background I used the Crossbones stencil and applied Black Soot Distress Ink through the stencil using a blending brush to apply the color. I shifted the stencil over to apply the design across the paper.
STENCILS & DISTRESS TEXTURE PASTE SPARKLE
Now it's time to add some magic to these background. I'm going to be using the stencils again, so I made sure to clean them well and let them dry before this step. I then lined the stencil up with the design I created earlier using the Distress Ink. Once the stencil was in place I used a palette knife to apply Distress Texture Paste Sparkle through the stencil. After I finished applying the paste, I washed the stencil immediately before the paste dried on it. I also returned the excess paste to the jar. I then set the paper to the side to dry and once it was dry, I added the Sparkle Paste to the other areas. I repeated this process on all three backgrounds.

The sparkle and shine created by the Distress Texture Paste Sparkle is just gorgeous and really makes the colors from the stenciling pop! I do want to share though that this paste is a bit slow to dry, especially if you live in a more humid environment. They don't recommend using a heat tool to speed up the drying process though as it will cause the paste to bubble. I did experiment with using a Minc Foiling Machine to speed up the drying though. I turned the machine on to level 3, and laid the papers on top of it. This seemed to decrease the drying time by about half and the paste did not bubble. So if you happen to have something like this you might try using it if you want to speed up the drying time.

DISTRESS MICA STAINS
The next thing I did was add some interest to the backgrounds by adding Distress Mica Stains. Before you use them, just make sure you shake them up really well and get that mica mixed in because this will help prevent the spray nozzle from getting clogged. I worked in a Splat Box while applying the spray inks with some paper towels placed inside to absorb the excess ink and to protect my work space from overspray.

For the Crossbones background I used Empty Tomb. I sprayed the ink here and there onto the paper and then added a little water with my Distress Sprayer to get the ink moving around. I then used a heat tool to help dry the ink. Just make sure that you keep the heat tool moving around because it will heat the paste and could cause it to bubble if you overheat it. If you want to dab off some of the excess ink with a rag or paper towel, make sure to let the paper cool off for just a second or the paper towel will stick to the paste because it does get sticky when the heat is being applied. I then added some water droplets by slowly squeezing the trigger on the Distress Sprayer. Like I mentioned the water will cause the ink to activate and flow and then you can start the drying process with a heat tool. Let it cool off a second and then use a paper towel or rag to dab up those larger droplets and lift off some of the ink. All of this just adds a little more interest and texture.

I repeated this same process for the Pinecones background using Specimen Mica Stain. And on the Autumn background I sprayed it with Frosted Juniper.
The backgrounds look pretty cool after you apply the Mica Stain, but the sparkle from the Sparkle Paste will have diminished from the sprays. To bring the sparkle back grab a clean paper towel or rag, lightly mist it with some water so that it's just a little bit damp and then take that and rub over the top of the pasted areas to remove the Mica Stain that was covering the Sparkle Paste. As you do this, you will see the sparkle and design return!

COZY AUTUMN WREATH DIE CUTS
Next, I took the Cozy Autumn Wreath Die. This die was was created specifically for Scrapbook.com's SBC Fest which started today and is a freebie for a very short period of time with any order from Scrapbook.com.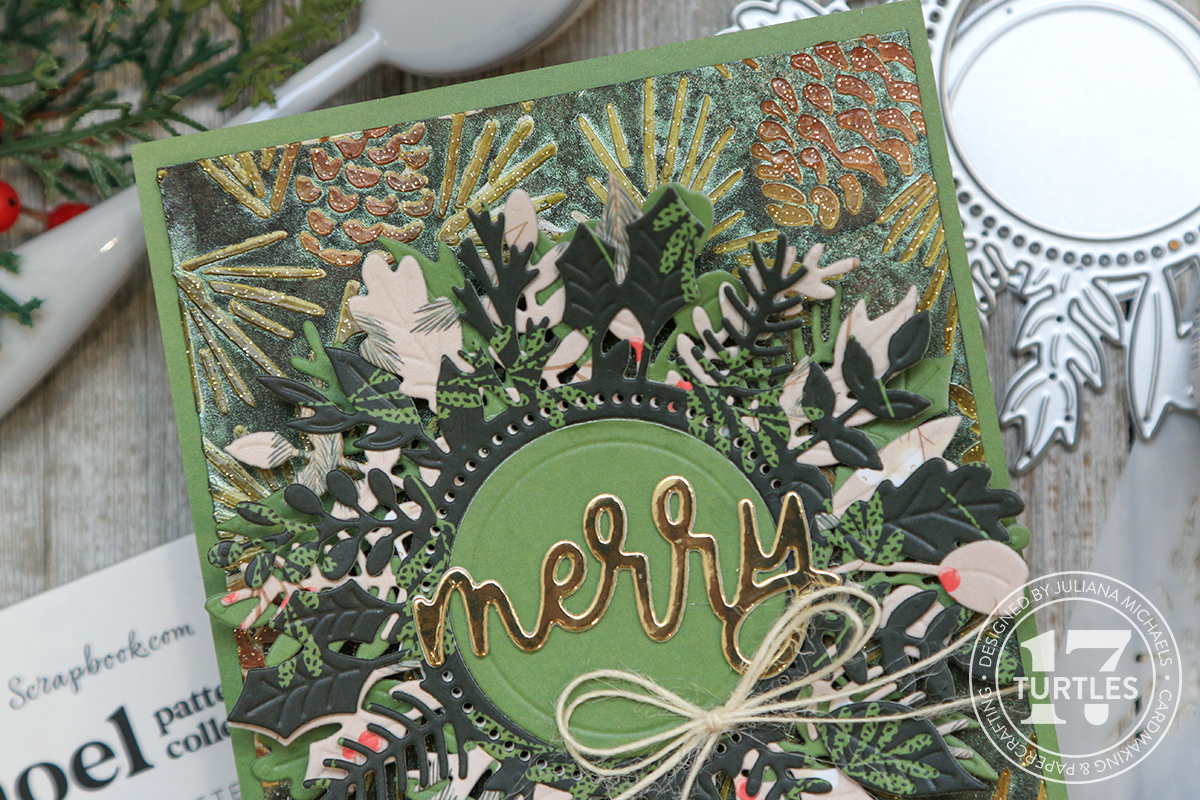
I took that die and die cut it 3 times out of 3 different papers from 3 different paper pads. I made a Halloween wreath using the Spooky paper pad, a Christmas wreath using the Noel paper pad and a Fall wreath using the Cozy paper pad. I then assembled the wreaths, adhering the layers together using Artis Glue.

DIE CUT SENTIMENTS & BOWS
For the sentiments, I used a mix of word dies including the Build And Layer Ghost Die Set, Merry Christmas Sentiments II Die Set and Thank You Sentiments II Die Set. I cut each word twice from white heavy weight cardstock and then once using some gold paper from the Holographic paper pad. I then adhered them together using Artis Glue. The precision tip on this really comes in handy for applying adhesive to these delicate thin die cuts. I did this to create a little dimension with the sentiment, but you could certainly just cut and adhere the gold layer to save some time. Once the layers were adhered, I attached the sentiment to the center of the wreath.

Next, I adhered the stenciled background to a piece of paper from the paper pad that I used to cut the wreath layers from. I then finished off each card by adding a bow using some twine from my stash. And there ya have it...A trio of cards to take your from Halloween to Christmas with a touch of sparkle and shine!

I hope you enjoyed learning more about Distress Texture Paste Sparkle and the magic it can add to your card backgrounds!


Next, I adhered the stenciled background to a piece of paper from the paper pad that I used to cut the wreath layers from. I then finished off each card by adding a bow using some twine from my stash. And there ya have it...A trio of cards to take your from Halloween to Christmas with a touch of sparkle and shine!
I hope you enjoyed learning more about Distress Texture Paste Sparkle and the magic it can add to your card backgrounds!
SUPPLIES
Below you can find the products I've used to create this Halloween Banner. When you shop through the links below, I receive a small commission from Scrapbook.com. These links are at absolutely no cost to you and the commission I receive helps me cover the costs of my blog and other expenses, which allows me to continue to provide you with FREE inspiration and tutorials. If you want to learn more about what an affiliate link is, you can see my full affiliate and product disclosure statement here. Thank you so much for your love and support!


No comments
Every time you smile at someone, it is an action of love, a gift to that person, a beautiful thing. ~Mother Teresa
HUGS!
JULIANA