
Today I'm sharing two cards that feature the Berry Sweet collection from Scrapbook.com and the berry basket two ways. While I created these cards and assembled the adorable strawberries and baskets I was taken down memory lane! As a child growing up in southeast Missouri, May was always strawberry month. It was also my birthday month so my Mom always made me a strawberry cake of some sort. We also grew our own strawberries and I remember the sweet joy of eating as many of them as I could without my Mom seeing me as we were picking them! Now that we've strolled down memory lane for a few, let's get into the making!

THANK YOU BERRY MUCH CARD | A2 Size
For my first card, I went rather traditional and used the Berry Sweet Die Set to create a berry basket filled with strawberries. I die cut the basket layers, the strawberry layers, the centers of the flowers, the leaves and the word berry from Distress Watercolor Paper. I then used ink blending brushes to apply various colors of Distress Oxide Inks to the die cuts. I die cut the flower base and shadow layer from white cardstock.
Distress Oxide Colors:
Basket - Walnut Stain and Brushed Corduroy
Strawberries - Scattered Straw, Festive Berries and Aged Mahogany
Flower centers - Fossilized Amber
Leaves - Peeled Paint and Forest Moss
Word Berry - Festive Berries

After I applied the ink, I lightly spritzed all of the pieces with water using my Distress Sprayer and dried them with my heat tool. I then assembled the layers using Distress Collage Medium as my adhesive. I inked the edges of the basket with Vintage Photo Distress Ink. I added tiny dots of Chocolate Kiss Pops of Color to add detail to the flower centers.

As I assembled the berries, leaves and flowers inside the basket, I adhered them with either Distress Collage Medium or Double Sided Foam Adhesive which gives them a little bit of dimension.
The sentiment was created using stamps from the Berry Sweet Stamp Set. I stamped it with Festive Berries Distress Oxide Ink onto white cardstock and then trimmed them into small strips. All of the sentiment pieces are adhered with Double Sided Foam Strips.
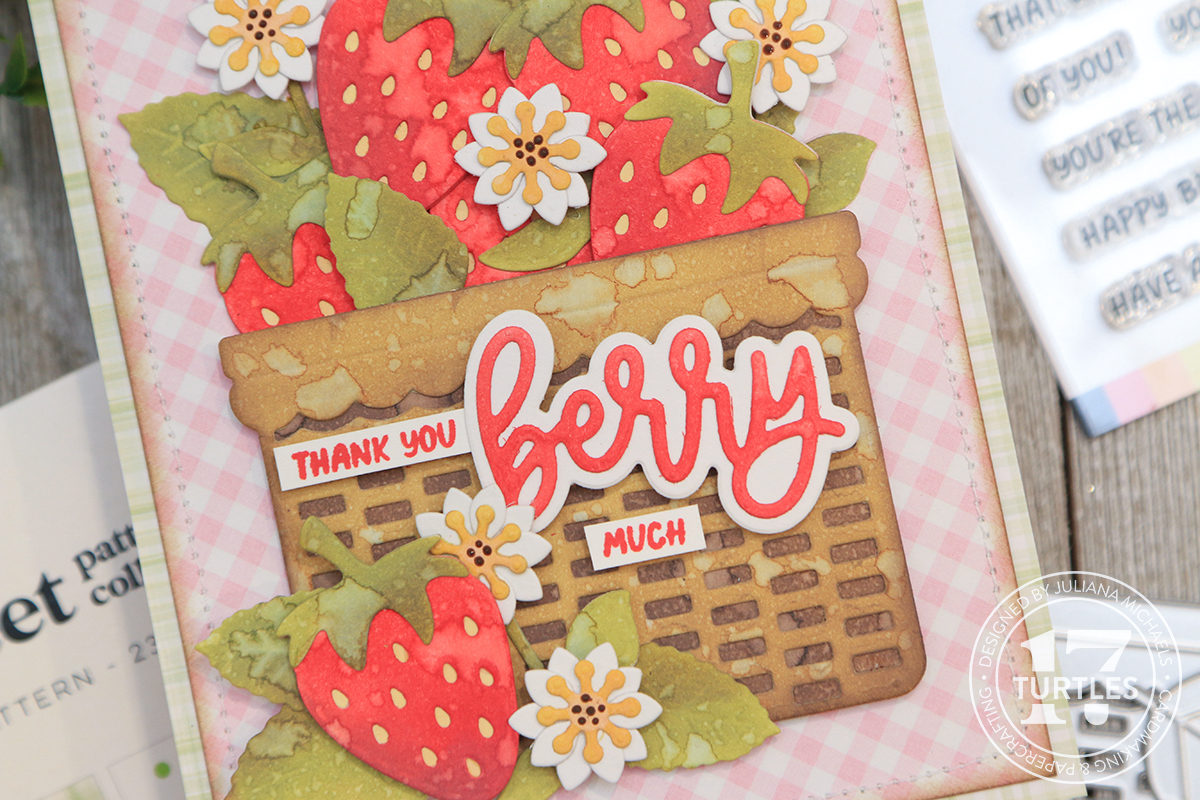
The pink gingham paper behind the basket is from the Berry Sweet A2 Paper Pad. I trimmed it to 4 x 5.25 inches, inked the edges lightly with Vintage Photo Distress Ink and added some machine stitching. I then adhered it to a green plaid paper which is also from the same paper pad.

HELLO CARD | A2 Size
For the second basket, I departed from the berry theme and decided to fill it with flowers and butterflies! You might notice it also has a handle and I'll share how I created that.

This card was created in much the same way as the first card. I used the Berry Sweet Die Set for the basket and label. I used the Sunny Lane Florals Die Set for the flowers and leaves. The butterflies are from the Butterflies 2 Die Set and the sentiment is from the Thank You Sentiments II Die Set. All of the colored pieces were cut from Distress Watercolor Paper, inked with Distress Oxide Ink and spritzed with water.
Distress Oxide Colors:
Basket - Walnut Stain and Brushed Corduroy
Flowers - Kitsch Flamingo, Picked Raspberry, Festive Berries
Flower centers - Fossilized Amber
Leaves - Peeled Paint and Rustic Wilderness
Butterflies - Fossilized Amber
Word Hello - Festive Berries
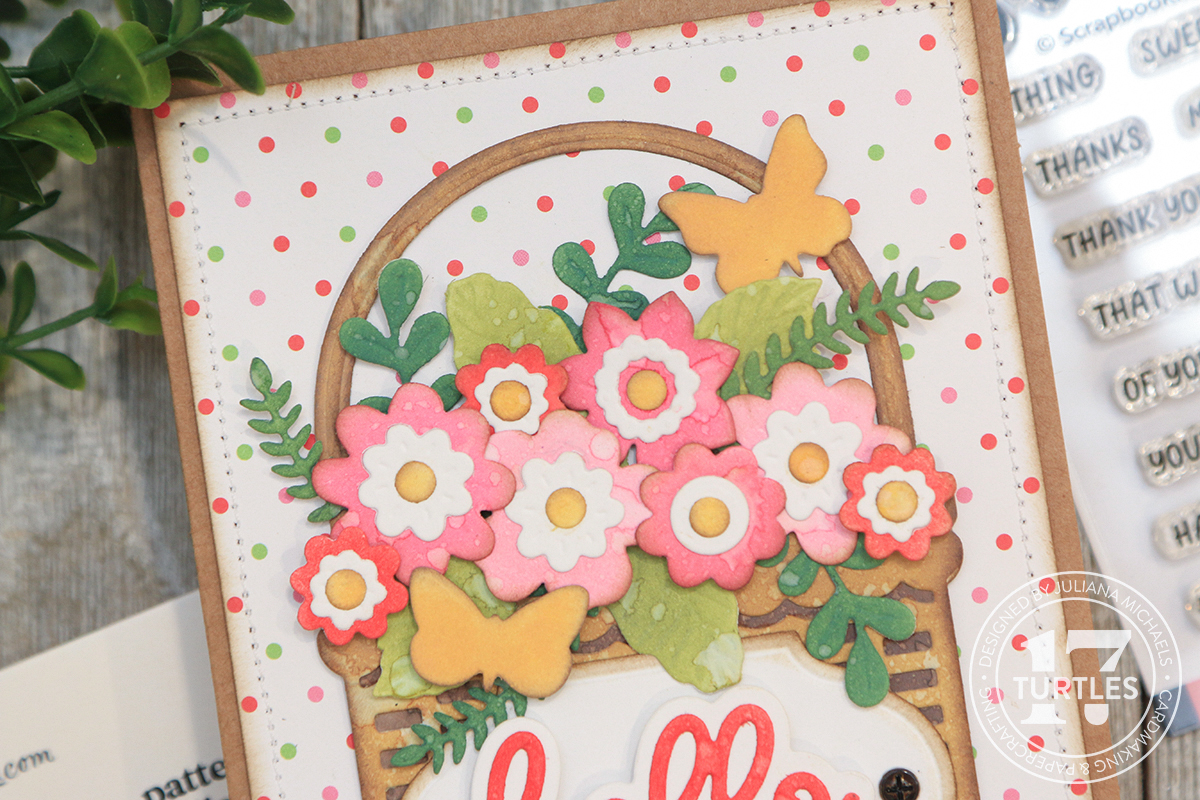
The label, shadow layer for the sentiment and the flower centers were cut from white cardstock. I inked the edges of the label, flowers, butterflies and basket with Walnut Stain Distress Ink.

I adhered Hardware Heads to the label using Distress Collage Medium as my adhesive. Before adhering them, I colored them with Mushroom Alcohol Ink.

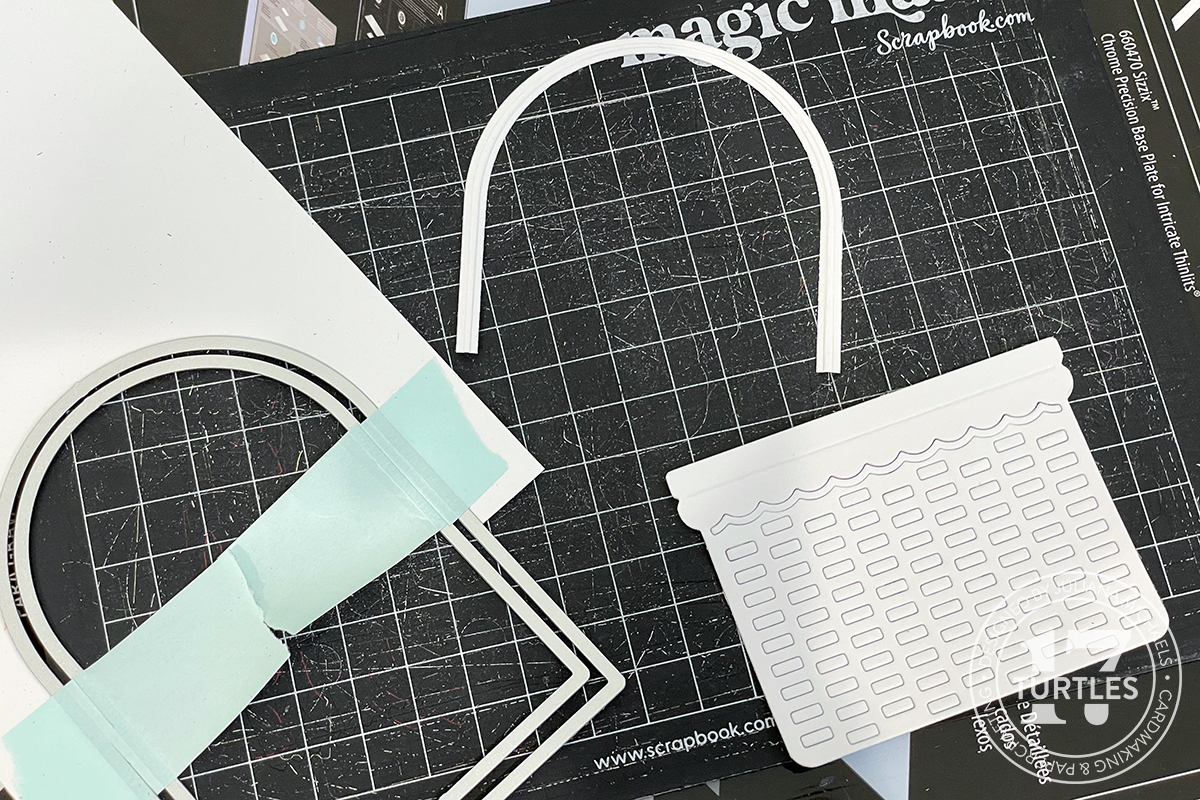
Now onto how I created the handle for the basket. I took 2 of the Scrapbook.com Nested Arches and nested them on a piece of Distress Watercolor Paper. I used a piece of Mint Tape to hold them in place so they wouldn't shift as I ran the dies through my die cutting machine.
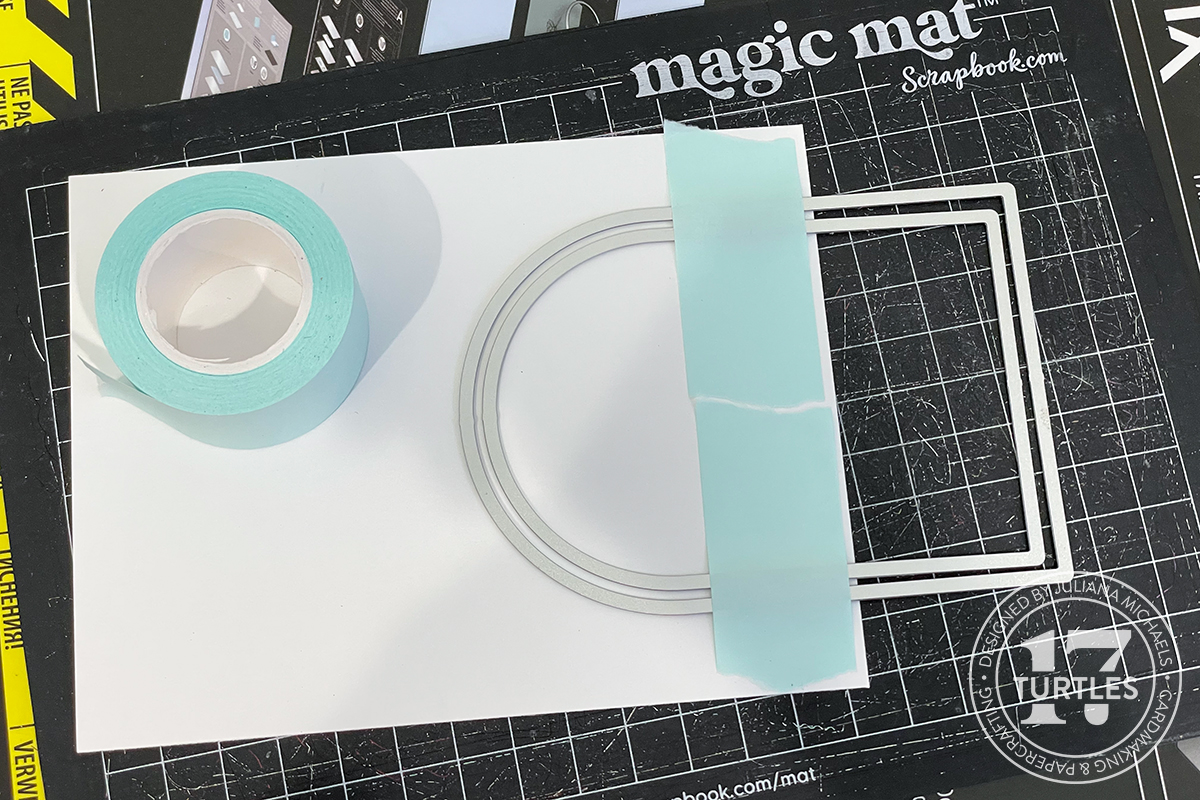
And viola...a handle for my basket! I used two dies that were next to each other in size, but if you wanted a thicker handle you could go to the next size down.
I hope you enjoyed this bit of inspiration and seeing the Berry Sweet Basket 2 Ways! What would you fill the basket with? Strawberries? Cherries? Flowers? Or maybe something else?

SUPPLIES
Below you can find the products I used to create these card along with compensated affiliate links to Scrapbook.com. These links are at absolutely no cost to you. When you shop through the links below, I receive a small commission from Scrapbook.com. These links are at absolutely no cost to you and the commission I receive helps me cover the costs of my blog and other expenses, which allows me to continue to provide you with FREE inspiration and tutorials. If you want to learn more about what an affiliate link is, you can see my full affiliate and product disclosure statement here. Thank you so much for your love and support!


No comments
Every time you smile at someone, it is an action of love, a gift to that person, a beautiful thing. ~Mother Teresa
HUGS!
JULIANA