Showing posts with label Easter. Show all posts

Tim Holtz Distress Techniques Anyone Can Do

I've got something eggstra special for you today! Say hello to Mr. Rabbit! The new Easter stamp set from Tim Holtz! This dapper fellow is similar in size to the Professor 2 and is paired with a wonderful worn plaid, distressed dots, and some vintage Easter ephemera. This set has all those vintage vibes that I love and as soon as I saw it I knew what I wanted to create and share with it. In my latest video I’m sharing some great techniques that anyone can do using Distress Oxide Inks and Distress Watercolor pencils. 

Happy Easter Card by Juliana Michaels featuring Tim Holtz Mr Rabbit Stamp Set and Distress Techniques anyone can do using Distress Oxide Inks and Distress Watercolor pencils

You can either watch the video below or head over to my YouTube Channel HERE to check it out.


If you’re interested in any of the supplies I’m using in this video, you can find a complete supply list at the end of this post. When you shop through those affiliate links you’re helping me continue to be able to provide you with all the content I share. 

MR. RABBIT HAPPY EASTER CARD

Here are some detail images of the card I create in the video. The finished size is A2 - 4.25 x 5.5 inches.

Happy Easter Card by Juliana Michaels featuring Tim Holtz Mr Rabbit Stamp Set and Distress Techniques anyone can do using Distress Oxide Inks and Distress Watercolor pencils


Thanks for stopping by here to check out this Happy Easter card that I created using the Tim Holtz Mr. Rabbit Stamp Set and Distress techniques that anyone can do. As always, if you have any questions, don't hesitate to reach out to me. Until next time, stay crafty my friend!

SUPPLIES

Below you can find the supplies I used to create this card. When you shop through the links below, I receive a small commission from Scrapbook.com. These links are at no cost to you and the commission I receive helps me cover the costs of my blog and other expenses, and allows me to continue to provide you with FREE inspiration and tutorials. If you want to learn more about what an affiliate link is, you can see my full affiliate and product disclosure statement here. Thank you so much for your love and support!

Some Bunny Loves You Easter Card | Nested Peeps

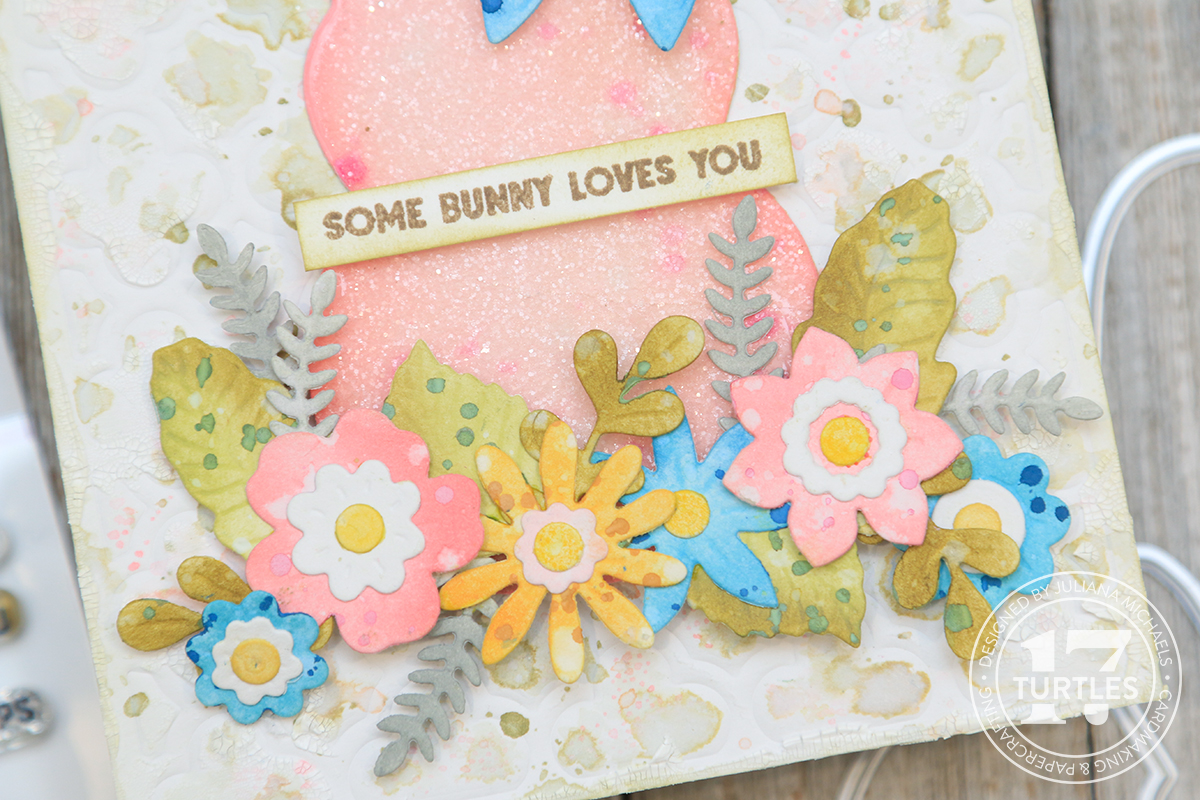
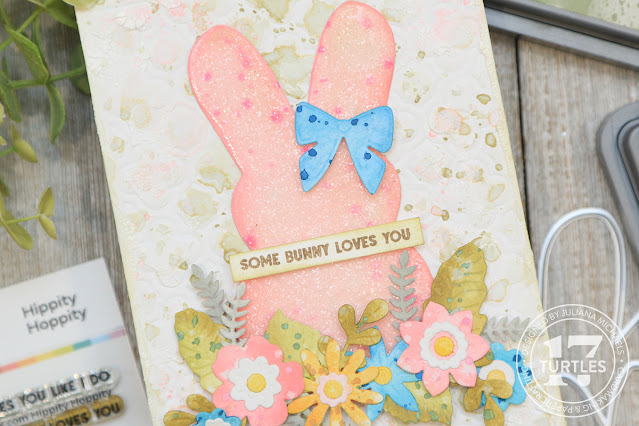
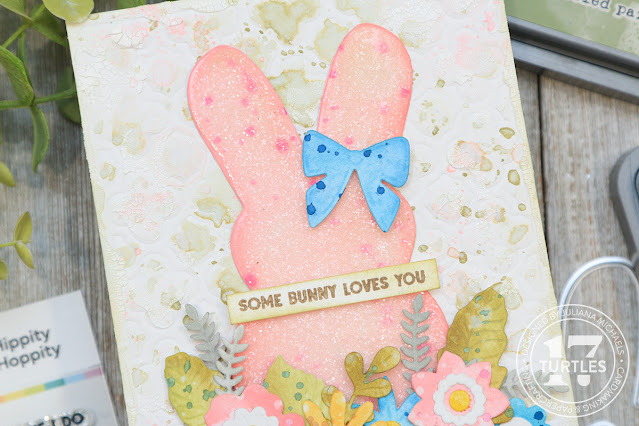
Spring feels like it's right around the corner here and it's definitely gotten me into the mood for creating some spring and Easter themed cards. Today I'm sharing this Some Bunny Loves You Easter Card that features a fun set of dies from Scrapbook.com including their Nested Peeps Die Set. Keep reading as I walk you through how I created this mixed media shabby style Easter card and make sure to take a close look at the background. There is so much detail there and photos don't seem to do it the justice it deserves!
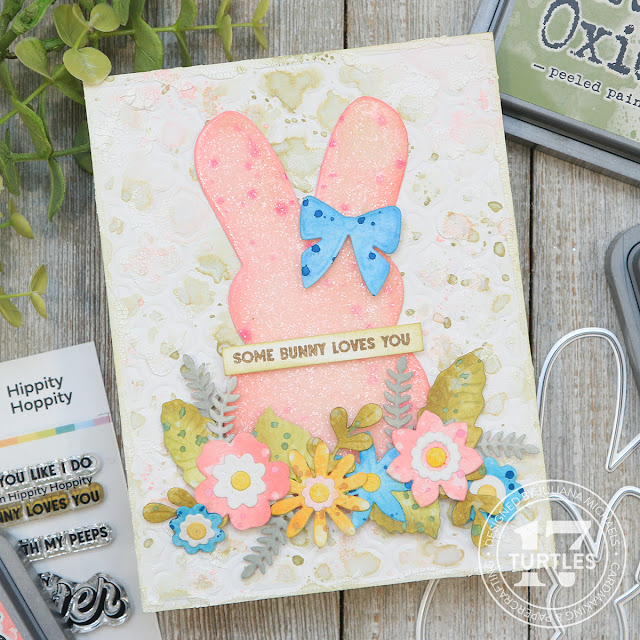
Some Bunny Loves You Easter Card by Juliana Michaels featuring Scrapbook.com  Nested Peeps Dies, Sunny Lane Floral Dies and Hippity Hoppity Stamp Set

Speaking of backgrounds, let's start there. I began with a piece of Distress Watercolor Paper cut to 4.25 x 5.5 inches. Using the Scrapbook.com Mosaic A2 Coverplate Die, I embossed the paper. If you are new to the technique I share the details about it here. After embossing the paper, smooshed my Old Paper Distress Ink Pad onto my craft mat, spritzed it with water and smooshed the paper into the ink. I dried it with my heat tool. I then repeated this process with Spun Sugar Distress Ink.

I then took a palette knife and applied Distress Crackle Paste around the edges and here and there on the background to add a little texture. I then set the background to the side to air dry and allow the paste to crackle.


Next I took a piece of Distress Watercolor Paper and die cut it using the a bow from the Scrapbook.com Bow Toppers Die Set and the Scrapbook.com Sunny Lane Florals Die Set. I then colored the various die cuts using Distress Oxide Ink in the following colors: Peeled Paint, Forest Moss, Spun Sugar, Worn Lipstick, Mustard Seed, Wild Honey, Broken China, Uncharted Mariner and Iced Spruce. I applied the ink using a blending brush. I applied the lighter color first to the entire die cut and then added the darker color to the edge to create some shadows. I then splattered the pieces with water, dabbed the water with a paper towel to lift off some of the ink and then dried them with my heat tool. The final step was to add some ink splatters to them using Distress Oxide Sprays. To do this, shake the bottle well and then remove the nozzle and use it to flick the ink onto the paper. You would also use a long thin paint brush to do this as well. I then dried the ink with my heat tool.

Now for that Peep! The Nested Peeps Die Set is SO fun and versatile. Whether you are a card maker, scrapbooker or creating party decor, this set has you covered! There are 5 dies and they range in size from 7.6 inches tall to just over 1 inch tall! This die set is part of an awesome Peeps Bundle that is available now at Scrapbook.com.  The Peeps dies coordinate with the stamps so you can use the dies to cut out the peep shaped stamps! I've also used the stamp set from this bundle on this card!
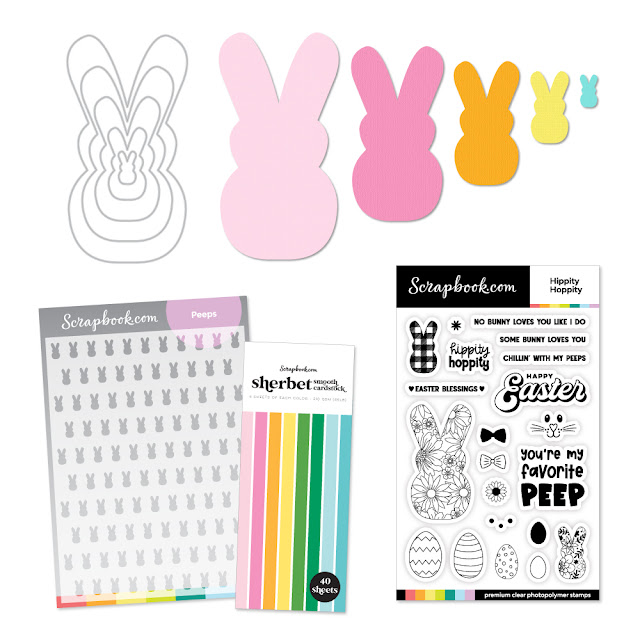
GRAB YOUR PEEPS BUNDLE NOW!


Here I've used the middle size and die cut a piece of Distress Watercolor Paper and inked it using Spun Sugar Distress Oxide Ink. I added a little Worn Lipstick Distress Oxide to the edges and then added some splatters using Kitsch Flamingo Distress Oxide Spray Stain and dried the ink with my heat tool. I wanted this to look like a Peep, so I then applied Glossy Accents to the entire die cut and while this was still wet, I sprinkled it with Distress Rock Candy Glitter. I tapped off the excess glitter and then set the piece to the side to dry. I applied the Glossy Accents a little too thick, so when it was finally dry, the paper was a little bowed. As I tried to flatten it out, the Glossy Accents cracked here and there. The end result added a nice touch of distress to my Peep and I love how it turned out.


Once all the die cutting was completed, I adhered the Peep to the background using Therm O Web Super Tape. I then adhered the various flowers and leaves using a combination of liquid adhesive (I prefer Distress Collage Medium) and double sided foam squares.


For the final touch, I stamped the sentiment from the Scrapbook.com Hippity Hoppity Stamp Set onto Distress Watercolor paper using Distress Archival Ink in Frayed Burlap. I trimmed it into a strip and inked the edges with Old Paper Distress Ink. I then adhered it to the card using double sided foam adhesive.


Thanks so much for stopping by today to take a closer look at my Some Bunny Loves You Easter Card featuring the Scrapbook.com Nested Peeps, Sunny Lane Florals, Bow Toppers and Hippity Hoppity Stamp Set.

SUPPLIES

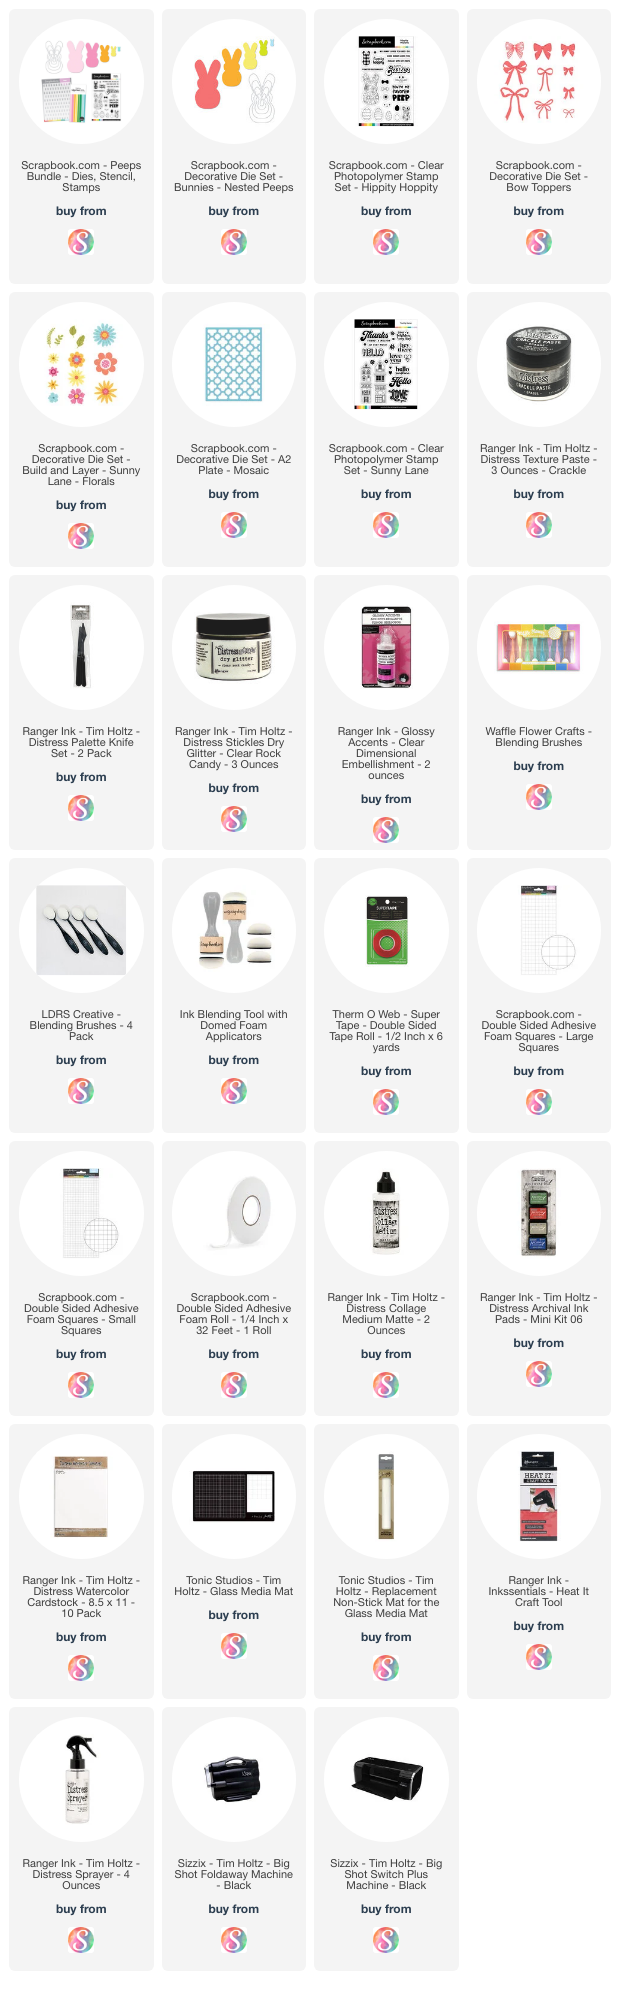
Below you can find the products I used to create this card along with compensated affiliate links to Scrapbook.com. These links are at absolutely no cost to you. When you shop through the links below, I receive a small commission from Scrapbook.com. These links are at absolutely no cost to you and the commission I receive helps me cover the costs of my blog and other expenses, which allows me to continue to provide you with FREE inspiration and tutorials. If you want to learn more about what an affiliate link is, you can see my full affiliate and product disclosure statement here. Thank you so much for your love and support!
Happy Easter Basket Card | Newton's Nook Designs

Hello friends! I'm sharing a Happy Easter Card with you. It features the new Newton's Nook Designs Beautiful Spring stamp and coordinating die set.

Happy Easter Basket Card by Juliana Michaels featuring Newton's Nook Designs Beautiful Spring

It's been a while since I did a card without any coloring. (I do love my colored pencils!) However, for this card, I decided to do some simple stamping, heat embossing and die cutting. 

I stamped the beautiful swirly eggs onto a variety of cardstock in Easter egg colors using Versamark Watermark Ink. I then heat embossed them with clear embossing powder and die cut them using the coordinating die. Don't you just love how the beautiful swirl designs pop on the cardstock with this simple technique?

Happy Easter Basket Card by Juliana Michaels featuring Newton's Nook Designs Beautiful Spring

Since I knew I was going to make an Easter card, those cute little eggs had to have a basket. I created the basket by weaving 1/2 inch strips of kraft cardstock. 

Happy Easter Basket Card by Juliana Michaels featuring Newton's Nook Designs Beautiful Spring

The grass is die cut using the Newton's Nook Designs Land Borders grass die. I trimmed off little pieces of it and stuck them in between the eggs, as I filled the basket. I used double sided foam tape to give the eggs, grass and basket a bit of dimension.

Happy Easter Basket Card by Juliana Michaels featuring Newton's Nook Designs Beautiful Spring

The final touches were a die cut a banner for the Happy Easter sentiment and a piece of jute tied around the basket.

Now it's time to finish up some more cards for the Spring Coffee Lover's Blog Hop using the Newton's Nook Newton Loves Coffee set!

Happy Easter Cards with Ombre Background | Newton's Nook

Hello friends! Today I'm sharing a couple of Easter cards I created using the Beautiful Spring stamp set by Newton's Nook Designs. I just love the swirly designs that look so much like paper quilling!

I'm also sharing my take on the Ombre Background that was recently shared by Jenifer McGuire. Her cards really inspired me however, after playing around with things a bit, I came up with a different take on the technique and I wanted to share it with you.

Happy Easter Cards with Ombre Background by Juliana Michaels featuring Newton's Nook Beautiful Spring Stamp Set

Creating beautifully blended backgrounds with Distress Inks can be a bit of a challenge. Many of us tend to get harsh edges when we apply the ink and they don't turn out looking soft and pretty. I have also had my arm get tired as I'm applying the ink! The technique I'm sharing today will help you achieve create a perfect blended result every time you work with Distress Inks.

I put together a short video that walks you through my technique for creating the ombre background. 
You can check out my video below or watch it on YouTube.


In my video I show you how to create an ombre background using watercolor paper, Distress Inks and foam blending tools. I have to admit, the Clarity brushes look amazing to work with, however, they really aren't in my budget so I wanted to find a way to create this same look for less.

After lots of trial and error, I've found the key for creating a perfect Distress Ink blended background - watercolor paper! I use Strathmore 400 series and I consistently achieve great results when I use it with Distress Inks, watercolor paints and watercolor markers such as Zig Clean Color.

Happy Easter Cards with Ombre Background by Juliana Michaels featuring Newton's Nook Beautiful Spring Stamp Set

When I use watercolor paper I never get those harsh ink edges from the blending tools. The ink doesn't soak into the paper right away, which gives you time to work with it and blend the ink and even better...your arm doesn't get tired from the blending!

Happy Easter Cards with Ombre Background by Juliana Michaels featuring Newton's Nook Beautiful Spring Stamp Set

I created the same card using different colors of ink. Just think of all the possibilities...green, orange, purple!

Happy Easter Cards with Ombre Background by Juliana Michaels featuring Newton's Nook Beautiful Spring Stamp Set

The sentiment is stamped on watercolor paper as well that was colored with Distress Ink. I heavily applied the ink to get the solid color. I also created the coordinating card front using regular cardstock. I didn't bother with watercolor for this piece because I wasn't worried about blending or trying to achieve an ombre look.

Happy Easter Cards with Ombre Background by Juliana Michaels featuring Newton's Nook Beautiful Spring Stamp Set

So, now it's your turn! Are you ready to create a perfect ombre ink blended background every time?! 

Supplies:
Stamp Positioning Tool - Hampton Art Stamp Perfect 
Watercolor Paper - Strathmore 400 Series
Embossing Powder - American Crafts Zing White
Heat Gun
Manual Die Cutting Machine - Cuttlebug
Cardstock - Core'dinations Premium Cardstock 110lb White

Happy Easter and Spring | Digital Cut Files

Hello and Happy Easter everyone! Yes, I know it was yesterday, but I thought I would continue the celebration by sharing some Easter and Spring themed digital cut files with you. These cut files will be perfect for scrapping all those great Easter photos you took this weekend! I'm also sharing a few scrapbook pages and paper craft project ideas to inspire you. 

Digital Cut File | Easter Chicks

Easter Chicks Free Digital Cut File by Juliana Michaels 17turtles.com

Happy Easter card and gift bag featuring Easter Chicks Free Digital Cut File by Juliana Michaels 17turtles.com


Happy Easter Scrapbook page featuring Easter Chicks Free Digital Cut File by Juliana Michaels 17turtles.com


Digital Cut File | Eggcellent Adventure

Eggcellent Adventure Free Digital Cut File by Juliana Michaels 17turtles.com

Hoppy Happy Easter Scrapbook Page featuring Eggcellent Adventure Free Digital Cut File by Juliana Michaels


 Digital Cut File | Spring Flowers

Spring Flowers Free Digital Cut File by Juliana Michaels 17turtles.com

These free cut files can be used for a full range of projects, including cards, home decor, scrapbook pages and more. These digital files are available in SVG, PNG, DXF and Studio formats and you may download this digital cut file for FREE for your own personal use. Please refer to my terms of use for more information if you wish to use these for more than your own personal projects.

Lastly, if you are looking for another great Easter digital cut file, check out the Spring 2016 Issue of Scrapbook and Cards Today. I have an Easter Bunny cut file available for you to download. Make sure to scroll all the way down to the bottom of the page to find it.

Easter Bunny Free Digital Cut File by Juliana Michaels featured in Spring 2016 Issue of Scrapbook and Cards Today

Thanks for stopping by today and make sure you print those Easter photos and scrapbook all of those egg-cellent memories!

DIY Wooden Easter Decor

Easter is this coming weekend, so I decided it was time to get crafty and make some DIY Wooden Easter Decor that includes some adorable wooden bunnies and eggs.

DIY Wooden Easter Decor by Juliana Michaels | 17turtles

I began by gathering my supplies which included some wooden eggs and bunnies from Hobby Lobby, along with chalk paint, cream wax and a paint brush. For a complete list of supplies, please see below.


Before I started painting the bunnies, I decide to add some texture to them using Gel Medium Heavy Gel. I happened to have Gloss, but Matte would work just fine. I used a spatula to apply a thick layer of the gel medium to both of the wooden bunnies.


As you can see, I put it on rather thick and made sure it was not smooth to help give it more texture.


After the gel medium was dry, I painted the bunny with the Everlasting (White) Chalk Paint. When the paint dried, I noticed that it had a cracked appearance. This was a nice surprise and I loved how it added even more texture to them. I ended up applying two coats of paint. 


After the paint was dry, I applied the Cream Wax with a foam brush and wiped away the excess with a rag. I love the wonderful antiqued feel the Deep Brown wax added!


To finish off the bunnies, I added eyes and noses using adhesive black pearls and a crinkled seam binding bow!

DIY Wooden Easter Decor by Juliana Michaels | 17turtles

I painted each of the eggs a different color of the chalk paint. I mixed the Romance (Red) with Everlasting (White) to get the soft pink color. After the paint was dry, I applied the cream wax with a foam brush. I then wiped off the excess and buffed them using a rag. The eggs seemed too plain with just a coat of paint, so I decided to dress them up using some ric rac ribbon from my stash. It was originally white, so I used Tim Holtz distress ink and a foam applicator to add some color to them.


To adhered the ribbon to the wooden egg, I used Therm O Web's iCraft Super Tape.


Now, my home is ready for Easter thanks to this cute DIY Wooden Easter Decor!


Supplies:
You can find links to the supplies I’ve used below by clicking on the image. This will take you directly to the product. Where available I use affiliate links. This means that if you make a purchase I will receive a small commission at no extra cost to you. I truly appreciate your support.
Subscribe