SBC Fest is for everyone—card makers, scrapbookers, and paper crafters of all kinds. Whether you're into clean and simple designs or love getting messy with mixed media, there's something for you. Plus, you can join the event LIVE to chat with instructors and enter giveaways throughout the day. It's such a fun way to connect with fellow crafters and soak up new techniques and ideas.
A SNEAK PEEK AT LAURA GRAFF'S KIT
Today I'm sharing a card I made using the kit that Laura Graff will be using for her class. This is NOT the class project—this is just one more way to use the kit. Think of it as some extra inspiration on how to use her kit and to help get you excited about her class!
KIT CONTENTS
A2 Heirloom Patterned Paper Pad
From The Heart Stamp Set
From The Heart Coordinating Die Set
Treasured Garden Die Set
Heartfelt Blooms Rub-On Transfers
Large Zipper Storage Pouch
The large zipper storage pouch is perfect for storing all of your materials for SBC Fest and be ready to craft alongside your favorite instructors!
I love this soft, romantic color palette with the peachy florals and sage greenery from the Heirloom paper pad. For this card, I used various dies to cut and layer elements, creating dimension with the nested stitched label, butterflies, and that gorgeous floral paper. The "Thinking of You" sentiment is perfect for so many occasions, and the whole design comes together beautifully with just a bit of distressing on the edges for that vintage feel.
GET YOUR KITS & MARK YOUR CALENDAR
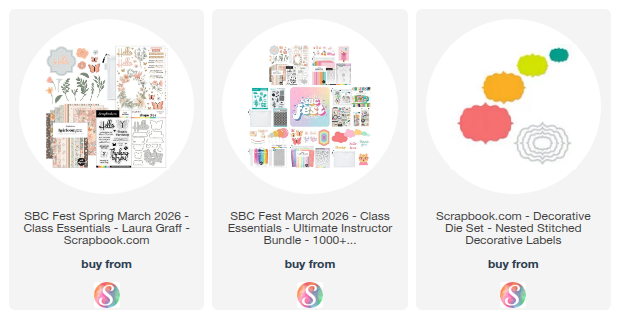
You can purchase each instructor's class kit separately, but if you're loving it all and are looking for a deal, you might want to consider purchasing the Ultimate Instructor Bundle, which includes ALL of the instructors' kits so that you can craft along for the ENTIRE event! Here's look at all of the kits that are included in this bundle.
The MSRP on the Ultimate Bundle is $655. However Scrapbook.com is offering it at an amazing price right now of only $229.99. And if you want to save even more make sure you use the code CRAFTY to save an extra 13%. This is the lowest price if will be offered prior to the start of SBC Fest, but if you wait for that it may be sold out.
Now with all that said, you do NOT need to purchase anything to play along and enjoy the event. You can always take a look at the kits and then shop your stash for similar items and play along.
I hope you'll join me and thousands of other crafters on March 13th for this amazing FREE event! Mark your calendars now, and I'll see you there!
SUPPLIES
Below you'll find the supplies I used to create this card. When you shop through these links—whether you purchase that exact item or something else entirely—you're supporting me at no extra cost to you. The commission I receive helps me cover the costs of my blog and other expenses, and allows me to continue providing you with FREE inspiration and tutorials. If you want to learn more, you can see my full affiliate and product disclosure statement HERE. Thank you so much for your love and support!
Your favorite event of the year is back! SBC Fest will take place Friday, March 13, 2026, and you are not going to want to miss it.
If you aren't familiar with SBC Fest, it is an incredible FREE online event hosted by Scrapbook.com! It is a one-day virtual paper crafting event packed with inspiration, tutorials, and crafty fun. You'll get to learn from some of your favorite instructors—including Justin Adkins, Laura Graff, Lea Lawson, Meghann Andrew, Marie Nicole, Vicki Boutin, and Gina K!
Do you ever feel like you're stuck in an ink blending rut with your stencils? I love ink blending - don't get me wrong - but stencils can do so much more! Today I'm sharing three completely different mixed media backgrounds that go way beyond basic ink blending, and I think you're going to love the variety of looks you can create.
In this video tutorial, I'm using the gorgeous new Beautiful Botanical Stencils from Vicki Boutin's first release with Sizzix. These botanical designs are stunning, but here's the best part - all of the techniques I'm sharing work with any stencils you already have in your stash. Whether you have florals, geometrics, or texture stencils sitting unused, this is your invitation to pull them out and play!
What You'll Learn
I'm walking you through three different mixed media stencil techniques to create unique card backgrounds:
Technique 1: Monoprinting with Stencils
This technique creates one-of-a-kind prints that add unique layers of texture and interest. It's one of my favorite ways to add subtle pattern and interest without overwhelming your design.
Technique 2: Layering Texture Paste
We'll explore using both translucent and opaque Distress Texture Paste through stencils to build dimension and depth. The combination of the two types of paste creates such beautiful, organic texture.
Technique 3: Distress Foundry Wax Splatters
Adding splatters with Foundry Wax brings unexpected texture and visual interest to your backgrounds. It's such a fun, loose technique that adds that signature mixed media feel.
Beyond the Backgrounds
I'm also sharing the techniques I used to create the floral embellishments on each finished card. You'll see how the Vicki Boutin stamp and die sets work beautifully with these mixed media backgrounds, and how versatile these products are when you approach them from a technique-focused perspective rather than just following the "intended" use.
Shop Your Stash Approach
The beauty of these mixed media stencil techniques is that you don't need to buy anything new to follow along. Yes, the Vicki Boutin Sizzix release is gorgeous (and I'll link everything below), but these techniques work with whatever you already have. Pull out those stencils that have been sitting in your drawer, grab your texture paste, ink pads, or wax, and let's create something beautiful together.
Whether you're new to mixed media or just looking for fresh ways to use your stencils, I hope this inspires you to break out of that ink blending routine and try something new!
Watch the Full Tutorial
Ready to dive in? Watch the full video tutorial below to see all three techniques in action:
[VIDEO EMBED]
I'd love to hear which technique you're most excited to try! Leave a comment on the video or send me an email - I always love hearing from you.
Happy creating!
Supplies
Below you will find links to the supplies I used to create these cards. Affiliate links and codes are used at no extra cost to you. I truly appreciate your support. When you use an affiliate link or code to make a purchase, I may receive a small commission at no additional cost to you. This commission helps me to continue to provide free content and tutorials. Your support means the world to me. Where available, I've provided multiple purchasing options. If you have a favorite online store, I encourage you to shop there. Supporting small businesses is something I believe in wholeheartedly. However, I've also included links to Amazon for your convenience, as I understand it's a preferred shopping destination for many. Thank you for being here and for your continued support!
Welcome to my 2026 Craft Room Tour! I'm excited to take you through my creative space and show you how I organize and store my craft supplies. When you compare this year's tour to 2025, you'll notice the changes are fairly subtle, but I wanted to share where my craft room stands at this stage of my creative journey. The lack of major changes really speaks to finding an organizational system that works beautifully with both my workflow and the supplies I reach for most often. That said, I'm always tweaking things here and there as my creative process evolves, and you'll catch some of those smaller adjustments as we move through the space.
One constant in my craft room? I'm still committed to regularly purging supplies. My dedicated "spare box" continues to serve its purpose, collecting items I no longer use or love. When it fills up, I find those products new homes—whether through donations or sharing them with fellow crafters who will appreciate them. This ongoing practice keeps my space functional without requiring additional storage solutions or furniture. I've discovered that having too many choices actually limits my creativity, so curating my collection allows me to work with only the products and supplies that truly inspire me.
2026 CRAFT ROOM TOUR
If you'd like to watch a video tour of my craft room, you can find that HERE or watch it below.
If you're interested in any of the storage items you see in the video, you can find links to those that are still available in the description box below. When you shop through those links, you're supporting me, and I truly appreciate that. This is just a peek at some of the storage in my craft room—for a better look at everything, I highly recommend watching the full video tour above.
Behind my desk is a wall of shelving and organization that holds all of my most-used supplies, from stamps and dies to my Tim Holtz Distress Inks and more. This unit sits to the right of my desk, which is in the center of the room as you face that wall. Here you can see my Tim Holtz Distress Ink and Distress Oxide Ink Pads stored in Stamp N Storage Distress Ink Pad Holders.
New to my room this year are the Scrapbook.com TiltBins! I'm currently trying them out to hold some of my everyday Tim Holtz Ideaology pieces, hoping that having them out where I can see them will inspire me to use them more frequently. They come in various sizes, and each size stacks together beautifully. If you don't have tabletop space for them, you can also hang them on the wall with the included hardware.
Here's a look at the Ikea Kallax unit where they sit, along with some of the other storage and organization I have in these cubes. The wood bins are from Target, but I'm not sure if they're still available.
Right behind my desk is an IKEA Billy Bookcase with a couple of shelves that hold some of my vintage treasures and handmade items. Here you can see my Totally Tiffany Stadium Organizer, which is now holding my Distress Spritz and Distress Mica Stain Sprays.
Below this is my Tim Holtz stamp set collection. I continue to use the Scrapbook.com Medium Envelope Organizer to store them, but my collection has grown beyond just these three units! You'll see additional organizers in other areas of my craft room—I have a dedicated unit just for my Christmas stamps and another for my Halloween stamps.
Below that are my Tim Holtz Sizzix dies and embossing folders, stored in my absolute favorite storage pieces in my entire craft room. These wooden drawers from Hobby Lobby are sadly no longer available.
On the other side of the room you'll find another Kallax unit with even more supplies. The ink pads are stored in Stamp N Storage Ink Pad Organizers, and this is my collection of Ranger Archival, 49 and Market, Versafine Clair, and other miscellaneous ink pads.
Here are a couple of photos showing the storage setup I have in this Kallax unit, including the Scrapbook.com Stadium Organizer, Ink Pad Holder (which I use to hold A2 size paper pads), and Skinny Stadium Organizer.
The green bins are vintage hardware bins that are heavy-duty and perfect for holding heavier items like dies. They're not the easiest to lift and carry around, but I absolutely love the vintage look. These are still available brand new—minus the rust!
Next to my desk I have an IKEA Raskog Cart loaded with all of my most-used tools. This is the Scrapbook.com Heat Tool Organizer.
In front of my desk, I have an IKEA dresser. Here's a look inside some of the drawers, which hold many of my essential craft supplies—things I need but don't necessarily use on every project. Here you can see my Distress Paints.
And here's a look at my Distress Spray Stains and Distress Oxide Sprays. I'm absolutely loving the new Ranger Distress Labels and have replaced all my old labels with these! They can be wiped clean, won't be impacted by inky fingers, and they're easily removable.
Here's a look at all of my reinkers, stored in Scrapbook.com Storage Bins—the same bins I use for all of my sprays.
Finally, here's a look inside my craft closet. I tend to keep most of my paper and cardstock on the second shelf, and I really like using drawers for my most frequently used papers. The drawers are also perfect for holding paper scraps!
Here's a look at some of the other shelves with various storage pieces, including more drawers, more Scrapbook.com Bins and Multi-Craft Storage Bins, along with more of those wood crates that hold a variety of miscellaneous craft items.
And there you have it, a quick craft room tour of how I like to store and organize my supplies. Again I highly recommend checking out the video for even more details and ideas.
SUPPLIES
Below you can find the storage and organization pieces I've shared in this craft room tour. When you shop through those links and whether you purchase that exact item or something else entirely, you’re supporting me at no extra cost to you. The commission I receive helps me cover the costs of my blog and other expenses, and allows me to continue to provide you with FREE inspiration and tutorials. If you want to learn more about what an affiliate link is, you can see my full affiliate and product disclosure statement here. Thank you so much for your love and support!