Showing posts with label Tim Holtz. Show all posts

Vintage Christmas Joy Card | Tim Holtz Sizzix Christmas 2026

Nothing says Christmas quite like a little vintage joy, and that's exactly what I felt making this Christmas card with the Tim Holtz Sizzix Christmas 2026 release. It's packed with dies that have come back from the vault (retirement, that is), released either as the original Vault versions or reimagined into something new. There's also a great assortment of rereleased embossing folders in the larger A5 and A6 sizes. I love adding texture, and nothing does that better than an embossing folder. If you missed the originals, now is the time to grab the ones you love!

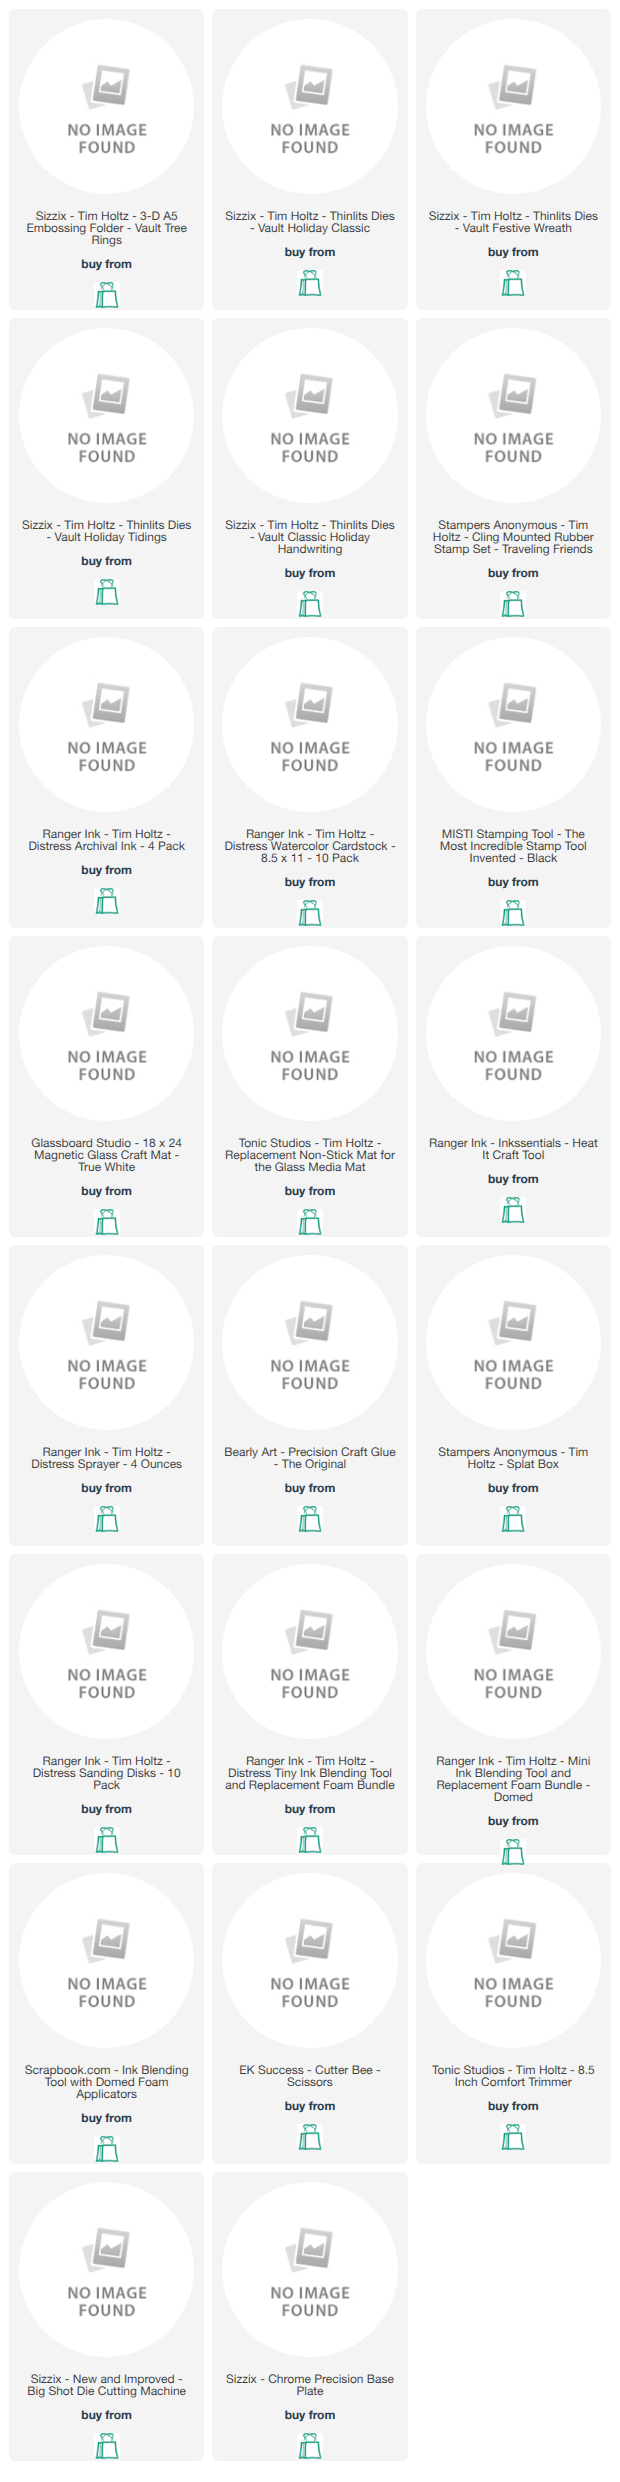
Vintage Christmas Joy Card by Juliana Michaels featuring Tim Holtz Sizzix Christmas 2026 Tree Rings Embossing folder and the Vault Holiday Classic, Vault Festive Wreath, Vault Holiday Tidings and Classic Holiday Handwriting die sets.

The Embossed Background

I started by embossing white cardstock with the 3D Tree Rings Embossing Folder. Then I lightly inked over the raised design with a blending brush and Pumice Stone Distress Ink. To finish the edges, I added a touch of gold with a Gold Leaf Embossing Pen.

The Wreath and Poinsettias

Next, I die cut Distress Watercolor cardstock using the wreath from Vault Festive Wreath and the poinsettia and evergreens from Vault Holiday Classic. I sprayed the die cuts with a mix of Distress Spray Stains in Forest Moss, Rustic Wilderness, Bundled Sage, Peeled Paint, Aged Mahogany, Festive Berries, Pumice Stone, and Ground Espresso. I also used Fossilized Amber Distress Ink to color the poinsettia centers. Then I layered the pieces to build the wreath.

Vintage Christmas Joy Card by Juliana Michaels featuring Tim Holtz Sizzix Christmas 2026 Tree Rings Embossing folder and the Vault Holiday Classic, Vault Festive Wreath, Vault Holiday Tidings and Classic Holiday Handwriting die sets.

The Sentiment

For the sentiment, I die cut the word joy from black kraftstock using the Vault Holiday Tidings die set. I die cut the word Christmas from gold cardstock using the Classic Holiday Handwriting die set. I lightly sanded the edges of both with a Ranger Sanding Disc to give them a distressed look.

The Ticket

The last piece is a ticket from the Tim Holtz Traveling Friends stamp set. I stamped it onto Distress Watercolor cardstock, ink smooshed it with Old Paper Distress Ink, fussy cut the image, and inked the edges with Pumice Stone Distress Ink. Then I adhered all of the layers onto the embossed background and mounted it on a piece of red cardstock.

Whether you're rebuilding a favorite vintage Christmas look with the Vault dies or trying an embossing folder for the first time, I hope this card gives you something to play with. I'd love to hear which piece from this release is on your list.

Supplies

Below you will find links to the supplies I used to create this card. When you shop through these links—whether you purchase that exact item or something else entirely—you're supporting me at no extra cost to you. The commission I receive helps me cover the costs of my blog and other expenses, and allows me to continue providing you with FREE inspiration and tutorials. If you want to learn more, you can see my full affiliate and product disclosure statement here. Thank you so much for your love and support!

A Spooky Twist on Embossing Folder Backgrounds | Tim Holtz Sizzix Halloween Card Tutorial

I have a confession to maker. The background on this card came from using the "wrong" side of my embossing folder — and I did it on purpose!

Wicked Halloween Card by Juliana Michaels featuring Tim Holtz Sizzix Halloween 2026

The Wrong Side Turned Out to Be the Best Side

Like most people I tend to grab my embossing folder, place the paper inside and emboss it without thinking about it too much. This time however I accidentally flipped the paper over after embossing it with the Vault Batground embossing folder and found that I really liked the reverse side better than the front side. I knew then and there that I had to use that side for my card. It's proof that sometimes the tools we already own have more to offer than we realize — you just have to flip your perspective (literally, in this case).

This wickedly fun Halloween card features some of the brand new dies and embossing folders from the Tim Holtz Sizzix Halloween 2026 release including the Vault Batground Embossing Folder, Vault Moonlight Scare Die Set, Vault Foliage Wreath Die Set, Handwritten Halloween Die Set and the Sidekick Laboratory Die and Embossing Folder Set.

The background has this moody, textured purple and black look that sets the perfect stage for a spooky little scene — think a bat-filled sky, a mysterious skull, bubbling potion bottles, and a "wicked" sentiment tucked into a wreath of foliage. It's got just the right mix of eerie and elegant.

Watch the Full Tutorial

Ready to see exactly how flipping the embossing folder created this background, plus which dies and Distress Ink colors I used to color each piece? You can watch the complete tutorial in the video below, or head over to my YouTube channel to check it out.

Have you ever tried using the backside of an embossing folder before? I'd love to hear about it in the comments, or if you give this technique a try yourself, be sure to share your version with me — I always love seeing what you create!

This card was such a fun reminder that a little experimentation can lead to my favorite projects — I hope it inspires you to flip a folder or two of your own this Halloween season!

Supplies

Below you will find links to the supplies I used to create these cards. When you shop through these links—whether you purchase that exact item or something else entirely—you're supporting me at no extra cost to you. The commission I receive helps me cover the costs of my blog and other expenses, and allows me to continue providing you with FREE inspiration and tutorials. If you want to learn more, you can see my full affiliate and product disclosure statement here. Thank you so much for your love and support


From Background to Finished Card | More Ways to Use Tim Holtz Distress Crayons

I recently had the pleasure of creating a tutorial for the Ranger Ink YouTube channel, and I am so excited to share all the details with you here on the blog! The video focuses on three different ways to use Distress Crayons with stencils to create beautiful backgrounds, and today I'm walking you through how I finished off the cards with layered embellishment clusters. These cards have such a gorgeous vintage botanical vibe and I think you're going to love them!

3 Ways to Use Tim Holtz Distress Crayons with Stencils by Juliana Michaels


Watch the Background Techniques on the Ranger Ink YouTube Channel

Before we dive into the finishing details, you'll want to head over to the Ranger Ink YouTube channel to watch the full background tutorial. I cover three techniques — applying Distress Crayons directly through the stencil, lifting color with a baby wipe, and monoprinting with the stencil. Each one gives you a completely different look and they're all so fun to try!

[RANGER INK VIDEO LINK] 

Stamping the Images

For the focal images, I used the Tim Holtz Botanic Collage Stamp set, stamping onto Distress Watercolor Cardstock with Black Soot Archival Ink. I stamped each image twice — once to have the individual flower and butterfly images to color and die cut, and a second time to keep the full stamped image intact for layering.

Watercoloring with Distress Crayons

To add color to the flowers and butterflies, I used Distress Crayons in Peeled Paint, Peacock Feathers, Rusty Hinge, and Fossilized Amber, with Black Soot for the butterfly bodies. I picked up the color directly from the crayon using a water brush and painted in the images. This is such a beautiful way to use the crayons — the colors blend so naturally and the watercolor cardstock handles the water beautifully.

Die Cutting the Images

Once the watercoloring was complete and dry, I cut out the individual flowers and butterflies using the coordinating die sets, available exclusively from Simon Says Stamp.

Thanks Card by Juliana Michaels featuring Tim Holtz Ranger Ink Distress Crayons

Creating the Ephemera Pieces

For additional layering pieces, I also stamped images from the Tim Holtz Field Notes Stamp set onto Distress Watercolor Cardstock using Black Soot Archival Ink, then cut them out using the coordinating die sets, also available exclusively from Simon Says Stamp.

To give both the Botanic Collage full stamped image pieces and the Field Notes ephemera pieces an aged, distressed look, I used the ink smooshing technique. I smooshed an Old Paper Distress Ink pad onto my craft mat, spritzed it with water, and then pressed the paper into the ink. After drying with my heat tool, I trimmed the pieces down to size. For even more texture, I tore some of the edges of the paper and inked the non-torn edges with Distress Ink in Walnut Stain.

Hello Card by Juliana Michaels featuring Tim Holtz Ranger Ink Distress Crayons

Film Strips and Photo Frames

I die cut the film strips and photo frames using the Tim Holtz Vault Picture Show Die Set, cutting them from Black Kraftstock. I then lightly sanded them to create a distressed effect — such a simple step but it makes such a difference!

Sentiments

For the sentiments, I used the Tim Holtz Vault Handwritten Celebrate Die Set, cutting them from copper/rose gold metallic cardstock. The metallic finish adds a beautiful pop against all the layered textures.

I'd love to hear from you — which of the three Distress Crayon stencil techniques from the Ranger Ink video are you most excited to try? Let me know in the comments below!

Supplies

Below you will find links to the supplies I used to create these cards. When you shop through these links—whether you purchase that exact item or something else entirely—you're supporting me at no extra cost to you. The commission I receive helps me cover the costs of my blog and other expenses, and allows me to continue providing you with FREE inspiration and tutorials. If you want to learn more, you can see my full affiliate and product disclosure statement HERE. Thank you so much for your love and support!

Sizzix Turns 25! A Birthday Card with Tim Holtz Gertrude Colorize & Celebration Streamers

Today's post is a bit of a stroll down memory lane, and it comes at a really fitting moment. Sizzix — the company that's been part of my papercrafting journey since I first started scrapbooking — is celebrating their 25th birthday this month, and I couldn't be more happy to be part of it.

It's got me thinking about just how long I've been enjoying this hobby, and how much both I and the industry have changed over 25 years. Truth be told, I started scrapbooking a few years before Sizzix came along, but they've been with me for most of the ride.

I still remember my very first die cutting machine — the original red Sizzix machine with the pull-lever that pushed straight down to cut through the dies. Affectionately known as "Big Red" back in the day, I actually won mine at a scrapbook crop, and I fondly recall using it with Sizzix alphabet dies to cut out titles for my scrapbook pages. Whether I've been using a die cutting machine, punches, or an electronic cutting machine since then, die cutting has always been one of my favorite ways to create and embellish my projects — and I think a lot of that traces back to that original Sizzix machine.

Fast forward to today, and I've been a Tim Holtz Maker with Sizzix since 2020 and a Creative Team Member since 2023. Who would have thought, all those years ago, that I'd still love paper crafting and die cutting this much — or that I'd still be connected to this company after so many years?

Over the years this hobby has given me so much more than scrapbook pages and finished cards — it's given me a creative outlet, a way to work with my hands, and a community of people who feel like friends. There's something about the process itself — cutting, layering, building something from a blank piece of paper — that still brings me so much joy, all these years later.

That's exactly why celebrations like this one mean so much to me.

Happy Birthday Card by Juliana Michaels featuring Tim Holtz Sizzix Gertrude Colorize and Celebration Streamers Die Set as part of their 25th Birthday Celebration

About the Collection

To celebrate this milestone, each of the Sizzix Licensed Designers created a brand new celebration themed die, stamp, stencil set or embossing folder. This release brings together designs from Tim Holtz, 49 and Market, Eileen Hull, Stacey Park, Shelly Kim, Catherine Pooler, Willow Wolfe, Vicki Boutin, and Seth Apter.

There's Willow Wolfe's Birthday Blooms stamp set with its beautiful hummingbird and floral wreath designs, Catherine Pooler's Let's Eat Cake dies and stencils, and Eileen Hull's Party Time embossing folder that's perfect for quick, textured backgrounds like the one I used on my card and of course Tim Holtz's Celebration Steamers die set that I'm using for this project. Whatever your style, there's something in this collection to celebrate with.

The Card

For the focal point on my card, I used the Tim Holtz Gertrude Colorize die in the larger original size. I die cut all of the layers from Distress Watercolor Cardstock. I then ink blended the various layers, working from lighter tones into deeper shadows and details. Walnut Stain, Vintage Photo and Ground Espresso gave her those darker patches, Pumice Stone and Antique Linen softened things out, Wild Honey added warmth, and a bit of Black Soot and Spun Sugar finished off the fine details and her ears.

The background is created by embossing a piece of Distress Watercolor cardstock using the Tim Holtz Numbered Large A5 Embossing Folder. I then added splatters using Distress Ink in Saltwater Taffy, Speckled Egg, and Dried Marigold.

To add to the birthday scene, the streamers are die cut from Distress Watercolor cardstock using the new Tim Holtz Celebration Streamers die set. I ink blended them using the same three Distress Ink colors that I used on for the background splatters. I used a heavy hand for the darker shadow areas and a light blend over the highlight sections. To give Gertrude some birthday flair, I added the party hat from the Colorize Large Accessories set, and those little glasses just give her so much personality. The presents underneath her are cut from Distress Watercolor cardstock using the Tim Holtz Santa's Helper die set and ink blended to coordinate with the rest of the card.

I hope this card inspires you to check out the new Colorize dies and the rest of the Sizzix 25th Birthday Release! If you give any of these new products a try, I'd love to see what you create. Feel free to share your projects with me on Instagram or in the comments.

Supplies

Below you will find links to the supplies I used to create these cards. When you shop through these links—whether you purchase that exact item or something else entirely—you're supporting me at no extra cost to you. The commission I receive helps me cover the costs of my blog and other expenses, and allows me to continue providing you with FREE inspiration and tutorials. If you want to learn more, you can see my full affiliate and product disclosure statement here. Thank you so much for your love and support!
A Mixed Media Father's Day Card | Tim Holtz Theodore Colorize

The best cards are the ones that feel made for someone, and that's exactly what I had in mind when I created this Father's Day card. My stepdad is a private pilot, so the travel theme, the airplanes, and the vintage ticket all came together with him in mind. I used the Tim Holtz Vault World Traveler die set for those little airplane accents, and Theodore just happened to be the perfect passenger.

Happy Father's Day Card by Juliana Michaels featuring Tim Holtz Sizzix Theodore Colorize Die Set

Meet Theodore

If you haven't met Theodore yet, he's part of the Tim Holtz Sizzix Colorize collection — and he is absolutely the most charming bear in a bow tie you'll ever put on a card. For this project, I cut him from pre-colored cardstock rather than building custom color with inks or paint, which makes the process so much faster while still giving you that gorgeous layered Colorize look.

The Card

The background has a lot going on in the best possible way — it's layered, textured, and has that vintage travel feel that I just love. I used the Honey Bee Stamps Aviator stamp along with Tim Holtz Numeric and Mini Set 11 stencils to build up the background, and the technique I used to pull it all together is one I taught in my Steampunk Vibes class. The color palette leans into those warm, earthy tones with hints of teal and blue — perfect for a masculine card without feeling flat or boring.

The sentiment is a combination of the Tim Holtz Handwritten Celebrate die set for the script "happy" and a stamp from the Scrapbook.com Celebrate Expressions set for the "Father's Day" label strip. The vintage ticket in the background is from the Tim Holtz Ticket Booth stamp set, which adds that perfect touch of worn, travel-worn charm.

If you love the background technique and want to learn it yourself, it's part of my Steampunk Vibes class — and right now, my email and newsletter subscribers can use the code BEARHUG to get $5 off. (This coupon code is good now through June 19th, 2026). 

Head over to my classes page at julianamichaels.podia.com/pretty-grunge-steampunk-vibes to check it out!

I'd love to know — do you make cards with specific people in mind, or do you tend to make a design and then decide who it's for? Leave a comment below and let me know!

Supplies

Below you will find links to the supplies I used to create these cards. When you shop through these links—whether you purchase that exact item or something else entirely—you're supporting me at no extra cost to you. The commission I receive helps me cover the costs of my blog and other expenses, and allows me to continue providing you with FREE inspiration and tutorials. If you want to learn more, you can see my full affiliate and product disclosure statement here. Thank you so much for your love and support!

Christmas Home Decor Tag | Tim Holtz Sizzix Colorize + Accessories

If the Halloween tag I shared earlier this week had you excited about the new Sizzix Colorize + Accessories collection, just wait until you see this one! Meet Harrison the lion — and he is dressed to the nines and ready for Christmas!

Christmas Toys Harrison the Lion Christmas Tag by Juliana Michaels featuring Tim Holtz Sizzix Harrison Colorize and Accesories

This project was also featured in Tim's live release party on YouTube, so if you caught the live you may have already spotted him! If you missed it, the replay is up on Tim's channel and I cannot recommend it enough. Seeing all of the inspiration from the designers in one place is so much fun, and this collection truly lends itself to so many creative possibilities. The Mini Colorize characters, the re-released originals, and the Accessories dies are such a brilliant combination — you really can create something unique for every season and occasion.

Harrison is wearing his best top hat with a sprig of holly and a dapper bow tie, surrounded by Christmas gifts and that gorgeous pine trim along the bottom. I used Christmas themed ephemera for the background to give it that warm, vintage holiday feel. Just like with my Halloween tag, I colored all of the die cut pieces with Distress Paints and I cannot imagine going back to anything else. The paint holds up so beautifully during assembly — no worrying about smudging or smearing while you're layering everything together.

The Distress Paint colors I used for Harrison are: Antique Linen, Frayed Burlap, Brushed Corduroy, Gathered Twigs, Walnut Stain and Black Soot.

The Distress Paint colors I used for the presents and the hat trim are: Lumberjack Plaid, Peeled Paint and Rustic Wilderness.

This is also made on a Tim Holtz Etc Tag, so just like Winifred's Halloween tag, Harrison is sturdy enough to display as a home decor piece all through the Christmas season. I am already thinking about where to put him! And this size is even small enough that this could easily be turned into a Christmas ornament by adding a bit of ribbon or twine!

I'd love to know — are you planning to create with this collection? Which character is calling your name? Let me know in the comments!

Supplies

Below you will find links to the supplies I used to create this project. When you shop through these links—whether you purchase that exact item or something else entirely—you're supporting me at no extra cost to you. The commission I receive helps me cover the costs of my blog and other expenses, and allows me to continue providing you with FREE inspiration and tutorials. If you want to learn more, you can see my full affiliate and product disclosure statement here. Thank you so much for your love and support!

Tim Holtz Sizzix Colorize + Accessories | Vintage Halloween Tag

If you love Halloween as much as I do, this one is for you! I am so excited to share this mixed media Halloween tag I created using the brand new Sizzix Colorize + Accessories collection from Tim Holtz — and this project was actually featured in Tim's live release party on YouTube!

Hocus Pocus Winifred The Zebra Halloween Tag by Juliana Michaels featuring Tim Holtz Sizzix Winifred Colorize

If you missed the live, you can head over to his channel and watch the replay — the inspiration was absolutely incredible and so worth your time. This release brought back the beloved Colorize animal characters in their original size AND in a smaller Mini size, perfect for tags, cards, and smaller projects, plus two new Accessories die sets in both large and small sizes. The accessories are a total game changer — hats, scarves, masks, party hats, witch hats, and so much more — giving you endless ways to customize these characters for any season or occasion. Halloween? Christmas? Birthdays? You can dress them for anything!

For my project I chose the Mini Winifred the zebra, and of course she had to be dressed for Halloween. I used the Winifred Mini Colorize die along with the Accessories dies to give her a witch hat, a mask, and a trick-or-treat bucket. She is absolutely perfect for the season!

The background was created using the Tim Holtz Moon Mask with Distress Oxide inks — I love how the moody nighttime sky came together with that gorgeous full moon. For coloring the die cut pieces, I reached for my Distress Paints instead of my usual Distress Inks. I am so glad I did! The paint is much more durable during assembly — no worrying about wet fingers, inky hands, or liquid adhesive messing up your beautifully colored pieces while you're layering everything together. It's a trick I'll be using from now on when I want to custom color my die cuts!

I finished the tag off with Tim Holtz ephemera, some stitching, trim along the bottom, the "Just a Bunch of Hocus Pocus" sentiment, and the clip at the top. This is made on a Tim Holtz Etc Tag which is a sturdy board material, so this piece works beautifully as a home decor item — perfect for displaying all through the Halloween season!

I'd love to know — did you watch Tim's live release? Which character are you most excited to create with? Let me know in the comments!

Supplies

Below you will find links to the supplies I used to create this project. When you shop through these links—whether you purchase that exact item or something else entirely—you're supporting me at no extra cost to you. The commission I receive helps me cover the costs of my blog and other expenses, and allows me to continue providing you with FREE inspiration and tutorials. If you want to learn more, you can see my full affiliate and product disclosure statement here: https://www.17turtles.com/p/affiliate-and-product-disclosure.html. Thank you so much for your love and support!

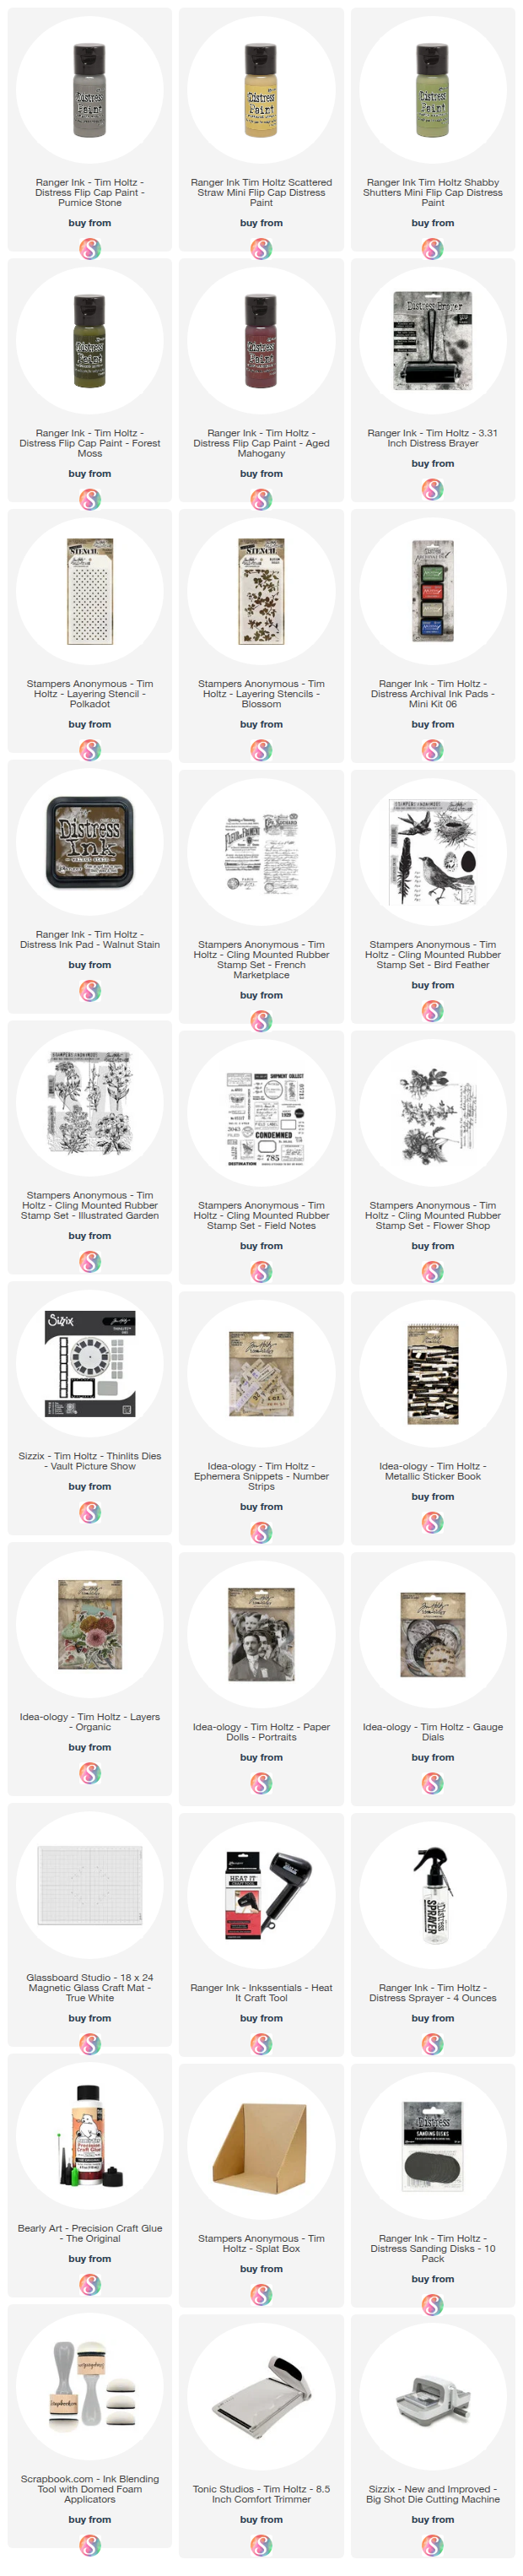
Tim Holtz Distress Paints Are Back | Gel Plate Art Journal Background

If you've been in the Tim Holtz world for any length of time, you probably remember when Ranger retired a bunch of the Distress Paint colors — and if you're anything like me, you were a little bummed about it. Well, the good news is they're back! And to celebrate, I decided to do something a little outside my comfort zone and create an art journal page using the re-released Distress Paints with a gel plate. Art journaling and paint aren't really my go-to — yet anyway — but that's kind of the point. Sometimes you just have to give yourself permission to play, and in my latest video that's exactly what I did.

Giving Yourself Permission to Play

I've been wanting to explore art journaling and paint more for a while now, and taking a class recently with Seth Apter really reignited that desire. When I heard the Distress Paints were coming back, it felt like the perfect push to just go for it. I'm not an expert in art journaling or paint, but I'm sharing this anyway because I think it's important to create outside your comfort zone — and honestly, I had so much fun with it. If you've been on the fence about trying something new, I hope this gives you that little nudge.

Believe In Yourself Art Journal Page by Juliana Michaels featuring Tim Holtz Distress Paint, Idea-ology and Sizzix Vault Picture Show Die Set

The Believe in Yourself Art Journal Pages

In the video I'm sharing the background techniques — how I used Distress Paints, stencils, a gel plate, and a brayer to build up those warm, golden, layered backgrounds you see across both pages of the spread. After filming, I went ahead and finished the pages too, and I'm sharing all of those details here.

To create the background for my art journal pages I used Distress Paint in Pumice Stone, Scattered Straw, Forest Moss, Shabby Shutters and Aged Mahogany. Head over to my YouTube channel to check out all the details on how I created the background using the paints, stencils, a gel plate and a brayer.

To add more interest to the background I added some stamping using Archival Ink in Frayed Burlap and a mix of Tim Holtz stamps including French Marketplace, Field Notes, Illustrated Garden, Flowershop and Bird Feather. I recommend using a permanent ink such as Archival Ink when stamping over paint as it will dry quickly and will be permanent.

Once the stamping was completed I went about sorting through my Tim Holtz paper scraps and ephemera pieces to create a layered cluster for each page. I also added an old book page. I used some similar pieces such as the same patterned paper, old book page and colors to keep things cohesive. I also inked the edges of the pieces with Walnut Stain Distress Ink.

I also die cut a viewfinder from Black Kraftstock using the Tim Holtz Vault Picture Show Die Set, sanded the edges with a sanding disc. I cut it in half and tucked one piece into the layers of each side of the spread.

I then finished off the pages with some white ink splatters and added some Stabilo pencil work around the outer edge of the patterned paper pieces. I then went about adhering the various layers together and then finally to the page itself.

Watch the Full Background Tutorial

Ready to see all the details on the gel plate background techniques? You can watch the complete tutorial in the video below, or head over to my YouTube channel to check it out.

I'd love to know — are you a Distress Paints fan? Are you excited they're back? Let me know in the comments, and if you give this a try I'd love to see what you create!

Happy crafting!
~ Juliana

Supplies

Below you will find links to the supplies I used to create these pages. When you shop through these links—whether you purchase that exact item or something else entirely—you're supporting me at no extra cost to you. The commission I receive helps me cover the costs of my blog and other expenses, and allows me to continue providing you with FREE inspiration and tutorials. If you want to learn more, you can see my full affiliate and product disclosure statement here: https://www.17turtles.com/p/affiliate-and-product-disclosure.html. Thank you so much for your love and support!


How to Use Distress Embossing Glaze | 3 Mixed Media Techniques

I recently had the pleasure of creating a tutorial for the Ranger Ink YouTube channel featuring Tim Holtz Distress Embossing Glaze, and I am so excited to share these tags with you today! The glaze is translucent, which means you can use it like a traditional embossing powder but still see color and detail through it — and the vintage mixed media results are absolutely stunning.

How to use Tim Holtz Distress Embossing Glaze | 3 Mixed Media Techniques  by Juliana Michaels

What is Distress Embossing Glaze?

If you've ever picked up the Distress Embossing Glaze and wondered what to do with it or how it's different from a regular embossing powder, you're not alone! The key is that it's translucent — so instead of covering your image or texture with an opaque color, the glaze allows the color and detail underneath to show through while still adding that beautiful raised, dimensional finish. Once you see it in action, it all clicks!

The Background Techniques

In the Ranger Ink video, I walk through three different ways to use the Distress Embossing Glaze — with an embossing folder, with stamped images, and combined with Distress Translucent Crackle Paste through a stencil. Each technique produces a completely different look, and I use Distress Spray Stains and Distress Paint to add color and bring out all that beautiful texture and detail. Head over to the Ranger Ink YouTube channel to watch the full background tutorial!

 WATCH HERE 


The Embellishments

Once the backgrounds were complete, I had so much fun layering in the embellishments to give each tag that eclectic, vintage collector feel. Each tag features a vintage portrait photo as the focal point, framed with postage stamps and layered with Tim Holtz die cuts — butterflies, florals, leaves, and architectural elements — along with sentiment labels that really bring the whole story together. The combination of the glazed, textured backgrounds with all those layered details gives each tag a rich, curiosity cabinet quality that I just love.

Keep Looking Tag by Juliana Michaels featuring Tim Holtz Distress Embossing Glaze, Entangled Embossing Folder and Scribbly Butterflies Die Set

For the embellishments on this tag, I die cut a couple of butterflies from Distress Watercolor Cardstock using the Scribbly Butterflies die set. I sprayed them with Distress Spray Stain in Fossilized Amber and inked the edges with Distress Ink in Walnut Stain. I then layered in an antique portrait from the Tim Holtz Photomatic set, tucking a few stamps from the Tim Holtz Postmarked Sticker Book behind it. A sentiment from the Tim Holtz Quote Chips labels finished everything off perfectly.

Everything Is Possible Tag by Juliana Michaels featuring Tim Holtz Distress Embossing Glaze, Deconstructed Stamp Set, and Vault Funky Wreath Die Set

For this tag I followed a similar process, die cutting the Tim Holtz Vault Funky Floral Wreath die set and spraying it with Scorched Timber Distress Spray Stain. The flowers and leaves were inked individually with Distress Ink in Rusty Hinge, Peeled Paint, Forest Moss, Salvaged Patina, Fossilized Amber, and Walnut Stain. I then finished it off with an antique portrait, a few stamps from the Tim Holtz Postmarked Sticker Book, and a sentiment from the Tim Holtz Quote Chips labels, just as I did on the first tag.

The World Needs Tag by Juliana Michaels featuring Tim Holtz Distress Embossing Glaze, Industrial Stencil and World Travel Die Set

For the final tag, I die cut the globe images using the Tim Holtz Vault World Travel die set and heat embossed them with gold embossing powder. After adhering them to the tag I trimmed off the excess. I then finished everything off with an antique portrait from the Tim Holtz Photomatic set, a few stamps from the Tim Holtz Postmarked Sticker Book, and a sentiment from the Tim Holtz Quote Chips labels.

I hope these tags inspire you to pull out your Distress Embossing Glaze and give it a try! If you have any questions about the techniques or the embellishments, feel free to leave them in the comments below. I'd love to see what you create!

Supplies

Below you'll find the supplies I used to create this card. When you shop through these links—whether you purchase that exact item or something else entirely—you're supporting me at no extra cost to you. The commission I receive helps me cover the costs of my blog and other expenses, and allows me to continue providing you with FREE inspiration and tutorials. If you want to learn more, you can see my full affiliate and product disclosure statement here: https://www.17turtles.com/p/affiliate-and-product-disclosure.html. Thank you so much for your love and support!

null

No Embossing Folder? No Problem | Faux Embossing Background Technique

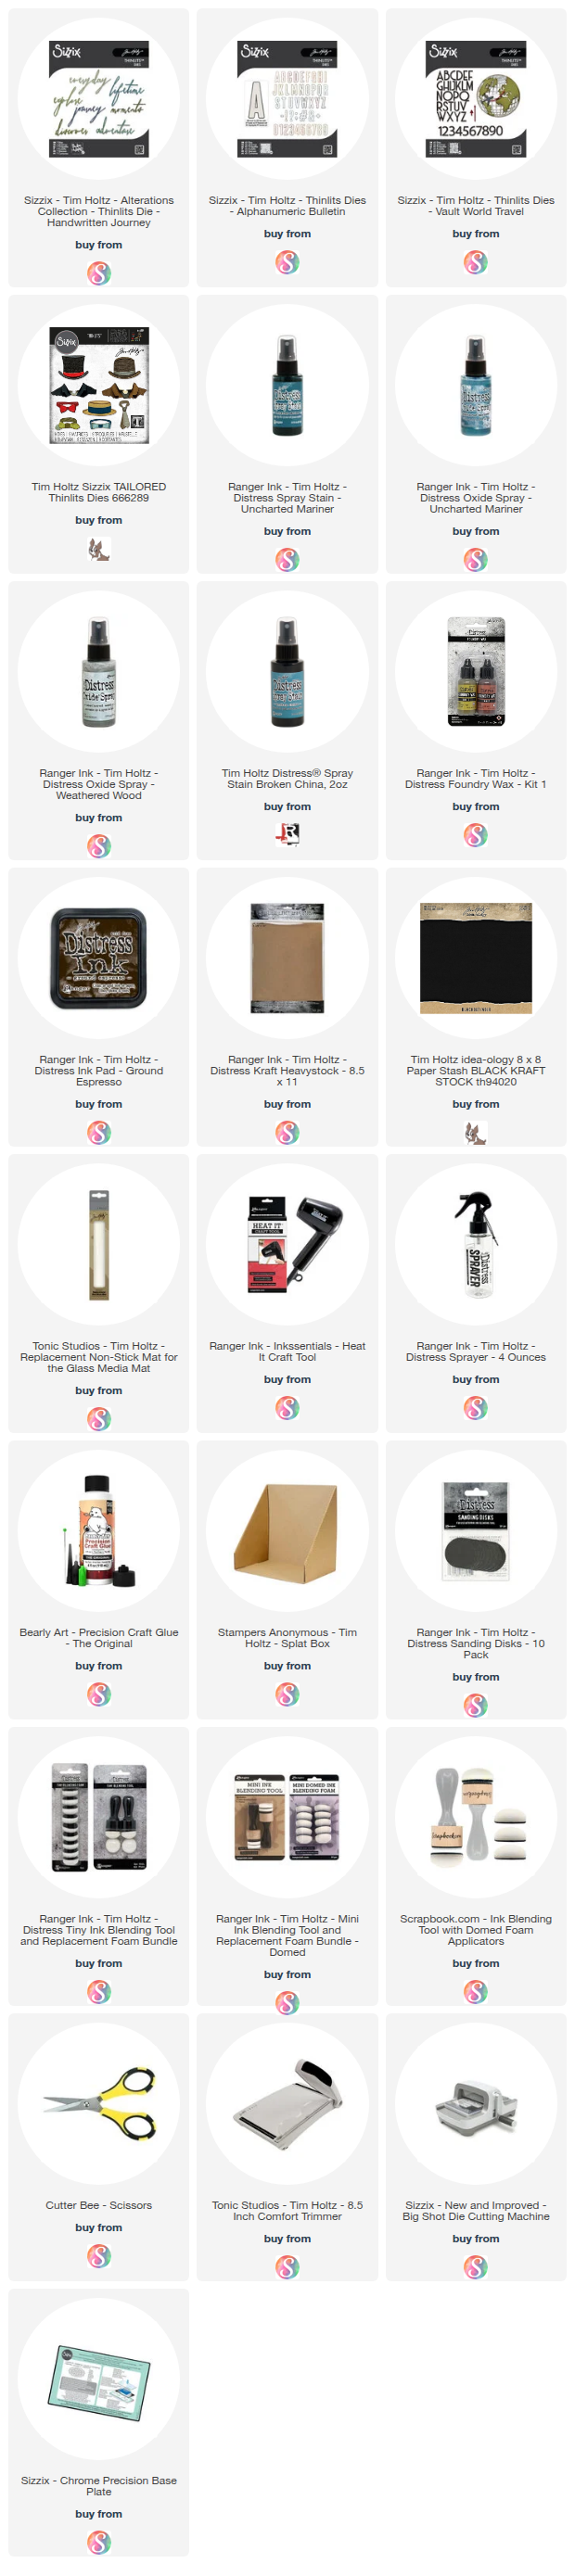
What if you could create a rich, textured background without an embossing folder? Today I'm sharing one of my favorite techniques using some of the newly released dies from the Tim Holtz Sizzix March release — and the best part is it works with any dies you already own.

The technique uses dies you already own and creates that beautiful raised, textured look without any special equipment. Add Distress Sprays and a little Foundry Wax and the results are stunning — this card has that vintage wanderlust vibe I absolutely love. You'll want to watch the video to see exactly how it all comes together!

The Journey Awakens The Soul by Juliana Michaels featuring Faux Embossing Background Technique with Tim Holtz Sizzix Dies including World Traveler, Alphanumeric Bulletin, Handwritten Journey and Tailored

The Faux Embossing Technique

The key to this technique is that you don't need specific dies — you can use whatever you have in your stash. Any die cut adhered to paper before adding color will create that raised, textured effect. For this card I used dies from the Tim Holtz Sizzix March release, which were previously released and retired and are now available again. So if you missed them the first time, this is a great opportunity to grab them!

For color I used Distress Spray Stains in Uncharted Mariner and Broken China, along with Distress Oxide Sprays in Uncharted Mariner and Weathered Wood. The good news is you don't need both types of sprays — use what you have, mix and match, or stick with one. That's the beauty of this technique: it's flexible and works with your stash.

Watch the Full Tutorial

Ready to see the faux embossing technique in action? Watch the complete tutorial in the video below, or head over to my YouTube channel to check it out. 

I'd love to know — do you have dies sitting in your stash that you haven't used in a while? This technique might be just the reason to pull them out! Leave a comment below and let me know what you're thinking of trying it with.

Supplies

Below you will find links to the supplies I used to create these cards. When you shop through these links—whether you purchase that exact item or something else entirely—you're supporting me at no extra cost to you. The commission I receive helps me cover the costs of my blog and other expenses, and allows me to continue providing you with FREE inspiration and tutorials. If you want to learn more, you can see my full affiliate and product disclosure statement here. Thank you so much for your love and support!

Subscribe