Spooky Skull Mixed Media Halloween Card | Tim Holtz Stampers Anonymous Fall Halloween Curation

I’m sharing a spooky Halloween card I created with the Fall Halloween Curation by Stampers Anonymous. If you’re new to Curations, they’re thoughtfully themed seasonal collections that bring together classic Tim Holtz stamps and stencils. Many of these designs were released years ago, and Stampers Anonymous has curated them into collections to remind us of their incredible artwork and inspire new ideas with them.

Happy Halloween Spooky Skull Card by Juliana Michaels featuring Tim Holtz Halloween Blueprint and Stampers Anonymous Fall Halloween Curation

HALLOWEEN BLUEPRINT
For this card, I went bold with a skull blueprint stamp as my focal point and built up the background with lots of mixed media layers. I used:
  • Distress Oxide Sprays for the inky background
  • Collage stamping + heat embossing for extra depth and texture
  • Die cuts to add dimension and more texture
  • Distress Inks to add color to the stamped focal image
It all comes together for a grungy, spooky Halloween vibe—perfect for October cardmaking.

You can either watch the video below or head over to my YouTube Channel HERE to check it out.

VIDEO

Please feel free to use products from your stash to recreate something similar. However, if you are interested in any of the products I’m using, you can find the supply list with links down below. Using these links does not cost you anything extra and it helps support my business. It also allows me to continue offering free content and keep my class costs low. I appreciate your support!


This is just one of the projects I’ve created with the Fall Halloween Curation, and each one explores a different technique. Be sure to check back for more seasonal inspiration! You can check out all of my Fall Halloween Curation projects HERE.

SUPPLIES
Below you can find the supplies I used to create this card. When you shop through those links and whether you purchase that exact item or something else entirely, you’re supporting me at no extra cost to you. The commission I receive helps me cover the costs of my blog and other expenses, and allows me to continue to provide you with FREE inspiration and tutorials. If you want to learn more about what an affiliate link is, you can see my full affiliate and product disclosure statement here. Thank you so much for your love and support!

New Color Combo, New Inspiration: Distress Ink + Eileen Hull’s Latest Sizzix Release

Eileen Hull has just released her latest collection with Sizzix, and I had the absolute pleasure of creating with some of the new products. One piece that immediately stole my heart is the Lacy Leaves 3D Embossing Folder—and it’s the star of the card I’m sharing today.

For a step-by-step look at the background technique I used with this embossing folder, be sure to check out my Gorgeous Grunge Techniques video HERE.

Although I used a very different color palette for this card, the coloring process is the same as in the video. The only variation is that I skipped the Luster Wax this time. If you’d like to add it, though, it would bring an extra layer of shimmer and interest!

Just Breathe Card by Juliana Michaels featuring Eileen Hull Sizzix Lacy Leaves Embossing Folder and Tunnel Arches Die Set

FINDING INSPIRATION IN COLOR

The Distress Ink combo I used on this project was completely new to me. My inspiration came from the color palette selector created by Lyllack.art on Instagram. She put together a fun video featuring tons of three-color Distress palettes. The best part? You can pause the video at any moment, and whichever palette you land on becomes your “creative destiny” for the day!

CHECK OUT THE COLOR PALETTE SELECTOR HERE

I loved the idea so much that I took screenshots of several palettes to keep on hand for when I needed a spark of inspiration. When I sat down to work on this card, I flipped through my saved palettes—and the combination I landed on turned into something really special.


DISTRESS INK COLOR PALETTE

The Distress Ink colors I used are Dried Marigold, Seedless Preserves and Abandoned Coral.

For this card, I used:
  • Dried Marigold – as the base for the background (step 1 in the video mentioned above)
  • Seedless Preserves & Abandoned Coral – softly rubbed over the embossed design (step 2 in the video)
I then die cut butterflies, ink blended them with Seedless Preserves, and layered them with foam tape for added dimension. The leaves were blended with Dried Marigold.

To frame the focal point, I used the Tunnel Arches die set:
  • Inner arch – cardstock ink blended with Abandoned Coral
  • Outer arch – vellum cut with the next size up
I finished the card with a simple stamped sentiment and mounted everything onto a piece of white cardstock for a crisp, clean frame.


To finish off the card, I added a stamped sentiment and adhered the background to a piece of white cardstock to frame it.


Thanks so much for stopping by! I hope you are inspired to pull out your embossing folders and play AND to step outside your color comfort zone and try a new color combination! It just might end up being your new favorite!

SUPPLIES

Below you can find the supplies I used to create this card. When you shop through those links and whether you purchase that exact item or something else entirely, you’re supporting me at no extra cost to you. The commission I receive helps me cover the costs of my blog and other expenses, and allows me to continue to provide you with FREE inspiration and tutorials. If you want to learn more about what an affiliate link is, you can see my full affiliate and product disclosure statement here. Thank you so much for your love and support!

Mini But Mighty | Halloween Tags & Cards with Tim Holtz Mini Distress Oxides

Hey crafty friends! Today I’m back with another Mini but Mighty project—this time with a spooky twist. I recently got my hands on the latest set of Mini Distress Oxide Ink Pads from Tim Holtz and Ranger Ink, and I couldn’t wait to try them out with some of the new colors. Tim Holtz and Ranger Ink just released 24 more colors from the Distress Palette, so there are now a total of 48 colors of the 72 colors available. Even though these ink pads are small, they pack a powerful punch and are perfect for so many techniques.

Halloween Tags & Cards by Juliana Michaels featuring Tim Holtz Stamps, Stencils and Mini Distress Oxides

For this project, I created three wickedly fun Halloween tags using the exact same techniques I shared in my Christmas Mini Distress Oxide video. The only difference? A new palette of colors and a Halloween theme! This just goes to show how versatile these inks are—by swapping out colors and imagery, you can carry your favorite ideas across seasons.

While I’m focusing on tags in the video, keep in mind you can always turn them into cards, add them to your junk journal, or use them as little handmade treats for friends and family.

Please feel free to use products from your stash to recreate something similar. However, if you are interested in any of the products I’m using, you can find the supply list with links down below. Using these links does not cost you anything extra and it helps support my business. It also allows me to continue offering free content and keep my class costs low. I appreciate your support!

Watch the full video below or click HERE to watch over on my YouTube channel.
 

Missed the Christmas version? Watch below or click HERE to watch over on my YouTube channel.


HALLOWEEN TAGS & CARD INSPIRATION

Below you can take a look at the tags I created in the video, along with a bonus option. 

Hocus Pocus Halloween Tag by Juliana Michaels featuring Tim Holtz Stamps, Stencils and Mini Distress Oxides

Happy Halloween Skull Halloween Tag by Juliana Michaels featuring Tim Holtz Stamps, Stencils and Mini Distress Oxides

Wicked Hipster Guy Halloween Tag by Juliana Michaels featuring Tim Holtz Stamps, Stencils and Mini Distress Oxides

BONUS TAG IDEA

Here is a bonus idea using the same techniques, just slightly different colors and of course the Hipster Girl instead of the Guy.

Wicked Hipster Girl Halloween Tag by Juliana Michaels featuring Tim Holtz Stamps, Stencils and Mini Distress Oxides

I hope this inspires you to give your Mini Distress Oxide Ink Pads a workout and start experimenting with seasonal twists of your own. Mini really is mighty—no matter the holiday!

SUPPLIES 

Below you can find the supplies I used to create these tags. When you shop through those links and whether you purchase that exact item or something else entirely, you’re supporting me at no extra cost to you. The commission I receive helps me cover the costs of my blog and other expenses, and allows me to continue to provide you with FREE inspiration and tutorials. If you want to learn more about what an affiliate link is, you can see my full affiliate and product disclosure statement here. Thank you so much for your love and support!

Halloween & Christmas Gift Card Packages | Tim Holtz Sizzix Christmas 2025

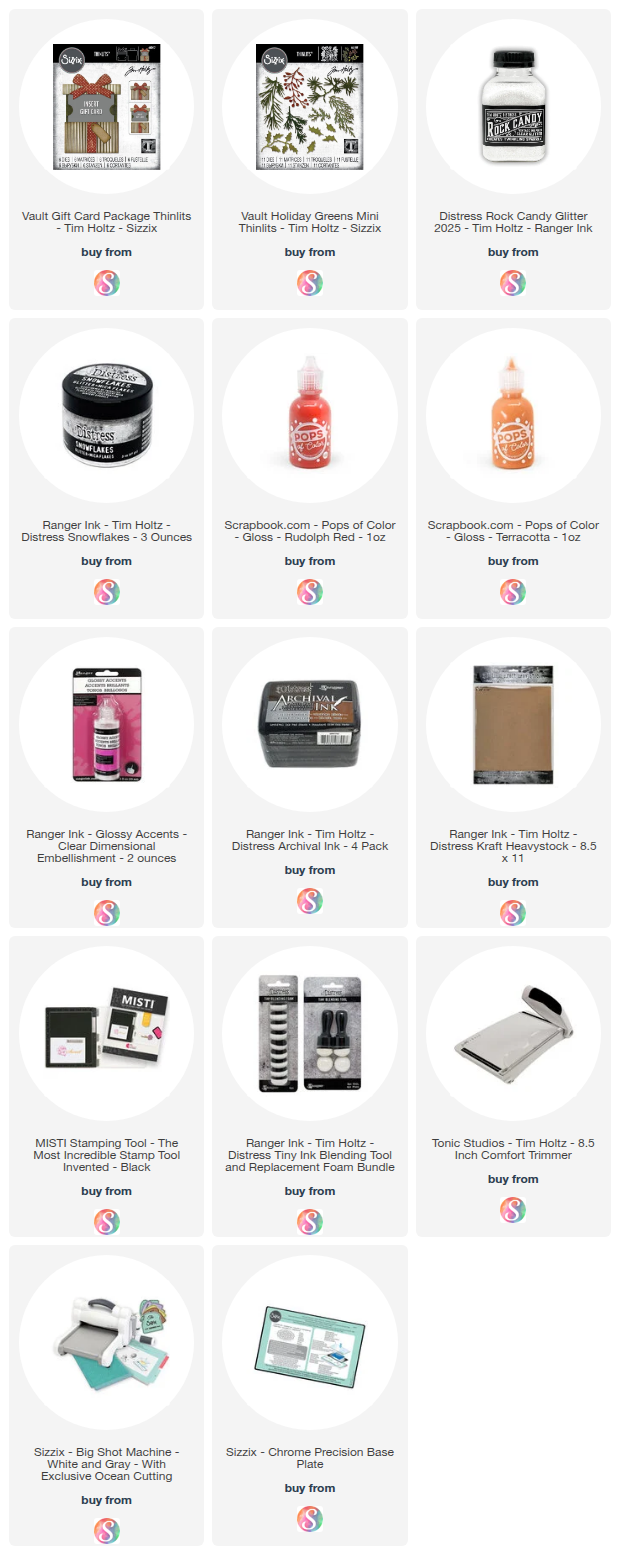
One of the new to me dies from the recent Tim Holtz Sizzix 2025 Christmas Vault Release is the Gift Card Package Die Set. It’s designed to create a quick and easy gift card holder—perfect for holiday giving! Since I’ve been bouncing back and forth between Christmas and Halloween crafting lately, I thought it would be fun to make two versions: one for Christmas and one for Halloween. The best part? By simply switching up your paper choices, this die can work for any holiday or celebration.

Halloween and Christmas Gift Card Holders by Juliana Michaels featuring Tim Holtz Sizzix Gift Card Package Die Set

CHRISTMAS GIFT CARD PACKAGE

For the Christmas version, I used a piece of patterned paper from my stash of Tim Holtz Backdrops to create the base of the package. I topped it with a coordinating solid cardstock bow and added some festive greenery using the Holiday Greens Mini Die Set (a longtime favorite of mine—so happy it’s back!). I then inked the edges with some Ground Espresso Distress Ink for a touch of grunge.

Christmas Gift Card Holders by Juliana Michaels featuring Tim Holtz Sizzix Gift Card Package Die Set

The greenery was cut from shades of green and blue colored cardstock, coated with Glossy Accents and then dusted with Distress Snowflakes for a frosted effect. I added Rudolph Red Pops of Color to the berries to bring in a traditional pop of red. While the Pops of Color was still wet I applied some Rock Candy Glitter using a Glitter Duster to a touch of shimmer. To finish it off, I stamped a sentiment onto a die-cut kraft tag and tied it on with a bit of white string.


HALLOWEEN GIFT CARD PACKAGE

For the Halloween version, I followed the same process but swapped in Halloween patterned paper for the base. The greenery was cut from black, gray, and deep green cardstock, then accented again with Glossy Accents and Distress Snowflakes for a spooky shimmer.

Halloween Gift Card Holders by Juliana Michaels featuring Tim Holtz Sizzix Gift Card Package Die Set

This time, I used Terracotta Pops of Color for the berries and of course dusted it with some Rock Candy Glitter. I then added a Halloween sentiment to finish it off.


READY TO GIFT

The final touch was sliding in a gift card—and just like that, these little packages were ready for gifting!

Thanks so much for stopping by today. I hope this gave you a bit of inspiration for using the Tim Holtz Gift Card Package Die Set in both festive and unexpected ways.

Halloween and Christmas Gift Card Holders by Juliana Michaels featuring Tim Holtz Sizzix Gift Card Package Die Set

SUPPLIES

Below you can find the supplies I used to create this card. When you shop through those links and whether you purchase that exact item or something else entirely, you’re supporting me at no extra cost to you. The commission I receive helps me cover the costs of my blog and other expenses, and allows me to continue to provide you with FREE inspiration and tutorials. If you want to learn more about what an affiliate link is, you can see my full affiliate and product disclosure statement here. Thank you so much for your love and support!

Winston the Snowman Snowglobe Shaker Card | Tim Holtz Sizzix Christmas 2025

Winston’s back and still as adorable as ever! For my second card with the Tim Holtz Sizzix Christmas 2025 release, I turned Winston into the star of a playful shaker card. This version leans pretty + festive with a pink scarf and extra inking over an embossed background. My original sample kept things classic—red scarf and no extra inking—so you’ll see two easy ways to change the mood with small choices.

Question for you: Which look do you prefer—pink + inked or classic red + clean? Tell me in the comments!

Winston the Snowman Snowglobe Shaker Card  by Juliana Michaels featuring Tim Holtz Sizzix Christmas 2025

WHAT'S IN THE VIDEO

This video is all about options—color shifts, background choices, and smart stash substitutions—so you can make a similar look with what you already own. You’ll see:
  • How lightly inking an embossed background adds instant depth
  • How to create and build a shaker card
  • Simple ways to fill a shaker (sequins, glitter, beads—mix and match!)
  • Substitutions if you don’t have the exact dies, inks, colors or embellishments

You can either watch the video below or head over to my YouTube Channel HERE to check it out.


Please feel free to use products from your stash to recreate something similar. However, if you are interested in any of the products I’m using, you can find the supply list with links down below. Using these links does not cost you anything extra and it helps support my business. It also allows me to continue offering free content and keep my class costs low. I appreciate your support!


DESIGN NOTES & IDEAS

  • Snowglobe Magic: Framing Winston inside a snowglobe makes the shaker feel extra interactive and festive.
  • Color Play: Switching up the scarf color completely changes the mood—try pink for whimsical, red for classic, or even icy blues.
  • Background Texture: Lightly inking over embossed cardstock adds dimension without overwhelming the scene.
  • Shaker Fillers: Sequins, glitter, or beads all give a snow-like effect—mix and match for more movement.

STASH FRIENDLY SUBSTITUTIONS

  • No Winston? Use any snowman, a Santa, or critter die as your focal point.
  • No Scribbly Snowflakes? Use any snowflake dies you might have or even snowflake punches or skip the snowflakes all together and add more color with your sequin mix.
  • No shaker snowflakes? Fill the shaker with any combination of sequins, glitter, mica flakes, beads, small punched shapes or any shaker pieces you may have that fit the color/theme of your card.
  • No Distress Inks or Distress Spray Stains? Use any ink you have to color your cardstock by ink blending or spraying. You can also use colored cardstock.

Winston the Snowman Snowglobe Shaker Card  by Juliana Michaels featuring Tim Holtz Sizzix Christmas 2025

TIPS & TRICKS

Window Clarity: Wipe acetate with an microfiber cloth before sealing to clean it before you add your shaker pieces. You can also use an antistatic tool to reduce cling, but it may leave a residual powder on the acetate so I don't tend to do this.
Dimension with Control: Make sure your foam tape is thicker than what you are using for your shaker pieces.
Use any solid die shape to create your own shaker window. You don't have to create a snowglobe to still get the shaker effect. 


SUPPLIES

Below you can find the supplies I used to create this card. When you shop through those links and whether you purchase that exact item or something else entirely, you’re supporting me at no extra cost to you. The commission I receive helps me cover the costs of my blog and other expenses, and allows me to continue to provide you with FREE inspiration and tutorials. If you want to learn more about what an affiliate link is, you can see my full affiliate and product disclosure statement here. Thank you so much for your love and support!

LET'S STAY CONNECTED

✔️ Subscribe on YouTube for more cardmaking tutorials, tips, and seasonal inspiration
✔️ Follow me on Instagram for sneak peeks and behind-the-scenes
✔️ Sign up for my Newsletter to stay updated on new releases and crafty resources
✔️ Take one of my online Classes to learn fun techniques and build your cardmaking confidence at your own pace


Thanks for stopping by—and until next time, stay crafty, my friend!

Creative Adventures with Stamps, Stencils & Dies | Scrapbook.com

I’m so excited to share that I have a brand-new video up on the Scrapbook.com YouTube Channel—and this one is all about creative play with a fun travel-inspired twist!

I set out to create something using a mini file folder…and ended up making a project I’m honestly not quite sure how to label! Is it a card? A mini album insert? An ATC? A stamp swatch? A scrapbook embellishment? The truth is—it can be any of those things (and more!).

Travel Themed Mini File Folders by Juliana Michaels featuring Elizabeth Craft Designs Stamps and Dies

That’s what I love most about this kind of project. It’s open-ended, versatile, and a great reminder that you don’t need to have a perfectly planned outcome when you sit down to create. Sometimes the best ideas happen when you just let yourself play.

In the video, I’m sharing:
  • A layered, mixed media project with a travel theme
  • Stamp collaging techniques you can use on any project
  • Tips and tricks for using your stash of stamps, stencils, and dies in new ways
  • Tons of ideas for how you could repurpose this design into cards, journal pages, scrapbook layouts, and more
This one’s perfect for those times when you just want to make something for the fun of it.

WATCH THE VIDEO

You can either watch the video below or head over to Scrapbook.com HERE to check it out.

Please feel free to use products from your stash to recreate something similar. However, if you are interested in any of the products I’m using, you can find the supply list with links down below. Using these links does not cost you anything extra and it helps support my business. It also allows me to continue offering free content and keep my class costs low. I appreciate your support!


And while you’re there, I’d love to know: What would YOU call this project? How would you use it in your own crafting? Leave a comment on the video—I’d love to hear your take!

A CLOSER LOOK
Here's a closer look at the cover and inside of each of these file folders. Please check out the video for all the details on how these were created.

Travel Themed Mini File Folder by Juliana Michaels featuring Elizabeth Craft Designs Stamps and Dies


Travel Themed Mini File Folder by Juliana Michaels featuring Elizabeth Craft Designs Stamps and Dies


Travel Themed Mini File Folder by Juliana Michaels featuring Elizabeth Craft Designs Stamps and Dies

SUPPLIES

Below you can find the supplies I used to create this card. When you shop through those links and whether you purchase that exact item or something else entirely, you’re supporting me at no extra cost to you. The commission I receive helps me cover the costs of my blog and other expenses, and allows me to continue to provide you with FREE inspiration and tutorials. If you want to learn more about what an affiliate link is, you can see my full affiliate and product disclosure statement here. Thank you so much for your love and support!

Festive Vintage Christmas Card Inspiration | Tim Holtz Sizzix Christmas 2025

Bring a touch of classic holiday charm to your cardmaking with this vintage-style Christmas card! I combined some of the new Tim Holtz Sizzix Christmas 2025 Vault dies and resized embossing folders with a few of my favorite older pieces to create a card that’s both timeless and festive.

Making Spirits Bright Christmas Card by Juliana Michaels featuring Tim Holtz Sizzix Mini Holiday Greens, Merry and Bright, and Engraved Embossing Folder

INSPIRATION & CREATIVE TIPS

This project is all about thinking outside the box and using what you have while experimenting with textures, inks, and embellishments. Even if you don’t own the exact new products, you can achieve a similar vintage holiday feel by layering, adding dimension, and mixing shimmer and shine.


TECHNIQUES FEATURED

With each of the techniques in the video I share ideas for substitutions of things that you may already have in your stash.
  • Embossed Backgrounds with Distress Ink & Embossing Glaze: Add texture, depth, and shimmer to your cards.
  • Custom-Colored Watercolor Cardstock: Layered greenery created with Distress Spray Stains, accented with berries and shimmer.
  • Dimensional Accents: Glossy Accents, Distress Snowflakes, Distress Rock Candy Glitter, and Distress Mica Flakes add festive sparkle and shine.
  • Focal Points with Dies: Combine new and retired dies, like the classic Holiday Mini Greenery and the Dashing Deer, for a layered, professional look.
  • DIY Sentiment Panels: Painted and distressed cardstock can stand in for discontinued or unavailable colors.

WATCH & CRAFT ALONG

Watch the video to see these techniques in action and get ideas for creating your own festive vintage Christmas cards! You can either watch the video below or head over to my YouTube Channel HERE to check it out. 

In the video, I share creative ways to use these new dies and embossing folders while also showing stash-friendly substitutions so you can make a similar card even if you don’t have the exact products.


Please feel free to use products from your stash to recreate something similar. However, if you are interested in any of the products I’m using, you can find the supply list with links down below. Using these links does not cost you anything extra and it helps support my business. It also allows me to continue offering free content and keep my class costs low. I appreciate your support!


SUPPLIES

Below you can find the supplies I used to create this card. When you shop through those links and whether you purchase that exact item or something else entirely, you’re supporting me at no extra cost to you. The commission I receive helps me cover the costs of my blog and other expenses, and allows me to continue to provide you with FREE inspiration and tutorials. If you want to learn more about what an affiliate link is, you can see my full affiliate and product disclosure statement here. Thank you so much for your love and support!

DIY Pumpkin Pail Shaker Card | Tim Holtz Halloween Card Tutorial

Last year, I came across a Halloween card by Tonya Brooks that featured the cutest pumpkin pail filled with treats, and I’ve been dreaming of making my own version ever since. I just needed the right products to bring it to life. With the re-release of the Tim Holtz Layered Jack-O-Lantern Die Set, I finally had what I needed!

With a few simple modifications, I was able to turn the die into a treat pail—and then I gave it an extra twist by transforming it into a Halloween shaker card filled with the brand-new Tim Holtz Rock Candy Chunky Glitter.

Keep reading to see how it all came together!

Happy Halloween DIY Pumpkin Pail Shaker Card by Juliana Michaels featuring Tim Holtz Layered Jack-O-Lantern, Distress Rock Candy Glitter and Rock Candy Chunky Glitter

CREATING THE BACKGROUND

Inspired by Tonya’s original design, I wanted a bold, spooky backdrop. I started with Distress Watercolor Cardstock and the Halloween Stencil from Mini Layering Stencil Set 17. Using a blending brush, I ink blended Black Soot Distress Ink through the stencil, concentrating the color in the center and fading it out toward the edges.

To add more depth, I blended Seedless Preserves around the outer edges, then softened everything with just a touch of Black Soot. A few water splatters and Black Soot ink splatters (applied with a paintbrush) finished off the background with that perfect distressed, spooky vibe.


COLORING THE DIE CUTS

Most of the die cuts were cut from Distress Watercolor Cardstock with the exception of the black pieces (the bow, skull base, Jack-O-Lantern base, and handle), which I cut from black cardstock. The skull and bones were cut from white cardstock.

Using the Scrapbook.com GripMate, I held each die cut in place and ink blended with these Distress Ink colors:
Jack-O-Lantern – Rusty Hinge, Wild Honey
Flowers – Seedless Preserves, Fossilized Amber
Leaves – Peeled Paint
Fern – Black Soot
Candy Corn – Carved Pumpkin, Fossilized Amber
Green Candy – Twisted Citron, Mowed Lawn
Purple Candy – Dusty Concord, Villainous Potion
Striped Candy – Black Soot, Dusty Concord

I assembled everything with Distress Collage Medium, then added shine and texture. The candy pieces got a coat of Glossy Accents followed by a dusting of Rock Candy Glitter using the Glitter Duster. The skull and bones also got a glossy finish for a little extra dimension.


CUSTOM SHAKER FILLER

For the shaker element, I created custom filler using Rock Candy Chunky Glitter. To color it, I followed Tim Holtz’s method of adding Pitch Black Alcohol Ink—so easy and it gave me the perfect Halloween sparkle.


BUILDING THE PUMPKIN PAIL SHAKER

To turn the Jack-O-Lantern into a pail, I left off the solid base layer and trimmed the top flat to create an opening. A piece of acetate adhered behind the pumpkin created the shaker window.

I built up a wall with double-sided foam adhesive around the edge, added the custom-colored glitter, and then sealed it with the solid base layer. Instant shaker!

The handle was made using an oval die, trimmed to size.

Finally, I arranged the candy, flowers, and greenery inside the pail, tucking a few elements along the bottom corner for balance. And just like that, my pumpkin pail shaker card was complete!

Thanks so much for stopping by! I hope this card inspires you to look at your dies in new ways and try turning them into something a little unexpected this Halloween.

SUPPLIES

Below you can find the supplies I used to create this card. When you shop through those links and whether you purchase that exact item or something else entirely, you’re supporting me at no extra cost to you. The commission I receive helps me cover the costs of my blog and other expenses, and allows me to continue to provide you with FREE inspiration and tutorials. If you want to learn more about what an affiliate link is, you can see my full affiliate and product disclosure statement here. Thank you so much for your love and support!

Subscribe