Showing posts with label Tags. Show all posts

Mini But Mighty | Halloween Tags & Cards with Tim Holtz Mini Distress Oxides

Hey crafty friends! Today I’m back with another Mini but Mighty project—this time with a spooky twist. I recently got my hands on the latest set of Mini Distress Oxide Ink Pads from Tim Holtz and Ranger Ink, and I couldn’t wait to try them out with some of the new colors. Tim Holtz and Ranger Ink just released 24 more colors from the Distress Palette, so there are now a total of 48 colors of the 72 colors available. Even though these ink pads are small, they pack a powerful punch and are perfect for so many techniques.

Halloween Tags & Cards by Juliana Michaels featuring Tim Holtz Stamps, Stencils and Mini Distress Oxides

For this project, I created three wickedly fun Halloween tags using the exact same techniques I shared in my Christmas Mini Distress Oxide video. The only difference? A new palette of colors and a Halloween theme! This just goes to show how versatile these inks are—by swapping out colors and imagery, you can carry your favorite ideas across seasons.

While I’m focusing on tags in the video, keep in mind you can always turn them into cards, add them to your junk journal, or use them as little handmade treats for friends and family.

Please feel free to use products from your stash to recreate something similar. However, if you are interested in any of the products I’m using, you can find the supply list with links down below. Using these links does not cost you anything extra and it helps support my business. It also allows me to continue offering free content and keep my class costs low. I appreciate your support!

Watch the full video below or click HERE to watch over on my YouTube channel.
 

Missed the Christmas version? Watch below or click HERE to watch over on my YouTube channel.


HALLOWEEN TAGS & CARD INSPIRATION

Below you can take a look at the tags I created in the video, along with a bonus option. 

Hocus Pocus Halloween Tag by Juliana Michaels featuring Tim Holtz Stamps, Stencils and Mini Distress Oxides

Happy Halloween Skull Halloween Tag by Juliana Michaels featuring Tim Holtz Stamps, Stencils and Mini Distress Oxides

Wicked Hipster Guy Halloween Tag by Juliana Michaels featuring Tim Holtz Stamps, Stencils and Mini Distress Oxides

BONUS TAG IDEA

Here is a bonus idea using the same techniques, just slightly different colors and of course the Hipster Girl instead of the Guy.

Wicked Hipster Girl Halloween Tag by Juliana Michaels featuring Tim Holtz Stamps, Stencils and Mini Distress Oxides

I hope this inspires you to give your Mini Distress Oxide Ink Pads a workout and start experimenting with seasonal twists of your own. Mini really is mighty—no matter the holiday!

SUPPLIES 

Below you can find the supplies I used to create these tags. When you shop through those links and whether you purchase that exact item or something else entirely, you’re supporting me at no extra cost to you. The commission I receive helps me cover the costs of my blog and other expenses, and allows me to continue to provide you with FREE inspiration and tutorials. If you want to learn more about what an affiliate link is, you can see my full affiliate and product disclosure statement here. Thank you so much for your love and support!

Game-Changing Craft Tools | Sizzix Circular Pads & Scrapbook.com GripMate

If you love making tags, cards, or any kind of papercrafting—I’ve got two new tools to share that just made my crafting life so much easier. And to show them in action, I created a trio of sweet baby-themed tags using some of the new baby products from Scrapbook.com.

Baby themed tags by Juliana Michaels featuring Scrapbook.com Special Delivery and Welcome Baby

These tags are perfect for baby shower favors or gift toppers, and they came together beautifully thanks to a few clever tools and the adorable baby themed stamps and dies from Scrapbook.com.

New Tool #1: Sizzix Circular Cutting Pads

These new cutting pads are designed specifically for small and medium-sized dies, and I love how compact and easy they are to use. The circular shape helps reduce warping over time—a common issue with traditional rectangular pads—and they glide smoothly through your die-cutting machine. I used both the 3.5" and 5" sizes in today’s project, and they worked perfectly alongside my Scrapbook.com Magic Mat and the Sizzix Chrome Precision Plate.

Sizzix Circular Cutting Pads

New Tool #2: Scrapbook.com GripMate

This little sticky mat is a total game changer for stamping, stenciling, and ink blending. It holds your paper firmly in place—no shifting, no slipping—so you can focus on creating, not constantly repositioning your cardstock. It’s sized to fit perfectly in a MISTI or other standard stamping platform, and it’s super easy to clean with just a damp cloth or baby wipe.

Scrapbook.com GripMate

The Project: Baby-Themed Gift Tags


To highlight these tools, I made three baby-themed tags using new dies and stamps from Scrapbook.com. The designs are simple, but the dimension and clean finish make them stand out. I finished each tag with a stamped sentiment and a touch of ribbon—ready to go on a gift or favor bag.

Baby themed tags by Juliana Michaels featuring Scrapbook.com Special Delivery and Welcome Baby

Want to see these tools in action? Watch the full tutorial below or on my YouTube channel where I walk you through the tag-making process step by step and give you a closer look at both the Sizzix Circular Cutting Pads and the Scrapbook.com GripMate.


Please feel free to use products from your stash to recreate something similar. However, if you are interested in any of the products I’m using, you can find the supply list with links down below. Using these links does not cost you anything extra and it helps support my business. It also allows me to continue offering free content and keep my class costs low. I appreciate your support!

Baby themed tags by Juliana Michaels featuring Scrapbook.com Special Delivery and Welcome Baby

SUPPLIES


Below you can find the supplies I used to create this card and the swatches. When you shop through those links and whether you purchase that exact item or something else entirely, you’re supporting me at no extra cost to you. The commission I receive helps me cover the costs of my blog and other expenses, and allows me to continue to provide you with FREE inspiration and tutorials. If you want to learn more about what an affiliate link is, you can see my full affiliate and product disclosure statement here. Thank you so much for your love and support!

Love You More Tags | 49 & Market anSizzix

FYI, Valentine's don't have to be pink and red! I was going to go that direction when I came up with this set of love you more tags, but then decided my husband might like them better if I switch up the color scheme. So...that's exactly what I did!

This set of tags can be put together as a twist on a Valentine's Day card, used in a journal or however you want. They came together using some of the new 49 and Market stamps and dies designed by Katie Pertiet for Sizzix. Let me walk you through it below.

Love You More Valentine's Day Tags by Juliana Michaels featuring Fine Stems, Fine Line Alpha, Build A Burst and Journal Essentials Stamps and Dies by 49 & Market for Sizzix

LOVE YOU MORE TAGS

I began by die cutting 3 large and 2 small tags from white cardstock using the Journal Essentials Die Set. I then stamped the tags using images from the Build-a-Burst - Painterly Stamp and Die Set. I stamped each design using Distress Oxide Ink in the following colors: Abandoned Coral, Scattered Straw, Broken China, Peeled Paint and Chipped Sapphire.


Next I ink blended 5 pieces of white cardstock. I applied the same colors of Distress Oxide Inks with one color to each piece of paper. I then die cut each color with a different die from the Fine Stems 2 Die Set.

The words on each tag are stamped using the Fine Line Alpha 01 Stamp and Die Set. I used Versafine Clair Fallen Leaves on white cardstock and then die cut them with the coordinating dies.


Once all the pieces where completed, I went through the Birdsong Ephemera Bits and selected some coordinating pieces to layer with the words, die cut stems and tags. I inked the edges of everything with Ground Espresso Distress Oxide Ink before I adhered them to the tag. 

The final touch was the addition of hand dyed seam binding and jute twine. I die the seam binding by spritzing the seam binding with water and then smooshing the Broken China Distress Oxide Ink Pad onto it. I continued scrunching the seam binding and used my heat tool to dry it. I then added it to the tags.


I hope you enjoyed seeing how this set of Love You More Valentine's tags came together!

SUPPLIES

Below you can find the supplies I used to create this card and the swatches. When you shop through the links below, I receive a small commission from Scrapbook.com. These links are at no cost to you and the commission I receive helps me cover the costs of my blog and other expenses, and allows me to continue to provide you with FREE inspiration and tutorials. If you want to learn more about what an affiliate link is, you can see my full affiliate and product disclosure statement here. Thank you so much for your love and support!

Christmas Holiday Gift Tags with the Tim Holtz Sizzix Sidekick Side Order

Hello there! I don't know about you, but there is just something about mini sized things that I adore! Mini always makes me think of something cute and the new Tim Holtz Sizzix Side Orders are just that! All things mini and cute! 

There are 5 New Side Orders and each one includes a coordinating set of thinlit dies and an embossing folder that are sized to work with the Sizzix Sidekick Die Cutting Machine. If you aren't familiar with the Sidekick, it is a mini die cutting machine that allows you to work with dies and embossing folders up to 2.5 inches wide and up to 4.5 inches in length. But, you don't have to have the Sidekick machine to use them. They will work in any die cutting machine! In my latest video I share more about the Sizzix Sidekick and how I used it with the Christmas Minis Side Order to create this set of festive Christmas Holiday Gift Tags.

Christmas Holiday Gift Tags by Juliana Michaels featuring the Tim Holtz Sizzix Sidekick and Christmas Mini Side Order Thinlits Dies

You can either watch the video below or head over to my YouTube Channel HERE to check it out.


Please feel free to use products from your stash to recreate something similar. However, if you are interested in any of the products I’m using, you can find the supply list with links at the bottom of this post. When you shop through those links you are supporting me at no extra cost to you and I truly appreciate that support so very much!

CHRISTMAS HOLIDAY GIFT TAGS

Here is an up close look each of the gift tags I created using the Tim Holtz Sizzix Christmas Mini Side Order and Sidekick Die cutting machine.

Christmas Holiday Gift Tags by Juliana Michaels featuring the Tim Holtz Sizzix Sidekick and Christmas Mini Side Order Thinlits Dies


SUPPLIES

Below you can find the supplies I used to create these Christmas Holiday Gift Tags. When you shop through the links below, I receive a small commission from Scrapbook.com. These links are at no cost to you and the commission I receive helps me cover the costs of my blog and other expenses, and allows me to continue to provide you with FREE inspiration and tutorials. If you want to learn more about what an affiliate link is, you can see my full affiliate and product disclosure statement here. Thank you so much for your love and support!

9 Amazing Distress Embossing Glaze Techniques

Hello beautiful crafty people! In this post I'm sharing 9 Amazing Distress Embossing Glaze Techniques using the new Tim Holtz Distress Embossing Glaze colors. There are 12 new colors which are being added to the current 29 colors for a total of 41 colors. I've created a video that is now live on my YouTube channel where I'm sharing all of the techniques I used to create 9 different backgrounds using everything from stamps to stencils to embossing folders!

If you are looking for even more inspiration make sure to watch the Tim Holtz YouTube Live and check out what the other Makers are creating and sharing on social media. You can find links to the Makers here.


In the write up below I'm sharing the highlights for creating these tags. If you would like more details, including tips and tricks on working with Embossing Glazes, make sure to watch the video below or you can check it out over on my YouTube Channel.


To create my samples, I used Distress Tags, but if tags aren't your thing you can certainly do these techniques on card size pieces of paper. The other supplies I'll be using are embossing folders, stencils, stamps, embossing ink, Distress Crayons, Distress Spray Stains, Distress Oxide Sprays, Distress Ink and Distress Pastes including...Opaque Texture Paste, Translucent Crackle Paste and Translucent Texture Paste. I know this seems like a lot of supplies, but I'm not using all of them for every technique. and definitely feel free to use any embossing folders, stencils and stamps you already have in your stash as well as whatever colors of inks, sprays or even embossing glazes you have as well. If you are interested in the supplies I'm using, I'll have all of them linked below in the supply list and when you shop through those links it helps support me and I really appreciate that so much!

EMBOSSING GLAZES VS EMBOSSING POWDERS

If you're not familiar with embossing glazes, you might be wondering how are these different from regular embossing powder. Well, embossing glazes and embossing powders are similar in that they are both powders that need something to stick to and then you must heat set them using a heat tool. How they are different is that embossing glazes are actually translucent so you can see through it. This is in comparison to regular embossing powder which you can't see through it. So with embossing glazes, if you put them over something you can see what is underneath and some of the techniques I'm going to share will explore that quality and show you how you can use it to add depth and interest to your cards.

To embellish each tag, I added a mix of Paper Dolls, Idea-ology Ephemera with the edges inked using Walnut Stain Distress Ink. I also layered in some Black Kraftstock that I die cut and lightly sanded with a Distress Sanding Disk to reveal the kraft colored core of the paper.

EMBOSSING FOLDERS & EMBOSSING GLAZE

To start off I'm going to show you some techniques for working with embossing folders and Embossing Glaze. I began by taking three Distress Tags and I embossed each one with a different embossing folder.

TAG No. 1

On this first tag, I embossed the tag using the Mosaic Embossing Folder. Next, I lightly rubbed an embossing ink over the raised surface of the tag. I then applied Aged Mahogany Embossing Glaze and heat set it with my heat tool.

Mosaic Embossing Folder and Aged Mahogany Embossing Glaze Tag by Juliana Michaels featuring Tim Holtz Embossing Glaze

To add some interest to this tag I applied Frayed Burlap Distress Oxide Spray, spritzed it with some water and dried the paper with my heat tool. I then added more color to the cracks with some Walnut Stain Spray Stain, spritzed it with more water, dabbed off the excess ink and then dried it with my heat tool. Next, I used Distress Crayons in Crooked Broomstick (a limited edition Halloween color with a pearlescent shimmer) and Walnut Stain Distress Crayon. I really love how this turned out and the shimmer from the pearl is really cool!

The die I used on this tag is the Paper Rose Texture 3 Die.

TAG No. 2

On this tag, I embossed it with the Tim Holtz Damask Embossing Folder. I then used a finger dauber sponge to apply the embossing ink. This allowed me to push the ink down into all the cracks and crevices created by the embossing folder. If you have the Distress Embossing Dabber you could also use that. I then applied Seedless Preserves Embossing Glaze.

Damask Embossing Folder and Seedless Preserves Embossing Glaze Tag by Juliana Michaels featuring Tim Holtz Embossing Glaze

To add some grunge and interest I applied Walnut Stain Distress Crayon using a stencil brush and just a tiny bit of water to work the crayon into the embossed design. I kept adding more of the Distress Crayon until I had the entire piece covered with the crayon. I then took a paper towel, spritzed lightly with water and gently rubbed here and there over the embossed areas to lift off some of the crayon. I then lightly applied Sizzix Luster Wax in Gold over the raised surfaces of the tag.

The die I used on this tag is the Tim Holtz Adorned Thinlits Dies. 

TAG No. 3

For this third tag I embossed it using the Tim Holtz Typewriter Embossing Folder. I gently rubbed over the raised part of the embossed design with an embossing ink pad. I then added three different colors of embossing glaze in Walnut Stain, Peacock Feathers and Rusty Hinge. Because I'm used several colors on this one, I'm spread the colors out across the paper, tap off the excess and then heat set it.

Typewriter Embossing Folder and Walnut Stain, Rusty Hinge and Peacock Feathers Embossing Glaze Tag by Juliana Michaels featuring Tim Holtz Embossing Glaze

To add interest to this tag, I spritzed it with some water and then added Pumice Stone Distress Oxide Spray, dried the paper with my heat tool and dabbed off the excess ink with a paper towel. Next I added a bit of Salvaged Patina Distress Oxide Spray and repeated the same process. I then finish it off by inking the edges with Walnut Stain Distress Ink, spritzed it with some water and dabbed the water droplets with a paper towel to lift the ink in those areas and then I dried it with my heat tool.

The die used on this tag is the Tim Holtz Gearhead Thinlits Dies.

STENCILS & EMBOSSING GLAZE

Now I'm going to share some techniques for working with stencils and Embossing Glaze.

TAG No. 4

On this tag I applied Distress Opaque Texture Paste through the Tim Holtz Mosaic Layering Stencil. This paste dries white and is less see through than the translucent pastes. Once I get the paste applied I'm going to set this tag to the side and let it dry completely. After the paste had dried, I placed the stencil back over the stenciled design and used a finger dauber to apply embossing ink to the areas with paste. Once the entire surface was covered with ink, I removed the stencil and applied Pumice Stone Embossing Glaze, tapped off the excess and then used my heat tool to heat set the glaze.

Mosaic Layering Stencil and Pumice Stone Embossing Glaze Tag by Juliana Michaels featuring Tim Holtz Embossing Glaze

To add some grunge and interest to this tag I spritzed the paper with water and then added Walnut Stain Distress Spray. I dabbed off the excess ink and dried the paper with my heat tool. I then added various colors of Distress Crayons in Crooked Broomstick, Salvaged Patina, Rusty Hinge, and Walnut Stain.

The die I used on this tag is Tim Holtz Leaf Fragments Thinlits Die Set.

TAG No. 5

For this next tag, I show you how the translucent nature of these glazes comes into play by first stamping one of the floral images from the Tim Holtz Botanic Collage Stamp Set onto the tag using Black Soot Archival Ink. Next, I applied Translucent Texture Paste through the Tim Holtz Typo Layering Stencil. This paste dries transparent so you can see the stamping underneath it. In retrospect, I wish I had picked a stencil with a slightly larger design so I could apply more paste which would allow for an even cooler effect.

After removing the stencil and while the paste is still wet, I applied Abandoned Coral and Pumice Stone Embossing Glaze. I used my fingers to pinch small amounts of the glaze onto the wet paste, making sure to spread the colors out across the pasted areas. I then tapped off the excess glaze and set this to the side to give the paste time to dry. Once the paste was dry, I used my heat tool to heat set the glaze.

Typo Layering Stencil and Pumice Stone and Abandoned Coral Embossing Glaze Tag by Juliana Michaels featuring Tim Holtz Embossing Glaze

To add little grunge and interest to this tag I spritzed it with some water and then added Distress Spray Stain in Tattered Rose. I used my heat tool to dry the paper and dabbed off any excess ink that was sitting on top of the glaze. Once the glaze has been heat set, the ink will not dry on it. I then repeated this process with Pumice Stone Distress Oxide Spray. The final step on this tag was to ink the edges with Walnut Stain Distress Ink, spritz it with some water and dab the ink dry.

The die I used on this tag is Tim Holtz Adorned Thinlits Die Set.

TAG No. 6

For this next tag, I'm going again stamp some images from the Tim Holtz Botanic Collage Stamp Set and Black Soot Archival Ink. This time I stamped the butterflies. I then applied Translucent Crackle Paste through the Tim Holtz Brush Hex Layering Stencil. I removed the stencil and then added Mermaid Lagoon, Peacock Feathers and Bundled Sage Embossing Glaze over the wet Translucent Crackle Paste making sure to spread the various colors across the pasted area. I then tapped off the excess glaze and and set the tag to the side to allow the paste time to dry. After the paste dried, I used my heat tool to heat set the embossing glaze.

Brush Hex Layering Stencil and Mermaid Lagoon, Peacock Feathers and Bundled Sage Embossing Glaze Tag by Juliana Michaels featuring Tim Holtz Embossing Glaze

Next, I spritzed the tag with water and added some Speckled Egg Distress Spray Stain. I used my heat tool to dry the paper and then dabbed off any excess ink with a paper towel because, as we learned earlier, the ink will not dry on the embossing glaze once the glaze is heat set..

Once the paper was dry, I applied Walnut Stain Distress Crayon to bring out the cracks from the Crackle Paste. Next, I inked the edges of the tag with some Walnut Stain Distress Ink. I then spritzed it with some water, dabbed the water droplets to lift the ink and then set it to the side to dry. You could also use your heat tool to dry the paper is so desired.

The die I used on this tag is Tim Holtz Adorned Thinlits Die Set.

TAG No. 7

For this tag, I wanted to apply the embossing glaze to very specific areas of the design, but first, I started off by stamping the tag with the ledger image from the Tim Holtz Ledger and Script Stamp Set with Black Soot Archival Ink. I then applied Opaque Texture Past through the Tim Holtz Roses Layering Stencil. I was a bit surprised, that I could see the stamped design through the opaque paste after it had dried.

Once the paste was dry, I lined up the stencil over the dry texture paste and used a finger sponge dauber to apply embossing ink through the stencil, making sure I get ink over the entire design. I removed the stencil and began to apply the embossing glaze. I like to refer to this as painting with the embossing glaze. I pinched different colors over different sections of the stenciled design. I applied Abandoned Coral to the flower areas and Crushed Olive to the leaf and stem areas. I then tapped off the excess powder and used my heat tool to set the embossing glaze.

Roses Layering Stencil and Abandoned Coral and Crushed Olive Embossing Glaze Tag by Juliana Michaels featuring Tim Holtz Embossing Glaze

To add some grunge and interest to this tag, I spritzed the tag with water and then added some Distress Spray Stains in Old Paper and Tea Dye and then dry the paper with my heat tool. I then finished it off by inking the edges with Walnut Stain Distress Ink, spritzing it with water. I then dried it with my heat tool and used a paper towel to dab up some of the larger water droplets.

The die I used on this tag is Tim Holtz Mini Detailed Butterflies Thinlits Die Set.

TAG No. 8

This is the last tag I used with a stencil and I only used a stencil, no pastes or other mediums. The first thing did was stamp a floral image from the Tim Holtz Botanic Collage Stamp Set onto the tag using Black Soot Archival Ink. I then placed the Tim Holtz Linked Circles Layering Stencil over the tag and applied embossing ink through the stencil at a diagonal across the tag using a finger sponge dauber. You could also use an Embossing Dabber.

I removed the stencil and applied Mowed Lawn, Mermaid Lagoon and Crushed Olive Embossing Glaze to various sections of the inked stencil. I then tapped off the excess embossing glaze and used my heat tool to set the glaze.

Linked Circles Layering Stencil Mowed Lawn, Mermaid Lagoon and Crushed Olive Embossing Glaze Tag by Juliana Michaels featuring Tim Holtz Embossing Glaze

To add some grunge and interest to this tag, I sprayed it with Speckled Egg Distress Spray Stain and dried the paper with my heat tool. Next, I inked the edges of the tag and also added some ink toward the center of the tag with Walnut Stain Distress Ink. The glaze acts as a resist to the ink and I really love the way it looked when I added the ink over some of the glazed areas. I then spritzed the tag with water, dried it and dabbed off some of the excess ink with a paper towel. I then re ink the edges to darken them up again.

The die I used on this tag is Paper Rose Circuit Texture Die Set.

STAMPS & EMBOSSING GLAZE

Now I'm going to share one last tag that only uses stamps and embossing glaze.

TAG No. 9


Now onto the final tag! For this one I went super simple and used only stamps. For this technique, I recommend using stamps that are more solid in their design such as the Tim Holtz Brushstrokes Stamp Set. I stamp the top of the tag with one of the brushstroke images from the Tim Holtz Brushstrokes Stamp Set with Embossing Ink. I then applied Abandoned Coral Embossing Glaze over the stamped image, tapped off the excess and heat set it with my heat tool. I repeated this process down the length of the tag using different brushstroke stamps from the set to provide a little variety. Each time I applied a different embossing glaze color to include Abandoned Coral, Spiced Marmalade, Squeezed Lemonade and Crushed Olive. After I had stamped and embossed each of the four colors, I repeated Spiced Marmalade and Abandoned Coral to finish off the design.
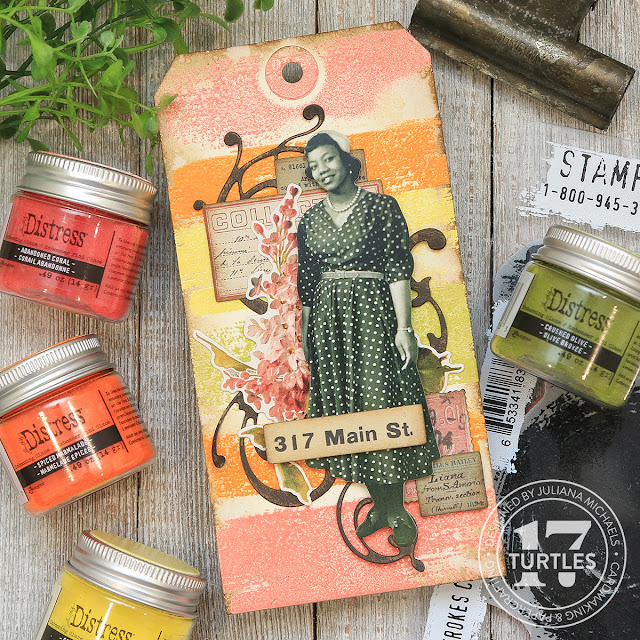
Brushstrokes Stamp Set with Abandoned Coral, Squeezed Lemonade, Spiced Marmalade and Crushed Olive Embossing Glaze Tag by Juliana Michaels featuring Tim Holtz Embossing Glaze

The final touch on this tag was to ink the edges with Walnut Stain Distress Ink. I then spritzed it with some water, dabbed it dry with a paper towel to lift off some of the ink and dried the tag with my heat tool.

The die I used on this tag is Tim Holtz Adorned Thinlits Die Set.

9 Amazing Embossing Glaze Techniques on Distress Tags by Juliana Michaels featuring Tim Holtz Embossing Glaze

So there you have it! Nine tags created using nine amazing Embossing Glaze Techniques and a mix of different mediums and supplies! To decorate each tag, I added a mix of die cuts cut from Black Kraftstock that I lightly sanded with a sanding disk, a paper doll and ephemera from my stash. I inked the edges of the ephemera with Walnut Stain Distress Ink. I then adhered the clusters with a mix of Scrapbook.com Clear Double Sided Adhesive Roll and Double Sided Adhesive Foam Roll. The dies I used are listed below each tag.

SUPPLIES FOR EMBOSSING GLAZE TECHNIQUES TAGS

Below you can find links to the Self-Healing Workspace Mat and Stackable Paper Trays. These are compensated affiliate links to Scrapbook.com and there is absolutely no cost to you when you click on them. When you click on them and then shop through them, I receive a small commission from Scrapbook.com. This helps support me and I truly appreciate that so very much! If you want to learn more about what an affiliate link is, you can see my full affiliate and product disclosure statement here. Thank you so much for your love and support!

Adhere Intricate Die Cuts Easily | Why You Need Artis Glue from Scrapbook.com

If you struggle when it comes to adhering small, delicate die cuts, they you must check out Artis Glue by Scrapbook.com. It's an adhesive game changer! With Artis Glue and it's precision tip there will be no more frustration when it comes to adhering those tiny die cuts. If you aren't familiar with Artis Glue, keep scrolling to find out why you need Artis Glue by Scrapbook.com.

I don't know about you, but I am constantly frustrated when it comes to adhering small, delicate die cuts.
Nothing is more irritating than getting adhesive where you don't want it or getting too much adhesive that squishes out all over the place. Artis Glue is a fast drying adhesive that is perfect for all of your favorite paper crafting and mixed media projects!

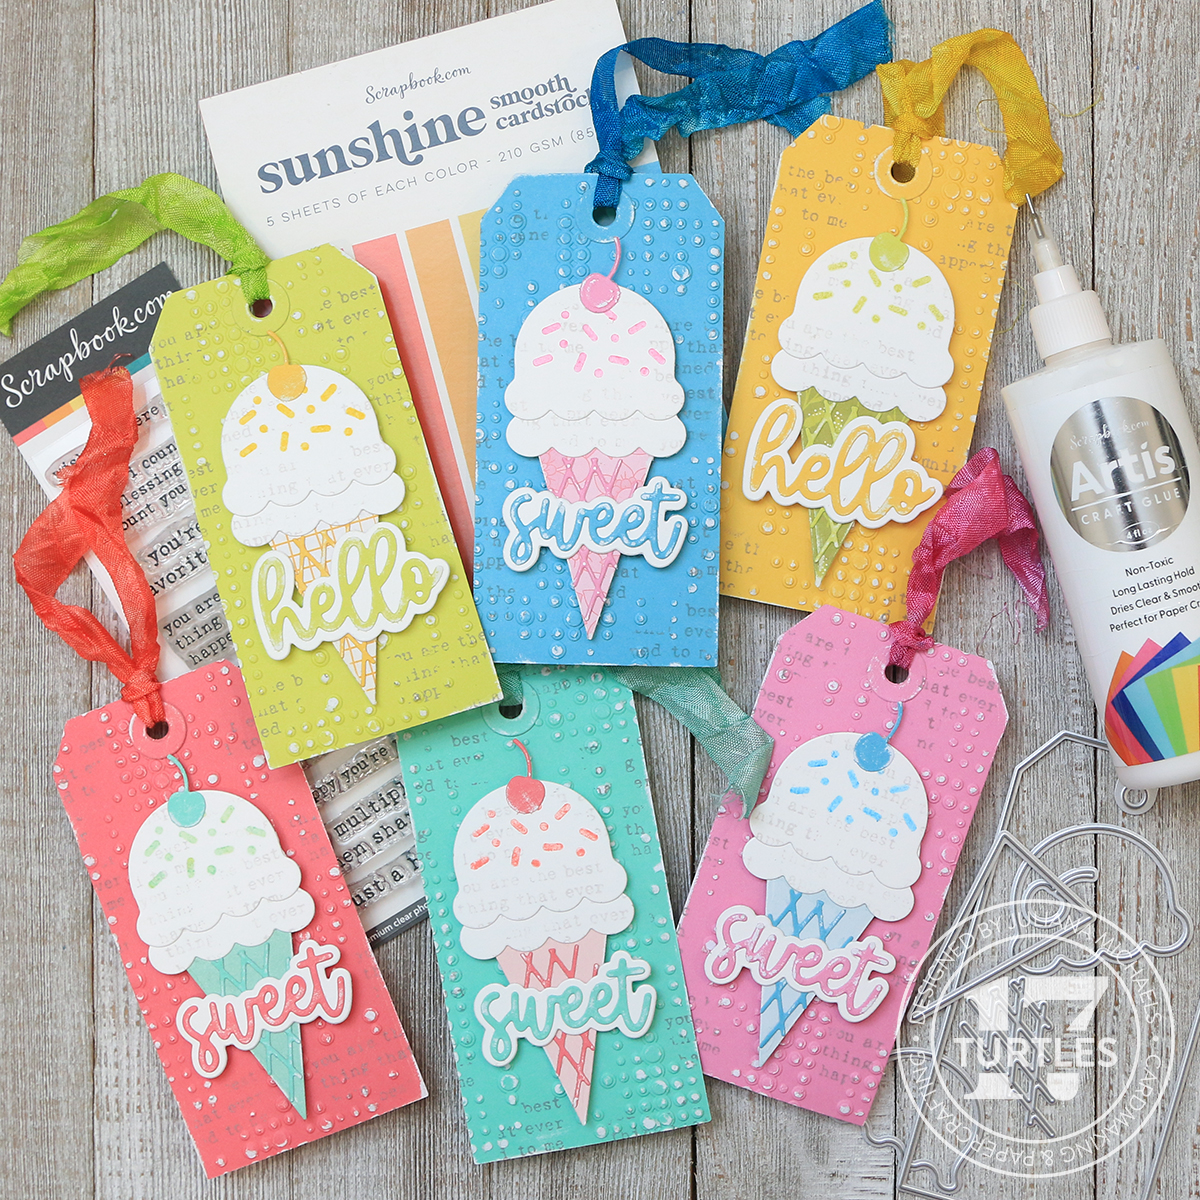
Gift Tags by Juliana Michaels featuring Scrapbook.com Sweet Scoops Die Set, Yay Tag Die Set and Artis Glue

Artis Glue is non-toxic, acid free and photo safe. It dries clear with a glossy finish and is wrinkle and clump resistant. It can be used to adhere paper, fabric, wood and leather. It is also water based, which makes clean up much easier. Along with these fabulous qualities it comes with 3 different tips

It comes with 2 interchangeable tips for applying the glue that include a fine tip made from plastic and an ultra fine precision tip made from stainless steel. It also comes with a pin that you can use to clean out the ultra fine tip. The pin however, is not made from stainless steel, so they recommend that you only use it for cleaning out the tip. When you aren't using the adhesive they recommend replacing the application tip with the storage tip.

Now that you know a little bit more about Artis Glue from Scrapbook.com, let me share set of gift tags I made using this game-changing adhesive. It's sure to become your favorite new adhesive!

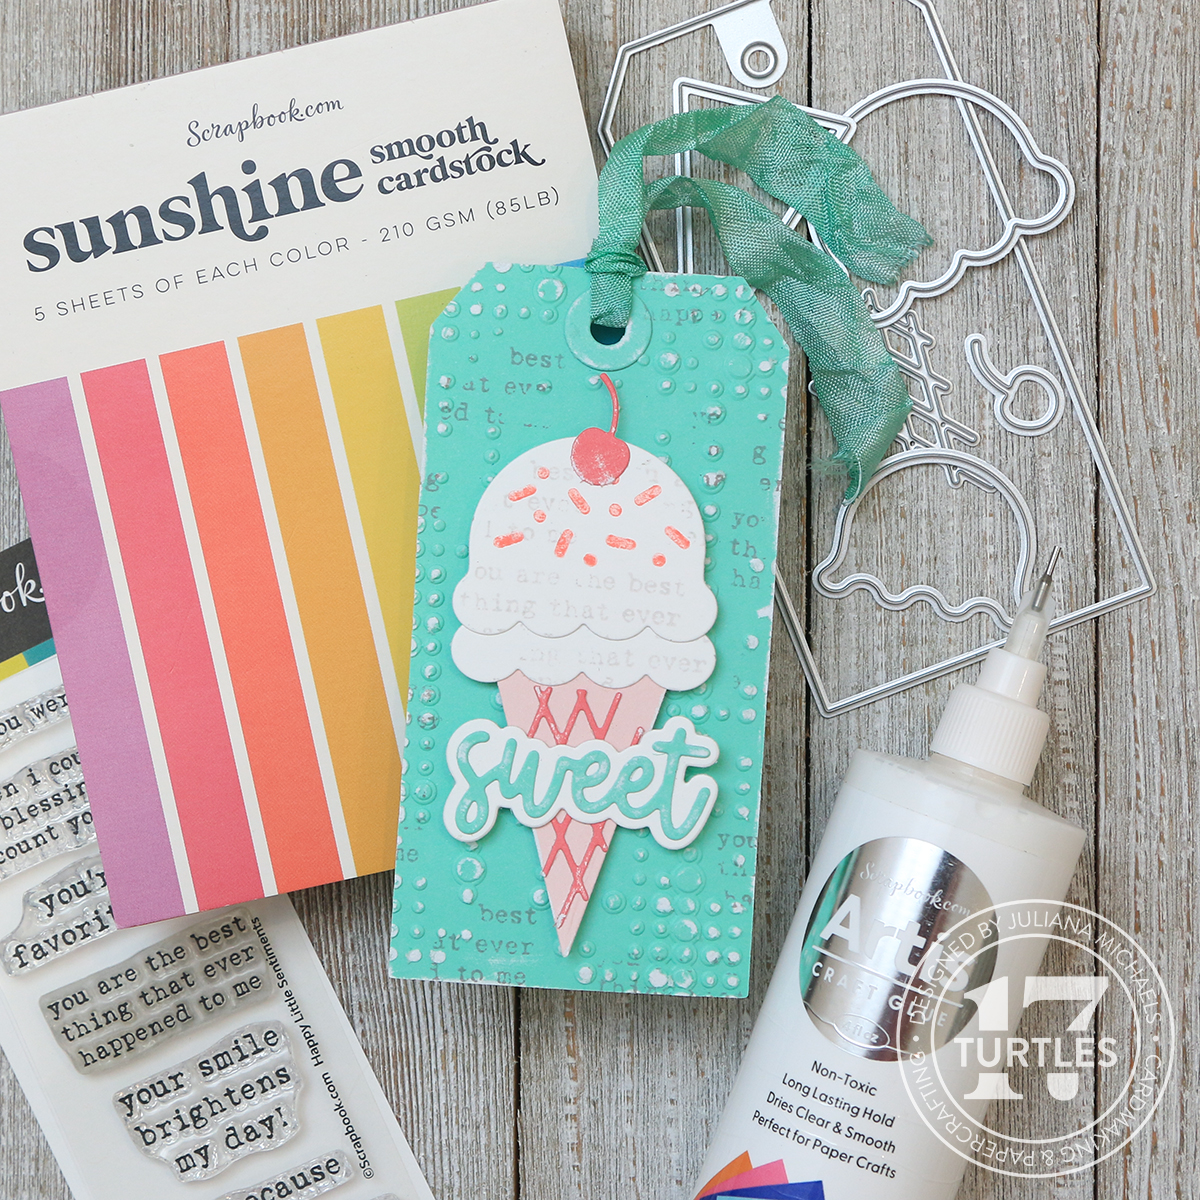
Sweet Gift Tag by Juliana Michaels featuring Scrapbook.com Sweet Scoops Die Set, Yay Tag Die Set and Artis Glue

I used Artis Glue in several locations on each tag in combination with the Sweet Scoops Die Set. I used it to adhere the delicate die cut layer on top of the ice cream cone. The ultra fine precision tip allows you to easily apply the tiniest amount of adhesive without getting more than you want or getting it all over where you don't want adhesive. I also used it to adhere the die cut sentiment layers together.


It came in handy once again to adhere the cherry on top of the ice cream scoops as well as for a the hole reinforcer on the tag.


With each use, I fell more in love with this glue and that ultra fine tip took it too the next level!

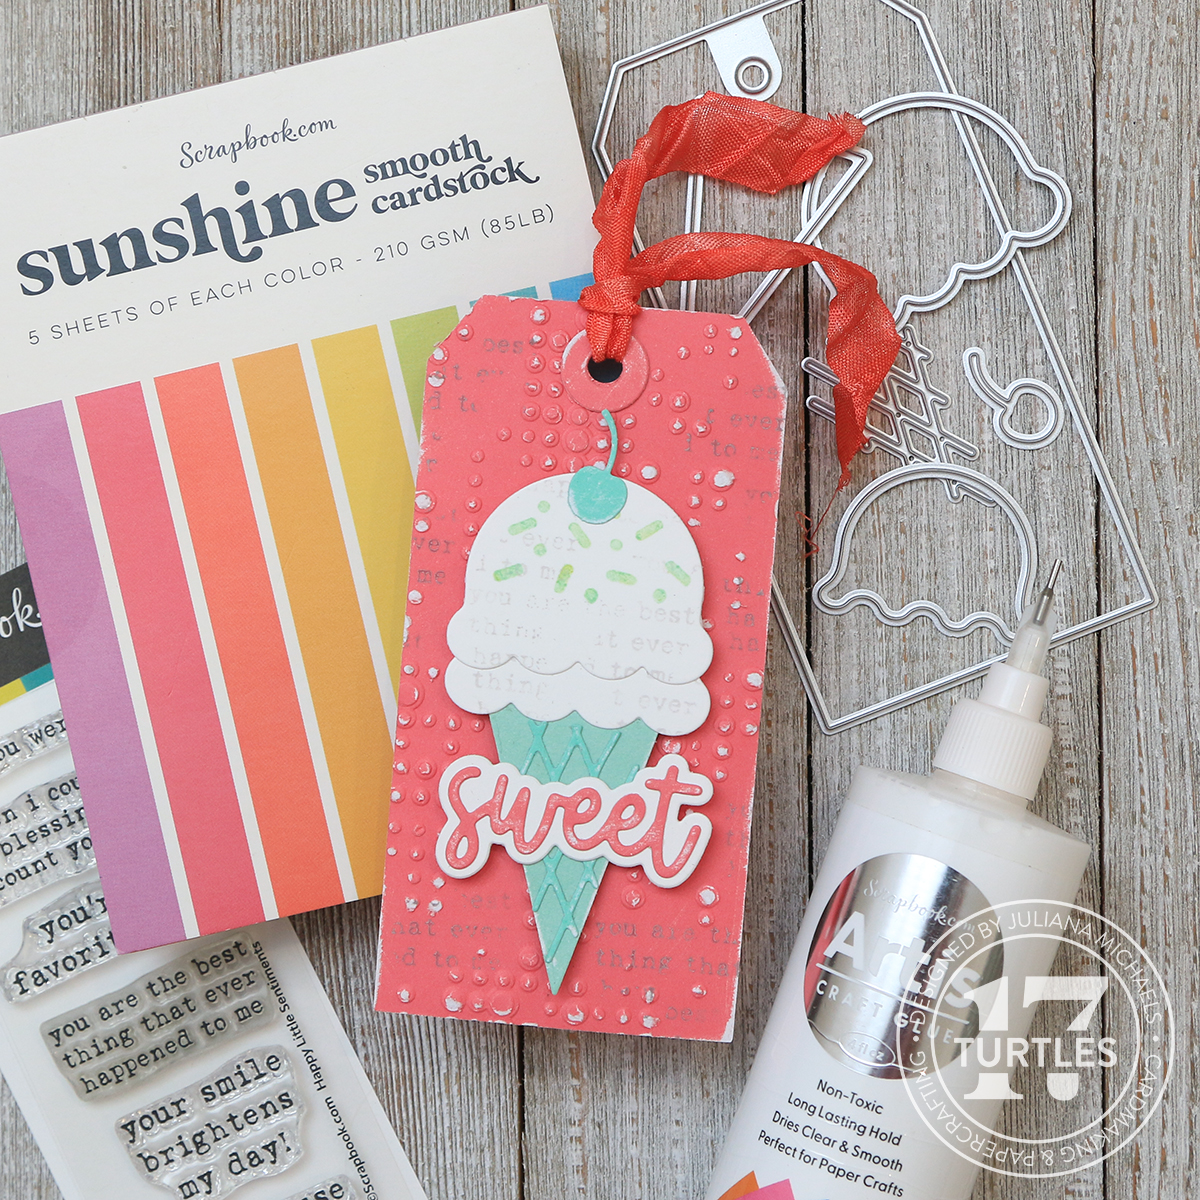
Sweet Gift Tag by Juliana Michaels featuring Scrapbook.com Sweet Scoops Die Set, Yay Tag Die Set and Artis Glue

Of course the tags aren't all about adhesive, so I'll share a couple of other details on how I created them. The tag base is cut from the Sunshine Paper Pad by Scrapbook.com using the Yay Tag Die Set. I then embossed each one using the Tim Holtz Dotted Embossing Folder and lightly sanded it using a Ranger Sanding Disk to reveal the white core and add a touch of texture and interest.

Sweet Gift Tag by Juliana Michaels featuring Scrapbook.com Sweet Scoops Die Set, Yay Tag Die Set and Artis Glue

I added some stamping detail using a stamp from the Happy Little Sentiments Stamp Set. I inked it with Hickory Smoke Distress Oxide Ink and then used my fingers to randomly stamp small sections of the image onto the tag.

Sweet Gift Tag by Juliana Michaels featuring Scrapbook.com Sweet Scoops Die Set, Yay Tag Die Set and Artis Glue

I used this same stamping technique to add interest to the ice cream scoop layers with Lost Shadow Distress Oxide Ink. The sprinkle details were stamped using the Sweet Scoops Stamp Set in various colors of Distress Oxide Ink that I stamped first onto a piece of scrap paper and then onto the die cut to lighten the color. The Distress Oxide colors I used are Abandoned Coral, Cracked Pistachio, Picked Raspberry, Salty Ocean, Mustard Seed, and Twisted Citron.

Sweet Gift Tag by Juliana Michaels featuring Scrapbook.com Sweet Scoops Die Set, Yay Tag Die Set and Artis Glue

The final touch on each tag was the addition of ribbons, which are hand dyed using Distress Ink and Hug Snug Seam Binding. The Distress Ink colors I used are Abandoned Coral, Cracked Pistachio, Picked Raspberry, Salty Ocean, Mustard Seed, and Twisted Citron.

Sweet Gift Tag by Juliana Michaels featuring Scrapbook.com Sweet Scoops Die Set, Yay Tag Die Set and Artis Glue

I hope you enjoyed learning about Artis Glue from Scrapbook.com and how a precision tip can be game changing for adhering small, delicate die cuts!

And for a limited time only, you can grab the Sweet Scoops Die Set for FREE with any order!

SUPPLIES 

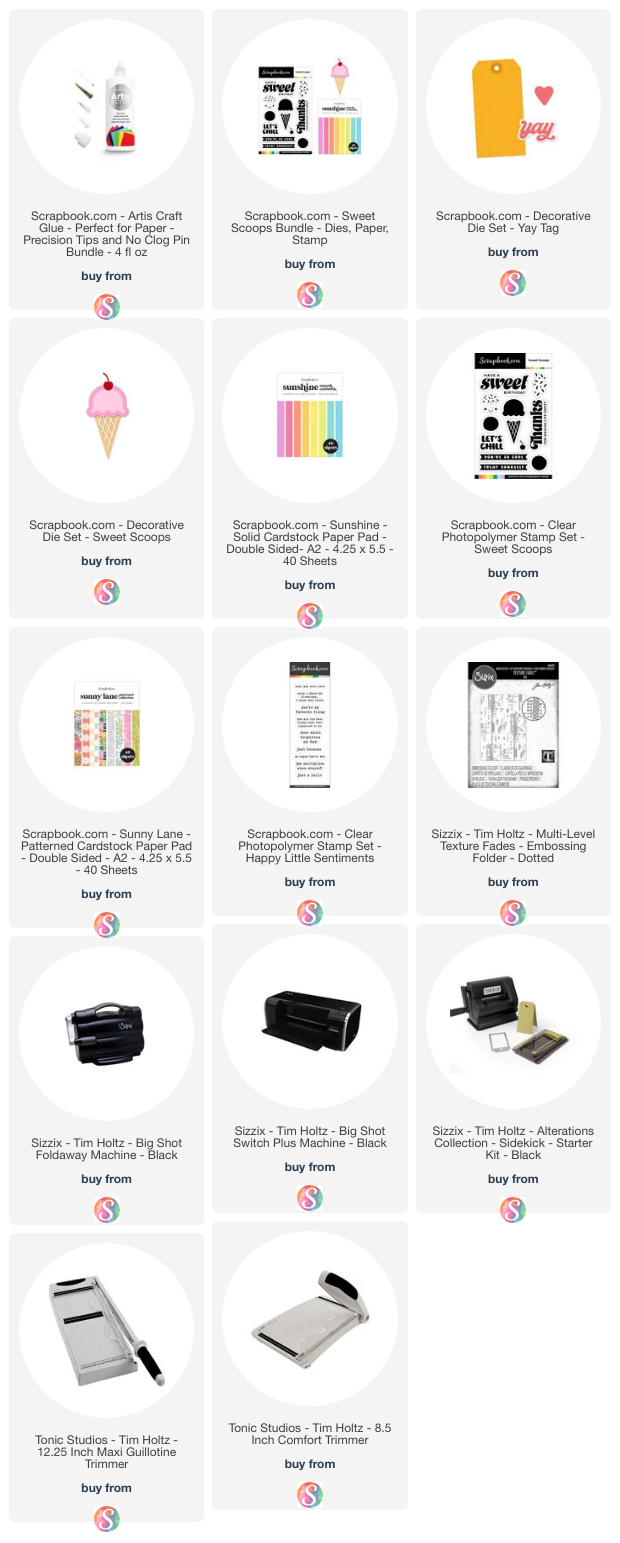
Below you can find links to the products I used in this post. These are compensated affiliate links to Scrapbook.com and there is absolutely no cost to you when you click on them. When you click on them and then shop through them, I receive a small commission from Scrapbook.com. This helps support me and I truly appreciate that so very much! If you want to learn more about what an affiliate link is, you can see my full affiliate and product disclosure statement here. Thank you so much for your love and support!

Happy Holidays Gift Tags | Compartmental Making

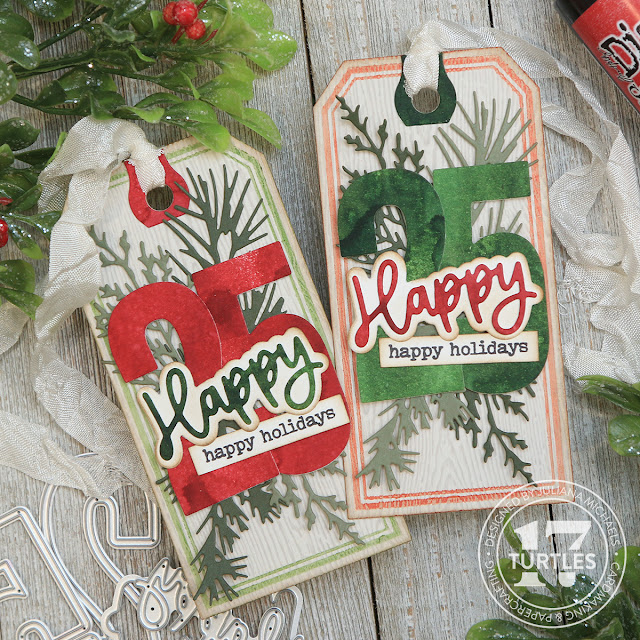
Happy Holidays friends! After a bit of a posting break, I'm back to share a little holiday cheer with a set of gift tags I created using some new dies from Scrapbook.com that I've mixed in with a few great staples from Tim Holtz. I'm also going to share how to put these together in 5 easy steps using compartmental making. Tim has recently shared a lot about compartmental making and if you aren't familiar with it, it's simply a way to break down the process of making into small sections so that it's more manageable and easier to fit some creative time into your busy schedule. Something that is super helpful this time of year!

Holiday Gift Tags by Juliana Michaels using Scrapbook.com Bold Numbers and Tim Holtz Framed Tags and Compartmental Making

HOLIDAY GIFT TAGS | COMPARTMENTAL MAKING

STEP 1. TAG BASE

The first step is to create the tag base. For these tags, I used the Tim Holtz Framed Tags Dies, Light Grey Woodgrain Cardstock and Distress Archival Ink in Fired Brick and Rustic Wilderness. The framed tags have a "frame" area on them that can emboss the paper for some added interest. When these dies first came out, Tim shared how to add ink to this area and achieve a letterpress effect and that is what I did on these tags.

To do this, you first want to clean the dies with a bit of rubbing alcohol to remove any residue from the manufacturing process. Then use a brayer to apply Archival Ink. I found his larger sized brayer to achieve the best results because it is wide enough to hit both side of the raised frame which minimizes getting ink on the inside of the die. After you apply the ink, place the die on top of you paper and run it through your die cutting machine. If you are making multiples of this, continue making as many as you need.

If you want to speed up this step, only use one color of ink instead of two. If you want to do more than one color, do all of the same color all at the same time. Make sure to clean off the die with rubbing alcohol before switching to the next color.


STEP 2. NUMBERS & REINFORCER HOLE

For this step, you are going to die cut the number 25 and the reinforcer hole using colored cardstock. I created my own colored cardstock using  Lumberjack Plaid Distress Spray Stain and Rustic Wilderness Distress Spray Stain. To do this, I spritzed a piece of Distress Watercolor Paper with the spray stain, sprayed it with some water to get the ink flowing and then dried it with my heat tool. Once the paper was dry, I die cut the 25 using the Scrapbook.com Bold Numbers Die Set and the reinforcer hole from the Framed Tags Dies and cut them from both of the colors of paper. 

If you want to speed up this step, skip creating your own cardstock with the spray inks and use colored cardstock.


STEP 3. WORD DIE

Using the same custom inked or colored cardstock as you did for the numbers and reinforcer hole, die cut the "Happy" from the Scrapbook.com Birthday Celebration Sentiments II Die Set.  Next, die cut the shadow layer for the word from white cardstock and inked the edges with a little Vintage Photo Distress Ink. Adhere these layers together.


STEP 3. SENTIMENTS

Using the same white cardstock that you used for the shadow layer, stamp "happy holidays" from the Scrapbook.com Wordfetti December Stamp Set in Black Soot Archival Ink. Trim this down using a paper trimmer or scissors and ink the edges.


STEP 4. HOLIDAY GREENS

Continuing with the die cutting, use the Tim Holtz Mini Holiday Greens to die cut 2 shades of green cardstock from the Tim Holtz Cool Kraft Stock Pack. You could use greenery die and any color of cardstock here or even create your own with spray inks like I did for the other die cutting.


STEP 5. ASSEMBLE

At this stage, it's time to assemble all of the layers. Using your preferred adhesive, adhere the various die cuts and sentiment to each tag. To finish them off, add some seam binding or ribbon of your choice.


And there you have it... set of Happy Holiday Tags ready for your holiday gift giving! I hope you enjoyed learning how these came together and how easy it is to do compartmental making!


SUPPLIES

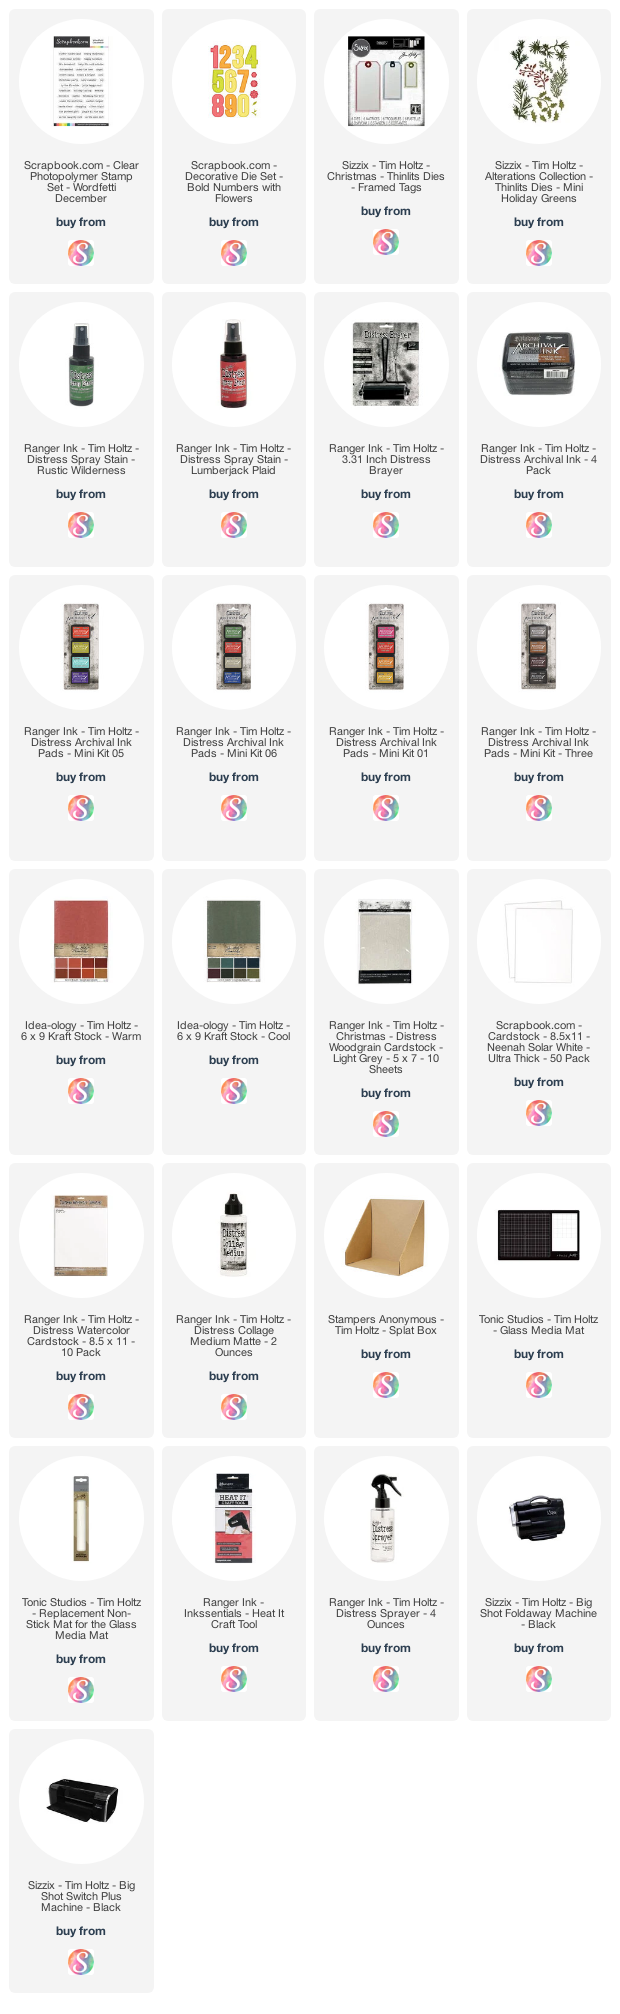
Below you can find the products I used to create these projects along with compensated affiliate links to Scrapbook.com. These links are at absolutely no cost to you. When you shop through the links below, I receive a small commission from Scrapbook.com. These links are at absolutely no cost to you and the commission I receive helps me cover the costs of my blog and other expenses, which allows me to continue to provide you with FREE inspiration and tutorials. If you want to learn more about what an affiliate link is, you can see my full affiliate and product disclosure statement here. Thank you so much for your love and support!

Subscribe