Showing posts with label Halloween. Show all posts

Spooky Skull Mixed Media Halloween Card | Tim Holtz Stampers Anonymous Fall Halloween Curation

I’m sharing a spooky Halloween card I created with the Fall Halloween Curation by Stampers Anonymous. If you’re new to Curations, they’re thoughtfully themed seasonal collections that bring together classic Tim Holtz stamps and stencils. Many of these designs were released years ago, and Stampers Anonymous has curated them into collections to remind us of their incredible artwork and inspire new ideas with them.

Happy Halloween Spooky Skull Card by Juliana Michaels featuring Tim Holtz Halloween Blueprint and Stampers Anonymous Fall Halloween Curation

HALLOWEEN BLUEPRINT
For this card, I went bold with a skull blueprint stamp as my focal point and built up the background with lots of mixed media layers. I used:
  • Distress Oxide Sprays for the inky background
  • Collage stamping + heat embossing for extra depth and texture
  • Die cuts to add dimension and more texture
  • Distress Inks to add color to the stamped focal image
It all comes together for a grungy, spooky Halloween vibe—perfect for October cardmaking.

You can either watch the video below or head over to my YouTube Channel HERE to check it out.

VIDEO

Please feel free to use products from your stash to recreate something similar. However, if you are interested in any of the products I’m using, you can find the supply list with links down below. Using these links does not cost you anything extra and it helps support my business. It also allows me to continue offering free content and keep my class costs low. I appreciate your support!


This is just one of the projects I’ve created with the Fall Halloween Curation, and each one explores a different technique. Be sure to check back for more seasonal inspiration! You can check out all of my Fall Halloween Curation projects HERE.

SUPPLIES
Below you can find the supplies I used to create this card. When you shop through those links and whether you purchase that exact item or something else entirely, you’re supporting me at no extra cost to you. The commission I receive helps me cover the costs of my blog and other expenses, and allows me to continue to provide you with FREE inspiration and tutorials. If you want to learn more about what an affiliate link is, you can see my full affiliate and product disclosure statement here. Thank you so much for your love and support!

Mini But Mighty | Halloween Tags & Cards with Tim Holtz Mini Distress Oxides

Hey crafty friends! Today I’m back with another Mini but Mighty project—this time with a spooky twist. I recently got my hands on the latest set of Mini Distress Oxide Ink Pads from Tim Holtz and Ranger Ink, and I couldn’t wait to try them out with some of the new colors. Tim Holtz and Ranger Ink just released 24 more colors from the Distress Palette, so there are now a total of 48 colors of the 72 colors available. Even though these ink pads are small, they pack a powerful punch and are perfect for so many techniques.

Halloween Tags & Cards by Juliana Michaels featuring Tim Holtz Stamps, Stencils and Mini Distress Oxides

For this project, I created three wickedly fun Halloween tags using the exact same techniques I shared in my Christmas Mini Distress Oxide video. The only difference? A new palette of colors and a Halloween theme! This just goes to show how versatile these inks are—by swapping out colors and imagery, you can carry your favorite ideas across seasons.

While I’m focusing on tags in the video, keep in mind you can always turn them into cards, add them to your junk journal, or use them as little handmade treats for friends and family.

Please feel free to use products from your stash to recreate something similar. However, if you are interested in any of the products I’m using, you can find the supply list with links down below. Using these links does not cost you anything extra and it helps support my business. It also allows me to continue offering free content and keep my class costs low. I appreciate your support!

Watch the full video below or click HERE to watch over on my YouTube channel.
 

Missed the Christmas version? Watch below or click HERE to watch over on my YouTube channel.


HALLOWEEN TAGS & CARD INSPIRATION

Below you can take a look at the tags I created in the video, along with a bonus option. 

Hocus Pocus Halloween Tag by Juliana Michaels featuring Tim Holtz Stamps, Stencils and Mini Distress Oxides

Happy Halloween Skull Halloween Tag by Juliana Michaels featuring Tim Holtz Stamps, Stencils and Mini Distress Oxides

Wicked Hipster Guy Halloween Tag by Juliana Michaels featuring Tim Holtz Stamps, Stencils and Mini Distress Oxides

BONUS TAG IDEA

Here is a bonus idea using the same techniques, just slightly different colors and of course the Hipster Girl instead of the Guy.

Wicked Hipster Girl Halloween Tag by Juliana Michaels featuring Tim Holtz Stamps, Stencils and Mini Distress Oxides

I hope this inspires you to give your Mini Distress Oxide Ink Pads a workout and start experimenting with seasonal twists of your own. Mini really is mighty—no matter the holiday!

SUPPLIES 

Below you can find the supplies I used to create these tags. When you shop through those links and whether you purchase that exact item or something else entirely, you’re supporting me at no extra cost to you. The commission I receive helps me cover the costs of my blog and other expenses, and allows me to continue to provide you with FREE inspiration and tutorials. If you want to learn more about what an affiliate link is, you can see my full affiliate and product disclosure statement here. Thank you so much for your love and support!

Halloween & Christmas Gift Card Packages | Tim Holtz Sizzix Christmas 2025

One of the new to me dies from the recent Tim Holtz Sizzix 2025 Christmas Vault Release is the Gift Card Package Die Set. It’s designed to create a quick and easy gift card holder—perfect for holiday giving! Since I’ve been bouncing back and forth between Christmas and Halloween crafting lately, I thought it would be fun to make two versions: one for Christmas and one for Halloween. The best part? By simply switching up your paper choices, this die can work for any holiday or celebration.

Halloween and Christmas Gift Card Holders by Juliana Michaels featuring Tim Holtz Sizzix Gift Card Package Die Set

CHRISTMAS GIFT CARD PACKAGE

For the Christmas version, I used a piece of patterned paper from my stash of Tim Holtz Backdrops to create the base of the package. I topped it with a coordinating solid cardstock bow and added some festive greenery using the Holiday Greens Mini Die Set (a longtime favorite of mine—so happy it’s back!). I then inked the edges with some Ground Espresso Distress Ink for a touch of grunge.

Christmas Gift Card Holders by Juliana Michaels featuring Tim Holtz Sizzix Gift Card Package Die Set

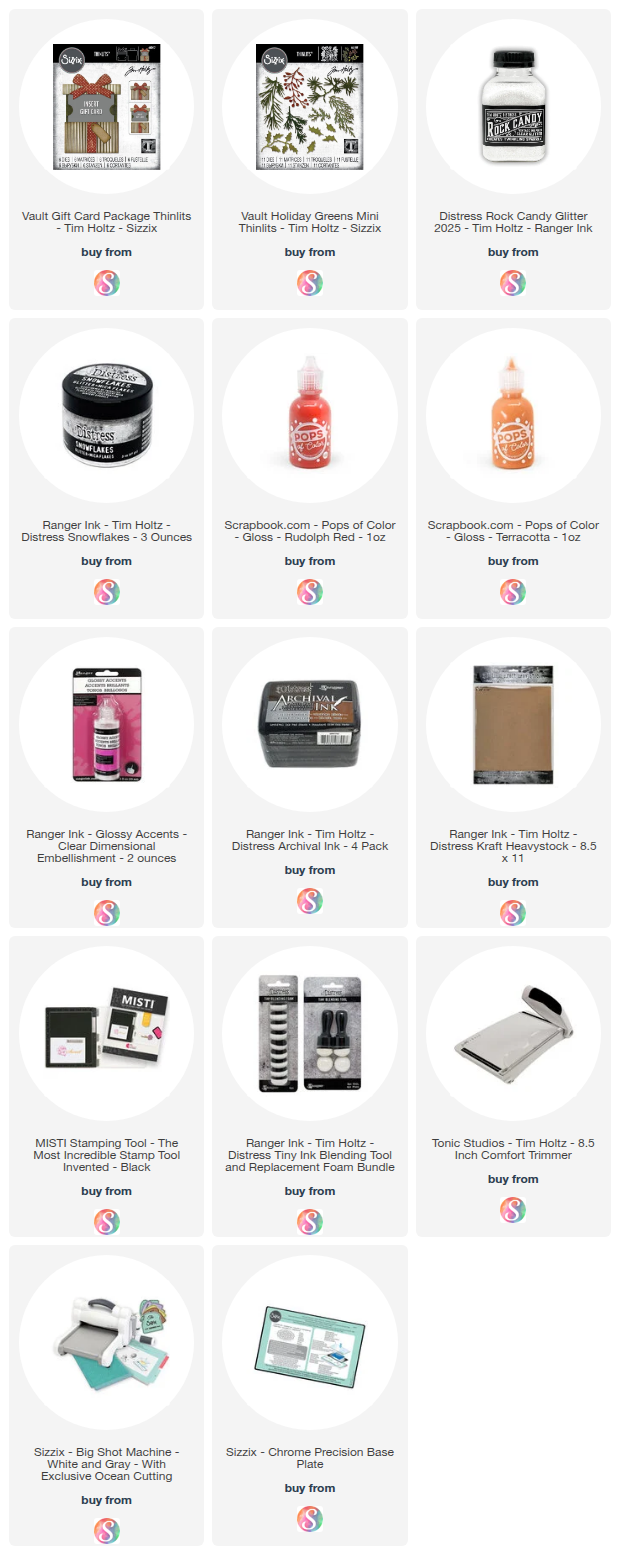
The greenery was cut from shades of green and blue colored cardstock, coated with Glossy Accents and then dusted with Distress Snowflakes for a frosted effect. I added Rudolph Red Pops of Color to the berries to bring in a traditional pop of red. While the Pops of Color was still wet I applied some Rock Candy Glitter using a Glitter Duster to a touch of shimmer. To finish it off, I stamped a sentiment onto a die-cut kraft tag and tied it on with a bit of white string.


HALLOWEEN GIFT CARD PACKAGE

For the Halloween version, I followed the same process but swapped in Halloween patterned paper for the base. The greenery was cut from black, gray, and deep green cardstock, then accented again with Glossy Accents and Distress Snowflakes for a spooky shimmer.

Halloween Gift Card Holders by Juliana Michaels featuring Tim Holtz Sizzix Gift Card Package Die Set

This time, I used Terracotta Pops of Color for the berries and of course dusted it with some Rock Candy Glitter. I then added a Halloween sentiment to finish it off.


READY TO GIFT

The final touch was sliding in a gift card—and just like that, these little packages were ready for gifting!

Thanks so much for stopping by today. I hope this gave you a bit of inspiration for using the Tim Holtz Gift Card Package Die Set in both festive and unexpected ways.

Halloween and Christmas Gift Card Holders by Juliana Michaels featuring Tim Holtz Sizzix Gift Card Package Die Set

SUPPLIES

Below you can find the supplies I used to create this card. When you shop through those links and whether you purchase that exact item or something else entirely, you’re supporting me at no extra cost to you. The commission I receive helps me cover the costs of my blog and other expenses, and allows me to continue to provide you with FREE inspiration and tutorials. If you want to learn more about what an affiliate link is, you can see my full affiliate and product disclosure statement here. Thank you so much for your love and support!

Halloween Love at First Bite: Pumpkin Pail Die Cut Card

I don’t know about you, but nothing says Halloween nostalgia quite like a plastic pumpkin pail overflowing with candy! So when I spotted the Hey Sugar Die Set from Scrapbook.com, it was Halloween love at first bite. I just had to put together my own pumpkin pail—complete with candy…and a few flowers, of course!

Happy Spooky Season Pumpkin Pail Halloween Card by Juliana Michaels featuring Scrapbook.com Hey Sugar and Spiderwebs Die Sets

PUMPKIN PAIL DETAILS

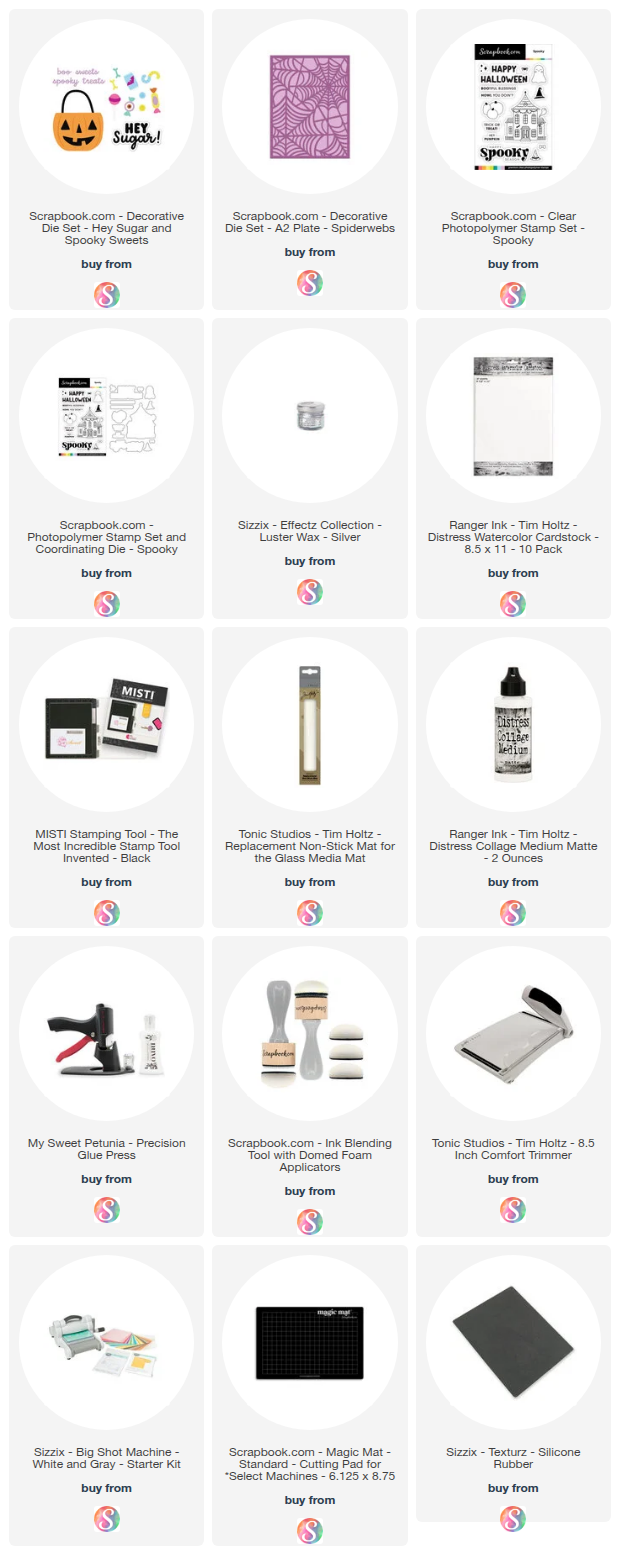
I die cut all the pieces from Distress Watercolor Cardstock and ink blended them with a mix of Distress Inks in these spooky-sweet shades: Dusty Concord, Villainous Potion, Seedless Preserves, Twisted Citron, Peeled Paint, Carved Pumpkin, Crackling Campfire, Fossilized Amber, Forest Moss, and Black Soot. Once the colors were down, I layered and adhered everything to fill up the pail with treats.

For the background, I reached for black cardstock and ran it through with the Spiderwebs Coverplate Die—but instead of cutting, I embossed it. A touch of Silver Sizzix Luster Wax brushed across the raised design made those webs shimmer just right.

To finish it off, I stamped a sentiment from the Spooky Stamp Set in crisp black ink and cut it out with the coordinating die for the perfect Halloween-ready touch.

SUPPLIES

Below you can find the supplies I used to create this card. When you shop through those links and whether you purchase that exact item or something else entirely, you’re supporting me at no extra cost to you. The commission I receive helps me cover the costs of my blog and other expenses, and allows me to continue to provide you with FREE inspiration and tutorials. If you want to learn more about what an affiliate link is, you can see my full affiliate and product disclosure statement here. Thank you so much for your love and support!


LET'S STAY CONNECTED
✔️ Subscribe on YouTube for more cardmaking tutorials, tips, and seasonal inspiration
✔️ Follow me on Instagram for sneak peeks and behind-the-scenes
✔️ Sign up for my Newsletter to stay updated on new releases and crafty resources
✔️ Take one of my online Classes to learn fun techniques and build your cardmaking confidence at your own pace


Thanks for stopping by—and until next time, stay crafty, my friend!

Spooky Cardmaking Tricks, Tips & Treats | Tim Holtz Sizzix Halloween 2025

Halloween is one of my favorite times to get creative, and I couldn’t wait to dive into the Tim Holtz Sizzix Halloween 2025 release. The new Witchcraft die set instantly sparked inspiration, and in today’s project, I’m sharing how I combined it with stamps, stencils, and inky techniques to create a hauntingly fun card full of texture, layers, and vibrant color.

Whether you’re all-in on Halloween or just looking to learn new techniques, this card is packed with ideas you can adapt to any theme.

Double Double Halloween Card by Juliana Michaels featuring Tim Holtz Sizzix Halloween 2025 Witchcraft Die Set

WATCH THE VIDEO

In the video, I take you step-by-step through the process—from creating the background to assembling the finished card. I also share tips for working with some of my favorite products and techniques.

You can either watch the video below or head over to my YouTube Channel HERE to check it out.


FEATURED TECHNIQUES

Here’s a quick look at what you’ll see in the video:
  • Inky Backgrounds: I used Distress Inks with Halloween-themed stencils to build up layers of spooky color and pattern. A touch of Black Texture Paste adds that extra bit of eerie dimension.
  • Alcohol Ink Die Cuts: For the focal point, I used Alcohol Inks and the brand-new Alcohol Neons to create bold, glowing embellishments.
  • Layering with Stamps & Stencils: I brought in some of my favorite Halloween stamps and stencils to add subtle texture and interest throughout the card.


Whether you’re familiar with these techniques or trying them for the first time, I walk through each step clearly so you can follow along and get inspired.

As always, please feel free to use products from your stash to recreate something similar. However, if you are interested in any of the products I’m using, you can find all the supplies I used linked below. This also includes a visual supply list to make shopping easy.


I hope this project inspires you to play with your supplies in new ways—and maybe even embrace the spookier side of crafting! The Tim Holtz Sizzix Halloween 2025 collection is full of possibilities, and this is just one way to bring it to life.


If you give this card a try (or use any of the techniques I shared), be sure to tag me—I’d love to see what you create!

LET'S STAY CONNECTED

✔️ Subscribe on YouTube for more cardmaking tutorials, tips, and seasonal inspiration
✔️ Follow me on Instagram for sneak peeks and behind-the-scenes
✔️ Sign up for my Newsletter to stay updated on new releases and crafty resources
✔️ Take one of my online Classes to learn fun techniques and build your cardmaking confidence at your own pace

Thanks for stopping by—and until next time, stay crafty, my friend!

SUPPLIES

Below you can find the supplies I used to create this card. When you shop through those links and whether you purchase that exact item or something else entirely, you’re supporting me at no extra cost to you. The commission I receive helps me cover the costs of my blog and other expenses, and allows me to continue to provide you with FREE inspiration and tutorials. If you want to learn more about what an affiliate link is, you can see my full affiliate and product disclosure statement. Thank you so much for your love and support!

Tim Holtz Sizzix Halloween 2025 | Wickedly Grungy Mixed Media Card Tutorial

The Tim Holtz Sizzix Halloween 2025 release is officially here—and it’s wicked in all the best ways! Whether you're a long-time fan of Tim’s classic Halloween designs or just love the layered look of mixed media, this release has something to stir your creative cauldron.

In my latest video, I’m sharing a quick look at the new Sizzix release—including six re-released die sets and two newly resized A5 embossing folders. Then I’ll walk you through how I used one of the new sets, Witchcraft, to create a wickedly grungy Halloween card packed with texture, depth, and spooky vibes.

Handmade Halloween card featuring a spooky witch silhouette from the Tim Holtz Sizzix Witchcraft die set. The card has a grungy mixed media background with crackle texture, stamped details, and layered Distress Spray Stains in warm, earthy tones. An embossed spiderweb and machine stitching add extra dimension and a vintage, haunted feel.
 

What’s New in the 2025 Release? 

The Halloween 2025 collection brings back six iconic Tim Holtz Sizzix Halloween die sets, giving both longtime crafters and new fans a chance to play with these hauntingly fun designs. Plus, two of his most popular embossing folders have been resized to A5 format—more space to grunge it up!


The Wickedly Grungy Card

For this project, I featured the Witchcraft die set and combined it with a variety of techniques to build a layered, textured background that feels spooky and worn in the best way.

Here’s a peek at what I used:
  • Distress Spray Stains for inky, vibrant layers
  • Crackle Paste to create aged, eerie texture
  • Stamping for extra visual interest
  • Machine Stitching for that final, unexpected touch of dimension

The best part? These techniques aren’t just for Halloween. Switch out the colors and focal point, and you’ve got a go-to formula for grungy mixed media cards all year long.


Watch the Video

Want to see the full process and learn how to layer it all together? You can either watch the video below or click here to head over to my YouTube Channel to check it out.

You'll get:
  • A quick overview of the Tim Holtz Sizzix Halloween 2025 release
  • A full tutorial on creating a mixed media background
  • Tips for working with Crackle Paste and stitching on your cards
  • Wicked inspiration for your next Halloween project


Please feel free to use products from your stash to recreate something similar. However, if you are interested in any of the products I’m using, you can find the supply list with links down below. Using these links does not cost you anything extra and it helps support my business. It also allows me to continue offering free content and keep my class costs low. I appreciate your support!


Let’s Chat

I’d love to know—what’s your favorite die set from the new release? Are you a fan of spooky silhouettes, creepy critters, or those beautiful grungy textures? Leave a comment below or tag me on Instagram @julianamichaels if you create something inspired by this tutorial!

Until next time, stay spooky—and stay crafty. 🖤

Supplies

Below you can find the supplies I used to create this card. When you shop through those links and whether you purchase that exact item or something else entirely, you’re supporting me at no extra cost to you. The commission I receive helps me cover the costs of my blog and other expenses, and allows me to continue to provide you with FREE inspiration and tutorials. If you want to learn more about what an affiliate link is, you can see my full affiliate and product disclosure statement here. Thank you so much for your love and support!

Something Wicked Good | Tim Holtz Sizzix Halloween 2025

Something wicked good is coming this way… The Tim Holtz Sizzix Halloween 2025 release is here!

Tim has gone back to the vault and re-released some of his classic Halloween and Fall die sets. These are not reimagined or resized—they’re the exact same designs and dimensions as the original releases. So if you already own them, you’re all set! But if you missed out the first time around, this is your chance to grab them and complete your collection. As a collector myself, I was beyond excited to add several of these spooky favorites to my stash.

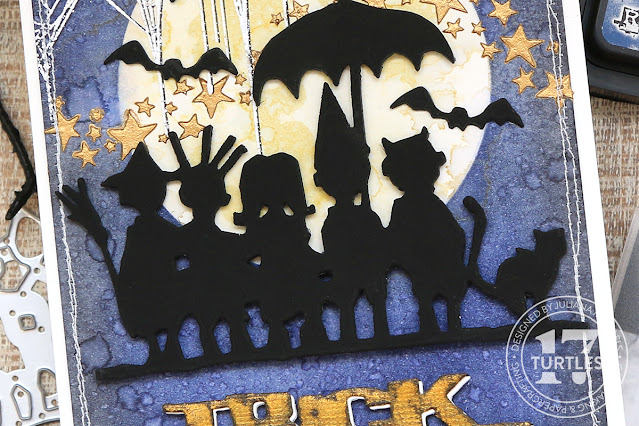
Handmade Halloween card featuring a dark, moody ink-blended night sky with a glowing full moon, gold stars, and white embossed spider webs. Silhouette die cuts of trick-or-treaters and bats are layered over the background, with a dimensional sentiment reading 'Trick or Treat' in black and white.

Trick Or Treat Halloween Card Details


One of the standout sets is the adorable Trick or Treat die set. I don’t know about you, but I have a soft spot for simple silhouette dies. They’re perfect for layering over fun mixed media backgrounds—and these sweet little trick-or-treaters are no exception. I was especially inspired to create a dark and moody Halloween night sky, thanks to the incredibly talented Emma Williams.

To bring that eerie night scene to life, I started with a piece of Distress Watercolor Cardstock (smooth side up, as always) and used the Moon Layering Stencil. I applied a touch of Pumice Stone Distress Ink around the edge of the moon mask, spritzed it with water to let the ink bleed, and dried it with my heat tool. With the moon mask back in place, I blended Chipped Sapphire and Black Soot Distress Ink around it to build the sky. A few water spritzes and a quick dry later, I was ready to move on.


Next, I added details inside the moon using the second layer of the stencil and Antique Linen Distress Ink. I finished off the moon with water splatters for added texture, dried again, and reinked the sky to deepen the color.


To create a magical starry night, I used the Hocus Pocus stencil with Gold Lunar Paste—the perfect way to add shimmer and dimension. I also stamped the spider web images from the Unraveled stamp set in the upper corners with embossing ink, then heat embossed them with white embossing powder for an extra spooky touch.

The Trick or Treaters and bats were die cut from black cardstock and adhered with black foam adhesive to give them a bit of dimension. For the sentiment, I layered two die cuts—one in white cardstock and the other in black textured cardstock, which I spritzed with Fossilized Amber Distress Spritz to give it a subtle shimmer. I offset the two slightly and popped them up with foam adhesive for extra impact


This card was an absolute joy to create. There’s something so satisfying about bringing a scene to life with simple dies and layered textures. I hope it inspires you to play with this wickedly wonderful release!

Let me know in the comments—will you be snagging any of these re-released sets? And what’s your go-to Halloween crafting vibe: spooky, sweet, or somewhere in between?

Happy haunting and happy creating!

Supplies

Below you can find the supplies I used to create this card. When you shop through those links and whether you purchase that exact item or something else entirely, you’re supporting me at no extra cost to you. The commission I receive helps me cover the costs of my blog and other expenses, and allows me to continue to provide you with FREE inspiration and tutorials. If you want to learn more about what an affiliate link is, you can see my full affiliate and product disclosure statement here. Thank you so much for your love and support!

Use Your Stash of Tim Holtz Halloween Idea-ology To Create A Junk Journal

I'm back with my second Halloween Junk Journal and even though Halloween is this week, I am not ready for the Halloween crafting to be over! I have so many more projects I want to make! Please tell me I'm not alone!

Once again, I'm sharing a flip through and walk through of this junk journal over on my YouTube Channel. And as with the last one, I'm sharing tips and tricks for how I assembled each page as well as how I put the entire junk journal together. Here though, you can check out still images of each of the pages and interactive elements that I created.
 

You can either watch the video below or head over to my YouTube Channel HERE to check it out.

Please feel free to use products from your stash to recreate something similar. However, if you are interested in any of the products I’m using, you can find the supply list with links at the bottom of this post. When you shop through those links, you’re supporting me at no extra cost to you and I really appreciate that so very much!

HALLOWEEN JUNK JOURNAL

Here is an up close look at each page and the pull outs I created. The completed junk journal is 5 x 5 inches.

Halloween Junk Journal by Juliana Michaels featuring Tim Holtz Halloween Idea-ology


SUPPLIES

Below you can find the supplies I used to create this Handmade Halloween Junk Journal. When you shop through the links below, I receive a small commission from Scrapbook.com. These links are at no cost to you and the commission I receive helps me cover the costs of my blog and other expenses, and allows me to continue to provide you with FREE inspiration and tutorials. If you want to learn more about what an affiliate link is, you can see my full affiliate and product disclosure statement here. Thank you so much for your love and support!

Subscribe