
Merry Christmas my crafty friend! I'm so excited that all of the Christmas crafting products are beginning to arrive. I always find SO much inspiration from everyone this time of year. In case you happened to miss it, Tim Holtz has begun his Christmas 2023 YouTube Lives and today was his Sizzix Live. In this blog post, I'm sharing how I created this Christmas Banner that Tim shared during his Sizzix Christmas 2023 Live. I'm going to share the highlights on how I created the various pieces and at the end show you how these same steps can be used to create a card, if banners aren't your thing! If you're looking for even more inspiration make sure to check out Tim's blog and YouTube channel to catch the replay and find links to the projects created by the other Makers.

CHRISTMAS BANNER 2023
If you prefer a video format, you can watch below or head over to my YouTube channel to see the process in more detail.
If you're interested in the supplies I've used, you can find affiliate links to them at the bottom of this post. When you shop through those links it supports me and I really do appreciate that so very much!
Now let's get on with the making.

SANTA GREETINGS
To create the embellishments for each of the banners, I began by using the Santa Greetings Colorize Thinlits Die Set to die cut the various colored cardstock. I used pink, cream, white, black, green and three shades of red. I also used a gold metallic paper for the buckle.
Next I added some interest to the die cuts using Distress Oxide Inks and the ink smooshing technique. I ink smooshed the red cardstock papers into Aged Mahogany, the beard/coat and hat trim into Lost Shadow, the belt/boots into Lost Shadow, the mittens into Bundled Sage and the pink parts of the face into Worn Lipstick. I used a small paint brush to apply the ink on the cheek pieces because they are so tiny.

For this technique, all you do is smoosh the ink pad onto a craft mat, spritz it with a little water and then smoosh the cardstock into the ink. You repeat the smooshing until you achieve the amount of coverage you would like and then you can use your heat tool to dry the paper. A pair of tweezers can come in handy to help smoosh smaller die cuts into the ink, but they're especially helpful so that you don't burn your fingers when you dry the paper with your heat tool.
I used this exact technique to add interest to the die cuts in my recent Halloween Banner, but I wanted to share it again for those of you who might be interested in the colors I used or happened to miss my Halloween Banner video and blog post. Which you can find here.
I used this exact technique to add interest to the die cuts in my recent Halloween Banner, but I wanted to share it again for those of you who might be interested in the colors I used or happened to miss my Halloween Banner video and blog post. Which you can find here.
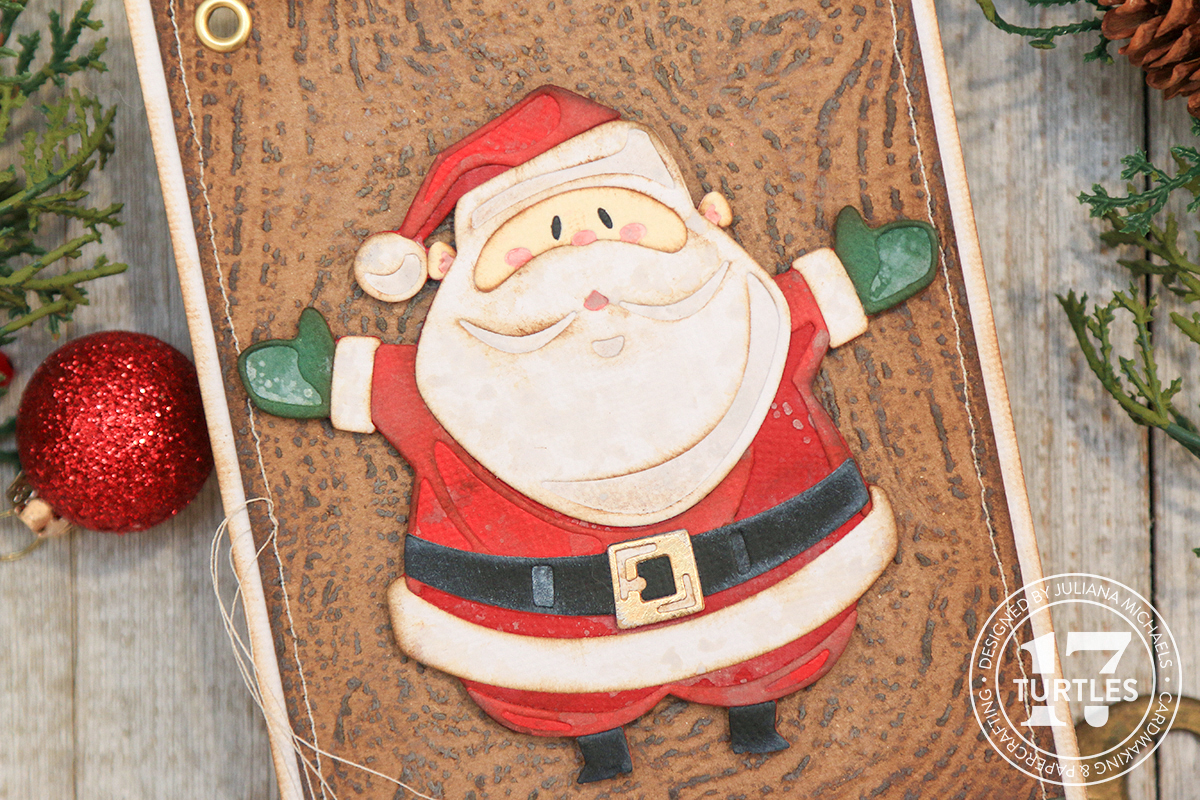
Once all of the pieces were inked and dried, I assembled the Santa using Distress Collage Medium, but feel free to use your adhesive of choice. If you've never used a Colorize Die, when you die cut the bottom layers they are embossed with the layer that goes on top of them. You can then use this to help line up the various layers.
To finish off the Santa and to add a bit more interest I used a small brush to add a little more of the Lost Shadow Distress Oxide Ink to the beard and trim. I also lightly inked the edges of the white layers with Vintage Photo Distress Ink before I adhered them to the Santa and then I inked the edges of the entire die cut with Vintage Photo Distress Ink.
To finish off the Santa and to add a bit more interest I used a small brush to add a little more of the Lost Shadow Distress Oxide Ink to the beard and trim. I also lightly inked the edges of the white layers with Vintage Photo Distress Ink before I adhered them to the Santa and then I inked the edges of the entire die cut with Vintage Photo Distress Ink.

TRIM A TREE
Now onto the trees. For the banner I created two trees for two separate panels using the exact same colors of paper and inks. Using the Trim A Tree Colorize Thinlits Die Set I cut the various layers from two shades of green. To make the ornaments easier to assemble, I adhered an adhesive sheet to the backside of the cardstock and then die cut them. I used two shades of red (a light and a dark red), two purple, two teal and two yellow and then silver for the base of the ornaments. After I assembled the ornaments, I inked the edges of the with Vintage Photo Distress Ink.
When you first look at this tree you might think it's really tall and too big for your project. Well, they are too tall for my banner, but, Tim in his brilliance made it super easy to trim the tree and make it shorter! Each of the trees has a section on them that is partially die cut. All you have to do is take a pair of scissors and trim off that last bit where the paper is still connected and voila you have trimmed the tree!
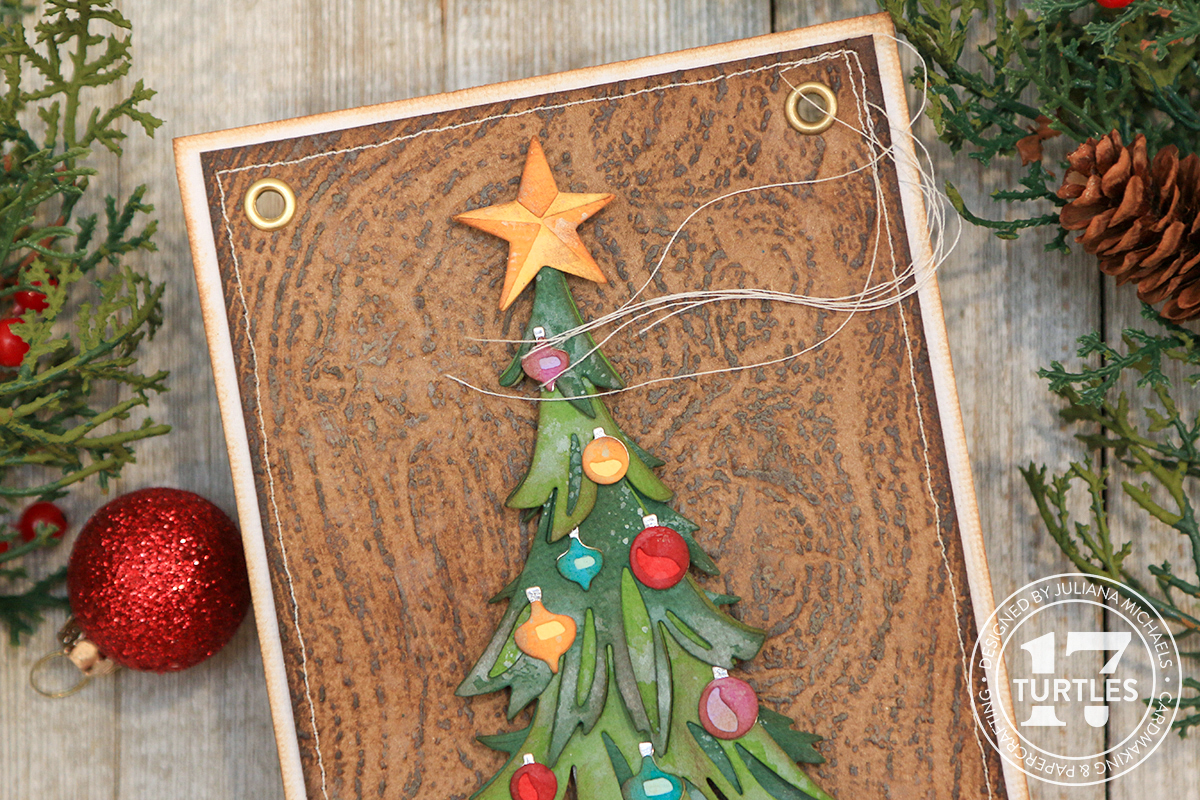
After I trimmed my tree, I added some ink smooshing detail to the green cardstock layers using Bundled Sage Distress Oxide Ink. I repeated this for each layer and used my heat tool to dry the paper. Before I assembled the trees, I inked the edges with Vintage Photo Distress Ink for a little distress.

If you want the trees to look more dimensional, I recommend only applying the adhesive to the very tops of the tree layers. Then once the glue is dry, you can lift and curl up the layers to give it a more realistic effect!
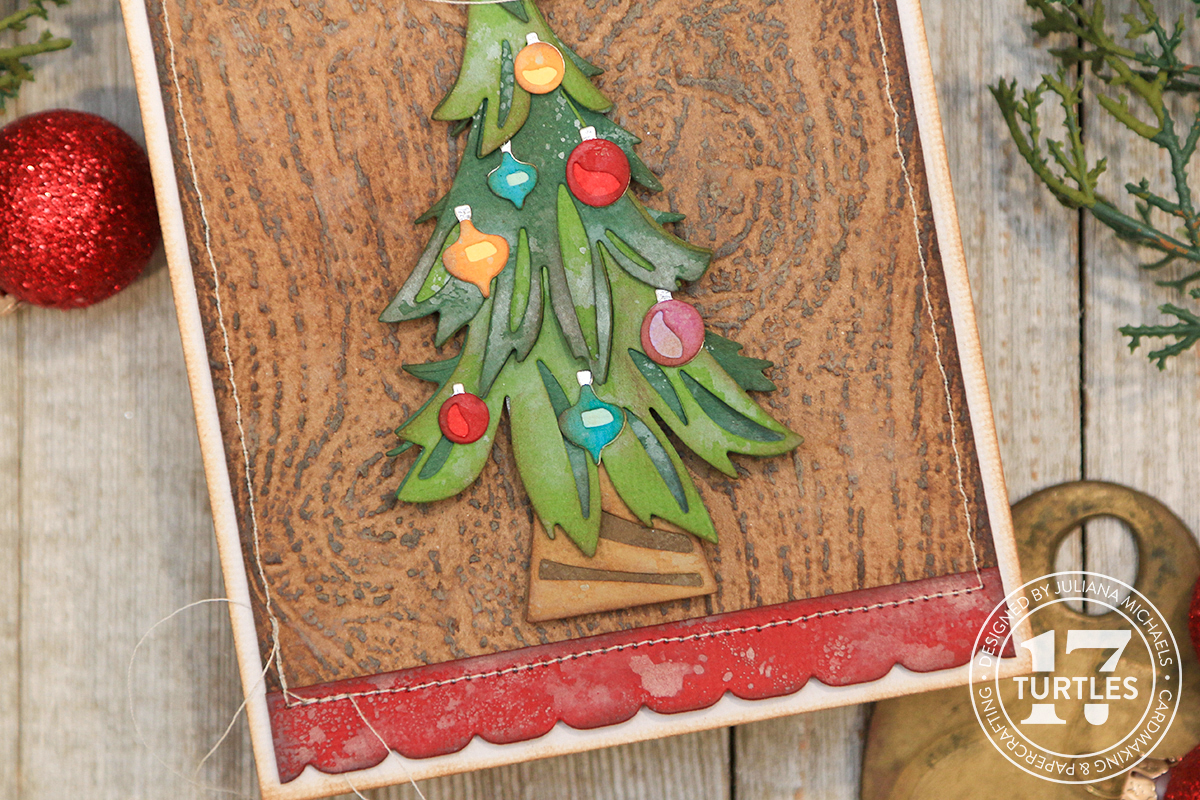
For the stars, I ink smooshed them into Scattered Straw Distress Oxide Ink. Once dry, I assembled them and inked the edges with Vintage Photo Distress Ink. Originally I wasn't going to include the tree trunk, but once I had the tree assembled I decided to add them. I die cut them from 2 shades of brown cardstock and ink smooshed them into Brushed Corduroy Oxide ink and then inked the edges with Vintage Photo Distress Ink.

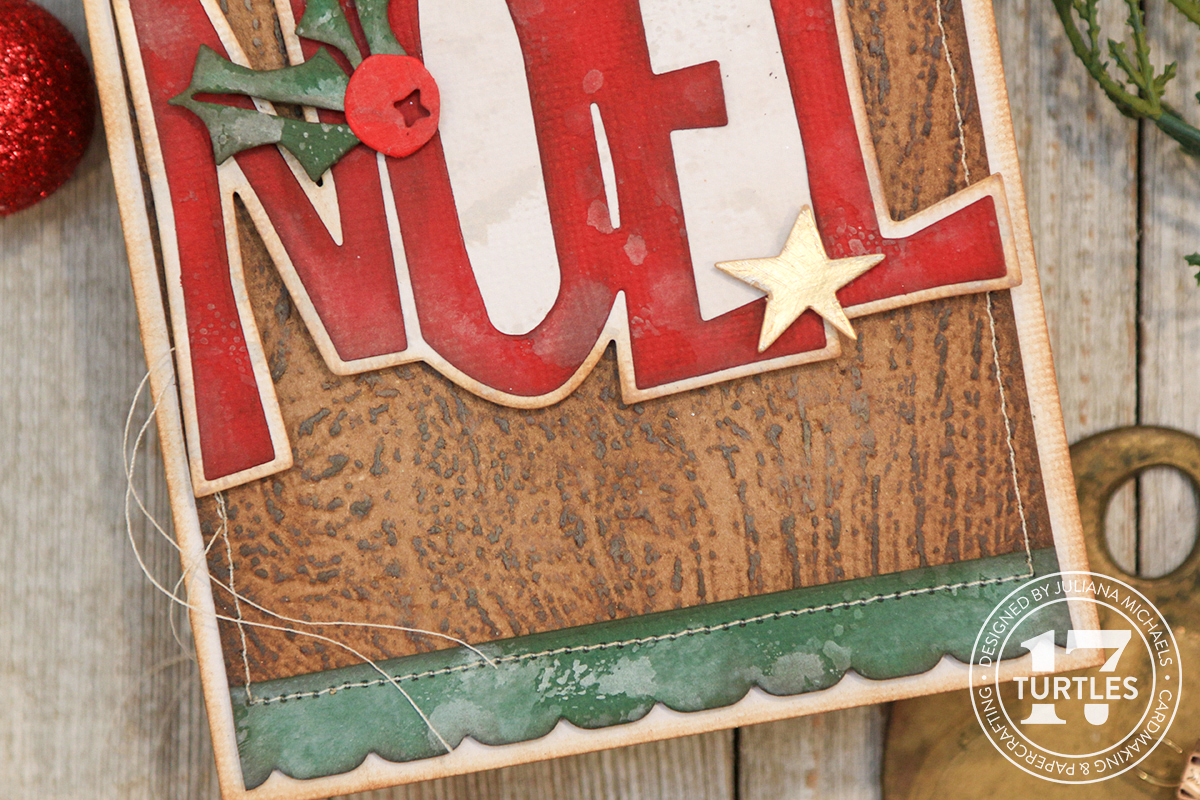
BIG TIDINGS
The word panels were created using the Big Tidings Die Set. I die cut the words from red cardstock and the shadow layer from white cardstock. I ink smooshed the red into Aged Mahogany and the white into Lost Shadow.

For the small icons on each word, I used the same ink smooshing technique on them as well. For the green cardstock I used Bundled Sage and for the red berry I used Aged Mahogany. I die cut the stars from Gold Metallic Kraft Stock. I then inked the edges of the die cuts with Vintage Photo Distress Ink.

WOODGRAIN BACKGROUND
To create the background for the banner, I used the Woodgrain 3D Embossing Folder to add some texture. I cut 5 pieces of Distress Kraft Heavystock to 4 x 6 inches. Before I embossed the papers, I lightly spritzed them with water using my Distress Sprayer 2 times on each side. I then placed the embossing folder at a slight angle on the cutting pad and with the open side toward the center and ran it through my die cutting machine. I have found that with these thicker folders that placing it this way helps it go through the machine a little easier.
Next, I took the Walnut Stain Distress Oxide Ink Pad and rubbed it over the surface of the embossed paper. I'm just trying to hit the raised areas with the ink. I then spritzed the paper with water by slowly pulling the trigger on my Distress Sprayer to get larger water droplets and dried it with my heat tool. Once it was dry, I added some areas of Ground Espresso to the paper to add some depth and interest. I spritzed the paper once again and dried it with my heat tool. I then inked the edges with Walnut Stain Distress Oxide Ink.
Next, I took the Walnut Stain Distress Oxide Ink Pad and rubbed it over the surface of the embossed paper. I'm just trying to hit the raised areas with the ink. I then spritzed the paper with water by slowly pulling the trigger on my Distress Sprayer to get larger water droplets and dried it with my heat tool. Once it was dry, I added some areas of Ground Espresso to the paper to add some depth and interest. I spritzed the paper once again and dried it with my heat tool. I then inked the edges with Walnut Stain Distress Oxide Ink.

DECORATIVE TRIMS
To create the trim piece on each panel, I used the Decorative Trims Die Set. I used the longest scallop die to cut 3 pieces of dark red cardstock and 2 pieces of green cardstock.
I ink smooshed the red pieces into Aged Mahogany Oxide Ink and the green into Bundled Sage. I then inked the edges with Walnut Stain Distress Oxide Ink.
CHRISTMAS BANNER
To complete the banner I cut a piece of white cardstock to 4.25 x 6.25 inches and inked the edges with Vintage Photo Distress Ink. I then adhered the woodgrain panel and added the trim along the bottom. Next, I added some machine stitching around the outer edge of each panel.
To turn these into a banner, I added eyelets to the top left and right corner of each panel using a Crop A Dile. For the ribbon, I cut a length of Seam Binding and dyed it using Distress Spray Stain in Lumberjack Plaid and Aged Mahogany. I then adhered the various die cuts to the panels using double sided foam adhesive to add a little more dimension.

SANTA GREETINGS CHRISTMAS CARD
As I mentioned at the beginning, if banners aren't your thing, you could easily take these same techniques and use them to create a card. This is a card I created using these exact same techniques with the Santa Greetings Die Set.
I added the banner that comes with the die set and used that as my sentiment, but you could also add a stamped sentiment for something a little faster.

And there you have it! I hope you enjoyed seeing how this Christmas Banner and Card came together using the Tim Holtz Sizzix Christmas 2023 release and that it inspires you as you begin your holiday making! Until next time...stay crafty my friend!
SUPPLIES
Below you can find the products I've used to create this Halloween Banner. When you shop through the links below, I receive a small commission from Scrapbook.com. These links are at absolutely no cost to you and the commission I receive helps me cover the costs of my blog and other expenses, which allows me to continue to provide you with FREE inspiration and tutorials. If you want to learn more about what an affiliate link is, you can see my full affiliate and product disclosure statement here. Thank you so much for your love and support!


No comments
Every time you smile at someone, it is an action of love, a gift to that person, a beautiful thing. ~Mother Teresa
HUGS!
JULIANA