
Hello beautiful crafty people and welcome! In this post, I'm kicking off my Christmas in July series where each week during the month of July I'll be sharing a new video over on my YouTube channel and creating a Christmas card using supplies from my stash. My hope is to inspire you to get an early start on your Christmas cards and use some of those amazing products you already own!

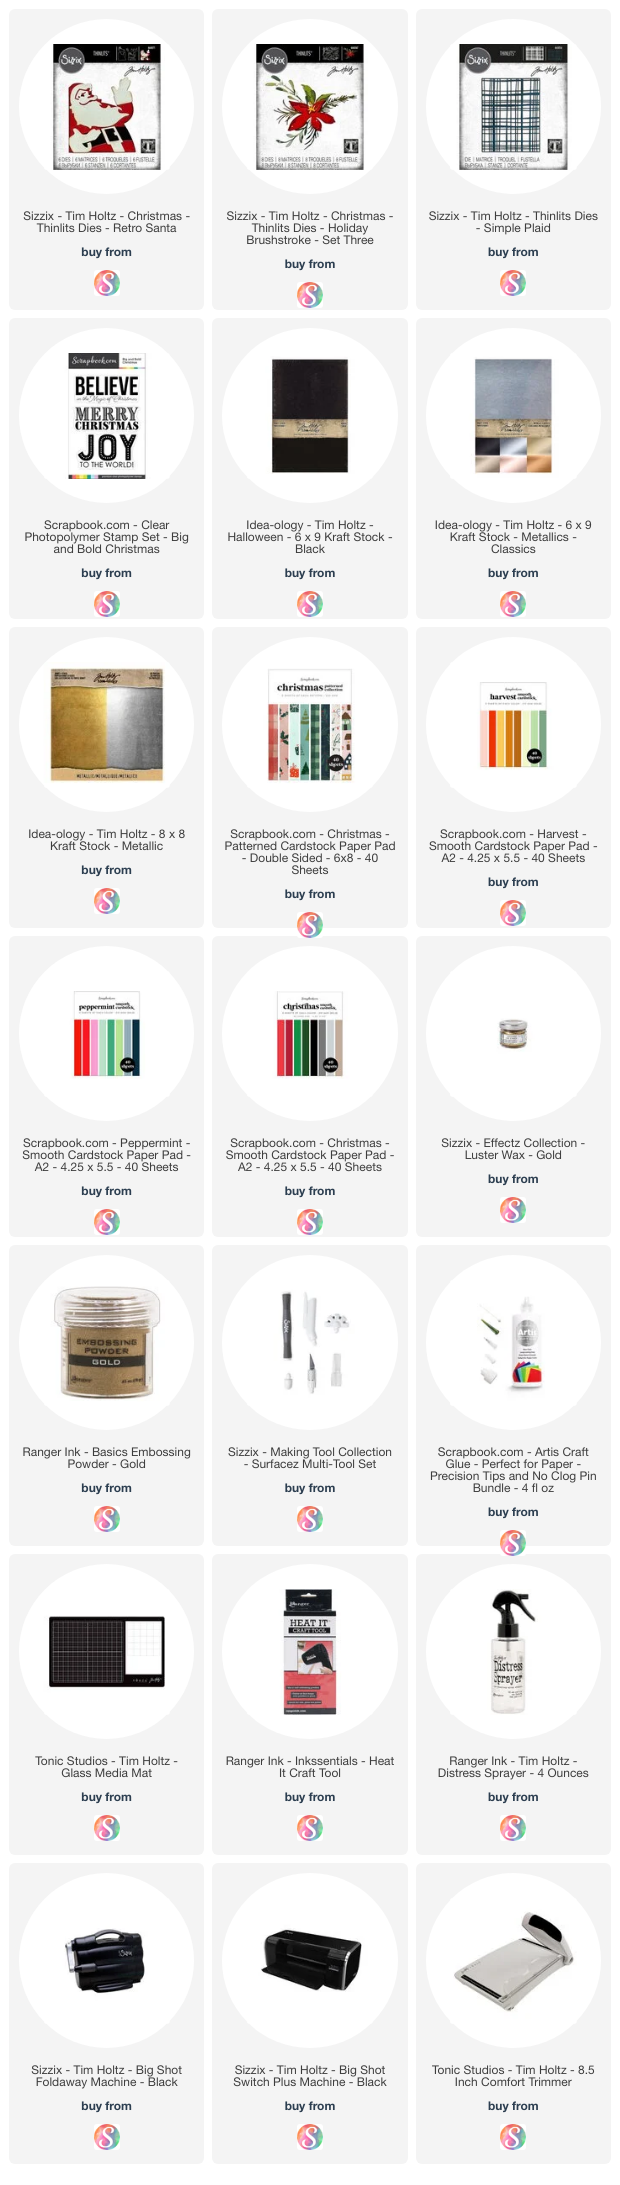
I'll be using papers from the Scrapbook.com Christmas, Peppermint and Harvest Smooth Cardstock Paper Pads and the Christmas Patterned Paper Pad. I also use a small piece of gold metallic cardstock and for the plaid die I use a piece of Tim Holtz Black Kraftstock. But feel free to use any cardstock you have on hand.

BELIEVE IN THE MAGIC CHRISTMAS CARD
I began by die cutting all of my pieces from different colors of cardstock. The paper I'm using here has a white core and to add a little distress, I'm going to sand the edges of all of the greenery pieces, the plaid die cut and the red layer of the Retro Santa to reveal that white core. I used a Ranger Sanding Disk attached to a blending brush handle, but you could also use a piece of sandpaper. If you are working with regular cardstock, you can skip this step. If you are wanting to add some interest you might consider inking the edges of the paper with a darker color of ink or my favorite Vintage Photo Distress Ink!
Before I assembled the Santa I trimmed off the face part of this layer to leave just the beard, mustache and hat trim. Because I removed the white part, I needed to fill that in with something besides red, so I cut that layer twice, once from red and once from a skin toned color. Next, I added pink highlights on the skin toned paper to his nose and cheek areas using Spun Sugar Distress Oxide Ink. I then trimmed off the areas that I wanted to remain red, which are his hat and coat.
After trimming these pieces, I inked the edges of the white die cuts using Walnut Stain Distress Ink. I then assembled the layers using a new to me adhesive...Artis Glue from Scrapbook.com. It comes with 3 different tips to allow you to apply more or less glue and a pin for cleaning them. It's a fast drying adhesive that dries clear but is water based so it cleans up easily. And I'm must say, I'm loving it! This is also my first time to use a precision tip and it is such a game changer when trying to apply adhesive to small and intricate die cuts.

Now onto the plaid die cut. I cut this from Black Kraftstock, which has a kraft core, but you can use any black cardstock if you prefer. I then applied a bit of Sizzix Luster Wax in Gold here and there for a bit of shine and interest. This is another step you could skip if you wanted to.
The size of this card is A6 which is 4.5 x 6.25 inches. I cut a piece of white cardstock to this size and then a piece of patterned paper to 4.25 x 6 inches to layer on top of it. I ink the edges of the white cardstock with Walnut Stain Distress Ink. Next, I used the distressor tool, which is part of the Sizzix Surfacez Multi-Tool Set, to distress the edges of the piece of patterned paper. This adds a little bit of texture, but you could easily skip this step. I then lightly inked the edges of this with Walnut Stain Distress Ink.
Next I trimmed down the plaid die cut to fit inside the patterned paper. I cut it down to 4 inches wide. I also trimmed the frame part off of the top edge. The bottom part is hidden underneath the sentiment, so I didn't trim anything off of that end.

For the sentiment I used the Believe in the Magic stamp from the Scrapbook.com Big Bold Christmas Stamp Set. I stamped it using Versamark Watermark Stamping Pad which is an embossing ink onto white cardstock. I sprinkled it with Gold Embossing Powder, tapped off the excess and heat set it using my heat tool. I trimmed this piece down to 1.75 x 4 inches to fit along the bottom of the card and then inked the edges with Walnut Stain Distress Ink.
Next, I adhered the card base layers together. I then adhered the plaid die cut, using the Artis Glue and the precision tip which was perfect for adhering this delicate die cut.
Before adding the greenery, I adhered the Santa but only put adhesive on the left side of the die cut so that I could more easily tuck the greenery pieces behind it. I then adhered them using the Artis Glue. Once I got all of the greenery pieces adhered, I added more adhesive to the back side of the Santa.

And there you have it! I hope you enjoyed this first Christmas card in my Christmas in July Series! Stay tuned for card number 2, coming next week.
SUPPLIES FOR BELIEVE IN THE MAGIC CHRISTMAS CARD


No comments
Every time you smile at someone, it is an action of love, a gift to that person, a beautiful thing. ~Mother Teresa
HUGS!
JULIANA